(Practice) Protected Routes
Refer to the instructions in the code.
Final App Preview
Starter Code
(Solution) Protected Routes
Solution
Preventing transitions with React Router v5
Respecting your user’s input is not only a solid business decision, but it also shows you care about little UX details. One of the most frustrating experiences a user can have is when they spend time inputting data into your app, accidentally hit a hotkey to navigate away from the current route, then have to restart the form all over. There are a few different approaches to fixing this bad UX but in this post, we’ll focus on how React Router v5 can help by warning before a route transition.
Before we can see how it’s done, we’ll need the basic skeleton of an app. Our app will be pretty straight forward. It will have a few different routes - one of which will render a form.
import * as React from 'react'
import {
  BrowserRouter as Router,
  Route,
  Link,
} from 'react-router-dom'

function Form () {
  return (
    <form></form>
  )
}

export default function App () {
  return (
    <Router>
      <div>
        <ul>
          <li><Link to="/">Form</Link></li>
          <li><Link to="/one">One</Link></li>
          <li><Link to="/two">Two</Link></li>
        </ul>

        <Route path="/" exact>
          <Form />
        </Route>
        <Route path="/one">
          <h3>One</h3>
        </Route>
        <Route path="/two">
          <h3>Two</h3>
        </Route>
      </div>
    </Router>
  )
}
Now the goal is to make it so if the form is “dirty” and the user tries to navigate away, we verify that’s what they’re really trying to do.
What I love about React Router v5 is its dedication to declarative, “React like” code. The fundamental aspect of React is user event -> state change -> re-render . With that in mind, it would make sense that the “React way” of preventing transitions follows that same paradigm - a declarative component we can render (or not) based off of the component’s state.
First, as mentioned, let’s add some state to the Form component. The goal here is to have some state which knows if the form is “dirty” (meaning the length of the value in the input field is > 0).
function Form () {
  const [isBlocking, setIsBlocking] = React.useState(false)

  return (
    <form>
      <p>
        Blocking? {
          isBlocking
            ? 'Yes, click a link or the back button'
            : 'Nope'
          }
      </p>

      <p>
        <input
          size="50"
          placeholder="type something to block transitions"
          onChange={(event) => setIsBlocking(
            event.target.value.length > 0
          )}
        />
      </p>
    </form>
  )
}
Now we have a property on our state, isBlocking , which tells us if we should warn the user before they transition away from the current route.
Next, we need to actually make it so the user is prompted if they try to navigate away and isBlocking is true. Conveniently, React Router v5 comes with a Prompt component that serves this exact purpose. It takes in two props - when and message . when needs to be a boolean that when true , will show the user a prompt with the message prop when they try to navigate away.
We’ve already added an isBlocking property to our state, so we can pass that to Prompt s when prop.
...

import {
  Prompt,
} from 'react-router-dom'
...

function Form () {
  const [isBlocking, setIsBlocking] = React.useState(false)

  return (
    <form>
      <Prompt
        when={isBlocking}
        message={(location) => `Are you sure you want to go to ${location.pathname}`}
      />

      <p>
        Blocking? {          isBlocking            ? 'Yes, click a link or the back button'            : 'Nope'          }      </p>

      <p>
        <input
          size="50"
          placeholder="type something to block transitions"
          onChange={(event) => setIsBlocking(
            event.target.value.length > 0
          )}
        />
      </p>
    </form>
  )
}
Now if the input field if “dirty”, the Prompt component will warn the user if they try to navigate away from the current route.
Lastly, let’s finish the example by actually adding a button to our form and resetting isBlocking when the form is submitted.
function Form() {
  const [isBlocking, setIsBlocking] = React.useState(false)

  return (
    <form onSubmit={(e) => {      e.preventDefault()      e.target.reset()      setIsBlocking(false)    }}>      <Prompt
        when={isBlocking}
        message={(location) => `Are you sure you want to go to ${location.pathname}`}
      />

      <p>
        Blocking? {
          isBlocking
            ? 'Yes, click a link or the back button'
            : 'Nope'
        }
      </p>

      <input
        size="50"
        placeholder="type something to block transitions"
        onChange={(event) => setIsBlocking(
          event.target.value.length > 0
        )}
      />

      <br />

      <button type='submit'>        Submit to stop blocking      </button>    </form>
  )
}
(Practice) Preventing Transitions
Refer to the instructions in the code.
Final App Preview
Starter Code
(Solution) Preventing Transitions
Solution
Route Config with React Router v5
The move from React Router v3 to v4 introduced a declarative, component-based approach to routing - moving away from a static route config. Though there are many benefits to this approach, there are still some benefits to having a central route config. Because React Router is now “just components” and therefore “just javascript”, having a central route config with React Router v4 and v5 is still very much possible. The key? Having your routes represented as an array.
const routes = [
  {
    path: '/sandwiches',
    component: Sandwiches
  },
  {
    path: '/tacos',
    component: Tacos,
  }
]
Now that your routes are centralized to an array, in order to render your Route s, you map over the array.
import * as React from 'react'
import {
  BrowserRouter as Router,
  Route,
  Link,
} from 'react-router-dom'

const Sandwiches = () => <h2>Sandwiches</h2>
const Tacos = () => <h2>Tacos</h2>

const routes = [
  {
    path: '/sandwiches',
    component: Sandwiches
  },
  {
    path: '/tacos',
    component: Tacos,
  }
]

export default function App () {
  return (
    <Router>
      <div>
        <ul>
          <li><Link to="/tacos">Tacos</Link></li>
          <li><Link to="/sandwiches">Sandwiches</Link></li>
        </ul>

        {routes.map((route) => (
          <Route
            key={route.path}
            path={route.path}
            exact={route.exact}
          >
            <route.component />
          </Route>
        ))}
      </div>
    </Router>
  )
}
Wow, look at that  . We’ve used the power of JavaScript to create a central route config.
Now, what if we wanted to have some nested routes? The first thing we would need to do is add some nested routes to our route config array.
For our example, let’s say the /tacos route is going to render some child routes - /tacos/bus and /tacos/cart .
const Bus = () => <h3>Bus</h3>
const Cart = () => <h3>Cart</h3>

const routes = [
  {
    path: '/sandwiches',
    component: Sandwiches
  },
  {
    path: '/tacos',
    component: Tacos,
    routes: [
      {
        path: '/tacos/bus',
        component: Bus
      },
      {
        path: '/tacos/cart',
        component: Cart
      }
    ]
  }
]
Now that we’ve added some nested routes to our route config, we need to modify the way we’re mapping over them to support the nested routes. The idea here is that when we map over our routes array, for each item we’re going to render a Route component as we did before, but now, instead of just rendering the component, we’re going to pass any child routes to that component so that it can also render the child routes.
That was a little wordy so let’s take a look at some code. Because we’ve added a little complexity to how we’re rendering the Route components, let’s abstract that to a new component called RouteWithSubRoutes .
function RouteWithSubRoutes(route) {
  return (
    <Route path={route.path} exact={route.exact}>
      <route.component />
    </Route>
  )
}

export default function App () {
  return (
    <Router>
      <div>
        <ul>
          <li><Link to="/tacos">Tacos</Link></li>
          <li><Link to="/sandwiches">Sandwiches</Link></li>
        </ul>

        {routes.map((route) => (
          <RouteWithSubRoutes key={route.path} {...route} />
        ))}
      </div>
    </Router>
  )
}
Now, as mentioned earlier, we need to pass the component that’s being rendered any child routes so that it can also render those.
function RouteWithSubRoutes(route) {
  return (
    <Route path={route.path} exact={route.exact}>
      <route.component routes={route.routes} />
    </Route>
  )
}
Solid. Now, any time a Route renders a component, that component will be passed any child routes that may or may not exist as a routes prop.
Now the only thing left to do is modify our Tacos component to receive those child routes and, for each item in routes , render a RouteWithSubRoutes component.
function Tacos ({ routes }) {
  return (
    <div>
      <h2>Tacos</h2>
      <ul>
        <li><Link to="/tacos/bus">Bus</Link></li>
        <li><Link to="/tacos/cart">Cart</Link></li>
      </ul>

      {routes.map((route) => (
        <RouteWithSubRoutes key={route.path} {...route} />
      ))}
    </div>
  )
}
To recap, by representing our routes as an array, we were able to create a central route config for our app. Also, when we created the RouteWithSubRoutes component, that component would pass any child routes down to the component that’s being rendered so that the rendered component could also render the child routes (as seen in Tacos .)
(Practice) Route Config
Refer to the instructions in the code.
Final App Preview
Starter Code
(Solution) Route Config
Solution
(Bonus) Server Rendering with React and React Router v5
You can find all the code for this post at github.com/uidotdev/react-router-v5-server-rendering
Server-side rendering AKA Isomorphic JavaScript AKA Universal JavaScript is the pipe dream idea of running your same JavaScript code on both the server and the client. Why is that beneficial? Well, you’ll typically benefit from code reuse, improved performance, and SEO gains. The more appropriate question is are the benefits you gain worth the complexity you’ll add? When building a server-rendered app, there are more circumstances you have to consider.
Which code will be shared?
Is there initial state that needs to be shared?
How do you handle routing on both the server and client?
Because all of these questions can be answered linearly, we’ll take the same approach with this post.
We’ll start off with the bare basics, solve it, then add in more complexity. By the end, you’ll be able to decide if the complexity trade-off of server rendering is worth it for your specific application.
If this is a new concept to you, it’s important to grasp the big picture of how all the pieces fit together before diving into the details.
Here’s the (initial) process
- A user types your URL into their web browser and hits enter.
- Your server sees there is a
GETrequest for the path “/”. - It renders your app’s main component, wraps it inside of a standard HTML doc (DOCTYPE, html, head, body, etc), and sends the whole thing back as a response.
- The browser sees it got an HTML document back from the server and its rendering engine goes to work. It soon finishes rendering the page.
- At this point, the page is viewable and the browser starts downloading any scripts.
- Once the scripts are downloaded, React takes over and the page is interactive.

Notice that with server rendering, the response the browser gets from the server is the HTML of your page that is ready to be rendered. This is vastly different from client-side rendering which just spits back a blank HTML document with a JS bundle.
By sending back a finished HTML document, the browser is able to show the user some UI without having to wait for the JavaScript the finish downloading.
Now that we get the big picture, let’s work on creating the foundation for what will become a server-rendered React Router v5 app.
Breaking down our list, we know there are three things we’re going to need up front.
- A React component - even just a basic one that renders “Hello World” for now.
- A server which spits back our basic React component after it’s wrapped it in some HTML structure.
- A React app which is going to pick up from where the server-rendered HTML left off and add in any event listeners to the existing markup where needed.
It’s important to note here that for React’s sake, what you render on the server (#2 above) needs to be identical to what is rendered on the client (#3). If not, React will throw a warning.
As always when dealing with React, we’re going to need to talk about webpack at some point. For max knowledge gain, we’re not going to use Create React App so we’ll have to roll our own configuration. For the sake of keeping this tutorial as focused as possible, I’ll paste the webpack.config.js file and the package.json file below then highlight the important parts.
Webpack Config
// webpack.config.js

const path = require('path')
const webpack = require('webpack')
const nodeExternals = require('webpack-node-externals')
const MiniCssExtractPlugin = require('mini-css-extract-plugin')

const browserConfig = {
  mode: "production",
  entry: './src/browser/index.js',
  output: {
    path: path.resolve(__dirname, 'dist'),
    filename: 'bundle.js'
  },
  module: {
    rules: [
      { test: /\.(js)$/, use: 'babel-loader' },
      { test: /\.css$/, use: [ 'css-loader' ]}
    ]
  },
  plugins: [
    new webpack.DefinePlugin({
      __isBrowser__: "true"
    })
  ]
}

const serverConfig = {
  mode: "production",
  entry: './src/server/index.js',
  target: 'node',
  externals: [nodeExternals()],
  output: {
    path: path.resolve(__dirname, 'dist'),
    filename: 'server.js'
  },
  module: {
    rules: [
      { test: /\.(js)$/, use: 'babel-loader' },
      { test: /\.css$/, use: [MiniCssExtractPlugin.loader, 'css-loader'] }
    ]
  },
  plugins: [
    new MiniCssExtractPlugin(),
    new webpack.DefinePlugin({
      __isBrowser__: "false"
    }),
  ]
}

module.exports = [browserConfig, serverConfig]
Notice we have two different configurations: one for the browser and one for the server.
Browser Configuration
const browserConfig = {
  mode: "production",
  entry: './src/browser/index.js',
  output: {
    path: path.resolve(__dirname, 'dist'),
    filename: 'bundle.js'
  },
  module: {
    rules: [
      { test: /\.(js)$/, use: 'babel-loader' },
      { test: /\.css$/, use: [ 'css-loader' ]}
    ]
  },
  plugins: [
    new webpack.DefinePlugin({
      __isBrowser__: "true"
    })
  ]
}
The browser configuration is going to take the code that lives at /src/browser/index.js , run it through the babel-loader (which will run it through the env and react presets), run it through css-loader (which will allow us to import our CSS file), then spit out the modified, bundled code at /dist/bundle.js .
We also use DefinePlugin to add an __isBrowser__ property to the global namespace ( window ) so we know when we’re in the browser.
Server Configuration
const serverConfig = {
  mode: "production",
  entry: './src/server/index.js',
  target: 'node',
  externals: [nodeExternals()],
  output: {
    path: path.resolve(__dirname, 'dist'),
    filename: 'server.js'
  },
  module: {
    rules: [
      { test: /\.(js)$/, use: 'babel-loader' },
      { test: /\.css$/, use: [MiniCssExtractPlugin.loader, 'css-loader'] }
    ]
  },
  plugins: [
    new MiniCssExtractPlugin(),
    new webpack.DefinePlugin({
      __isBrowser__: "false"
    }),
  ]
}
The server configuration is similar. It’s going to take the code that lives at /src/server/index.js , run it through the babel-loader and css-loader , then spit it out at ./dist/server.js .
externals makes it so the server’s node_modules aren’t bundled with the output.
target tells webpack to compile for usage in a “Node.js like environment” and also helps externals know what to ignore (built in node modules like path , fs , etc).
MiniCssExtractPlugin is going to extract all our CSS into a single file then output it as main.css inside of the same dist folder.
tl;dr. The final client code is going to be bundled and put at dist/bundle.js and the final server code will be bundled and put at dist/server.js .
package.json
{
  "name": "react-router-v5-server-rendering",
  "description": "Example for server rendering with React Router v5.",
  "scripts": {
    "build": "webpack -p",
    "start": "node dist/server.js",
    "dev": "webpack && node dist/server.js"
  },
  "babel": {
    "presets": [
      "@babel/preset-env",
      "@babel/preset-react"
    ],
    "plugins": [
      "@babel/plugin-proposal-object-rest-spread"
    ]
  },
  "devDependencies": {
    "@babel/core": "^7.9.0",
    "@babel/plugin-proposal-object-rest-spread": "^7.9.5",
    "@babel/preset-env": "^7.9.5",
    "@babel/preset-react": "^7.9.4",
    "babel-loader": "^8.1.0",
    "css-loader": "^3.5.3",
    "mini-css-extract-plugin": "^0.9.0",
    "webpack": "^4.43.0",
    "webpack-cli": "^3.3.11",
    "webpack-node-externals": "^1.7.2"
  },
  "dependencies": {
    "cors": "^2.8.5",
    "express": "^4.17.1",
    "isomorphic-fetch": "^2.2.1",
    "react": "^16.13.1",
    "react-dom": "^16.13.1",
    "react-router-dom": "^5.1.2",
    "serialize-javascript": "^3.0.0"
  },
  "version": "1.0.0",
  "main": "index.js",
  "repository": {
    "type": "git",
    "url": "git+https://github.com/uidotdev/react-router-v5-server-rendering.git"
  },
  "author": "Tyler McGinnis",
  "license": "MIT",
  "homepage": "https://github.com/uidotdev/react-router-v5-server-rendering#readme",
  "engines": {
    "node": "13.12.x"
  }
}
The big takeaway here is npm run dev will run webpack && node dist/server.js . The webpack command kicks off the Webpack process and bundles our code while node dist/server.js starts our node server.
The
buildandstartcommands are for hosting our server on a platform like Heroku.
Now that our build process is set up, let’s start building our app. According to our webpack.config.js file, inside of our src folder, we’re going to have a server and a browser folder. Let’s also add a shared folder for all the functionality which will be shared between the two.
webpack.config.js
package.json
/src
  /browser
  /server
  /shared
Now if you’ll remember when we broke down the initial SSR process, there were three items we were going to need first.
- A React component - even just a basic one that renders “Hello World” for now.
- A server which spits back our basic React component after it’s wrapped it in some HTML structure.
- A React app which is going to pick up from where the server-rendered HTML left off and add in any event listeners to the existing markup where needed.
We can handle #1 pretty easily. Let’s make an App.js component inside of the shared folder and have it render “Hello World”.
// src/shared/App.js

import * as React from 'react'

export default function App () {
  return (
    <div>
      Hello World
    </div>
  )
}
Done and done. Now, on to #2.
#2 - A server which spits back our basic React component after it’s wrapped it in some HTML structure.
First, let’s create an index.js file inside of our src/server folder. We’re going to use express so let’s get the basics set up.
// src/server/index.js

import express from "express"
import cors from "cors"

const app = express()

app.use(cors())
app.use(express.static("dist"))

const PORT = process.env.PORT || 3000

app.listen(PORT, () => {
  console.log(`Server is listening on port: ${PORT}`)
})
Simple enough. The biggest takeaway is that we’re serving up our dist folder. If you remember from earlier, dist is where we have Webpack putting all our final bundled code.
Now we want to make it so anytime our server receives a GET request, we send back the HTML skeleton along with the markup from our App component inside of it. To do this, we’ll use React’s renderToString which takes in a React element and converts it into an HTML string.
import express from "express"
import cors from "cors"
import ReactDOM from "react-dom/server"import * as React from 'react'import App from '../shared/App'
const app = express()
app.use(cors())
app.use(express.static("dist"))
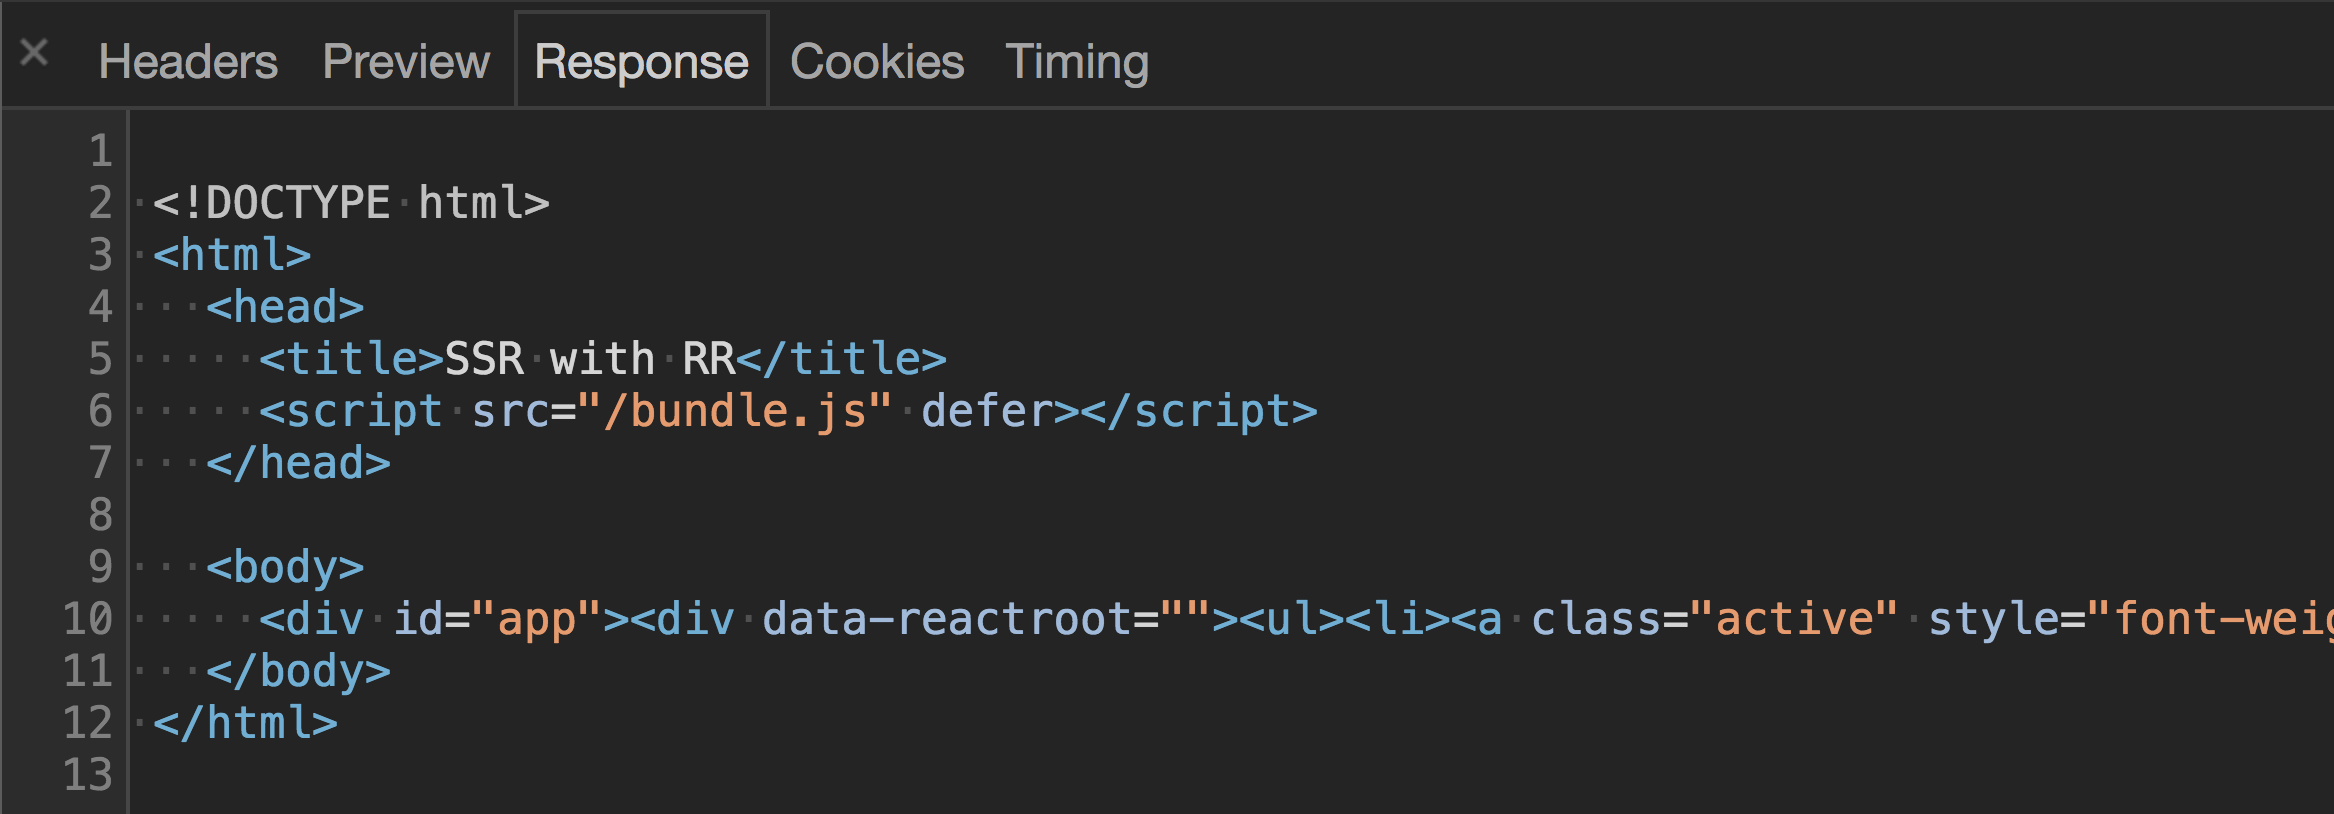
app.get("*", (req, res, next) => { const markup = ReactDOM.renderToString( <App /> ) res.send(` <!DOCTYPE html> <html> <head> <title>SSR with RRv5</title> </head> <body> <div id="app">${markup}</div> </body> </html> `)})
const PORT = process.env.PORT || 3000
app.listen(PORT, () => {
console.log(`Server is listening on port: ${PORT}`)
})
Lastly, we need to include a reference to our bundle.js file and our main.css file, both located in dist and both created by Webpack.
Lastly, we’ll also want to include a script tag which references the bundle.js file being created by Webpack.
<head>
  <title>SSR with RRv5</title>
  <script src="/bundle.js" defer></script>  <link href="/main.css" rel="stylesheet"></head>
Now whenever a GET request is made to our server, it’ll send back some HTML which includes our <App /> component, a script referencing the bundle.js file, and a link referencing the main.css file.
#3. A React app which is going to pick up from where the server-rendered HTML left off and add in any event listeners to the existing markup where needed.
This one sounds more difficult than it is. Typically when you want to tell the browser about your React app, you call ReactDOM.render passing it the element and the DOM node you want to mount to.
ReactDOM.render(
  <App />,
  document.getElementById('app)
)
Since we’re initially rendering our app on the server, instead of calling ReactDOM.render , we want to call ReactDOM.hydrate .
ReactDOM.hydrate(
  <App />,
  document.getElementById('app)
)
hydrate tells React that you’ve already created the markup on the server and instead of recreating it on the client, it should preserve it while attaching any needed event handlers to the existing server rendered markup.
Let’s make a new index.js file inside of src/browser where we can import our App component and call hydrate .
//src/browser/index.js

import * as React from 'react'
import ReactDOM from 'react-dom'
import App from '../shared/App'

ReactDOM.hydrate(
  <App />,
  document.getElementById('app')
)
Note that we’re mounting App to an element with an id of app . This coincides with the HTML that the server will respond with that we created earlier.
res.send(`
 <!DOCTYPE html>
 <html>
   <head>
    <title>SSR with RRv5</title>
    <script src="/bundle.js" defer></script>
    <link href="/main.css" rel="stylesheet">
   </head>

   <body>
     <div id="app">${markup}</div>   </body>
 </html>
`)
At this point, assuming you’ve already ran npm install and npm run dev , when you visit localhost:3000 you should see Hello World .
That “Hello World” was initially rendered on the server then when it got to the client and the bundle.js file loaded, React took over.
 View the code or View the commit
Cool. Also, anticlimactic.
Let’s mix things up a big so we can really see how this works. What if instead of rendering “Hello World”, we wanted App to render Hello {props.data} .
export default function App (props) {
  return (
    <div>
      Hello {props.data}
    </div>
  )
}
Now whenever we create our App element, we need to pass it a data prop - React 101.
Where are we creating the App element? There are two places. The first place is inside of server/index.js for when we server render and the second is inside of browser/index.js for when the browser picks it up. Let’s modify both of those and add a data prop of Tyler .
// browser/index.js

ReactDOM.hydrate(
  <App data='Tyler' />,  document.getElementById('app')
)
// server/index.js

const markup = ReactDOM.renderToString(
  <App data='Tyler' />)
View the code or View the commit
Great. So now we see “Hello Tyler” in the UI. Remember earlier when I mentioned that what you render on the server needs to be identical to what is rendered on the client? We can see this in action if we change one of the data props.
ReactDOM.hydrate(
  <App data='Mikenzi' />,  document.getElementById('app')
)
View the code or View the commit
Now when you refresh the app, you’ll initially see Hello Tyler (which is what was rendered on the server), then when React takes over, you’ll see Hello Mikenzi . In the console, you’ll see a warning Text content did not match. Server: "Tyler" Client: "Mikenzi" .
Here’s what the React docs have to say about this
React expects that the rendered content is identical between the server and the client. It can patch up differences in text content, but you should treat mismatches as bugs and fix them. In development mode, React warns about mismatches during hydration. There are no guarantees that attribute differences will be patched up in case of mismatches. This is important for performance reasons because in most apps, mismatches are rare, and so validating all markup would be prohibitively expensive.
When you’re just rendering a component with no data, it’s not difficult to have the server-rendered and client rendered content be identical - as we saw when we just rendered <App /> . When you add in data, it gets a little more complex. You need to make sure that the component is rendered with the same data (or props) on both the client and server.
Let’s take a look at how we’d do that (without just hard-coding the data prop on the server and the client).
We know since the app is going to be server rendered first, any initial data our app needs is going to have to originate on the server. With that in mind, in order to make sure the server and the client are the same, we need to figure out how to get the same data that originated on the server, down to the client. Well, there’s a pretty “old school” solution that works perfectly. Let’s stick it on the global namespace ( window ) so the client can reference it.
...

import serialize from "serialize-javascript"
app.get("*", (req, res, next) => {
  const name = 'Tyler'  const markup = renderToString(
    <App data={name}/>  )

  res.send(`
    <!DOCTYPE html>
    <html>
       <head>
         <title>SSR with RRv5</title>
         <script src="/bundle.js" defer></script>
         <link href="/main.css" rel="stylesheet">         <script>window.__INITIAL_DATA__ = ${serialize(name)}</script>
       </head>

      <body>
        <div id="app">${markup}</div>
      </body>
    </html>
  `)
})
Now, on the client, we can grab the name from window.__INITIAL_DATA__ .
ReactDOM.hydrate(
  <App data={window.__INITIAL_DATA__} />,  document.getElementById('app')
)
Cool. We’ve solved sharing initial data from the server to the client by using the window object.
View the code or View the commit
Now let’s actually start building something of substance. Odds are you’re never going to have static initial data. Your data will most likely be coming from an API somewhere. Let’s modify our server so that it fetches some data before it returns the HTML. The end goal is to build something like this. We’ll use the Github API to fetch popular repositories for a specific language. We’ll start off without any routing; then we’ll see how we can add it in using React Router v5.
The first thing we’ll want to do is make a function that takes in a language and, using the Github API, fetch the most popular repos for that language. Because we’ll be using this function on both the server and the client, let’s make an api.js file inside of the shared folder and we’ll call the function fetchPopularRepos .
// shared/api.js

import fetch from 'isomorphic-fetch'

export function fetchPopularRepos (language = 'all') {
  const encodedURI = encodeURI(`https://api.github.com/search/repositories?q=stars:>1+language:${language}&sort=stars&order=desc&type=Repositories`)

  return fetch(encodedURI)
    .then((data) => data.json())
    .then((repos) => repos.items)
    .catch((error) => {
      console.warn(error)
      return null
    });
}
Now we need to figure out when to invoke this function. The idea is when a GET request is made to our server, instead of calling renderToString immediately, we first fetch the popular repositories then call it after giving our React component the data.
// src/server/index.js

...

import { fetchPopularRepos } from '../shared/api'
app.get("*", (req, res, next) => {
  fetchPopularRepos()    .then((data) => {      const markup = ReactDOM.renderToString(
        <App data={data} />
      )

      res.send(`
        <!DOCTYPE html>
        <html>
          <head>
            <title>SSR with RRv5</title>
            <script src="/bundle.js" defer></script>
            <link href="/main.css" rel="stylesheet">
            <script>window.__INITIAL_DATA__ = ${serialize(data)}</script>
          </head>

          <body>
            <div id="app">${markup}</div>
          </body>
        </html>
      `)    })
})
Now when a GET request is made to our server, we get back not only the React UI, but also the initial data coming from the Github API.
Next, let’s update the App component to be able to properly handle that new data. Instead of handling it in App , let’s make a new component called Grid that deals with mapping over all the repos.
// src/shared/Grid.js

import * as React from 'react'

export default function Grid ({ repos }) {
 return (
    <ul className='grid'>
      {repos.map(({ name, owner, stargazers_count, html_url }, i) => (
        <li key={name}>
          <h2>#{i+1}</h2>
          <h3><a href={html_url}>{name}</a></h3>
          <p>by <a href={`https://github.com/${owner.login}`}>@{owner.login}</a></p>
          <p>{stargazers_count.toLocaleString()} stars</p>
        </li>
      ))}
    </ul>
 )
}
Now we just need to modify our App component to pass along data as repos to the Grid component.
// shared/App.js
import * as React from 'react'
import Grid from './Grid'import "./styles.css"
export default function App (props) {
  return (
   <div>
     <Grid repos={props.data} />   </div>
  )
}
Solid. Now when our app is requested, the server fetches the data the app needs and the HTML response we get has everything we need for the initial UI.
Note for this commit I’ve included a bunch of CSS in
src/shared/styles.cssand them insrc/shared/App.js. Because this is a post about server rendering and not CSS, feel free to paste those into your app.
View the code or View the commit
At this point, we’ve done a lot, but our app still has a long way to go, especially around routing.
React Router v5 is a declarative, component-based approach to routing. However, when we’re dealing with server-side rendering with React Router v5, we need to abandon that paradigm and move all of our routes to a central route configuration. The reason for this is because both the client and the server be aware and share the same routes. The client because it obviously needs to know which components to render as the user navigates around our app and the server because it needs to know which data to fetch when the user requests a specific path.
Let’s create that central route config now. Make a new file inside of our shared folder called routes.js . We’re going to represent our routes as an array of objects, each object representing a new route. Eventually, we’ll map over our routes array and create a <Route> for each item.
If you’re not familiar with URL Parameters, read URL Parameters with React Router v5 before continuing.
In the case of our app, we’ll have two routes - / and /popular/:id . / will render the (soon to be created) Home component and /popular/:id will render our Grid component.
// src/shared/routes.js

import Home from './Home'
import Grid from './Grid'

const routes =  [
  {
    path: '/',
    exact: true,
    component: Home,
  },
  {
    path: '/popular/:id',
    component: Grid,
  }
]

export default routes
Before we continue, let’s hurry and create the Home component.
// src/shared/Home.js

import * as React from 'react'

export default function Home () {
  return <h2 className='heading-center'>Select a Language</h2>
}
Now I mentioned earlier that the reason the server needs to have access to a central route config is because “it needs to know which data to fetch when the user requests a specific path”. What that means is that we’re going to put any data requests that a specific route needs in the route object itself. What that will do is it will allow the server to say “It looks like the user is requesting the /popular/javascript route. Is there any data that needs to be fetched before we send back a response? There is? OK fetch it.”.
// shared/routes.js

import Home from './Home'
import Grid from './Grid'
import { fetchPopularRepos } from './api'
const routes =  [
  {
    path: '/',
    exact: true,
    component: Home,
  },
  {
    path: '/popular/:id',
    component: Grid,
    fetchInitialData: (path = '') => fetchPopularRepos(      path.split('/').pop()    )  }
]

export default routes
Again, by adding a fetchInitialData property to our /popular/:id route, when a user makes a GET request with that path, we’ll know we need to invoke fetchInitialData before we can return the HTML.
Let’s head back over to our server and see what these changes will look like.
The first thing we need to do is figure out which route (if any) matches the current requested URL to the server. For example, if the user requests the / page, we need to find the route which matches / . Luckily for us, React Router v5 exports a matchPath function that it uses internally to match locations to routes.
// server/index.js
...
import { matchPath } from "react-router-dom"import routes from '../shared/routes'
app.get("*", (req, res, next) => {
  const activeRoute = routes.find(    (route) => matchPath(req.url, route)  ) || {}
})

...
Now, activeRoute will be the route of whatever page the user was requesting ( req.url ).
The next step is to see if that route requires any data. We’ll check if the activeRoute has a fetchInitialData property. If it does, we’ll invoke it passing it the current path, if it doesn’t, we’ll just continue on.
app.get("*", (req, res, next) => {
  const activeRoute = routes.find((route) => matchPath(req.url, route)) || {}

  const promise = activeRoute.fetchInitialData    ? activeRoute.fetchInitialData(req.path)    : Promise.resolve()
  promise.then((data) => {  }).catch(next)})
Now we have a promise which is going to resolve with the data or nothing. As we’ve done previously, we want to grab that and both pass it to our component as well as put it on the window object so the client can pick it up later.
app.get("*", (req, res, next) => {
  const activeRoute = routes.find((route) => matchPath(req.url, route)) || {}

  const promise = activeRoute.fetchInitialData
    ? activeRoute.fetchInitialData(req.path)
    : Promise.resolve()

  promise.then((data) => {
    const markup = ReactDOM.renderToString(
      <App data={data} />
    )

    res.send(`
      <!DOCTYPE html>
      <html>
        <head>
          <title>SSR with RRv5</title>
          <script src="/bundle.js" defer></script>
          <link href="/main.css" rel="stylesheet">
          <script>window.__INITIAL_DATA__ = ${serialize(data)}</script>
        </head>

        <body>
          <div id="app">${markup}</div>
        </body>
      </html>
    `)
  }).catch(next)
})
Getting closer. Now instead of always fetching the popular repos, we’re only fetching them if the route that is being rendered has a fetchInitialData property. This means that only if the user requests a path that matches /popular/:id will we fetch data.
View the code or View the commit
Try it out in your browser. Head to localhost:3000/popular/javascript . You’ll notice that the most popular JavaScript repos are being requested. You can change the language to any language the github API support and you’ll get back the most popular repos for that language. The reason this works is because we’re passing req.path to fetchInitialData in our routes array. It’s then parsing the language from the path then calling fetchPopularRepos with that language.
// src/shared/routes.js

  {
    path: '/popular/:id',
    component: Grid,
    fetchInitialData: (path = '') => fetchPopularRepos(      path.split('/').pop()    )  }
Now that we’re fetching the correct data on our server based on the route the user requested, let’s add in some client-side routing as well.
As always, we need to wrap our main component ( App ) inside of React Router’s BrowserRouter component on the client. We’ll do that inside of src/browser/index.js since that’s where we’re rendering App .
import * as React from 'react'
import ReactDOM from 'react-dom'
import App from '../shared/App'
import { BrowserRouter } from 'react-router-dom'
ReactDOM.hydrate(
  <BrowserRouter>    <App data={window.__INITIAL_DATA__} />
  </BrowserRouter>,  document.getElementById('app')
)
Now, because we’ve given control of the client over to React Router, we also need to do the same on the server so they match. Because we’re on the server, it doesn’t make sense to render a component called BrowserRouter . Instead, we’ll use React Router v5’s StaticRouter component. It’s called StaticRouter since the location never actually changes. It takes in two required props: location and context . location is the current location being requested by the user ( req.url ) and context needs to be an object that can contain any information about the render - we’ll use a blank context object for now.
// server/index.js
...
import { StaticRouter, matchPath } from "react-router-dom"...

const markup = ReactDOM.renderToString(
  <StaticRouter location={req.url} context={{}}>    <App data={data}/>
  </StaticRouter>)

...
Now let’s render some client-side routes. We already have our routes array, so we just need to map over that to create our Route s. We also need to make sure that we pass the component that is being rendered the fetchInitialData property if it exists so the client can also invoke it if it doesn’t already have the data from the server.
Why we’re here, let’s add some extra stuff to make our app look better. Specifically our
ColorfulBordercomponent and adivwith aclassNameofcontainerin ourAppcomponent.
// src/shared/ColorfulBorder.js

import * as React from 'react'

export default function ColorfulBorder() {
  return (
    <ul className='border-container'>
      <li className='border-item' style={{ background: 'var(--red)' }} />
      <li className='border-item' style={{ background: 'var(--blue)' }} />
      <li className='border-item' style={{ background: 'var(--pink)' }} />
      <li className='border-item' style={{ background: 'var(--yellow)' }} />
      <li className='border-item' style={{ background: 'var(--aqua)' }} />
    </ul>
  )
}
// src/shared/App.js

import * as React from 'react'
import routes from './routes'import { Route } from 'react-router-dom'
import ColorfulBorder from './ColorfulBorderimport './styles.css'

export default function App (props) {
  return (
    <React.Fragment>
      <ColorfulBorder />      <div className='container'>        {routes.map(({ path, exact, fetchInitialData, component: C }) => (          <Route key={path} path={path} exact={exact}>            <C              fetchInitialData={fetchInitialData}              repos={props.data}            />          </Route>        ))}      </div>
    </React.Fragment>
  )
}
Before we move on, let’s also add a Navbar and a catch all - 404 route to our App .
// src/shared/Navbar.js

import * as React from 'react'
import { NavLink } from 'react-router-dom'

const languages = [
  {
    name: 'All',
    param: 'all'
  },
  {
    name: 'JavaScript',
    param: 'javascript',
  },
  {
    name: 'Ruby',
    param: 'ruby',
  },
  {
    name: 'Python',
    param: 'python',
  },
  {
    name: 'Java',
    param: 'java',
  }
]

export default function Navbar () {
  return (
    <ul className='nav'>
      {languages.map(({ name, param }) => (
        <li key={param}>
          <NavLink
            activeStyle={{fontWeight: 'bold'}}
            to={`/popular/${param}`}>
              {name}
          </NavLink>
        </li>
      ))}
    </ul>
  )
}
// src/shared/NoMatch.js

import * as React from 'react'

export default function NoMatch () {
  return <h2 className='heading-center'>Four Oh Four</h2>
}
// src/shared/App.js

import * as React from 'react'
import routes from './routes'
import { Route, Switch } from 'react-router-dom'import Navbar from './Navbar'import NoMatch from './NoMatch'import ColorfulBorder from './ColorfulBorder'
import './styles.css'

export default function App (props) {
  return (
    <React.Fragment>
      <ColorfulBorder />
      <div className='container'>
        <Navbar />
        <Switch>           {routes.map(({ path, exact, fetchInitialData, component: C }) => (
            <Route key={path} path={path} exact={exact}>
              <C
                fetchInitialData={fetchInitialData}
                repos={props.data}
              />            </Route>           ))}          <Route path='*'>
            <NoMatch />
          </Route>
        </Switch>
      </div>
    </React.Fragment>
  )
}
View the code or View the commit
At this point our app is coming along nicely, but there are some pretty glaring issues with it. The biggest being with our Grid component and how it gets and manages its own data.
When it comes to data fetching, there are three different states of our app we need to consider. The first is when the app is rendered on the server. The second is when the client picks up the server rendered app. The third is when the user navigates around the app on the client (via React Router).
Let’s focus on that first server rendered state right now and how we can improve on what we currently have. Currently on the server we’re invoking fetchInitialData , passing the response as a data prop to App , then passing it down as repos to all components rendered by React Router. Now there’s nothing wrong with doing a little prop plumbing, but React Router has an easier way that utilizes React Context.
Remember inside of our server file when we used StaticRouter passing it a prop of context that we gave an empty object?
const markup = ReactDOM.renderToString(
  <StaticRouter location={req.url} context={{}}>    <App data={data}/>
  </StaticRouter>
)
Whatever we pass to context will be available to any component that React Router renders as a property on the staticContext prop. What that means is that no matter how nested our component tree is, any React Router rendered component that needs access to repos can easily get it.
The first change we’ll make is adding data to our context object on the server and remove passing it to App .
promise.then((data) => {
  const markup = ReactDOM.renderToString(
    <StaticRouter location={req.url} context={{ data }}>      <App />    </StaticRouter>
  )

  ...
Now since we’re no longer passing data as a prop to App , we need to modify our App component. There are two changes we need to make. First, we’re no longer receiving data as a prop which means we can no longer pass repos={data} as a prop to the component being rendered by React Router ( C ). Next, instead of passing React Router a children element, we want to use the render prop. The reason for this is how React Router handles children elements vs render functions. If you look at the code, you’ll notice that React Router doesn’t pass along any props to children elements. Typically this is fine but we already established we want React Router to pass our components staticContext so we can get access to our repos .
export default function App () {
  return (
    <React.Fragment>
      <ColorfulBorder />
      <div className='container'>
        <Navbar />

        <Switch>
          {routes.map(({ path, exact, fetchInitialData, component: C }) => (
            <Route key={path} path={path} exact={exact} render={(props) => (
              <C fetchInitialData={fetchInitialData} {...props} />
            )} />
          ))}
          <Route path='*'>
            <NoMatch />
          </Route>
        </Switch>
      </div>
    </React.Fragment>
  )
}
By utilizing the render prop, the function we pass to render will be passed props from React Router which we can then take and spread across the component it renders.
Now the only other change we need to make is in our Grid component. Instead of receiving repos as a prop, it’s going to receive staticContext which will have a data prop.
export default function Grid ({ staticContext }) {
  const repos = staticContext.data

  return (
    <ul className='grid'>
      {repos.map(({ name, owner, stargazers_count, html_url }, i) => (
        <li key={name}>
          <h2>#{i+1}</h2>
          <h3><a href={html_url}>{name}</a></h3>
          <p>by <a href={`https://github.com/${owner.login}`}>@{owner.login}</a></p>
          <p>{stargazers_count.toLocaleString()} stars</p>
        </li>
      ))}
    </ul>
  )
}
At this point we’ve solved prop plumbing on the server by utilizing StaticRouter 's context prop, however, we still have a few large issues with our app. Earlier I said that “When it comes to data fetching, there are three different states of our app we need to consider. The first is when the app is rendered on the server. The second is when the client picks up the server rendered app. The third is when the user navigates around the app on the client (via React Router).”
We just clean up the first, data fetching on the server. Now let’s move to the second - when the client picks up the server rendered app. If you were to run the app in it’s current form, you’d notice that it’s broken. The reason for that is because our Grid component is always expecting to get its data via staticContext . However, as we just saw, it’ll only get it’s data from staticContext when it’s first rendered on the server. When the client takes over, it’s going to get its data from window.__INITIAL_DATA__ as we talked about earlier.
Let’s make this fix to our Grid component. We can tell if we’re on the server or in the browser by the __isBrowser__ flag we set up in our webpack.config.js file.
export default function Grid ({ staticContext }) {
  const repos =  __isBrowser__    ? window.__INITIAL_DATA__    : staticContext.data
  return (
    ...
  )
}
View the code or View the commit
At this point we’ve solved our data needs when the app is rendered on the server via context and when the app is rendered on the client via window . However, there’s still one last data puzzle piece we need to put in place and that’s when the user navigates around our app via React Router.
Before we solve that it’s important that you understand why we have this problem. You can think of our app as having three phases - server rendered -> client pickup -> client navigation. Anything that happens after “client pickup” is in the hands of React and React Router. What this means is that just because we fetched the initial data on the server, that doesn’t mean that data is going to be valid throughout the whole lifetime of the user using our app. As soon as the user navigates away from the initial server rendered page, we need to have our client code be responsible for fetching any new pieces of data it needs.
The good news is at this point the hardest parts are behind us. Now we’re only dealing with client-side React which is probably the mental model you’re used to.
What we’ll do now is give our Grid component the ability to fetch the popular repositories of whatever language the user selects. To do this, we’ll use some combination of Hooks, the fetchInitialData property on our routes , and React Router v5’s URL parameters.
The first thing we’ll do is move repos to be a piece of state rather than just a variable since we’ll be modifying it as the user selects different languages.
export default function Grid ({ staticContext }) {
  const [repos, setRepos] = React.useState(() => {
    return __isBrowser__
      ? window.__INITIAL_DATA__
      : staticContext.data
  })

  ...

}
Next we’ll add a new loading state to our component. We’ll want the default value to be false if repos is truthy and true if it isn’t. (Another way to put that - we want loading to be false if we already have repos , which means they were created on the server).
export default function Grid ({ staticContext }) {
const [repos, setRepos] = React.useState(() => {
return __isBrowser__
? window.__INITIAL_DATA__
: staticContext.data
})
const [loading, setLoading] = React.useState( repos ? false : true )
if (loading === true) {
return <i className='loading'>🤹♂️</i>
}
return (
<ul className='grid'>
...
</ul>
)
}
Finally, whenever the user selects a new language, we want to fetch the new popular repositories for that language and update our repos state. To fetch the new popular repositories, we can use the fetchInitialData prop that we passed in when we created our Route s.
 {routes.map(({ path, exact, fetchInitialData, component: C }) => (
   <Route key={path} path={path} exact={exact} render={(props) => (
     <C fetchInitialData={fetchInitialData} {...props} />
   )} />
 ))}
Now the questions are, when do we invoke fetchInitialData and how do we know what language to fetch?
If you’ll remember, the route for when our Grid component renders looks like this.
{
 path: '/popular/:id',
 component: Grid,
 fetchInitialData: (path = '') => fetchPopularRepos(path.split('/').pop())
}
We’re using a URL Parameter ( id ) to represent the language. We can get access to that URL Parameter (and therefor language) via React Router 5.1’s useParams Hook.
Next is when should we invoke fetchInitialData ? If you’re familiar with the useEffect Hook, you’ll know you can pass to it an array of dependencies as its second argument. Whenever one of the elements in the array changes, React will re-apply the effect. That means if we pass our id URL Parameter as an element in the effect’s dependency array, React will only re-apply the effect when it changes. Perfect.
...

import { useParams } from 'react-router-dom'
export default function Grid ({ staticContext }) {
  const [repos, setRepos] = React.useState(() => {
    return __isBrowser__
      ? window.__INITIAL_DATA__
      : staticContext.data
  })

  const [loading, setLoading] = React.useState(
    repos ? false : true
  )

  const { id } = useParams()
  React.useEffect(() => {    setLoading(true)    fetchInitialData(id)      .then((repos) => {        setRepos(repos)        setLoading(false)      })
  }, [id])

  ...
}
View the code or View the commit
And just like like, we’re done…almost.
Can you spot any issues with our current implementation of Grid ? Here’s a hint - it has to do with our effect.
By default, React will invoke the effect after the first render of the component and then anytime an element in the dependency array changes. Typically this is fine - except for our case. We only want to run the effect on the initial render if repos is falsy. Similar to loading , if repos isn’t falsy that means that they were created on the server and there’s no use in re-fetching them. To solve this, we’ll use React’s useRef Hook.
export default function Grid ({ fetchInitialData, staticContext }) {
  ...

  const { id } = useParams()

  const fetchNewRepos = React.useRef(    repos ? false : true  )
  React.useEffect(() => {
    if (fetchNewRepos.current === true) {      setLoading(true)

      fetchInitialData(id)
        .then((repos) => {
          setRepos(repos)
          setLoading(false)
        })
    } else {      fetchNewRepos.current = true    }  }, [id, fetchNewRepos])
  ....
On the initial render of Grid , we set our fetchNewRepos ref to false if repos is truthy and true if it’s falsy . Then inside the effect we can check to see what the value of fetchNewRepos is (via fetchNewRepos.current ). If it’s true , we need to fetch the new languages repos . If it isn’t true , that means it’s the initial render and we’ve already fetched the repos on the server. We then set fetchNewRepos.current to true so that an subsequent renders will trigger a fetching of the new language’s popular repos as normal.
View the code or View the commit
And with that, we’re finished! The first request will be server rendered and every subsequent path change after that React Router will own.
Now you tell me, is this complexity worth the benefits to your app? 🤷
You can find all the code for this post at github.com/uidotdev/react-router-v5-server-rendering