Introduction
Hello, and welcome. This lesson isn’t truly a lesson. It’s more of a presentation to introduce myself and present what’s coming in this journey.
Who am I?
My name is Bruno Simon. I’m a French creative developer, as you can probably hear now. I’ll do my best about that, and I hope you’ll understand me. All the lessons are also available as text if you really can’t follow some of my explanations.
Right now, I’m a freelance developer and work with clients from different countries. I used to be the lead developer for Immersive Garden, a french creative studio. And for many years, I’ve been a professor for multiple French post-grad and Masters degrees. I teach web development to beginners as well as WebGL with Three.js to more advanced students.
My favorite activity is, as you can guess, WebGL and particularly with Three.js. I’ve been using it for many years on various projects, and, in 2019, I launched my portfolio. I initially meant it to showcase some techniques for my students, but I enjoyed doing it, so I kept improving it, and people seemed to appreciate it. You can check it out at https://bruno-simon.com/
Why this course?
When I started learning Three.js, we didn’t have many resources. The library was flourishing, but it was without a doubt new, and there appeared to be considerable gaps in the documentation. At that time, we had to push through and dig into the code and examples, find threads about frequent problems, and keep trying until it worked.
Nowadays, the documentation is excellent. We have pretty decent tutorials; the library is stable even though it’s still evolving thanks to the community. Yet, an ultimate course that takes you by the hand is still missing. It would help if you had guidance to fully understand this subject and get enough experience to do your projects without struggling or getting lost.
After I’ve launched my portfolio, many people asked me if I could tutor them or where to learn those techniques I use. As a matter of fact, I’ve had the idea of creating a course for my students for a long time. When I got all those requests, I figured it was time to build that online course for everyone to explore.
What will you learn?
Three.js is vast, and you can do an infinite number of things with it. That explains why the course is so long.
First, we will start by learning all the basics, such as creating our first scene, adding objects, choosing the right materials, adding textures, and animating everything.
Then, we will go through many traditional skills: for instance, creating our own geometries, adding lights and shadows, interacting with the 3D objects, adding particles.
Finally, we will end with more advanced techniques like physics, producing realistic renders, writing custom shaders, adding post-processing, and even creating our own Blender models. That’s right! You’ll also learn how to use Blender during this course.
It’s pretty neat to hatch stunning WebGL experiences, but if you need a high-end PC that can run AAA games at 140fps to enjoy it, it’s not worth it. We will learn how to monitor the performances and apply different tips to make our WebGL experience work on as many devices as possible.
Some things might seem challenging, and don’t worry, it’s perfectly normal. No one can understand everything on the first try. Each lesson focuses on one skill. These lessons will have you try said skill repeatedly in different situations until it feels comfortable enough.
Because I’m a creative developer, I’ll also do my best to help you create elegant experiences. I’ll give you many tips and tricks to find the perfect tweaks for your WebGL creations.
How to apprehend this course?
Find out how you can learn best
Each individual has a unique way to learn. It’s a valuable lesson for you to find how you can get the most out of this course.
My recommendation is to have the class running on a second screen from your working computer —or maybe a portion of your screen if this one is big enough. Always learn in the morning. That is the moment of the day when your brain is the most efficient. Do not try to rush things and complete the whole course in only one week. The brain needs time to process items, and it does it best at night. Maybe try one or two (three tops) lessons a day. Eat well, sleep enough, drink, and stay healthy. And don’t forget to shut down any distraction.
Of course, you don’t need to finish the whole class to start working on projects, whether personal or professional. If you feel like dropping out and want to start creating on your own, go ahead! The course will be there waiting for you if you need it.
The lessons
Each lesson covers one subject, and it’s better to follow them in order, but if you already feel comfortable with the basics, you can try to jump directly to more advanced techniques like the shaders.
Each lesson will provide you with a starter zip file —except for the first one. I used Webpack for that starter. If you don’t know Webpack, don’t worry, there is a lesson dedicated to that.
You will also find a final zip file file per lesson. It’s just like the starter zip file but it displays the finished assignment if you need it.
Each lesson is video recorded, but remember, you also have access to a text version on the same page. The formated code involves syntax coloration, and every step of the way, you also have access to previews of the result you’re supposed to achieve.
During each class, we will go through various documentation pages, online tools, and examples. All the links will be available under the “ Lesson’s links” button at the bottom-right of each page. Go ahead and click on those when you want to dive deeper on any of the topics we cover
The code
Each developer has their way to code and I have mine. During the lesson, in the starter zip file and the final zip file , the code will follow my preferences, but do as you wish. If you want to refactor all the code, go ahead.
Prerequisite
Obviously, it would be best if you had a computer. Some course portions might vary depending on the OS, like the terminal commands or some Blender shortcuts. I’ll always provide the macOS and Windows versions.
This course is beginner-friendly, yet you need to know JavaScript basics like variables, loops, function, events, and, perhaps, modules. Don’t worry about this last point; you’ll figure out the module basics by following the next lessons.
You will also need a code editor. I recommend Visual Studio Code because it’s a well-oiled editor with a broad community and extended updates coming every month, but use the editor that suits you. There will be a few instances when we install plugins, but again, it won’t be a big deal, and you’ll probably find corresponding plugins for your code editor.
Another requirement is a modern browser with useful developer tools. I’ll be using Chrome, but you can also use Firefox. I don’t recommend other browsers because we need our tools to be robust and efficient. At some point, we will install a Chrome extension to help us monitor WebGL performances, but this part is optional.
We will also learn how to use Blender. It’s a free 3D software that works on every primary OS, and it’s just great. If you are curious, give it a try already.
You don’t need to be good at maths. I’m terrible at it, and still, I manage to creates impressive experiences. Yes, being good at it would be a plus, but you can do without it, and I’ll explain the formulas.
Finally, if you know nothing about Three.js, you’re in the right place.
What to do if I’m stuck?
If you get stuck for whatever reason, don’t worry, you’re not alone.
You can join the Discord Server with the link that should be on the top of the page, and explain your issue. The community or I will help you as best as we can.
What is WebGL and why using Three.js
Difficulty Easy
Introduction
If you are here, you probably already know what Three.js is but let’s talk about it and see why we need this library.
Three.js is a 3D JavaScript library that enables developers to create 3D experiences for the web. It works with WebGL, but you can make it work with SVG and CSS as well. Those two are quite limited, and we won’t cover them in this course.
Showcase
Here’s a preview of what you can achieve with Three.js:
- https://bruno-simon.com
- https://go.pioneer.com/cornrevolution
- https://richardmattka.com
- https://lusion.co
- https://www.oculus.com/medal-of-honor/
- http://letsplay.ouigo.com
- https://zen.ly
- https://prior.co.jp/discover
- https://www.midwam.com
- https://heraclosgame.com
- https://chartogne-taillet.com
- https://live.vanmoof.com/site
Before going further, we need to know what WebGL is exactly.
What is WebGL?
WebGL is a JavaScript API that renders triangles in a canvas at a remarkable speed. It’s compatible with most modern browsers, and it’s fast because it uses the Graphic Processing Unit (GPU) of the visitor.
WebGL can draw more than triangles and can also be used to create 2D experiences, but we will focus on 3D experiences using triangles for the course’s sake.
The GPU can do thousands of parallel calculations. Imagine that you want to render a 3D model and this model is constituted of 1000 triangles—which, come to think about it, is not that many. Each triangle includes 3 points. When we want to render our model, the GPU will have to calculate the position of these 3000 points. Because the GPU can do parallel calculations, it will handle all the triangles points in one raw.
Once the model’s points are well placed, the GPU needs to draw each visible pixel of those triangles. Yet again, the GPU will handle the thousands and thousands of pixels calculations in one go.
The instructions to place the points and draw the pixels are written in what we call shaders. And let me tell you, shaders are hard to master. We also need to provide data to these shaders. For example: how to place the points according to the model transformations and the camera’s properties. These are called matrices. We also need to provide data to help colorize the pixels. If there is a light and the triangle is facing that light, it should be brighter than if the triangle isn’t.
And this is why native WebGL is so hard. Drawing a single triangle on the canvas would take at least 100 lines of code. Good luck if you want to add perspective, lights, models, and animate everything in that case.
But native WebGL benefits from existing at a low level, very close to the GPU. This enables excellent optimizations and more control.
Three.js to the rescue
Three.js is a JavaScript library under MIT license that works right above WebGL. The library’s goal is to drastically simplify the process of handling all of what we just stated. You’ll have an animated 3D scene in just a few code lines, and you won’t have to provide shaders and matrices.
Because Three.js is right above WebGL, we can still interact with it in some ways. At some point, we will get to writing shaders and create matrices.
Ricardo Cabello, aka Mr.doob (Website, Twitter), is the developer who created Three.js. He is still working on it, but now he’s helped by a large community. You can check the list of contributors here: https://github.com/mrdoob/three.js/graphs/contributors
Currently, the library gets an update every month and you can see what’s changed in the releases page here: https://github.com/mrdoob/three.js/releases
You can discover many exceptional projects using Three.js on the website’s homepage: https://threejs.org/
There is also some well-maintained documentation that we will use a lot: https://threejs.org/docs/index.html#manual/en/introduction/Creating-a-scene
And you can find hundreds of examples with public code here: https://threejs.org/examples/#webgl_tonemapping
If you want to follow updates and discover exceptional projects, I advise you to follow the Mr.doob and Three.js twitter accounts:
https://twitter.com/threejs_org
What about other libraries?
Three.js is the most popular WebGL library for good reasons that we already covered. It’s very stable, it provides many features, the documentation is remarkable, the community is working hard on updates, and it’s still close enough to native WebGL.
That’s why it’s probably better to learn Three.js.
But there are many other libraries, and some of them are amazing as well. Be curious, try them out, and experience their strength for yourself. You might even learn things that will be useful for your Three.js projects.
03 Basic scene
Difficulty Easy
Introduction
For our first lesson, we will make Three.js works the most straightforward way: no bundler, no dependency, no modules, just an HTML file, and some JavaScript.
Base files
To begin, create a plain index.html file:
<!DOCTYPE html>
<html lang="en">
<head>
    <meta charset="UTF-8">
    <meta name="viewport" content="width=device-width, initial-scale=1.0">
    <title>03 - Basic Scene</title>
</head>
<body>
    <script src="./script.js"></script>
</body>
</html>
HTML
Copy
And a simple script.js file:
console.log('Hello Three.js')
JavaScript
Copy
Open the index.html in your browser. To do that, you can try to double click on the file. If it doesn’t work or it opens with the wrong browser, you can drag and drop the file onto the right browser. Even if Three.js will work on most browsers, I recommend using a developer-friendly browser like Chrome or Firefox .
Now open the Developer Tools .
To do that, you can right click anywhere on the page and choose Inspect or you can press F12 on Windows and CMD + OPTION + I on MacOS.
Then navigate to the Console tab on top of the Developer Tools .
You should keep the Console open at all time to se potential errors and warnings.
How to load Three.js
Now we need to load the Three.js library. There are many ways of doing it. For now, we will simply download the library and load it using <script> .
Go to https://threejs.org/ and click on the download button to download a zip file and unzip it. The file is quite heavy, but don’t worry, we only need one file from it.
You should get a folder that looks like this:
Go to the build/ folder and copy the three.min.js file to your project.
You should get something like this:

We can now load the Three.js library at the end of the <body> , right before closing it:
<script src="./three.min.js"></script>
<script src="./script.js"></script>
HTML
Copy
Make sure to load three.min.js before your script.js ; otherwise, your script will not be aware of what’s inside the three.min.js file.
How to use Three.js
Inside of our script.js file, we now have access to a variable named THREE . Be careful and always write it using uppercase.
If you console.log() this variable, you’ll see that there is a lot going on inside:
console.log(THREE)
JavaScript
Copy
The THREE variable contains most of the classes and properties you might need on a classic Three.js project. Unfortunately, not all classes are inside this variable, but we will see later how to access them.
To use one of those classes, you need to instantiate it. For example, if you want to create a scene, you’ll write const scene = new THREE.Scene() . If you want to create a sphere geometry, you need to write const sphereGeometry = new THREE.SphereGeometry(1.5, 32, 32) —We’ll dig deeper into these later.
First scene
It’s time to create our scene and produce something on the screen.
We need 4 elements to get started:
- A scene that will contain objects
- Some objects
- A camera
- A renderer
Scene
The scene is like a container. You place your objects, models, particles, lights, etc. in it, and at some point, you ask Three.js to render that scene.
To create a scene, use the Scene class:
// Scene
const scene = new THREE.Scene()
JavaScript
Copy
Objects
Objects can be many things. You can have primitive geometries, imported models, particles, lights, and so on.
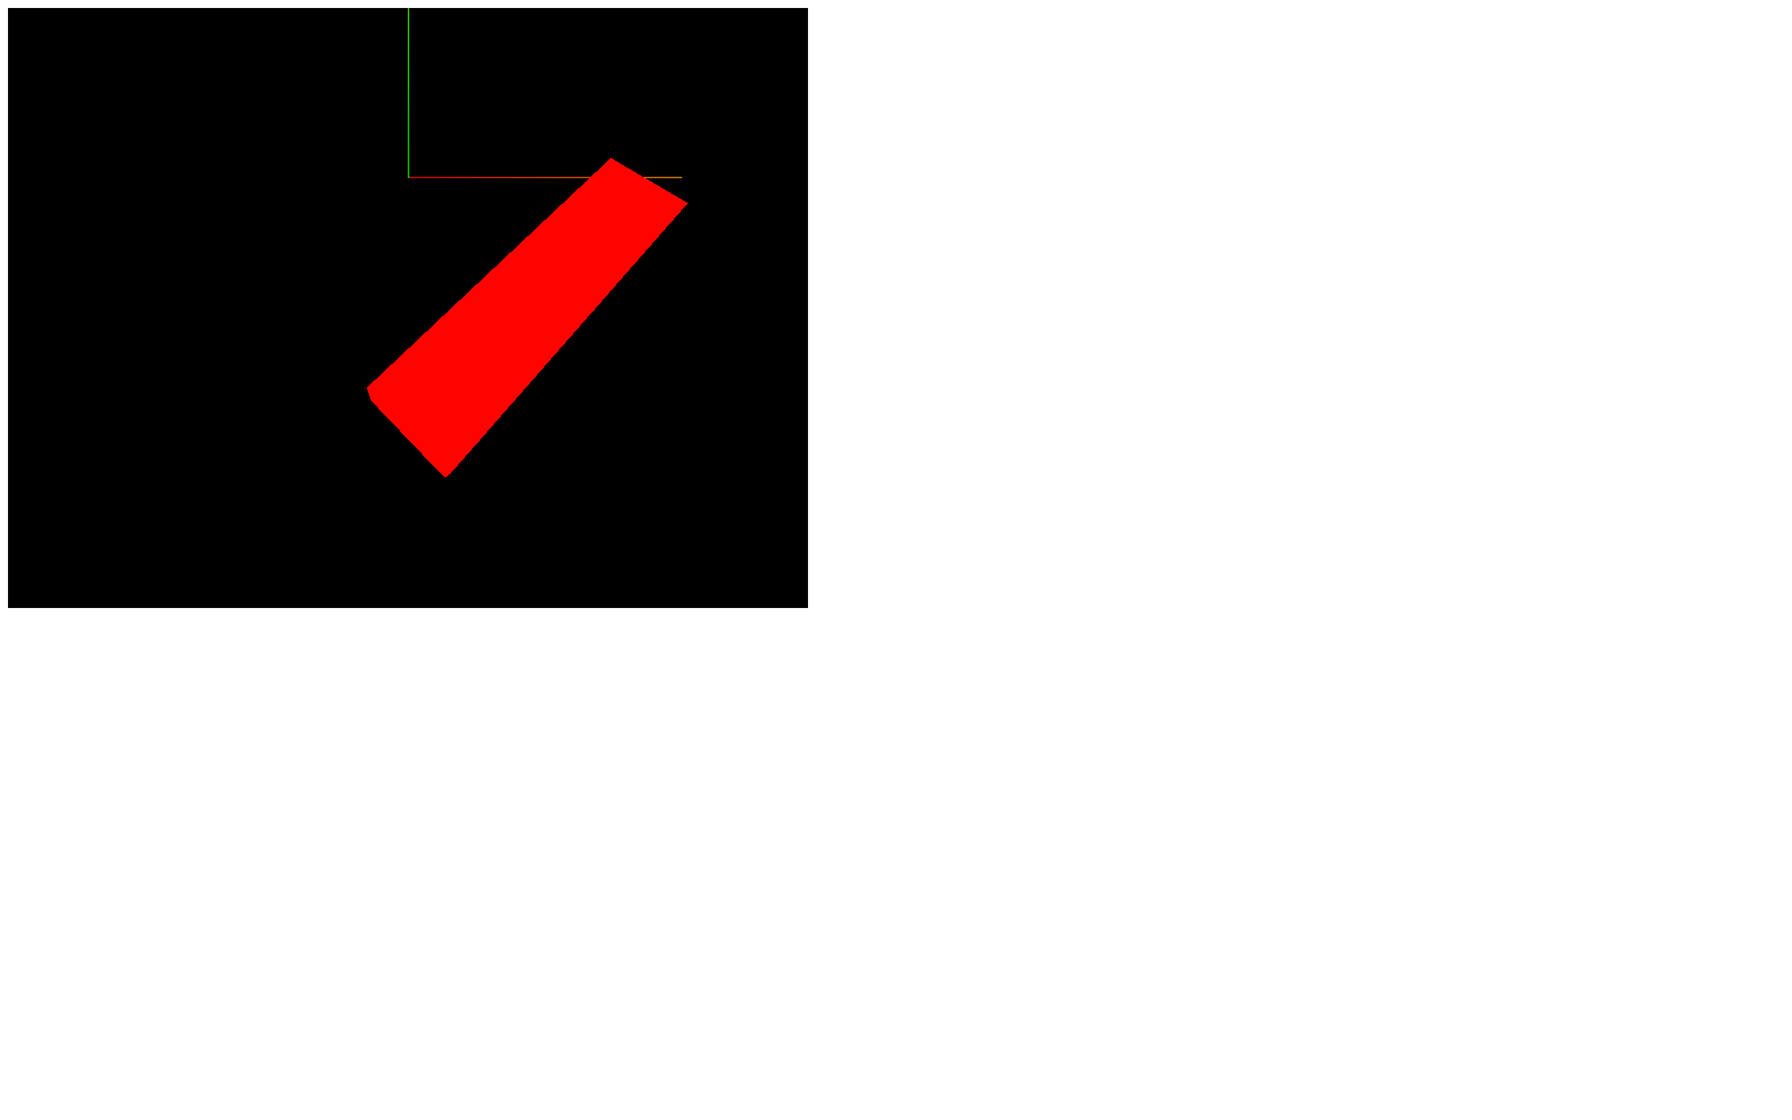
We will start with a simple red cube.
To create that red cube, we need to create a type of object named Mesh. A Mesh is the combination of a geometry (the shape) and a material (how it looks).
There are many geometries and many materials, but we will keep things simple for now and create a BoxGeometry and a MeshBasicMaterial.
To create the geometry, we use the BoxGeometry class with the first 3 parameters that correspond to the box’s size.
// Object
const geometry = new THREE.BoxGeometry(1, 1, 1)
JavaScript
Copy
To create the material, we use the MeshBasicMaterial class with one parameter: an object {} containing all the options. All we need is to specify its color property.
There are many ways to specify a color in Three.js. You can send it as a JS hexadecimal 0xff0000 , you can send it as a string hexadecimal '#ff0000' , you can use color names like 'red' , or you can send an instance of the Color class —we’ll cover more about it later.
// Object
const geometry = new THREE.BoxGeometry(1, 1, 1)
const material = new THREE.MeshBasicMaterial({ color: 0xff0000 })
JavaScript
Copy
To create the final mesh, we use the Mesh class and send the geometry and the material as parameters.
// Object
const geometry = new THREE.BoxGeometry(1, 1, 1)
const material = new THREE.MeshBasicMaterial({ color: 0xff0000 })
const mesh = new THREE.Mesh(geometry, material)
JavaScript
Copy
You can now add your mesh to the scene by using the add(...) method:
scene.add(mesh)
JavaScript
Copy
If you don’t add an object to the scene, you won’t be able to see it.
Camera
The camera is not visible. It’s more like a theoretical point of view. When we will do a render of your scene, it will be from that camera’s point of view.
You can have multiple cameras just like on a movie set, and you can switch between those cameras as you please. Usually, we only use one camera.
There are different types of cameras, and we will talk about these in a future lesson. For now, we simply need a camera that handles perspective (making close objects look more prominent than far objects).
To create the camera, we use the PerspectiveCamera class.
There are two essential parameters we need to provide.
The field of view
The field of view is how large your vision angle is. If you use a very large angle, you’ll be able to see in every direction at once but with much distortion, because the result will be drawn on a small rectangle. If you use a small angle, things will look zoomed in. The field of view (or fov ) is expressed in degrees and corresponds to the vertical vision angle. For this exercise we will use a 75 degrees angle.
Here’s a video to explain what the field of view variation looks like:
The aspect ratio
In most cases, the aspect ratio is the width of the canvas divided by its height. We haven’t specified any width or height for now, but we will need to later. In the meantime, we will create an object with temporary values that we can re-use.
Don’t forget to add your camera to the scene. Everything should work without adding the camera to the scene, but it might result in bugs later:
// Sizes
const sizes = {
    width: 800,
    height: 600
}

// Camera
const camera = new THREE.PerspectiveCamera(75, sizes.width / sizes.height)
scene.add(camera)
JavaScript
Copy
Renderer
The renderer’s job is to do the render. Bet you didn’t see that coming?
We will simply ask the renderer to render our scene from the camera point of view, and the result will be drawn into a canvas. You can create the canvas by yourself, or let the renderer generate it and then add it to your page. For this exercise, we will add the canvas to the html and send it to the renderer.
Create the <canvas> element before you load the scripts and give it a class:
<canvas class="webgl"></canvas>
HTML
Copy
To create the renderer, we use the WebGLRenderer class with one parameter: an object {} containing all the options. We need to specify the canvas property corresponding to the <canvas> we added to the page.
Create a canvas variable at the start of the code, then fetch and store in it the element we created in the HTML using document.querySelector(...) .
It’s better to assign the canvas to a variable because we’ll use it for other purposes in the next lessons.
We also need to update the size of your renderer with the setSize(...) method using the sizes object we created earlier. The setSize(...) method will automatically resize our <canvas> accordingly:
// Canvas
const canvas = document.querySelector('canvas.webgl')

// ...

// Renderer
const renderer = new THREE.WebGLRenderer({
    canvas: canvas
})
renderer.setSize(sizes.width, sizes.height)
JavaScript
Copy
If you refresh the page, you should see a black canvas of 800px width and 600px large.

First render
It’s time to work on our first render. Call the render(...) method on the renderer and send it the scene and the camera as parameters:
renderer.render(scene, camera)
JavaScript
Copy
Still nothing? Here’s the issue: we haven’t specified our object’s position, nor our camera’s. Both are in the default position, which is the center of the scene and we can’t see an object from its inside (by default).
We need to move things.
To do that, we have access to multiple properties on each object, such as position , rotation , and scale . For now, use the position property to move the camera backward.
The position property is an object with three relevant properties: x , y and z . By default, Three.js considers the forward/backward axis to be z .
To move the camera backward, we need to provide a positive value to that property. You can do that anywhere once you’ve created the camera variable, yet it has to happen before you do the render:
const camera = new THREE.PerspectiveCamera(75, sizes.width / sizes.height)
camera.position.z = 3
scene.add(camera)
JavaScript
Copy

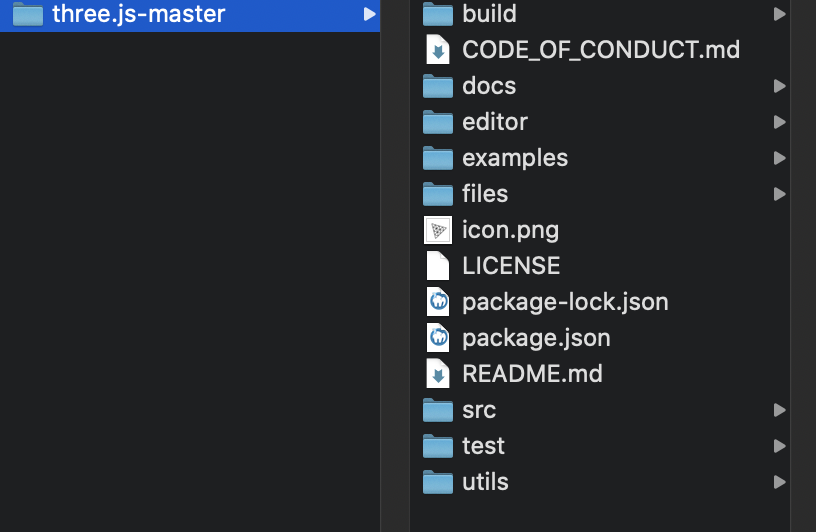
Congratulations, you should see your first render. It looks like a square, and that’s because the camera aligns perfectly with the cube, and you can see only one side of it.
Don’t worry about the render’s size; we’ll learn how to make the canvas fit the viewport later.
In the next lessons, you will learn more about the position , rotation and scale properties, how to change them, and animate the scene.
04 Webpack
Difficulty Easy
Introduction
The way we loaded Three.js in the previous lesson is the easiest. Unfortunately, it has some limitations. It doesn’t include some of the Three.js classes because the file would be too heavy. But we need a way to load those hidden classes. We are also going to need to run a server to load and manipulate images. To do that and because of security reasons, we need to run a local server.
There are many ways of handling those issues, but the simplest is to use a bundler.
What is a bundler
A bundler is a tool in which you send assets like JavaScript, CSS, HTML, images, TypeScript, Stylus, and other languages. The bundler will handle those assets, apply potential modifications, and output a “bundle” composed of web friendly files like HTML, CSS, images, JavaScript
You can see that like a pipe in which you send non-web-friendly assets and, at the end of the tube, you get web-friendly assets.
Bundler can do even more. You can use a bundler to create a local server, manage dependencies, improve compatibility, support modules, optimize images, deploy on a server, minify the code, etc.
Webpack
Webpack is currently the most popular bundler. It can handle most of your needs and provide extensive documentation and a constructive community.
Unfortunately, Webpack is quite challenging to configure. Don’t worry; I’ll provide you a simple template, and I’ll explain what it does and how to use it.
Each following lesson will start with a zip file that you’ll have to download and unzip. Then you’ll have to launch the commands that I’ll show you to run the project.
While you might see this as a limitation, Webpack is so popular and useful that it’s a must for web developers. And if you didn’t know about Webpack, that’s the perfect occasion to learn a new tool.
How to use the template
- Download Node.js (any modern “LTS” version will do) and install it on your computer with default settings.
- Download and unzip the starter zip file (right below the player). If you are on macOS or Linux, open the Terminal . If you are on Windows, then use the Command Prompt (or CMD ). If you are using Visual Studio Code, I recommend you to use the integrated terminal. Press
CMD + J(on Mac) orCTRL + J(on Windows) to open the integrated terminal. If you do so, the following commands will be the same regardless of your OS. - In your terminal, navigate to the template you’ve just unzip. You can use
cdfollowed by the name of the folder to go in it. You can also usecd(with a space at the end), and drag and drop the folder. You can test where you are withpwdand list the files in the current folder withls. - Now that you are in the project folder, use the command
npm installto install dependencies (like Three.js) using NPM. NPM is the a dependencies manager installed with Node.js. - Once you’ve completed the install, use the command
npm run devto launch the local server. Your browser should open on an URL looking likehttp://192.168.1.1:8080with the192.168.1.1part being your local IP and8080being the port. Both might be different for you according to various factors like your network or the available ports on your computer. The following URL should also show up in the terminalhttp://localhost:8080. It’s an alternative that should have the same result.
Except for the first step when we installed Node.js, these are the instructions we’ll have to follow for each lesson.
Troubleshooting
If you are on Mac and you see an error message related to Xcode, you can just ignore it. But if you really want to get rid of that message, you can follow this article, but if you don’t want to follow the whole article, just run xcode-select --install from your terminal and follow the instructions. That should fix the problem.
If you get an error or the website doesn’t open on your browser, check those points:
- Check for errors in the terminal and try to find critical information in the messages. Some errors, such as Xcode’s ones, aren’t essential, and the project should be running fine.
- Verify if you are in the right folder from your terminal with
pwd - Ensure that all those files and folders are present in the project folder:
bundler/,package-lock.json,package.json,readme.md,src/,static/(if not, re-download the starter) - Make sure you have installed a recent version of Node.js
- Make sure you’re on any network (wifi or ethernet)
- Try to open the following URL instead of the one with the IP:
http://localhost:8080
If you can’t find the problem, go to the course’s Discord server and share any information you have.
More about the Webpack template
There are a few things you need to know about the Webpack template before we continue:
- You need to run
npm installonly once. - You have to do
npm run deveach time you want to run the server and start coding. Your terminal might seem stuck, but it’s perfectly normal, and it means that the server is running. - Press
CTRL + Cto stop the server. You might need to press the shortcut multiple times on Windows or confirm with the lettero. - If you want to build your website to deploy it online, you can run
npm run build. The final files will appear in the/dist/folder. - You can find the
index.htmlfile in the/src/folder (you don’t need to add the<script>manually. Webpack will add it automatically). - The
script.jsfile is also in the/src/folder. - You can load the
style.cssfile from thescript.jsfile. It might seem strange, but that’s how modules in Webpack work. - Making a syntax mistake will usually result in an error visible directly on the page with the concerned line.
- The page will automatically refresh as you save any of those files.
- You can put “static files” in the
static/folder. Those files will be accessible by typing the URL of the local server, followed by the path to the file (starting from thestatic/folder). We’ll use this to load textures and models laters. - The only folders you need to go into are the
src/and thestatic/folders. - You can access your local server from any other device on the same network by typing the same URL that opened in your browser (which is very useful if you want to debug on mobile).
- If you make a mistake and the page reloads as a white page, you might need to refresh the page manually once you fixed the error
Get our scene back
Here’s the easy part. We want to get our scene back in this Webpack template.
First, you need to add the <canvas> to the src/index.html file:
<!DOCTYPE html>
<html lang="en">
<head>
    <meta charset="UTF-8">
    <meta name="viewport" content="width=device-width, initial-scale=1.0">
    <title>04 - Webpack</title>
</head>
<body>
    <canvas class="webgl"></canvas>
</body>
</html>
HTML
Copy
Remember that you don’t need to add any <script> . Webpack will handle this part.
Now you need to add your JavaScript code to the /src/script.js file. The only differences are the two first lines.
-
import './style.css'will import the CSS and apply it to the page (the CSS file is currently empty). -
import * as THREE from 'three'will import all default classes of Three.js inside theTHREEvariable. Thethreemodule is in the/node_modules/folder, but you don’t need to touch it.
import './style.css'
import * as THREE from 'three'

// Scene
const scene = new THREE.Scene()

// Object
const geometry = new THREE.BoxGeometry(1, 1, 1)
const material = new THREE.MeshBasicMaterial({ color: 0xff0000 })
const mesh = new THREE.Mesh(geometry, material)
scene.add(mesh)

// Sizes
const sizes = {
    width: 800,
    height: 600
}

// Camera
const camera = new THREE.PerspectiveCamera(75, sizes.width / sizes.height)
camera.position.z = 3
scene.add(camera)

// Renderer
const renderer = new THREE.WebGLRenderer({
    canvas: document.querySelector('canvas.webgl')
})
renderer.setSize(sizes.width, sizes.height)
renderer.render(scene, camera)
JavaScript
Copy
If the server was already running, open the page (no need to refresh).
If not, run npm run dev from the terminal, and the page should open.
Webpack is a little hard at first, but once you get used to it, it’s really powerful. Remember all you need to do with the starter is to open the terminal, go to the project folder, run npm install , run npm run dev and start coding awesome WebGL experiences!
05 Transforms objects
Difficulty Medium
Introduction
Now that we have everything in place, we can explore Three.js functionalities.
Before animating our scene, we need to know how to transform objects in our scene. We’ve already done that with the camera by moving it backward using the camera.position.z = 3 .
There are 4 properties to transform objects in our scene
-
position(to move the object) -
scale(to resize the object) -
rotation(to rotate the object) -
quaternion(to also rotate the object; more about that later)
All classes that inherit from the Object3D class possess those properties like PerspectiveCamera or Mesh and classes that we haven’t covered yet.
You can see from what classes inherit each class on top of the Three.js documentation.
Those properties will be compiled in what we call matrices. Matrices are used internally by Three.js, by the WebGL, and by the GPU to transform things. Fortunately, you don’t have to handle matrices by yourself and you can just modify the previously-mentioned properties.
Setup
In the starter, all we have is the project how we left it in the previous lesson with the cube in the center of the view.
Move objects
The position possesses 3 essential properties, which are x , y , and z . Those are the 3 necessary axes to position something in a 3D space.
The direction of each axis is purely arbitrary, and it can vary according to the environment. In Three.js, we usually consider that the y axis is going upward, the z axis is going backward, and the x axis is going to the right.
As for the meaning of 1 unit, it’s up to you. 1 can be 1 centimeter, 1 meter, or even 1 kilometer. I recommend that you adapt the unit to what you want to build. If you’re going to create a house, you probably should think of 1 unit as 1 meter.
You can play around with the position property of your mesh and try to guess where the cube will get (try to keep it in the screen).
Make sure to do that before you call the render(...) method or you will render the mesh before moving it.
mesh.position.x = 0.7
mesh.position.y = - 0.6
mesh.position.z = 1
JavaScript
Copy

The position property is not any object. It’s an instance of the Vector3 class. While this class has an x , a y , and a z property, it also has many useful methods.
You can get the length of a vector:
console.log(mesh.position.length())
JavaScript
Copy
You can get the distance from another Vector3 (make sure to use this code after creating the camera):
console.log(mesh.position.distanceTo(camera.position))
JavaScript
Copy
You can normalize its values (meaning that you will reduce the length of the vector to 1 unit but preserve its direction):
console.log(mesh.position.normalize())
JavaScript
Copy
To change the values, instead of changing x , y and z separately, you can also use the set(...) method:
mesh.position.set(0.7, - 0.6, 1)
JavaScript
Copy
Axes helper
Before we go any further, as you can see, positioning things in space can be a real challenge. Knowing where each axis is oriented is complicated especially when we start to move the camera.
One good solution is to use the Three.js AxesHelper.
The AxesHelper will display 3 lines corresponding to the x , y and z axes, each one starting at the center of the scene and going in the corresponding direction.
To create the AxesHelper, instantiate it and add it to the scene right after instantiating that scene . You can specify the length of the lines as the only parameter. We are going to use 2 :
/**
 * Axes Helper
 */
const axesHelper = new THREE.AxesHelper(2)
scene.add(axesHelper)
JavaScript
Copy

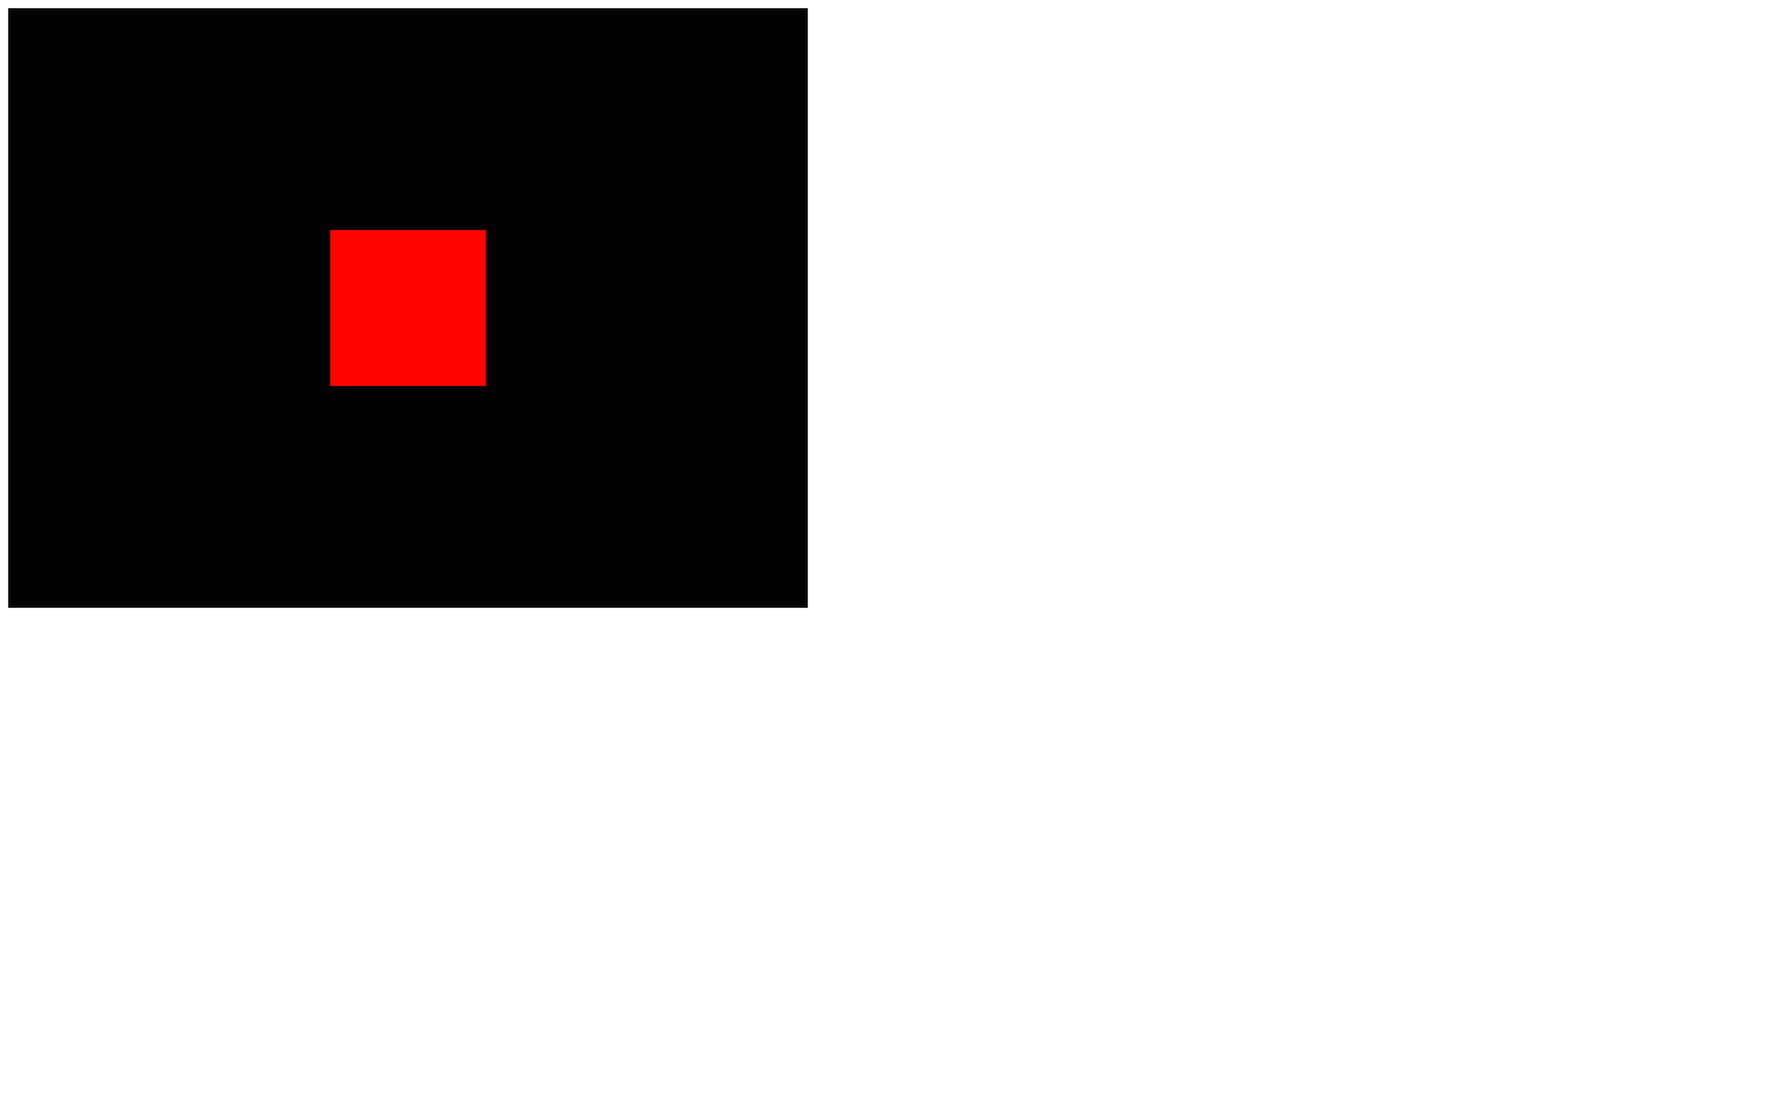
You should see a green and a red line.
The green line corresponds to the y axis. The red line corresponds to the x axis and there is a blue line corresponding to the z axis but we can’t see it because it’s perfectly aligned with the camera.
We won’t use this AxesHelper in the next lessons but feel free to add it if you need a visual reference.
Scale objects
scale is also a Vector3. By default, x , y and z are equal to 1 , meaning that the object has no scaling applied. If you put 0.5 as a value, the object will be half of its size on this axis, and if you put 2 as a value, it will be twice its original size on this axis.
If you change those values, the object will start to scale accordingly. Comment the position and add these scales:
mesh.scale.x = 2
mesh.scale.y = 0.25
mesh.scale.z = 0.5
JavaScript
Copy
Clearly, we cannot see the z scale because our Mesh is facing the camera.
While you can use negative values, it might generate bugs later on because axes won’t be oriented in the logical direction. Try to avoid doing it.
Because it’s a Vector3, we can use all the previously mentioned methods.
Rotate objects
Rotation is a little more troublesome than position and scale . There are two ways of handling a rotation.
You can use the self-evident rotation property, but you can also use the less obvious quaternion property. Three.js supports both, and updating one will automatically update the other. It’s just a matter of which one you prefer.
Rotation
The rotation property also has x , y , and z properties, but instead of a Vector3, it’s a Euler. When you change the x , y , and z properties of a Euler, you can imagine putting a stick through your object’s center in the axis’s direction and then rotating that object on that stick.
- If you spin on the
yaxis, you can picture it like a carousel. - If you spin on the
xaxis, you can imagine that you are rotating the wheels of a car you’d be in. - And if you rotate on the
zaxis, you can imagine that you are rotating the propellers in front of an aircraft you’d be in.
The value of these axes is expressed in radians. If you want to achieve half a rotation, you’ll have to write something like 3.14159… You probably recognize that number as π. In native JavaScript, you can end up with an approximation of π using Math.PI .
Comment the scale and add an eighth of a complete rotation in both x and y axes:
mesh.rotation.x = Math.PI * 0.25
mesh.rotation.y = Math.PI * 0.25
JavaScript
Copy

Is it easy? Yes, but when you combine those rotations, you might end up with strange results. Why? Because, while you rotate the x axis, you also change the other axes’ orientation. The rotation applies in the following order: x , y , and then z . That can result in weird behaviors like one named gimbal lock when one axis has no more effect, all because of the previous ones.
We can change this order by using the reorder(...) method object.rotation.reorder('yxz')
While Euler is easier to understand, this order problem can cause issues. And this is why most engines and 3D softwares use another solution named Quaternion.
Quaternion
The quaternion property also expresses a rotation, but in a more mathematical way, which solves the order problem.
We will not cover how quaternions work in this lesson but keep in mind that the quaternion updates when you change the rotation . This means that you can use any one of the two as you please.
Look at this!
Object3D instances have an excellent method named lookAt(...) that lets you ask an object to look at something. The object will automatically rotate its -z axis toward the target you provided. No complicated maths needed.
You can use it to rotate the camera toward an object, orientate a cannon to face an enemy, or move the character’s eyes to an object.
The parameter is the target and must be a Vector3. You can create one just to try it:
camera.lookAt(new THREE.Vector3(0, - 1, 0))
JavaScript
Copy
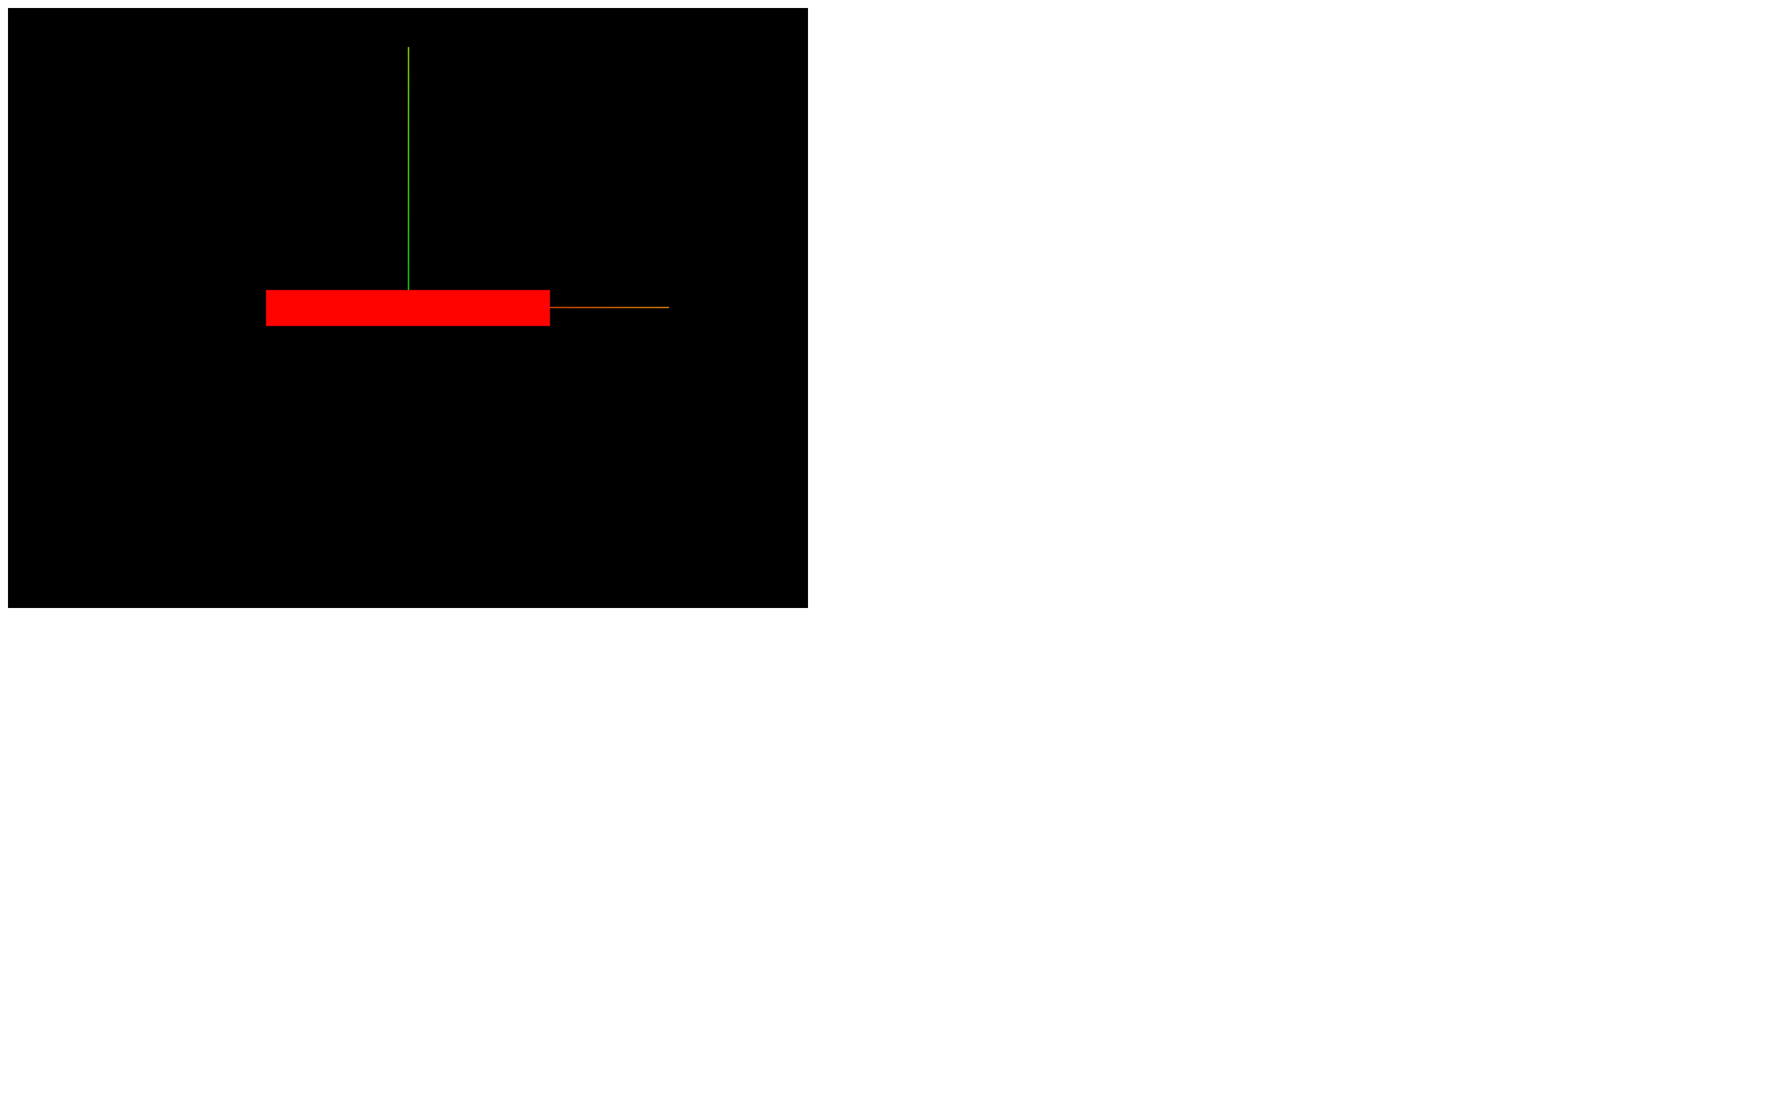
The cube seems to be higher, but in fact, the camera is looking below the cube.
We can also use any existing Vector3 such as the mesh 's position , but that will result in the default camera position because our mesh is in the center of the scene .
camera.lookAt(mesh.position)
JavaScript
Copy
Combining transformations
You can combine the position , the rotation (or quaternion ), and the scale in any order. The result will be the same. It’s equivalent to the state of the object.
Let’s combine all the transformations we tried before:
mesh.position.x = 0.7
mesh.position.y = - 0.6
mesh.position.z = 1
mesh.scale.x = 2
mesh.scale.y = 0.25
mesh.scale.z = 0.5
mesh.rotation.x = Math.PI * 0.25
mesh.rotation.y = Math.PI * 0.25
JavaScript
Copy
Scene graph
At some point, you might want to group things. Let’s say you are building a house with walls, doors, windows, a roof, bushes, etc.
When you think you’re done, you become aware that the house is too small, and you have to re-scale each object and update their positions.
A good alternative would be to group all those objects into a container and scale that container.
You can do that with the Group class.
Instantiate a Group and add it to the scene. Now, when you want to create a new object, you can add it to the Group you just created using the add(...) method rather than adding it directly to the scene
Because the Group class inherits from the Object3D class, it has access to the previously-mentioned properties and methods like position , scale , rotation , quaternion , and lookAt .
Comment the lookAt(...) call and, instead of our previously created cube, create 3 cubes and add them to a Group. Then apply transformations on the group :
/**
 * Objects
 */
const group = new THREE.Group()
group.scale.y = 2
group.rotation.y = 0.2
scene.add(group)

const cube1 = new THREE.Mesh(
    new THREE.BoxGeometry(1, 1, 1),
    new THREE.MeshBasicMaterial({ color: 0xff0000 })
)
cube1.position.x = - 1.5
group.add(cube1)

const cube2 = new THREE.Mesh(
    new THREE.BoxGeometry(1, 1, 1),
    new THREE.MeshBasicMaterial({ color: 0xff0000 })
)
cube2.position.x = 0
group.add(cube2)

const cube3 = new THREE.Mesh(
    new THREE.BoxGeometry(1, 1, 1),
    new THREE.MeshBasicMaterial({ color: 0xff0000 })
)
cube3.position.x = 1.5
group.add(cube3)
JavaScript
Copy
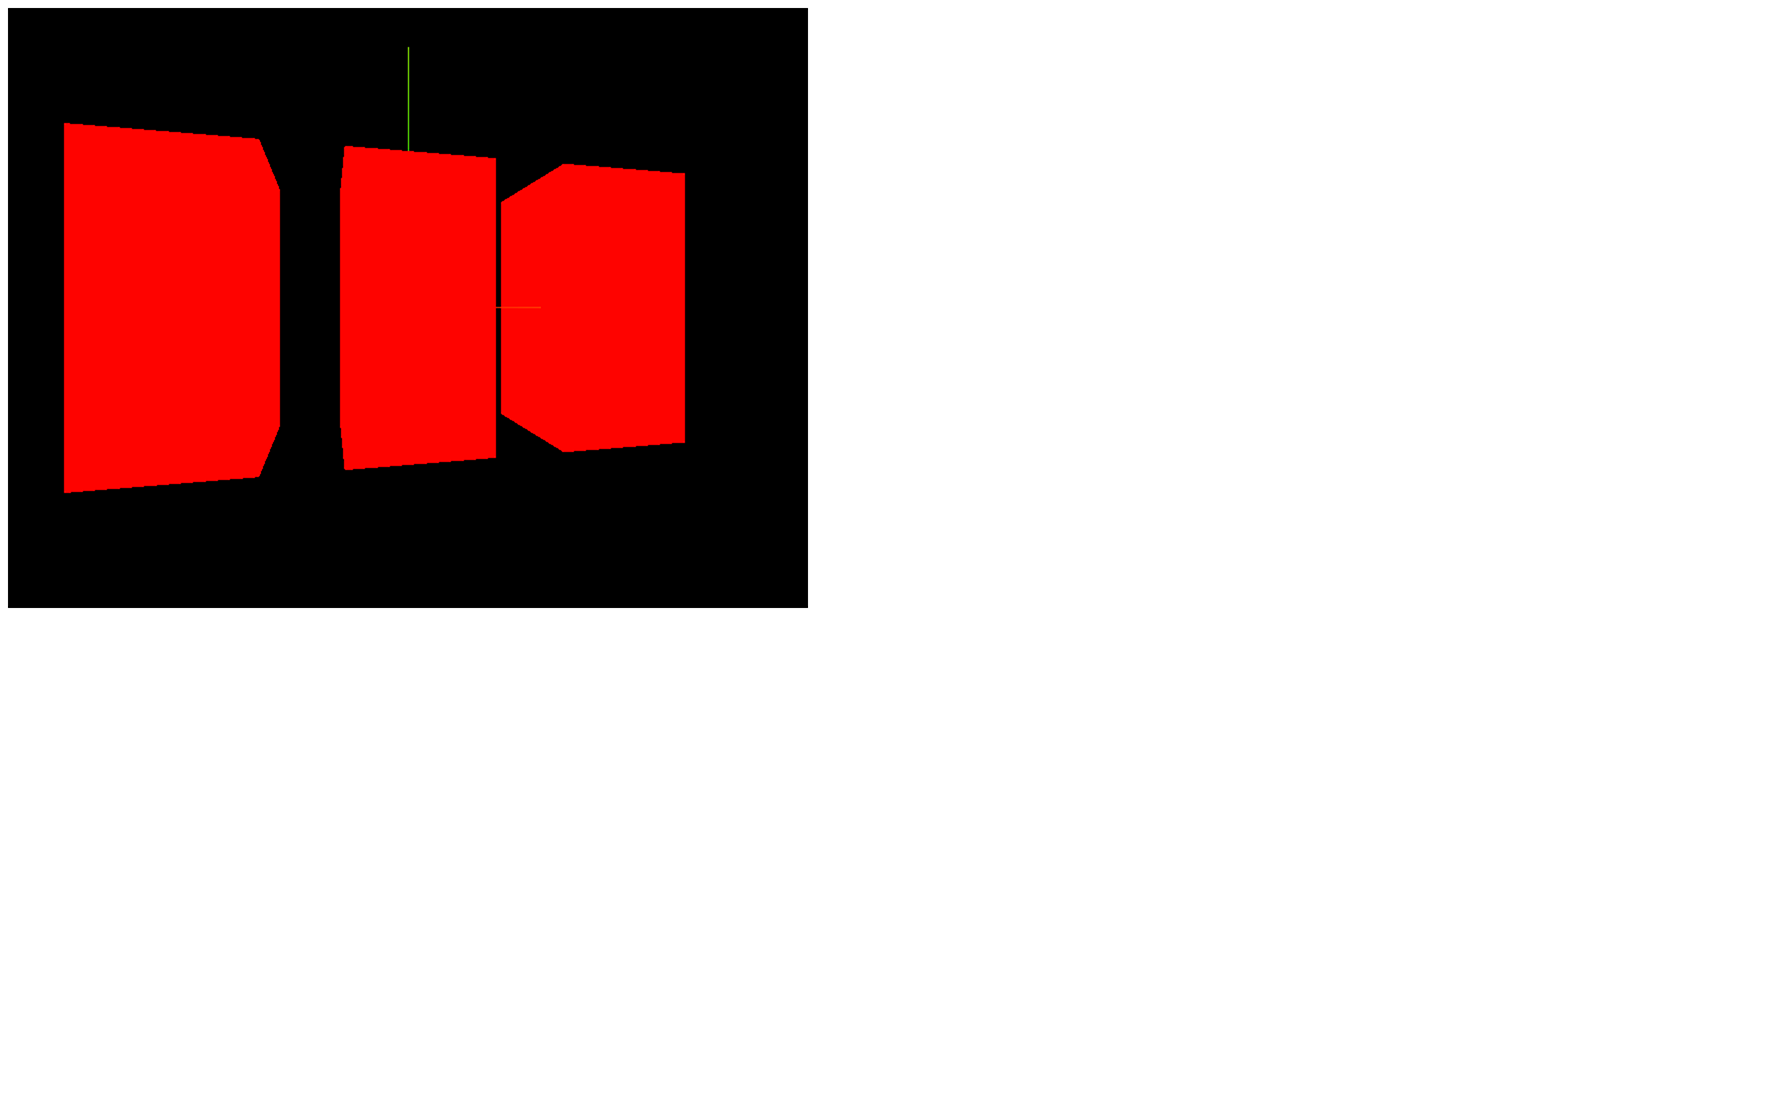
The order doesn’t really matter, as long as it’s valid JavaScript.
Now that we know how to transform objects, it’s time to create some animations.
06 Animations
Difficulty Medium
Introduction
We created a scene that we rendered once at the end of our code. That is already good progress, but most of the time, you’ll want to animate your creations.
Animations, when using Three.js, work like stop motion. You move the objects, and you do a render. Then you move the objects a little more, and you do another render. Etc. The more you move the objects between renders, the faster they’ll appear to move.
The screen you are looking at runs at a specific frequency. We call that a frame rate. The frame rate mostly depends on the screen, but the computer itself has limitations. Most screens run at 60 frames per second. If you do the maths, that means about a frame every 16ms. But some screens can run much faster, and when the computer has difficulties processing things, it’ll run more slowly.
We want to execute a function that will move objects and do the render on each frame regardless of the frame rate.
The native JavaScript way of doing so is by using the window.requestAnimationFrame(...) method.
Setup
As we had before, all we have in the starter is our cube in the scene’s center.
Using requestAnimationFrame
The primary purpose of requestAnimationFrame is not to run code on each frame.
requestAnimationFrame will execute the function you provide on the next frame . But then, if this function also uses requestAnimationFrame to execute that same function on the next frame, you’ll end up with your function being executed on each frame forever which is exactly what we want.
Create a function named tick and call this function once. In this function, use window.requestAnimationFrame(...) to call this same function on the next frame:
/**
 * Animate
 */
const tick = () =>
{
    console.log('tick')

    window.requestAnimationFrame(tick)
}

tick()
JavaScript
Copy
That’s it. You have your infinite loop.
As you can see on the console, the 'tick' is being called on each frame. If you test this code on a computer with a high frame rate, the 'tick' will appears at a higher frequency.
You can now move the renderer.render(...) call inside that function and increase the cube rotation :
/**
 * Animate
 */
const tick = () =>
{
    // Update objects
    mesh.rotation.y += 0.01

    // Render
    renderer.render(scene, camera)

    // Call tick again on the next frame
    window.requestAnimationFrame(tick)
}

tick()
JavaScript
Copy
Congratulations, you now have a Three.js animation.
The problem is, if you test this code on a computer with high frame rate, the cube will rotate faster, and if you test on a lower frame rate, the cube will rotate slower.
Adaptation to the framerate
To adapt the animation to the framerate, we need to know how much time it’s been since the last tick.
First, we need a way to measure time. In native JavaScript, you can use Date.now() to get the current timestamp:
const time = Date.now()
JavaScript
Copy
The timestamp corresponds to how much time has passed since the 1st of January 1970 (the beginning of time for Unix). In JavaScript, its unit is in milliseconds.
What you need now is to subtract the current timestamp to that of the previous frame to get what we can call the deltaTime and use this value when animating objects:
/**
 * Animate
 */
let time = Date.now()

const tick = () =>
{
        // Time
    const currentTime = Date.now()
    const deltaTime = currentTime - time
    time = currentTime

    // Update objects
    mesh.rotation.y += 0.01 * deltaTime

    // ...
}

tick()
JavaScript
Copy
The cube should rotate faster because the deltaTime should be around 16 if your screen is running at 60fps , so feel free to reduce it by multiplying the value.
Now that we base our rotation on how much time was spent since the last frame, this rotation speed will be the same on every screen and every computers regardless of the frame rate.
Using Clock
While this code isn’t that complicated, there is a built-in solution in Three.js named Clock that will handle the time calculations.
You simply have to instantiate a Clock variable and use the built-in methods like getElapsedTime() . This method will return how many seconds have passed since the Clock was created.
You can use this value to rotate the object:
/**
 * Animate
 */
const clock = new THREE.Clock()

const tick = () =>
{
    const elapsedTime = clock.getElapsedTime()

    // Update objects
    mesh.rotation.y = elapsedTime

    // ...
}

tick()
JavaScript
Copy
You can also use it to move things with the position property. If you combine it with Math.sin(...) you can get a pretty good result:
/**
 * Animate
 */
const clock = new THREE.Clock()

const tick = () =>
{
    const elapsedTime = clock.getElapsedTime()

    // Update objects
    mesh.position.x = Math.cos(elapsedTime)
    mesh.position.y = Math.sin(elapsedTime)

    // ...
}

tick()
JavaScript
Copy
And obviously, you can use those techniques to animate any Object3D like the camera:
/**
 * Animate
 */
const clock = new THREE.Clock()

const tick = () =>
{
    const elapsedTime = clock.getElapsedTime()

    // Update objects
    camera.position.x = Math.cos(elapsedTime)
    camera.position.y = Math.sin(elapsedTime)
    camera.lookAt(mesh.position)

    // ...
}

tick()
JavaScript
Copy
Another available method is getDelta(...) , but you should not use it unless you know exactly what’s going on in the Clock class code. Using it might mess with your animation, and you’ll get unwanted results.
Using a library
Sometimes you’ll want to animate your scene in a very specific way that will require using another library. There are tons of animation libraries, but a very famous is GSAP.
To add GSAP to our Webpack project, we can use the dependency manager provided with Node.js called npm .
In your terminal (while the server is not running or by using another terminal window on the same folder), run npm install --save gsap@3.5.1
The --save argument saves the dependency in the package.json so the module can be fetched if we do an npm install .
The @3.5.1 forces the version. We use this version because it was the one used when writing the lesson, but you can try the latest version if you want by removing @3.5.1 .
GSAP is now available in the node_modules/ folder, and we can import it in our script.js :
import './style.css'
import * as THREE from 'three'
import gsap from 'gsap'

// ...
JavaScript
Copy
There are many ways of using GSAP, and we could dedicate an entire course to it, but it is not the goal of this course. We will simply create a tween to test things out. If you already know how to use GSAP, it works the same with Three.js.
Comment the code related to the previous animations but keep the tick function with the render. Then you can create what we call a tween (an animation from A to B) using gsap.to(...) :
/**
 * Animate
 */
gsap.to(mesh.position, { duration: 1, delay: 1, x: 2 })

const tick = () =>
{
    // Render
    renderer.render(scene, camera)

    // Call tick again on the next frame
    window.requestAnimationFrame(tick)
}

tick()
JavaScript
Copy
GSAP has a built-in requestAnimationFrame , so you don’t need to update the animation by yourself, but still, if you want to see the cube moving, you need to keep doing the renders of your scene on each frame.
Choosing the right solution
As for choosing between native JS and an animation library, it’s a matter of what you want to achieve. If you’re going to create a carousel that spins forever, you don’t need any library for that. But if you want to animate, for instance, the swing of a sword, you might prefer to use a library.
07 Cameras
Difficulty Medium
Introduction
We already created a PerspectiveCamera , but there are other types of cameras, as you can see in the documentation.
Camera
The Camera class is what we call an abstract class. You’re not supposed to use it directly, but you can inherit from it to have access to common properties and methods. Some of the following classes inherit from the Camera class.
ArrayCamera
The ArrayCamera is used to render your scene multiple times by using multiple cameras. Each camera will render a specific area of the canvas. You can imagine this looking like old school console multiplayer games where we had to share a split-screen.
StereoCamera
The StereoCamera is used to render the scene through two cameras that mimic the eyes in order to create what we call a parallax effect that will lure your brain into thinking that there is depth. You must have the adequate equipment like a VR headset or red and blue glasses to see the result.
CubeCamera
The CubeCamera is used to get a render facing each direction (forward, backward, leftward, rightward, upward, and downward) to create a render of the surrounding. You can use it to create an environment map for reflection or a shadow map. We’ll talk about those later.
OrthographicCamera
The OrthographicCamera is used to create orthographic renders of your scene without perspective. It’s useful if you make an RTS game like Age of Empire. Elements will have the same size on the screen regardless of their distance from the camera.
PerspectiveCamera
The PerspectiveCamera is the one we already used and simulated a real-life camera with perspective.
We are going to focus on the OrthographicCamera and the PerspectiveCamera.
PerspectiveCamera
As we saw earlier, the PerspectiveCamera class needs some parameters to be instantiated, but we didn’t use all the possible parameters. Add the third and fourth parameters:
const camera = new THREE.PerspectiveCamera(75, sizes.width / sizes.height, 1, 1000)
JavaScript
Copy

You should get the same result but let’s talk about those parameters in detail.
Field of view
The first parameter called field of view corresponds to your camera view’s vertical amplitude angle in degrees. If you use a small angle, you’ll end up with a long scope effect, and if you use a wide-angle, you’ll end up with a fish eye effect because, in the end, what the camera sees will be stretched or squeezed to fit the canvas.
As for choosing the right field of view, you’ll have to try things out. I usually use a field of view between 45 and 75 .
Aspect ratio
The second parameter is called aspect ratio and corresponds to the width divided by the height. While you might think that it’s obviously the canvas width by the camera height and Three.js should calculate it by itself, it’s not always the case if you start using Three.js in very specific ways. But in our case, you can simply use the canvas width and the canvas height.
I recommend saving those values in an object because we are going to need them multiple times:
const sizes = {
    width: 800,
    height: 600
}
JavaScript
Copy
Near and far
The third and fourth parameters called near and far , correspond to how close and how far the camera can see. Any object or part of the object closer to the camera than the near value or further to the camera than the far value will not show up on the render.
You can see that like in those old racing games where you could see the trees pop up in the distance.
While you might be tempted to use very small and very large values like 0.0001 and 9999999 you might end up with a bug called z-fighting where two faces seem to fight for which one will be rendered above the other.
Try to use reasonable values and increase those only if you need it. In our case, we can use 0.1 and 100 .
OrthographicCamera
While we will not use this type of camera for the rest of the course, it can be useful for specific projects.
The OrthographicCamera differs from the PerspectiveCamera by its lack of perspective, meaning that the objects will have the same size regardless of their distance from the camera.
The parameters you have to provide are very different from the PerspectiveCamera.
Instead of a field of view, you must provide how far the camera can see in each direction ( left , right , top and bottom ). Then you can provide the near and far values just like we did for the PerspectiveCamera.
Comment the PerspectiveCamera and add OrthographicCamera . Let the position update and lookAt(...) call:
const camera = new THREE.OrthographicCamera(- 1, 1, 1, - 1, 0.1, 100)
JavaScript
Copy

As you can see, there is no perspective, and the sides of our cube seem parallel. The problem is that our cube doesn’t look cubic.
That is due to the values we provided for the left , right , top , and bottom which are 1 or - 1 , meaning that we render a square area, but that square area will be stretched to fit our rectangle canvas and our canvas isn’t a square.
We need to use the canvas ratio (width by height). Let’s create a variable named aspectRatio (just like the PerspectiveCamera) and store that ratio in it:
const aspectRatio = sizes.width / sizes.height
const camera = new THREE.OrthographicCamera(- 1 * aspectRatio, 1 * aspectRatio, 1, - 1, 0.1, 100)
JavaScript
Copy

This results in a render area width larger than the render area height because our canvas width is larger than its height.
We now have a cube that looks like a cube.
Custom controls
Let’s get back to our PerspectiveCamera. Comment the OrthographicCamera, uncomment the PerspectiveCamera, move the camera so it faces the cube, and remove the mesh rotation in the tick function:
// Camera
const camera = new THREE.PerspectiveCamera(75, sizes.width / sizes.height, 1, 1000)

// const aspectRatio = sizes.width / sizes.height
// const camera = new THREE.OrthographicCamera(- 1 * aspectRatio, 1 * aspectRatio, 1, - 1, 0.1, 100)

// camera.position.x = 2
// camera.position.y = 2
camera.position.z = 3
camera.lookAt(mesh.position)
scene.add(camera)
JavaScript
Copy
What we want to do now is control the camera with our mouse. First of all, we want to know the mouse coordinates. We can do that using native JavaScript by listening to the mousemove event with addEventListener .
The coordinates will be located in the argument of the callback function as event.clientX and event.clientY :
// Cursor
window.addEventListener('mousemove', (event) =>
{
    console.log(event.clientX, event.clientY)
})
JavaScript
Copy
We could use those values, but I recommend adjusting them. By adjusting, I mean to have a 1 amplitude and that the value can be both negative and positive.
If we only focus on the x value, that would mean that:
- if your cursor is on the far left of the canvas, you should get
- 0.5 - if your cursor is at the center of the canvas, you should get
0 - if your cursor is at the far right of the canvas, you should get
0.5
While this is not mandatory, it helps to have clean values like that.
Just like the size variable, we will create a cursor variable with default x and y properties and then update those properties in the mousemove callback:
// Cursor
const cursor = {
    x: 0,
    y: 0
}

window.addEventListener('mousemove', (event) =>
{
    cursor.x = event.clientX / sizes.width - 0.5
    cursor.y = event.clientY / sizes.height - 0.5

    console.log(cursor.x, cursor.y)
})
JavaScript
Copy
Dividing event.clientX by sizes.width will give us a value between 0 and 1 (if we keep the cursor above the canvas) while subtracting 0.5 will give you a value between - 0.5 and 0.5 .
You now have the mouse position stored in the cursor object variable, and you can update the position of the camera in the tick function:
const tick = () =>
{
    // ...

    // Update camera
    camera.position.x = cursor.x
    camera.position.y = cursor.y

    // ...
}
JavaScript
Copy
As you can see, it’s working but the axes movements seem kind of wrong. This is due to the position.y axis being positive when going upward in Three.js but the clientY axis being positive when going downward in the webpage.
You can simply invert the cursor.y while updating it by adding a - in front of the whole formula (don’t forget the parentheses):
window.addEventListener('mousemove', (event) =>
{
    cursor.x = event.clientX / sizes.width - 0.5
    cursor.y = - (event.clientY / sizes.height - 0.5)
})
JavaScript
Copy
Finally, you can increase the amplitude by multiplying the cursor.x and cursor.y and ask the camera to look at the mesh using the lookAt(...) method:
const tick = () =>
{
    // ...

    // Update camera
    camera.position.x = cursor.x * 5
    camera.position.y = cursor.y * 5
    camera.lookAt(mesh.position)

    // ...
}
JavaScript
Copy
We can go even further by doing a full rotation of the camera around the mesh by using Math.sin(...) and Math.cos(...) .
sin and cos , when combined and used with the same angle, enable us to place things on a circle. To do a full rotation, that angle must have an amplitude of 2 times π (called “pi”). Just so you know, a full rotation is called a “tau” but we don’t have access to this value in JavaScript and we have to use π instead.
You can access an approximation of π in native JavaScript using Math.PI .
To increase the radius of that circle, you can simply multiply the result of Math.sin(...) and Math.cos(...) :
const tick = () =>
{
    // ...

    // Update camera
    camera.position.x = Math.sin(cursor.x * Math.PI * 2) * 2
    camera.position.z = Math.cos(cursor.x * Math.PI * 2) * 2
    camera.position.y = cursor.y * 3
    camera.lookAt(mesh.position)

    // ...
}

tick()
JavaScript
Copy
While this is a good start to control the camera, Three.js has integrated multiple classes called controls to help you do the same and much more.
Built-in controls
If you type “controls” in the Three.js documentation, you’ll see that there are a lot of pre-made controls. We will only use one of them for the rest of the course, but it can be interesting to know their role.
DeviceOrientationControls
DeviceOrientationControls will automatically retrieve the device orientation if your device, OS, and browser allow it and rotate the camera accordingly. You can use it to create immersive universes or VR experiences if you have the right equipment.
FlyControls
FlyControls enable moving the camera like if you were on a spaceship. You can rotate on all 3 axes, go forward and go backward.
FirstPersonControls
FirstPersonControls is just like FlyControls, but with a fixed up axis. You can see that like a flying bird view where the bird cannot do a barrel roll. While the FirstPersonControls contains “FirstPerson,” it doesn’t work like in FPS games.
PointerLockControls
PointerLockControls uses the pointer lock JavaScript API. This API hides the cursor, keeps it centered, and keeps sending the movements in the mousemove event callback. With this API, you can create FPS games right inside the browser. While this class sounds very promising if you want to create that kind of interaction, it’ll only handle the camera rotation when the pointer is locked. You’ll have to handle the camera position and game physics by yourself.
OrbitControls
OrbitControls is very similar to the controls we made in the previous lesson. You can rotate around a point with the left mouse, translate laterally using the right mouse, and zoom in or out using the wheel.
TrackballControls
TrackballControls is just like OrbitControls but there are no limits in terms of vertical angle. You can keep rotating and do spins with the camera even if the scene gets upside down.
TransformControls
TransformControls has nothing to do with the camera. You can use it to add a gizmo to an object to move that object.
DragControls
Just like the TransformControls, DragControls has nothing to do with the camera. You can use it to move objects on a plane facing the camera by drag and dropping them.
We will only use the OrbitControls but feel free to test the other classes.
OrbitControls
Let’s comment the part where we update the camera in the tick function.
Instanciating
First, we need to instantiate a variable using the OrbitControls class. While you might think you can use THREE.OrbitControls here, you are unfortunately mistaken.
The OrbitControls class is part of those classes that are not available by default in the THREE variable. That decision helps to reduce the weight of the library. And this is where our Webpack template comes in.
The OrbitControls class may not be available in the THREE variable; it is still located in the dependencies folder. To import it, you must provide the path from inside the /node_modules/ folder, which is /three/examples/jsm/controls/OrbitControls.js :
import { OrbitControls } from 'three/examples/jsm/controls/OrbitControls.js'
JavaScript
Copy
You can now instantiate a variable using the class OrbitControls (without the THREE. ) and make sure to do that after creating the camera.
For it to work, you must provide the camera and the element in the page that will handle the mouse events as parameters:
// Controls
const controls = new OrbitControls(camera, canvas)
JavaScript
Copy
You can now drag and drop using both the left mouse or the right mouse to move the camera, and you can scroll up or down to zoom in or out.
It’s much easier than our custom code, and it comes with more controls. But let’s go a little further.
Target
By default, the camera is looking at the center of the scene. We can change that with the target property.
This property is a Vector3, meaning that we can change its x , y and z properties.
If we want the OrbitControls to look above the cube by default, we just have to increase the y property:
controls.target.y = 2
JavaScript
Copy
This is not very useful in our case so let’s comment this part.
Damping
If you read the documentation of OrbitControls there are mentions of damping . The damping will smooth the animation by adding some kind of acceleration and friction formulas.
To enable damping, switch the enableDamping property of controls to true .
In order to work properly, the controls also needs to be updated on each frame by calling controls.update() . You can do that on the tick function:
// Controls
const controls = new OrbitControls(camera, canvas)
controls.enableDamping = true

// ...

const tick = () =>
{
    // ...

    // Update controls
    controls.update()

    // ...
}
JavaScript
Copy
You’ll see that the controls are now a lot smoother.
You can use many other methods and properties to customize your controls such as the rotation speed, zoom speed, zoom limit, angle limit, damping strength, and key bindings (because yes, you can also use your keyboard).
When to use built-in controls
While those controls are handy, they have limitations. If you rely too much on them, you might end up having to change how the class is working in an unexpected way.
First, make sure to list all the features you need from those controls, then check if the class you’re about to use can handle all of those features.
If not, you’ll have to do it on your own.