Welcome to Part II of the course! If you’re here, you’ve successfully finished Part I so congratulations  !
!
In Part II , we take everything we’ve learned from Part I and focus our efforts on building the TinyHouse home sharing application.
In more detail, for Part II of the course we’ll:
- Prepare the boilerplate of our app from the code we’ve built in Part I
- Use React Router to create the necessary client-side routes of our app.
- Establish the structure of the documents and collections in our database.
- Allow user authentication with Google Sign-In and OAuth 2.0
- See how can persist login sessions for users with the help of cookies
- Query and display user information in the User page of our app.
- Query listing information and have it displayed in the Listing page of our app.
- Query information for multiple listings.
- Allow users to search for listings in certain locations with the help of Google’s Geocoding API .
- Use the third-party payment provider Stripe to allow users to pay out other users in our app.
- Allow users to host a listing.
- Host our listing images using Cloudinary .
- Allow users to book a listing from other users.
- Compile & deploy our TinyHouse application to the cloud with the help of Heroku .
- Finally, the last module will be a bonus module that consists of individual lessons that teach certain specific topics we consider important and weren’t able to cover during the core of the course.
There’s a lot of content here and we’re incredibly excited to have you on board!
THE TINYHOUSE APP
Welcome to Newline’s first Masterclass - TinyHouse .
TinyHouse is a structured, self-paced, online learning course designed to help you build a Universal JavaScript application. We’ll be working with a variety of different technologies such as React , GraphQL , and TypeScript to learn how we can build a real home-sharing app including authentication, data persistence, payments, and deployment.
In this document, we’ll be highlighting the TinyHouse application we are to build in this course. By the end of Part II, we’ll have a fully functioning home-sharing application where users will be able to sign-in, create a listing, and book other listings.
FEATURES
Here is a summary of all the main features in the TinyHouse application. A user will be able to:
- Sign-in with their Google account information.
- Search for listings in various different locations in the world.
- See specific details about listings.
- Book listings for a period of time.
- Connect their Stripe account to be allowed to create listings (i.e. be a host in TinyHouse) and receive payments from other users.
- Create (i.e. host) listings of their own.
- See a history of the listings they’ve created, the bookings they’ve made, and the bookings made to their own listings.
- See a history of listings created by other users.
SIGN-IN WITH GOOGLE
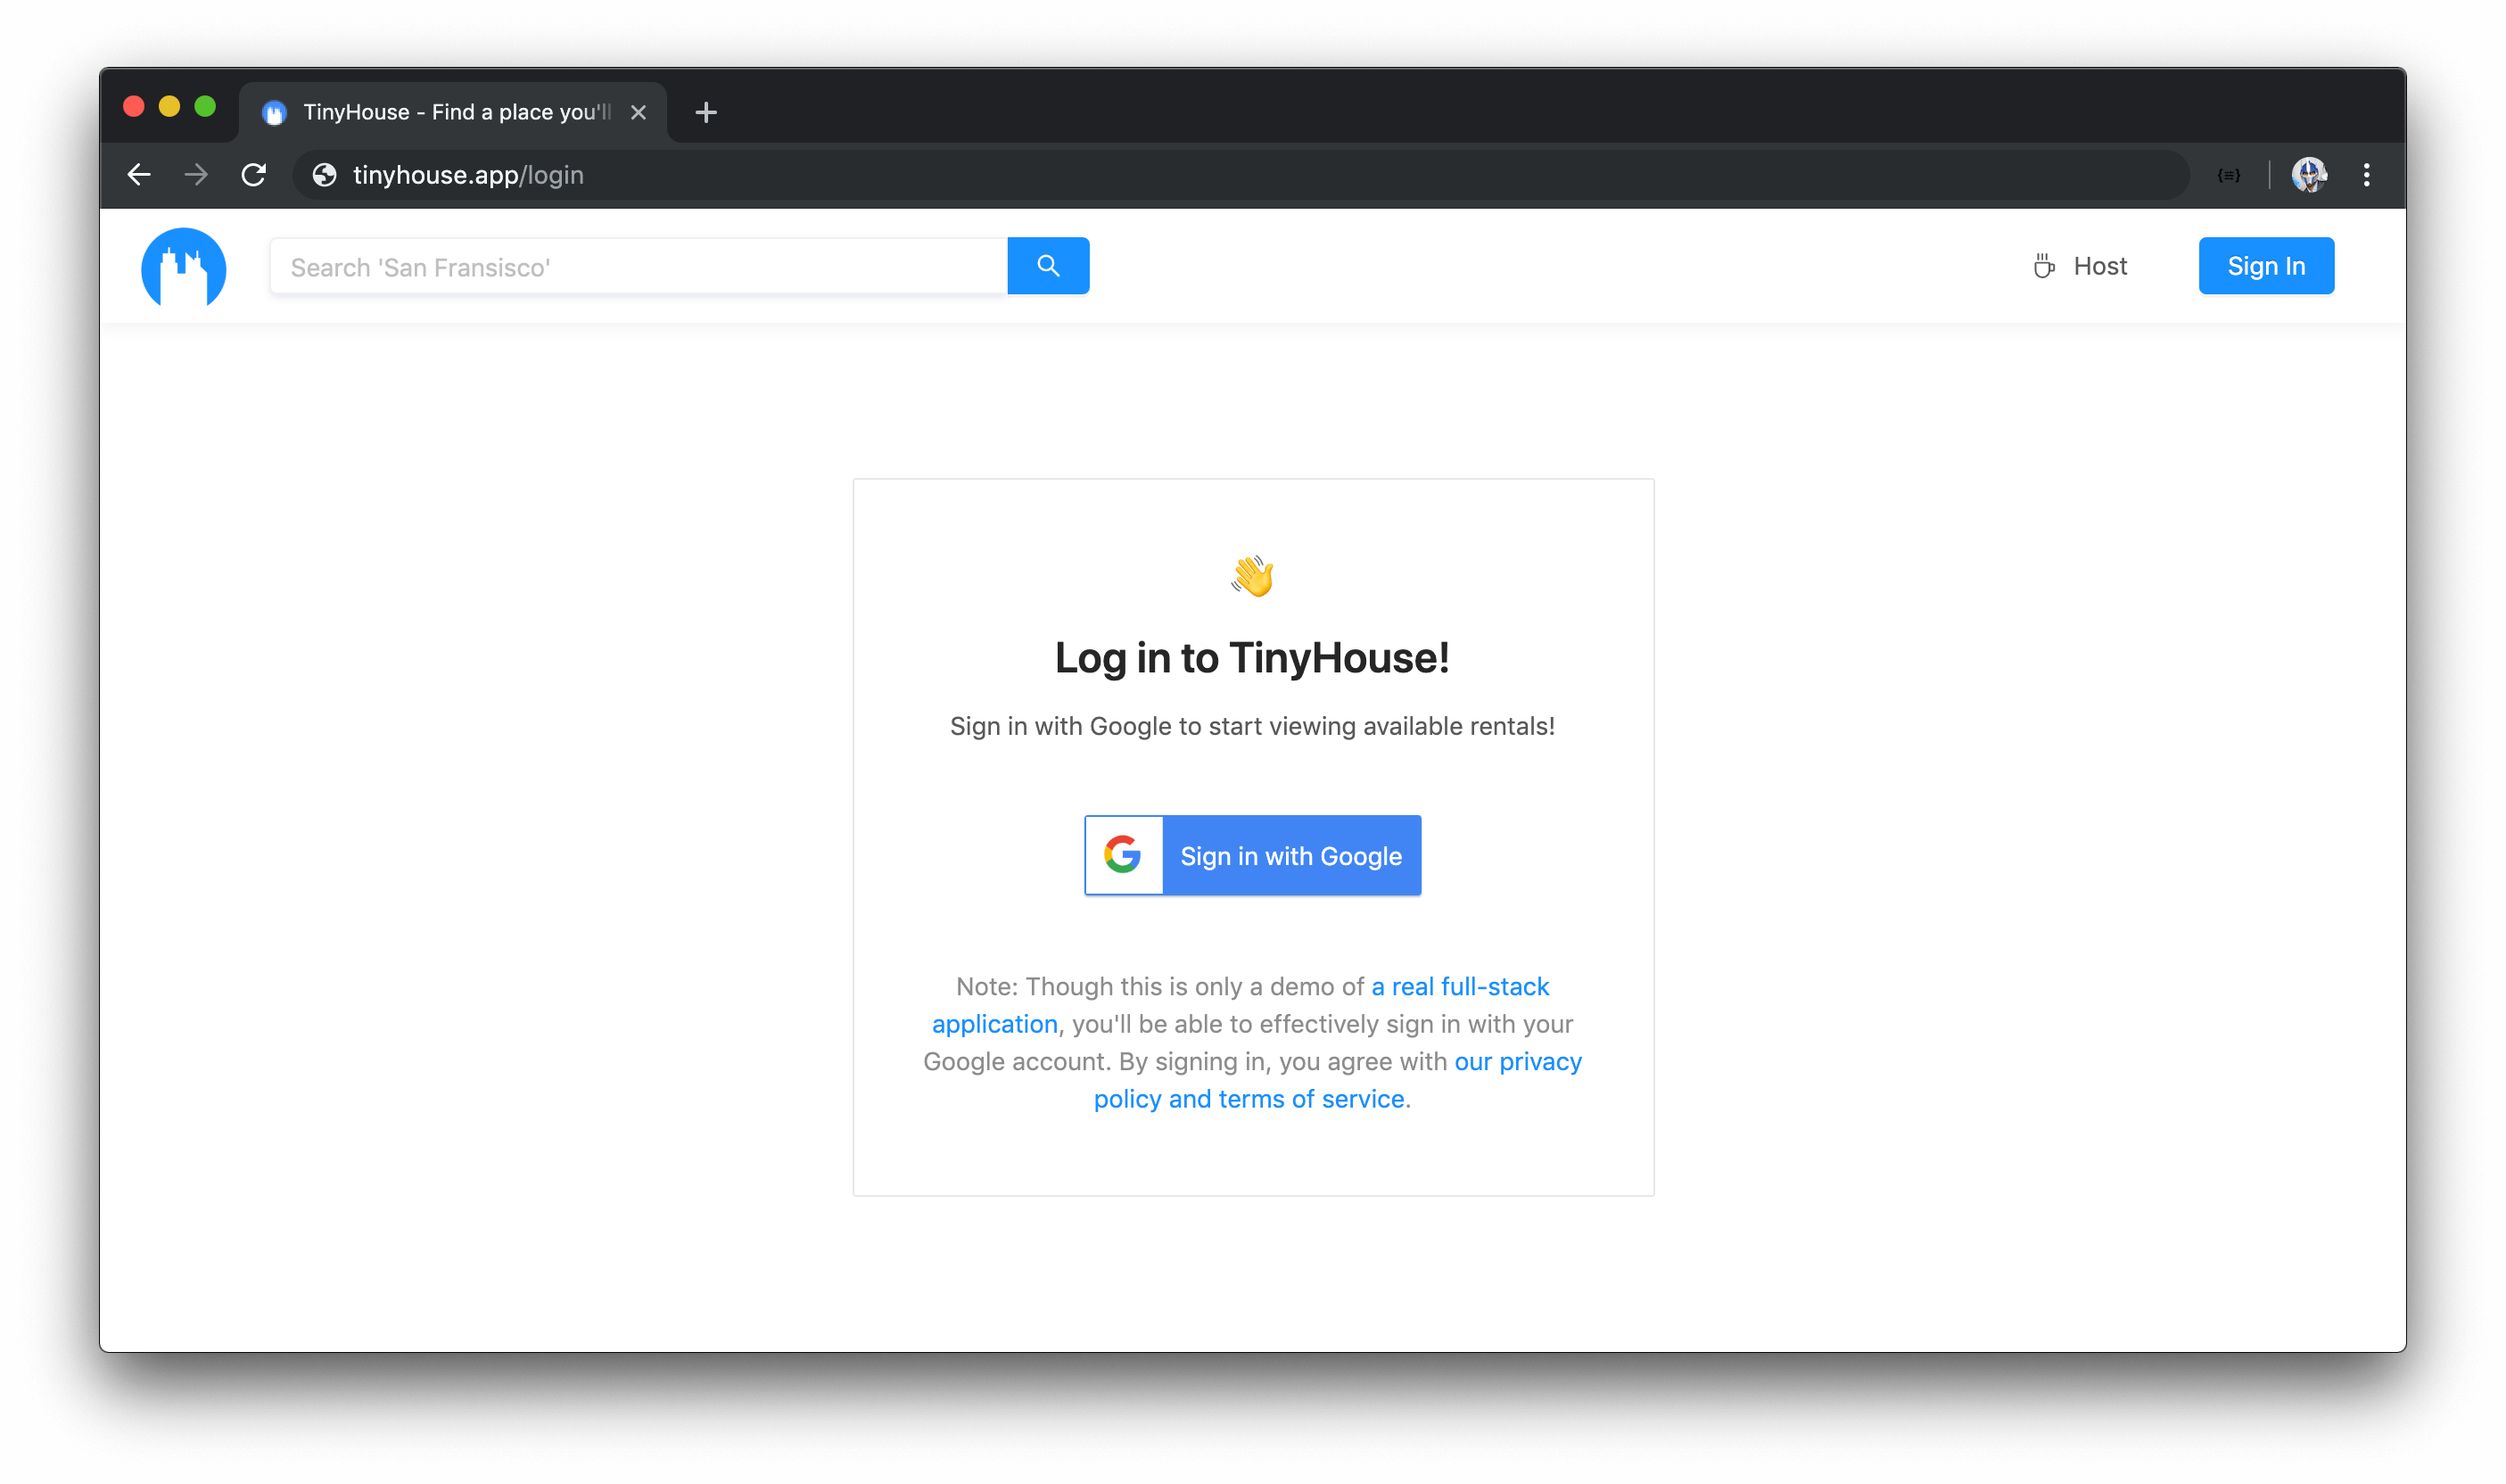
Users will be able to sign-in to the TinyHouse application through Google Sign-In by providing their Google account information.
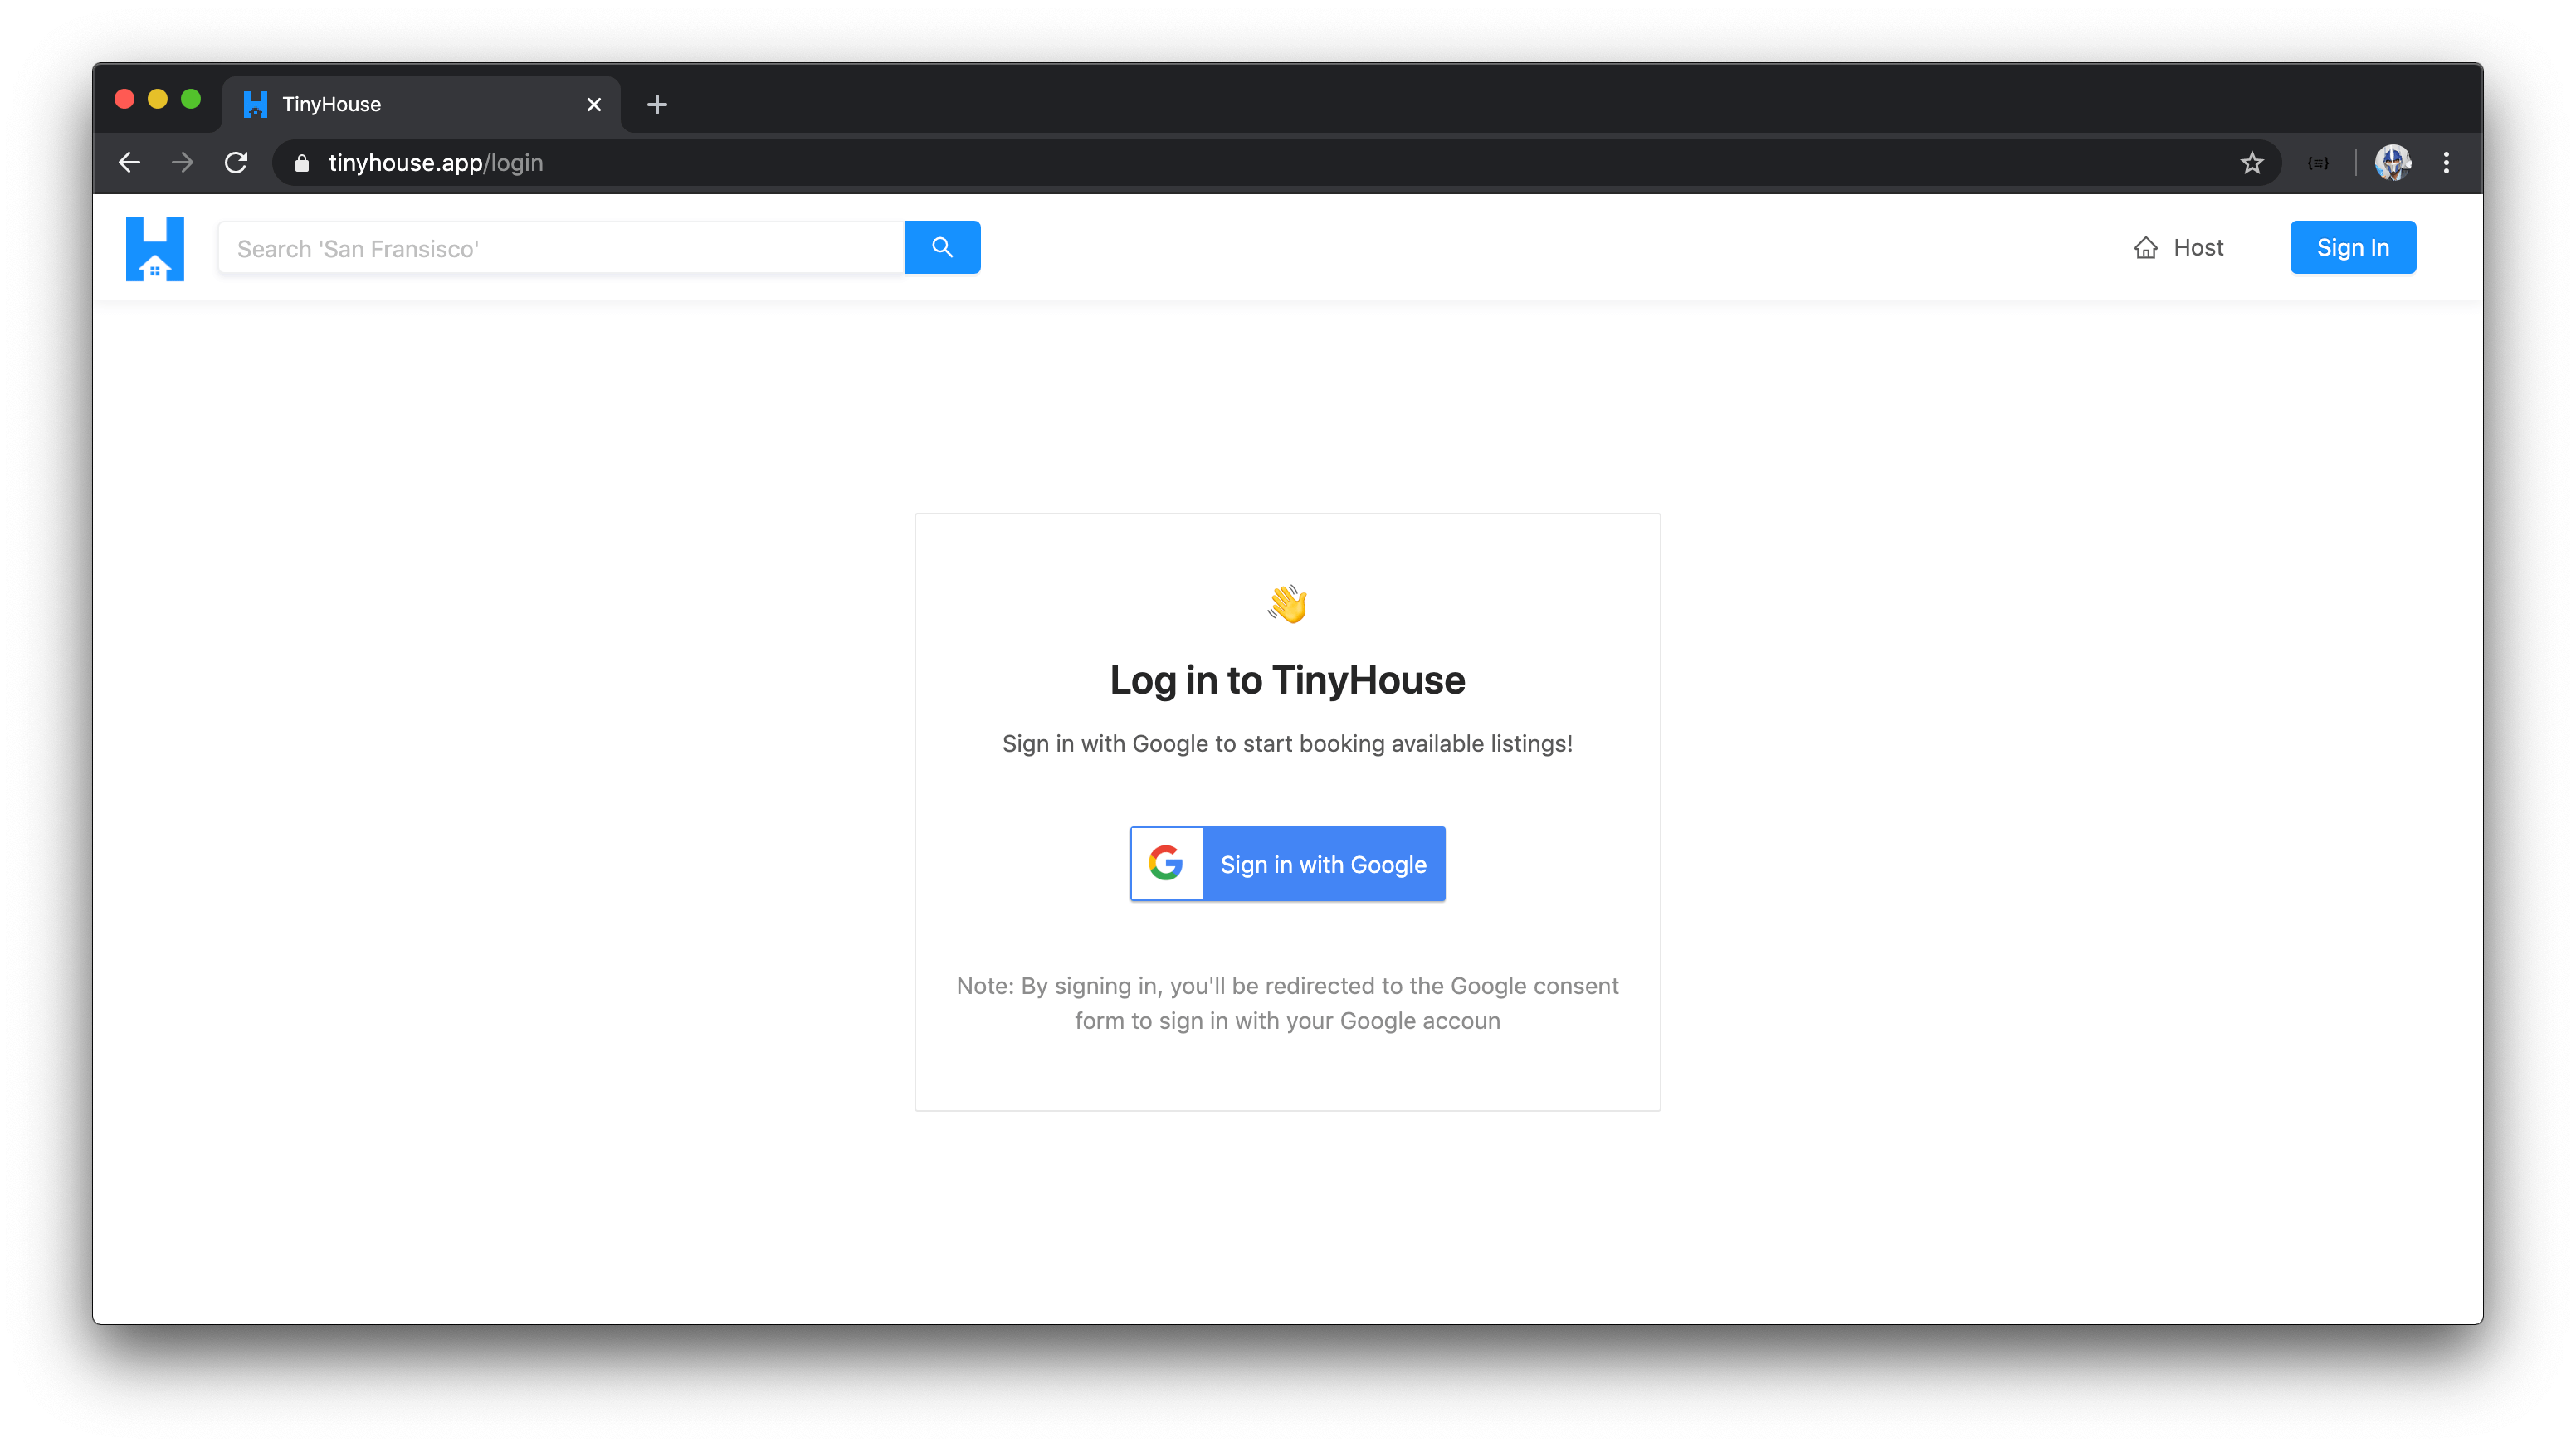
When a user attempts to sign-in with Google Sign-In, they’ll be prompted to provide their Google account information and when successful, will be direceted to the TinyHouse application in the logged-in state.

When logged-in, users are able to book listings in the TinyHouse application.
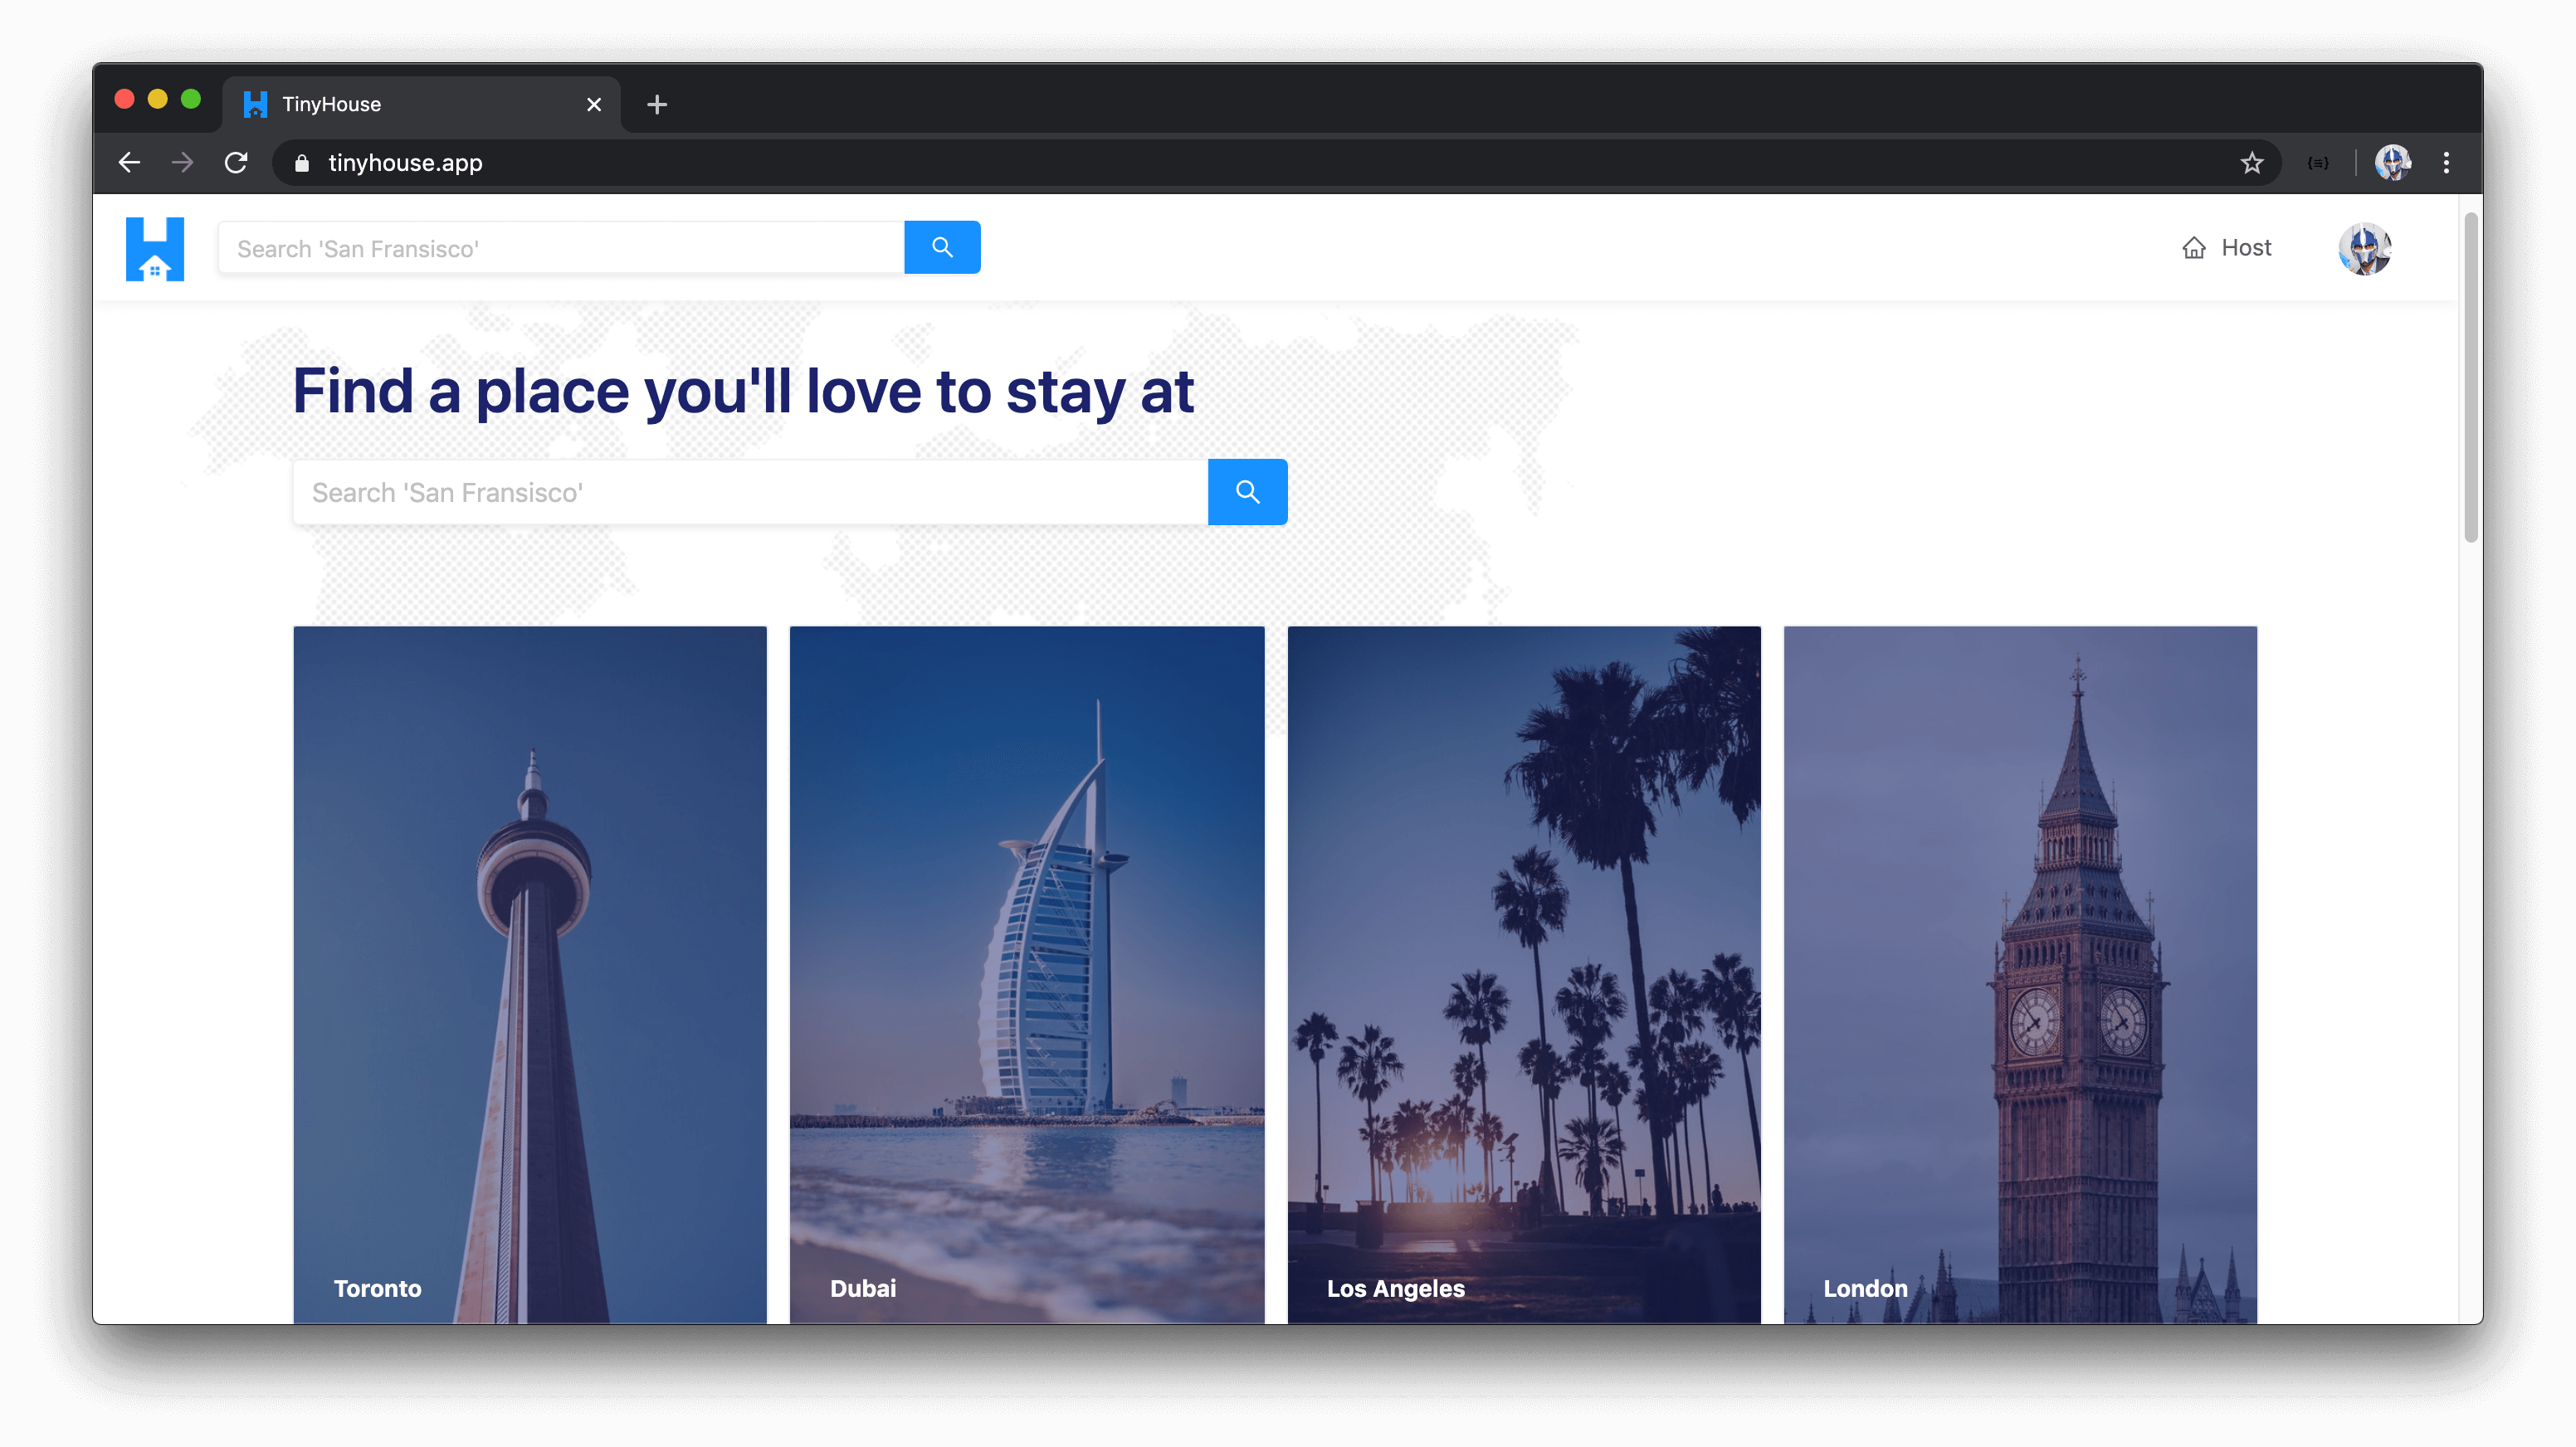
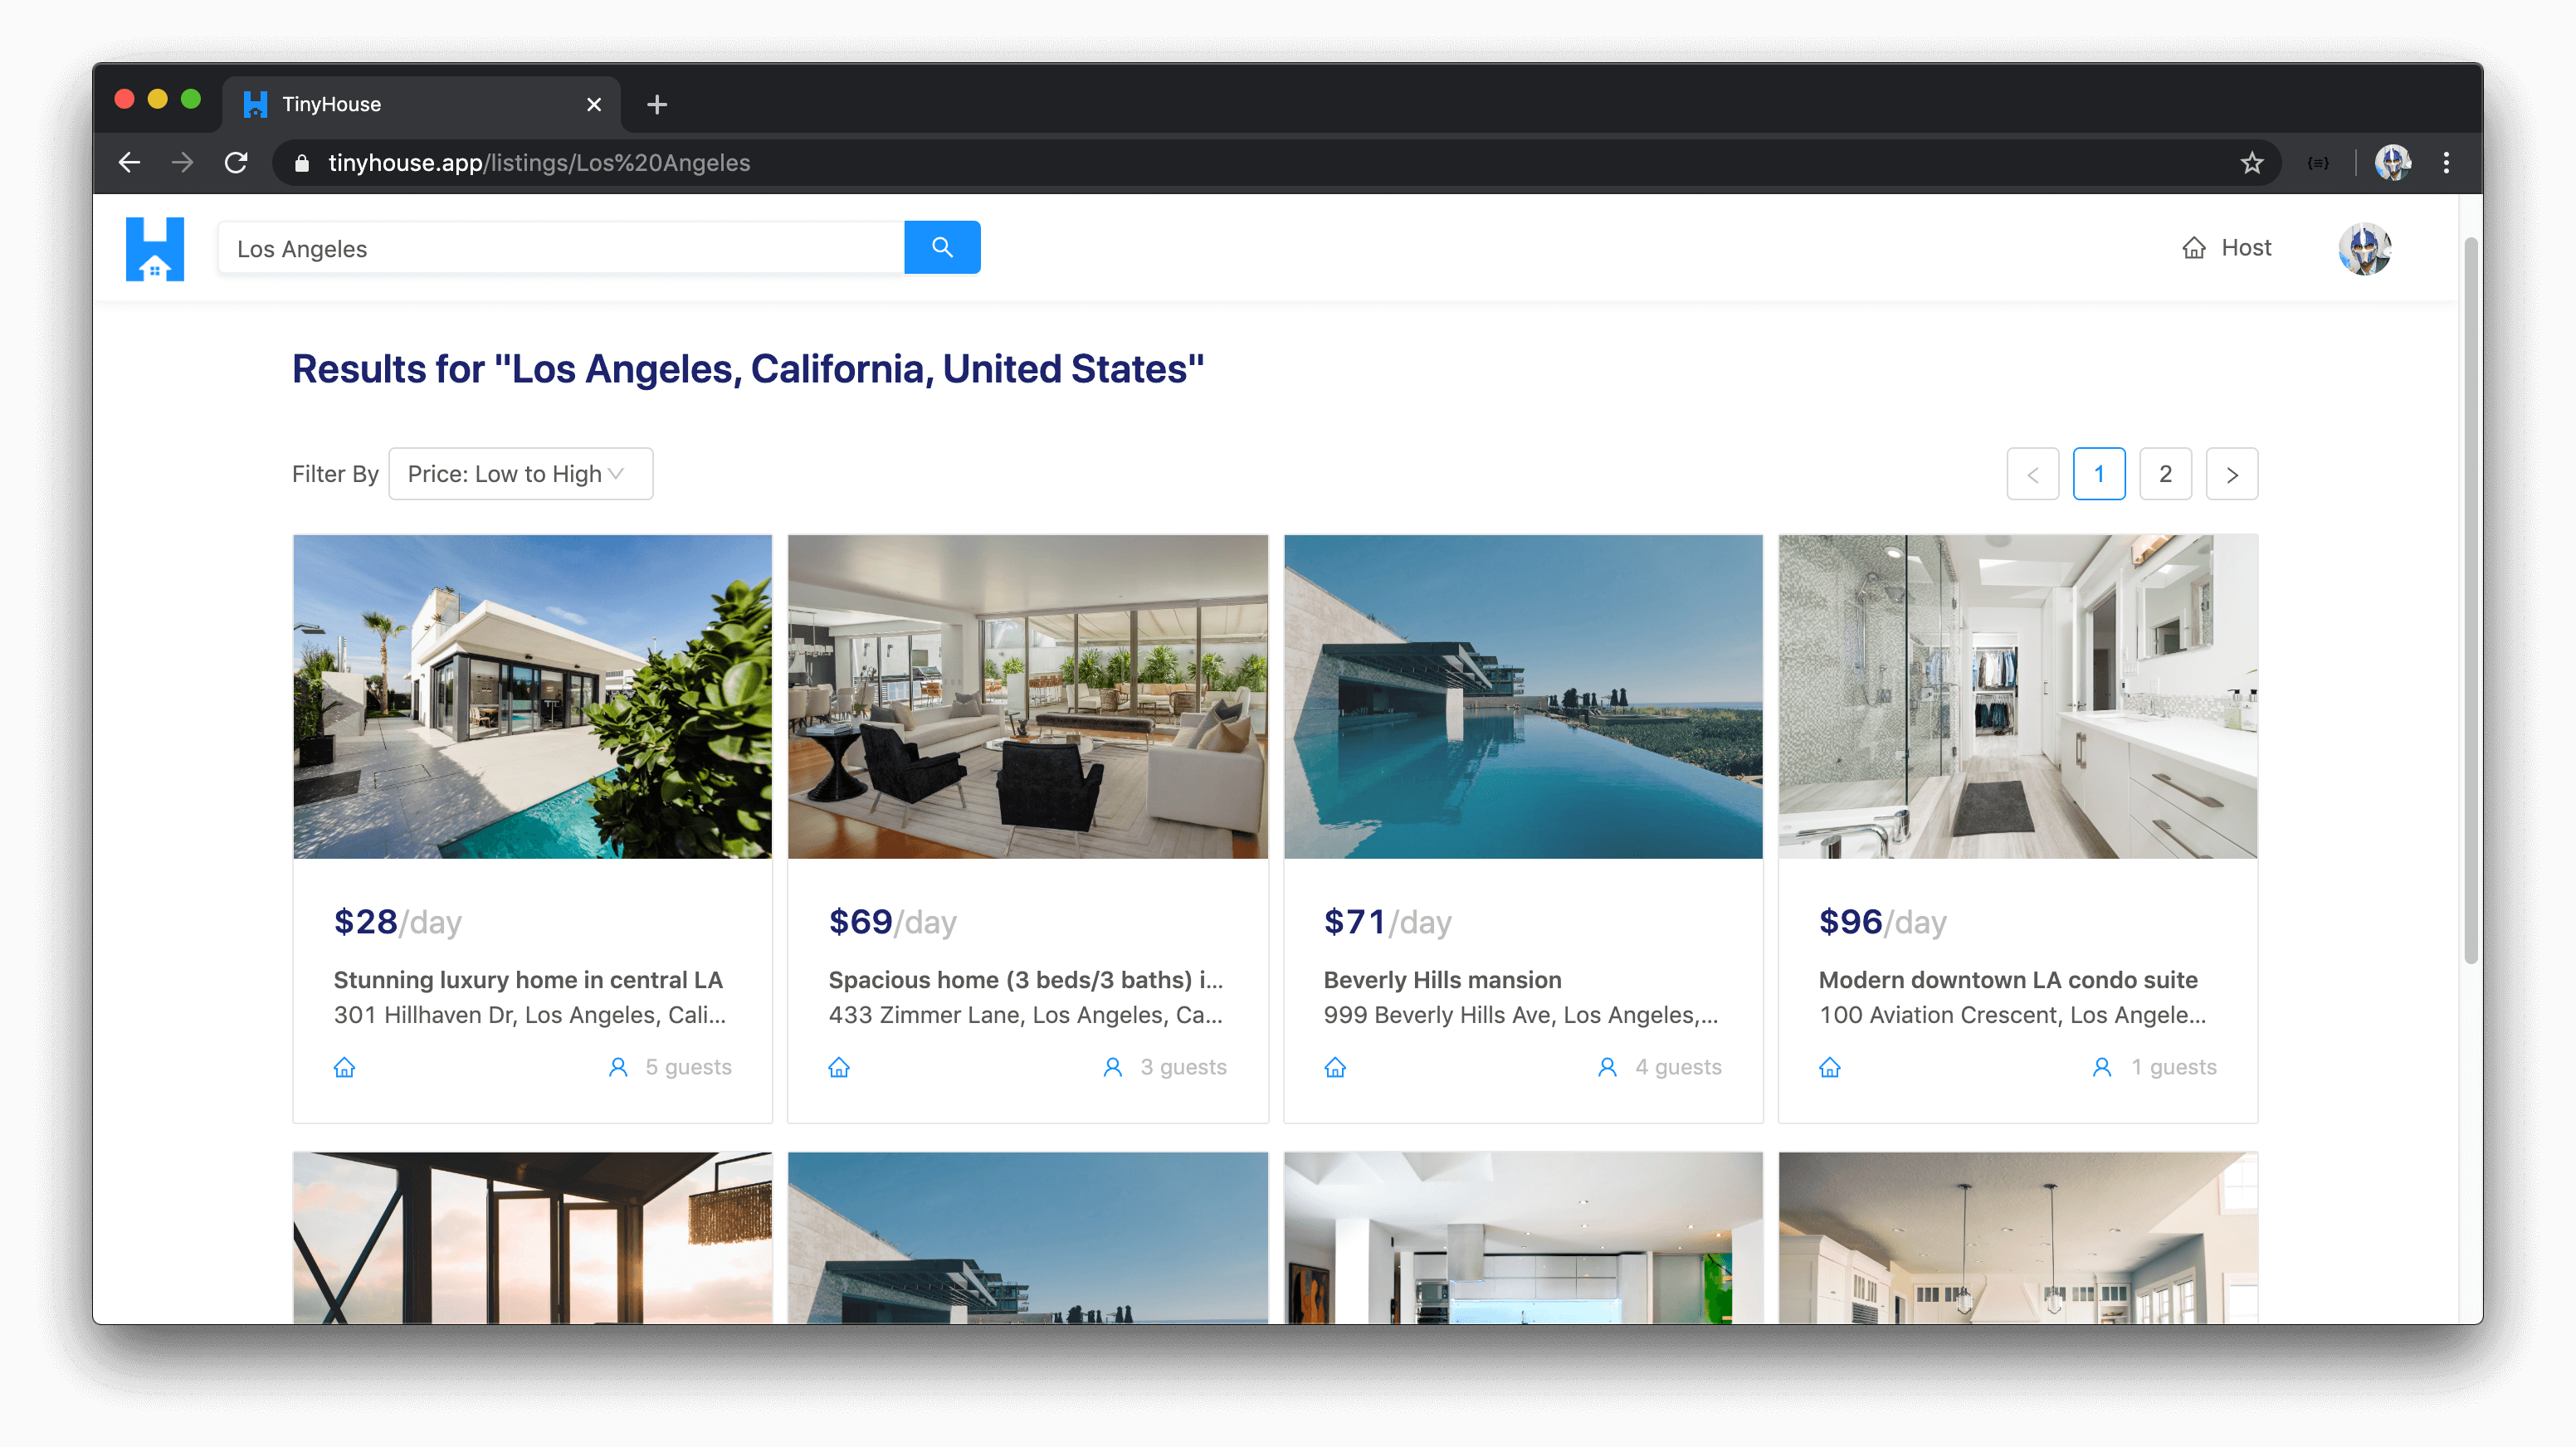
SEARCH FOR LISTINGS IN VARIOUS DIFFERENT LOCATIONS IN THE WORLD
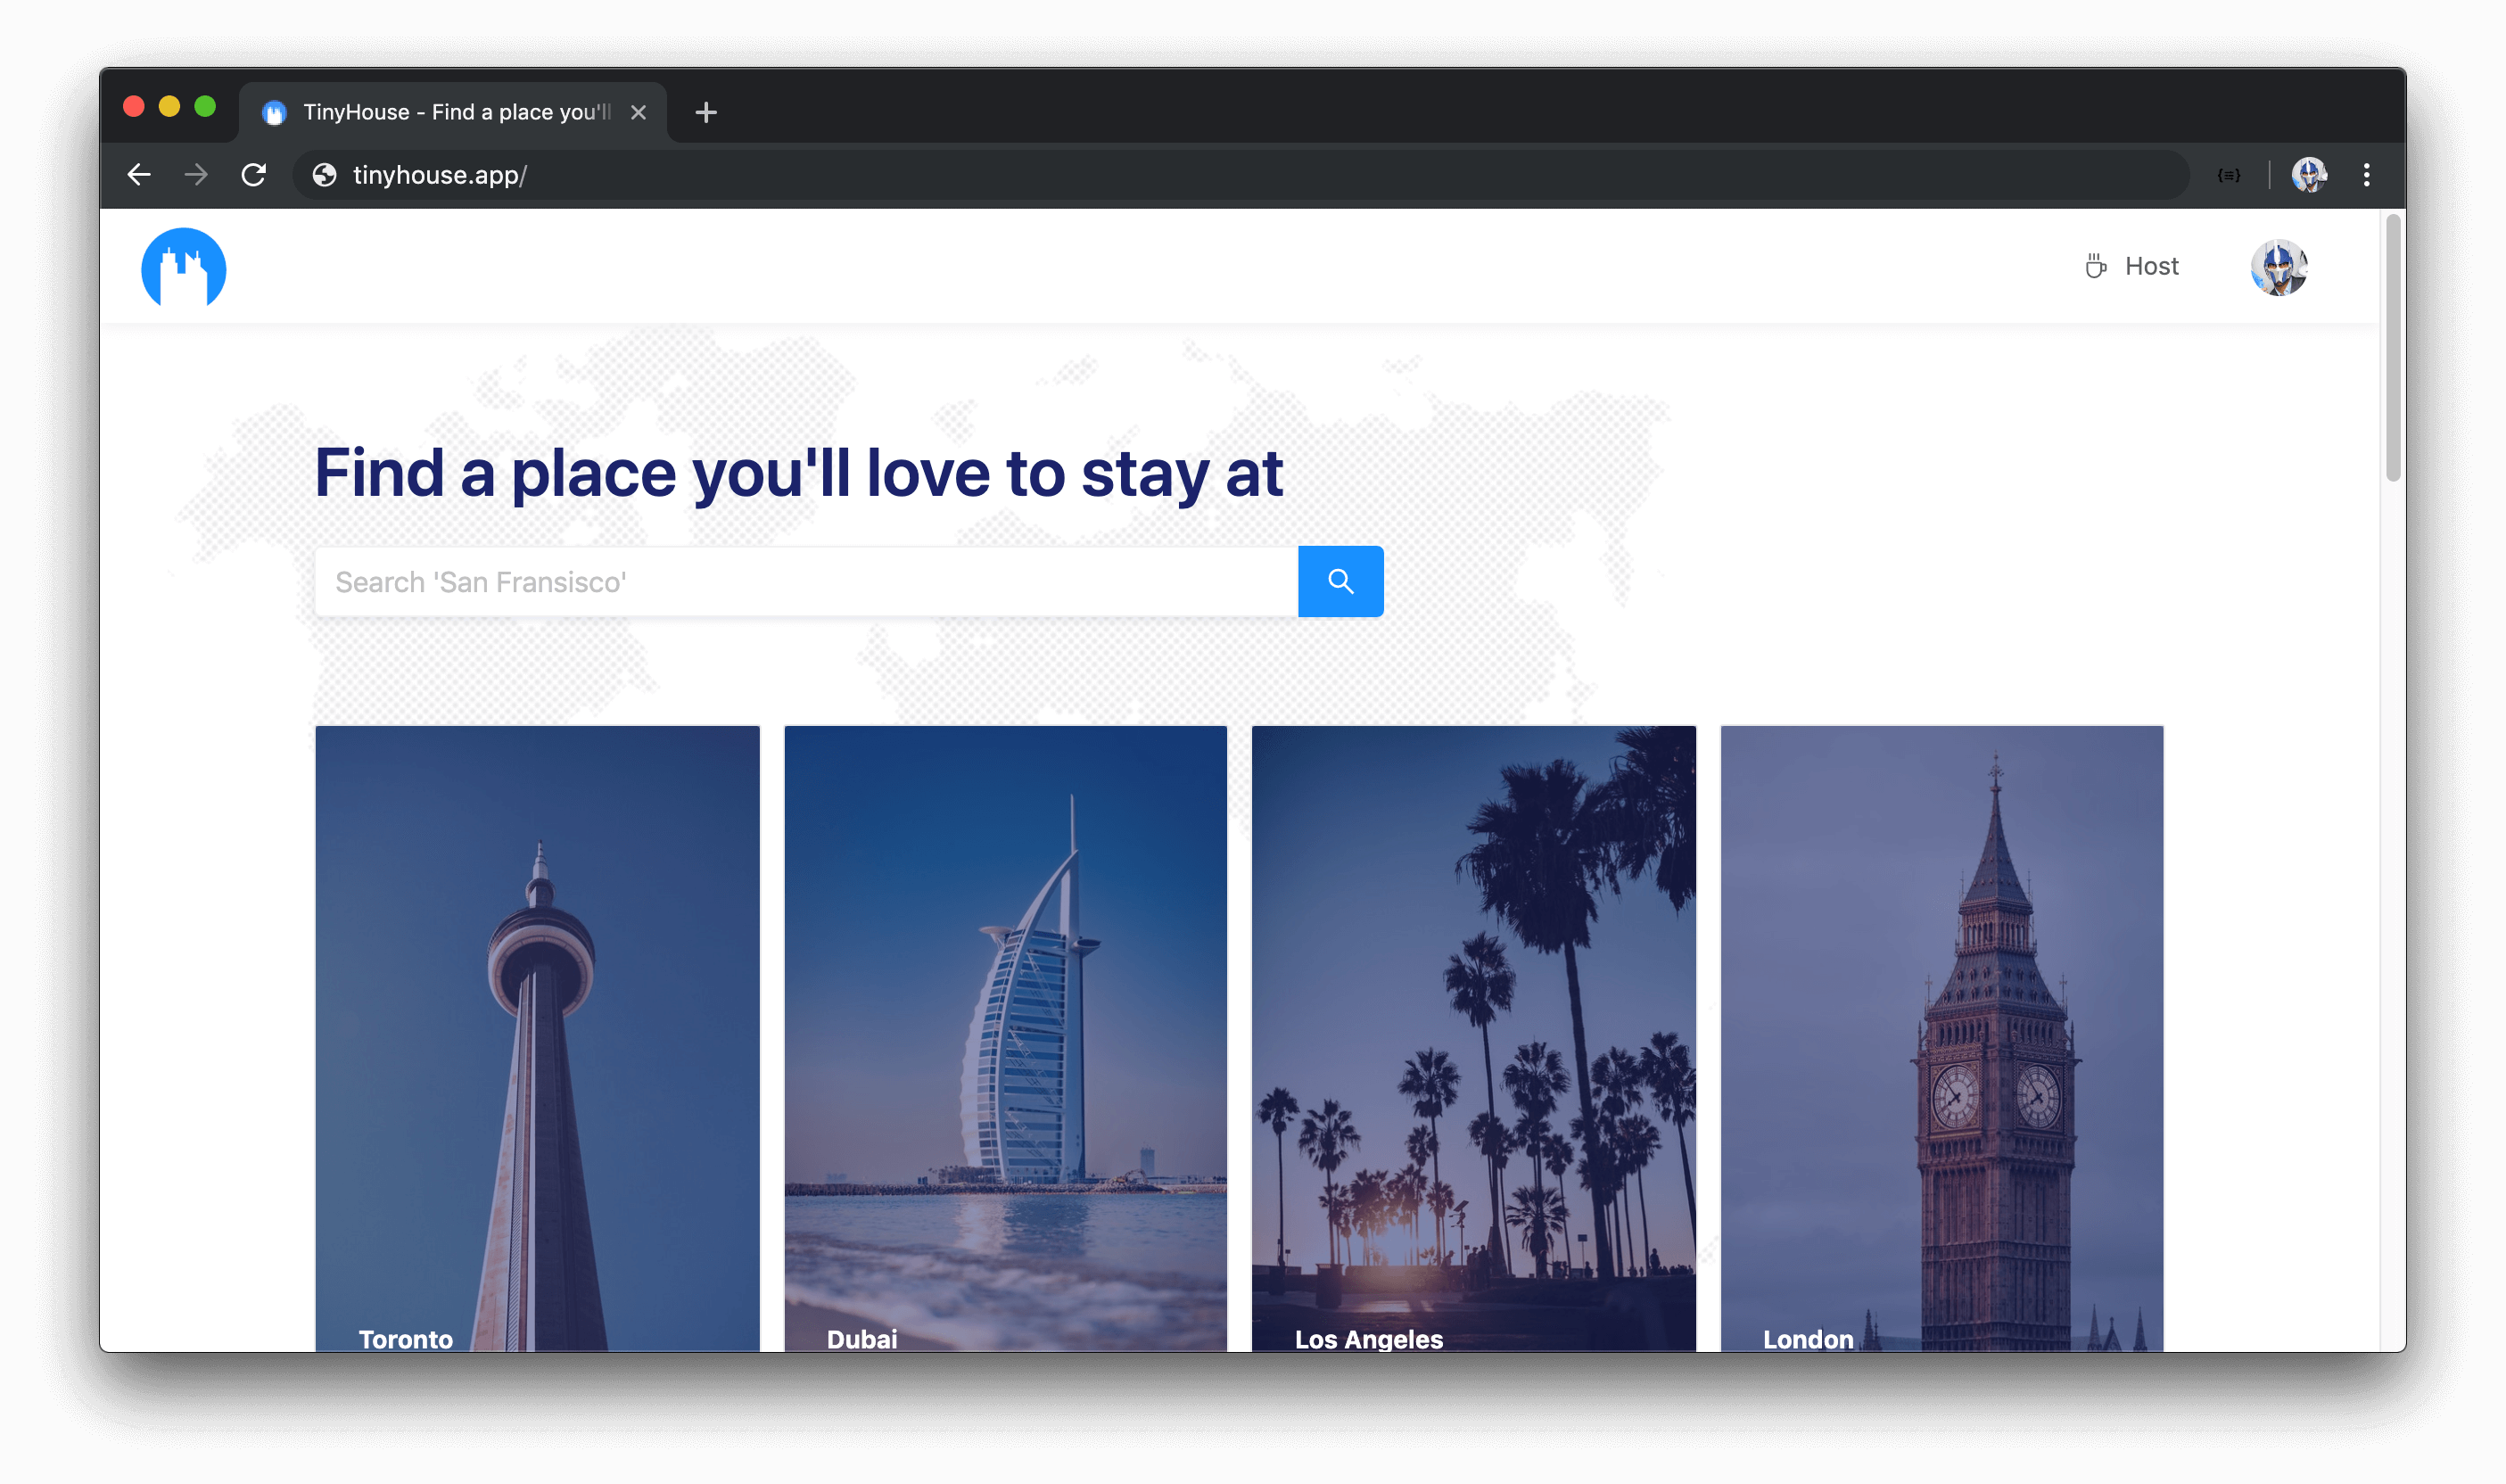
Users are to be able to search for listings in practically any part of the world. To search for listings, users can use the search input available in the homepage or in the app header menu.

When a search is made, users are then directed to a listings page where they’re able to survey all the listings that have been created for a certain location.
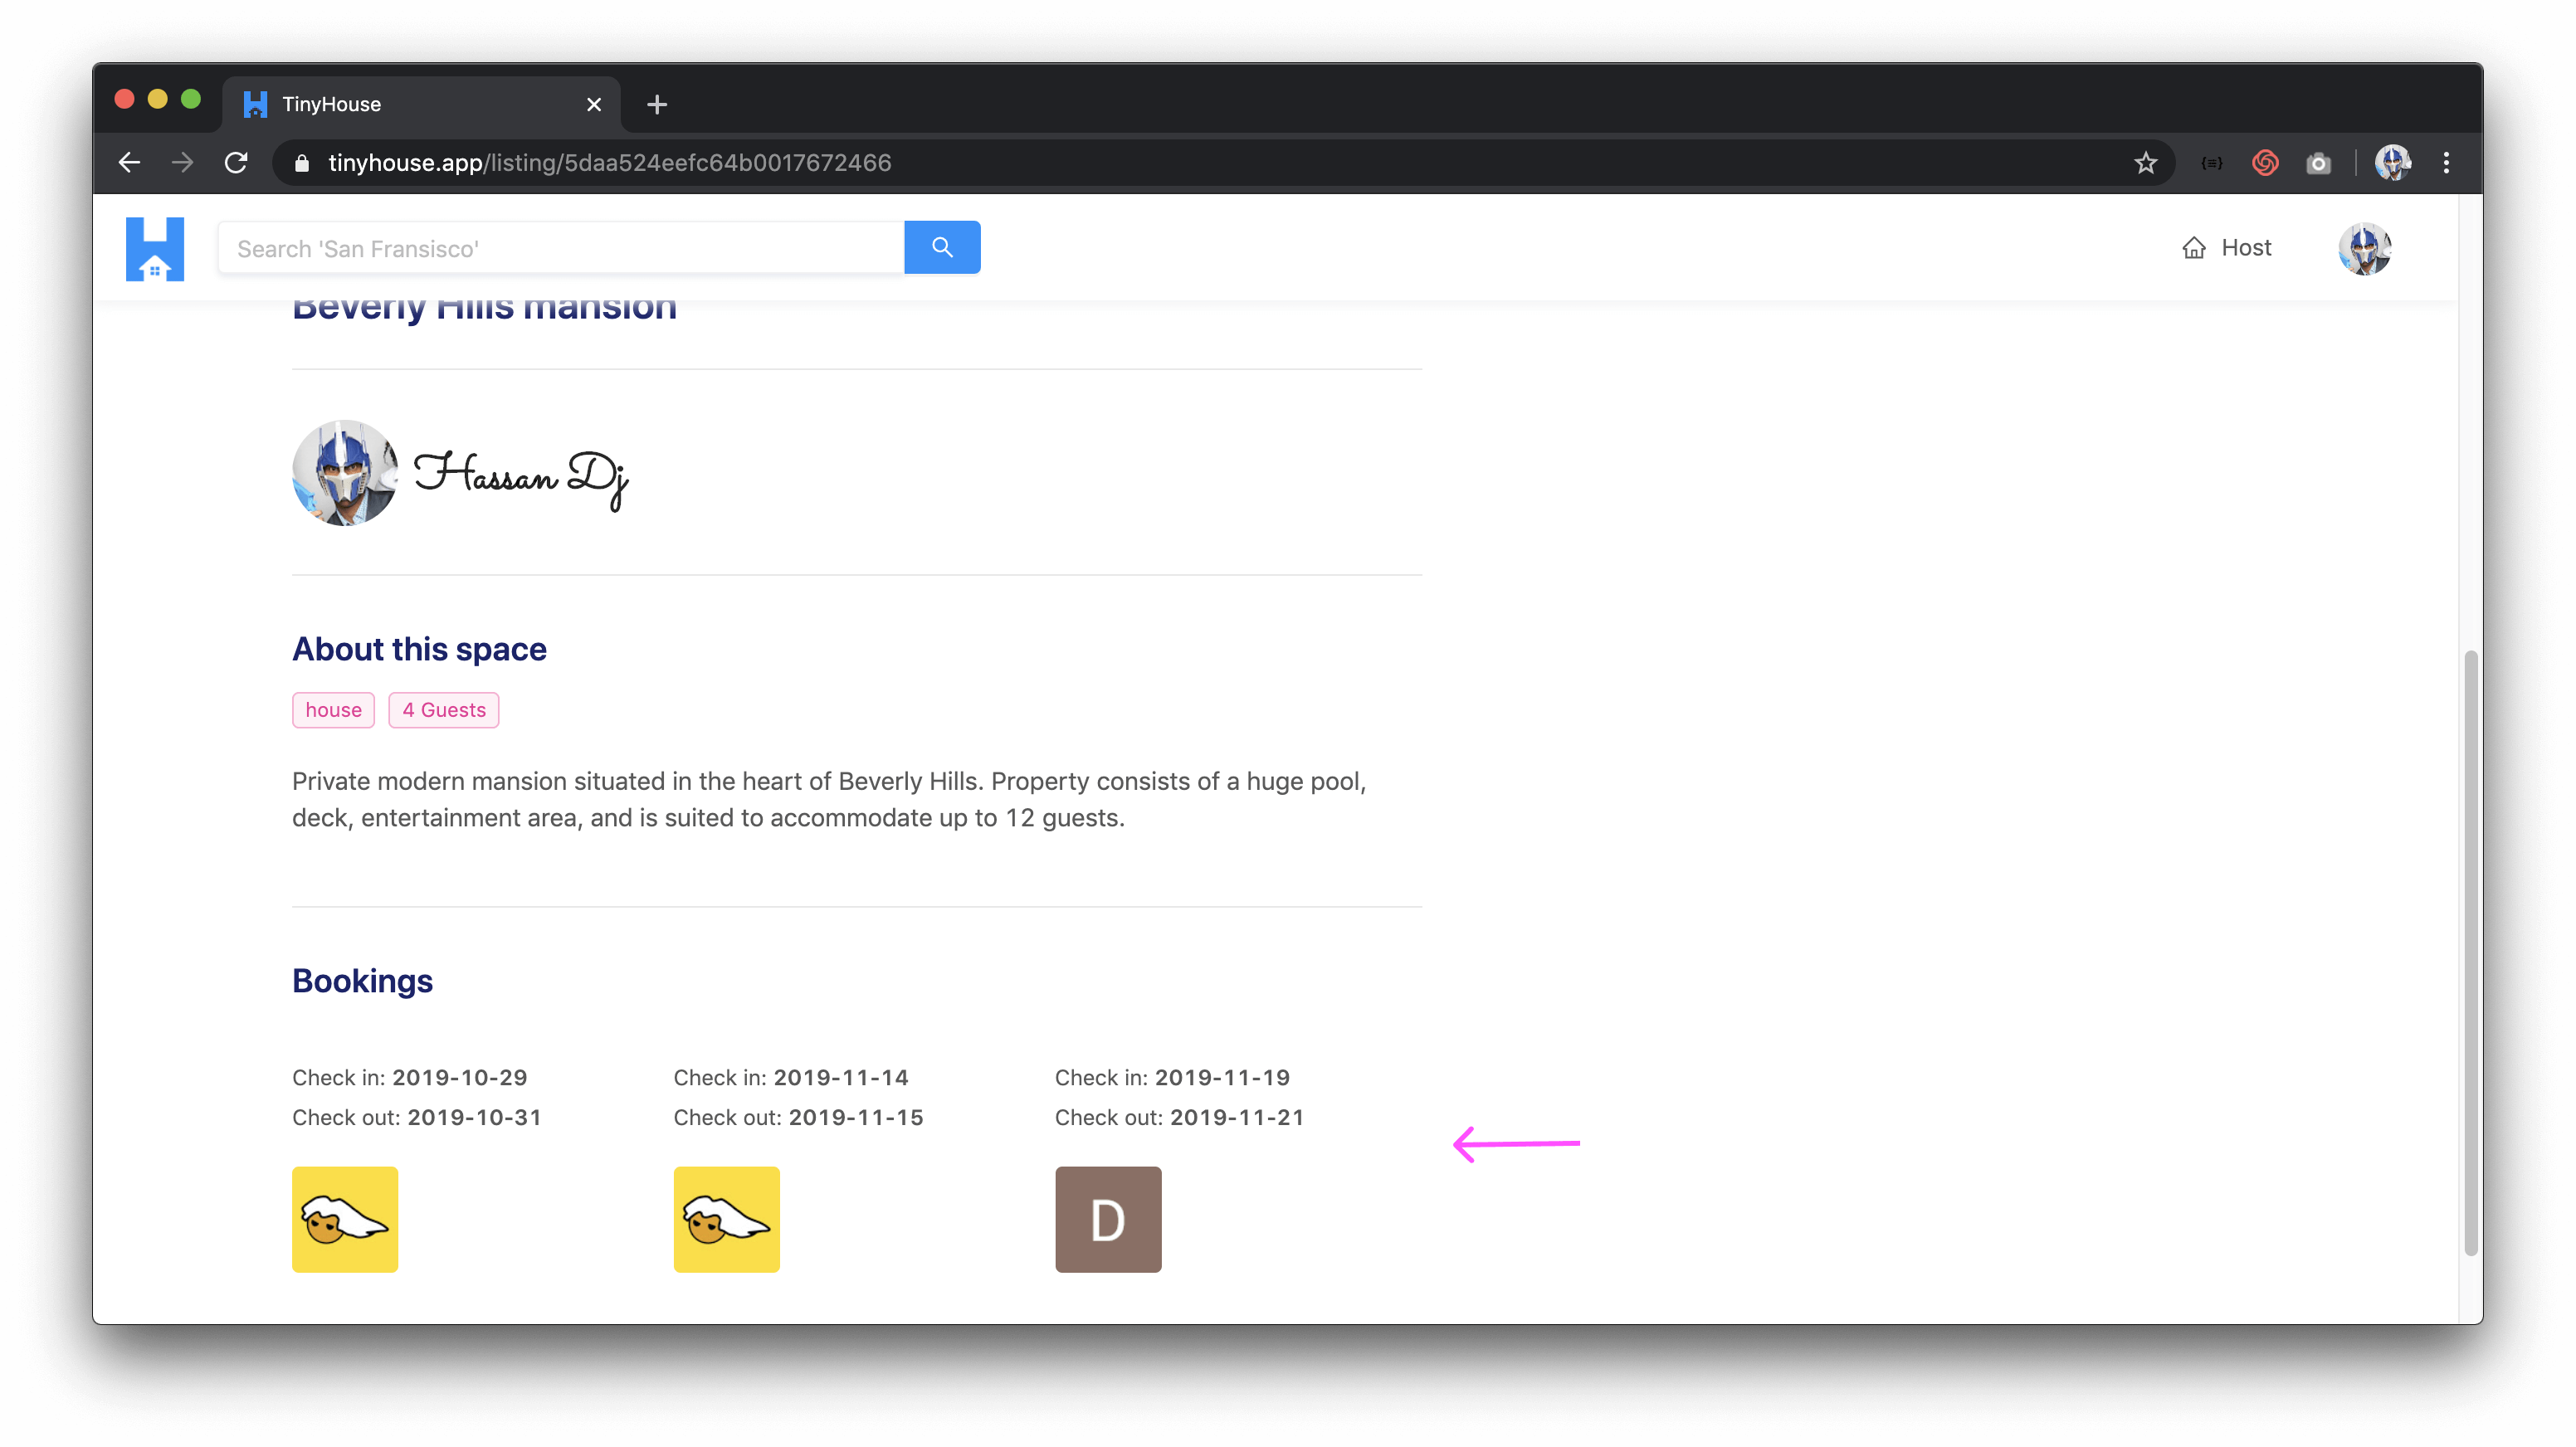
SEE LISTING DETAILS
When a user is to select a listing from a list of listings presented to them, specific details about the listing is to be shown to the user consisting of but not limited to the listing’s description, title, image, address, and the host of the listing.
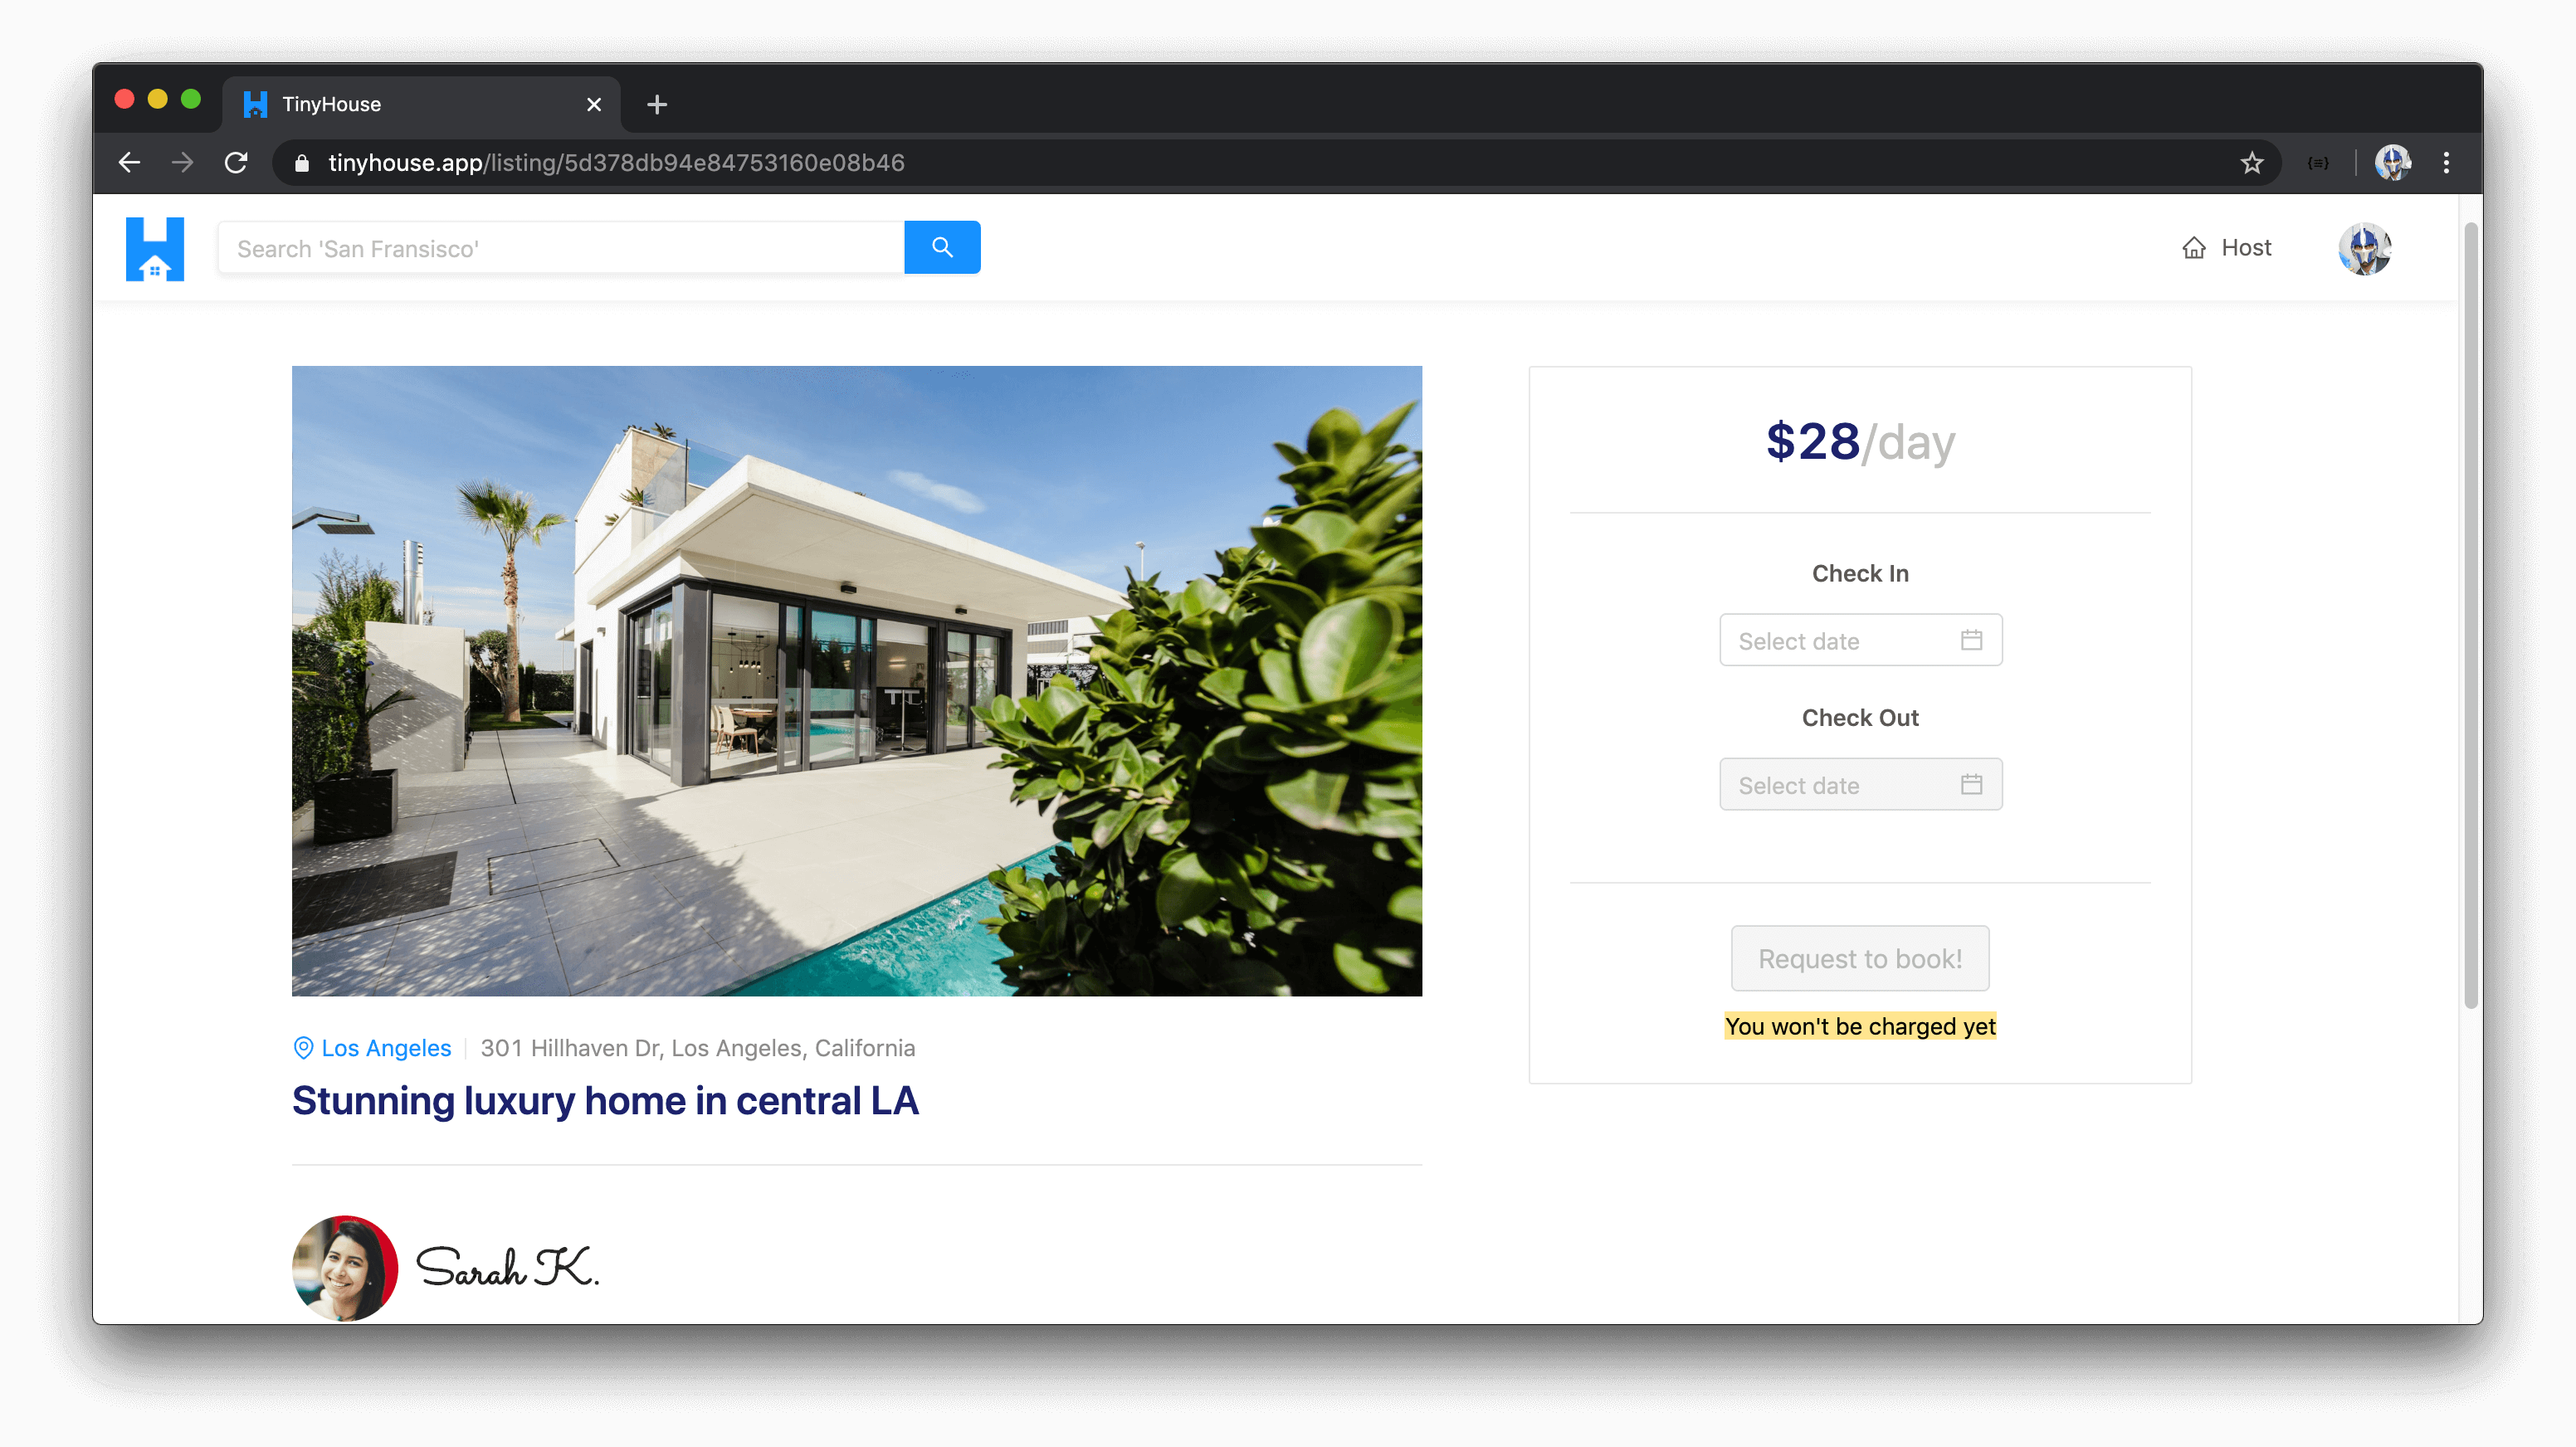
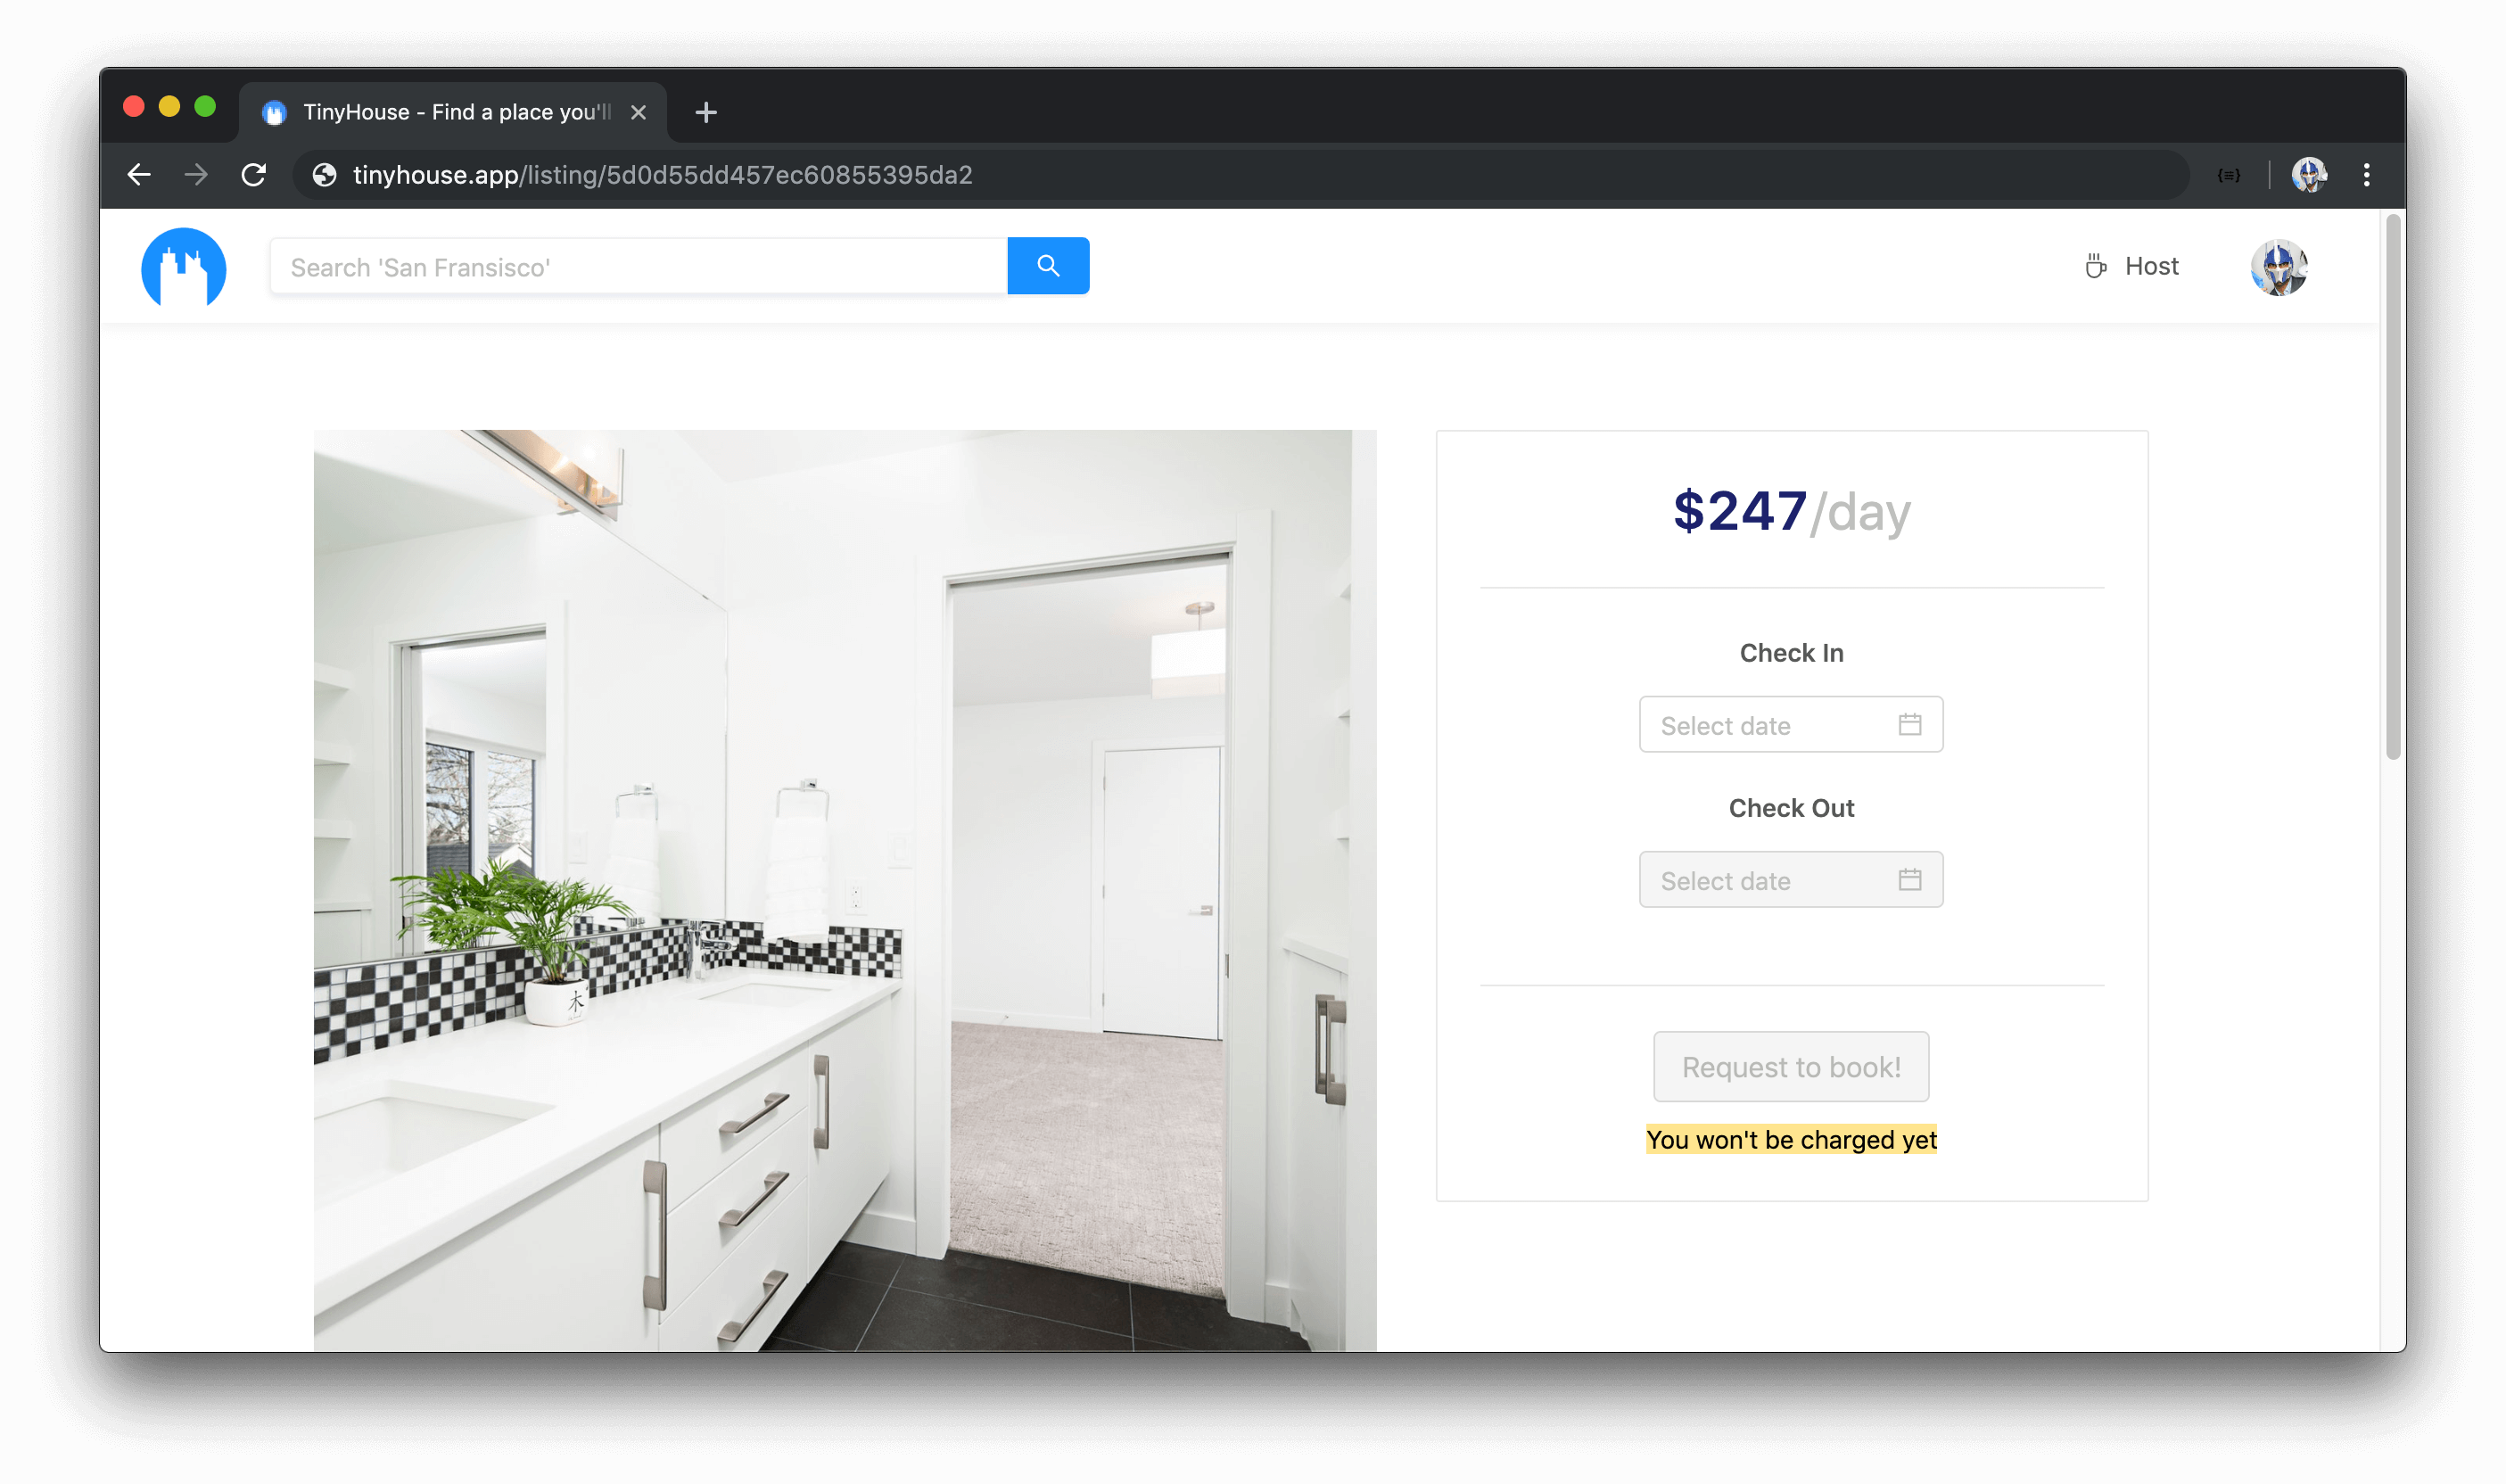
BOOK LISTINGS FOR A PERIOD OF TIME
In the overview for a specific listing, users are able to request a listing is to be booked for a certain period of time.

When valid dates are selected, the user is prompted to confirm their booking by providing valid payment information (i.e. valid credit/debit card).

CONNECT WITH STRIPE
If a user is interested in hosting and/or creating listings within TinyHouse, they’ll first need to connect their Stripe account which will allow them to receive payments from other users. A user will be to connect their Stripe account from their user profile section in the user page.
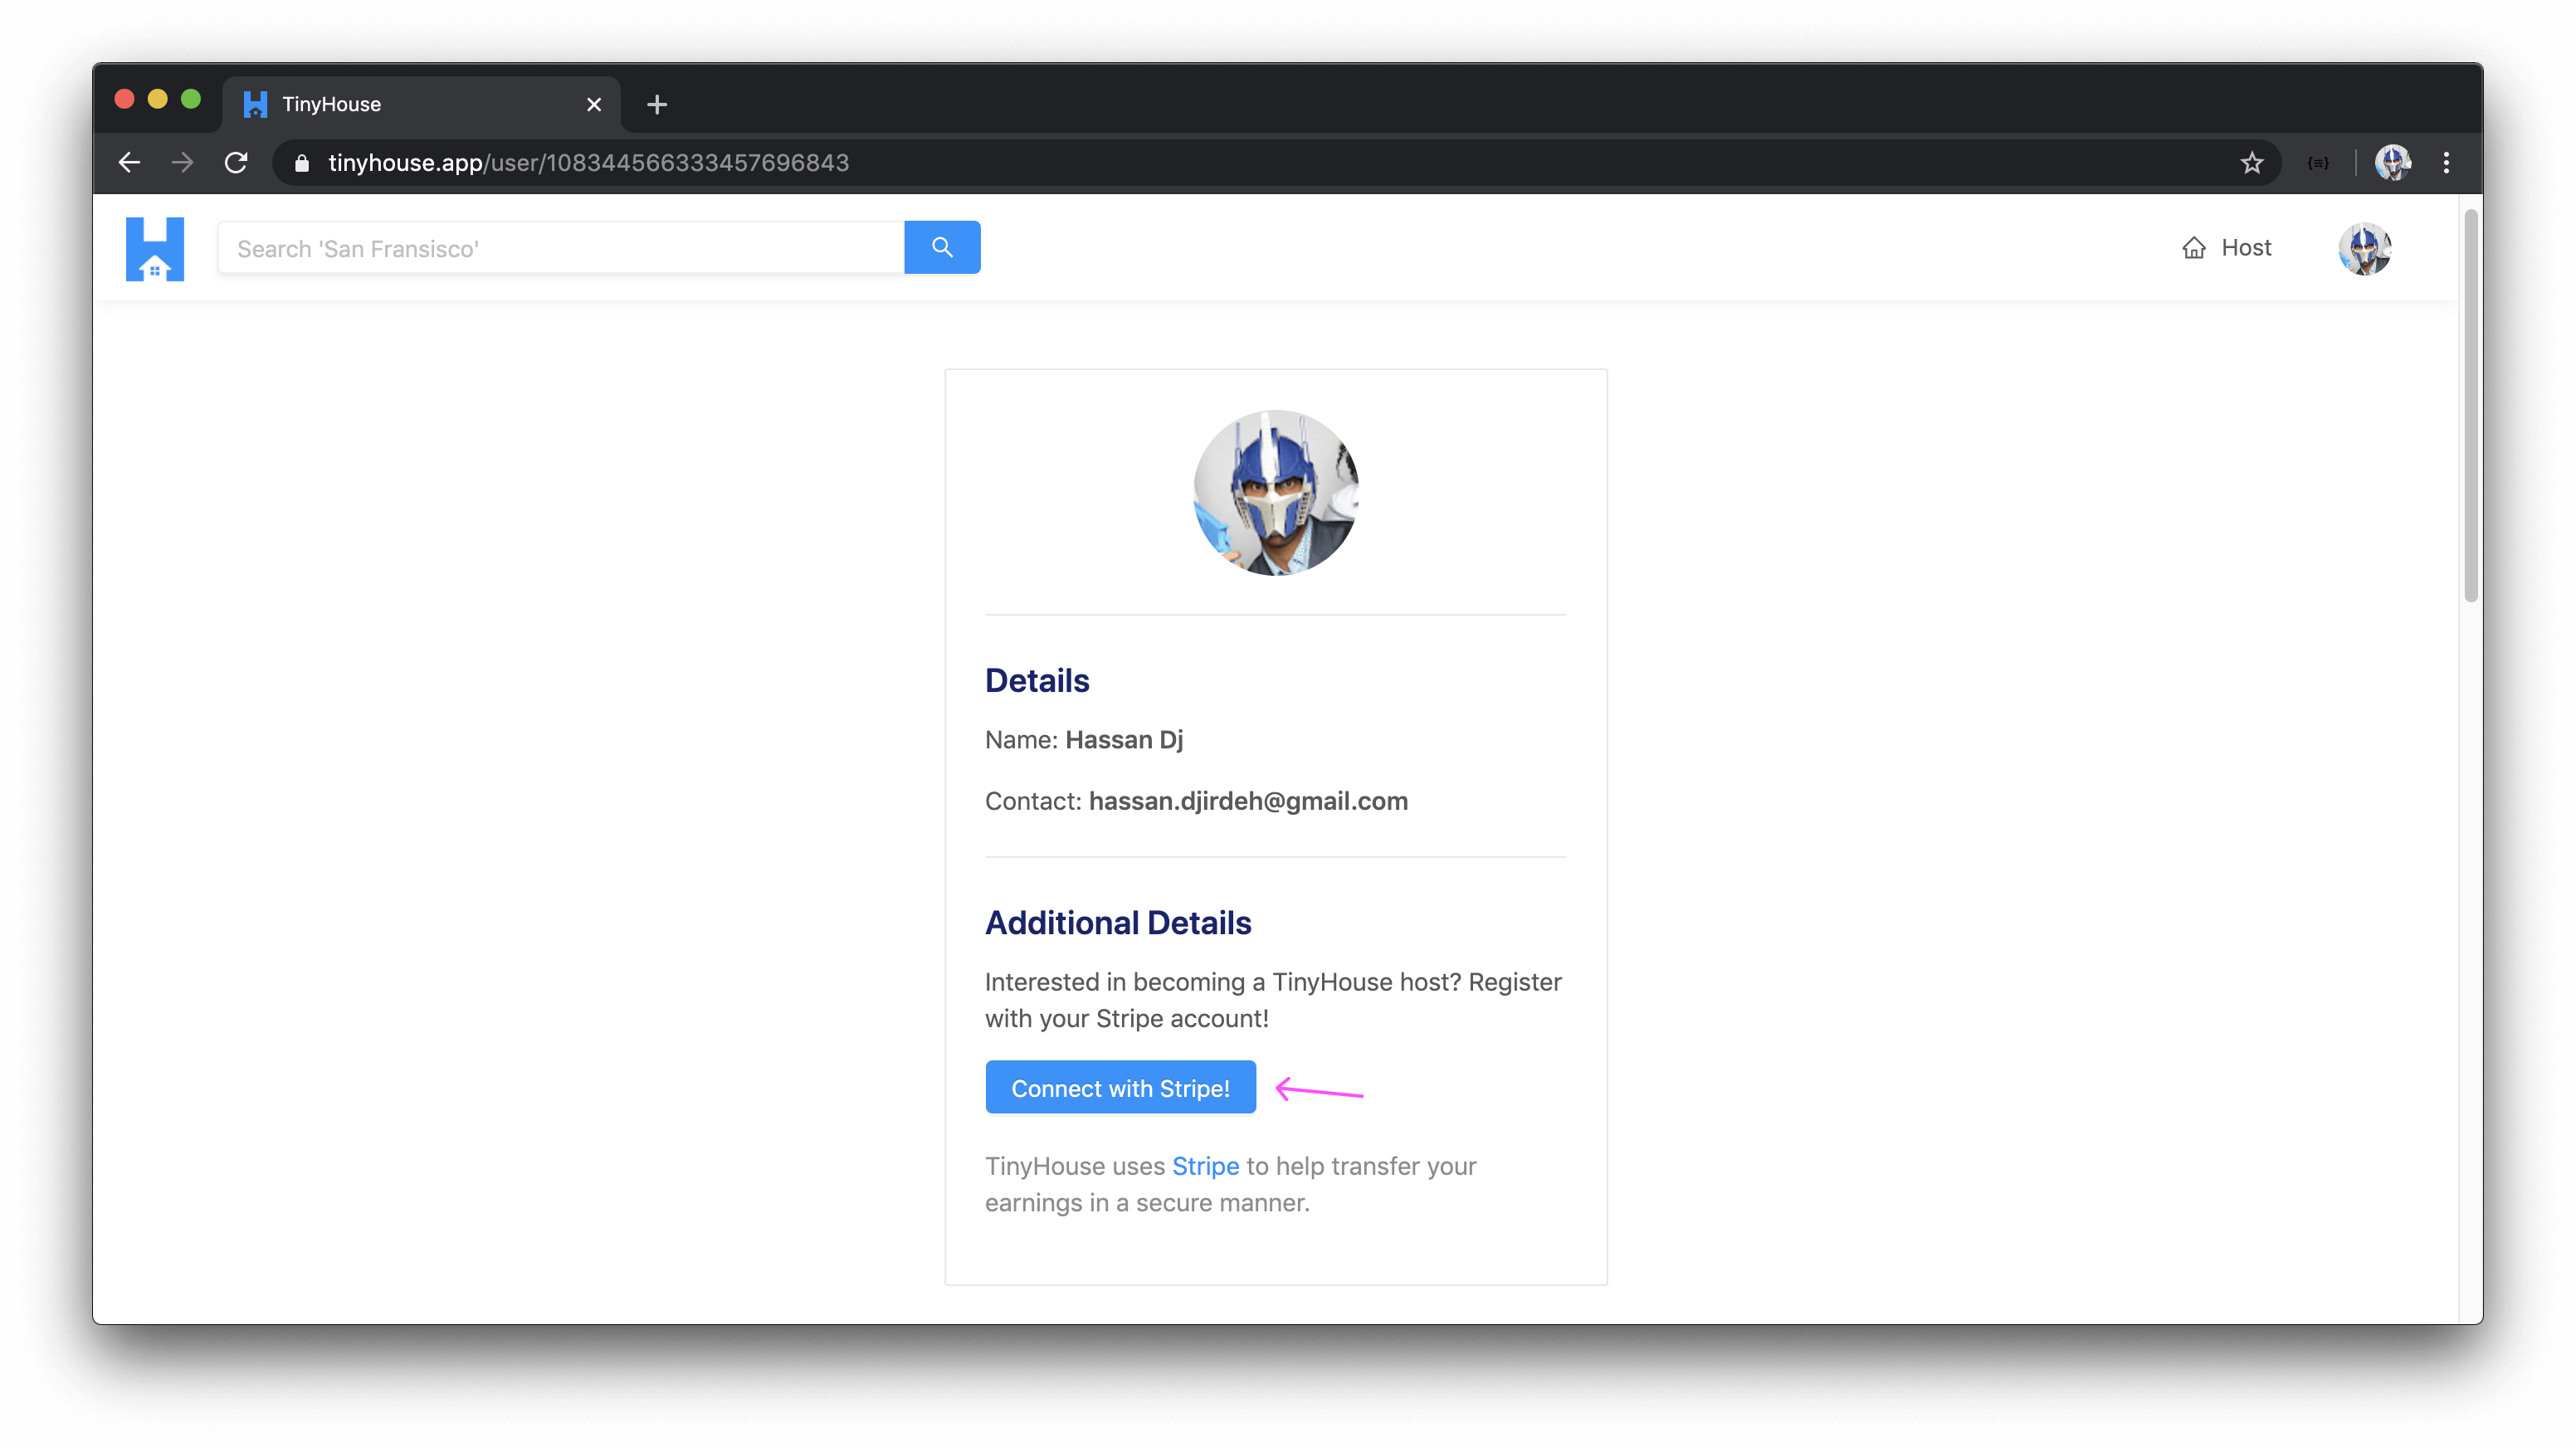
When a user attempts to connect their Stripe account, they’ll be prompted to provide their Stripe account information and when successful, will be redirected to the TinyHouse application.

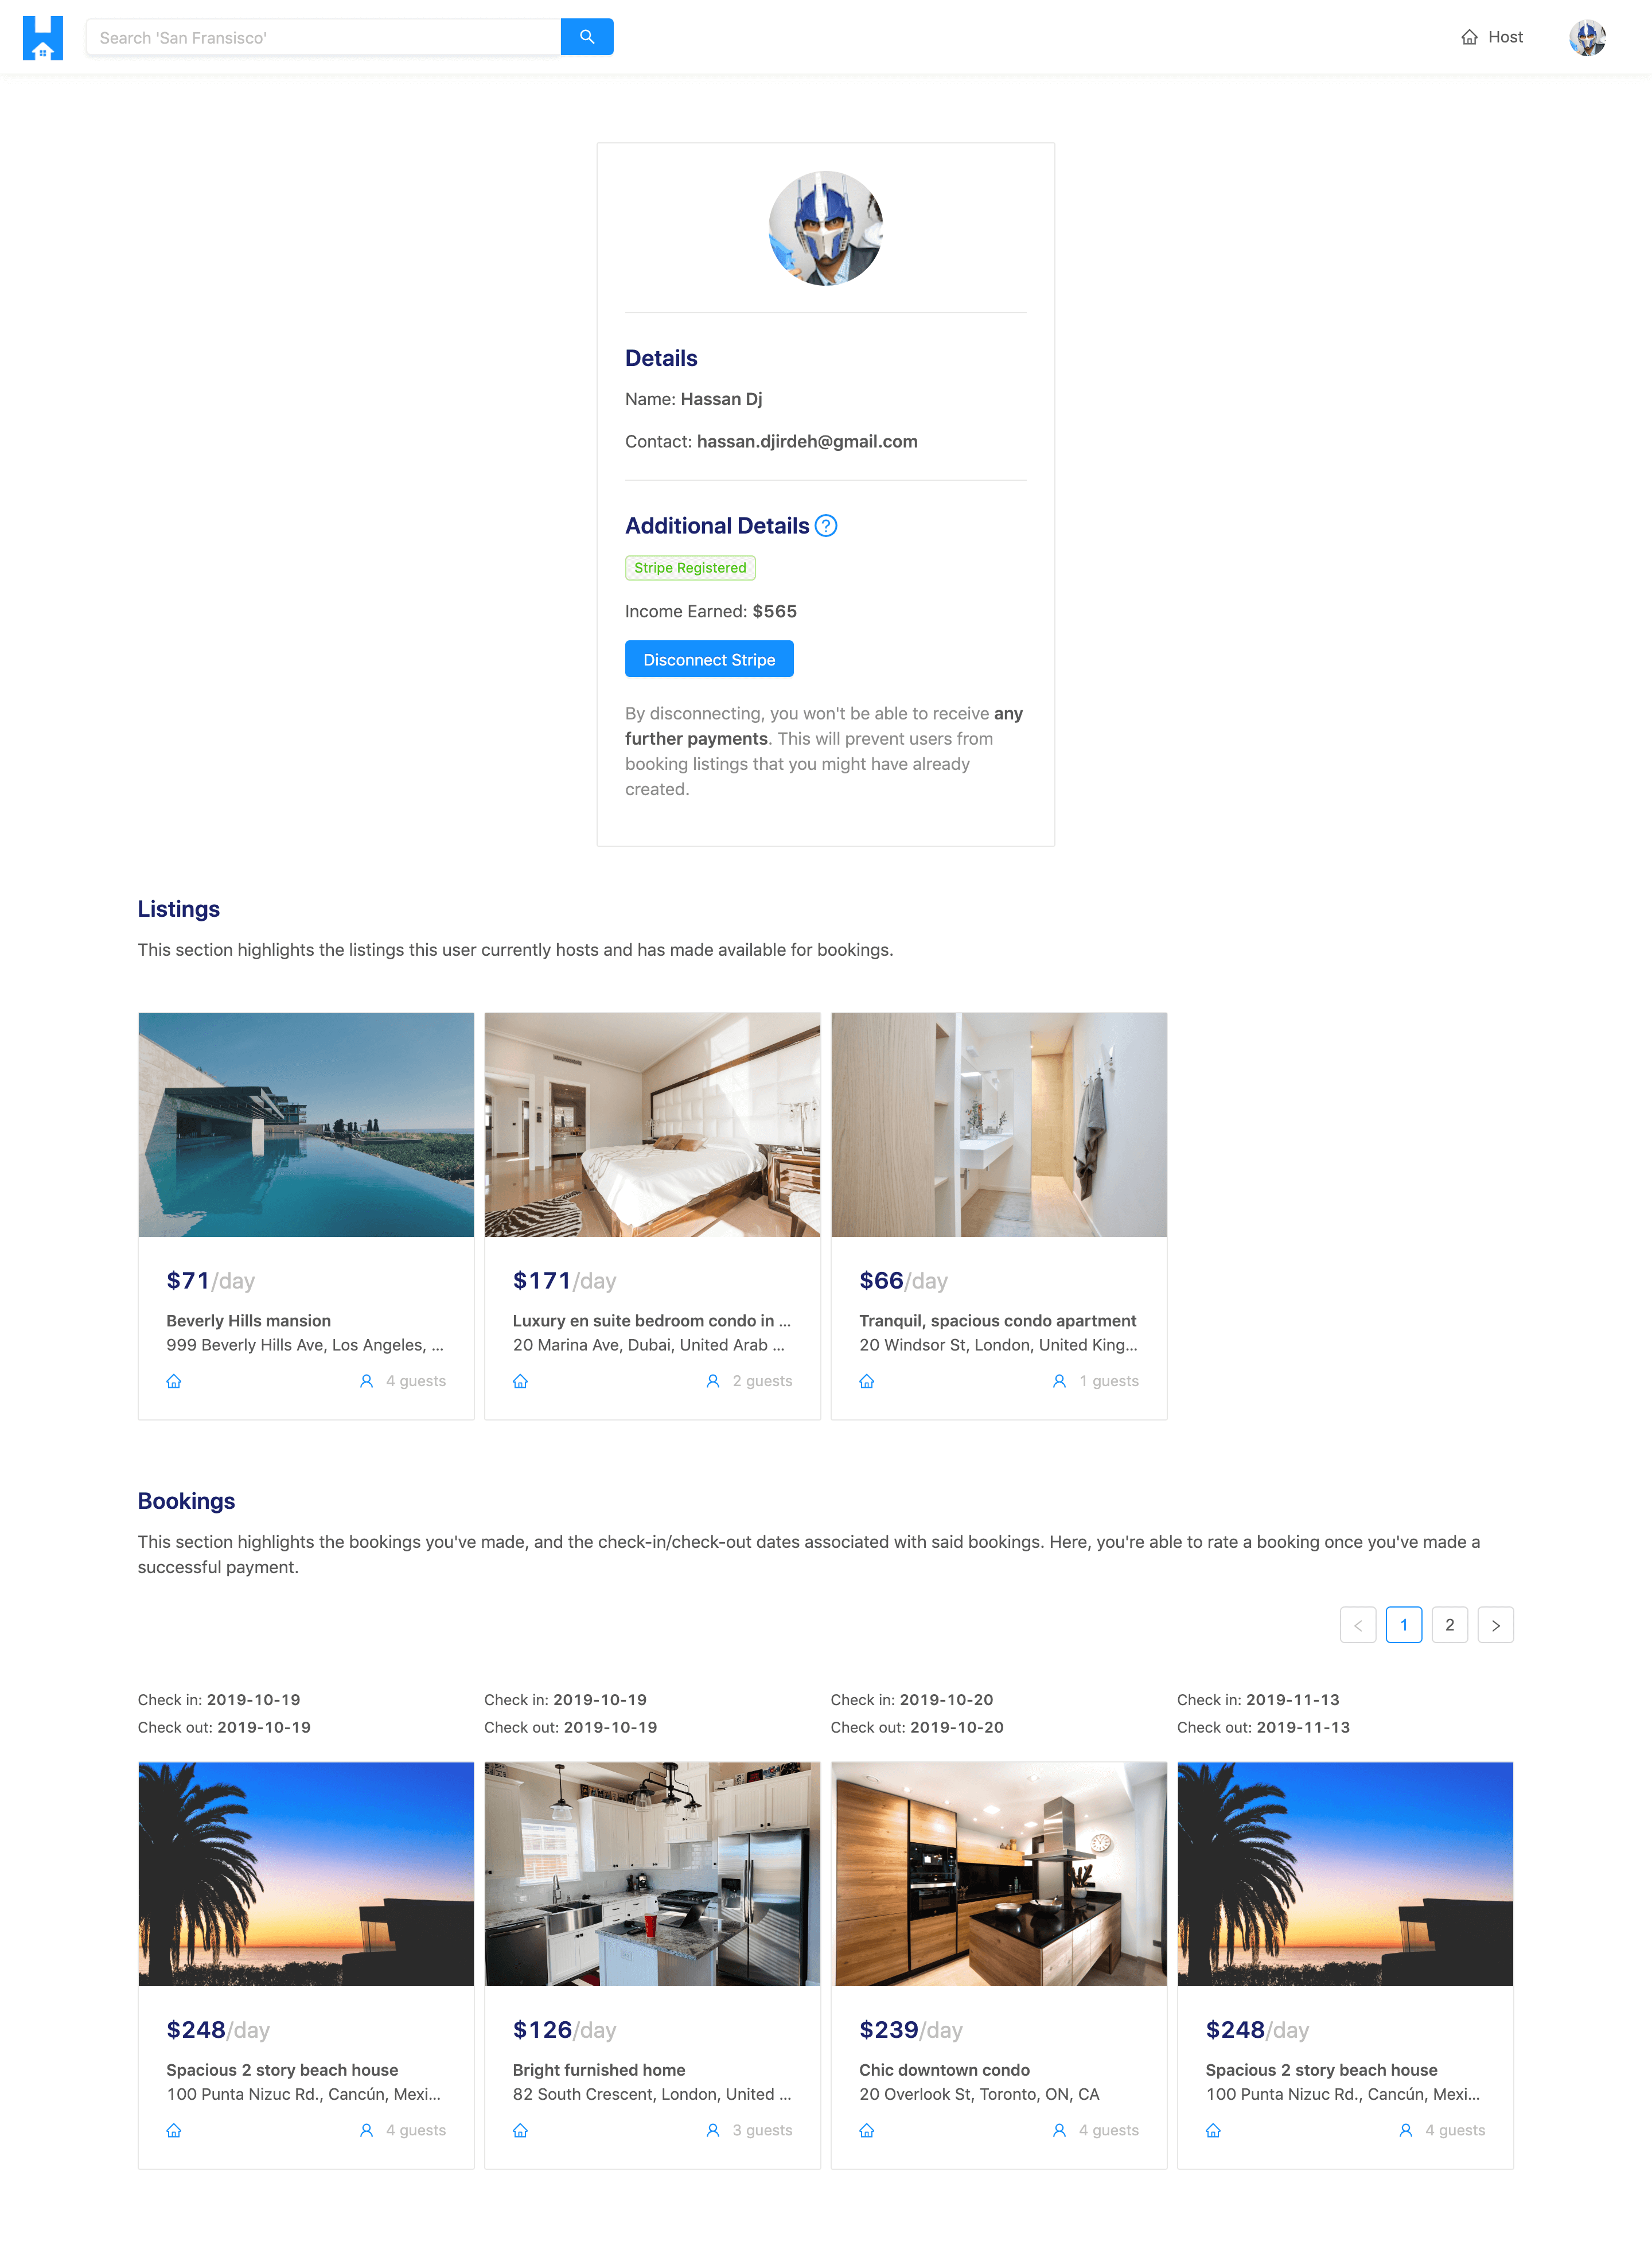
When a user is connected with Stripe, they’ll see the overall income they’ve made and will be able to create listings of their own.
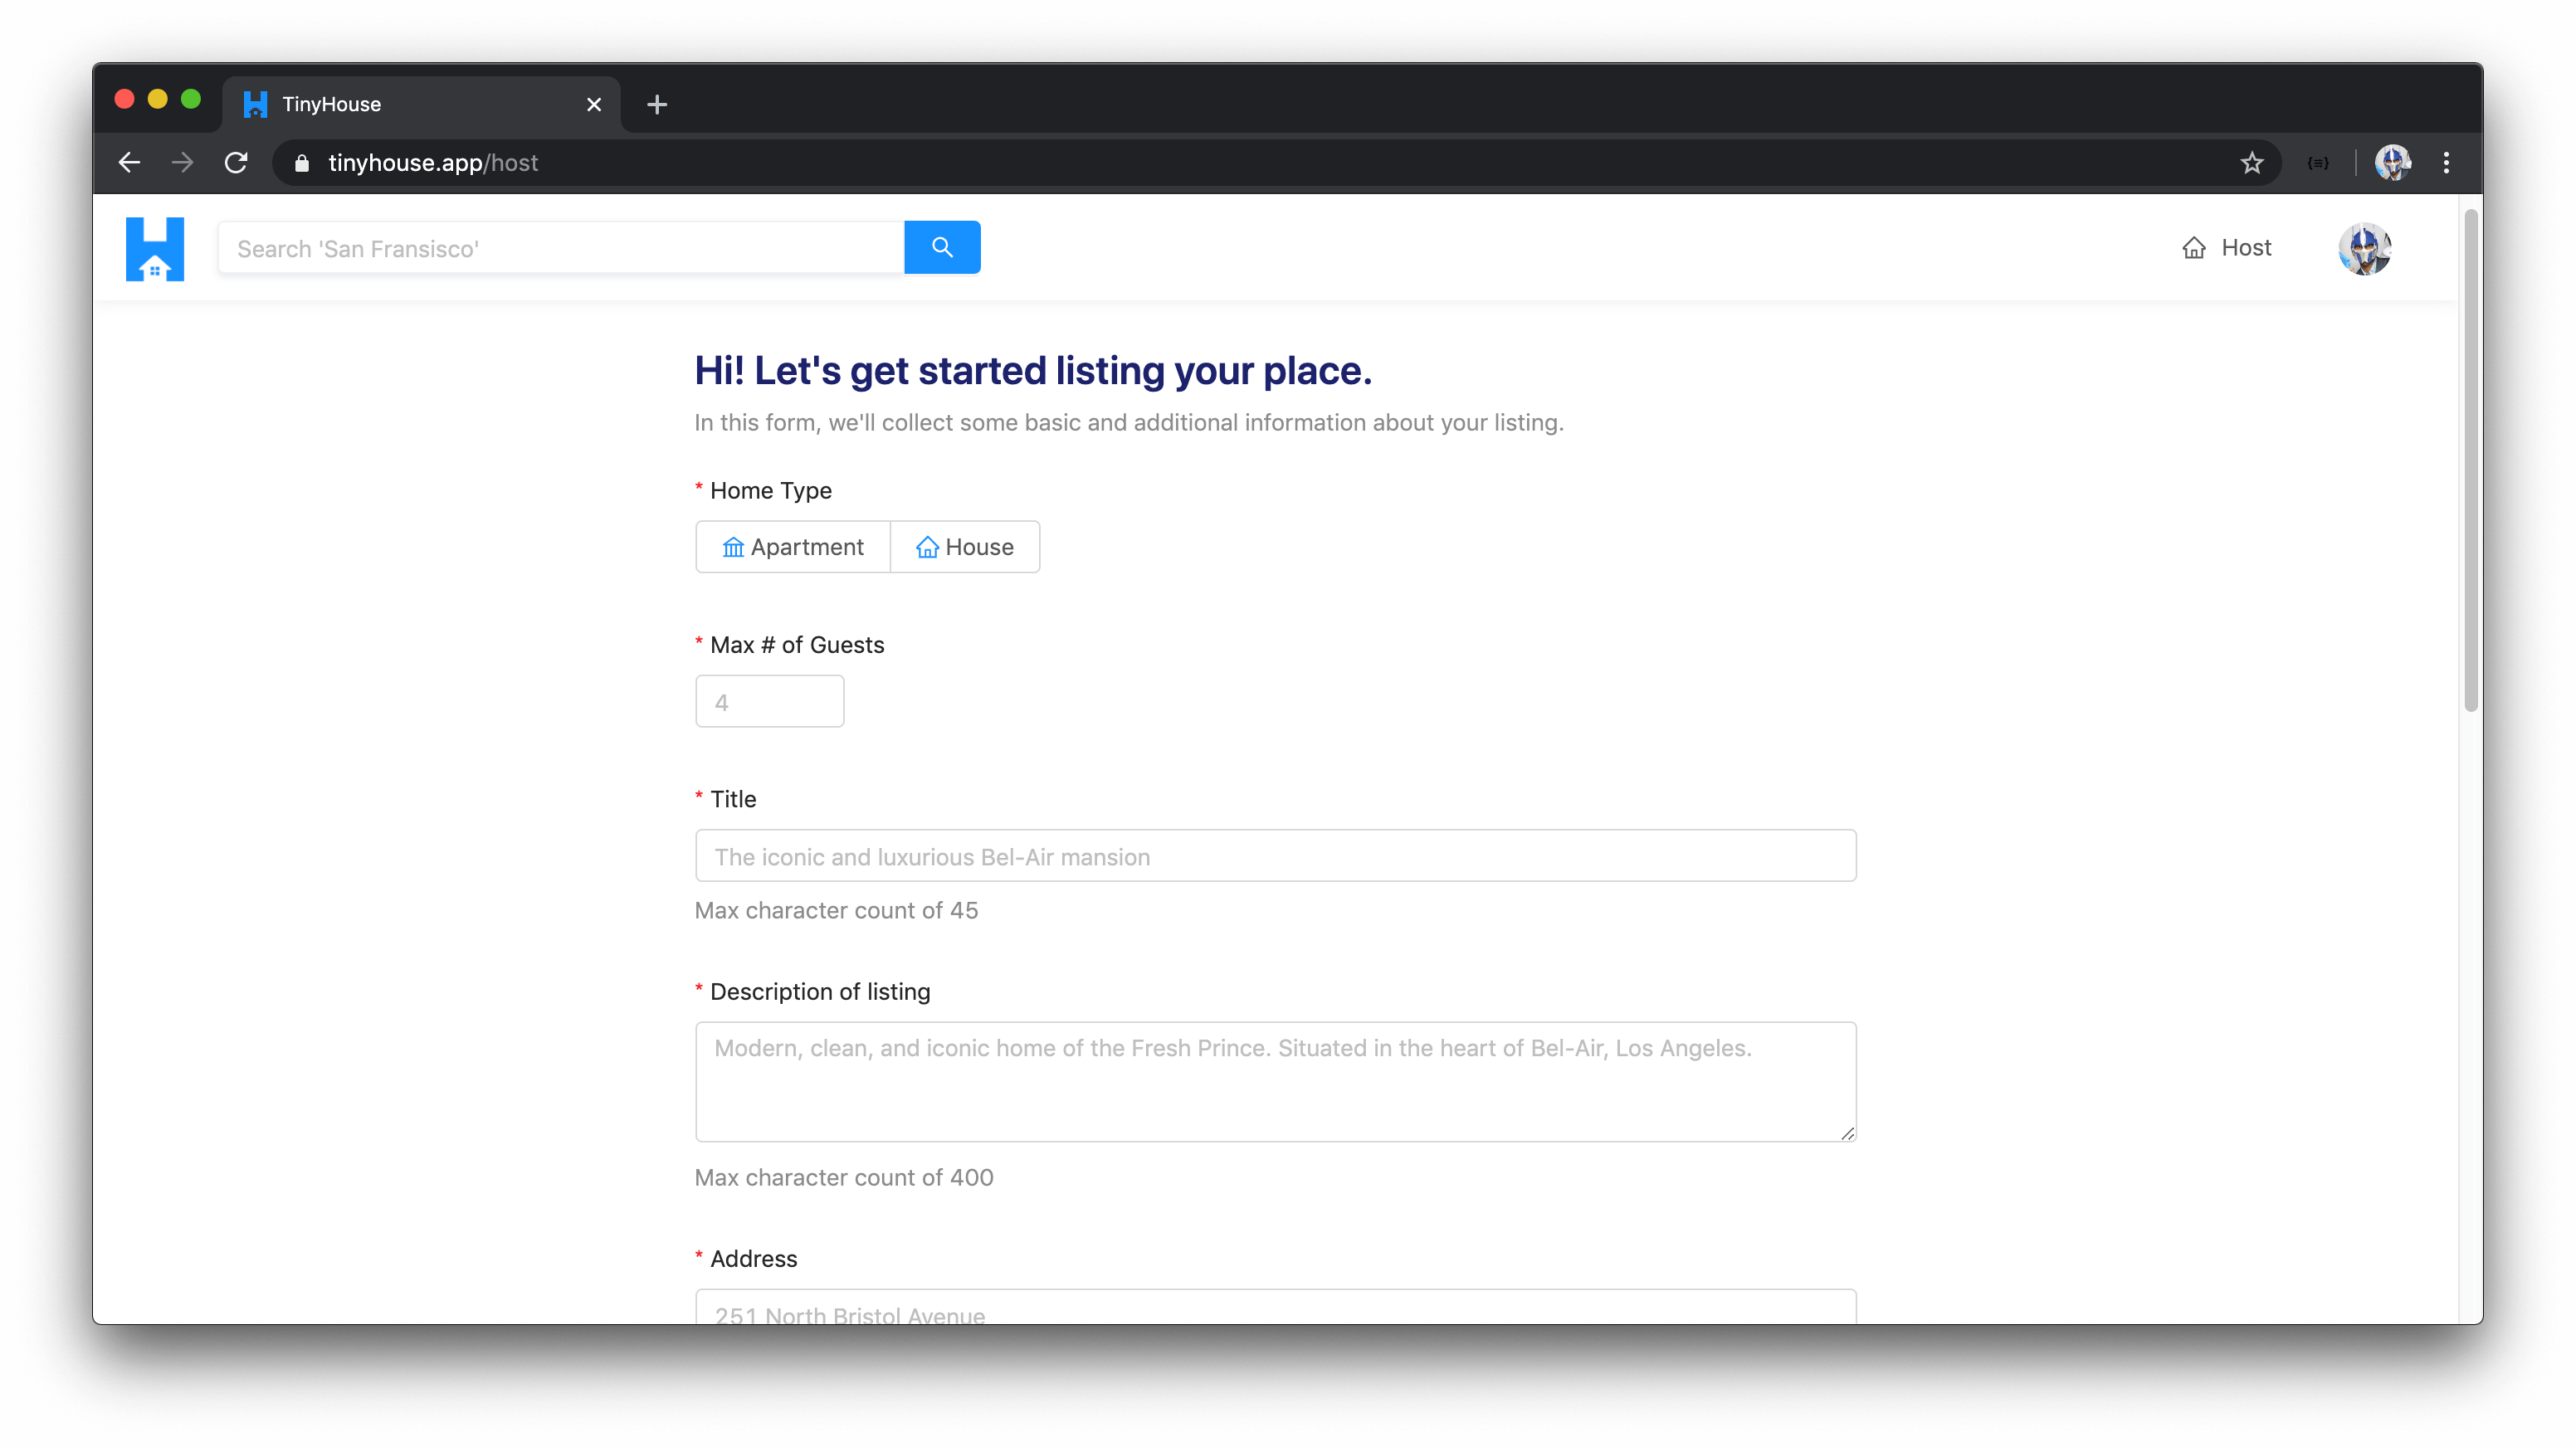
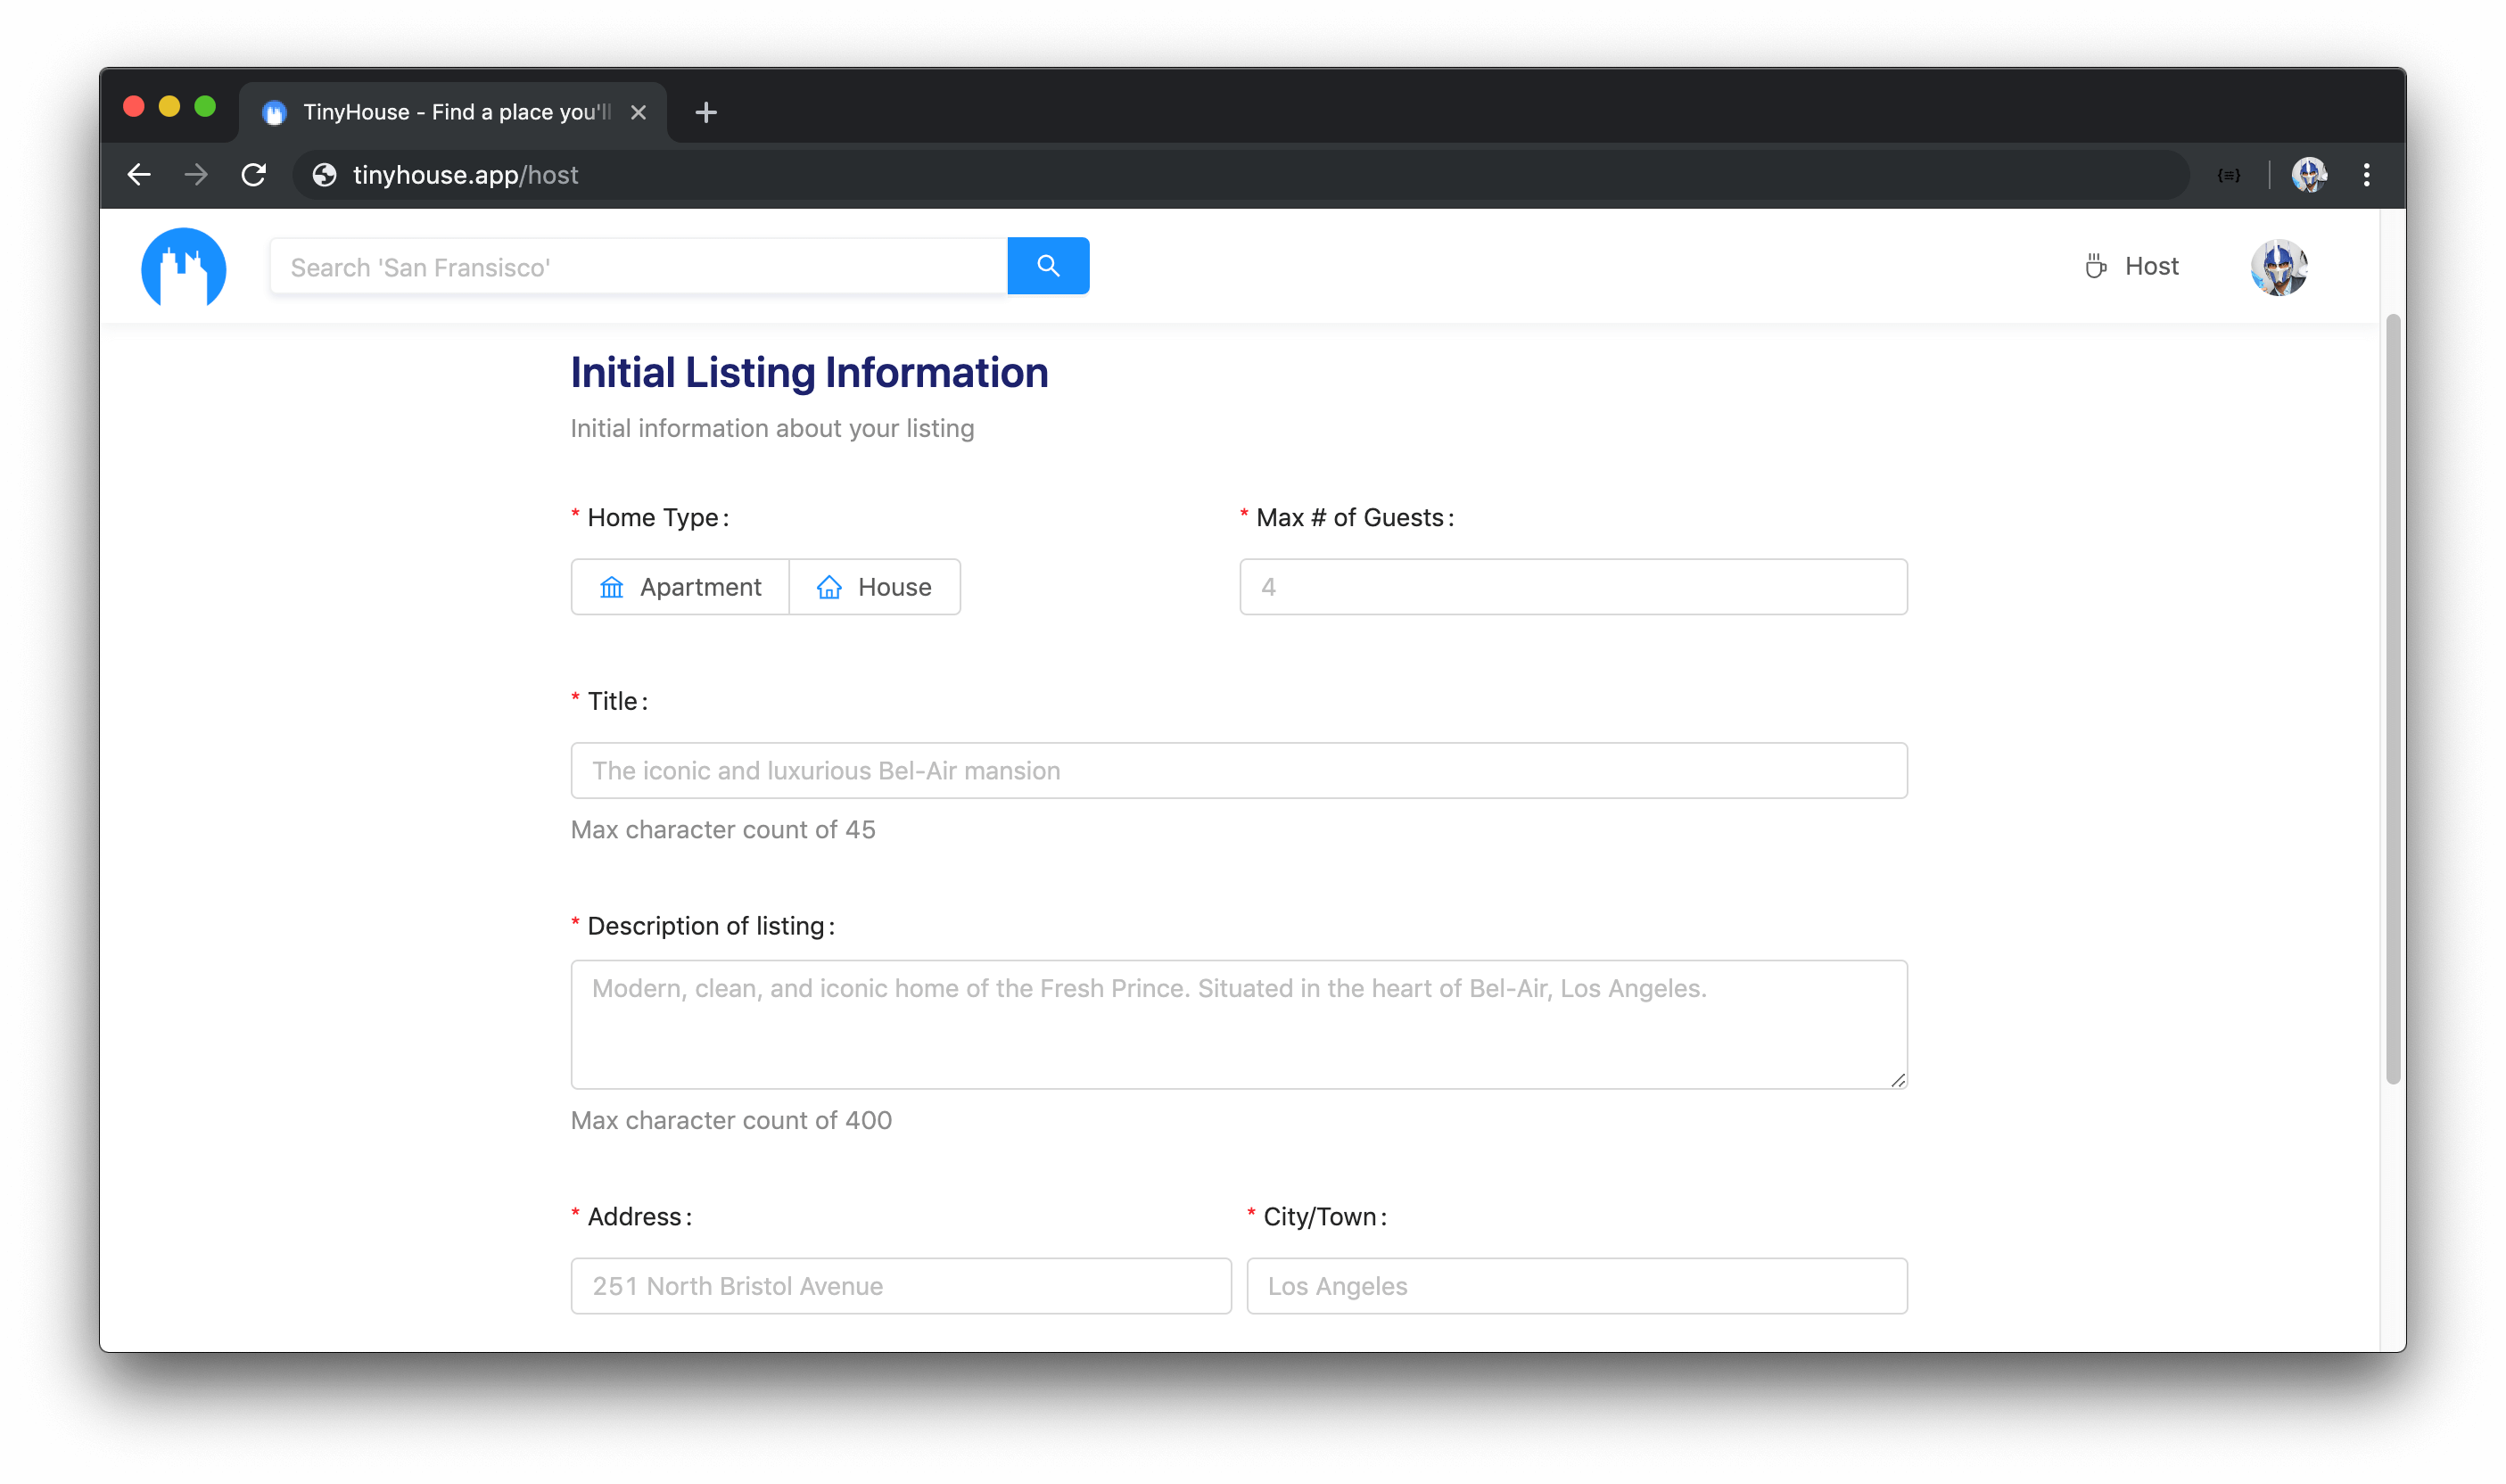
CREATE (I.E. HOST) LISTINGS
When signed-in to the application and connected with Stripe, users will be able to create new listings. This is to be done in the host page where users are required to provide all valid information for new listings such as but not limited to the listing title, image, address, and price.
SEE HISTORY OF LISTINGS CREATED AND BOOKINGS MADE
When signed in and located within the user page of one’s own account, the user will be able to see a history of all the listings they’ve created and the bookings they’ve made for other listings.
When a user is to view the details of a listing they own, they are also able to see the bookings that have been by other users to the specific listing.
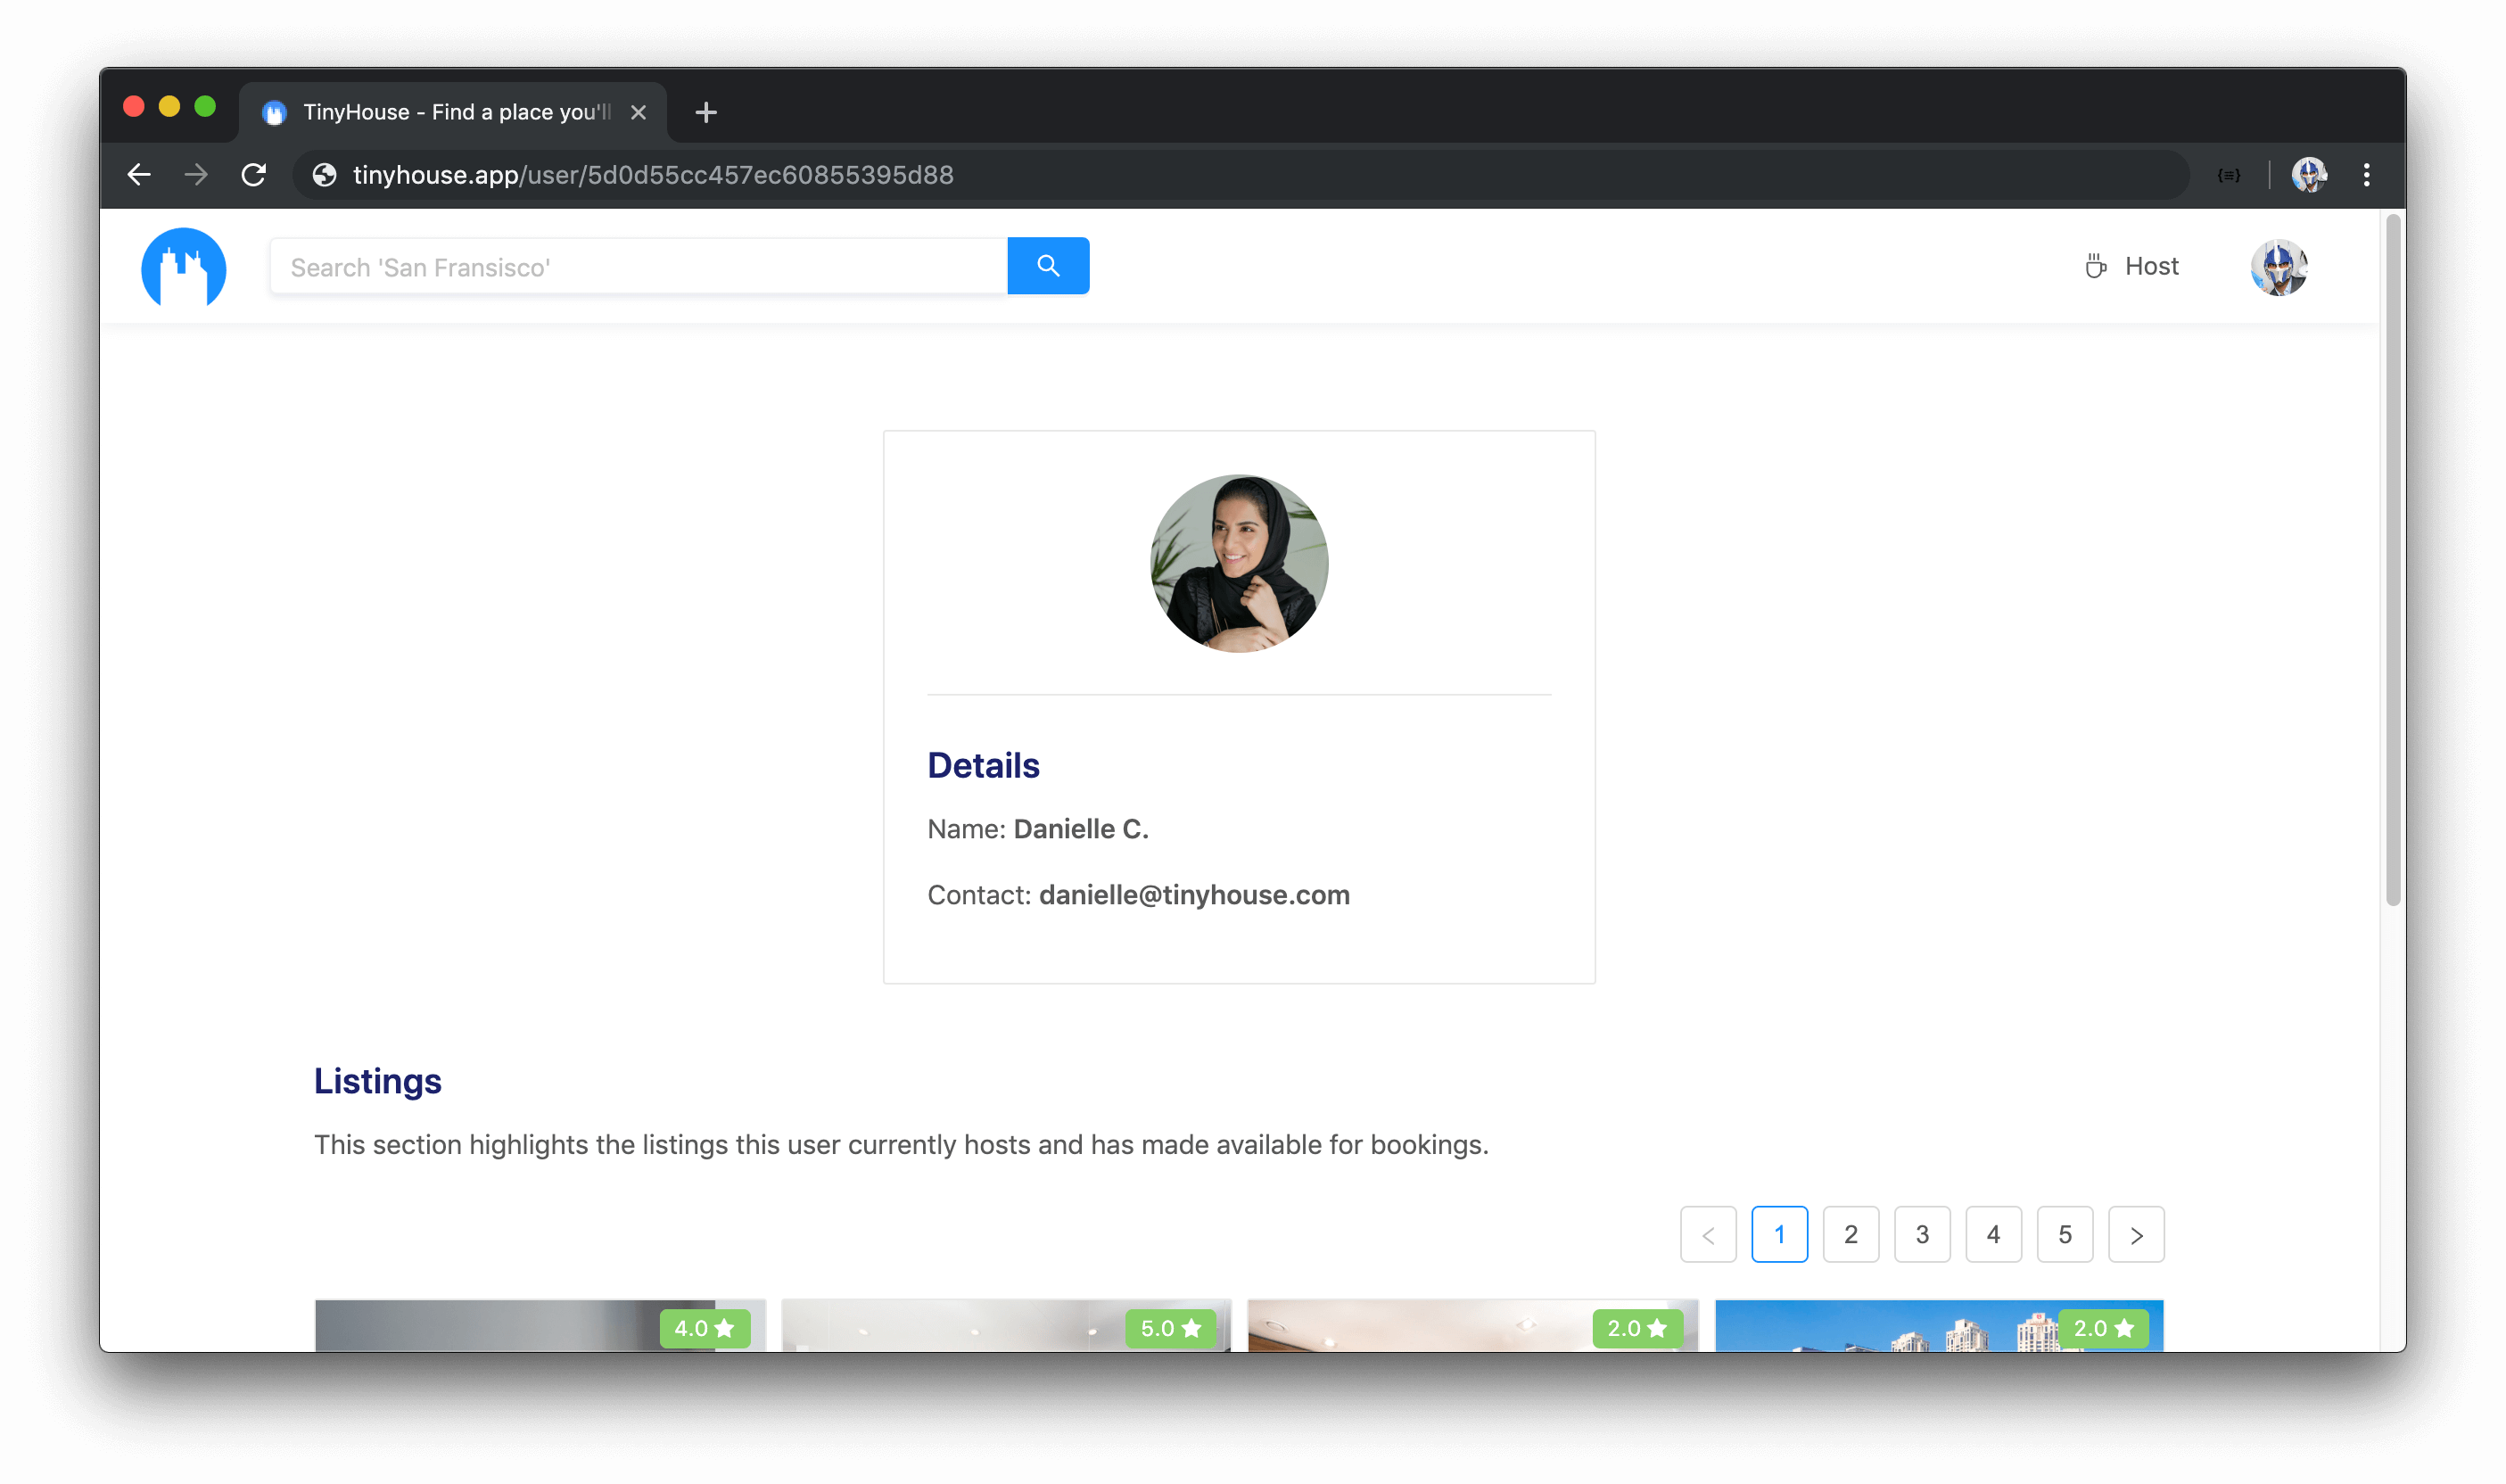
SEE HISTORY OF LISTINGS CREATED BY OTHER USERS
When visiting the user page of other users in the TinyHouse application, a user is able to see the listings created by other users.

WALKTHROUGH OF TINYHOUSE CODE
In this lesson, we’ll walk through the finished code for the client and server projects for the TinyHouse application. This will help in gathering some context on the patterns we’ll follow and the folder/file structuring of our projects. In this lesson, we are not going to address the actual code we’ll write but instead provide a high-level perspective on how we plan our client and server projects to be built.
API-DRIVEN APPROACH
Coming from Part I of the course, we’ve probably already have come to understand this but we’re going to build the TinyHouse application through an API-driven approach . This means we’re going to develop an interface (i.e. a GraphQL API) that exposes server data and business logic . Our client (i.e. our web application) is going to interact with this API to query or persist data . This API-driven development model helps split the back-end and front-end code, which further helps the capability if we wanted to build multiple front-end clients to interact with the same API.
SERVER PROJECT
We’ll first survey the complete server/ project. The server project is going to be a Node/Express server where its responsibility is to serve a GraphQL API and interact with our MongoDB database to either query or persist data.
server/
  src/
  temp/
  .env
  .eslintrc.json
  package.json
  README.md
  tsconfig.json
src/
The src/ directory is essentially where we’ll write 99% of our actual source code.
server/
  src/
    database/
    graphql/
    lib/
    index.ts
  // ...
The src/database/ folder is where we make the connection from our Node application to the MongoDB database we have in our MongoDB Atlas cluster. In our MongoDB database, we’re going to have three collections for Part II of the course.
- A
"users"collection to store information for the users in our application. - A
"listings"collection to store information for the listings in our application. - A
"bookings"collection to store information for the bookings made in our application.
The src/graphql/ folder is where we establish and create the GraphQL API. Here is where we’ll define the type definitions of the actual API and the resolver functions responsible for resolving the fields of the API.
The src/lib/ folder is where we’ll keep the functionality that is to be shared in different areas of our server project. This is where we’ll define the capability to interact with third-party APIs (e.g. Cloudinary, Stripe, and Google APIs). In the src/lib/ folder, we’ll also store any utility functions and TypeScript type definitions that are to be used in different parts of our server project.
temp/
server/
  // ...
  temp/
    clear.ts
    seed.ts
  // ...
The temp/ directory of our server project is where we’ll establish a seed() function to help populate our MongoDB database with fake mock data that we’ll use for development purposes when building our application. We’ll also have a clear() function that can be used to clear the database if we ever need to.
Everything else in our server/ project involves the environment set-up of our project which consists of but is not limited to defining the environment configuration variables, ESLint configuration, TypeScript configuration, and the dependencies our app depends on.
CLIENT PROJECT
The client project is to be a React/TypeScript project where we build a Single-Page Application.
client/
  public/
  src/
  .env
  .gitignore
  package.json
  README.md
  schema.json
  tsconfig.json
src/
Similar to the server project, 99% of the actual code we’ll write in our client project is to be in the src/ directory.
client/
  // ...
  src/
    lib/
    sections/
    styles/
    index.tsx
    react-app-env.d.ts
    serviceWorker.ts
  // ...
The root src/index.tsx file is where we are to instantiate our Apollo Client to interact with the GraphQL API and is where we develop the highest parent-level component, <App /> , that’s going to represent our React application.
In the parent <App /> component, we are to use React Router (a third-party library) to create client-side routes and have different components rendered based on the route. These high-level page components are to be defined in the src/sections/ folder.
The src/lib/ folder is where we’ll group all pieces of code that are to be shared in different section components of our client such as the GraphQL API documents, shared components, utility functions, and TypeScript type definitions.
A src/styles/ directory will exist and will contain a single index.css file that we’ll provide to you as part of course material and is to contain all the custom CSS classes and styles we’ll need in our app. This is to be used in conjunction with the Ant Design UI framework for how we intend to build the UI elements of the TinyHouse application (this is to be discussed more in the lesson How To Go Through The Course ).
Outside of the src/ folder, our client project contains:
- The
public/directory that has the markupindex.htmlfile with the root element in which our React app is to be mounted onto. - A
package.jsonfile that contains our application dependencies. - An autogenerated
schema.jsonfile that represents our GraphQL API and is generated with the Apollo CLI tool. - A
.envfile where we introduce environment variables we intend to keep in our React project.
Though we’ve talked about a few things in this lesson, there are a lot of things we haven’t addressed and will address when we proceed throughout Part II of the course. In the next lesson, we’ll take a brief tangent and talk about patterns we’ll employ as we build the server and client projects.
CODE PATTERNS & BEHAVIOR
In this lesson, we’ll continue from what we’ve done in the previous lesson and we’ll quickly go over some high-level patterns and behavior that we’ll employ as we build the server and client projects.
FOLDER STRUCTURE & EXPORTS
Similar functionality is to be grouped together
The very first thing we’ll mention is we’ll always look to group similar functionality together within folders and directories. For example, here’s the src/ directory of our finished server project.
src/
  database/
    index.ts
  graphql/
    resolvers/
    index.ts
    typeDefs.ts
  lib/
    api/
    utils/
    types.ts
  index.ts
If we were to create any GraphQL resolver information, we’ll create it and keep it within the src/graphql/resolvers/ folder. If we had a specific function that needed to interact with a third-party API, we’ll keep it in the src/lib/api/ folder.
As we start to build functionality in our application, we’re going to specify and declare where we want to group certain things, and as things continue, we’ll continue to group things together.
Create explicit index files to “barrel” export functionality
In multiple areas of both our server code and client code, we’re going to create explicit index files within folders that will help “barrel” export functionality together. As an example, in the src/lib/ directory of our client project, there exists a components/ folder where many different parts of our client app will use.
lib/
  components/
    AppHeaderSkeleton/
    ErrorBanner/
    ListingCard/
    PageSkeleton/
  index.ts
In the lib/components/index.ts file, we’ll re-export each of the components being created within the lib/components/ folder.
export * from "./AppHeaderSkeleton";
export * from "./ErrorBanner";
export * from "./ListingCard";
export * from "./PageSkeleton";
Note: We’re using the
*symbol to simply re-export everything exported in each of the component files. We could very well use named exports as well.
Why would we be doing this? It’s preferential and it’s due to how we intend to have the components listed above be imported in other areas of our code. For example, with an index.ts file in the lib/components/ folder re-exporting all the components, we can import them in one line as follows:
import {
  AppHeaderSkeleton,
  ErrorBanner,
  ListingCard,
  PageSkeleton
} from "./lib/components";
This helps avoid the importing of each component one by one:
import { AppHeaderSkeleton } from "./lib/components/AppHeaderSkeleton";
import { ErrorBanner } from "./lib/components/ErrorBanner";
import { ListingCard } from "./lib/components/ListingCard";
import { PageSkeleton } from "./lib/components/PageSkeleton";
This is to help keep things more neat and concise as we proceed through the course.
ROUTING & URL PARAMETERS
The next thing we’ll talk about is Routing and URL parameters. If you’ve used web applications before, you’re already probably familiar with routes and URLs. Routing is essentially the capability to direct a user from a certain URL to another URL where the user can see information that pertains to that new URL.
Routing is helpful since it allows us to keep context of where we are in our application. It allows us to use the browser back and forward history functionality. Routing also allows us to bookmark URLs and share them with others.
URL Parameters to get specific information
In the TinyHouse application, we’re going to use routes and dynamic URL parameters to get specific information on certain routes. As an example, if a user was interested in seeing the listings within the region of Los Angeles , they’ll surface this information by visiting the /listings/Los%20Angeles pathname of the application route.
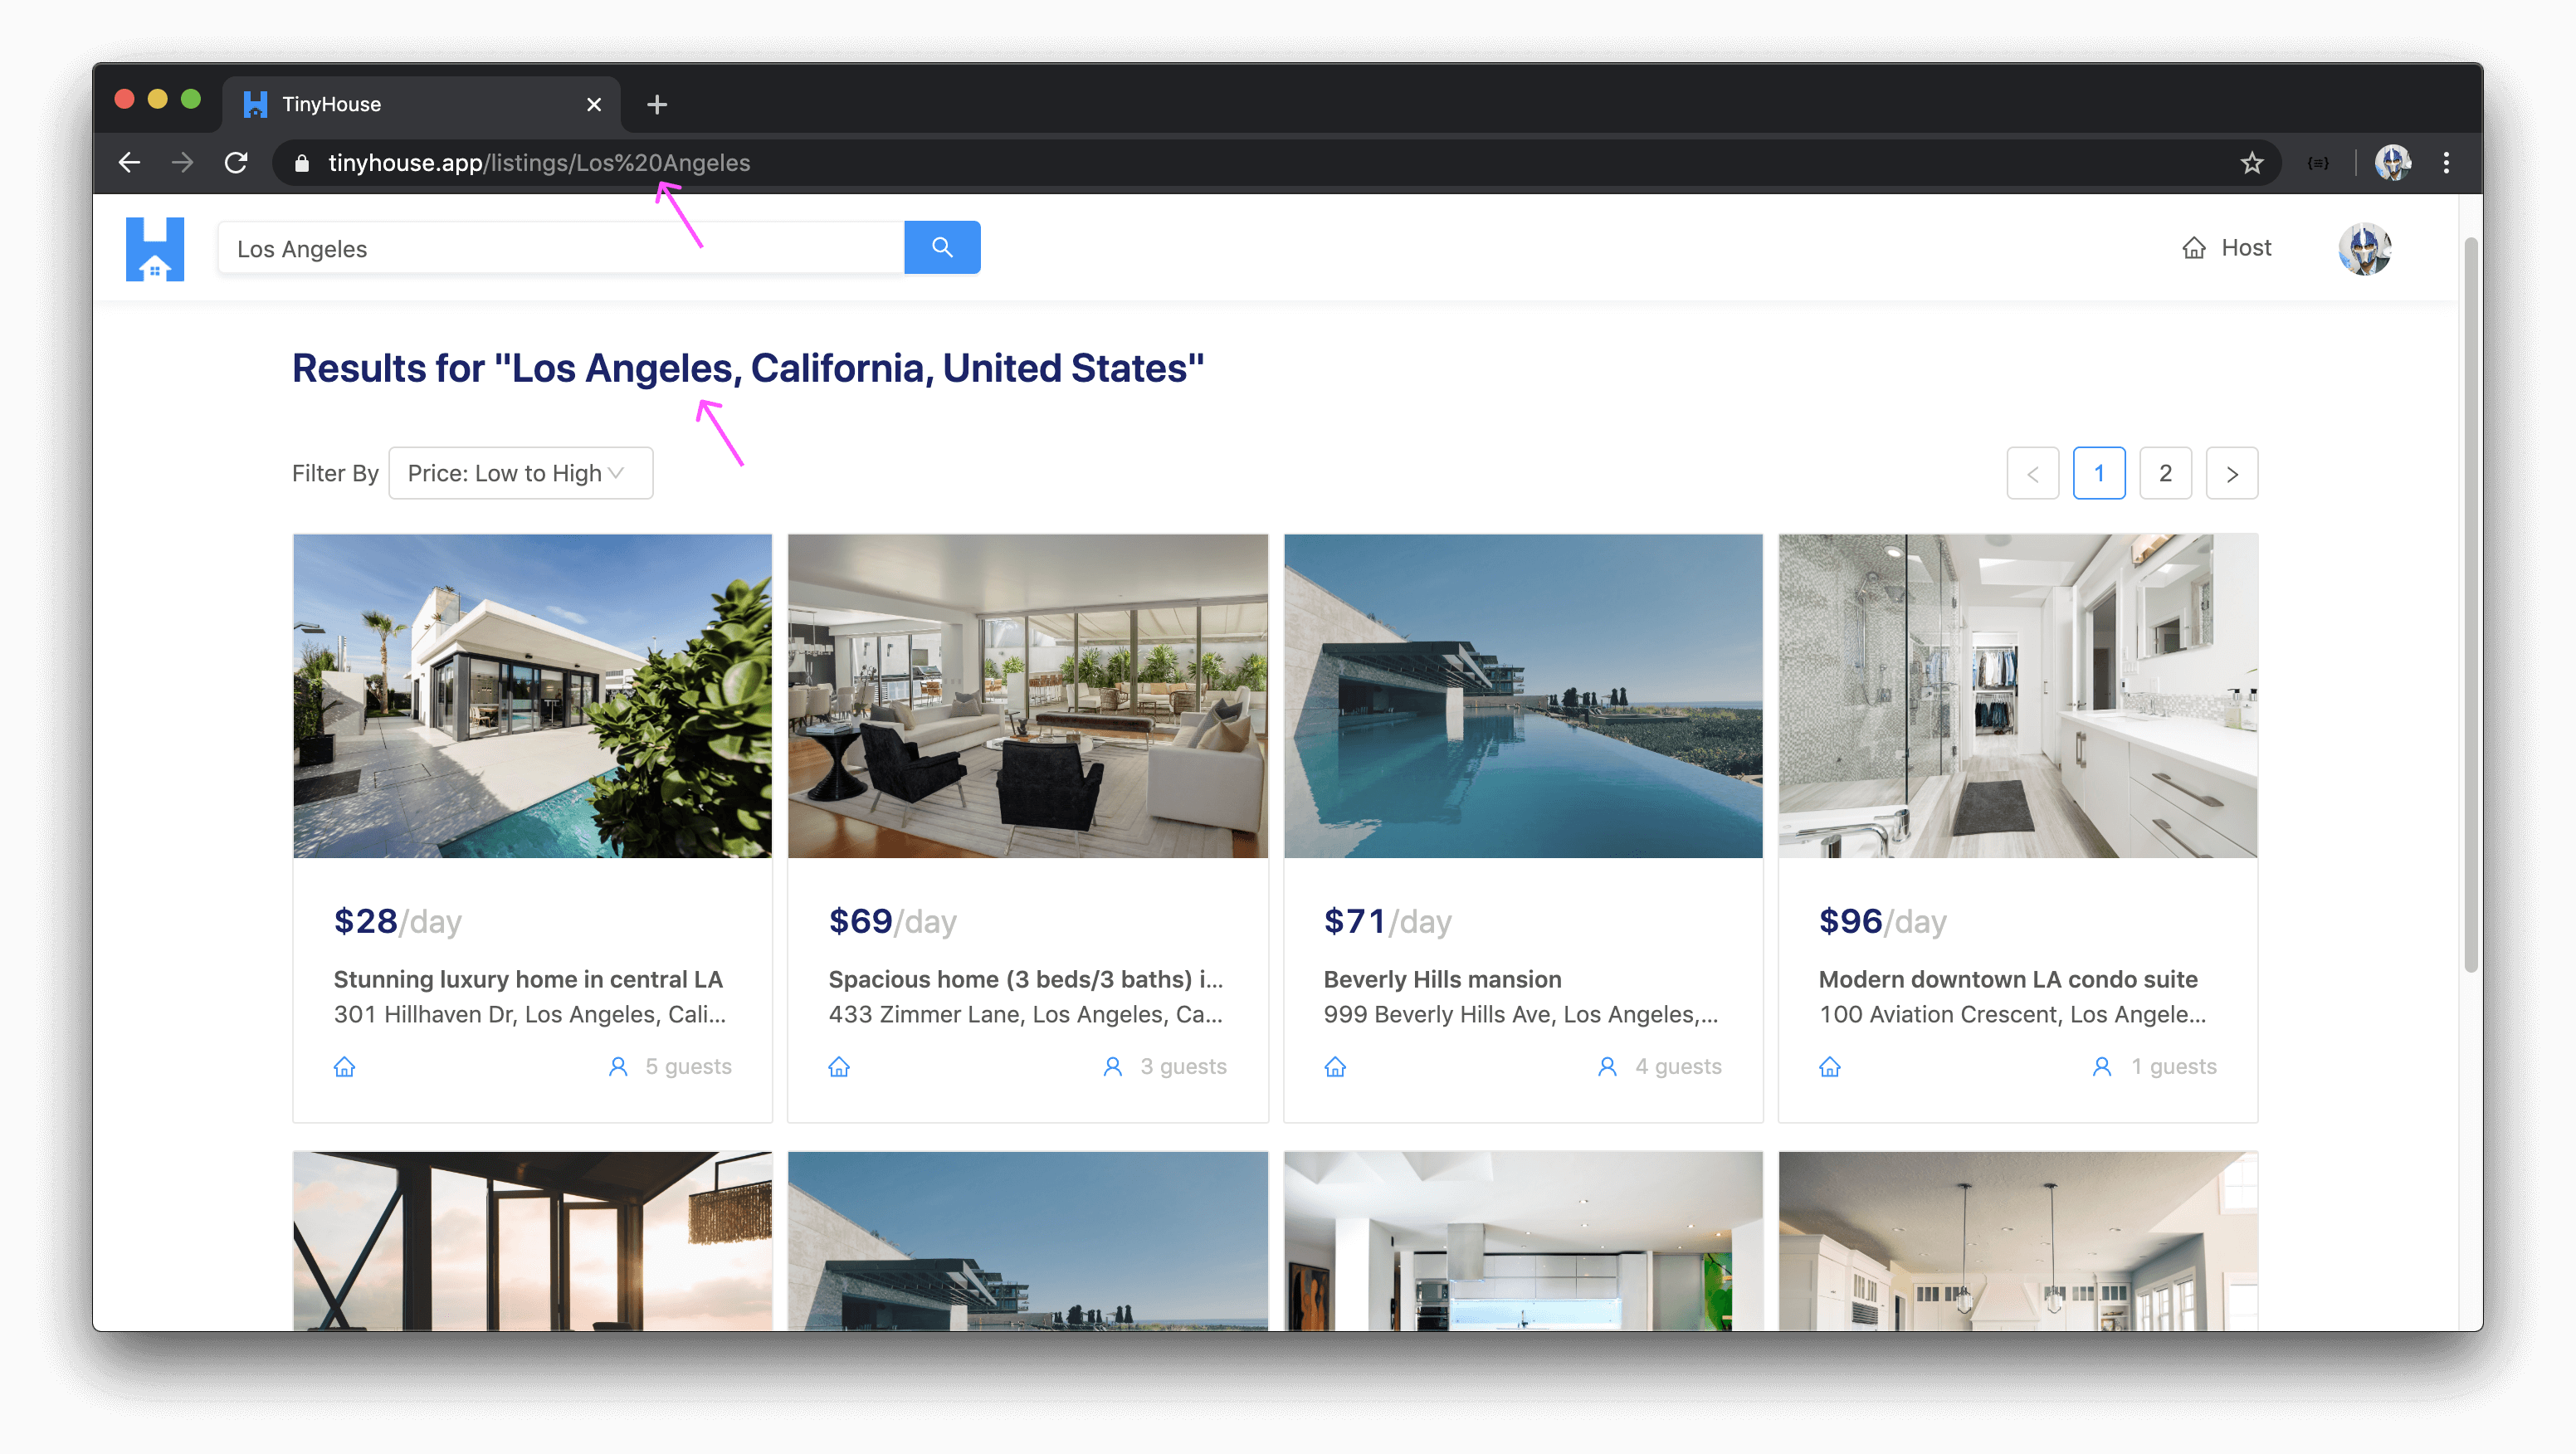
How would this work? In summary:
- The client will receive the value of the dynamic URL parameter (e.g.
Los Angeles). - The client will make a request to the server (e.g. a query) and provide the value of the URL parameter as an argument of the request.
- The server receives the request and returns data that satisfies the request made.
- The client receives the data and surfaces the relevant information.
We’re going to employ this pattern in many different parts of our app such as when we want to surface information for a certain listing or a certain user.
QUERIES & MUTATIONS
Queries on page-level & mutations on user action
For the most part , in the TinyHouse application, queries are to usually run when a page first loads and mutations are to usually execute based on user action .
For example, if we were to surface information for a certain user in the /user/:id route of our app, a query will be run when the page loads to get the relevant information. Some of the additional actions that can be done on the page (i.e. user disconnects from Stripe) will conduct a mutation when the user action is made.

Following the above pattern, query errors would often be page-level while mutation errors would often be a notification on the page. If a page-level query was to ever fail, we’ll have no information to show to the user so we’ll surface a page-level error. If a mutation based on user action was to ever fail, the page information should still be present so we’ll keep the user on the page and surface an error message.

With this pattern in mind, we’ll look to usually have page-level queries be made in the parent section components that are to be rendered for a certain route (e.g. <User /> component in /user/:id route). We’ll use props to pass this component data down to child components that depend on it. We’ll organize mutations to occur in the child component the mutation is to happen in.
User/
  components/
    UserBookings/
    UserListings/
    UserProfile/
      index.tsx // specific mutation
  index.tsx  // page-level query
This is a general pattern we’ll follow for organization and maintainability, not a requirement . In a few areas of our app (e.g. handling OAuth on the client), we’ll do things slightly differently.
BUILDING NEW FEATURES
As we proceed through Part II of the course, we’ll look to build certain features within specific modules (e.g. connect with Stripe in Module 10). As we look to tackle in building new features, we’ll follow a general pattern:
- Understand the scope and what we intend to accomplish.
- Establish the GraphQL fields we’ll need in our API.
- Implement type definitions and resolver functions for the new GraphQL fields.
- Build the client-side UI to consume the new GraphQL fields.
In a few specific cases, we may move around between some of these steps but usually, we’ll look to do the above in order.
Once we begin to start working through Part II of the course, we’ll get more context on a lot of different things we’ve talked about in this and the previous lesson!
HOW TO GO THROUGH THE COURSE
WHAT’S SIMILAR TO PART I?
To see the documentation on what’s similar to Part I, check out the How To Go Through The Course lesson video we’ve prepared in Part I.
WHAT’S DIFFERENT FROM PART I?
The primary distinction between Part II and Part I is in Part II, our end goal is to build a full-stack, fully functioning, home-sharing application - TinyHouse.
In Part I, we work with a variety of different technologies to see how the client (i.e. React) can interact with a server (i.e. Node/Express) through a GraphQL API. In part II, we take everything we learned from Part I, however, the end goal is to build TinyHouse. This comes with a set of different challenges and a different perspective on how we do certain things.
BUILDING FEATURES
In Part II of the course, modules and lessons encompass building certain features we want in our application. We’ll have modules and lessons that govern topics like:
- How do we host new listings in our application?
- How do we connect with Stripe?
- How do we build the homepage?
- How do we persist login sessions with cookies?
- etc.
LESSON LENGTH
In Part I, lesson videos were around 10 minutes in length on average. In Part II, a large number of lesson videos will still be around this time. However, there are going to be a lot of different lessons where we’re going to try to implement something that takes a significant more amount of time. Some examples:
- Module 4 | Lesson 5 - Building the Authentication Resolvers. Length ~ 18:55
- Module 4 | Lesson 7 - Executing Login. Length ~ 22:35
- Module 6 | Lesson 5 - The UserListings & UserBookings React Components. Length ~ 42:50
AMOUNT OF CODE
In Part II, we’re going to be writing a lot more code than we’ve done in Part I. This is due to the scale of what we intend to build in Part II when compared with Part I.
CONCEPTS LEARNED IN PART I
It’s important to note as you proceed through Part II, we assume you know all the materials we’ve taught in Part I . In Part II, we won’t be spending a lot of time explaining concepts like how GraphQL is different from Rest APIs, how React can be used as a UI library, etc. We’ll assume you’ve already understood these concepts and we’ll build and learn a lot of new things on top of this base.
INTERACTING WITH THIRD-PARTY APIS
In Part II, we’re going to be interacting with many different third-party APIs - Stripe, Google’s Geocoding & People APIs, and Cloudinary. For all of these different APIs, we’re going to generate environment configuration values and store them in our application.
When you navigate and import the source code we share with you as part of this course, it’s important to keep in mind that you’ll need to generate values for these environment variables to potentially get the server/client to run the way you expect it to.
MARK-UP/CSS
Another important note to make which has been mentioned in the course syllabus is that markup and CSS are not a primary concern for this course . We’ll style the TinyHouse application to make it appear presentable but the presentation isn’t the main takeaway for what we want to teach you.
There are a few things we’re going to do to support you in being able to build the TinyHouse app without being fully concerned with how the application is to be styled.
Ant Design UI Framework
The first thing we’ll do that you may have already gained context from in Part I is use the Ant Design UI framework to access a large number of different UI components that we’re simply going to import and use.
Already prepared custom styles
At an early point in the course (Module 1 | Lesson 1 - Set-up for Part II), we’re going to share with you a single CSS file that’s going to contain all the custom classes we’ve prepared that’s going to be used in the application. This will help avoid having to write custom CSS code in our app as we proceed through the course.
In the lesson videos, lesson manuscripts, and source code that we’ll share with you - you’ll be able to gain context on the different CSS classes used for different elements through the course. For example, in the code snippet below:
import React from "react";
import { Link } from "react-router-dom";
import { Layout } from "antd";

import logo from "./assets/tinyhouse-logo.png";

const { Header } = Layout;

export const AppHeader = () => {
  return (
    <Header className="app-header">
      <div className="app-header__logo-search-section">
        <div className="app-header__logo">
          <Link to="/">
            <img src={logo} alt="App logo" />
          </Link>
        </div>
      </div>
    </Header>
  );
};
The custom classes - app-header , app-header__logo-search-section , and app-header__logo are custom CSS classes we’ve already prepared before that we’ll simply declare and use directly to get the intended styling and presentation.
CODE SNIPPETS IN LESSON MANUSCRIPT
In the lesson manuscripts, you may notice entire code samples be shared with you.
import React from "react";
import { Link } from "react-router-dom";
import { Layout } from "antd";

import logo from "./assets/tinyhouse-logo.png";

const { Header } = Layout;

export const AppHeader = () => {
  return (
    <Header className="app-header">
      <div className="app-header__logo-search-section">
        <div className="app-header__logo">
          <Link to="/">
            <img src={logo} alt="App logo" />
          </Link>
        </div>
      </div>
    </Header>
  );
};
At other points in time, we’ll share snippets of code to reflect the main piece of work that is being made at that period of time.
// ...
import { Affix } from "antd";
// ...

const App = () => {
  // ...
  return (
    <Router>
      <Affix offsetTop={0} className="app__affix-header">
        <AppHeader />
      </Affix>
      <Switch>{/* ... */}</Switch>
    </Router>
  );
};
By following along with the lesson videos and reading the lesson manuscripts, code snippets like the above will be made clear as to what is being attempted.
SET-UP FOR PART II
The master
index.cssfile that is to be referenced in this lesson can be found - here.
From Part I of the course, we’ve prepared a tinyhouse folder that contains the client and server directories.
tinyhouse/
  client/
  server/
We may have labeled our project directory in Part I as
tinyhouse_v1. If so, feel free to rename the directory you’d intend to work within Part II astinyhouse.
In this short lesson, we’ll make some small modifications to the client and server code from Part I of the course. The first thing we’ll do is update the project names of our client/ and server/ directories. We’ll do this in the package.json files of each folder.
First, we’ll head to the package.json file of our client/ project, and we’ll update the value of the name property with "tinyhouse-client" .
client/package.json
"name": "tinyhouse-client",
And in the server project, we’ll do something similar and provide the name "tinyhouse-server" .
server/package.json
"name": "tinyhouse-server",
INDEX.CSS
The Ant Design UI framework will play the biggest role in helping style the presentation of our client application. With that said, there are some custom styling we’ll provide to customize a few of the components and sections that we intend to build in our app. To avoid having to write custom CSS code in our app as we proceed through the course, we’re simply going to place a pre-existing index.css file in a styles/ folder that is to be kept within the src/ directory. This index.css file will essentially contain all the custom CSS code we’ll need in our TinyHouse project.
client/
  // ...
  src/
    // ...
    styles/
      index.css
    // ...
  // ...
Grab the contents of the
index.cssfile here.
If we take a look at the index.css file provided, we’ll notice that the CSS code within is fairly straight forward. The benefit of having this file is that when we begin to write our components, we’ll directly reference the classes we’ve created from this file to get the intended styling changes.
From the work we’ve done in Part I of the course, we’ve already imported an index.css file from an adjacent styles/ folder in the client/src/index.tsx file, which is the root file of our React project.
client/src/index.tsx
import "./styles/index.css";
We haven’t removed any existing code that we’ve written from Part I yet. We’ll be making changes to the client/ and server/ directories as we begin to proceed.
MODULE 2 INTRODUCTION
The boilerplate of our application is now prepared. In this module, we’ll begin establishing the main page-level components of our application as well as the different URL routes for where these components should show.
For the details within this module:
- We’ll address what routing is within the context of a web application.
- Spend a little time addressing the difference between server-side and client-side routing.
- Install and introduce React Router in our client application.
- Finally, set-up some of the main routes and corresponding components we’ll have in TinyHouse.
ROUTING IN TINYHOUSE
Routing is the process of navigating through a web application with the help of URLs. When a link in a webpage is clicked, the URL changes which then navigates a user to a new page.
Though the capability to change routes is helpful, we don’t always need it. We could always have an entire application be displayed within a single homepage. However, if an app starts to become large, it would be quite difficult to show all the information the app is to contain within a single webpage. This is why nearly all large scale web applications (e.g. YouTube, Twitter, Airbnb, etc.) provide the capability to route between different pages.
Our TinyHouse application is going to have routing. As an example, if a user was to ever venture to the /listings/toronto route, they would see the listings for the city that they’re looking for - which in this case is “Toronto” .

There are often two ways to achieve routing within a web application - server-side routing or client-side routing .
SERVER-SIDE ROUTING
In server-side routing , web page navigation is handled completely by the server . When a user clicks on a link, the browser sends a new request to the server to fetch the web page.
PROS
- Server-side routing will only request the web page that the user is viewing, not the entire web app. As a result, the initial page load is often faster since we’re only downloading the content for one web page.
- Search Engine Optimization (SEO) is optimized for server-rendered applications.
CONS
- Every URL change results in a full-page refresh as the server returns the contents to the client. This is the unpleasant blinking state that’s shown to a user when a user navigates from route to route.
- Templates that are to remain the same might have to be requested from the server over and over again (e.g. a header and a footer that stays the same on all web pages).
CLIENT-SIDE ROUTING
In client-side routing , web page navigation is handled completely by the JavaScript that is loaded on the browser . When a user clicks on a link, the browser simply renders “new content” from the code already loaded in memory.
Because of this, client-side routed web applications are often called Single-Page Applications (SPAs). These are applications that consist of just one web page and the different routes in the application are the same web page displaying different views.
PROS
- Since there isn’t a need to wait for a server response after the initial page load, navigating between web pages is often faster than server-rendered applications. Additionally, the white “blinking” state no longer exists when navigating from route to route.
CONS
- Since the template of the entire web app needs to be loaded on the first request, the initial page load time is often longer than server-rendered applications.
- Search engine crawling is less optimized. With modern browsers, there is some good progress being made on crawling SPAs for search engines, but it isn’t nearly as efficient as server-side routed websites.
TINYHOUSE ROUTES
Our TinyHouse application is going to be a Single-Page Application, or in other words - an application that is client-side routed. With that said, let’s brainstorm all the routes we’ll need based on how we want our app to perform.
In total, our TinyHouse application will have about 7 defined routes.
- The
/route (a.k.a. theindexroute). - The
/hostroute. - The
/listing/:idroute. - The
/listings/:locationroute. - The
/user/:idroute. - The
/loginroute. - The
/striperoute.
The index route ( / ) will display the homepage of our application. This is where we’ll have our landing page that explains TinyHouse as well as certain links to navigate the user to see the most premium listings, listings for popular cities, etc.
The /host route will be the location where a user can create a new listing. The page displayed in the /host route will check if a user is logged in to our application and connected to our 3rd party payment processor - Stripe. If the user is logged in and connected with Stripe, they’ll see a form where they’ll be able to fill in the details of their soon to be created listing.
The /listing/:id route will display the details of a single listing. This route will take an id as a dynamic URL parameter. If a user is to look at their own listing, the listing page will also display sensitive information such as the bookings that have been made for the listing.
The /listings/:location route will display all the listings matching a certain location. For example, if a user was interested in seeing the listings for the city of Toronto - they’ll navigate to the /listings/toronto route where the :location URL parameter in this context is toronto .
The /user/:id route will display the details of a single user and will also take an id URL parameter. If the user is to view their own user page, sensitive information such as the amount of income made will be shown.
The /login page will allow the user to begin the login process with their Google account. In addition, the /login page is going to be the redirect URL where Google OAuth will send the user to when signed in, with a code query parameter that we’ll use to authenticate the user in our application.
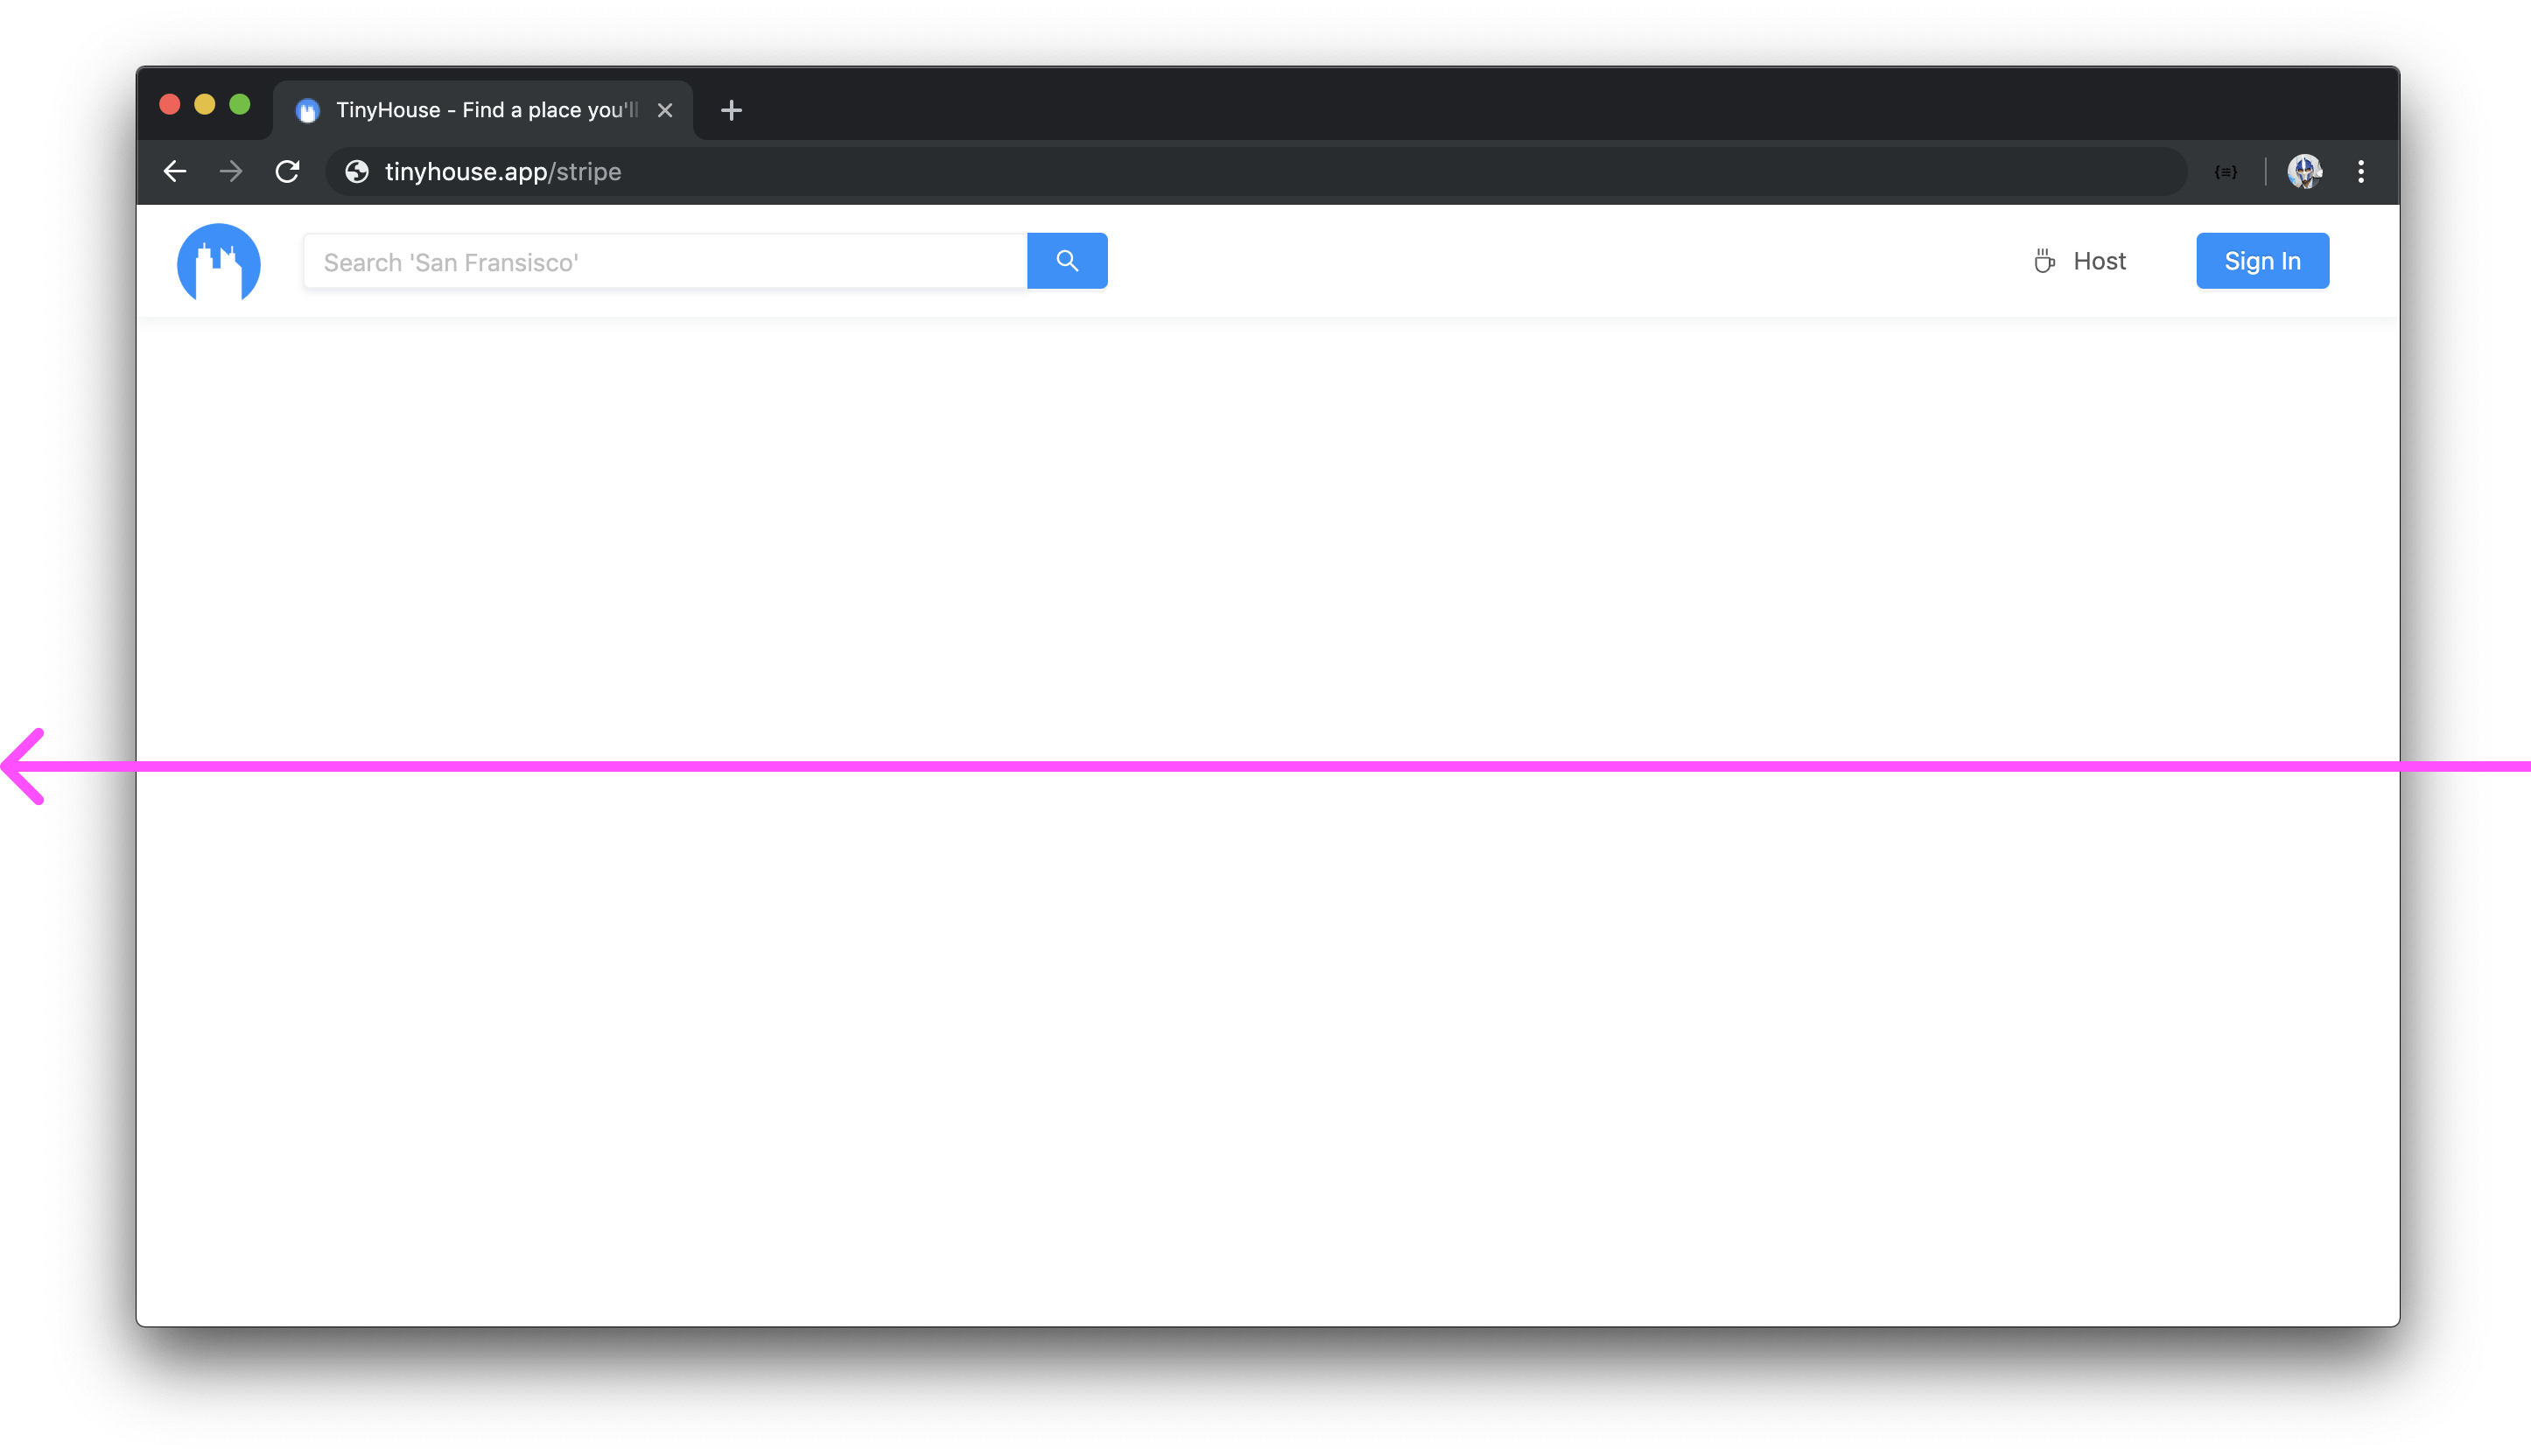
The /stripe page will be the redirect URL that Stripe OAuth will return, when a user connects with their Stripe account, with a code query parameter that we’ll use to communicate to our Node server. Unlike the login page, the stripe page will only be used for the redirect so if the user attempts to access the /stripe route directly in the URL bar, we’ll redirect them elsewhere.
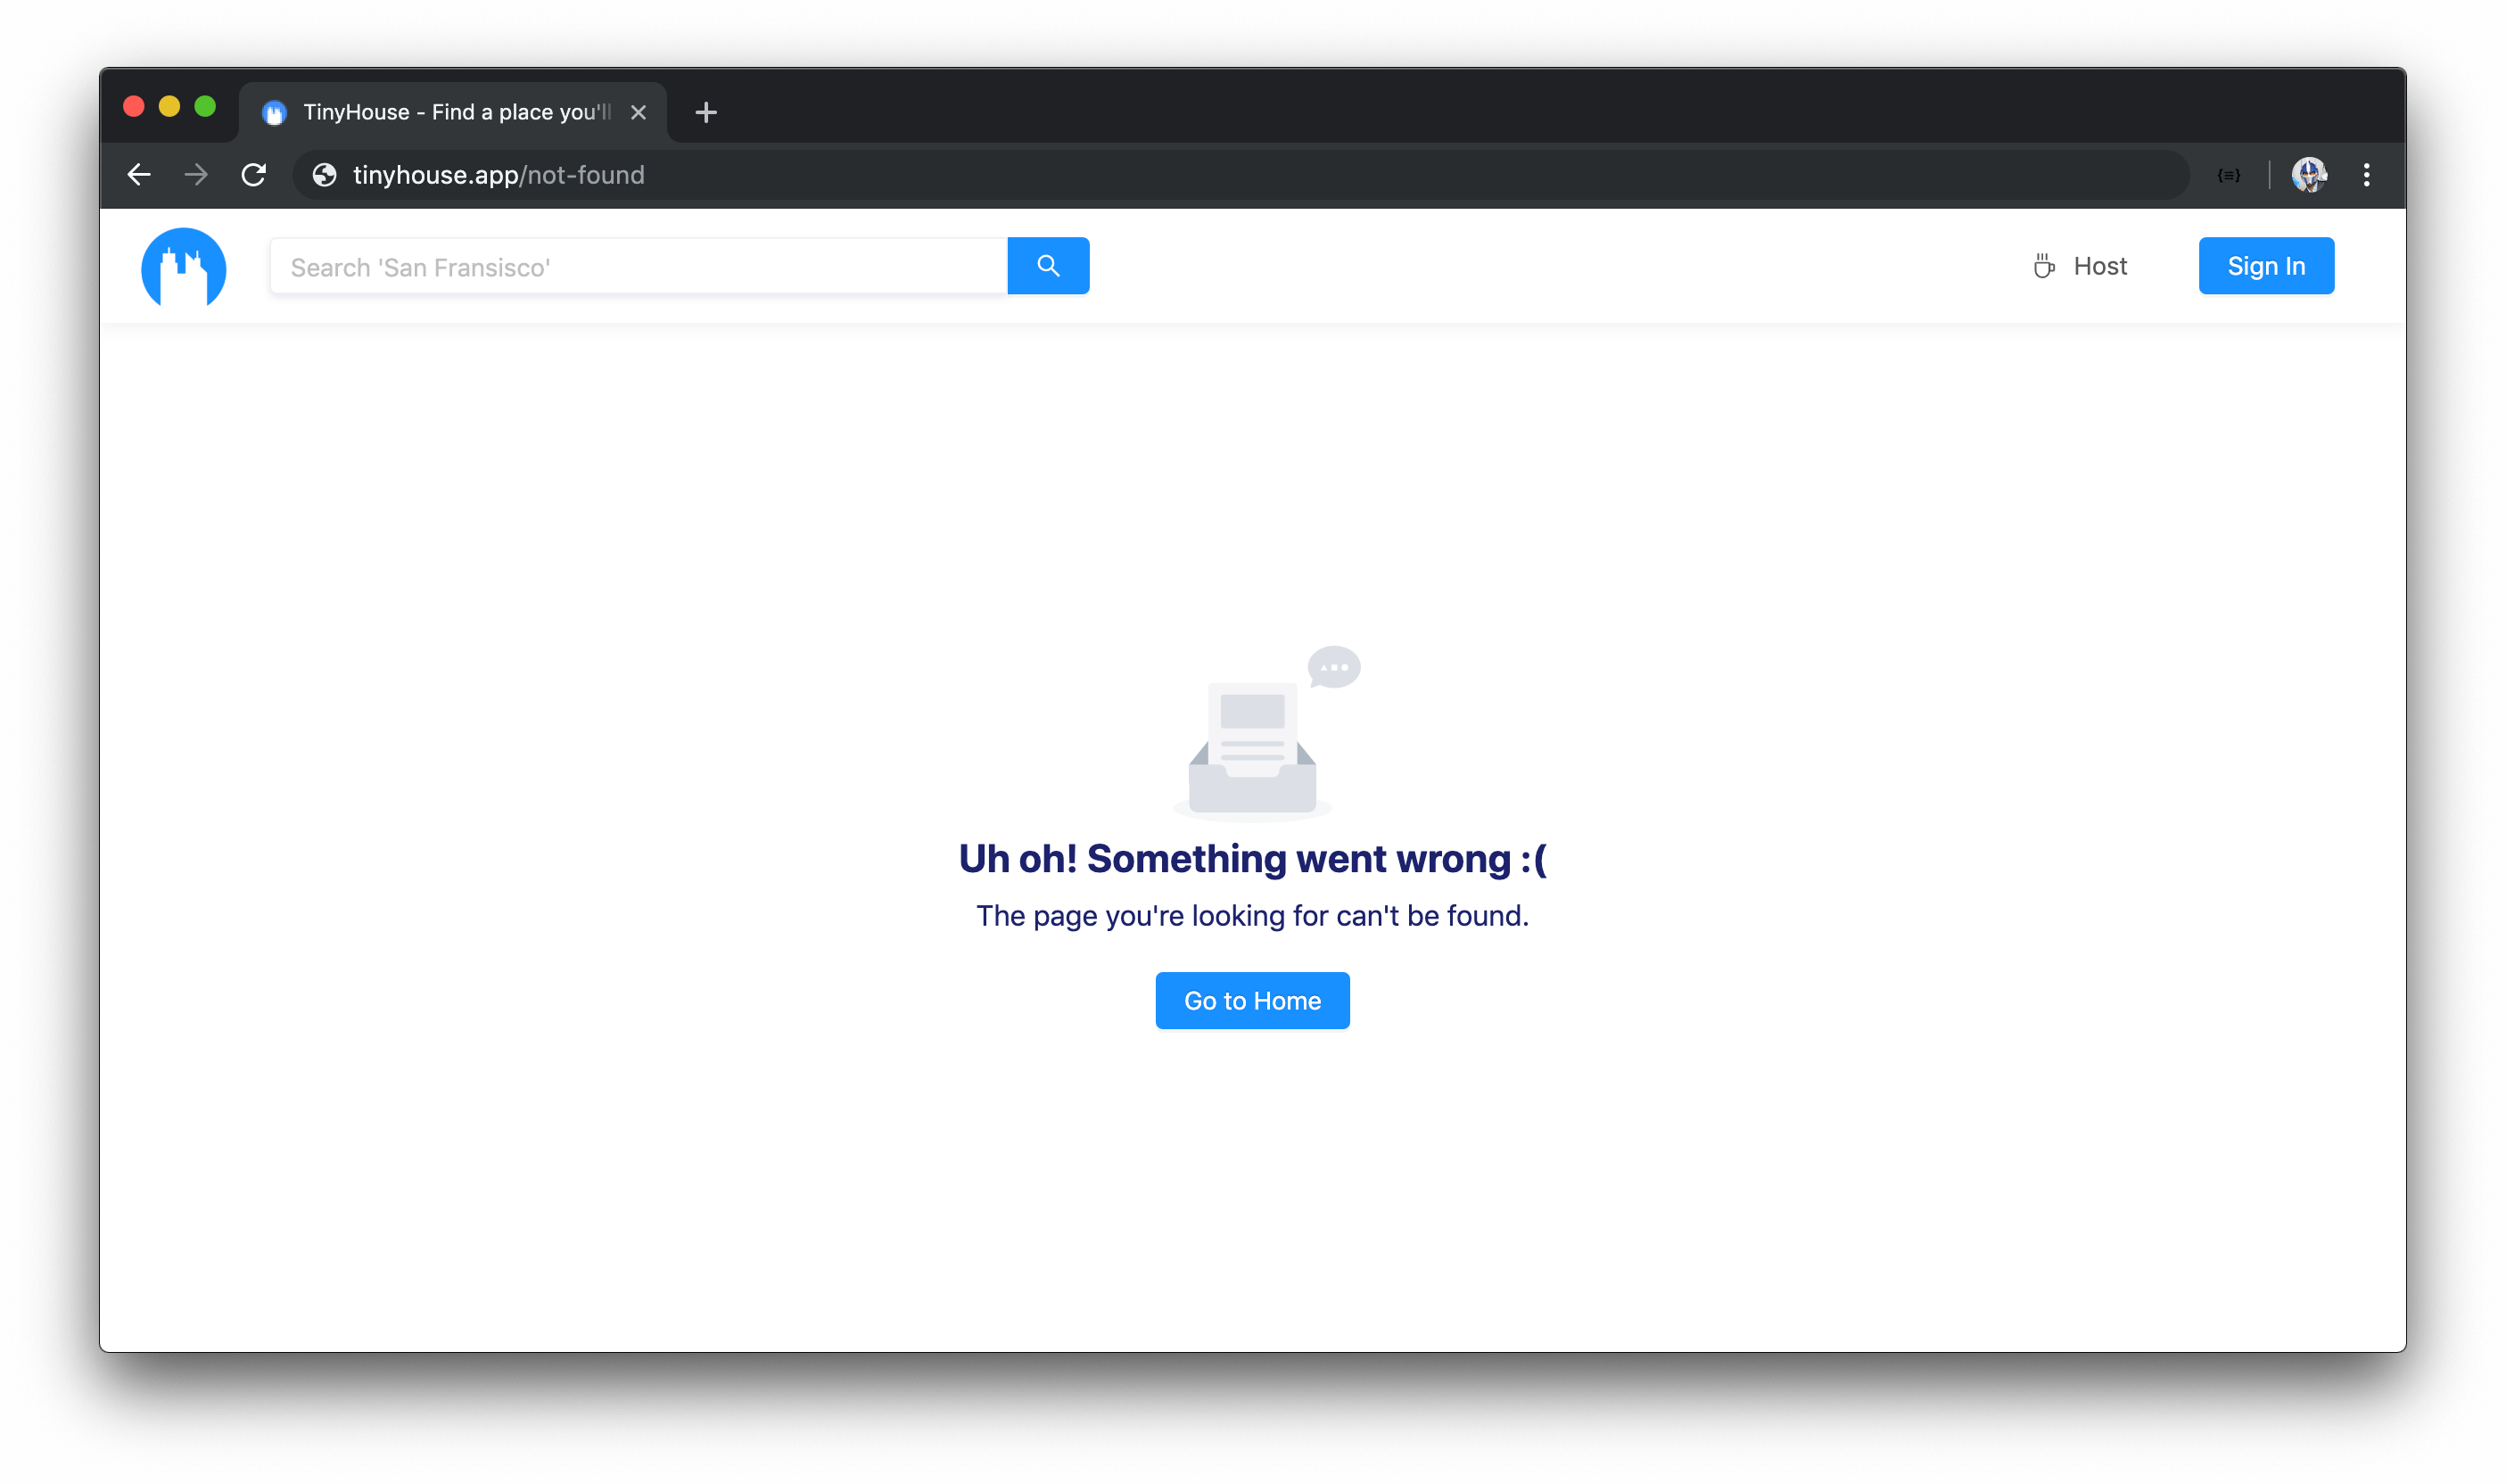
And finally, the page in the /not-found route will be shown to the user if the user attempts to access any route we haven’t established as a route of our application.
We’ll get a better understanding of what we intend to build for each of these routes as we proceed through the course.
REACT ROUTER
Note: In Module 15 (i.e. the Bonus Module), we’ve added a spin-off lesson titled React Router Hooks that describes how React Router now provides a few Hooks we can use! Through the course, feel free to use that lesson as a reference to recognize how certain things we may do later on (e.g. access URL parameters of a route) can be done with certain Hooks.
While many different routing libraries exist for React applications, the community’s clear favorite is React Router. React Router gives us a wonderful foundation for building rich applications that have numerous components across many different views and URLs.
We’ll install React Router into our application. In the terminal of our client project, we’ll install the react-router-dom library which is the React Router npm package. We’ll also install additional type definitions for the react-router-dom library.
npm install react-router-dom @types/react-router-dom
TINYHOUSE ROUTES
In the main src/index.tsx file where we render our React application, we’ll begin constructing the initial routes we’ll want to be defined. We’ll assume component files have already been set up in the sections folder, and we’ll look to import the components we want to render for separate routes. These would be the <Home /> , <Host /> , <Listing /> , <Listings /> , <NotFound /> , and <User /> components.
client/src/index.tsx
import { Home, Host, Listing, Listings, NotFound, User } from "./sections";
React Router provides a few separate components to help conduct client-side routing. At the core of every React Router application is the main router components - BrowserRouter & HashRouter . We’ll use BrowserRouter which is preferred for client-side routed applications since URL paths with BrowserRouter won’t have a hash (#) symbol. We’ll import BrowserRouter and label it as Router .
The
HashRoutercomponent sets URLs in hash mode . Hash mode URLs always contain a hash symbol (#) after the hostname. Hash mode means application routes will be displayed something like this -https://tinyhouse.app/#/host. The benefit to this often lies with allowing us to have multiple client-side routes without having to provide the necessary server-side fallbacks. This is because everything after the hash is never sent to the server .Our TinyHouse application is a single-page application which means the server will return the same index page regardless of which route the user is in. Because of this, hash mode URLs will be unnecessary which is why we conform to using the
BrowserRoutercomponent fromreact-router-dom.
For route matching, React Router also provides two other components - Switch and Route . We’ll import the Switch and Route components as well.
client/src/index.tsx
import { BrowserRouter as Router, Route, Switch } from "react-router-dom";
In the src/index.tsx file, we’ll construct a function component labeled App that will hold the responsibility in rendering a certain component based on the route the user is in. In the App component return statement, we’ll return the <Router /> component as the parent.
const App = () => {
  return <Router>{/* ... */}</Router>;
};
Within <Router /> , we’ll place the React Router <Switch/> component that will help control which routed component should be shown.
Route matching is done with the help of the React Router <Route/> component that takes a few props.
- The
pathprop is used to determine the pathname in which a certain component should be rendered. - The
componentprop is used to determine which component should be shown for a particular pathname.
We’ll set up our application routes as follows:
client/src/index.tsx
const App = () => {
  return (
    <Router>
      <Switch>
        <Route exact path="/" component={Home} />
        <Route exact path="/host" component={Host} />
        <Route exact path="/listing/:id" component={Listing} />
        <Route exact path="/listings/:location?" component={Listings} />
        <Route exact path="/user/:id" component={User} />
        <Route component={NotFound} />
      </Switch>
    </Router>
For each <Route /> component except the last, we’ve also used the exact prop to ensure that the intended components should only be rendered when the URL path matches the specified pathname exactly .
/
The index "/" route is to render the <Home /> component.
/host
The "/host" route is to render the <Host /> component.
/listing/:id
The "/listing/:id" route is to render the <Listing /> component. The :id syntax is how we’re stating the /listing route is to have an id URL parameter that is to be set dynamically in our application.
/listings/:location?
The "/listings/:location?" route is to render the <Listings /> component with a dynamic location URL parameter. The "?" in the route states that the location parameter is optional and the /listings route without the location parameter will still render the <Listings /> component.
/user/:id
The "/user/:id" route with a dynamic id parameter is to render the <User /> component.
/not-found
And finally, if a route is specified that we haven’t defined, React Router will default to the last route we’ve prepared that doesn’t have a path prop. We’ve stated in this condition, the <NotFound /> component will render.
We’ll now render the <App /> functional component we’ve created within our ReactDOM render() function.
client/src/index.tsx
render(
  <ApolloProvider client={client}>
    <App />
  </ApolloProvider>,
  document.getElementById("root")
);
At this moment, we haven’t created any of the components that are to be rendered in our app. With that said, let’s set up the different folders in our src/sections/ directory to represent the different components we want to be created.
client/
  src/
    // ...
    sections/
      Home/
      Host/
      Listing/
      Listings/
      NotFound/
      User/
    // ...
  // ...
In each of these folders, we’ll keep things simple and only create a single index.tsx file responsible for creating and returning the component function. We’ll state that each component function, for now, is to render the name of the route displayed to the user.
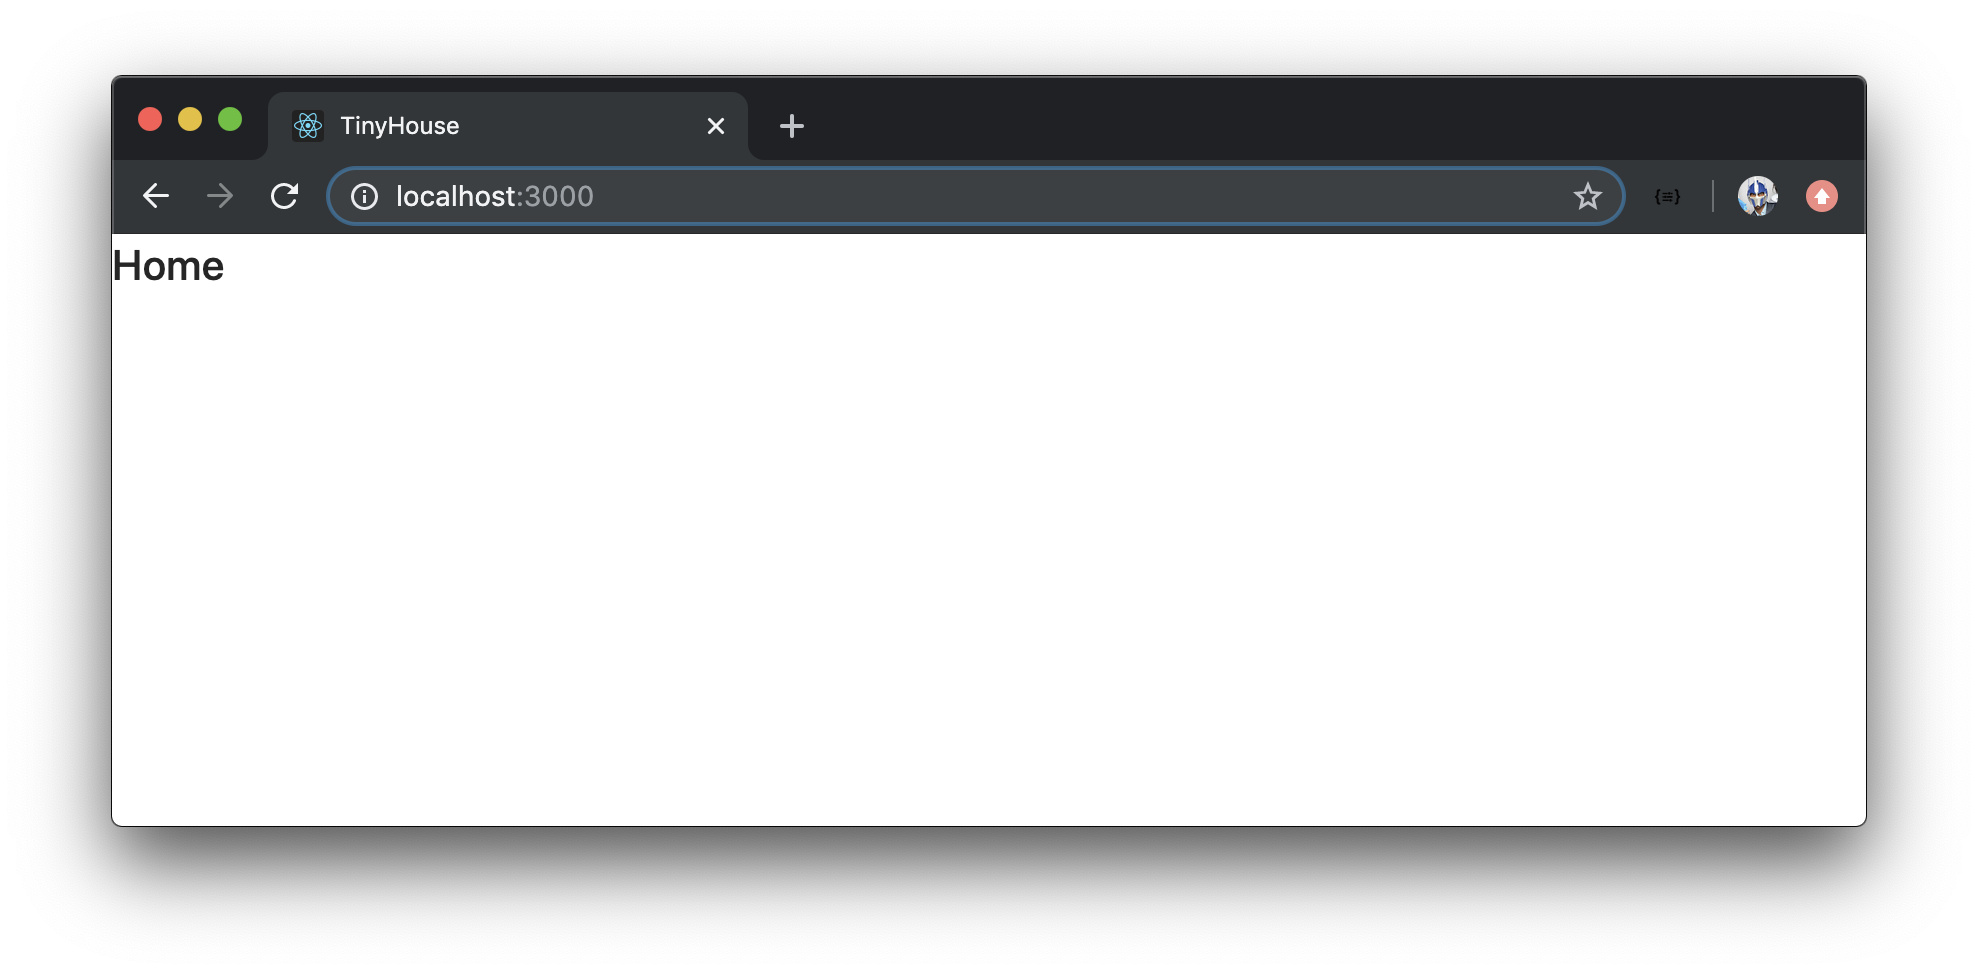
The <Home /> component will simply say "Home" :
client/src/sections/Home/index.tsx
import React from "react";

export const Home = () => {
  return <h2>Home</h2>;
};
The <Host /> component will say "Host" :
client/src/sections/Host/index.tsx
import React from "react";

export const Host = () => {
  return <h2>Host</h2>;
};
The <Listing /> component will say "Listing" :
client/src/sections/Listing/index.tsx
import React from "react";

export const Listing = () => {
  return <h2>Listing</h2>;
};
We’ll remove all the work we’ve done in our sections/Listings/ folder from Part I of the course. We’ll simply have an index.tsx file contained within where a <Listings /> component is to say "Listings" :
client/src/sections/Listings/index.tsx
import React from "react";

export const Listings = () => {
  return <h2>Listings</h2>;
};
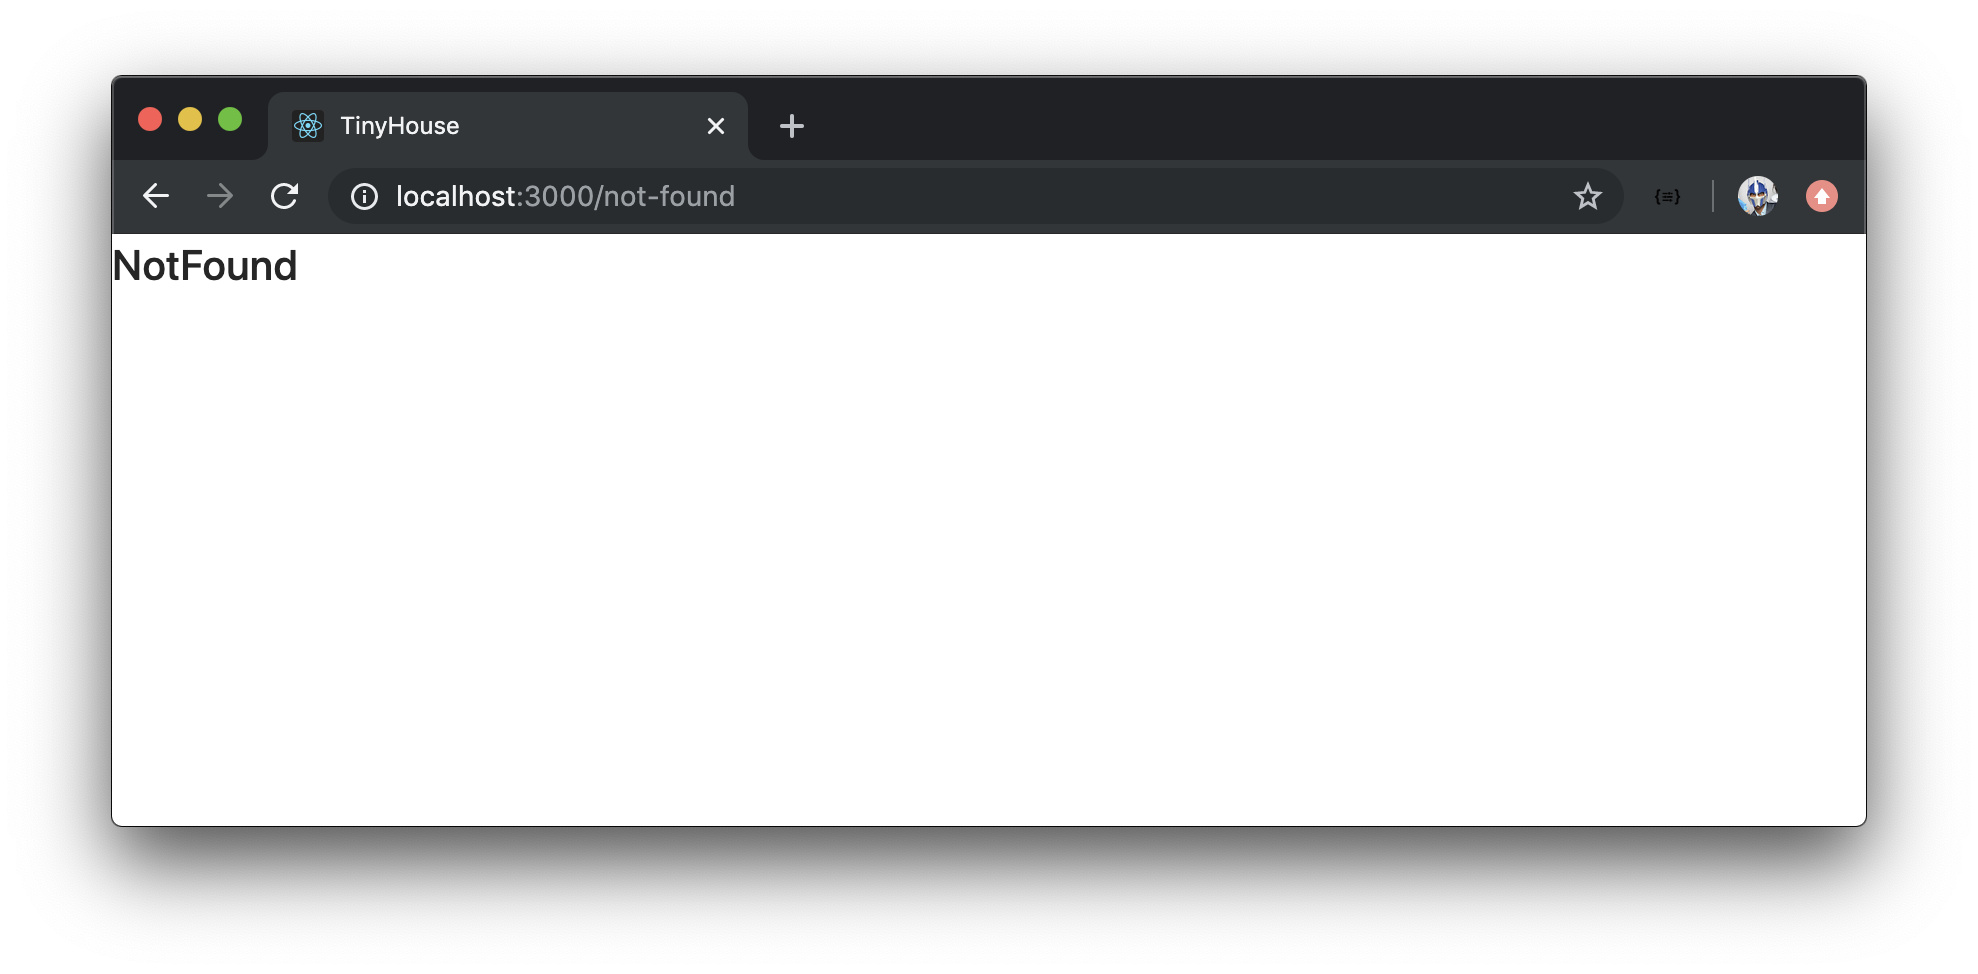
The <NotFound /> component will say "NotFound" :
client/src/sections/NotFound/index.tsx
import React from "react";

export const NotFound = () => {
  return <h2>NotFound</h2>;
};
And the <User /> component will say "User" :
client/src/sections/User/index.tsx
import React from "react";

export const User = () => {
  return <h2>User</h2>;
};
In the sections/index.ts file, we’ll re-export all the created components so the components can be imported directly from the sections/ folder.
client/src/sections/index.ts
export * from "./Home";
export * from "./Host";
export * from "./Listing";
export * from "./Listings";
export * from "./NotFound";
export * from "./User";
When we save all our changes and launch our client application in the browser, we’ll be displayed with the <Home /> component in the index route.
When we navigate to the different routes we’ve set up, we’ll see the individual components that should show for each route. For example, when we head to the /host route, we’ll see the <Host /> component.

When we visit /listing/:id and provide an id parameter, we’ll see the <Listing /> component.

When we visit /listings/:location? and provide a value for the location parameter, we’ll be presented with the <Listings /> component.

Visting /user/:id with an id parameter will show us the <User /> component.

If we enter a random route that we haven’t specified, our <NotFound /> component will show.
Amazing. We’re now officially using React Router to display different components in different client-side routes. We’ll build a few of the other routes we’ll have in our application (e.g. /login and /stripe ) when we begin to work on those sections.
MODULE 3 INTRODUCTION
In Part I of the course, we introduced MongoDB as a non-relational database that doesn’t require to have a schema associated with it. However, with the help of TypeScript, we can type define the shape of the data we insert and receive from a MongoDB database.
We’ll spend some time constructing the shape of documents we intend to store for the different collections we’ll establish in Part II of the course. In Part II, we’ll work with three collections:
-
"users"collection to store user data. -
"listings"collection to store listing data. -
"bookings"collection to store booking data.
In this module, we’ll work on the server project and:
- Declare the three collections we intend to create.
- With TypeScript, describe the shape of documents we intend to store for each collection.
- Seed the collections in our database with mock data that we’ve prepared and will provide to you.
DATABASE COLLECTION STRUCTURE
We’ll now shift our focus to the server. In this lesson, we’ll brainstorm the structure of our database.
In a MongoDB database, related objects (i.e. documents) are stored in a collection. A database is simply a group of collections. The number of collections we need is directly related to what our app would need to do.
In our TinyHouse application, we’ll create and use three collections:
- A
"users"collection. - A
"listings"collection. - And a
"bookings"collection.
USERS COLLECTION
We’ll need a collection to store the users of our application. In the src/database/index.ts file of our server project, there exists a connectDatabase() function responsible for connecting our MongoDB Atlas cluster with our Node server project. In the return object of this function, we’ll state a new users field to declare that we want to access a "users" collection from our database. We’ll specify the access to the users collection with the db.collection() function available to us from the Node Mongo driver.
import { MongoClient } from "mongodb";
import { Database } from "../lib/types";

const url = `mongodb+srv://${process.env.DB_USER}:${process.env.DB_USER_PASSWORD}@${process.env.DB_CLUSTER}.mongodb.net`;

export const connectDatabase = async (): Promise<Database> => {
  // ...

  return {
    // ...,
    users: db.collection("users")
  };
};
We’ll look to create a type definition for our user documents to describe the shape of a single document within the "users" collection. We’ll do this in the src/lib/types.ts file.
MongoDB automatically creates an _id field of type ObjectId for any document we insert into a collection. Before we discuss the other fields of a user document, we’ll state that the _id field will exist. We’ll create an interface intended to describe the shape of a single User , and we’ll state the _id field to be of type ObjectId .
import { ObjectId } from "mongodb";

export interface User {
  _id: ObjectId;
}
We’ll then introduce a users field into the Database interface that exists within this types.ts file that is used to describe the shape of the returned database object from the connectDatabase() function. We’ll say the users field type is the Collection generic and we’ll pass the User type as the type argument.
import { Collection, ObjectId } from "mongodb";

...

export interface User {
  _id: ObjectId;
}

export interface Database {
  ...
  users: Collection<User>;
}
In the database/index file, we’ll import the User interface type we’ve just created and pass it into the db.collection() function that acts as a generic as well.
import { MongoClient } from "mongodb";
import { Database, User } from "../lib/types";

const url = `mongodb+srv://${process.env.DB_USER}:${process.env.DB_USER_PASSWORD}@${process.env.DB_CLUSTER}.mongodb.net`;

export const connectDatabase = async (): Promise<Database> => {
  // ...

  return {
    // ...,
    users: db.collection<User>("users")
  };
};
LISTINGS COLLECTION
Since our app is going to allow users to create listings to rent, we’ll need a collection to store these listings. We already have a listings field be declared in the connectDatabase() function of our server project for a "test_listings" collection we set up in Part I of the course. We’ll keep the listings field but instead, we’ll say the field should be a reference to a collection that is to be named "listings" .
import { MongoClient } from "mongodb";
import { Database, User } from "../lib/types";

const url = `mongodb+srv://${process.env.DB_USER}:${process.env.DB_USER_PASSWORD}@${process.env.DB_CLUSTER}.mongodb.net`;

export const connectDatabase = async (): Promise<Database> => {
  // ...

  return {
    listings: db.collection("listings"),
    users: db.collection<User>("users")
  };
};
In the src/lib/types.ts file, we have a Listing interface type be created from Part I of the course as well. We’re not sure how the document is to be shaped just yet so we’ll remove all the other fields except for the _id field.
The Listing interface is currently being used as the type argument for the Collection interface type of the listings field within the Database interface.
import { Collection, ObjectId } from "mongodb";

export interface Listing {
  _id: ObjectId;
}

// ...

export interface Database {
  listings: Collection<Listing>;
  users: Collection<User>;
}
With that said, we’ll import the Listing interface type in our src/database/index.ts file, and place it as a type variable in the db.collection() function that references the "listings" collection.
import { MongoClient } from "mongodb";
import { Database, Listing, User } from "../lib/types";

const url = `mongodb+srv://${process.env.DB_USER}:${process.env.DB_USER_PASSWORD}@${process.env.DB_CLUSTER}.mongodb.net`;

export const connectDatabase = async (): Promise<Database> => {
  // ...

  return {
    listings: db.collection<Listing>("listings"),
    users: db.collection<User>("users")
  };
};
BOOKINGS COLLECTION
Finally, when a user is to eventually book a listing to stay at, we’ll need a collection to store the data that represents a single booking . This bookings collections might not seem necessary but will be more clear once we define the structure of our documents in the next lesson. For now, think of a booking as a “ticket” or a “receipt” that identifies the customer instead of the owner.
We’ll introduce a bookings field in the return statement of our connectDatabase() function and state that the collection is "bookings" .
import { MongoClient } from "mongodb";
import { Database, Listing, User } from "../lib/types";

const url = `mongodb+srv://${process.env.DB_USER}:${process.env.DB_USER_PASSWORD}@${process.env.DB_CLUSTER}.mongodb.net`;

export const connectDatabase = async (): Promise<Database> => {
  // ...

  return {
    bookings: db.collection("bookings"),
    listings: db.collection<Listing>("listings"),
    users: db.collection<User>("users")
  };
};
In the src/lib/types.ts file, we’ll create an interface that is to represent the shape of a single booking document and we’ll state it is to have an _id field of type ObjectId . We’ll also specify the bookings field and its appropriate type ( Collection<Booking> ) in our Database interface.
import { Collection, ObjectId } from "mongodb";

export interface Booking {
  _id: ObjectId;
}

// ...

export interface Database {
  bookings: Collection<Booking>;
  listings: Collection<Listing>;
  users: Collection<User>;
}
In the connectDatabase() function within the src/database/index.ts file, we’ll import the Booking interface type and place it as the type variable of our db.collection() function that references the bookings collection.
At this moment, our src/database/index.ts file will look like the following:
server/src/database/index.ts
import { MongoClient } from "mongodb";
import { Database, Booking, Listing, User } from "../lib/types";

const url = `mongodb+srv://${process.env.DB_USER}:${process.env.DB_USER_PASSWORD}@${process.env.DB_CLUSTER}.mongodb.net`;

export const connectDatabase = async (): Promise<Database> => {
  const client = await MongoClient.connect(url, { useNewUrlParser: true });
  const db = client.db("main");

  return {
    bookings: db.collection<Booking>("bookings"),
    listings: db.collection<Listing>("listings"),
    users: db.collection<User>("users")
  };
};
We’ve defined the three collections ( bookings , listings , and users ) we expect to interact with from our database and in our Node server project. In the next lesson, we’ll look to declare the types of the fields for each document that is to be stored in each of these collections. In other words, we’ll look to declare the shape of the data we expect to store in each of these collections.
DATABASE DOCUMENT STRUCTURE
We’ll now look to determine the structure of the documents that are to be stored in the separate database collections.
If we recall, we’ve discussed how MongoDB (and NoSQL databases in general) don’t require us to have a predefined schema for the data we intend to insert in a database. With that said, we’ll still want our application to prepare for the kind of data it expects to receive. As a result, the structure we define here is important since it’ll help us prepare for the data we expect in our TypeScript code.
USER
First, let’s define what a user is in our database.
Although MongoDB automatically creates an _id field of type ObjectId for us when we create a new user, we’re going to default to using a string type here instead. The reason being, when we use the third-party service, Google OAuth, to authenticate our users; that service will instead return a string value to identify a specific user. We’ll use that string value as the _id field for our user documents. We’ll get a better understanding of this once we begin at the authentication section of our course.
We could very well also attempt to convert the string
idvalue returned from the third-party service to anObjectIdformat, but in our case, we’ll simply store it as astringfor the_idfield.
export interface User {
  _id: string;
}
A user will have a token field to store the user’s login session token with which will be of type string .
export interface User {
  _id: string;
  token: string;
}
A user will have a name field which is a reference to the user’s human-readable name. This name field will also be of type string .
export interface User {
  _id: string;
  token: string;
  name: string;
}
A user will have an avatar field to store the user’s avatar image. This will be of type string since the data of these fields will be image URLs.
export interface User {
  _id: string;
  token: string;
  name: string;
  avatar: string;
}
We’ll give our user a contact field of type string which will be used to store the user’s email address.
export interface User {
  _id: string;
  token: string;
  name: string;
  avatar: string;
  contact: string;
}
Next, we’ll eventually need an identifying field to store a user’s payment details. We’ll create a field for this called walletId . walletId will be of type string or be undefined . When a user’s walletId field has a valid string value, the user will be able to receive money. If walletId is undefined , then the user will have yet to have linked their payment information and as a result won’t be able to receive money yet.
The walletId value will be populated once the user has authenticated with the third-party payment processor we’ll eventually use in our app - Stripe.
export interface User {
  _id: string;
  token: string;
  name: string;
  avatar: string;
  contact: string;
  walletId?: string;
}
Next, we’ll have an income field of type number which will be used to store the user’s total income.
export interface User {
  _id: string;
  token: string;
  name: string;
  avatar: string;
  contact: string;
  walletId?: string;
  income: number;
}
We’ll get a clearer understanding of how the
walletIdandincomefields work once we begin the lessons that involve authenticating and using Stripe.
A user document will also have a bookings field to store the bookings the user has made. This field will be an array of ObjectId values. And each id element in this array will refer to a document inside of our bookings collection. This type of relationship is a One-to-Many relationship. where one user object will hold references to many booking objects.
export interface User {
  _id: string;
  token: string;
  name: string;
  avatar: string;
  contact: string;
  walletId?: string;
  income: number;
  bookings: ObjectId[];
}
A user document will also have a listings field to store the listings a user has created. This field will also be an array of ObjectId values and each element in this array will refer to a document inside of our listings collection. Another One-to-Many relationship.
At this moment, the User interface will look as follows:
server/src/lib/types.ts
export interface User {
  _id: string;
  token: string;
  name: string;
  avatar: string;
  contact: string;
  walletId?: string;
  income: number;
  bookings: ObjectId[];
  listings: ObjectId[];
}
LISTING
We’ll now define the shape of a listing document in our database within a Listing interface. The first thing we need is an _id field. This time, unlike the User interface, we’ll have the _id field be of the automatically generated type ObjectId type.
export interface Listing {
  _id: ObjectId;
}
Our listings will have title and description fields, both of type string . These fields will be used to store the listing’s title and description information.
export interface Listing {
  _id: ObjectId;
  title: string;
  description: string;
}
We’ll state that our listings are to have an image field of type string . These will be used to store the listing’s image URL.
export interface Listing {
  _id: ObjectId;
  title: string;
  description: string;
  image: string;
}
Since each listing must have a host (i.e. owner), we’ll reference who this host is with a host field. This will be used to hold a reference to the host by storing the host user’s _id . Therefore, the type for this field must be the same as our user’s _id field - string . This is an example of a One-to-One relationship, where one listing holds a reference to one host.
export interface Listing {
  _id: ObjectId;
  title: string;
  description: string;
  image: string;
  host: string;
}
Next, we’re interested in introducing a type field which is to be of one of two values - either an APARTMENT or a HOUSE . To define a known set of named constants, we’ll use a TypeScript enum type. We’ll declare the enum type above our Listing interface and call it ListingType .
export enum ListingType {}

export interface Listing {
  _id: ObjectId;
  title: string;
  description: string;
  image: string;
  host: string;
}
Enums in TypeScript could have numeric or string values. In our case, we’ll want our enum to be a set of constants with string values. We’ll state an Apartment property of "APARTMENT" and a house property of "HOUSE" .
export enum ListingType {
  Apartment = "APARTMENT",
  House = "HOUSE"
}
In our Listing interface, we’ll set the type of the type field as ListingType which is to be one of the two constants we’ve specified in our ListingType enum.
export interface Listing {
  _id: ObjectId;
  title: string;
  description: string;
  image: string;
  host: string;
  type: ListingType;
}
We’ll now specify our listings is to have an address , country , admin , and city fields - all of which will be of type string . These fields will be used to store the listing’s geographic information.
export interface Listing {
  _id: ObjectId;
  title: string;
  description: string;
  image: string;
  host: string;
  type: ListingType;
  address: string;
  country: string;
  admin: string;
  city: string;
}
adminis analogous to the concept of states or provinces . We’ll get a better understanding of the location specific fields once we begin to discuss how we intend to geocode locations in our app.
Just like our user documents, our listing documents will also have a bookings field to reference any bookings made against itself. Similarly, this field will be an array of ObjectId values where each ObjectId item is to reference a document in the bookings collection.
export interface Listing {
  _id: ObjectId;
  title: string;
  description: string;
  image: string;
  host: string;
  type: ListingType;
  address: string;
  country: string;
  admin: string;
  city: string;
  bookings: ObjectId[];
}
BOOKINGSINDEX
In a listing document, we’ll create another field that’s a little more complex. This field will essentially help handle how we can ensure that when a user books a listing, another user doesn’t create a booking where the dates overlap.
In software programming, handling dates is hard. Questions like how do handle different geographic areas with different timezones, daylight savings time, leap seconds, the ability to compare times, etc. all have to be answered. Many different libraries (e.g. Moment.js ) exist to help with a lot of these use cases.
With that being said though, we’re not going to go through a difficult approach to look into how we can best handle how dates are captured when a booking is made to a listing. We’ll introduce an index that will essentially be nested key-value pairs that captures all the dates that a listing is not available because of a previous booking.
Here’s an example. Assume the following dates are booked with the dates listed here in the YYYY-MM-DD format.
// 2019-01-01   year: 2019 | month: 01 | day: 01
// 2019-01-02   year: 2019 | month: 01 | day: 02
// 2019-05-31   year: 2019 | month: 05 | day: 31
We’ll call the index we’ll create to represent these dates that have already been booked bookingsIndex , and will look something like this:
// 2019-01-01   year: 2019 | month: 01 | day: 01
// 2019-01-02   year: 2019 | month: 01 | day: 02
// 2019-05-31   year: 2019 | month: 05 | day: 31

const bookingsIndex = {
  "2019": {
    "00": {
      "01": true,
      "02": true
    },
    "04": {
      "31": true
    }
  }
};

// NOTE: the JavaScript function for getting the month returns 0 for Jan ... and 11 for Dec
The bookings index is to be nested key-value pairs where the first key is a reference to the year a booking is made.
const bookingsIndex = {
  "2019": {
    // Bookings made in 2019
  }
};
The value provided to the first key is the months in which the booking is made.
const bookingsIndex = {
  "2019": {
    "00": {
      // Bookings made in January 2019
    },
    "04": {
      // Bookings made in May 2019
    }
  }
};
The values provided in the nested keys representing the months booked will contain references to the days a booking is made.
const bookingsIndex = {
  "2019": {
    "00": {
      "01": true, // Booking made in January 01, 2019
      "02": true // Booking made in January 02, 2019
    },
    "04": {
      "31": true // Booking made in May 31, 2019
    }
  }
};
In the example above, bookings have been made in 2019-01-01 , 2019-01-02 , and 2019-05-31 so we have the values of bookingsIndex[2019][00][01] , bookingsIndex[2019][00][02] , and bookingsIndex[2019][04][31] all return true to represent this.
The default JavaScript function for getting the month of a date returns
0for the first month of the year and11for the last month of the year. This is reflected in how we prepare the keys for the “month” nested objects inbookingsIndex.
Why are we using objects here as the data structure within our index? This is because values in objects (i.e. hash values) can, on average, be accessed in constant time which is much computationally cheaper than having arrays where we have to iterate through a series of values to search for a particular element.
With all that said, let’s introduce a bookingsIndex field in our Listing interface and we’ll say the type of bookingsIndex is to be an interface called BookingsIndex .
export interface BookingsIndex {}

export interface Listing {
  // ...,
  bookingsIndex: BookingsIndex;
}
BookingsIndex will be an interface that is to contain objects that represent the year a booking is made. key-value pairs in TypeScript can be defined as an index signature , where the key is to be a string and the value is to be another interface. For BookingsIndex , the nested value in the index signature will be another interface we’ll call BookingsIndexYear .
interface BookingsIndexYear {}

export interface BookingsIndex {
  [key: string]: BookingsIndexYear;
}

export interface Listing {
  // ...,
  bookingsIndex: BookingsIndex;
}
The BookingsIndexYear interface will also be an object of key-value pairs but the value is to be an object that represents the months a booking is made. As a result, this will be another index signature where the value is to have the shape of another interface we’ll call BookingsIndexMonth .
interface BookingsIndexMonth {}

interface BookingsIndexYear {
  [key: string]: BookingsIndexMonth;
}

export interface BookingsIndex {
  [key: string]: BookingsIndexYear;
}

export interface Listing {
  // ...,
  bookingsIndex: BookingsIndex;
}
BookingIndexMonth will also be an object of key-value pairs but the value, in this case, is to be a boolean . The boolean values will indicate which days in the month have been booked.
Here’s a representation of the nested object structure of the bookingsIndex field. It is to be an object of objects that is to then have boolean values.
interface BookingsIndexMonth {
  [key: string]: boolean;
}

interface BookingsIndexYear {
  [key: string]: BookingsIndexMonth;
}

export interface BookingsIndex {
  [key: string]: BookingsIndexYear;
}

export interface Listing {
  // ...,
  bookingsIndex: BookingsIndex;
}
We’ll now also state our listing documents are to have a price field of type number that is to represent the price of the listing per day as set by the host.
export interface Listing {
  _id: ObjectId;
  title: string;
  description: string;
  image: string;
  host: string;
  type: ListingType;
  address: string;
  country: string;
  admin: string;
  city: string;
  bookings: ObjectId[];
  bookingsIndex: BookingsIndex;
  price: number;
}
Finally, our listing documents will also have a numOfGuests field which is to be a number and represents the maximum number of guests a listing can have.
Our Listing interface in it’s entirety will look like the following:
export interface Listing {
  _id: ObjectId;
  title: string;
  description: string;
  image: string;
  host: string;
  type: ListingType;
  address: string;
  country: string;
  admin: string;
  city: string;
  bookings: ObjectId[];
  bookingsIndex: BookingsIndex;
  price: number;
}
BOOKING
Next, we’ll define what a booking is in our database and we’ll do this in an interface called Booking . The first thing this interface is to have is an _id field and we will state that it is to be of the automatically generated ObjectId type.
export interface Booking {
  _id: ObjectId;
}
We’ll want each booking to have a reference to which listing it refers to (i.e. which listing has been booked). With that said, the Booking interface will have a listing field of type ObjectId . This is another example of a One-to-One relationship.
export interface Booking {
  _id: ObjectId;
  listing: ObjectId;
}
We’ll also want each booking to have a reference to the tenant who’s making the booking. We’ll want this tenant field to represent the _id of the user who’s made the booking as another One-to-One relationship. Since the _id field of a user document is to be of type string , we’ll state that the tenant field is to be of type string as well.
export interface Booking {
  _id: ObjectId;
  listing: ObjectId;
  tenant: string;
}
Finally, we’ll have our booking documents contain checkIn and checkOut fields which will be of type string and is to store the booking’s date information (i.e. the dates the tenant attempts to check-in and check-out of the booking).
In the completed state, the Booking interface will look as follows:
server/src/lib/types.ts
export interface Booking {
  _id: ObjectId;
  listing: ObjectId;
  tenant: string;
  checkIn: string;
  checkOut: string;
}
And that’s it! This is almost all the details we’ll have for the different documents in our database collections. With that said, we’re going to explain in detail how each of the fields specified in our documents is to be created and used in our app when we start to build the different sections and portions of our app.
Oftentimes when an app is being built for the first time within a NoSQL setting, you might find yourself navigating back to where you specify the types of your data structure and change it from time to time. In our case, we’ve attempted to establish the collection and document structure in the beginning so we won’t have to come back and make a lot of changes as we move forward.
SEED & CLEAR DATA FROM MONGODB
Now that we have our database structure setup, let’s add some mock data to our database so we’ll have data that we can begin to use in our GraphQL resolvers and our client UI.
We’ll use the seed() function we’ve already created in Part I to help seed our database. This seed() function was created in the seed.ts file in the temp/ folder of our server project. We’ll make some changes to our seed() function and this file.
First, we’ll import the Listing , ListingType , and User type definitions from the src/lib/types.ts file.
server/temp/seed.ts
import { Listing, ListingType, User } from "../src/lib/types";
We’ll create two constants, outside of the seed function, labeled listings and users and assign the types for these constants as the Listing and User array type.
const listings: Listing[] = [];
const users: User[] = [];
Next, we’ll paste the mock data we’ve prepared for these constant values.
const listings: Listing[] = [
  {
    _id: new ObjectId("5d378db94e84753160e08b30"),
    title: "Clean and fully furnished apartment. 5 min away from CN Tower",
    description:
      "2 bed, 2 bathroom cozy apartment in the heart of downtown Toronto and only 5 min away from the CN Tower.",
    image:
      "https://res.cloudinary.com/tiny-house/image/upload/...",
    host: "5d378db94e84753160e08b57",
    type: ListingType.apartment,
    address: "3210 Scotchmere Dr W, Toronto, ON, CA",
    country: "Canada",
    admin: "Ontario",
    city: "Toronto",
    bookings: [],
    bookingsIndex: {},
    price: 12424,
    numOfGuests: 3,
    numOfBeds: 2,
    numOfBaths: 1,
    numOfStars: 768,
    numOfVotes: 768,
    rating: 1
  }
  // ...
];

const users: User[] = [
  {
    _id: "5d378db94e84753160e08b55",
    token: "token_************",
    name: "James J.",
    avatar:
      "https://res.cloudinary.com/tiny-house/image/upload/...",
    contact: "james@tinyhouse.com",
    walletId: "acct_************",
    income: 723796,
    bookings: [],
    listings: [
      new ObjectId("5d378db94e84753160e08b31"),
      new ObjectId("5d378db94e84753160e08b4b"),
      new ObjectId("5d378db94e84753160e08b4c")
    ]
  }
  // ...
];
Find the prepared mock data for listings here and for users here.
We’ve provided a total of around 37 listing documents with each object representing a single listing that has been submitted to our application. The listings here in this mock data cover six cities around the world - Toronto , Dubai , Los Angeles , London , San Fransisco , and Cancun . All the data here is mock data with free to use images and made-up information about the details of a listing such as the address.
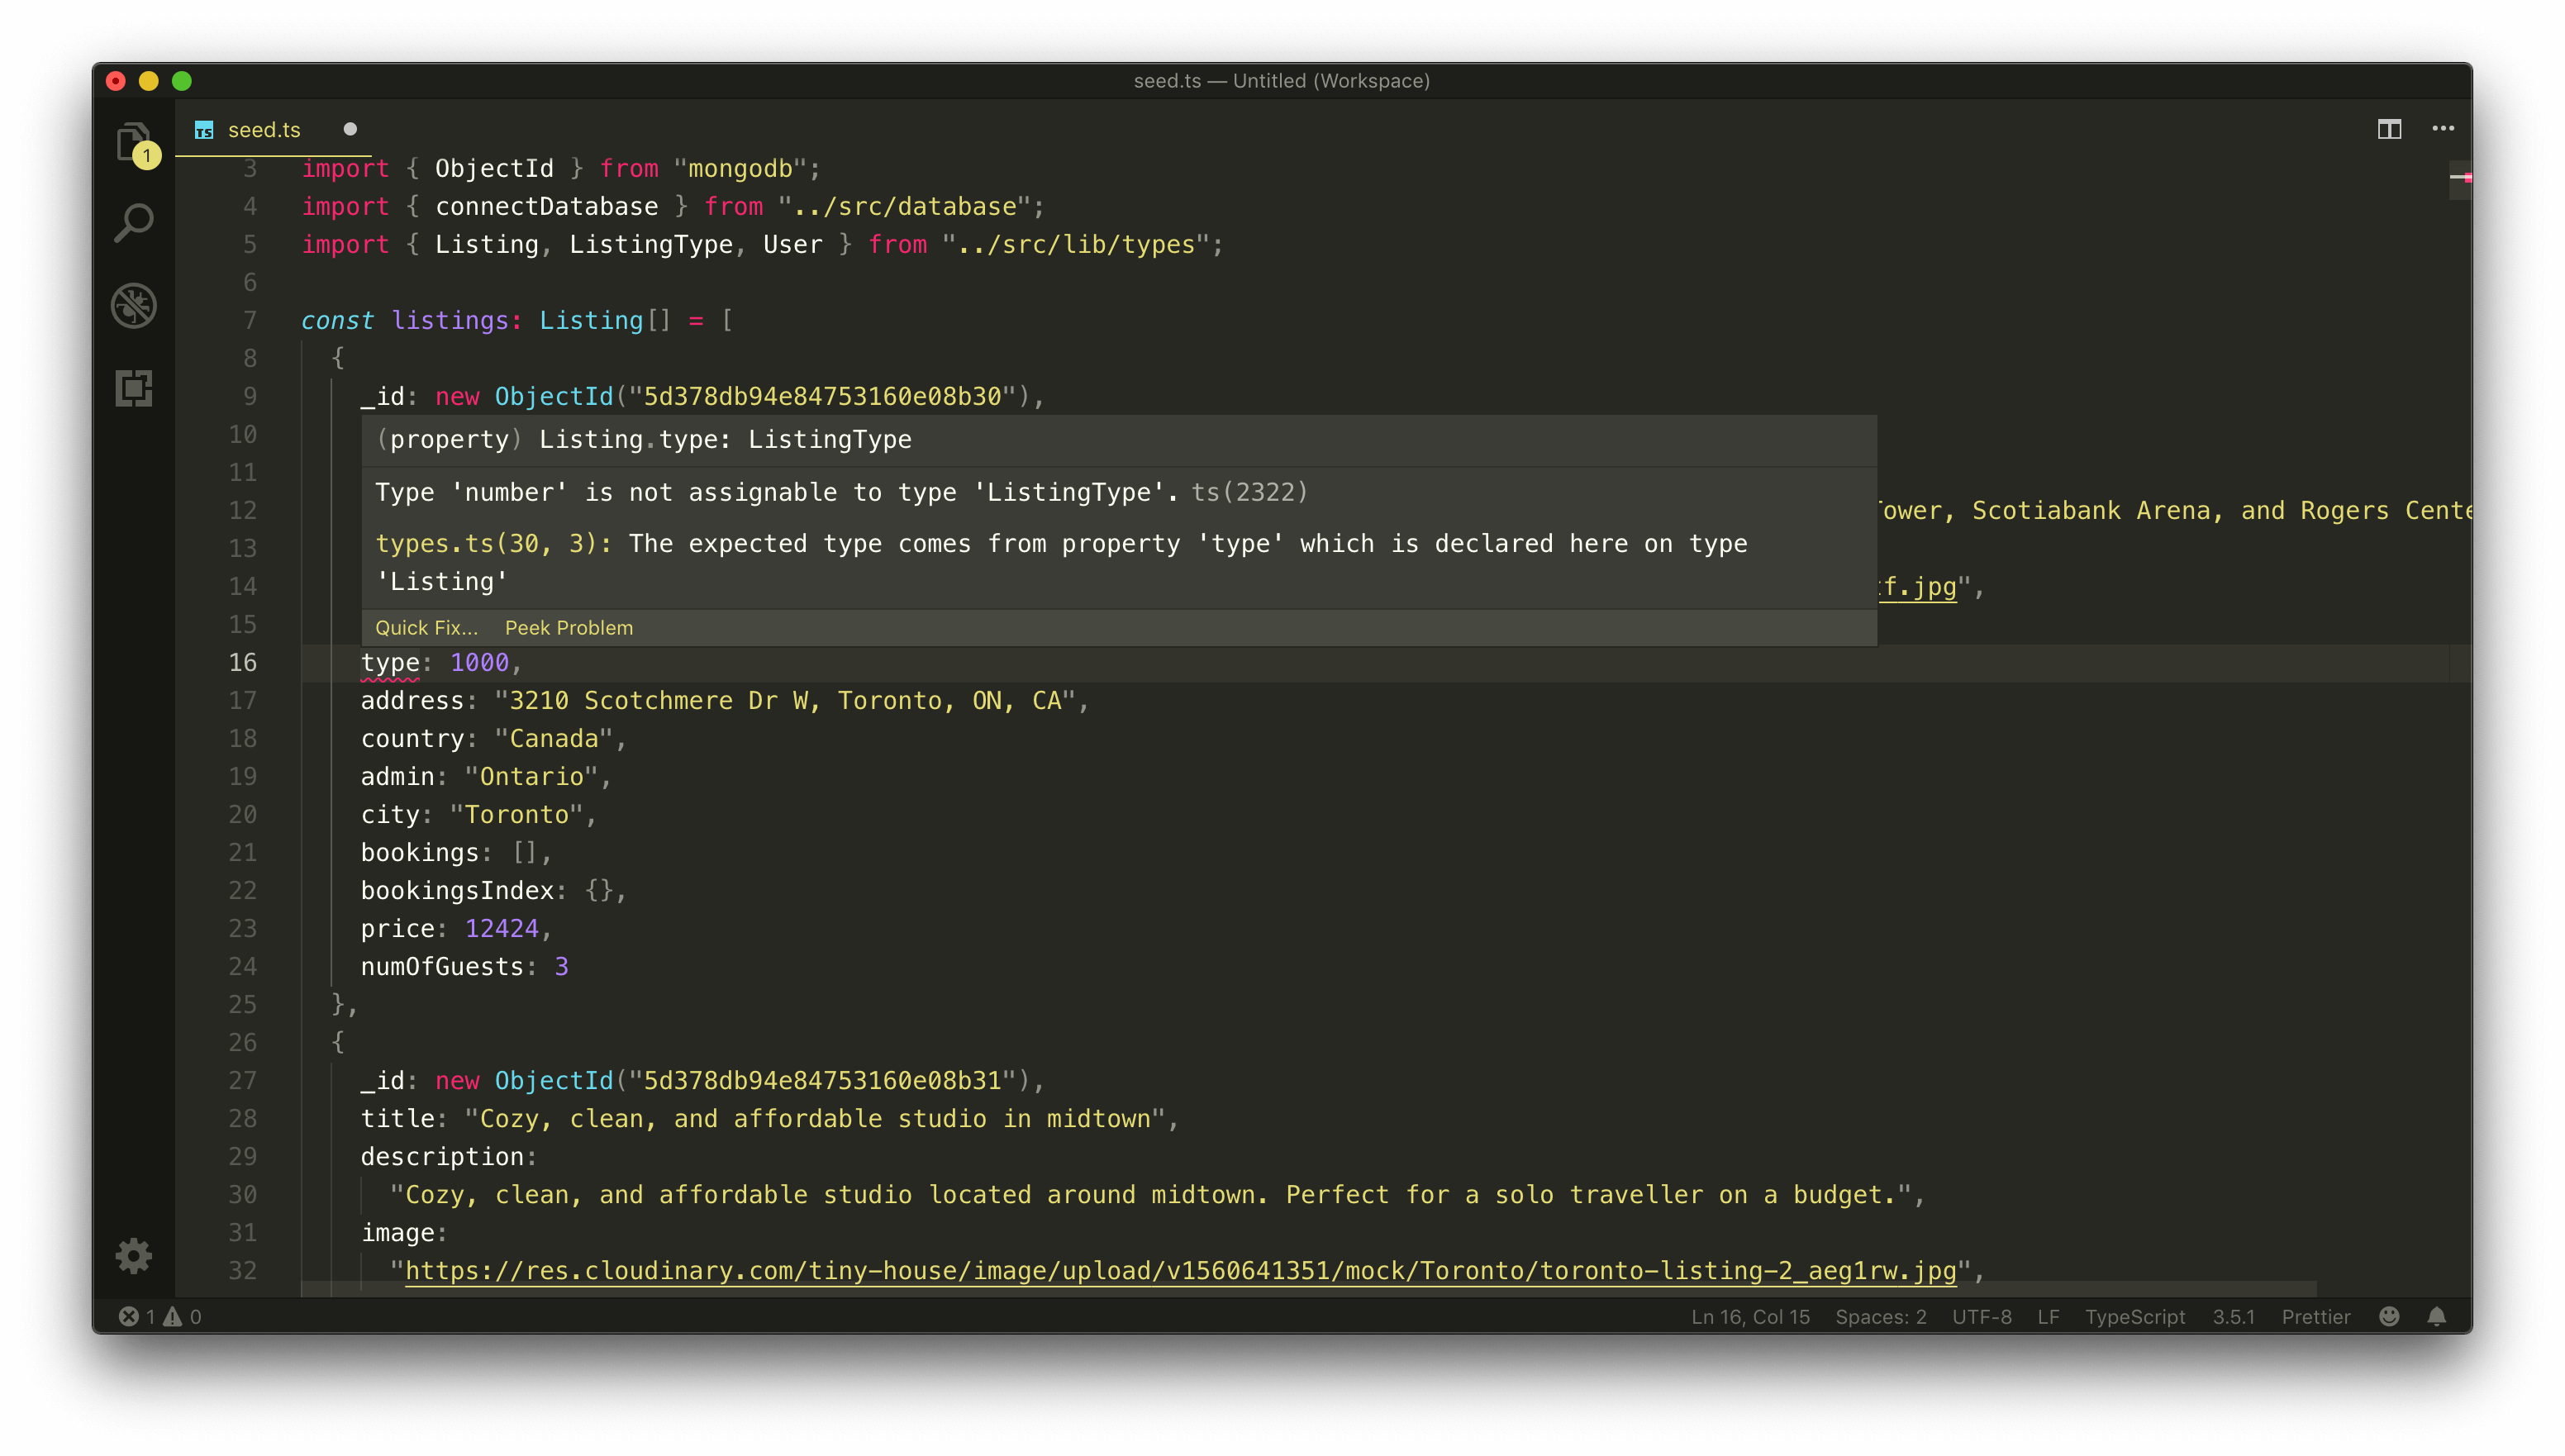
Each of these listings conforms to the Listing Interface shape we’ve set up. They all have titles, descriptions, images, and so on. If we attempt to change the value of a field that doesn’t conform to the type in the interface, TypeScript will warn us.
The users mock array represents the mock users we’ll have in our application. Each of these user objects conforms to the User interface shape and consist of fake data of a fictional user. Note that the token and walletId fields for every mock user are given dummy values since these aren’t real user accounts and they won’t be going through authentication or connecting with the payment provider. The listings field for each of these users is a list of ObjectId values for the listings in which the user has created.
The listings and users mock arrays are to be populated to the "listings" and "users" collections in our database. Notice how we haven’t prepared mock data for bookings? Our mock application state will be where no user has booked any listing yet. As a result, booking data will only be populated through the application.
SEED()
Let’s now modify our seed() function to utilize the new mock data. We’ll remove the old listings array we had before. We already have a for loop being used to add every single listing document from our mock array into our "listings" collection.
We’ll introduce another loop to add every user from the mock users array into the "users" collection. This will have the seed() function look as follows:
server/temp/seed.ts
const seed = async () => {
  try {
    console.log("[seed] : running...");

    const db = await connectDatabase();

    for (const listing of listings) {
      await db.listings.insertOne(listing);
    }

    for (const user of users) {
      await db.users.insertOne(user);
    }

    console.log("[seed] : success");
  } catch {
    throw new Error("failed to seed database");
  }
};
To run our seed function, we can execute the seed script we have in our terminal which is a script already set up in the package.json file to run the the contents of the temp/seed.ts file.
npm run seed
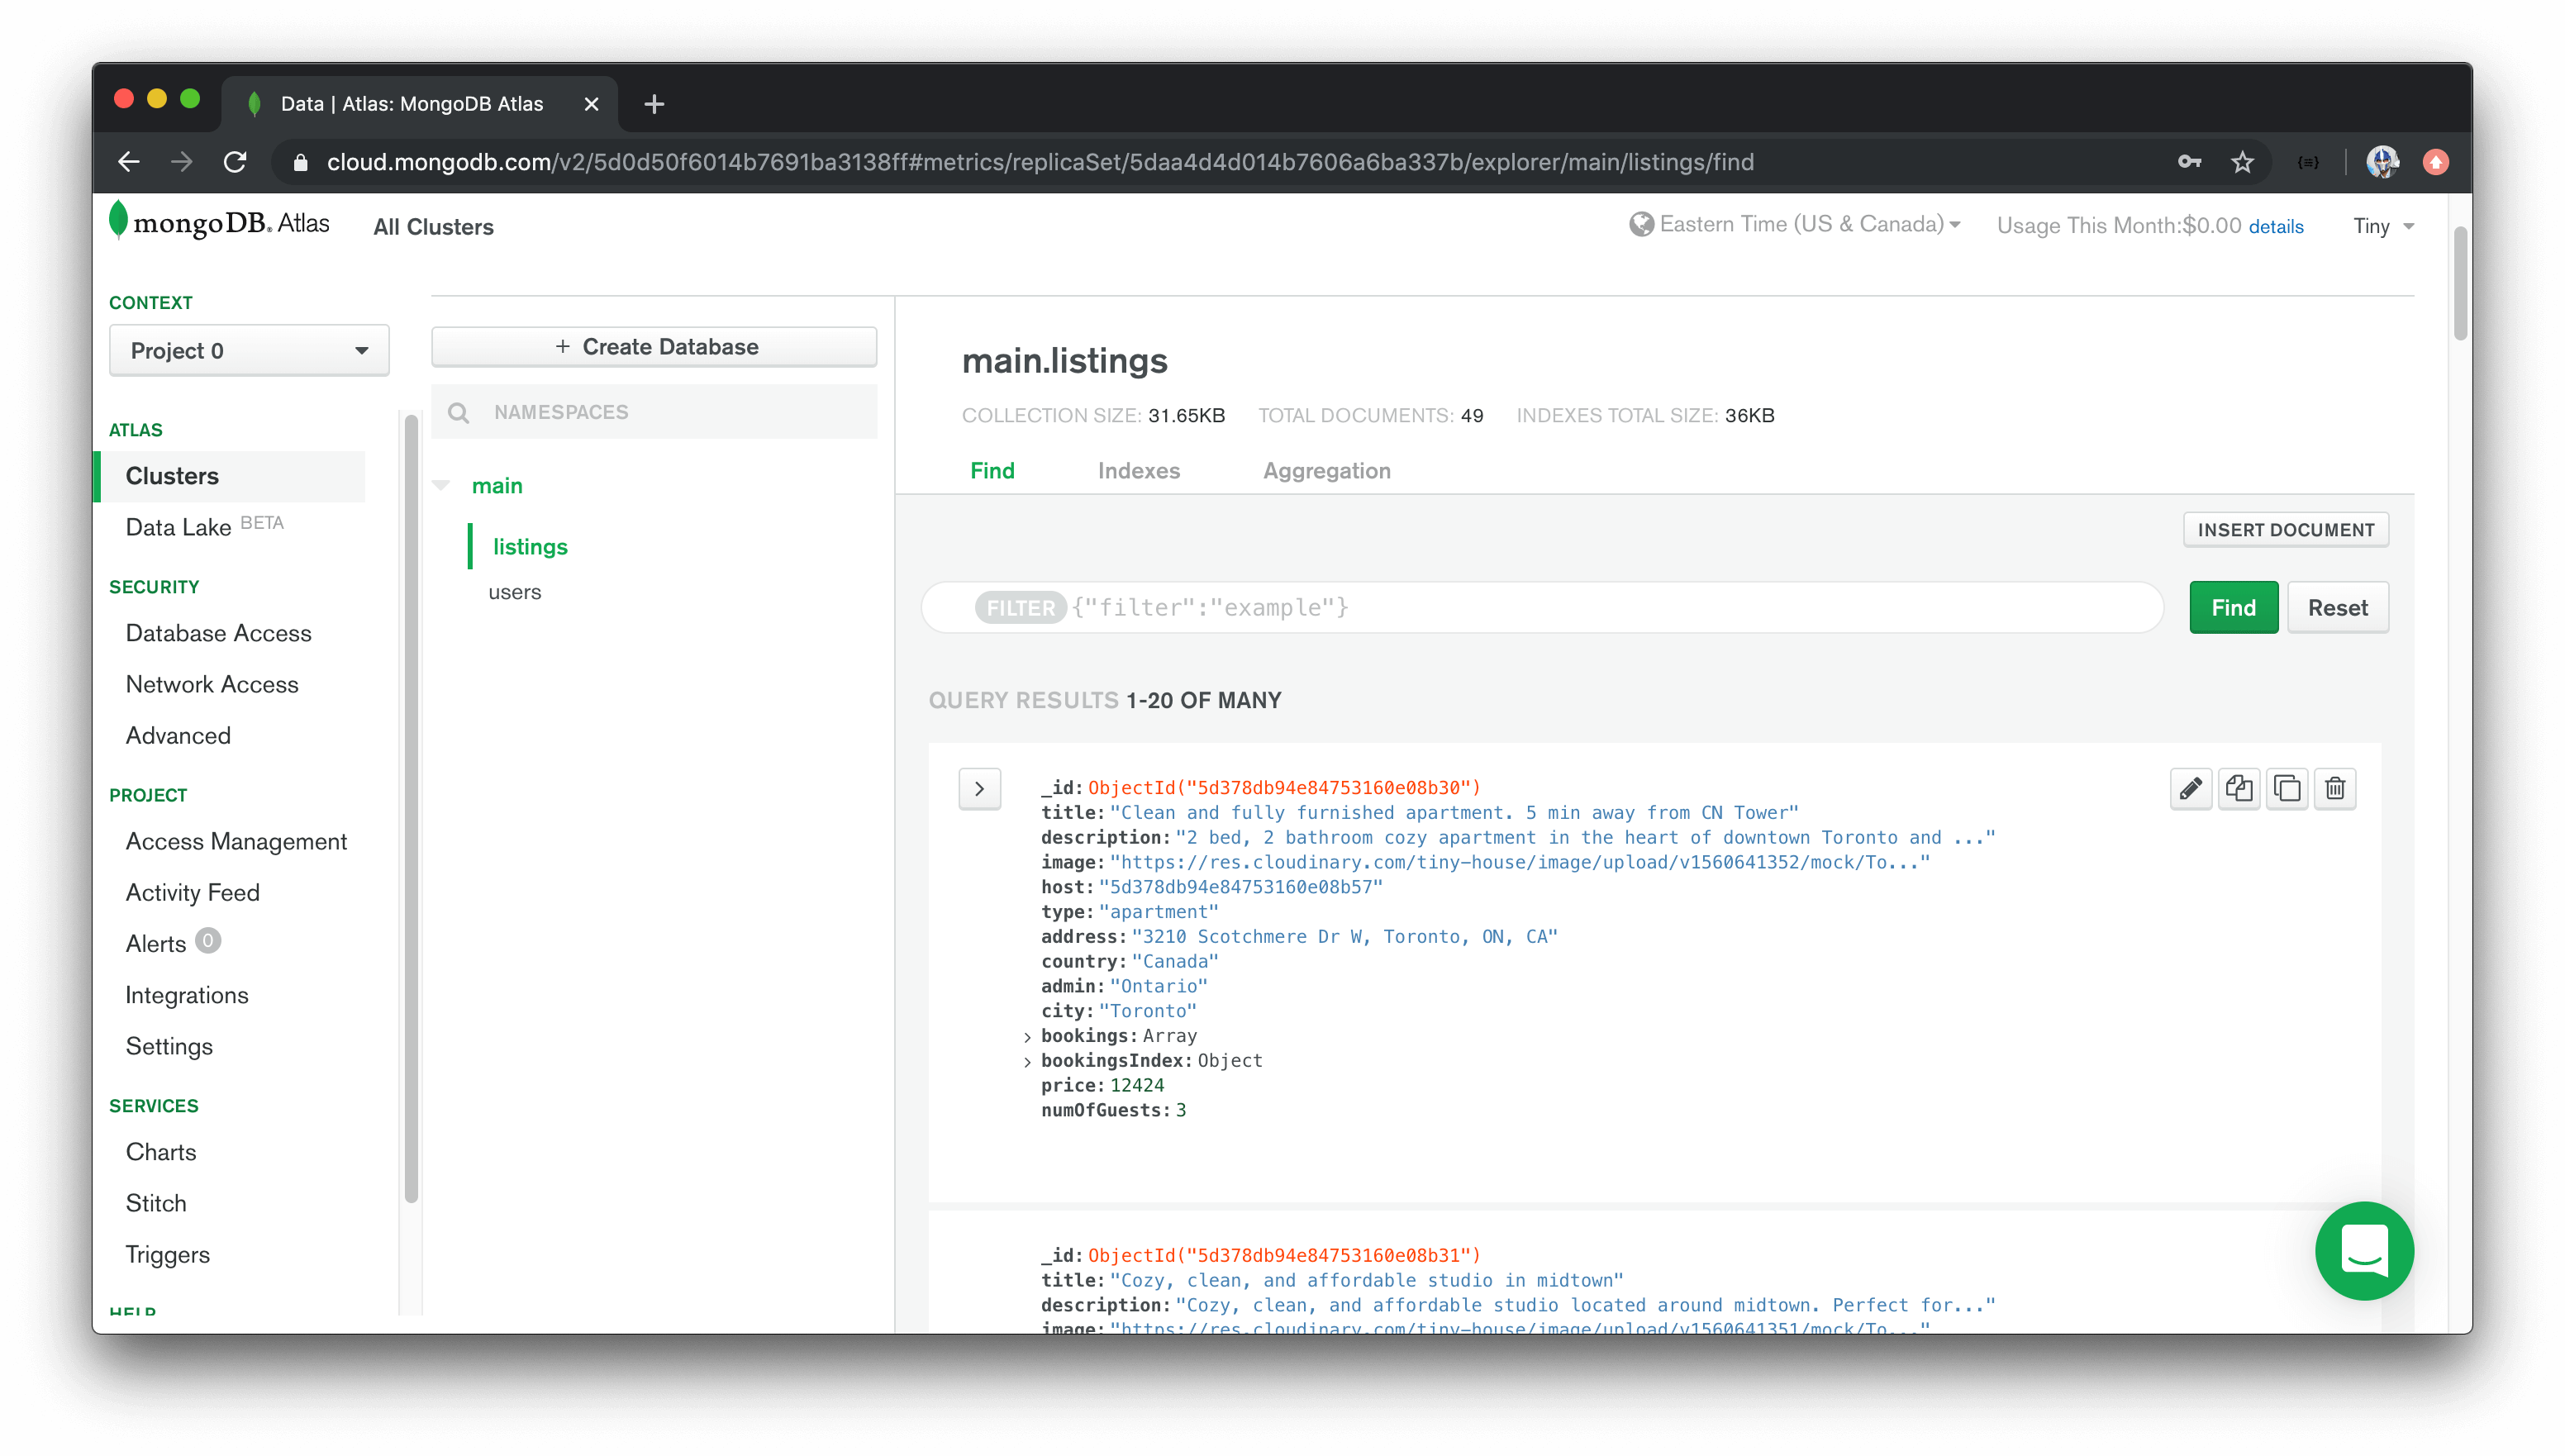
When the seed script has been run and we take a look at our cluster in Atlas, we’ll now see the newly introduced "listings" and "users" collections with the mock data we’ve supplied!
CLEARING DATA
At certain times in our development, we may get to some points in which we’re interested in re-seeding our collections back to the original setting of our mock data if more data gets added.
To do this, we could log into the MongoDB Atlas dashboard and use the UI to delete the collections one by one before we run the seed() function again. But to keep things simpler, we’ll create an npm command to do the clearing for us.
This will appear similar to the seed() function, we’ll create a clear.ts file in our temp folder that will be responsible for being able to clear our database.
server/
  // ...
  temp/
    clear.ts
    seed.ts
  // ...
In the temp/clear.ts file, we’ll require the dotenv library, import the connectDatabase() function, and create a clear() function that will hold the responsibility in clearing out our collection data.
require("dotenv").config();

import { connectDatabase } from "../src/database";

const clear = async () => {};
To empty or remove a collection (i.e. to drop a collection), we can use MongoDB’s drop() function. In our clear() function, we’ll drop the bookings , listings, and users collections.
We’ll do an extra check and first retrieve all the documents for the different collections, and only run the drop() function when a collection is populated (i.e. has at least one document).
Running the functionality within a try statement, attempting to catch any errors if they arise, and executing the clear() function at the end will have our temp/clear.ts file look like the following:
server/temp/clear.ts
require("dotenv").config();

import { connectDatabase } from "../src/database";

const clear = async () => {
  try {
    console.log("[clear] : running...");

    const db = await connectDatabase();

    const bookings = await db.bookings.find({}).toArray();
    const listings = await db.listings.find({}).toArray();
    const users = await db.users.find({}).toArray();

    if (bookings.length > 0) {
      await db.bookings.drop();
    }

    if (listings.length > 0) {
      await db.listings.drop();
    }

    if (users.length > 0) {
      await db.users.drop();
    }

    console.log("[clear] : success");
  } catch {
    throw new Error("failed to clear database");
  }
};

clear();
In our server package.json file, we’ll create a clear script that when run will run the contents of the temp/clear.ts file.
server/package.json
"clear": "ts-node temp/clear.ts",
Now at any moment in time, if we need to re-seed the database back to its original mock data state, we can simply run the clear script followed by the seed script.
MODULE 4 INTRODUCTION
OAuth is an industry-standard protocol that enables applications to gain limited access to user accounts that have been created on different platforms. If you’ve ever signed in to an application with your Google account, Facebook account, Twitter account, etc. - that sign-in process was most likely made capable with OAuth!
In this module, we’ll:
- Explain what OAuth 2.0 is.
- Create OAuth Credentials for Google Sign-In.
- Update our GraphQL API to allow a user to sign-in with a Google account.
- Construct the UI of the Login page of our client project.
- Execute the
loginandlogoutmutations we’ll create from the client. - Build the app header to convey to our user when in the logged-in state.
OAUTH 2.0
OAuth is an open industry-standard authorization protocol that enables applications to obtain limited access to user accounts without giving away any passwords.
As an example, we’ve seen sign-in requests like the one below when trying to log-in to an application that allows you to authenticate with a different provider (e.g. Google Sign-In).

In the image above, we’re able to successfully sign-in to an application labeled tinyhouse.app with a Google account. As a user signing in, this is essentially where we tell the application “I grant you permission to access my account or a portion of my account”. Notice that in this example, Google tells us exactly what information the app will have access to which in this case is the user’s name, email address, language preference, and profile picture.
Being able to sign-in with an approach like this (i.e via OAuth) has some major advantages. In the event that an application suffers a breach, our Google password will remain safe because OAuth doesn’t share passwords but instead uses authorization tokens to prove identities. OAuth also allows us to leverage other platforms where users most likely already have accounts created helping avoid the need for users to create new accounts to use a certain application.
OAUTH IN TINYHOUSE
We’re going to use Google Sign-In/OAuth to authenticate and sign in users to our TinyHouse application. OAuth between different providers behave similarly to one another. Though implementing Google Sign-In/OAuth differs slightly depending on the application making the request (web server, client app, etc.), they all follow a similar pattern. We’ll go through the steps of how Google Sign-In/OAuth will be used in our application.
In our context, OAuth includes the following roles:
- Resource Owner : the user/person that signs in and grants our app (TinyHouse) access to their Google account.
- App : The TinyHouse app. Once the user grants us access to their account, we (i.e. TinyHouse) can make API calls to Google’s servers on behalf of our user (e.g. add an item to their Google calendar, send an email on their behalf, etc.).
- Authorization & Resource Server : this is the server that holds the data and provides the APIs. In our case, this will be Google’s server.
With the roles identified, let’s dive into how the flow will behave. In the very beginning, a user will be able to click a Sign in with Google button to begin the Google sign-in process.
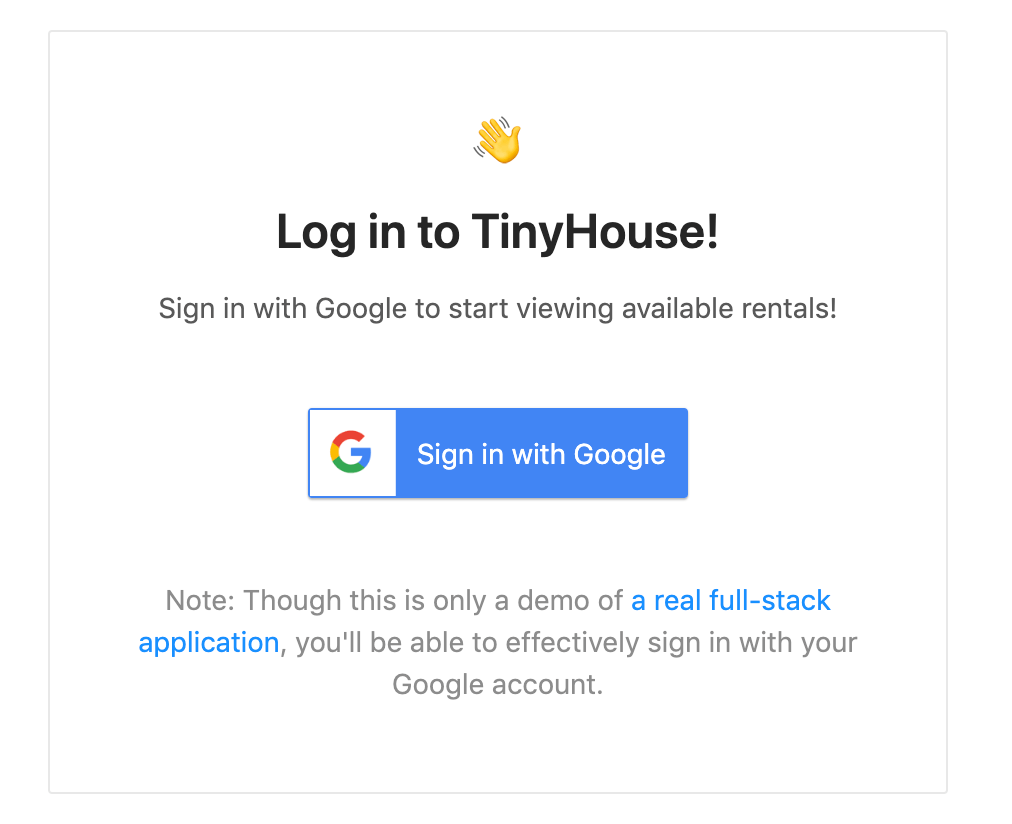
The first step after this point is redirecting the user to Google’s authentication page to log in.
When the user provides their account information, Google then handles the user authentication, session selection, and user consent. Once logged in, Google will return an authorization code to our client app.
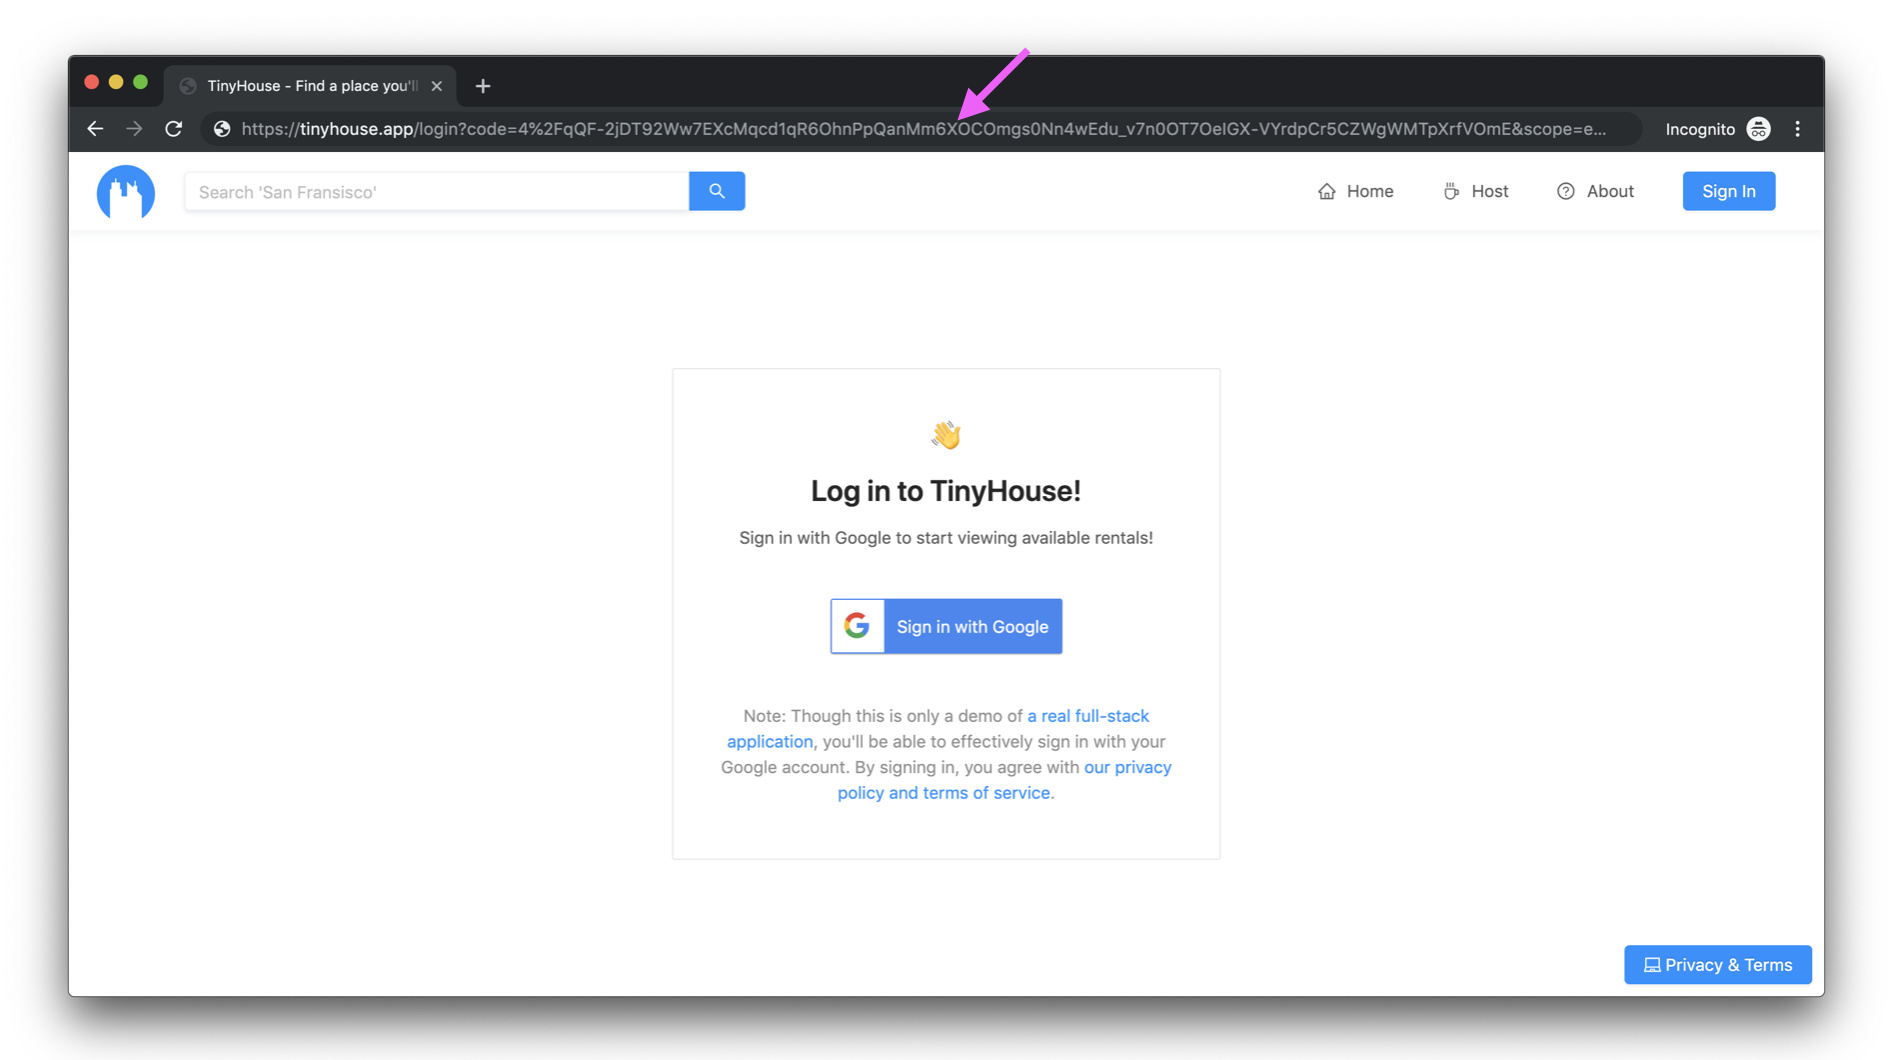
Our client application will then pass this code to our Node server app. Once our server receives this code , we’ll make another request from our server project to Google using the code to get the user’s access token .

With the user’s access token , we’ve obtained access and can use the token to interact with Google APIs to act on behalf of the user . In our application, we’ll use the access token to interact with Google’s People API to get the user’s name, email address, and profile image to store in our database.
Here’s the flow we’ve just shown being summarized in a UML sequence diagram from Google’s developer documentation.
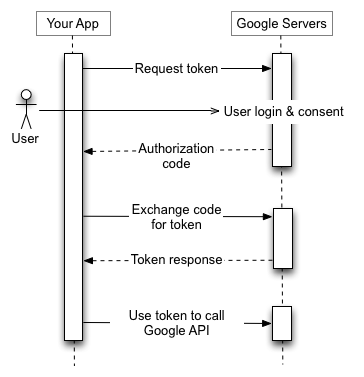
Sequence diagram (otherwise known as UML sequence diagrams) show how items in a system or code interact with one another and the interactions in the sequence of events that occur.
This can be summarized as follows:
- When a user attempts to sign-in, they’re taken to Google’s login and consent screen.
- When signed in successfully, an authorization
codeis returned from Google’s servers to our application. - A request is made from our app to Google Servers with the authorization
codeto retrieve the access token of the user. - With the access token available in our app, we’re able to make requests to Google APIs on behalf of the user .
GOOGLE SIGN-IN (OAUTH)
Any application that uses Google OAuth to access Google APIs must have credentials that identify the application to Google’s server.
To achieve this, we’ll need to login to Google’s API console: https://console.developers.google.com .
When logged in, we’ll create a new project by clicking the project drop-down menu and selecting NEW PROJECT .
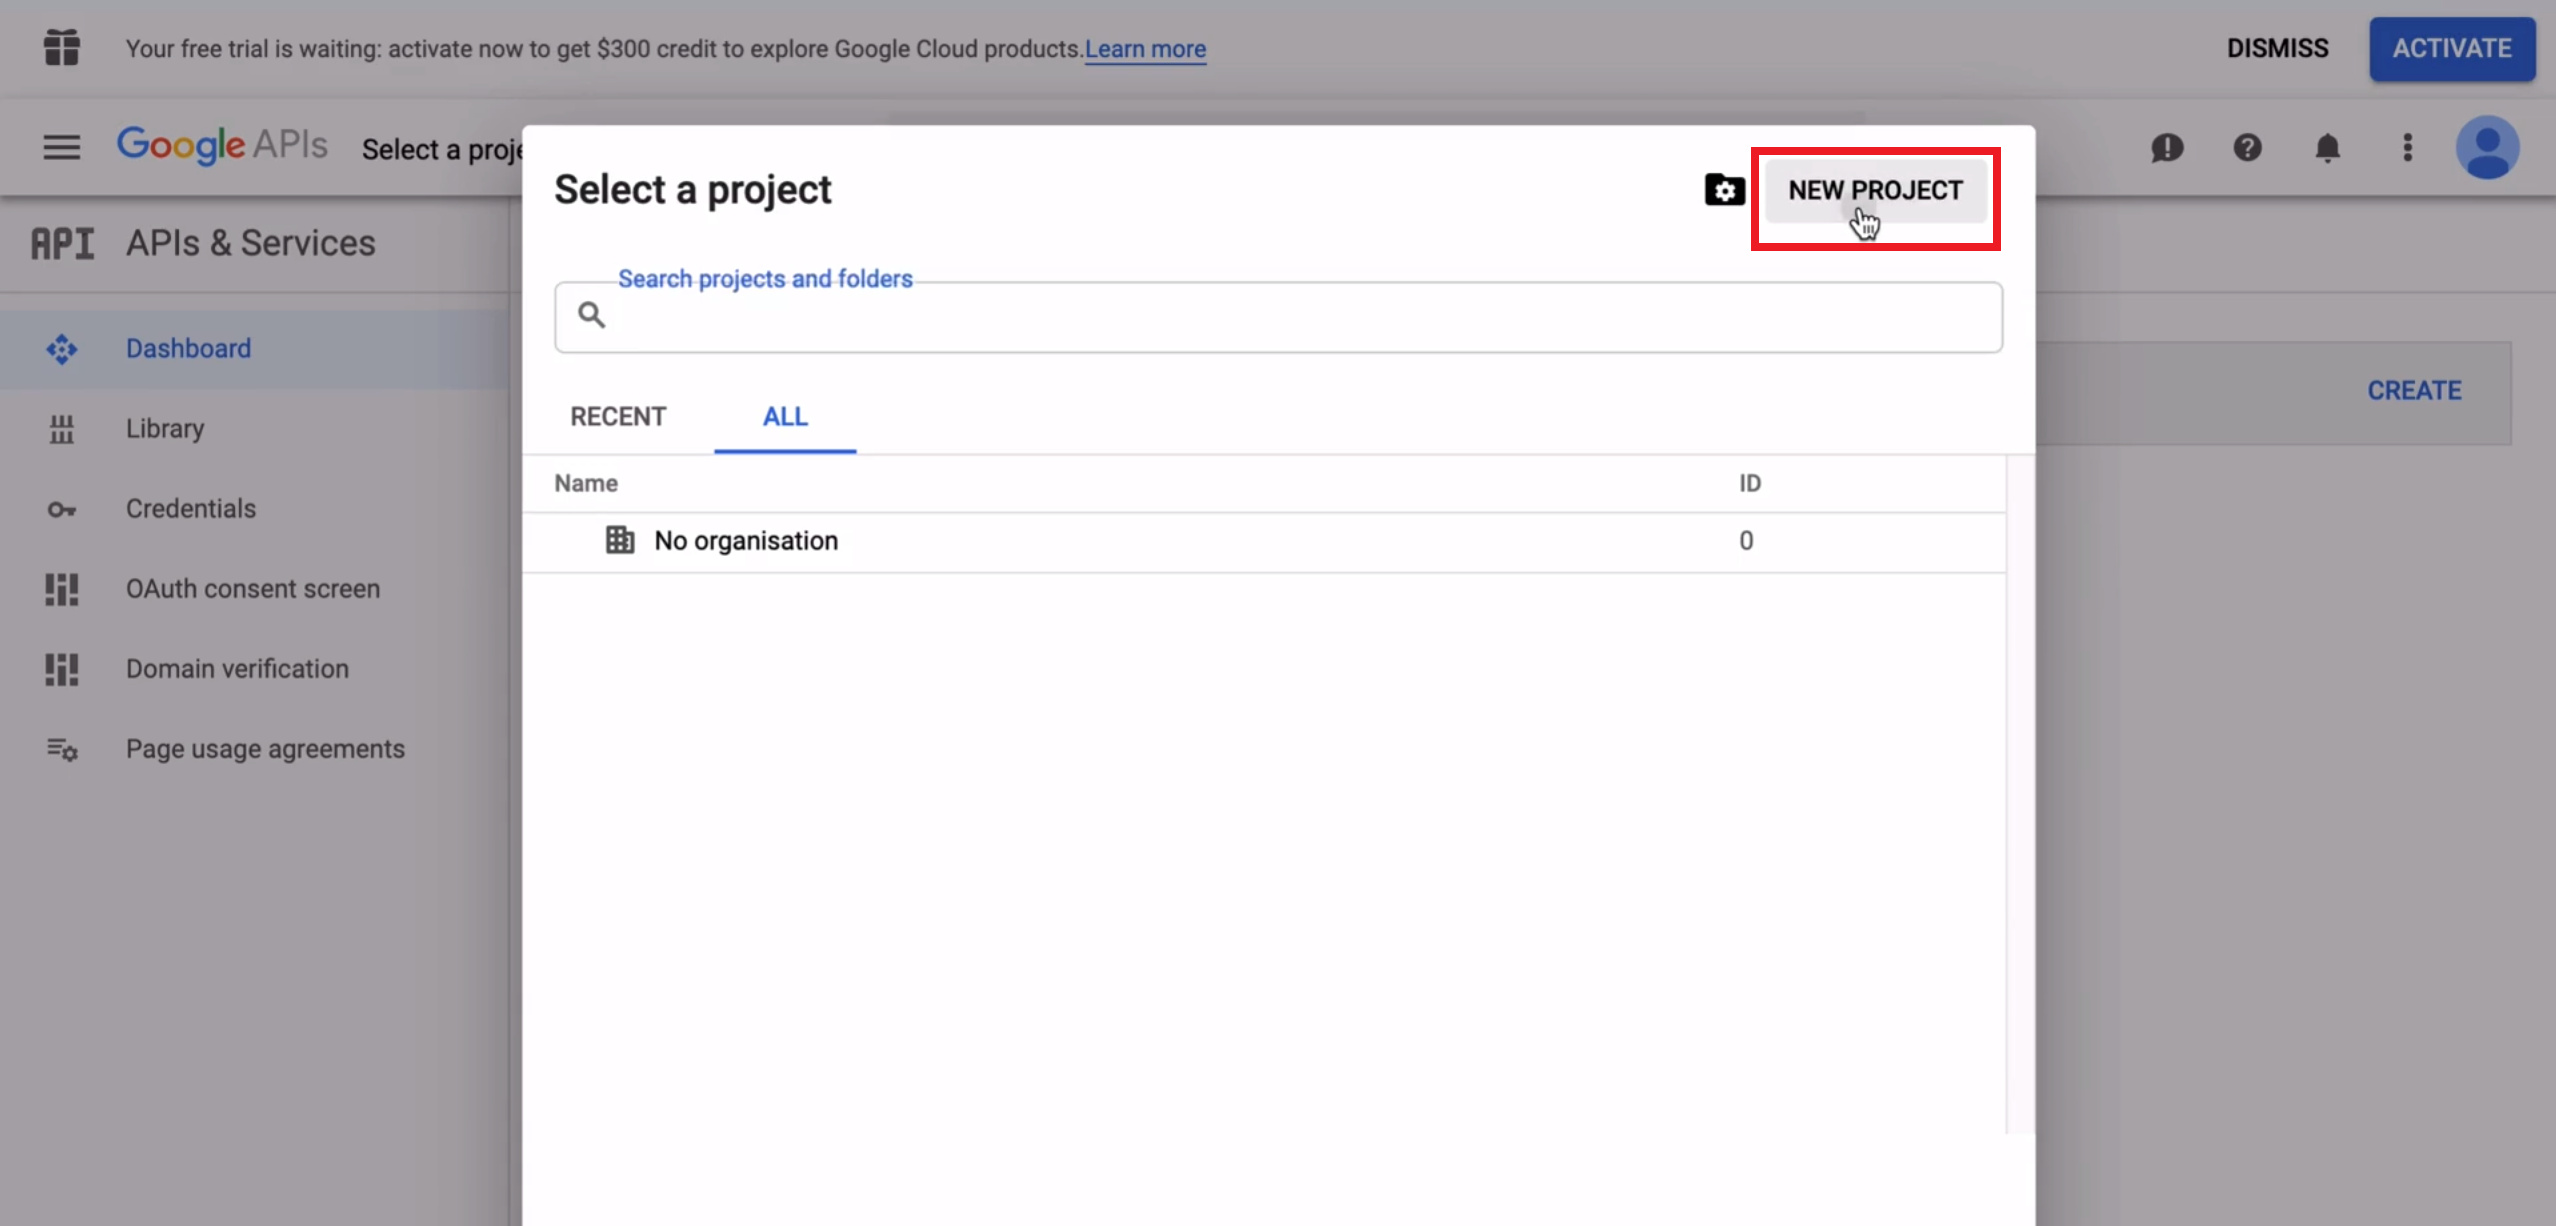
We’ll provide a project name of TinyHouse and create the project.
With the project created, we’ll be redirected to the dashboard of the created project. Next, we’ll click Credentials on the left-hand pane which will take us the credentials page.
We’ll click the Create credentials button available to us to create new credentials and we’ll select the OAuth Client ID option. OAuth Client ID is the credential that can allow us to request user consent so our app can access user data.

We’re told that to create an OAuth Client ID, we must set a product name on the consent screen.

We’ll click the Configure consent screen button available to us to configure the consent screen we’ll want to display to the user.
In the OAuth consent screen form, we’ll state that the app, where the consent screen is being established, is to be public for any Google Account. We’ll state the Application Name as TinyHouse and the support email will be the email address of the account connected to the developer console.
Scopes is where we can state the access we want to the user’s private data from our application. We won’t make any changes to what’s populated by default which involves gaining access to the email and profile information of the user. With these changes, we can click Save at the bottom of the form to save the changes we’ve made for the OAuth consent screen .

At this point, we’ll now be able to create an OAuth Client ID. In the Create OAuth client ID form, we’ll set the application type to Web application since we’re creating a web app. We’ll also name our credential the TinyHouse Web Client .
We’ll then need to specify authorized origins and redirect URIs. An authorized origin refers to the URI of the client application and can’t contain a wildcard or a path. For development, we’ll list our local development origin - http://localhost:3000 .
Redirect URIs refer to the path in our application that users are redirected to after they’ve successfully authenticated with Google. We’ll state that the user should be redirected to a /login path within localhost:3000 .
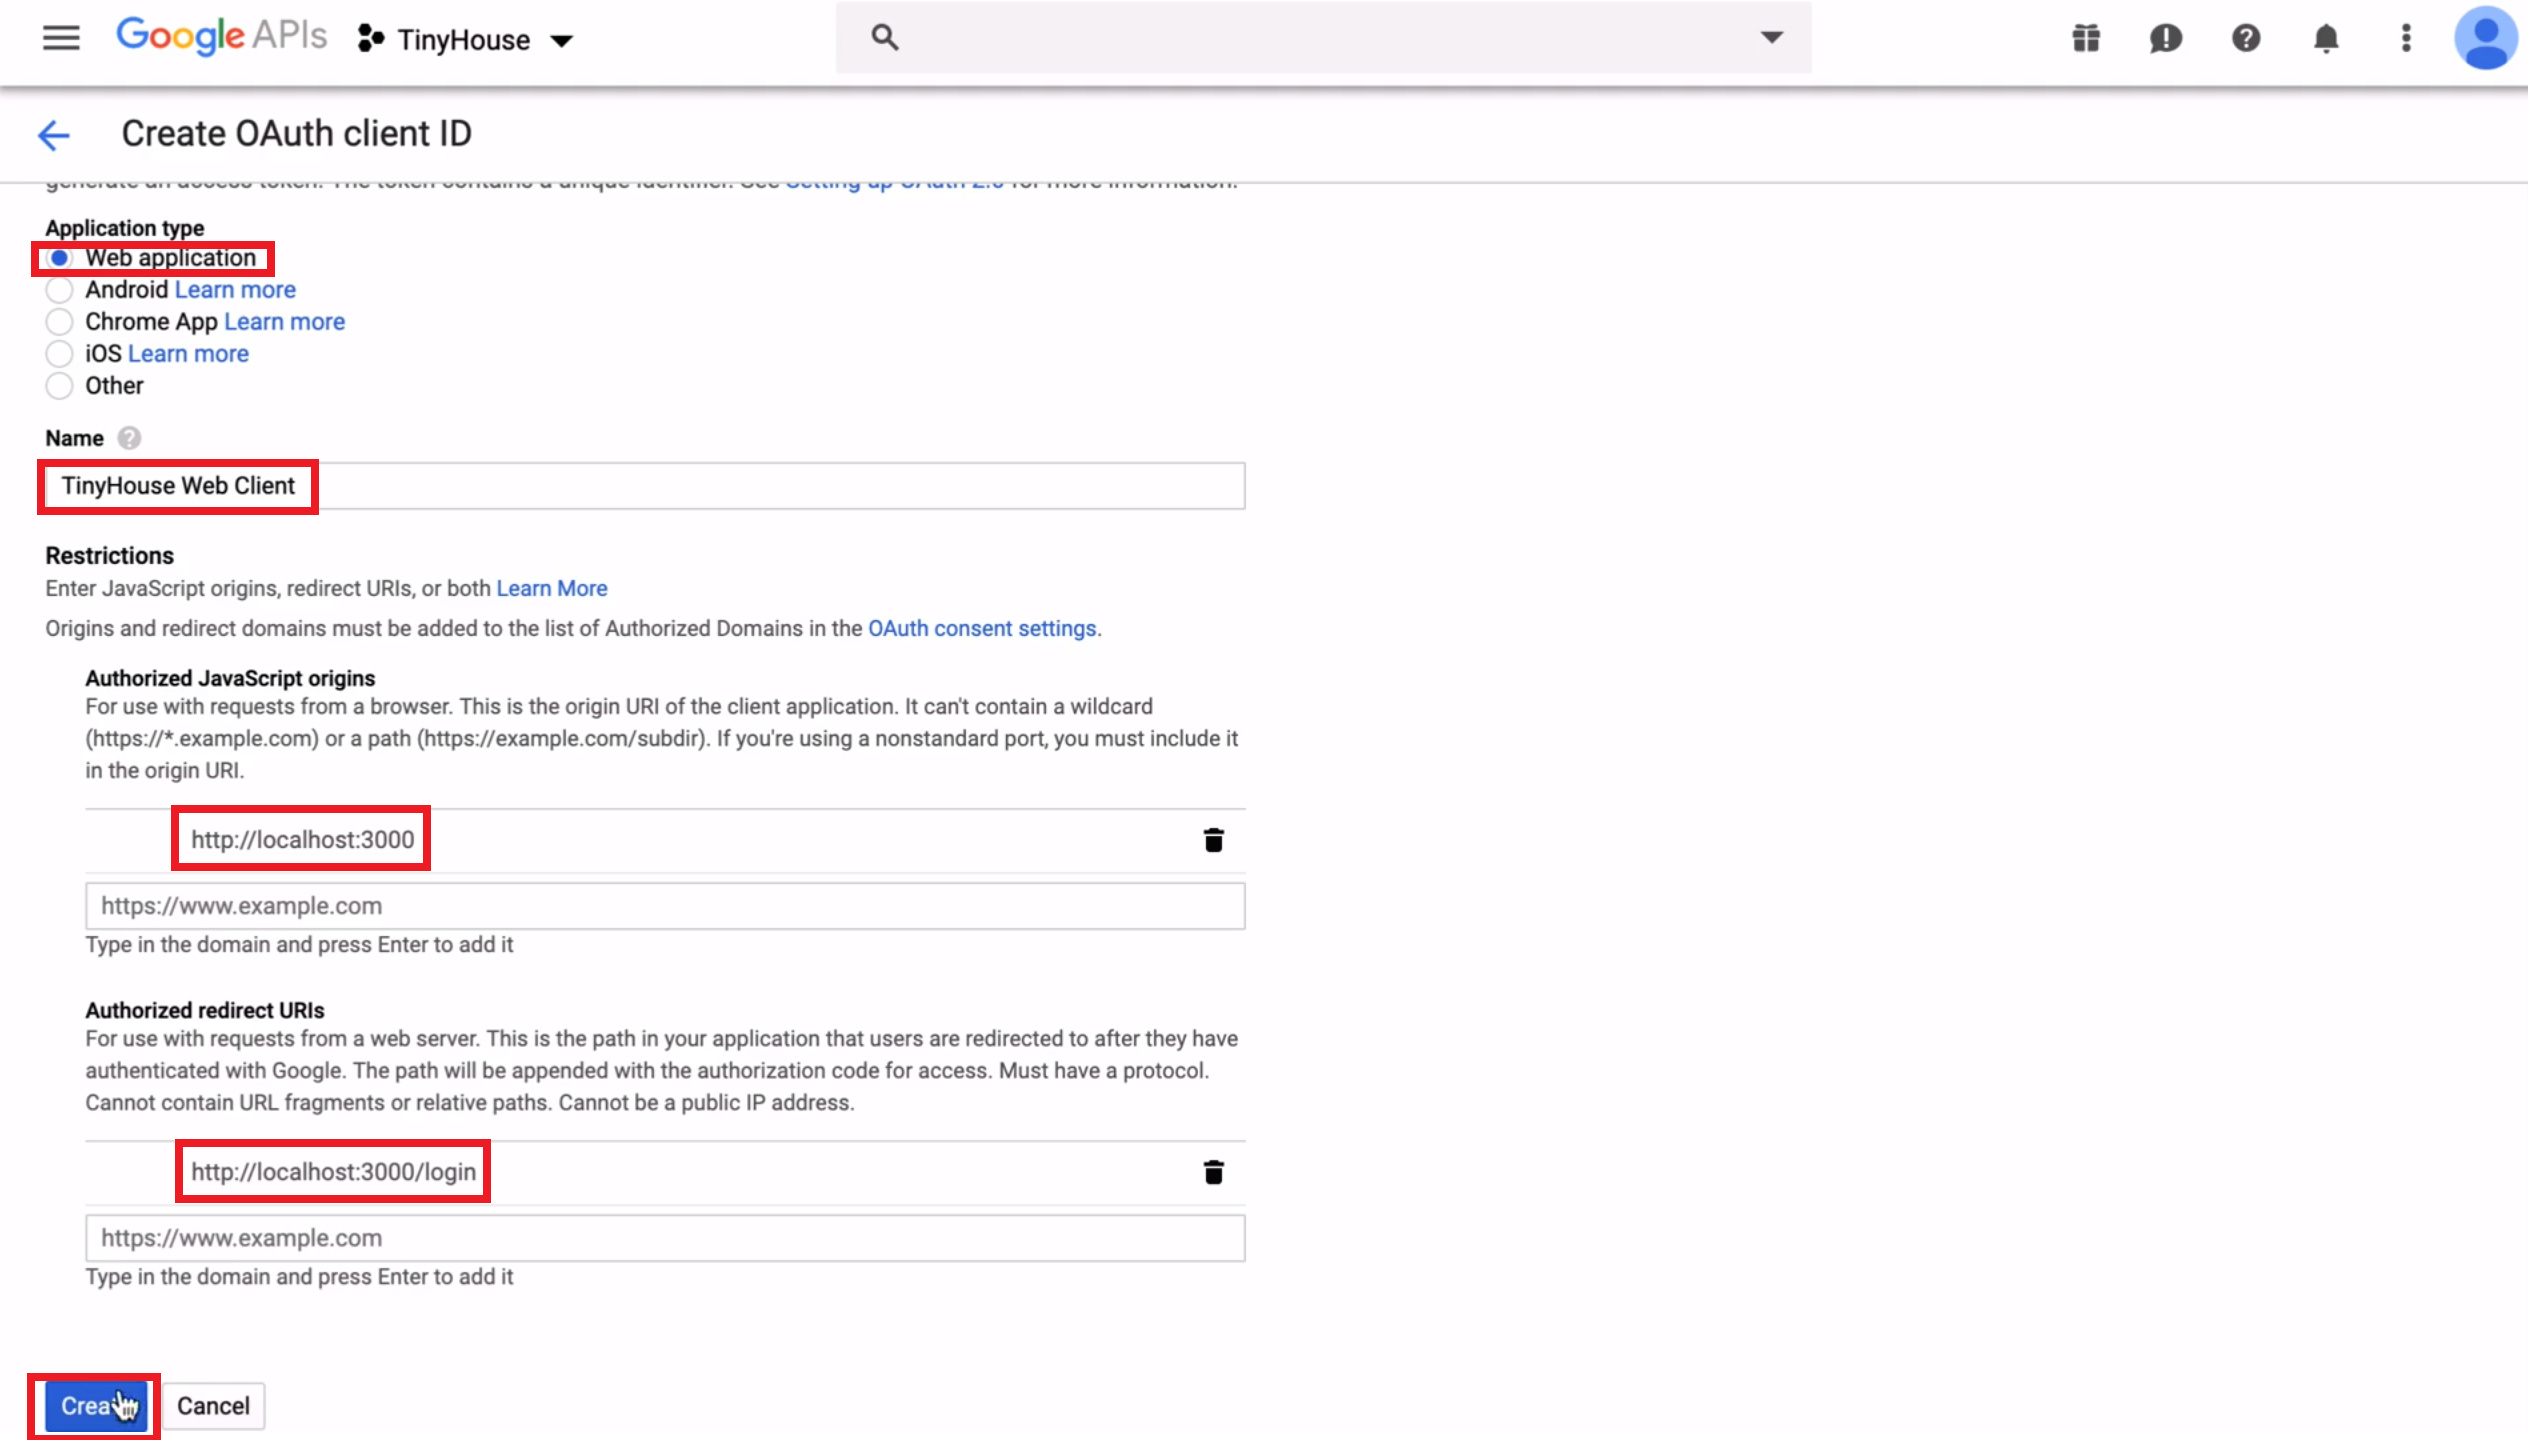
Note: The values we’ve provided for an authorized origin and redirect URL are development credentials. We’ll need to update them to a new set of values (or create separate credentials) when we eventually deploy our app.
At this moment, our application can use the OAuth Client ID credential to help access Google APIs on behalf of users signed in to our application.
Note: Google OAuth may be limited to 100 logins until the consent screen is published, which may require a verification process that can take several days. We’ll be able to develop our application well before the 100 logins limit is ever reached so we won’t have an urgent need to publish our consent screen.
With the information provided in the Create OAuth client ID form, we can click Save at the bottom of the form to create the OAuth Client ID. This is where a Client ID and Client Secret is returned to us. Since these are configuration values that should be kept secret, we’ll look to place these values in our Node server .env file.
SAVE API KEYS
We’ll head to the .env file of our server project and introduce two new environment variables - G_CLIENT_ID and G_CLIENT_SECRET to reference the Client ID and Client Secret of the OAuth Client ID we’ve just created.
We’ll also introduce another environment variable to reference the origin of our client application in development - http://localhost:3000. We’ll use this environment variable as we set up the functionality to have users sign-in to our application. We’ll call this environment variable PUBLIC_URL .
At this moment, our .env file will look something like the following:
PORT=9000
PUBLIC_URL=http://localhost:3000
DB_USER=************
DB_USER_PASSWORD=*****************
DB_CLUSTER=*****************
G_CLIENT_ID=**************************.apps.googleusercontent.com
G_CLIENT_SECRET=**************************
In the next lesson, we’ll begin creating the GraphQL fields in our API that we’ll use to help us set-up Google OAuth in our application.