Lesson1
JWT Docs
Lesson2
Starting Code
Lesson3
- Starting Code
-
Ending Code
Lesson4 - Starting Code
-
Ending Code
Lesson5 - Starting Code
- Ending Code
-
Vue Router Docs: Route Meta Fields
Lesson 6 - Starting Code
-
Ending Code
Lesson 7 - Starting Code
- Ending Code
Intro to Authentication
In a modern web application, it’s likely that you’ll need to make parts of your app private so that not just anyone on the internet can access everything in your app. But if you want some users to be able to access those restricted parts, this requires implementing some form of user authentication to your app, so that your users can create an account, and later log back into that account, to access your protected content.
In Vue Mastery’s Token-Based Authentication course, we walk through the process of creating a front-end authentication solution for a Vue.js app using JSON Web Tokens.
While there are many options for authenticating users in a Vue app, we’ve chosen to teach JWT because it offers a straightforward solution that doesn’t rely on any specific third-party services. If you end up using a different option, many of the concepts we are teaching here will still be quite helpful when you need to implement authentication in your app.
How Token-Based Authentication works
Token-based authentication means that our app will allow users to log into it. But we can’t log just anyone in. Our users need to be authenticated, which means when they type their username and password into our app, we’ll send that info to our server so it can authenticate it. If everything is good to go, the user is logged in and the server returns a token.
We then store that token in our browser’s local storage and use it when we need to, such as when we need to make an API call for some private data. At this point, we make a copy of the token we’ve stored, and send it along with our API request. The server then decrypts the token, making sure our user has the proper permission to access the data that’s being requested. If approved, the server sends the requested private data to the client.
Whenever the user logs out, the token is cleared from local storage. We can also set an expiration on the token so it automatically clears after a set amount of time.
How a JWT is Structured
The specific type of tokens we’ll be using are JSON Web Tokens (JWTs). You can think of a JWT like a key that can unlock the parts of your app that are private.
The structure of a JWT consists of three encoded strings: the header, payload and signature. ****Each hashed string is separated by a dot, like so: xxxxx.yyyyy.zzzzz .
The header is contains the type of token (in our case: JWT) and the hashing algorithm being used.
The payload contains the information we are transmitting (usually info about the user) along with some optional “claims” such as who issued the token, its expiration date, and if the user is an admin, etc.
The signature is a hash of the header + the payload + the secret. The secret lives on the server and is used to decrypt the token as well as to sign new tokens.
You can read more about the structure of a JWT here.
How we’ll use JWT
In this course, we’ll use JWT to build out a front-end authentication solution into a simple Vue app. This means we’ll be creating an interface for users to create an account that they can log in and out of. Both actions of signing up and logging in will provide the user with a token.
When logged in, the user will be able to access a protected route, which is our dashboard. When the dashboard loads, it requests some private data from the server by making an API call that includes a copy of our JWT token.
Upon logging out, we’ll make sure the token is cleared from local storage. Additionally, we’ll learn how to handle authentication errors.
Learning Outcomes
We’ll cover a lot in this course, but we won’t be teaching how to build out the backend. There are many options for this, from Node.js to Rails or PHP, so we’ll let you decide what is the best option for you or your team.
This course focuses on creating a front-end authentication solution that can be paired with your backend of choice. By the end of the course, you’ll understand how to combine JWT with Vue Router, Vuex and Axios to craft a straightforward user authentication interface for your Vue app.
Project Structure
In this lesson we’ll be looking at the starting code for the example app we’ll be using for this course. We’ll understand the steps that need to be taken to add authentication to it, which we’ll do lesson by lesson throughout the course. We will be using Vue Router, Vuex, and Axios, so if you are not yet familiar with those topics, please take our Real World Vue and Mastering Vuex courses, then meet me back here.
Exploring the Starting Code
If you’d like to code along during this course, you can download the starting code in the Lesson Resources located on this page. Once you’re ready, we’ll start in the main.js file.
 main.js
    import Vue from 'vue'
    import App from './App.vue'
    import router from './router'
    import store from './store'

    Vue.config.productionTip = false

    new Vue({
      router,
      store,
      render: h => h(App)
    }).$mount('#app')
There’s nothing new here, but note that we’re using Vue Router and Vuex ( router and store ).
Now let’s look at the App.vue file.
App.vue
    <template>
      <div id="app">
        <app-nav />
        <router-view class="page" />
      </div>
    </template>
    <script>
    import AppNav from './components/AppNav'
    export default {
      components: { AppNav }
    }
    </script>
    <style lang="scss">
    @import './assets/styles/global.scss';
    .page {
      display: flex;
      justify-content: center;
      flex-direction: column;
      align-items: center;
      min-height: calc(100vh - 56px);
    }
    </style>
In the style section you can see we’re importing a global stylesheet from our assets directory and have imported the AppNav component, which we’re using in the template.
Now let’s look at the AppNav component.
src/components/AppNav.vue
    <template>
      <div id="nav">
        <router-link to="/">
          Home
        </router-link>
        <router-link to="/dashboard">
          Dashboard
        </router-link>
      </div>
    </template>

    <script>
    export default {}
    </script>

    <style lang="scss" scoped>
    #nav {
      display: flex;
      align-items: center;
      min-height: 50px;
      padding: 0.2em 1em;
      background: linear-gradient(to right, #16c0b0, #84cf6a);
    }
    .nav-welcome {
      margin-left: auto;
      margin-right: 1rem;
      color: white;
    }
    a {
      font-weight: bold;
      color: #2c3e50;
      margin: auto 0.8em auto 0.4em;
      text-decoration: none;
      border-top: 2px solid transparent;
      border-bottom: 2px solid transparent;
    }
    .router-link-exact-active {
      color: white;
      border-bottom: 2px solid #fff;
    }
    button,
    .button {
      margin-left: auto;
      background: white;
      text-decoration: none;
      color: #2c3e50;
      &.router-link-active {
        color: #2c3e50;
      }
    }
    .logoutButton {
      cursor: pointer;
    }
    .nav-welcome + button {
      margin-left: 0;
    }
    </style>
This file simply has two router-links to our views , and some scoped styles.
Also in the components directory we have the EventCard.vue file, which we’ve seen in previous courses.
src/components/EventCard.vue
    <template>
      <div class="event-card">
        <span>@{{ event.time }} on {{ event.date }}</span>
        <h4>{{ event.title }}</h4>
      </div>
    </template>
    <script>
    export default {
      name: 'EventCard',
      props: {
        event: {
          type: Object,
          default: () => {
            return {}
          }
        }
      }
    }
    </script>
    <style scoped>
    .event-card {
      width: 13em;
      margin: 1em auto 1em auto;
      padding: 1em;
      border: solid 1px #2c3e50;
      cursor: pointer;
      transition: all 0.2s linear;
    }
    .event-card:hover {
      transform: scale(1.01);
      box-shadow: 0 3px 12px 0 rgba(0, 0, 0, 0.2), 0 1px 15px 0 rgba(0, 0, 0, 0.19);
    }
    .event-card h4 {
      font-size: 1.4em;
      margin-top: 0.5em;
      margin-bottom: 0.3em;
    }
    </style>
This component expects an event prop, which it displays in its template.
Now let’s head into our views directory, where we have the Dashboard.vue and Home.vue files.
src/views/Home.vue
    <template>
      <div class="home">
        <h1>Welcome to the App!</h1>
      </div>
    </template>

    <script>
    export default {}
    </script>
The Home view is currently very simple, with just an h1 . The Dashboard is where the action is happening.
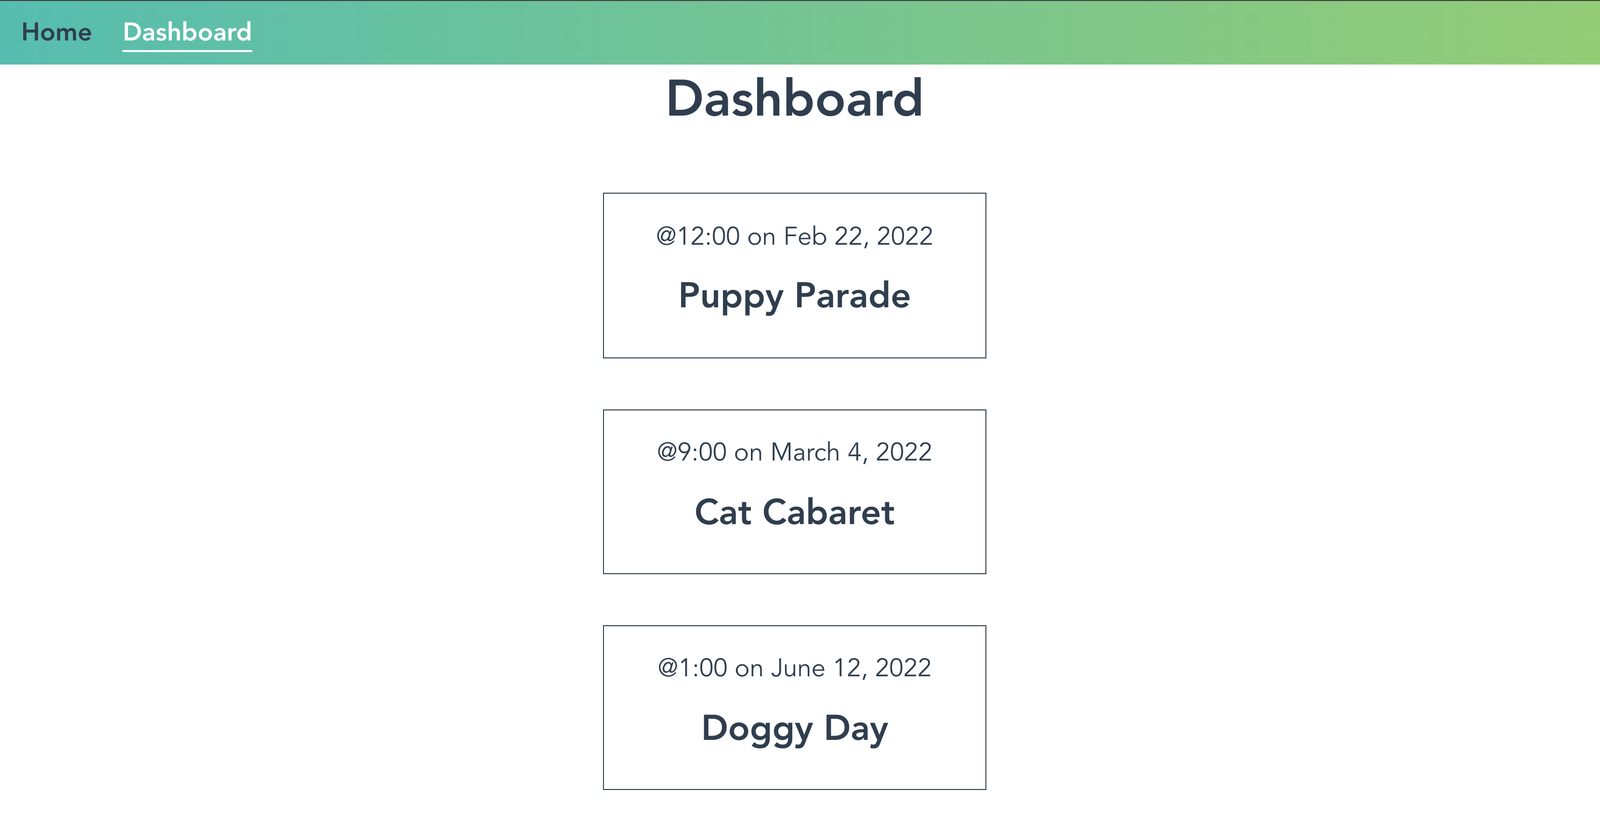
src/views/Dashboard.vue
    <template>
      <div>
        <h1>Dashboard</h1>
        <template v-if="!isLoading">
          <EventCard v-for="event in events" :key="event.id" :event="event" />
        </template>
        <p v-else>
          Loading events
        </p>
      </div>
    </template>

    <script>
    import axios from 'axios'
    import EventCard from '../components/EventCard'
    export default {
      components: { EventCard },
      data () {
        return {
          isLoading: true,
          events: []
        }
      },
      created () {
        axios.get('//localhost:3000/dashboard').then(({ data }) => {
          this.events = data.events.events
          this.isLoading = false
        })
      }
    }
    </script>
Here, we are importing axios, and using it when the component is created to make a call out to our api, which returns a list of events. We then set the Dashboard ’s component data equal to the response. We are also changing isLoading to false . We use the boolean value of isLoading in the template to determine whether to v-for through an EventCard for each event in our events data or to display a loading message instead.
If we look at our router file, we can see we’re importing both Home and Dashboard and have a route for each of them, respectively.
router.js
    import Vue from 'vue'
    import Router from 'vue-router'
    import Home from './views/Home.vue'
    import Dashboard from './views/Dashboard.vue'
    Vue.use(Router)
    const router = new Router({
      mode: 'history',
      base: process.env.BASE_URL,
      routes: [
        {
          path: '/',
          name: 'home',
          component: Home
        },
        {
          path: '/dashboard',
          name: 'dashboard',
          component: Dashboard
        }
      ]
    })
    export default router
Peeking into our store file, we’ll see it’s currently blank.
store.js
    import Vue from 'vue'
    import Vuex from 'vuex'

    Vue.use(Vuex)

    export default new Vuex.Store({
      state: {},
      mutations: {},
      actions: {}
    })
We’ll be adding to Vuex as we build out the app.
Also, notice how we have a server.js file that makes use of the two files in our db directory. Our api will get events from the events.json , and we’ll use the user.json file to register and log in users. Please know that this server-side code is a simple solution meant only for this course. The backend code is not meant for a real production-level application. This course focuses on how to develop an Vue.js authentication front-end , which should work with your backend solution of choice.
Finally, in the package.json , you’ll see I’ve added a start script, which runs our server and builds our app. We’ll type npm run start in the terminal to get our project up and running.
Understanding the Tasks Ahead
Now that we have explored the app, we can start adding authentication to it. But we need to take a step back and understand what steps we’ll be taking to make that happen.
Client/Server Communication
We’ll need to understand the communication that should happen between the client and our server. Our server has three api endpoints: /register , /login , and /dashboard .
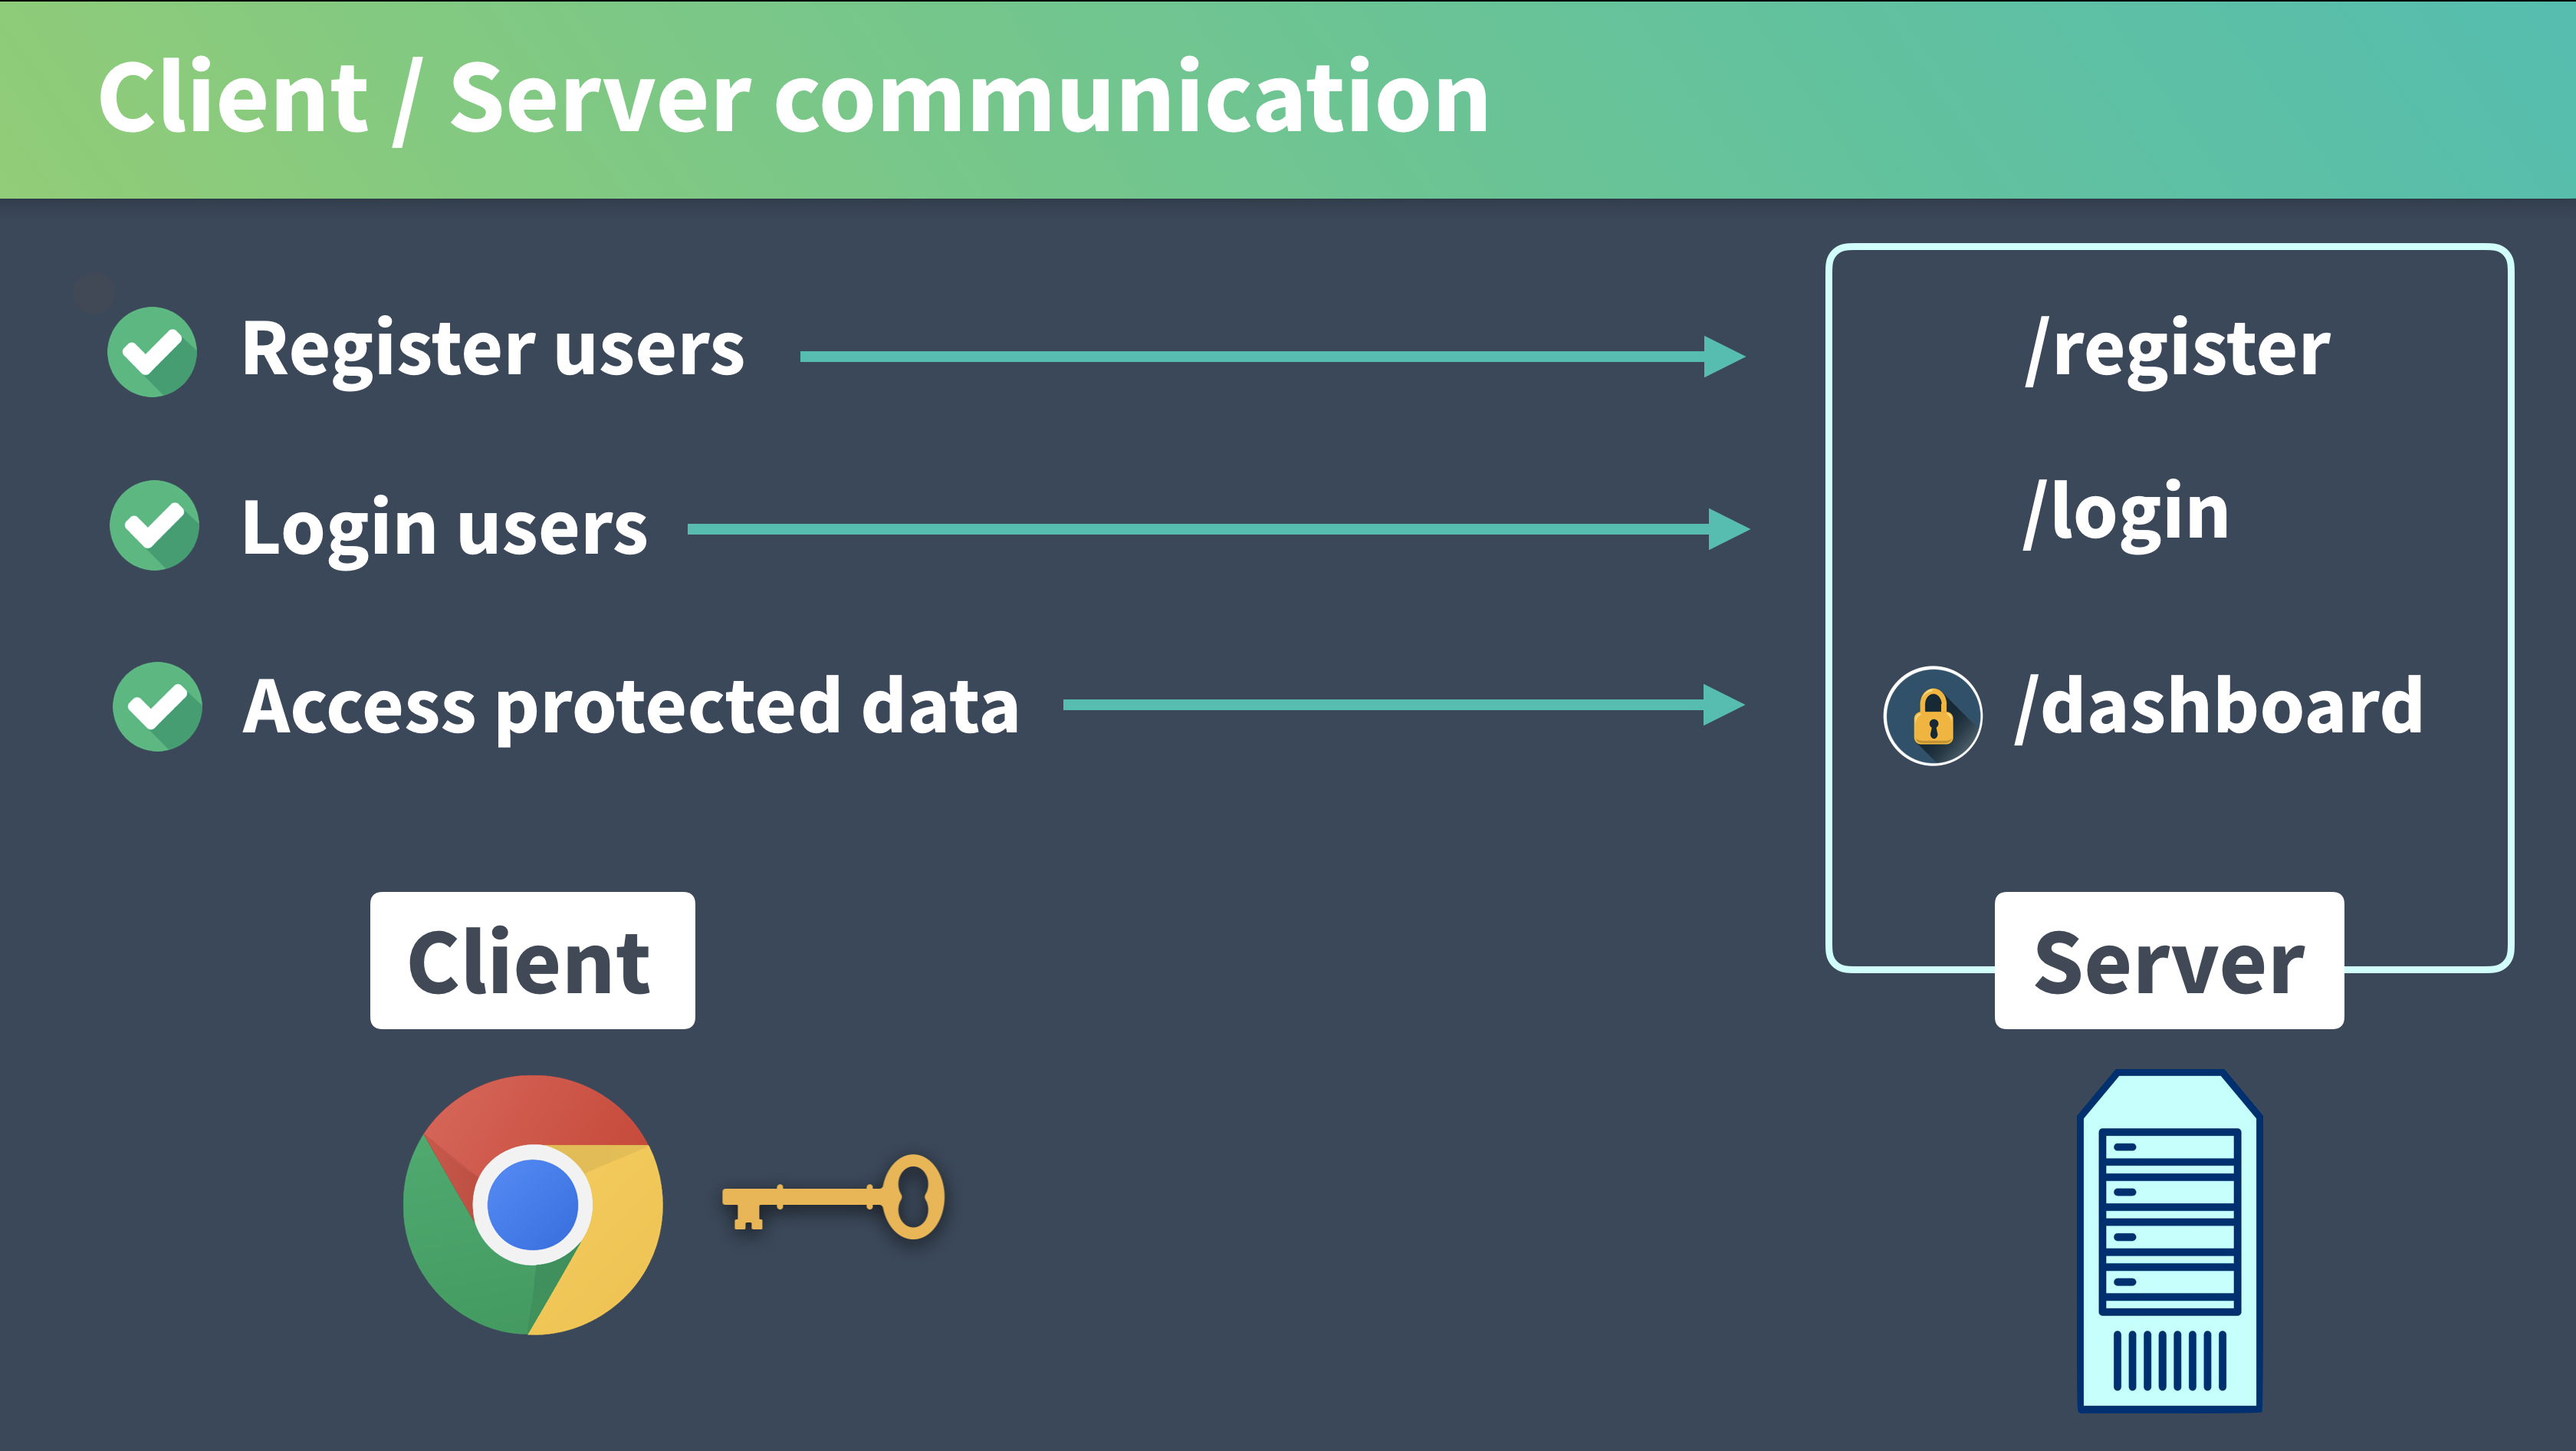
We’ll call out to the register endpoint to register our users, then to the login endpoint to log in a registered user. Both of these actions causes the server to return a response that includes a JWT token, which we will send along with our requests to the /dashboard route, where our protected data (events) is returned.
So far so good… but there are three steps that need to be taken between logging a user in and requesting private data.
Handling the Response
When a user registers or logs in, our server will return a response, which includes a JWT token along with the user’s email and name.
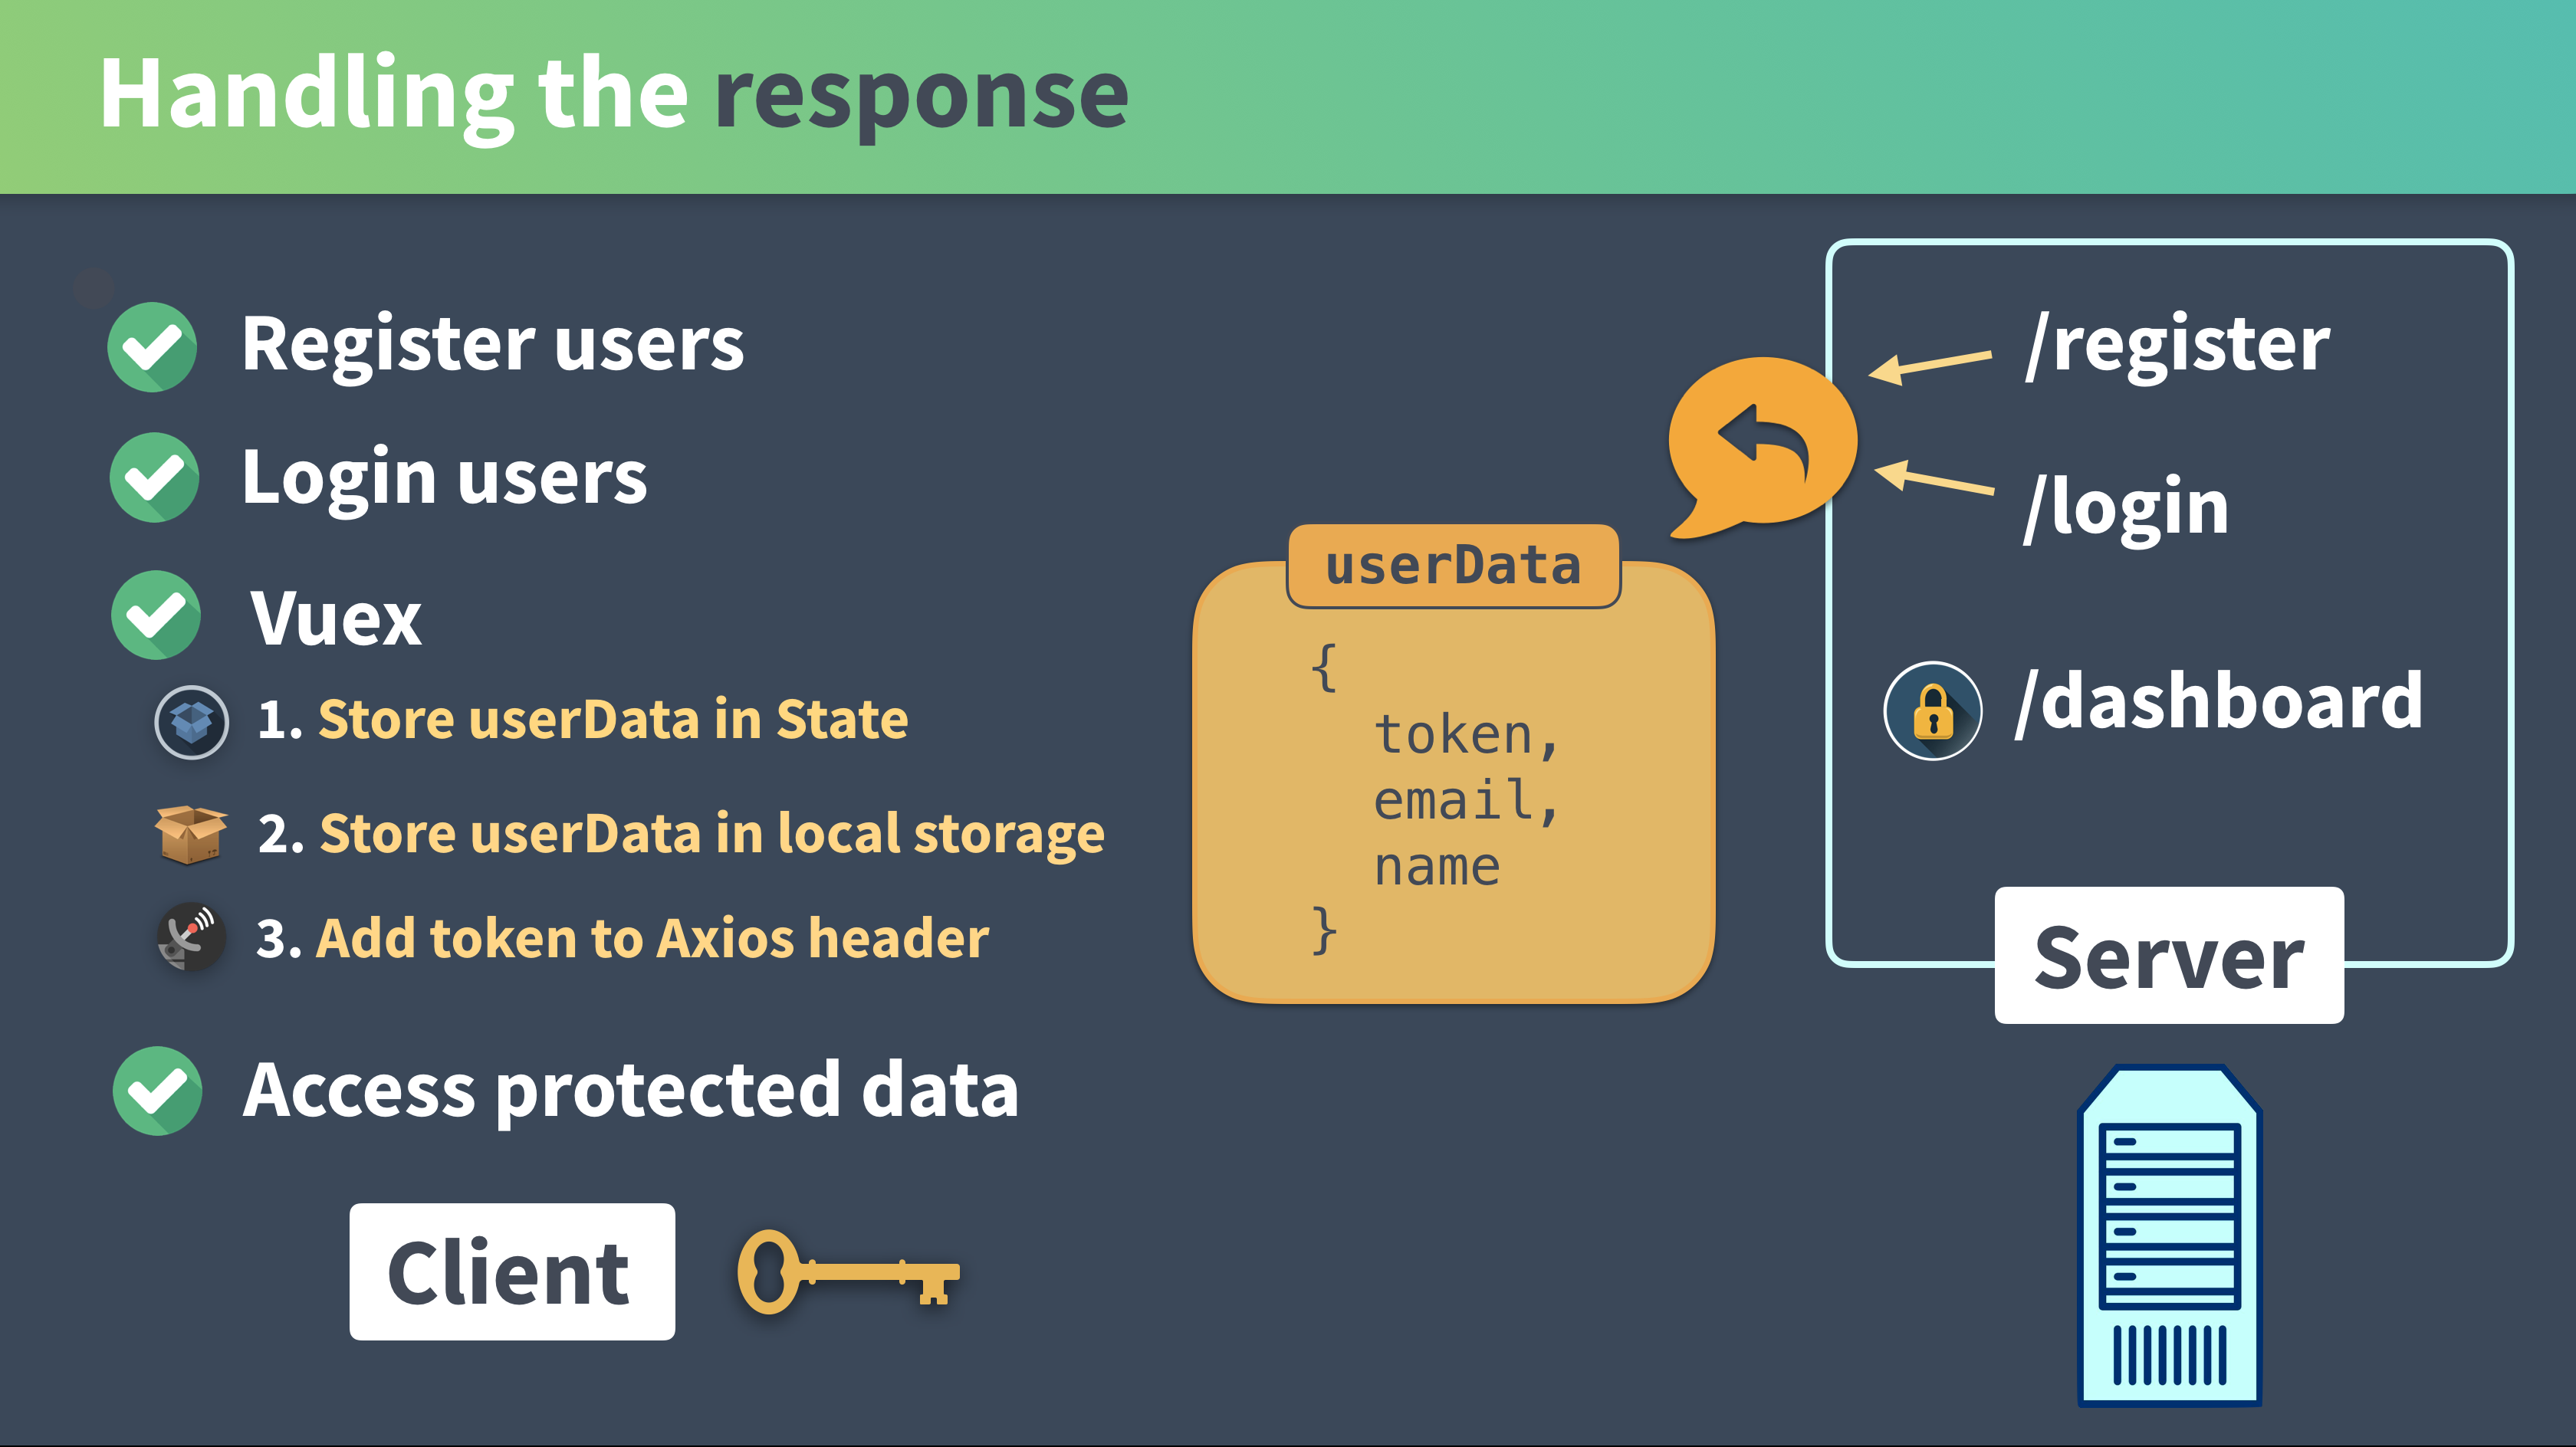
We’ll be using Vuex to do three things with that user data:
- Store userData in Vuex State
- Store userData in local storage (to persist it in case of browser refresh)
- Add token to Axios header
We’ll also need to be logging out our user, which will reverse these steps.
What’s next?
Now that we have a foundational understanding of what token-based authentication is and the steps we’ll take to implement it, we are ready to start building. In the next lesson, we’ll add the ability to register users.
User Registration
In our previous lesson, we toured our example app’s starting code and saw that any user off the internet was able to access our dashboard, which displays a list of events from our mock database. We only want users who have an account with our app to be able to access those events.
If you download the starting code in the Lesson Resources of this page, you’ll see that our server.js file now only returns those events when the /dashboard endpoint is accessed by an API call that includes a token.
server.js
     app.get('/dashboard', verifyToken, (req, res) => { //verifyToken is middleware
      jwt.verify(req.token, 'the_secret_key', err => { // verifies token
        if (err) { // if error, respond with 401 code
          res.sendStatus(401)
        } else { // otherwise, respond with private data
          res.json({
            events: events
          })
        }
      })
    })
As a reminder, the server.js file is our mock authorization server running Express.js. We will run API calls against this server, and it is already configured for proper token authentication. If we run our app now ( npm run start )and try to access the dashboard, we’ll get a 401 error in our console.

So we need to add to our app so that when a user is registered, they receive a token, which we can send along as we make a call out for that protected data. The /dashboard endpoint will then verify that token. If everything is good, it will respond with the private data we are requesting.
The steps we’ll take in this lesson include:
- Create a new RegisterUser.vue component
- This will accept a name, email, and password from the user, and use Vuex to make a call out to our server’s
/registerendpoint - Add to our Vuex store
- We need an Action to register users and a Mutation that stores the response received from our server’s
/registerendpoint and adds the received token to our Axios header - Add RegisterUser as a route
Let’s get started.
Creating a RegisterUser component
So what does a component look like that registers users? You’ve seen a lot of them before in other apps. We’re essentially building a small form that takes in a user’s information, which we use to create their new account.
So what kind of information are we gathering? We’ll need a name , email and password from our new user, which means we’ll need to add those as fields in our component’s data, like so:
src/views/RegisterUser.vue
      data () {
        return {
          name: '',
          email: '',
          password: ''
        }
      },
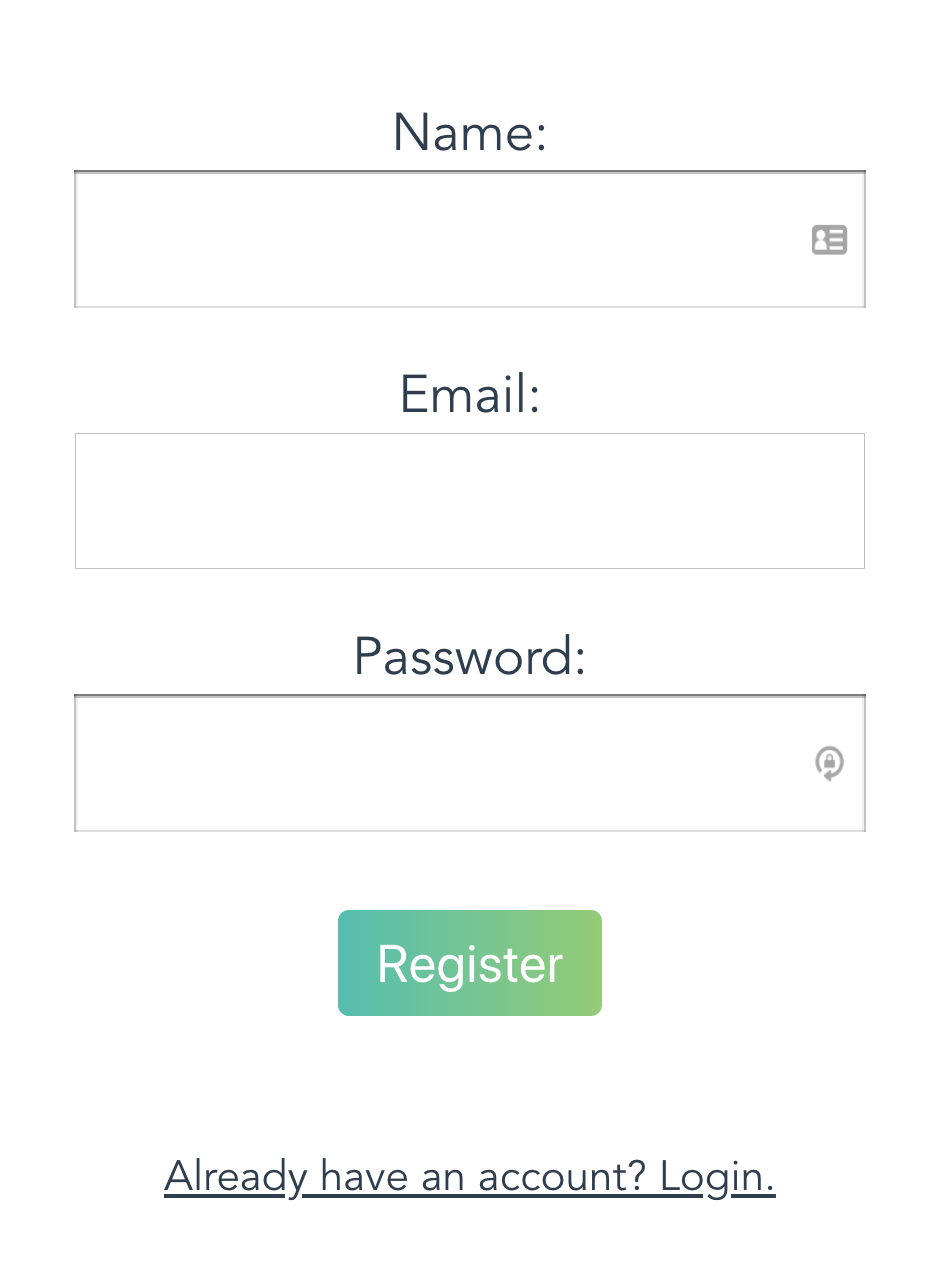
Now in the component’s template we can create a form and add an input for each of those fields and bind them to the data with v-model . While we’re at it, we’ll give each input a label , and add a button that will eventually trigger our submit behavior.
src/views/RegisterUser.vue
    <template>
      <div>
        <form>
          <label for="name">
            Name:
          </label>
          <input v-model="name" type="text" name="name" value>

          <label for="email">
            Email:
          </label>
          <input v-model="email" type="email" name="email" value>

          <label for="password">
            Password:
          </label>
          <input v-model="password" type="password" name value>

          <button type="submit" name="button">
            Register
          </button>
        </form>
      </div>
    </template>
Now our data fields will be populated as the user types into them. But what do we want to do with that user data we’ve collected? We need to send it as credentials to our backend, to the /register endpoint, when a user clicks our button. Since the button is of type submit we need to add @submit.prevent="register" to the form element to prevent the default behavior. That register method name? Let’s write that method now.
We need the register method to take the user’s credentials and dispatch a Vuex Action (which we’ll write in a minute).
src/views/RegisterUser.vue
      methods: {
        register () {
          this.$store
            .dispatch('register', {
              name: this.name,
              email: this.email,
              password: this.password
            })
        }
      }
We are about to add the register Action to our Vuex store, but I wanted you to first see that we’re taking an object with the name , email and password from our RegisterUser component, and passing it into the register Action as the payload. Now let’s head into our Vuex store and write out that Action.
Setting up Vuex
Since our register Action will be making an API call, we’ll need to import the Axios library into our store.js file. The Action will then look like this:
src/store.js
    import axios from 'axios'
    ...
      actions: {
        register ({ commit }, credentials) {
          return axios
            .post('//localhost:3000/register', credentials)
            .then(({ data }) => {
              console.log('user data is', userData)
              commit('SET_USER_DATA', data)
            })
        }
We’re making an Axios post request to our server’s register endpoint. While making this call, we’re sending along the user’s credentials (name, email, password), which we passed in as the payload from the RegisterUser component when we dispatched this Action.
Our dummy server’s register endpoint will take those user credentials, add the user to our user.json file, then send us back a response object that includes a JWT token , along with the user’s name and email . Since we are console.logging the data we get back, we can see that response in our browser’s devtools. But first we need to add RegisterUser as as a route so we can access it, so let’s quickly do that now.
Adding RegisterUser to router.js
We’ll just import and add as a route inside the router.js file.
src/router.js
    import Vue from 'vue'
    import Router from 'vue-router'
    import Home from './views/Home.vue'
    import Dashboard from './views/Dashboard.vue'
    import RegisterUser from './views/RegisterUser.vue'

    Vue.use(Router)
    const router = new Router({
      mode: 'history',
      base: process.env.BASE_URL,
      routes: [
        {
          path: '/',
          name: 'home',
          component: Home
        },
        {
          path: '/dashboard',
          name: 'dashboard',
          component: Dashboard
        },
        {
          path: '/register',
          name: 'register',
          component: RegisterUser
        }
      ]
    })
Storing the Server’s Response
Now we can head to the app running in the browser, pull up the /register route, and create a new account.
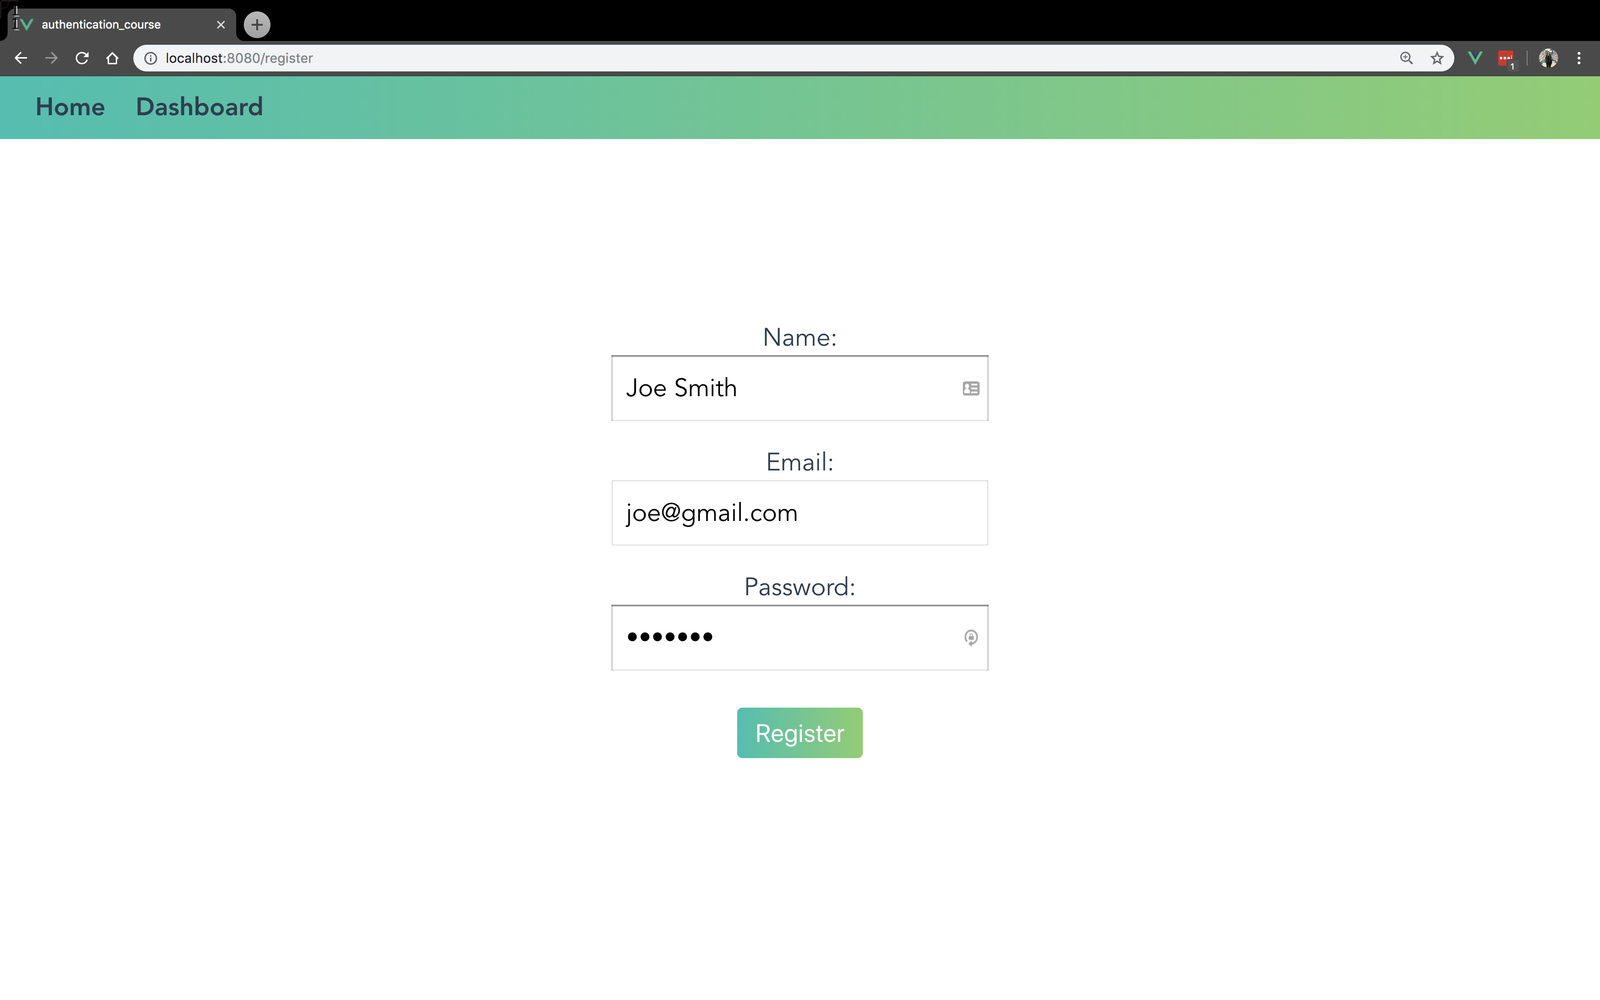
When we click the register button, we’ll see that our server’s response was logged to the console:

As we learned in the previous lesson, we then need to take that data and store it in our Vuex State, store a copy of it in the browser’s local storage, and add the token into our Axios header. We’ll accomplish those steps in a Mutation called SET_USER_DATA , which we’re about to write.
But first, since that Mutation will be adding the user to our Vuex State, we need to add a user field to our State.
src/store.js
      state: {
        user: null
      },
Now let’s write the Mutation that will add it to the State, along with adding a copy to local storage.
src/store.js
      mutations: {
        SET_USER_DATA (state, userData) {
          state.user = userData
          localStorage.setItem('user', JSON.stringify(userData))
        },
Notice how we’re using the JSON.stringify method to convert the JavaScript object into a JSON string.
Next, we need to add the token that lives in the userData into our Axios header, so that when we make API calls with Axios, our server will have the “key” (JWT token) to unlock our locked /dashboard endpoint.
src/store.js
    import axios from 'axios'
    ...
    mutations: {
        SET_USER_DATA (state, userData) {
          state.user = userData
          localStorage.setItem('user', JSON.stringify(userData))
           axios.defaults.headers.common['Authorization'] = `Bearer ${
              userData.token
            }`
        },
This code may look confusing at first, but we’re simply setting the default Authorization header of our Axios instance so that it includes the JWT token. If you’re wondering what Bearer means, it’s just the type of Authentication being used. You can read more about it here. You just need to know that we’re giving Axios the JWT token so the server can use it unlock its protected /dashboard endpoint.
Great. Now we have user State, which our SET_USER_DATA populates when our server returns the userData in response to our API call. We’ve stored a copy of it in our local storage so we can reset our State in case of a browser refresh (we haven’t yet implemented that reset code, but you can expect it in a future lesson), and we’ve given Axios the key it needs to unlock our server’s dashboard route so we can access that private data: the events that live in our mock database.
Redirecting to Dashboard
We’re about to check to see if this all works, but we need to consider where we send the user once they successfully register with our app. Currently, when they they are click the register button, they aren’t taken anywhere. We should be redirecting them to the dashboard once they register successfully, so let’s implement that now.
Back in our RegisterUser component, we’ll add that redirect:
src/views/RegisterUser.vue
      methods: {
        register () {
          this.$store
            .dispatch('register', {
              name: this.name,
              email: this.email,
              password: this.password
            })
            .then(() => {
              this.$router.push({ name: 'dashboard' })
            })
        }
      }
Now, once the user successfully registers, they will then be routed to the dashboard . Great! Now we’re ready to check this out in the browser.
Checking the Browser
If we head into the browser, create an account, and hit the register button, we should now be getting back our private events.
It works! If we pop open the devtools and inspect the network tab, we can see that the register call was made, as well as a call to the dashboard, where we can indeed see our token was added in the Authorization header.
Remember when we covered the structure of a JWT in the first lesson? Notice the three parts of that JWT token, each separated by a period.
Awesome. We did it!
What’s next?
Now that we’ve started registering users, in the next lesson we’ll look at logging a user back into the account they’ve already created. As we progress through the course we’ll also handle what to do when a user tries to access the dashboard route when they aren’t logged in.
User Login
Now that we’ve learned how to register users into our app, we can move forward and implement the ability for already-registered users to log into the accounts they’ve created.
In this lesson, we’ll create a new LoginUser.vue component, add some routing to our app to smooth out the user experience, and organize some of our Vuex code.
Creating our Login Component
We are already familiar with creating the RegisterUser component, which took in the user’s name, email and password in order to register them with our app. The LoginUser component will behave very similarly, with some minor differences.
One of the main differences is that we no longer need the user’s name, just their email and password, so our component data will look like this:
src/views/LoginUser.vue
      data () {
        return {
          email: '',
          password: ''
        }
      },
Which means the template will need input elements that are bound to these values, like so:
src/views/LoginUser.vue
    <template>
      <div>
        <form @submit.prevent="login">
          <label for="email">
            Email:
          </label>
          <input v-model="email" type="email" name="email" value>

          <label for="password">
            Password:
          </label>
          <input v-model="password" type="password" name="password" value>

          <button type="submit" name="button">
            Login
          </button>
        </form>
      </div>
    </template>
The other difference here is instead of calling the register method when the form is submitted, we are calling the login method, which we can write now.
src/views/LoginUser.vue
      methods: {
        login () {
          this.$store
            .dispatch('login', {
              email: this.email,
              password: this.password
            })
            .then(() => { this.$router.push({ name: 'dashboard' }) })
        }
      }
This method dispatches the login Vuex action (which we’ll get to in a moment) and sends an object containing the user’s email and password when dispatching. Notice how we are then redirecting to the dashboard route, just like our RegisterUser component does.
Pretty straightforward, huh? So what’s the login Action look like? Let’s head to the Vuex store.js file and write that out.
Vuex: The login Action
The login Action will also behave similarly to how our register Action works. We’ll need it to make an axios post request, but this time to the server’s /login endpoint, sending along the credentials the user input in the LoginUser component.
src/store.js
      login ({ commit }, credentials) {
        return axios
          .post('//localhost:3000/login', credentials)
          .then(({ data }) => {
            commit('SET_USER_DATA', data)
          })
      }
When the server response is returned, we’re taking that data and passing it in as the payload when we commit the SET_USER_DATA Mutation.
Conceptually, there’s not much new happening here. But let’s get clear on what is actually happening on the server-side when that /login endpoint is hit.
Server Login Behavior
When we post out to our example server’s /login endpoint, this will cause the server to read the user.json file in our mock database, and check if the email and password in that file match the email and password that we just sent as credentials. If they match, a new JWT token is created and sent back within the response data.
This means that when our login Action commits the SET_USER_DATA Mutation, we’re doing exactly what we did in the previous lesson:
- Storing the userData in our Vuex State
- Storing a copy of the userData in local storage
- Adding the token from the userData into our Axios header
Since we’ll then have a JWT token in the axios header, we should be successfully accessing our private event data when we’re redirected to the dashboard route (which calls out for those private events).
We’re almost ready to try this out in the browser, but first we need to add LoginUser into our router.js so we can access it.
Adding LoginUser as a route
We’ll just import the file and add it to the routes array.
src/router.js
    import LoginUser from './views/LoginUser.vue'
    ...
      routes: [
        ...
        {
          path: '/login',
          name: 'login',
          component: LoginUser
        }
      ]
Testing it out
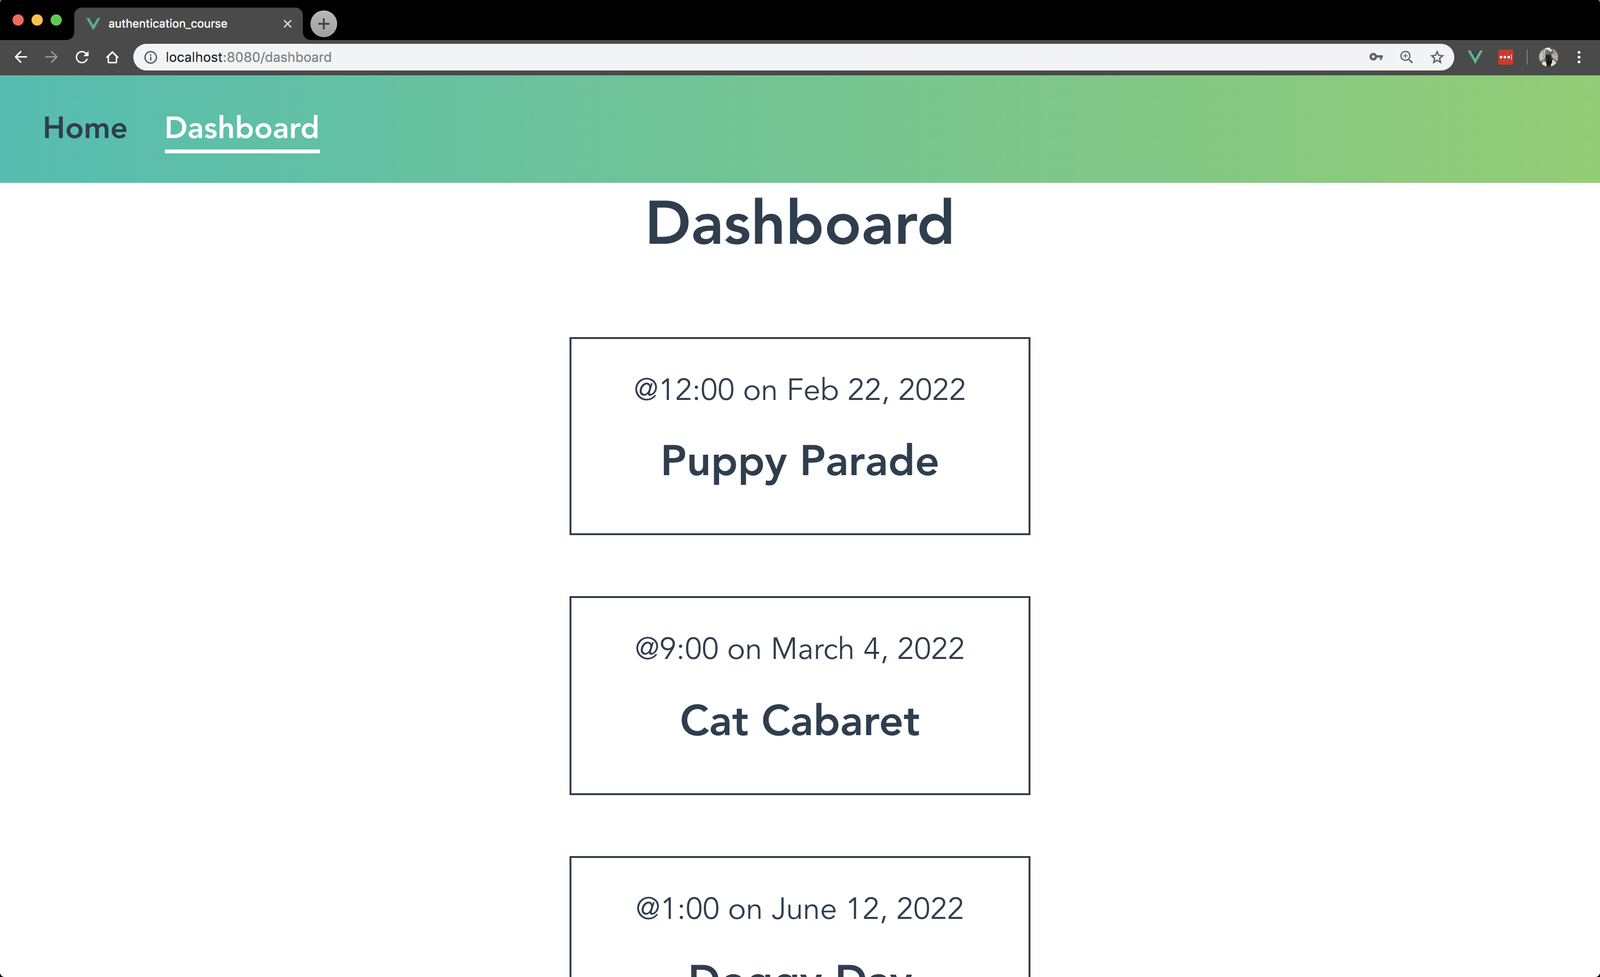
Now let’s head into our browser and test to see if this all works. We’ll go to localhost:8080/login , which brings us to the login component. We’ll login with whatever email and password is currently saved in the user.json file of our mock database.
(Remember, this backend is not a production-ready solution; it’s only storing one user at a time so you’ll need to log in with the same info you most recently registered with.)
When we do so and hit the login button, we are successfully redirected to the dashboard, which displays our private events.
Great! Now we just have a few more steps remaining for this lesson.
Adding Router Links
Right now, we have to manually type in a url such as localhost:8080/login or localhost:8080/register . We need to add to our user interface so the user has some links they can click on to route them to these paths.
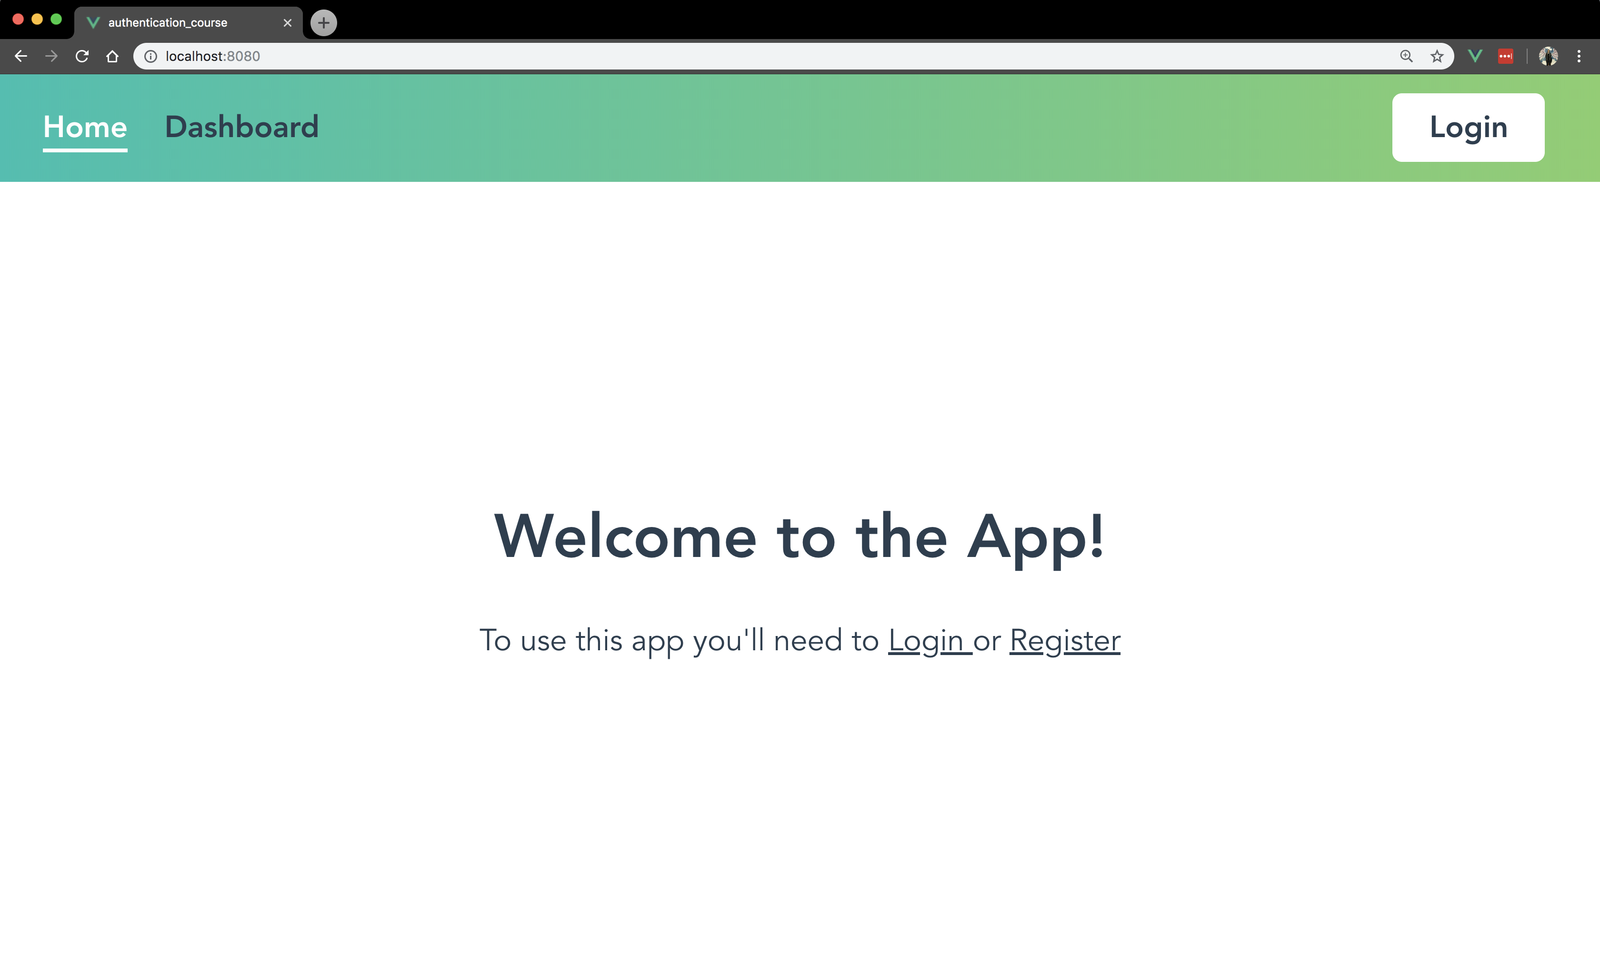
So let’s head into our Home.vue component and start that process. In our template we’ll add a welcome message, like so:
src/views/Home.vue
      <div>
        To use this app you'll need to
        <router-link to="/login">
          Login
        </router-link>
        or
        <router-link to="/register">
          Register
        </router-link>
      </div>
Now when someone lands on our site’s homepage, they are prompted to login to their account or register to create one.
So far so good, but what if a visitor is at the /login route but they realize they need to create an account? They would have to go back to the home page and then click on the “register” router-link . We’d have the same problem if a visitor is at /register but they need to be at the /login route because they realized they already have an account.
We can add router-links to the bottom of the LoginUser and RegisterUser components to solve this issue and improve our user experience.
src/views/LoginUser.vue
    <form>
    ...
      <button type="submit" name="button">
        Login
      </button>

      <router-link to="/register">
        Don't have an account? Register.
      </router-link>
    </form>
src/views/RegisterUser.vue
    <form>
    ...
      <button type="submit" name="button">
        Login
      </button>

      <router-link to="/login">
        Already have an account? Login.
      </router-link>
    </form>
Now our user has a convenient way to navigate to the route they need. Yay UX!
Adding a Login Button
Additionally, we can add a button to our navbar that prompts a user to login as well. Let’s head into our AppNav.vue component and add a button there.
src/components/AppNav.vue
    ...
    <router-link to="/login" class="button">
      Login
    </router-link>
    ...
Now, at the bottom of our template, we have a router-link styled like a button. So if we check the browser, that’ll appear at the top-right corner, like we’ve seen in many web apps before.
Great. Now our app has convenient ways for a user to navigate between our LoginUser and RegisterUser components. But once a user is logged in, they probably shouldn’t be seeing prompts for them to login or register, since they’ve clearly already done that. We can solve for that by using some Vuex State we already have.
Removing router-links when logged in
If our user is logged in, they probably shouldn’t see router-links prompting them to login. So we can hide those router-links when we know we have a user in our Vuex State.
Technically, we can use this.$store.state.user as an expression to determine whether we display the router-links that prompt logging in/registering, like so:
src/views/Home.vue
    <template>
      ...
       <template v-if="!this.$store.state.user">
          <div>
            To use this app you'll need to
            <router-link to="/login">
              Login
            </router-link>
            or
            <router-link to="/register">
              Register
            </router-link>
          </div>
        </template>
      ...
    </template>
While this works, it’s not the most ideal solution, for a few reasons. We want our templates to be as readable as possible. We might have a designer on our team who doesn’t know Vuex, for example. Also, as our app grows, our Vuex store will evolve. We might break our store into modules and/or rename items in our State, which would require us to update every v-if statement that relies on our Vuex store being structured in a specific way.
A more ideal solution is to use a getter that tells us whether we have a user logged in or not, and make that getter accessible from anyone component that may need it.
So we let’s first create that loggedIn getter:
src/store.js
    ...
      getters: {
        loggedIn (state) {
          return !!state.user
        }
      }
    ...
If this !! syntax is new to you, just know it helps us determine the truthiness or falsiness of the value. So this getter will return true if we have a user stored in our state, and false when that state is null.
Now let’s start to make this getter accessible to any component that needs it.
Inside our src directory, we’ll create a new vuex folder, and move our store.js file into it. Inside of that vuex folder, we’ll then create a new helpers.js file. As you might imagine, we can use this file to import Vuex helpers, specifically mapGetters .
src/vuex/helpers.js
    import { mapGetters } from 'vuex'

    export const authComputed = {
      ...mapGetters(['loggedIn'])
    }
Notice how we’re then exporting authComputed , which uses the mapGetters helper to map to the loggedIn getter that we just added to our store.js file.
Now we can import this vuex helper into the components that need it, such as the Home component.
src/views/Home.vue
    <script>
    import { authComputed } from '../vuex/helpers.js'

    export default {
      computed: {
        ...authComputed
      }
    }
    </script>
After importing, we can add authComputed as a computed property, this component will then have access to everything that lives within authComputed , which includes the loggedIn getter.
So in our template, instead of <template v-if="!this.$store.state.user"> , we can use our getter: loggedIn
src/views/Home.vue
    <template>
      ...
        <div v-if="!loggedIn">
          To use this app you'll need to
          <router-link to="/login">
            Login
          </router-link>
          or
          <router-link to="/register">
            Register
          </router-link>
        </div>
      ...
    </template>
Great. Now we will only display this welcome message when we’ve determined that there is not already a user in our State.
We can repeat this process in the our AppNav component, which also needs to hide a router-link when we have a user logged in.
src/components/AppNav.vue
    <template>
      <div id="nav">
        ...
        <router-link v-if="!loggedIn" to="/login" class="button">
          Login
        </router-link>
      </div>
    </template>

    <script>
    import { authComputed } from '../vuex/helpers.js'
    export default {
      computed: {
        ...authComputed
      }
    }
    </script>
Here, we’ve imported authComputed , added it as a computed property, and added v-if="!loggedIn" to the router-link that we need to display or not.
Let’s ReVue
In this lesson, we covered how to log in users who had already registered with our app, then added conditionally displaying navigational links to smooth out the user experience, relying on some effective Vuex reorganization to provide a more scalable (and readable) solution.
In the next lesson, we’ll cover the process of effectively logging out a user.
User Logout
Now that we understand how to log users into our app, we can start thinking about what it takes to successfully log a user out of our app. As you might expect, logging a user out will essentially require us to reverse the steps we took when we logged a user in. This means we’ll need to remove the user data from our Vuex State, remove the user data from our local storage, and take the JWT token out of our axios Authorization header. Let’s get started adding all of this functionality.
Creating a Logout Button
First, we need to add to our user interface. We’ll add a simple way for a user to log out of our app. Just like we have a Login button that shows up in our navbar when a user is not logged in, we can add a Logout button to our navbar, which shows up when a user is logged in. Let’s head into our AppNav component and add that button now.
src/components/AppNav.vue
    <router-link v-if="!loggedIn" to="/login" class="button">
            Login
    </router-link>

    <button v-else type="button" class="logoutButton" @click="logout">
            Logout
    </button>
Notice how we placed the Logout button just below the Login button. We did this so that we could simply add a v-else onto it so it will show up whenever the Login button is not showing up. In other words: the Logout button will show up whenever a user is logged in. In addition to having a logoutButton class, our button is also triggering a method with @click="logout" So what does that logout method need to do? We’ll want it to dispatch a Vuex Action called logout , so let’s add that method now inside our AppNav component.
 src/components/AppNav.vue
    methods: {
        logout () {
          this.$store.dispatch('logout')
        }
      }
Now we can head into our Vuex store and get this logout behavior working.
Adding to the Store
Let’s add our logout Action. src/vuex/store.js
    logout ({ commit }) {
      commit('LOGOUT')
    }
As you can see, this simply commits the LOGOUT Mutation. Before we write that Mutation, let’s pause a moment to think about what needs to happen inside of it. Like I mentioned earlier, when we log a user out of the app, we are essentially reversing the login steps. Or in other words, we are reversing what we accomplished with the SET_USER_DATA Mutation, which looks like this:
src/vuex/store.js
    SET_USER_DATA (state, userData) {
      state.user = userData
      localStorage.setItem('user', JSON.stringify(userData))
      axios.defaults.headers.common['Authorization'] = `Bearer ${
        userData.token
      }`
    }
It’s setting the userData into our user State, setting the userData in local storage, and setting the token as the axios Authorization header. So to reverse this, we could write something like:
src/vuex/store.js
    LOGOUT (state) {
            state.user = null
      localStorage.removeItem('user')
      axios.defaults.headers.common['Authorization'] = null
    }
But there is actually a simpler and more scalable way to achieve this, which looks like:
src/vuex/store.js
    LOGOUT () {
      localStorage.removeItem('user')
      location.reload()
    }
Here, we are still manually removing the user from our local storage, but we’re using location.reload() to handle clearing out the Vuex State and axios header. If you’re not familiar with this reload method, it is essentially forcing a refresh of our page. And since Vuex State does not survive a browser refresh, it takes care of clearing our user State for us. Additionally, it clears our axios Authorization header as well.
So with one forced refresh, we handled both steps we needed, and have proactively built-in some scalability here. How? Well if you imagine our app growing, we’d probably break our Vuex into modules. This means we’d likely need to rewrite the way we are clearing our user State, which eventually may not live in the same file as the Mutation that is trying to clear it. So reload() is a handy trick to save us some headache down the line.
Checking the browser
If we check this out in the browser, we’ll see that when we click the Logout button, it works as expected. And if we’re on the Dashboard route, we’ll see that the page displays “Loading events…” and the console gives us a 401 error (which our mock server sent back since it did not receive the correct request credentials). So far so good! But it doesn’t make sense for us to allow a user who is not logged in to access this Dashboard route, since they won’t have the proper permissions to view the events that we display here anyway. So we can head into our router.js file and make sure that when a user logs out (or was never logged in to begin with) they can’t access our Dashboard, or any other private route within our app.
Blocking private routes
In order to block access to a private route via Vue Router, we can use a navigation guard, which we learned about in our Next-Level Vue course. Our first step will be to make use of the metatag, which can be used to add protections to a given route. So let’s make it so that the dashboard route requiresAuth .
src/router.js
    {
      path: '/dashboard',
      name: 'dashboard',
      component: Dashboard,
      meta: { requiresAuth: true }
    },
Now we can start building out our beforeEach method, which receives three arguments: to : the route being navigated to from : the current route being navigated away from next the function called to resolve the hook
src/router.js
    router.beforeEach((to, from, next) => {
            // now what?
    })
What do we need to happen inside this guard? First, we’ll need to know a couple things:
- Do we have a user logged in?
- Does the route being navigated
torequireAuth?
So let’s handle step one. We can find that out by simply checking our local storage, like so:
src/router.js
    router.beforeEach((to, from, next) => {
      const loggedIn = localStorage.getItem('user')
    })
Now we can check if the route being navigated to requiresAuth :
src/router.js
    router.beforeEach((to, from, next) => {
      const loggedIn = localStorage.getItem('user')

            if (to.matched.some(record => record.meta.requiresAuth)) {
                    // now what?
            }
    })
Here we are saying if the route being navigated to matches one of our routes ( record ) where the meta tag includes requiresAuth = true , then we’ll do something. What do we want to do now? We need to see if we have a user loggedIn . If not, then we will redirect to the home route and return the function.
src/router.js
    router.beforeEach((to, from, next) => {
      const loggedIn = localStorage.getItem('user')

            if (to.matched.some(record => record.meta.requiresAuth)) {
                    if (!loggedIn) {
          next('/')
                            return
        }
                next()
              }
    })
Otherwise, the function continues to run and we’ll hit the second next() and fulfill that route request. And we need to add a third next() outside of the initial if statement so that we can fulfill the route request if the route is simply public.
src/router.js
    router.beforeEach((to, from, next) => {
      const loggedIn = localStorage.getItem('user')

      if (to.matched.some(record => record.meta.requiresAuth)) {
        if (!loggedIn) {
          next('/')
                            return
        }
        next()
      }

      next()
    })
If you’re looking at this code and wondering, “Can’t this be done with less code?” You’re right! This is how we could simplify it further:
src/router.js
    router.beforeEach((to, from, next) => {
      const loggedIn = localStorage.getItem('user')
      if (to.matched.some(record => record.meta.requiresAuth) && !loggedIn) {
        next('/')
      }
      next()
    })
Great. Now every time we navigate to a new route ( beforeEach ), we are checking if that route requires authentication and if we have a user logged in. If it does require authentication and we don’t have a user, we’ll redirect to our home route. Otherwise, we can fulfill that route request. We’re almost done, there’s just one little feature we need to add.
Hiding the Dashboard Link
If we check this out in the browser, we can see when we hit the Logout button, not only are we logged out, but since we no longer have the permission to access the guarded Dashboard route, we are redirected to the home page. But we can still see the Dashboard link in the navbar. Even though that link won’t take us to the guarded route when we click on it, that’s even more of a reason to hide it when a user is logged out. So let’s head into our AppNav component and make sure it won’t show up when it shouldn’t.
src/components/AppNav.vue
    <router-link v-if="loggedIn" to="/dashboard">
      Dashboard
    </router-link>
By simply adding v-if="loggedIn" , we will show this button only when a user is logged in. This is similar to the previous lesson, where we hid the Login button whenever a user was not logged in.
Let’s ReVue
In this lesson, we successfully added the functionality to log a user out of our app, which means we reversed our login steps, and we even learned how to use the reload method to make this logout functionality more scalable from the get-go. In the next lesson, we’ll learn how to handle the errors that happen when people attempt to log into our app incorrectly.
Handling Errors
In this lesson, we’ll be taking a look at handling some of the errors that can happen when users attempt to register or log in to our app. So let’s think about the situations that we should be checking for.
First, we want to make sure that when a user tries to log in with invalid credentials (with the wrong password, for example) we display an error. We’ll handle that inside of our LoginUser component. Additionally, when a user tries to register an account with our app, a few things could go wrong. They might already have an account and try to create a second one with an email that already exists. Or they may be trying to create an account with an invalid password (too short, for example). We will need to display errors then, too, within our RegisterUser component.
Understanding the Server Behavior
Before we add the features I just mentioned, it will be helpful if we understand what the server ought to be doing so that our front end Vue app can respond appropriately.
When a user logs in, we’ll need our backend to check that the user’s credentials (in our case: the email and password) match a record in our database. Remember that in our mock backend, we only store one user at a time, so we are simply checking if the user data that is stored matches the credentials our user is logging in with. If not, the server should send back an error with the status code of 401 .
You can observe that behavior in our mock server.js file:
server.js
    app.post('/login', (req, res) => {
      const userDB = fs.readFileSync('./db/user.json') // reading db
      const userInfo = JSON.parse(userDB)
      if ( // check if user credentials exists in db
        req.body &&
        req.body.email === userInfo.email &&
        req.body.password === userInfo.password
      ) {
        const token = jwt.sign({ userInfo }, 'the_secret_key')
        res.json({
          token,
          email: userInfo.email,
          name: userInfo.name
        })
      } else {
        res.status(401).json({ error: 'Invalid login. Please try again.'}) // send error if credentials don't match record
      }
    })
Great. Now what do you think the /register endpoint ought to do?
Since we don’t want a user creating multiple accounts with the same email, we’ll need to check that the user’s registration credentials do not match what already exists in our database. We also need to ensure they are giving us a strong enough password. In a production solution, your team may be using a validation library and have a custom validation solution on your backend. But for simplicity’s sake, this is how we are handling that “validation” in our mock server.js file:
server.js
    app.post('/register', (req, res) => {
    ...
    	var errorsToSend = [] // array to collect errors

      if (dbUserEmail === user.email) { // check to see if email already exists in db
        errorsToSend.push('An account with this email already exists.')
      }
      if (user.password.length < 5) { // validate password is in correct format
        errorsToSend.push('Password too short.')
      }
      if (errorsToSend.length > 0) { // check if there are any errors
        res.status(400).json({ errors: errorsToSend }) // send errors back with status code
      } else {
    	  // success
      }
    ...
    })
Now that we understand how our dummy server is behaving, and what triggers those status codes to be sent back, we can start adding to our Vue app to receive and display them.
Handling the Login Error
Inside of our LoginUser component, in our login method, we can add the ability to catch the error the server sends back to us.
src/views/LoginUser.vue
    login () {
      this.$store
        .dispatch('login', {
          email: this.email,
          password: this.password
        })
        .then(() => {
          this.$router.push({ name: 'dashboard' })
        })
        .catch(err => {
          // now what?
        })
    }
Once an error is caught, we can add it to a new error property on our component’s data, like so:
src/views/LoginUser.vue
    <script>
    export default {
      data () {
        return {
    			...
          error: null
        }
      },
      methods: {
        login () {
          ...
            .catch(err => {
              this.error = err.response.data.error
            })
        }
      }
    }
    </script>
Now that we are locally storing that error status code, we can display that message in our template.
Below our button , we’ll add:
src/views/LoginUser.vue
    <template>
    ...
    	<p>{{ error }}</p>
    ...
    </template>
If our user attempts to login with invalid credentials, they’ll now be met with:
Great. Now we can head into our RegisterUser component and repeat this process.
Handling the Register Errors
Inside of our RegisterUser component, we will catch the error the same way we just did, but now in the register method. We’ll also be adding that response error to a new errors property on our component’s data.
src/views/RegisterUser.vue
    <script>
    export default {
      data () {
        return {
          ...
          errors: null
        }
      },
      methods: {
        register () {
          ...
            .catch(err => {
              this.errors = err.response.data.errors
            })
        }
      }
    }
    </script>
Now we can add to our template to display the error messages we’ve collected. We’ll do that by iterating over them with a v-for .
src/views/RegisterUser.vue
    <template>
    ...
    <ul>
      <li v-for="(error, index) in errors" :key="index">
        {{ error }}
      </li>
    </ul>
    ...
    </template>
Great, now when a user logs in with an already-registered email or too short of a password, they’ll see:

Side Notes:
- In addition to whatever validation you are doing on the server-side, you’ll also want to add validation to these forms on the front end. We teach you how to do that in our Next Level Vue course.
- You’ll want to handle when the server API is down. We also teach this in Next Level Vue course.
- Depending on the level of security your app requires, the message here will vary. For example, if you don’t want a hacker knowing the email they just input exists in your database, you probably shouldn’t tell them: “The email already exists.” You and your team can decide on the best message to display for your needs.
- You may be wondering at this point why we’re only handling these errors at the component level and not using Vuex. These errors are presently not of concern to our entire app, so we don’t need to share them with any other components. We’re better off simply keeping this functionality of catching, storing and displaying the errors within the components that care about them.
Let’s ReVue
We’ve now added the ability for our user interface to catch errors when a user logs in or registers with invalid credentials, and display messages to our user accordingly. We also looked at the behavior that ought to happen on the backend to get this working on the front end.
In the next lesson, we’ll look at how to automatically log users back into your app.
Automatic Login
Once a user is logged into our app, we want the ability to keep them logged in, even if they refresh the browser or close the tab our app is running in. In this lesson, we’ll learn how to accomplish this through a process of automatic login.
The user State disappears
Currently if we refresh the browser when a user is logged in, we can see in the Vuex tab of the Vue DevTools that our user State disappears.

This also happens if we were to close the app and reopen it in a new tab. But we don’t necessarily want to force our user to log back in every time one of these things happen. Instead, we can utilize the user data we already have in the browser’s local storage to restore this Vuex state, which effectively logs the user back in automatically.
To handle this, we’ll head into our main.js file and add some code that will run every time the app is created .
Implementing Automatic Login
When our app is created , we want to check if there is a user in our local storage, and if so, we can restore the Vuex user State with that user data. If you recall from earlier in this course, when a user logs in we set our user data by using the Vuex Mutation by the same name: SET_USER_DATA . We can make use of that Mutation to restore our user State with the user data we have in our local storage, when the app is created .
Let’s make that happen within our main.js file now.
src/main.js
    new Vue({
      router,
      store,
      created () {
        const userString = localStorage.getItem('user') // grab user data from local storage
        if (userString) { // check to see if there is indeed a user
          const userData = JSON.parse(userString) // parse user data into JSON
          this.$store.commit('SET_USER_DATA', userData) // restore user data with Vuex
        }
      },
      render: h => h(App)
    }).$mount('#app')
As you can see in the created hook, we’re checking to see if user data exists in our local storage, and if it does we’re parsing that data into JSON and passing it in as the payload when we commit the SET_USER_DATA mutation, which effectively logs our user back in.
Great. Now our user won’t have to log in every time the browser is refreshed. They could even close their entire browser, go to bed, and navigate to our app the next day and find themselves “still” logged in. I say “still” because technically they were logged out, but we forced that re-login process when they pulled up the app.
Adding a Security Measure
While we’re here in the main.js file, we can take some time to add a security measure to our app. Currently, it’s possible for an ill-intentioned person to save a fake token to local storage. While this might allow them to navigate to certain parts of our app, if they navigate somewhere that makes an API call for private resources, we can intercept that request and log them out.
Let’s take a look at the code for that:
src/main.js
    new Vue({
      router,
      store,
      created () {
    		...
    		axios.interceptors.response.use(
    			response => response, // simply return the response
    			error => {
    				if (error.response.status === 401) { // if we catch a 401 error
    					this.$store.dispatch('logout') // force a log out
    				}
    				return Promise.reject(error) // reject the Promise, with the error as the reason
    			}
    		)
      },
      render: h => h(App)
    }).$mount('#app')
If we step through this, we see we’re intercepting the response from axios, and returning it as-is when it’s correct. However, when there is an error , we’re checking to see if it’s a 401 status code ( which means the user is unauthorized to view the content they’re attempting to load), and if so we use Vue Router to redirect to the homepage, and use Vuex to force a logout. We’ll then return a rejection of the Promise, and pass in the error as the reason for that rejection.
Great. Now even if someone attempts to hack our app with a fake token, they will be logged out as soon as they try to access private resources.
Let’s ReVue
In this lesson, we added a feature to automatically log users back into our app, and we also added a feature to log malevolent users out of our app if they’re using a fake token.
That brings us to the end of our Token-Based Authentication course. I hope you’ve learned a lot and feel confident about implementing authentication in your own apps. See you in another course!