Admin pages and components
At this point, we’ve implemented static methods inside our models, Express routes, and API methods. Here we work on our last task - adding API methods to our pages and components.
We will discuss components and pages in this order:
-
Component
components/adminEditBook.js -
Page
pages/admin/add-book.js -
Page
pages/admin/edit-book.js -
Page
pages/admin/book-detail.js -
The component
EditBookmakes up most of the interface for ouradd-book.jsandedit-book.jspages. Thus we should discuss how this component works before we go into pages.Note that we’ve already built multiple pages and components with React and Material-UI. We discussed how to usepropTypes,defaultProps,constructor,state,getInitialProps(),componentDidMount, and more. We won’t repeat what you learned - we’ll primarily discuss how to add API methods to pages and components.The componentEditBookis essentially a simple form with aSavebutton. When our Admin clicksSave, the form gets submitted, thereby triggeringonSubmit = (event) =>. This event passesname,price, andgithubRepotothis.state.bookwith ES6 destructuring:
const { name, price, githubRepo } = this.state.book;
If all three parameters exist, then they are passed to the onSave function as this.state.book , and we call the onSave prop function (i.e. parameter of props object, this.props.onSave ) with:
this.props.onSave(this.state.book);
One important purpose of this component is to call getGithubRepos() to get a list of repos. Our Admin user will select one Github repo out of this list to create a book. As always, we call the method only after our component mounts, using our favorite async/await and try/catch combo:
async componentDidMount() {
 try {
   const { repos } = await getGithubRepos();
   this.setState({ repos }); // eslint-disable-line
 } catch (err) {
   logger.error(err);
 }
}
constructor sets an initial state with book and repos props (we discussed constructor in detail in Chapter 2 and Chapter 5):
constructor(props) {
 super(props);

 this.state = {
   book: props.book || {},
   repos: [],
 };
}
The form has three items: book name ( <TextField> ), book title (also <TextField> ), and a dropdown list of repos ( <Select> with <MenuItem> ).Put all this information about our EditBook component together:
components/admin/EditBook.js :
import React from 'react';
import PropTypes from 'prop-types';
import Button from '@material-ui/core/Button';
import TextField from '@material-ui/core/TextField';
import Input from '@material-ui/core/Input';
import Select from '@material-ui/core/Select';
import MenuItem from '@material-ui/core/MenuItem';

import { getGithubRepos } from '../../lib/api/admin';
import { styleTextField } from '../../components/SharedStyles';
import notify from '../../lib/notifier';
import logger from '../../server/logs';

class EditBook extends React.Component {
 static propTypes = {
   book: PropTypes.shape({
     _id: PropTypes.string.isRequired,
   }),
   onSave: PropTypes.func.isRequired,
 };

 static defaultProps = {
   book: null,
 };

 constructor(props) {
   super(props);

   this.state = {
     book: props.book || {},
     repos: [],
   };
 }

 async componentDidMount() {
   try {
     const { repos } = await getGithubRepos();
     this.setState({ repos }); // eslint-disable-line
   } catch (err) {
     logger.error(err);
   }
 }

 onSubmit = (event) => {
   event.preventDefault();
   const { name, price, githubRepo } = this.state.book;

   if (!name) {
     notify('Name is required');
     return;
   }

   if (!price) {
     notify('Price is required');
     return;
   }

   if (!githubRepo) {
     notify('Github repo is required');
     return;
   }

   this.props.onSave(this.state.book);
 };

 render() {
   return (
     <div style={{ padding: '10px 45px' }}>
       <form onSubmit={this.onSubmit}>
         <br />
         <div>
           <TextField
             onChange={(event) => {
               this.setState({
                 book: Object.assign({}, this.state.book, { name: event.target.value }),
               });
             }}
             value={this.state.book.name}
             type="text"
             label="Book's title"
             labelClassName="textFieldLabel"
             style={styleTextField}
             required
           />
         </div>
         <br />
         <br />
         <TextField
           onChange={(event) => {
             this.setState({
               book: Object.assign({}, this.state.book, { price: Number(event.target.value) }),
             });
           }}
           value={this.state.book.price}
           type="number"
           label="Book's price"
           className="textFieldInput"
           style={styleTextField}
           step="1"
           required
         />
         <br />
         <br />
         <div>
           <span>Github repo: </span>
           <Select
             value={this.state.book.githubRepo || ''}
             input={<Input />}
             onChange={(event) => {
               this.setState({
                 book: Object.assign({}, this.state.book, { githubRepo: event.target.value }),
               });
             }}
           >
             <MenuItem value="">
               <em>-- choose github repo --</em>
             </MenuItem>
             {this.state.repos.map(r => (
               <MenuItem value={r.full_name} key={r.id}>
                 {r.full_name}
               </MenuItem>
             ))}
           </Select>
         </div>
         <br />
         <br />
         <Button raised type="submit">
           Save
         </Button>
       </form>
     </div>
   );
 }
}

export default EditBook;
We are done with the EditBook component. Now let’s discuss pages.
2. The page add-book.js is straightforward. Most of this page’s interface comes from the EditBook component. We need to achieve this: Admin clicks on the form’s Save button to call the addBook() method and pass a book’s data to this method. That’s why we wrote an addBookOnSave function inside the EditBook component. Once our Admin clicks Save , the EditBook component does three things:
- submits the form
- passes the book’s
name,price, andgithubRepo(asthis.state.book) to theonSavefunction - calls the
onSavefunctionWe calladdBookOnSave()with<EditBook onSave={this.addBookOnSave} />To create a new book, we want theaddBookOnSavefunction to call the API methodaddBook(). The API methodaddBook()returns abookobject.Then we wait for the API methodsyncBookContent()to sync content with Github. When done, we display success withnotify()from Chapter 4. Also we let the loading Nprogress bar finish withNProgress.done().At the end, our app should redirect the Admin to theBookDetailpage (pages/admin/book-detail.js) with Next.js’sRouter.push()(read more):
addBookOnSave = async (data) => {
 NProgress.start();

 try {
   const book = await addBook(data);
   notify('Saved');
   try {
     const bookId = book._id;
     await syncBookContent({ bookId });
     notify('Synced');
     NProgress.done();
     Router.push(`/admin/book-detail?slug=${book.slug}`, `/admin/book-detail/${book.slug}`);
   } catch (err) {
     notify(err);
     NProgress.done();
   }
 } catch (err) {
   notify(err);
   NProgress.done();
 }
};
We’ll discuss and create the BookDetail page later in this chapter.Note that data inside the addBookOnSave = async (data) function is this.state.book . This is because we defined our onSave() function as onSave(this.state.book) (see the EditBook component above), and we pointed onSave() to addBookOnSave() : onSave={this.addBookOnSave} (see above snippet).Create an AddBook component and add the above code to it before render() :
pages/admin/add-book.js :
import React from 'react';
import Router from 'next/router';
import NProgress from 'nprogress';

import withLayout from '../../lib/withLayout';
import withAuth from '../../lib/withAuth';
import EditBook from '../../components/EditBook';
import { addBook, syncBookContent } from '../../lib/api/admin';
import notify from '../../lib/notifier';

class AddBook extends React.Component {
 addBookOnSave = async (data) => {
   NProgress.start();

   try {
     const book = await addBook(data);
     notify('Saved');
     try {
       const bookId = book._id;
       await syncBookContent({ bookId });
       notify('Synced');
       NProgress.done();
       Router.push(`/admin/book-detail?slug=${book.slug}`, `/admin/book-detail/${book.slug}`);
     } catch (err) {
       notify(err);
       NProgress.done();
     }
   } catch (err) {
     notify(err);
     NProgress.done();
   }
 };

 render() {
   return (
     <div style={{ padding: '10px 45px' }}>
       <EditBook onSave={this.addBookOnSave} />
     </div>
   );
 }
}

export default withAuth(withLayout(AddBook));
The Admin has to wait a bit for the API method to return a response (with data for GET requests, without data for POST requests). Thus we use NProgress.start(); before we call await addBook() , and we call NProgress.done(); after it.
3. The page edit-book.js is a bit more complex than add-book.js . In addition to calling the API method editBook() , we have to display the book’s current data with another API method, getBookDetail() . We do so:
- with Next.js’s
getInitialProps():
static getInitialProps({ query }) {
 return { slug: query.slug };
}
- with our
getBookDetail()API method inside thecomponentDidMountlifecycle hook:
async componentDidMount() {
 NProgress.start();

 try {
   const book = await getBookDetail({ slug: this.props.slug });
   this.setState({ book }); // eslint-disable-line
   NProgress.done();
 } catch (err) {
   this.setState({ error: err.message || err.toString() }); // eslint-disable-line
   NProgress.done();
 }
}
- and by passing the
bookprop to ourEditBookcomponent with<EditBookComp book={book} />Next, we need to make sure that when our Admin clicks theSavebutton, we call the API methodeditBook(). We make sure that after form submission, theonSavefunction points to the internaleditBookOnSavefunction:<EditBookComp onSave={this.editBookOnSave} book={book} />We call theeditBook()API method inside theeditBook()function as follows:
editBookOnSave = async (data) => {
 const { book } = this.state;
 NProgress.start();

 try {
   const editedBook = await editBook({ ...data, id: book._id });
   notify('Saved');
   NProgress.done();
   Router.push(`/admin/book-detail?slug=${editedBook.slug}`, `/admin/book-detail/${editedBook.slug}`);
 } catch (err) {
   notify(err);
   NProgress.done();
 }
};
Note that editBook() returns the editedBook object to the client. This object has a slug parameter. We use editedBook.slug to redirect a user to the BookDetail page of the edited book (instead of the old book, since a user might have changed the book’s name and therefore slug).After editBook returns editedBook object we indicate success to user with notify() and Nprogress.done() .At the end, our app redirects the Admin user to the BookDetail page ( pages/admin/book-detail.js ) that we introduce later in this chapter.Again, data inside the editBookOnSave = async (data) function is this.state.book , because we defined our onSave() function as onSave(this.state.book) (in the EditBook component), and we pointed onSave() to editBookOnSave() : onSave={this.editBookOnSave} .You’ll notice that unlike passing data without modification ( addBook(data); ), here we add an id to our data. Thus the syntax is editBook({ ...data, id: book._id }); instead of editBook(data); .In summary, we get:
pages/admin/edit-book.js :
import React from 'react';
import Router from 'next/router';
import NProgress from 'nprogress';
import PropTypes from 'prop-types';
import Error from 'next/error';

import EditBookComp from '../../components/admin/EditBook';
import { getBookDetail, editBook } from '../../lib/api/admin';
import withLayout from '../../lib/withLayout';
import withAuth from '../../lib/withAuth';
import notify from '../../lib/notifier';

class EditBook extends React.Component {
 static propTypes = {
   slug: PropTypes.string.isRequired,
 };

 static getInitialProps({ query }) {
   return { slug: query.slug };
 }

 state = {
   error: null,
   book: null,
 };

 async componentDidMount() {
   NProgress.start();

   try {
     const book = await getBookDetail({ slug: this.props.slug });
     this.setState({ book }); // eslint-disable-line
     NProgress.done();
   } catch (err) {
     this.setState({ error: err.message || err.toString() }); // eslint-disable-line
     NProgress.done();
   }
 }

 editBookOnSave = async (data) => {
   const { book } = this.state;
   NProgress.start();

   try {
     const editedBook = await editBook({ ...data, id: book._id });
     notify('Saved');
     NProgress.done();
     Router.push(`/admin/book-detail?slug=${editedBook.slug}`, `/admin/book-detail/${editedBook.slug}`);
   } catch (err) {
     notify(err);
     NProgress.done();
   }
 };

 render() {
   const { book, error } = this.state;

   if (error) {
     notify(error);
     return <Error statusCode={500} />;
   }

   if (!book) {
     return null;
   }

   return (
     <div>
       <EditBookComp onSave={this.editBookOnSave} book={book} />
     </div>
   );
 }
}

export default withAuth(withLayout(EditBook));
- The
book-detail.jspage has two main purposes. The first is to show book data (such asname,githubRepo,chapters, and more) to the Admin user. The second is to sync content. This page will have aSyncbutton that our Admin clicks to get content from Github.Similar to ouredit-book.jspage, we need to display book data. We do it the same way as we did onedit-book.js.
-
getInitialProps():
 static getInitialProps({ query }) {
 return { slug: query.slug };
}
- API method
getBookDetail()inside lifecycle hookcomponentDidMount:
async componentDidMount() {
 NProgress.start();
 try {
   const book = await getBookDetail({ slug: this.props.slug });
   this.setState({ book, loading: false }); // eslint-disable-line
   NProgress.done();
 } catch (err) {
   this.setState({ loading: false, error: err.message || err.toString() }); // eslint-disable-line
   NProgress.done();
 }
}
- Passing props to component:
<MyBook {...this.props} {...this.state} />To sync content on the button click, add the functionhandleSyncContent()to theonClickhandler:
<Button raised onClick={handleSyncContent(book._id)}>
 Sync with Github
</Button>
We call the API method syncBookContent() (discussed in Admin Dashboard section) inside the handleSyncContent() function:
const handleSyncContent = bookId => async () => {
try {
 await syncBookContent({ bookId });
 notify('Synced');
} catch (err) {
 notify(err);
}
};
Our book-detail.js page will now have a list of chapters with hyperlinked titles.Final code for this page:
pages/admin/book-detail.js :
import React from 'react';
import NProgress from 'nprogress';
import PropTypes from 'prop-types';
import Error from 'next/error';
import Link from 'next/link';
import Button from '@material-ui/core/Button';

import { getBookDetail, syncBookContent } from '../../lib/api/admin';
import withLayout from '../../lib/withLayout';
import withAuth from '../../lib/withAuth';
import notify from '../../lib/notifier';

const handleSyncContent = bookId => async () => {
 try {
   await syncBookContent({ bookId });
   notify('Synced');
 } catch (err) {
   notify(err);
 }
};

const MyBook = ({ book, error }) => {
 if (error) {
   notify(error);
   return <Error statusCode={500} />;
 }

 if (!book) {
   return null;
 }

 const { chapters = [] } = book;

 return (
   <div style={{ padding: '10px 45px' }}>
     <h2>{book.name}</h2>
     <a href={`https://github.com/${book.githubRepo}`} target="_blank" rel="noopener noreferrer">
       Repo on Github
     </a>
     <p />
     <Button raised onClick={handleSyncContent(book._id)}>
       Sync with Github
     </Button>{' '}
     <Link as={`/admin/edit-book/${book.slug}`} href={`/admin/edit-book?slug=${book.slug}`}>
       <Button raised>Edit book</Button>
     </Link>
     <ul>
       {chapters.map(ch => (
         <li key={ch._id}>
           <Link
             as={`/books/${book.slug}/${ch.slug}`}
             href={`/public/read-chapter?bookSlug=${book.slug}&chapterSlug=${ch.slug}`}
           >
             <a>{ch.title}</a>
           </Link>
         </li>
       ))}
     </ul>
   </div>
 );
};

MyBook.propTypes = {
 book: PropTypes.shape({
   name: PropTypes.string.isRequired,
 }),
 error: PropTypes.string,
};

MyBook.defaultProps = {
 book: null,
 error: null,
};

class MyBookWithData extends React.Component {
 static propTypes = {
   slug: PropTypes.string.isRequired,
 };

 static getInitialProps({ query }) {
   return { slug: query.slug };
 }

 state = {
   loading: true,
   error: null,
   book: null,
 };

 async componentDidMount() {
   NProgress.start();
   try {
     const book = await getBookDetail({ slug: this.props.slug });
     this.setState({ book, loading: false }); // eslint-disable-line
     NProgress.done();
   } catch (err) {
     this.setState({ loading: false, error: err.message || err.toString() }); // eslint-disable-line
     NProgress.done();
   }
 }

 render() {
   return <MyBook {...this.props} {...this.state} />;
 }
}

export default withAuth(withLayout(MyBookWithData));
We are almost at the end of this section. Before we finish, let’s make a small readability improvement.
Go back to pages/public/read-chapter.js . To pass bookSLug and chapterSlug parameters to the page and render this page on our server, we use app.render() (discussed before in Chapter 5):
server.get('/books/:bookSlug/:chapterSlug', (req, res) => {
  const { bookSlug, chapterSlug } = req.params;
  app.render(req, res, '/public/read-chapter', { bookSlug, chapterSlug });
});
When our app user navigates to the /books/:bookSlug/:chapterSlug route, we render the /public/read-chapter page on our server with bookSLug and chapterSlug parameters extracted from the route.
We have to do the same thing for our Admin’s edit-book.js and book-detail.js pages. We need to extract a book’s slug from the routes of these pages, pass this slug to the server, and then render pages/admin/edit-book.js and pages/admin/book-detail.js :
server.get('/admin/book-detail/:slug', (req, res) => {
  const { slug } = req.params;
  app.render(req, res, '/admin/book-detail', { slug });
});

server.get('/admin/edit-book/:slug', (req, res) => {
  const { slug } = req.params;
  app.render(req, res, '/admin/edit-book', { slug });
});
We can add the code snippet above to our main server code at server/app.js - but that file is getting big.
Instead, let’s move all three Express routes to a new file routesWithSlug.js :
server/routesWithSlug.js :
export default function routesWithSlug({ server, app }) {
  server.get('/books/:bookSlug/:chapterSlug', (req, res) => {
    const { bookSlug, chapterSlug } = req.params;
    app.render(req, res, '/public/read-chapter', { bookSlug, chapterSlug });
  });

  server.get('/admin/book-detail/:slug', (req, res) => {
    const { slug } = req.params;
    app.render(req, res, '/admin/book-detail', { slug });
  });

  server.get('/admin/edit-book/:slug', (req, res) => {
    const { slug } = req.params;
    app.render(req, res, '/admin/edit-book', { slug });
  });
}
Go to server/app.js . Import this function with:
import routesWithSlug from ‘./routesWithSlug’;
Then initialize routes on the server with routesWithSlug({ server, app }) . Add it like this::
server.use(session(sess));

auth({ server, ROOT_URL });
api(server);
routesWithSlug({ server, app });
We are ready for testing.
In the next section, we will improve our Header component. And in the section after that, we will test out entire Admin flow, which includes syncing content between our database and Github.
Redirects for Admin and Customer users
One problem is the UX for our Customer user. After a login event, we should redirect the Customer to /my-books , not to /admin .
Open server/google.js and find the following Express route:
server.get(
  '/oauth2callback',
  passport.authenticate('google', {
    failureRedirect: '/login',
  }),
  (req, res) => {
    res.redirect('/admin');
  },
);
We discussed this Express route in detail in Chapter 3. Passport makes the user object available at req.user . Similar to above, use req.user.isAdmin to check if a user is Admin:
server.get(
  '/oauth2callback',
  passport.authenticate('google', {
    failureRedirect: '/login',
  }),
  (req, res) => {
    if (req.user && req.user.isAdmin) {
      res.redirect('/admin');
    } else {
      res.redirect('/my-books');
    }
  },
);
Make sure your user is a Customer (in DB, User doc’s parameter isAdmin is false ), then log out and log back in. After logging in, you will be automatically redirected to /my-books route instead of /admin .
Yet another UX problem, currently the Admin page ( pages/admin/index.js ) is available to both Admin and Customer users. But only Admin user should be able to see Admin page.
To solve this problem, we have to update withAuth HOC: check value of user.isAdmin and add adminRequired parameter. Here is a behaviour of adminRequired parameter of withAuth HOC:
- When
withAuthHOC wraps page component andadminRequiredistruethen Admin page will render and be displayed to Admin user. - When
withAuthHOC wraps page component andadminRequiredistruethen Admin page will not render and returnnullto Customer user. App will redirect Customer user to/my-booksroute.
Open lib/withAuth.js and update it as follows:
import React from 'react';
import PropTypes from 'prop-types';
import Router from 'next/router';

let globalUser = null;

export default (
  Page,
  { loginRequired = true, logoutRequired = false, adminRequired = false } = {},
) => class BaseComponent extends React.Component {
    static propTypes = {
      user: PropTypes.shape({
        id: PropTypes.string,
        isAdmin: PropTypes.bool,
      }),
      isFromServer: PropTypes.bool.isRequired,
    };

    static defaultProps = {
      user: null,
    };

    componentDidMount() {
      const { user, isFromServer } = this.props;

      if (isFromServer) {
        globalUser = user;
      }

      if (loginRequired && !logoutRequired && !user) {
        Router.push('/public/login', '/login');
        return;
      }

      if (logoutRequired && user) {
        Router.push('/');
      }

      if (adminRequired && (!user || !user.isAdmin)) {
        Router.push('/customer/my-books', '/my-books');
      }
    }

    static async getInitialProps(ctx) {
      const isFromServer = !!ctx.req;
      const user = ctx.req ? ctx.req.user && ctx.req.user.toObject() : globalUser;

      if (isFromServer && user) {
        user._id = user._id.toString();
      }

      const props = { user, isFromServer };

      if (Page.getInitialProps) {
        Object.assign(props, (await Page.getInitialProps(ctx)) || {});
      }

      return props;
    }

    render() {
      const { user } = this.props;

      if (loginRequired && !logoutRequired && !user) {
        return null;
      }

      if (logoutRequired && user) {
        return null;
      }

      if (adminRequired && (!user || !user.isAdmin)) {
        return null;
      }

      return <Page {...this.props} />;
    }
};
Note, that we introduced adminRequired parameter in addition to loginRequired and logoutRequired , find line with loginRequired = true, logoutRequired = false, adminRequired = false .
We redirect Customer (non-Admin) user to /my-books if user tries to access any page with adminRequired: true :
if (adminRequired && (!user || !user.isAdmin)) {
  Router.push('/customer/my-books', '/my-books');
}
We render null when Customer (non-Admin) user tries to access any page with adminRequired: true :
if (adminRequired && (!user || !user.isAdmin)) {
  return null;
}
Finally, open pages/admin/index.js , let’s add adminRequired to Admin page. Find line:
export default withAuth(withLayout(IndexWithData));
Update it like this:
export default withAuth(withLayout(IndexWithData), { adminRequired: true });
Done.
Go ahead and test.
Make sure your user is a Customer (in DB, your User doc’s parameter isAdmin is set to false ). Try to access /admin route, you will be automatically redirected to /my-books route.
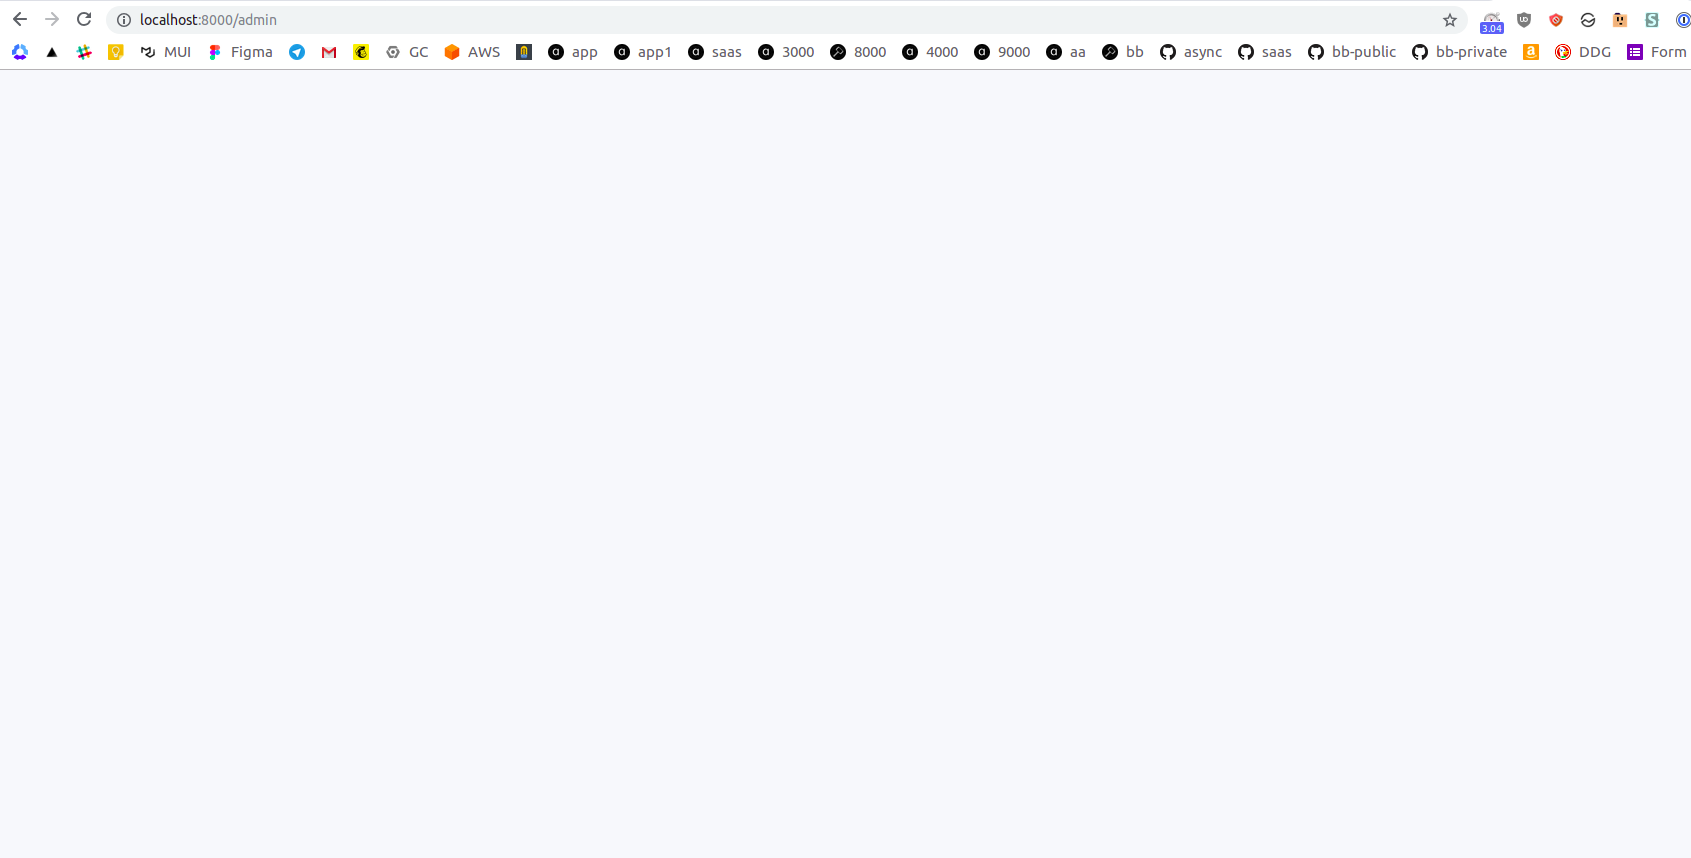
You can also test that Admin page renders null for Customer user. Simply comment out following block of code inside withAuth HOC:
if (adminRequired && (!user || !user.isAdmin)) {
  Router.push('/customer/my-books', '/my-books');
}
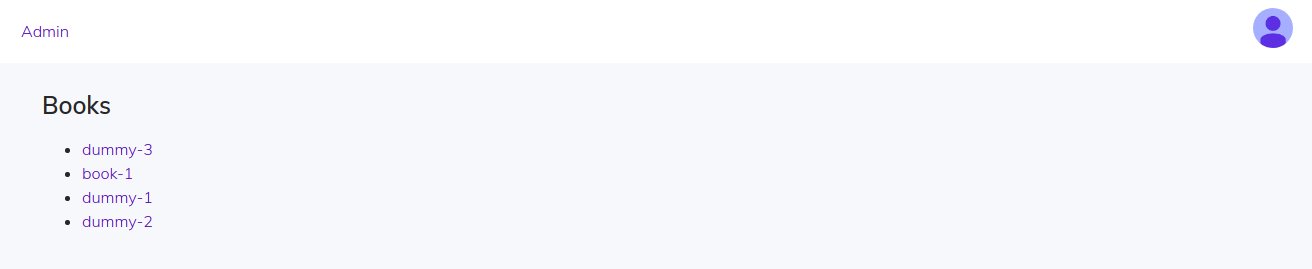
Then, as Customer user, try to access /admin route, you will see blank page:
Update Header component
On our server, we added a redirect to the /admin page. Now we need to add Customer/Admin logic to our Header component.
For a logged-out user, the Header component looks the same, and this is how we want it to be.

But let’s change how the Header component looks to a logged-in user. The logged-in user can either be a Customer or Admin.
Currently, the Header component looks exactly same to Customer and Admin users:
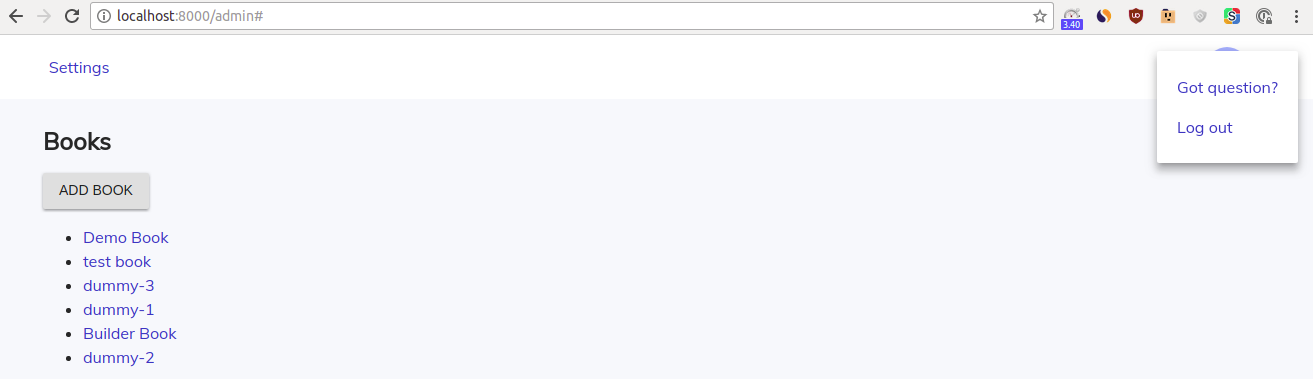
We want to make 3 changes to our Header component:
- Remove the
Settingslink from the left - Replace the
Got question?link from theMenuDropcomponent with eitherMy bookslink for a Customer user orAdminlink for an Admin user - For an Admin user who did not connect Github to our app, we want to show the
Connect Githubbutton
Let’s discuss each step.
- That’s easy. Simply delete the
<div>element containing theSettingslink. - This is where we need to use logic. Since a
userobject is available in theHeadercomponent (ourwithLayoutHOC passesusertoHeader), we can check if a user is an Admin withuser.isAdmin.For the Customer user,{user && !user.isAdmin ? ... : ...}.
For the Admin user,{user && user.isAdmin ? ... : ...}.Opencomponents/Header.jsand replace the following code snippet:
<div style={{ whiteSpace: ' nowrap' }}>
 {user.avatarUrl ? (
   <MenuDrop options={optionsMenu} src={user.avatarUrl} alt={user.displayName} />
 ) : null}
</div>
with a snippet that checks if a user is an Admin:
<div style={{ whiteSpace: ' nowrap' }}>
 {!user.isAdmin ? (
   <MenuDrop
     options={optionsMenuCustomer}
     src={user.avatarUrl}
     alt={user.displayName}
   />
 ) : null}
 {user.isAdmin ? (
   <MenuDrop
     options={optionsMenuAdmin}
     src={user.avatarUrl}
     alt={user.displayName}
   />
 ) : null}
</div>
Above, we simply used {condition ? value1 : value2} We need to define optionsMenuCustomer and optionsMenuAdmin . Replace the following code snippet:
const optionsMenu = [
 {
   text: 'Got question?',
   href: 'https://github.com/builderbook/builderbook/issues',
 },
 {
   text: 'Log out',
   href: '/logout',
 },
];
with:
const optionsMenuCustomer = [
 {
   text: 'My books',
   href: '/customer/my-books',
   as: '/my-books',
 },
 {
   text: 'Log out',
   href: '/logout',
 },
];

const optionsMenuAdmin = [
 {
   text: 'Admin',
   href: '/admin',
 },
 {
   text: 'Log out',
   href: '/logout',
 },
];
- For an Admin user who did not connect Github yet,
{user && user.isAdmin && !user.isGithubConnected ? ... : ...}.
Add an extra grid column that contains theConnect Githubbutton:
<Grid item sm={2} xs={2} style={{ textAlign: 'right' }}>
 {user && user.isAdmin && !user.isGithubConnected ? (
   <Hidden smDown>
     <a href="/auth/github">
       <Button raised color="primary">
       Connect Github
       </Button>
     </a>
   </Hidden>
 ) : null}
</Grid>
Combine code from steps 1 to 3, and the refactored Header component will look like:
components/Header.js :
import PropTypes from 'prop-types';
import Link from 'next/link';
import Router from 'next/router';
import NProgress from 'nprogress';
import Toolbar from '@material-ui/core/Toolbar';
import Grid from '@material-ui/core/Grid';
import Hidden from '@material-ui/core/Hidden';
import Button from '@material-ui/core/Button';
import Avatar from '@material-ui/core/Avatar';

import MenuDrop from './MenuDrop';

import { styleToolbar } from './SharedStyles';

Router.onRouteChangeStart = () => {
  NProgress.start();
};
Router.onRouteChangeComplete = () => NProgress.done();
Router.onRouteChangeError = () => NProgress.done();

const optionsMenuCustomer = [
  {
    text: 'My books',
    href: '/customer/my-books',
    as: '/my-books',
  },
  {
    text: 'Log out',
    href: '/logout',
  },
];

const optionsMenuAdmin = [
  {
    text: 'Admin',
    href: '/admin',
  },
  {
    text: 'Log out',
    href: '/logout',
  },
];

function Header({ user }) {
  return (
    <div>
      <Toolbar style={styleToolbar}>
        <Grid container direction="row" justify="space-around" alignItems="center">
          <Grid item sm={9} xs={8} style={{ textAlign: 'left' }}>
            {!user ? (
              <Link prefetch href="/">
                <Avatar
                  src="https://storage.googleapis.com/builderbook/logo.svg"
                  alt="Builder Book logo"
                  style={{ margin: '0px auto 0px 20px', cursor: 'pointer' }}
                />
              </Link>
            ) : null}
          </Grid>
          <Grid item sm={2} xs={2} style={{ textAlign: 'right' }}>
            {user && user.isAdmin && !user.isGithubConnected ? (
              <Hidden smDown>
                <a href="/auth/github">
                  <Button variant="contained" color="primary">
                    Connect Github
                  </Button>
                </a>
              </Hidden>
            ) : null}
          </Grid>
          <Grid item sm={1} xs={2} style={{ textAlign: 'right' }}>
            {user ? (
                <div style={{ whiteSpace: ' nowrap' }}>
                  {!user.isAdmin ? (
                    <MenuDrop
                      options={optionsMenuCustomer}
                      src={user.avatarUrl}
                      alt={user.displayName}
                    />
                  ) : null}
                  {user.isAdmin ? (
                    <MenuDrop
                      options={optionsMenuAdmin}
                      src={user.avatarUrl}
                      alt={user.displayName}
                    />
                  ) : null}
                </div>
              ) : (
                <Link prefetch href="/public/login" as="/login">
                  <a style={{ margin: '0px 20px 0px auto' }}>Log in</a>
                </Link>
              )}
          </Grid>
        </Grid>
      </Toolbar>
    </div>
  );
}

Header.propTypes = {
  user: PropTypes.shape({
    avatarUrl: PropTypes.string,
    displayName: PropTypes.string,
  }),
};

Header.defaultProps = {
  user: null,
};

export default Header;
Testing time.
Go to MongoDB Atlas, navigate to test.users collection of test database (that is part of Cluster0 cluster), and find your user document.
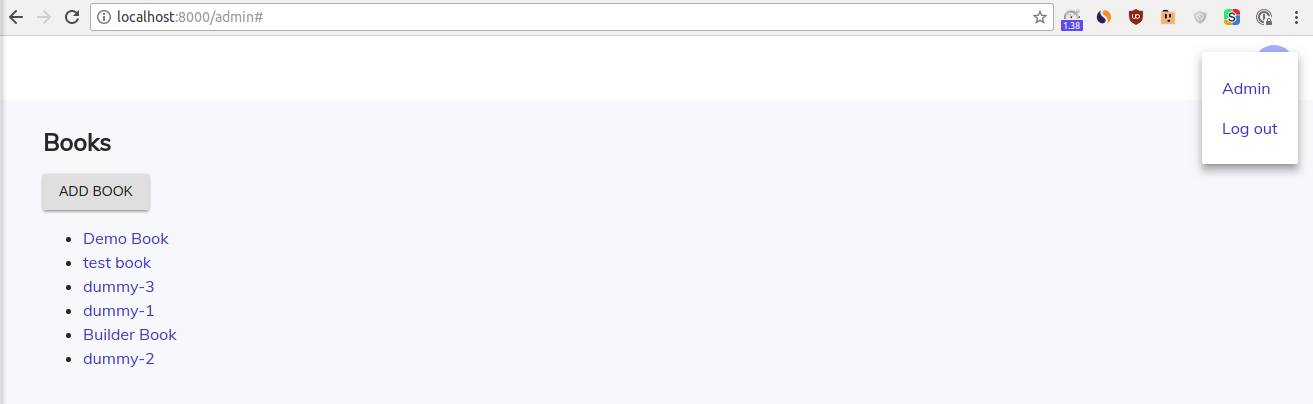
- To test an Admin user. Set parameter
"isAdmin": trueand"isGithubConnected": falseon the user document.
Start the app (yarn dev), go to the/loginpage, and log in. You’ll be redirected to the/adminpage:
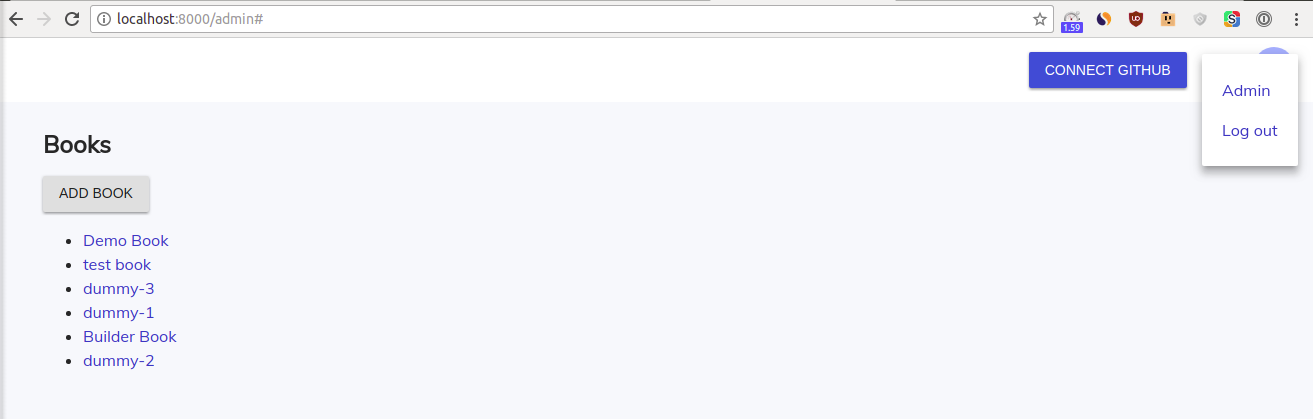
- The above is an Admin user who did not connect Github. Set
"isAdmin": trueand"isGithubConnected": trueon the user document.
Refresh the tab.
- Testing the Customer user is tricky since our app has no
/my-bookspage.
Let’s add the bare minimum of code we need to render this page. Create a file atpages/customer/my-books.jswith the following content:
pages/customer/my-books.js:
import React from 'react';

import withLayout from '../../lib/withLayout';
import withAuth from '../../lib/withAuth';

const MyBooks = () => (
  <div style={{ padding: '10px 45px' }}>
    <h3>Your books</h3>
  </div>
);

export default withAuth(withLayout(MyBooks));
Also, since our server attempts to render the page from /my-books instead of /customer/my-books , we have to add some handler function to server/app.js to fix this.Go to server/app.js . Below the '/login': '/public/login', line of code, add a new line of code '/my-books': '/customer/my-books', :
const URL_MAP = {
  '/login': '/public/login',
  '/my-books': '/customer/my-books',
};
Go to Atlas, in the test.users collection, edit your user document to make sure that parameter "isAdmin": false .
Log out and log in. After logging in, you are automatically redirected to /admin .
Go to /my-books page:
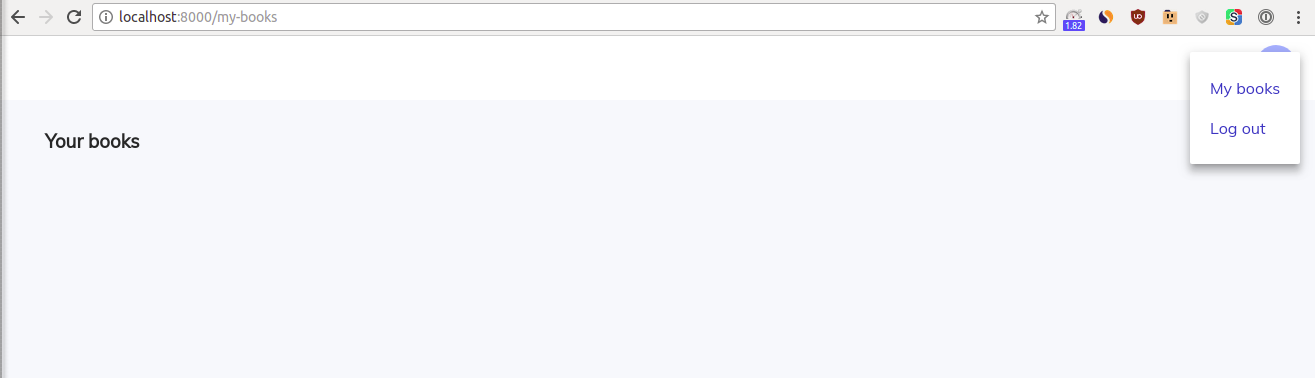
Good job if you see the proper UI.
Testing
In this section, we test out our Admin flow. We plan to test:
- connecting to Github
- adding a new book
- editing that new book
- syncing content
As we test our Admin flow - make sure that your user document in the database has the following parameters: "isAdmin": true and "isGithubConnected": false .
link Connecting Github
So far, so good. Here we continue testing our Admin flow. Make sure that your user document has "isAdmin": true and "isGithubConnected": false . Log out and log into the app if necessary.

Before we click the Connect Github button:
- Go to Github and follow these instructions on how to register your app and get
ClientIDandSecretKeyAPI credentials. Add both credentials to your app’s.envfile as follows:
Github_Test_ClientID="XXXXXX"
Github_Test_SecretKey="XXXXXX"
Important note, Github does not support multiple domains in one registered app. We suggest you register two apps on Github, one for http://localhost:8000 and a second for your production domain (in our case, it is https://builderbook.org ).For development, take the values of ClientID and SecretKey from your Github app registered with http://localhost:8000 . Pass these values as Github_Test_ClientID and Github_Test_SecretKey .For production, take the values of ClientID and SecretKey from your Github app registered with https://yourdomain.com . Pass these values as Github_Live_ClientID and Github_Live_SecretKey .For both Github apps, the callback route is /auth/github/callback .
2. Open server/app.js and import the setupGithub function as github :
const { setupGithub } = require(’./github’);
Initiate it on the server with github({ server }); . Add it like this:
auth({ server, ROOT_URL });
github({ server });
api(server);
routesWithSlug({ server, app });
You should monitor what happens to your user document on the database after you click Connect Github .
Go back to the browser and click the dark blue Connect Github button.
The button disappears, because isGithubConnected becomes true .
Go to the database and check your user document - you successfully connected Github if your app received githubAccessToken and saved it to the database and if "isGithubConnected": true .
Adding new book
Before we create a new book, let’s add an Add book button to pages/admin/index.js :
<Link href="/admin/add-book">
  <Button variant="contained">Add book</Button>
</Link>
Add this button above the list of all books ( <ul>...</ul> ):
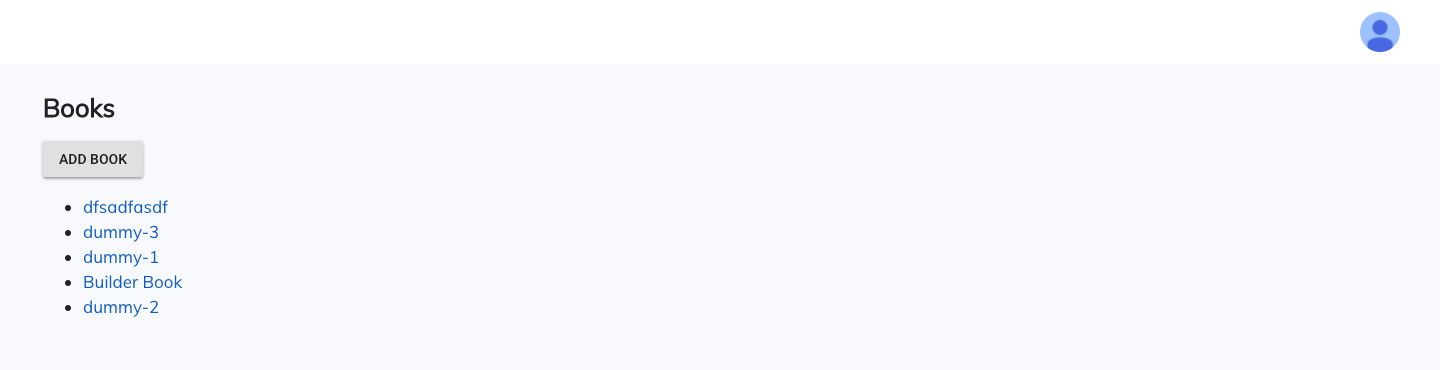
Now go to Github. To save time from creating your own new repo with content, fork our demo-book repo.
Click the Add book button. You are now on the /add-book page:
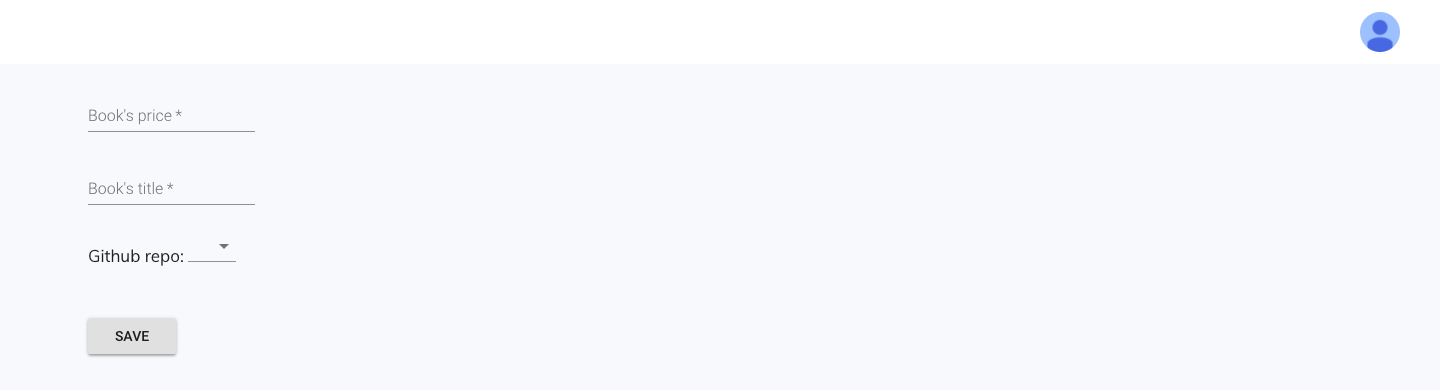
Set a price, write a name, and pick a repo. We set 49 , Demo Book , and builderbook/demo-book , respectively:

Click the Save button and you will see your newly added book at the top of the list:

Editing existing book
Click Demo Book from the list of all books. You will go to the pages/admin/book-detail.js page for this book. We see the book’s name and githubRepo , as well as two buttons that we are going to test:

Click the Edit book button and you will go to pages/admin/edit-book.js . This page looks very similar to pages/admin/add-book.js , since both pages are mainly the EditBook component:

Syncing content
Go to Github and check out the introduction.md file in the demo-book repo that you forked:
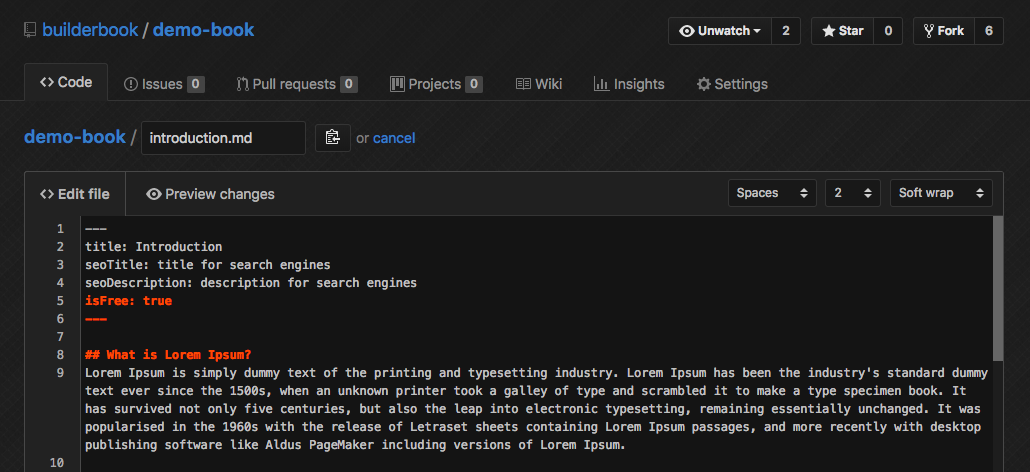
Notice that this file has metadata at the top: title , seoTitle , seoDescription , and isFree . We discussed these parameters, as well as many others, in the Chapter Schema section of Chapter 5.
Every chapter ( .md file) that we create for our book needs to have this metadata section at the top. For chapters that are not free, replace the isFree parameter with excerpt:"" and add some content between the quotes. This content will be a free preview, but all other content in the chapter will be hidden until a user buys the book. See chapter-1.md in the demo-book repo for an example of excerpt content.
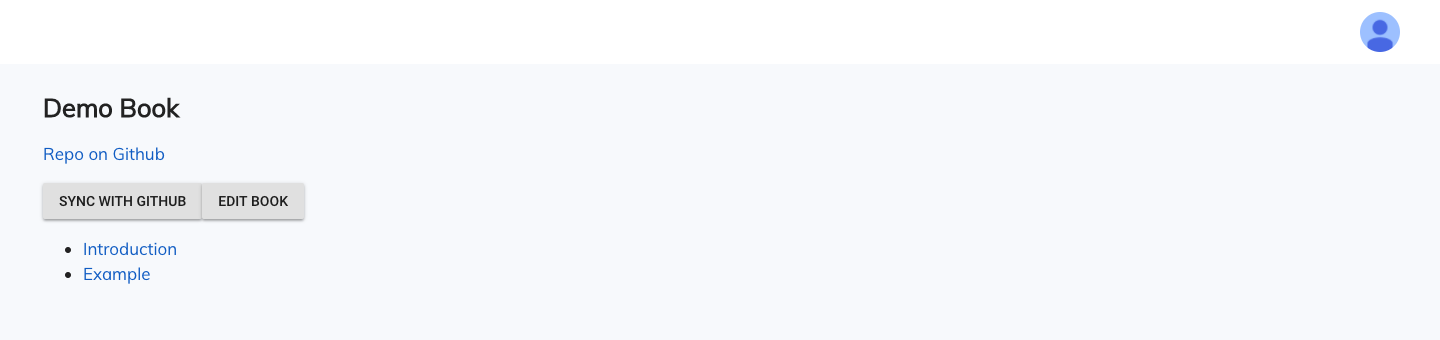
Now click the Sync with Github button on pages/admin/book-detail.js . You will see an in-app success message Synced at the top right. Refresh the page, and you will see a hyperlinked titles to the Introduction and Chapter 1 (titled Example ):
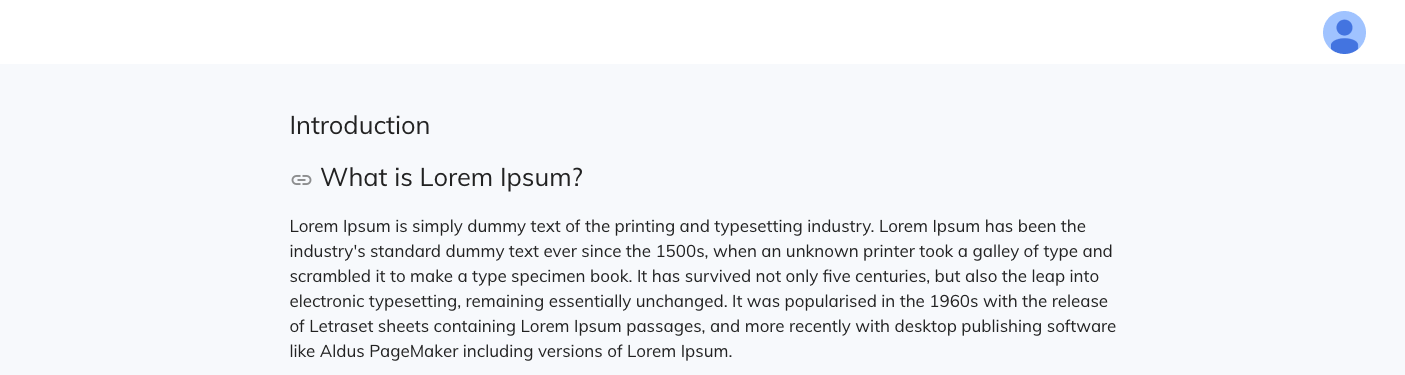
Click on the Introduction link, and you will go to the books/:bookSlug/:chapterSlug page (this page’s code is at pages/public/read-chapter.js ). For our demo book, the page’s URL is http://localhost:8000/books/demo-book/introduction :
Go back to Github and edit your introduction.md file by adding a sentence: Hello world! . You can add anything you want - feel free to add markdown content.

Go back to your Admin dashboard, then click Demo Book , then Sync with Github , and then finally the Introduction hyperlink:
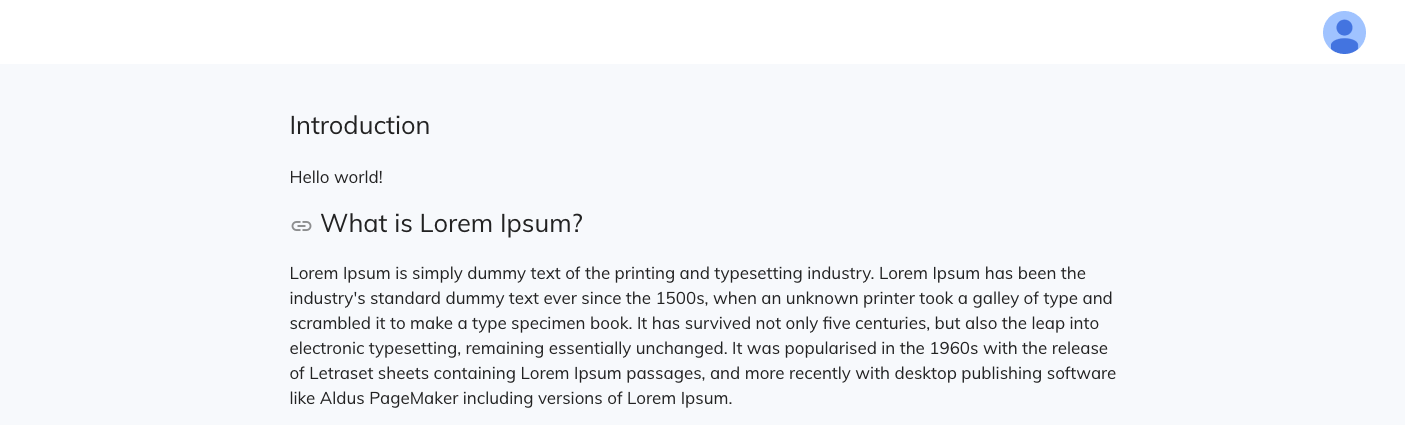
Our app has successfully synced content between our database and Github’s!
In this chapter, we added and tested all Admin pages in our app. Now you, as an Admin, can write content on Github and display it in your web app.
In the next chapter (Chapter 7), we will work on the ReadChapter page. Among other things, we will add an interactive Table of Contents.
At the end of Chapter 6, your codebase should look like the codebase in 6-end . The 6-end folder is located at the root of the book directory inside the builderbook repo.
Compare your codebase and make edits if needed.
Enjoying the book so far? Please share a quick review. You can update your review at any time.