Remix IDE
Remix is a browser-based integrated development environment that allows users to write smart contracts in Solidity and Vyper. For this course, we will be writing all of our smart contracts in Solidity.
Once the smart contracts are ready for the Ethereum blockchain, there are a variety of different tools to allow us to deploy and run them. We can deploy on a local blockchain, a test blockchain, or on the main Ethereum blockchain. As we progress through this chapter, we will explain what each means.
Getting Started with Remix
Remix can be found at http://remix.ethereum.org/ , or a secure version at https://remix.ethereum.org . It is important to take note of which you select, because to send our smart contract to the blockchain, there are certain limitations if we access Remix through the secure protocol https . For the following few sections, I will be using the http version of Remix .
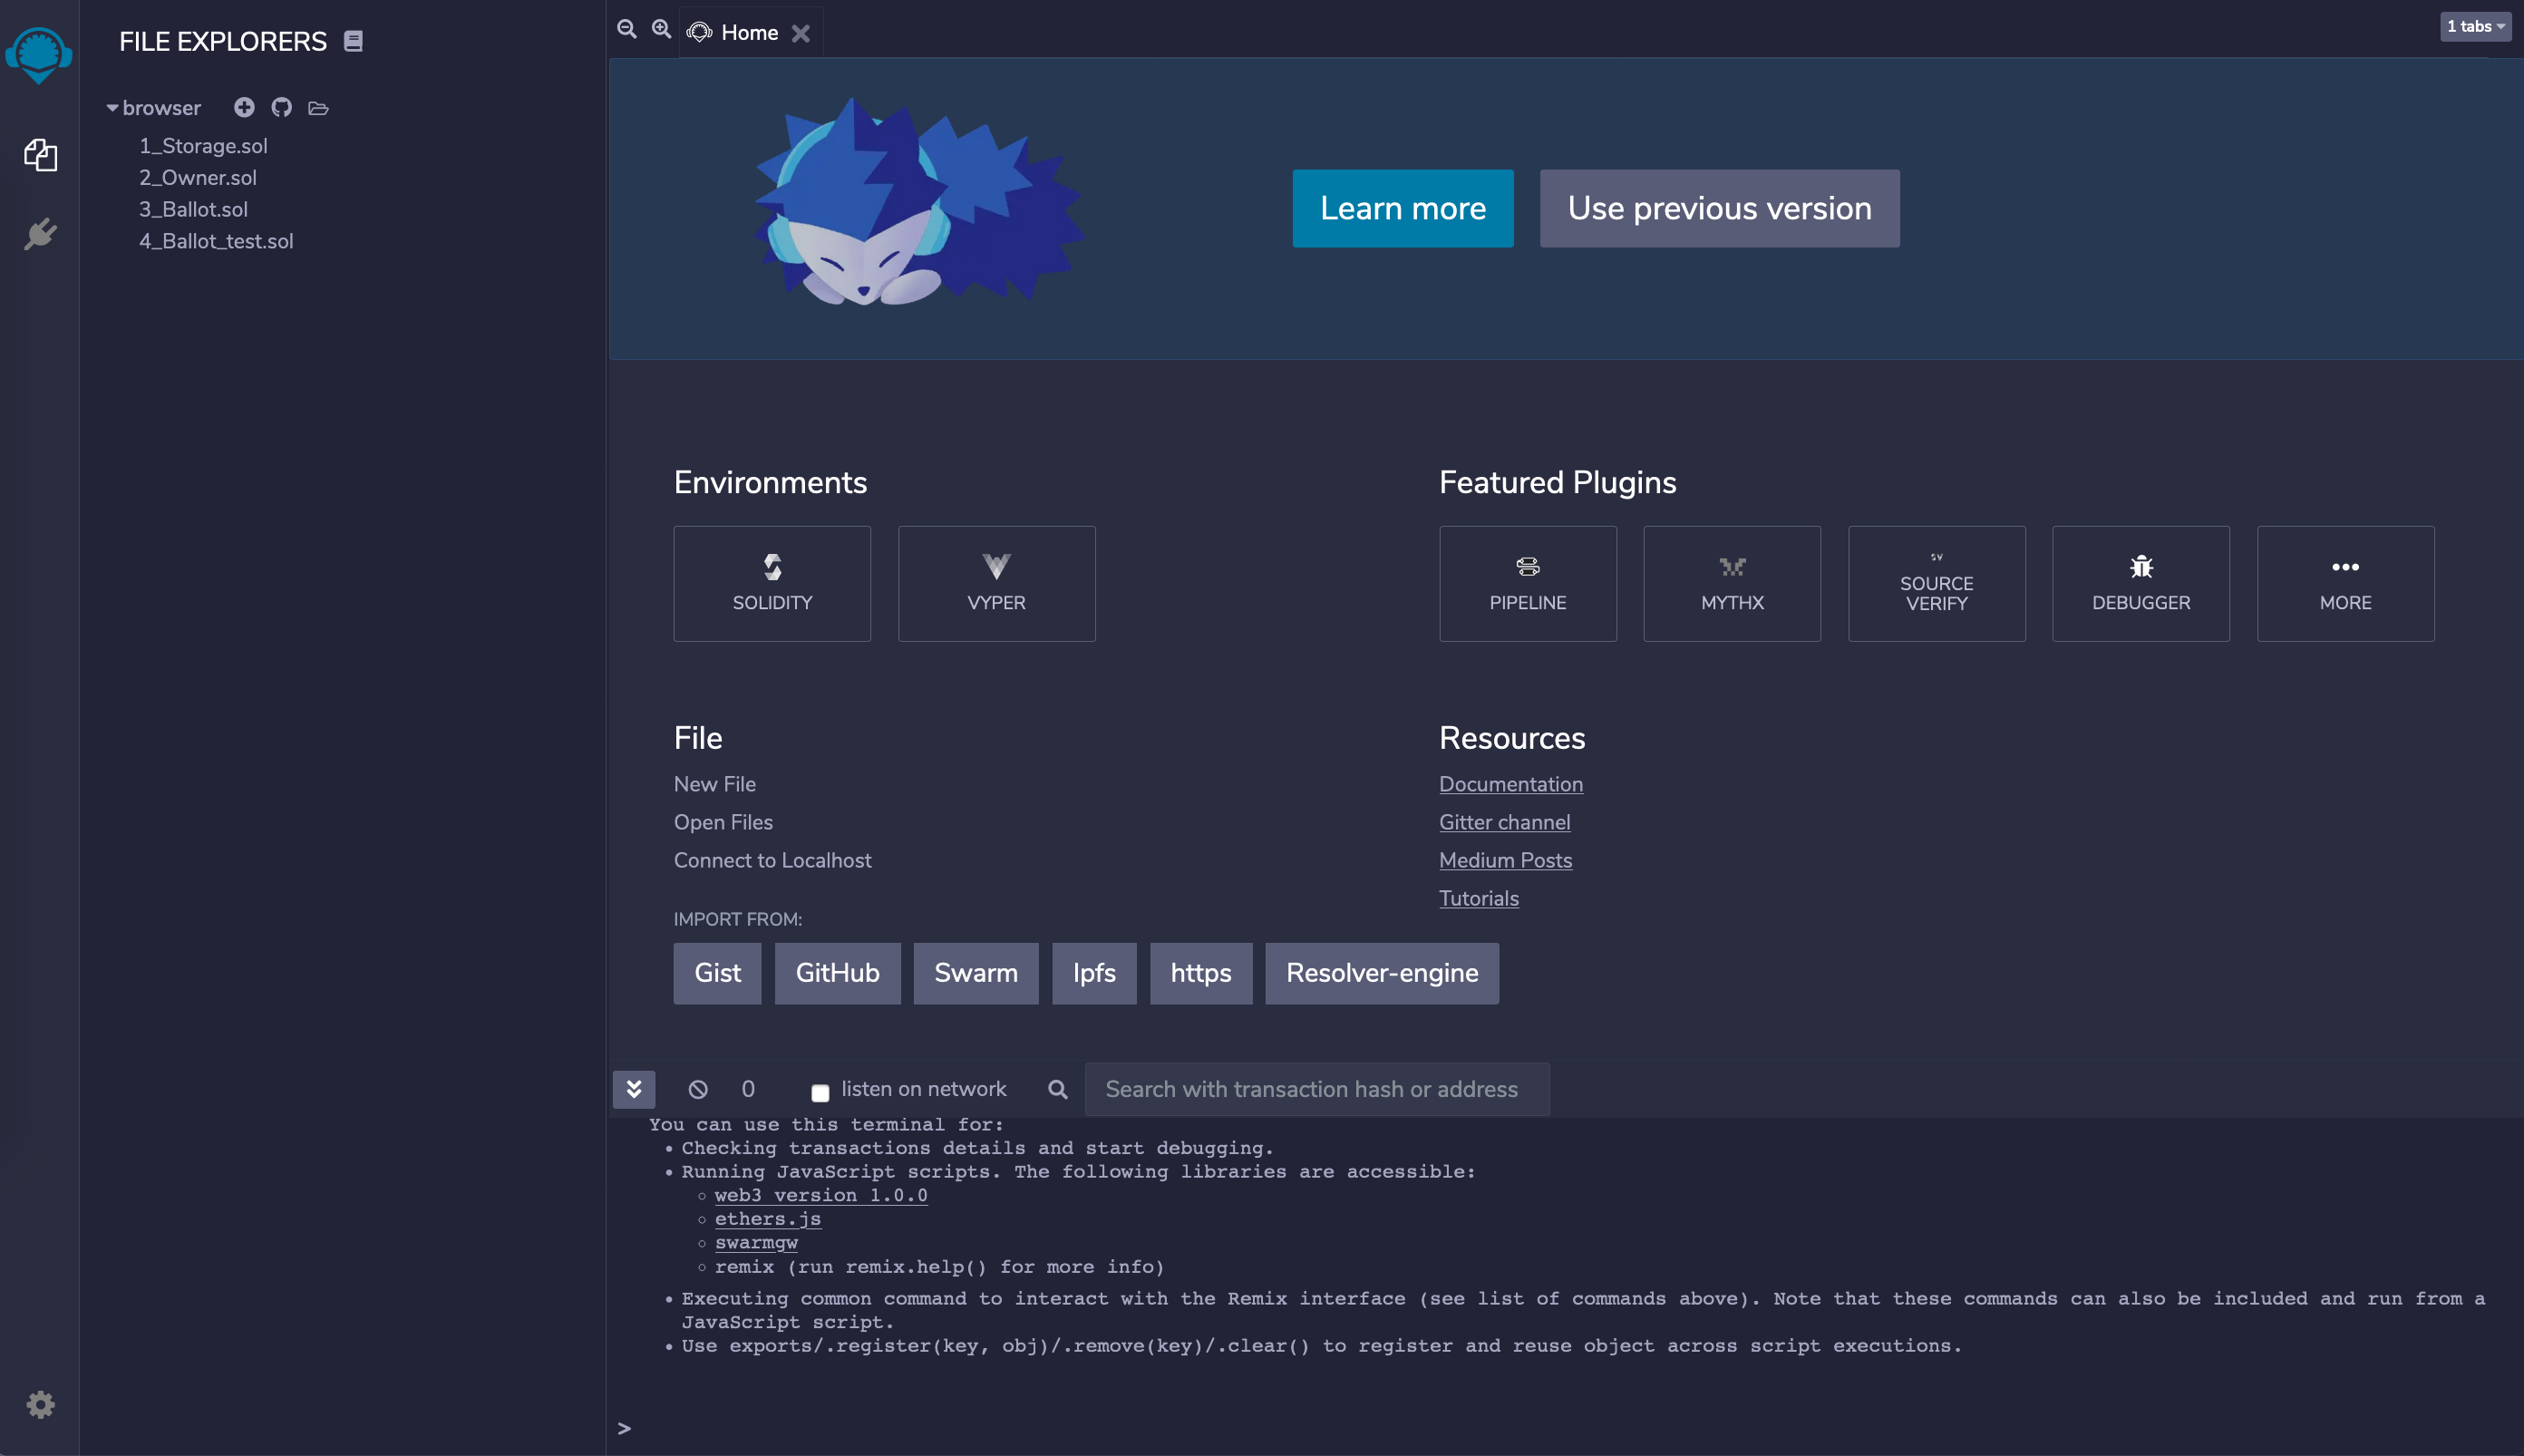
We will see the following screen:
remix-1
From this page, we will select “Solidity” as the environment we want to use.

remix-2
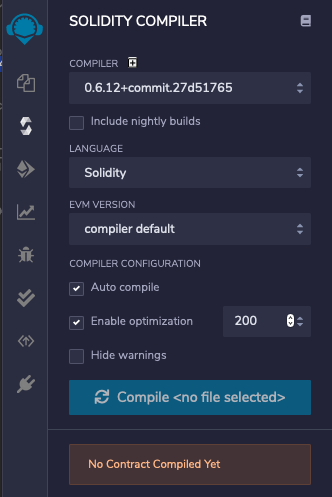
Upon selecting the “Solidity” environment, the “Solidity Compiler” will appear on the left. We can specify a few parameters here so that we are all aligned. Solidity is a tricky language because it evolves quite frequently, so pay close attention to the configuration we are applying here.
Compiler
In the Solidity Compiler panel on the left, we’re going to specify our compiler, to process the smart contract that we write.
The compiler can produce various outputs, ranging from simple binaries and assembly over an abstract syntax tree (parse tree) to estimations of gas usage. These outputs can be used in web applications that interact with the smart contract once we are done deploying it to the blockchain.
Configure the compiler as follows:
- Compiler: v0.6.12
- Language: Solidity
- EVM Version: Compiler Default
- Auto Compile: Flag Selected
- Enable optimization: Flag Selected and number set to 200
Once these values are selected, your Solidity compiler settings should look like this:
remix-4
We will be using Solidity version 0.6.12 to write the smart contracts for this book.
File Explorer
Now that we’ve added the appropriate compiler settings, let’s jump into the File Explorer. You will notice that there is a toolbar on the left of your Remix screen.

remix-5
From this toolbar, you can get to the file explorer by clicking the following button:

remix-6
This will show the following next to the toolbar:
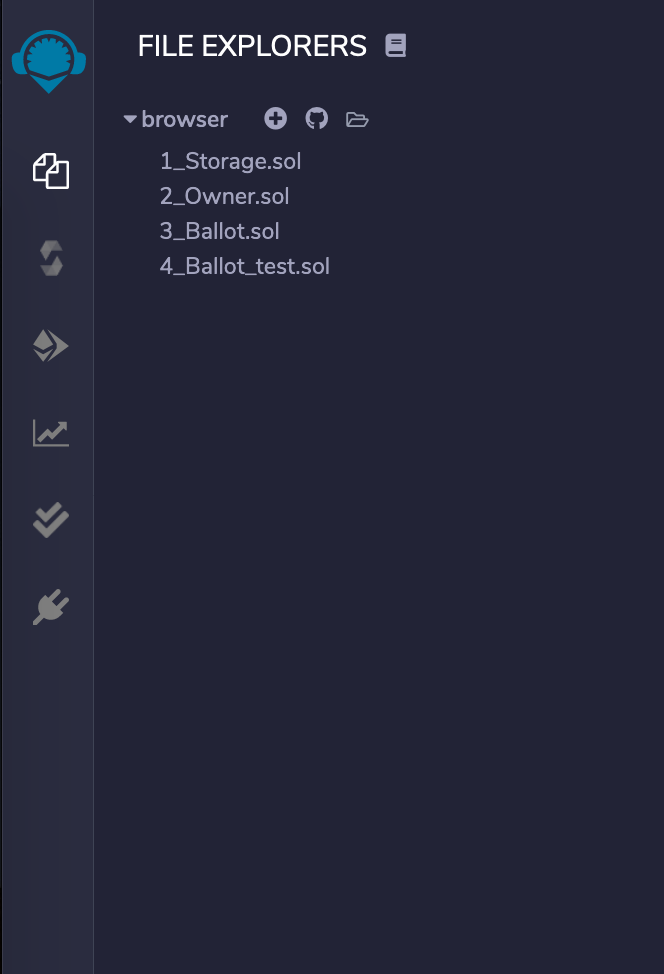
remix-7
The files that you see may be different from what is shown in the book because this is your first time using Remix .
From this section, we can do five things:
- View the smart contracts that we’ve created (if this is your first time, you may see two files already available)
- Create a new file
- Publish the files that you have on GitHub as a gist
- Copy all files into another version of Remix
- Add local storage to the file explorer
For the purposes of this chapter, we will only be viewing the files we want to work with and creating a handful of files to write smart contracts in.
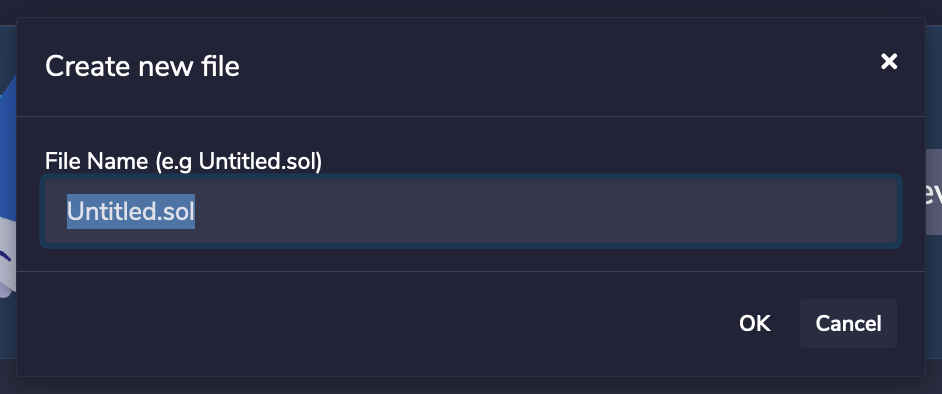
Let’s click the + icon to add our first contract.
This will prompt you to add a file name for the smart contract that you are creating.
remix-9
We will call this file “Inbox.sol”. Once we put in the name, let’s close the popup -the file should already be open in Remix. The file is blank, and we are now ready to start writing some Solidity.

remix-10
Creating a Smart Contract with Remix
The following code was inspired by StephenGrider. The Inbox.sol is a common smart contract example to identify how to read and write to a blockchain through a smart contract. Minor updates have been made to the code to align with a newer version of Solidity.
Initial Set-Up
Now that we have our smart contract file created, let’s start adding some code.
The first thing that you have to do is to identify which version of Solidity you are using. We selected version ^0.6.12. The ^ lets the compiler know that the 0.6.12 is the minimum version of Solidity we want to use. To ensure that the Solidity processor knows what version we are using, we have to start the file by declaring that:
pragma solidity ^0.6.2;
The next line of code declares the contract. In Solidity, use the keyword contract followed by the name of the contract. The contents of the contract will be contained within curly braces {} .
contract Inbox {

}
The purpose of this smart contract is to store a simple message on the blockchain. The message will be of type string and will be publicly available. This means that if anyone can find this contract on the blockchain, the message that is stored will be readable to that user.
To declare a public variable within the smart contract, add the following code inside the contract brackets:
contract Inbox {
    string public message;
}
The first keyword is the type of variable we want to create, the second keyword is to identify to the Solidity processor that this variable should be publicly available, and the final word is the name of the variable, message .
Since this line of code is not a function (or a modifier… more on that later), the line must end with a semicolon ( ; ).
Now that we have our variable out of the way, the next thing is to create a constructor function. In Solidity, like other programming languages:
- functions are modules of code that accomplish a specific task. They take in data, process it, and return a result.
- constructors are special functions that are executed when the smart contract is initially created.
To declare a constructor in Solidity, use the keyword constructor . Next you have to identify if this function takes any inputs. In our case, our constructor will take a string variable which will be used to update the message variable that we just created. Finally specify the constructor’s visibility. Let’s keep it public . Once this is complete, add curly braces (the rest of our code will reside within these).
constructor(string memory _message) public {

}
A few notes here about syntax and styling:
- There are two keywords associated with
stringvariables in Solidity:storageandmemory. If you anticipate creating functions that make state changes,storagemight be the best option. If you need a copy of the data but don’t necessarily want to manipulate the contract state usememory. When passing instringvariables into functions, they should be passed in with thememorykeyword. - If you are passing in variables, a styling suggestion is to prefix your variable name with an underscore (
_).
In this constructor, we will be updating the message variable with the string that we are passing into the constructor. Inside the constructor, let’s set the message of the smart contract to the _message variable we are passing in.
message = _message;
Adding More Functions
One other thing we might want to do with this smart contract is have the ability to change messages once the contract is available on the blockchain. When the smart contract is initially deployed, the state of the Ethereum blockchain gets updated with the message that we initially set. Since we are creating a smart contract called “Inbox”, one of the things we may want to do is update the message that is stored at this smart contract. The variable, message , will get updated.
To do this, we will add a function called changeMessage . This function will take in a string variable called _changeMessage and it will be publicly accessible.
To declare a function in Solidity, use the function keyword and then name the function. Once the function is declared, add the variables you will pass in and the visibility. It should look something like this:
function changeMessage(string memory _changeMessage) public {

}
Just like the constructor, the code that we need for this function to execute correctly will also sit in a set of curly braces.
To update the message variable with the new variable that we are passing in, we will need the following line of code:
message = _changeMessage;
We now have a function we could use to update the message after the contract has been sent to the blockchain.
Given that we are writing a function to update the message in our smart contract, you might be thinking that we should also write a function to read the variable in our smart contract. This would be the right thing to do except that the Solidity compiler automatically creates reading functions for you for all public variables. Since our message variable is public, we don’t need to add any more code to the smart contract.
Our final Inbox.sol smart contract should look something like this:
pragma solidity ^0.6.2;

contract Inbox {
    string public message;

    constructor(string memory _message) public {
        message = _message;
    }

    function changeMessage(string memory _changeMessage) public {
        message = _changeMessage;
    }
}
Once you are done writing your smart contract you should see something like this in the Remix instance in your browser. We are now ready to compile this smart contract.

remix-11
Compiling and Deploying the Smart Contract
One of the most powerful features of Remix is the ability to compile and deploy smart contracts. Compiling smart contracts means that a software takes the Solidity code and turns it into a format usable on the Ethereum blockchain. This format is called Ethereum Virtual Machine (EVM) Bytecode .
To access the compiling functionality on Remix, return to the Solidity Compiler tab by clicking the compiler icon to the left of the file explorer. There are a few items here that can enhance our smart contract writing experience.
Compiler Settings
We will now use the Remix compiler to see if the smart contract that we wrote can be compiled properly. If the compiler does not throw any errors, it means that we can send it to the Ethereum blockchain.
As a reminder, the compiler was set with the following parameters:
- Compiler: 0.5.17+commit.d19bba13
- Language: Solidity
- EVM Version: compiler default
Compiler configuration:
- Auto compile: selected
- Enable optimization: not selected
- Hide warnings: not selected
If the code was written correctly, you should see no errors after you hit the Compile Inbox.sol button.

remix-12
Successful compilation is shown with the following icon (on the left toolbar):
remix-13
Deploying the Smart Contract
Now that we have confirmed that our smart contract compiles correctly, let’s see how it works on the Ethereum blockchain.
Based on what we have learned so far about the Ethereum blockchain, if we want to change state, we will have to pay (ETH and gas). To ensure that we are not spending any money before we can actually validate how our smart contract works, developers have created a variety of different tools to test smart contracts. In Remix, developers have access to local and test blockchains. We will be leveraging these local or test blockchains to test and use the smart contract that we developed.
Go to the Deploy and Run Transactions tab in Remix by clicking on the icon on the far left of the screen:

remix-14
The Deploy & Run Transactions panel should appear on the left of the screen.
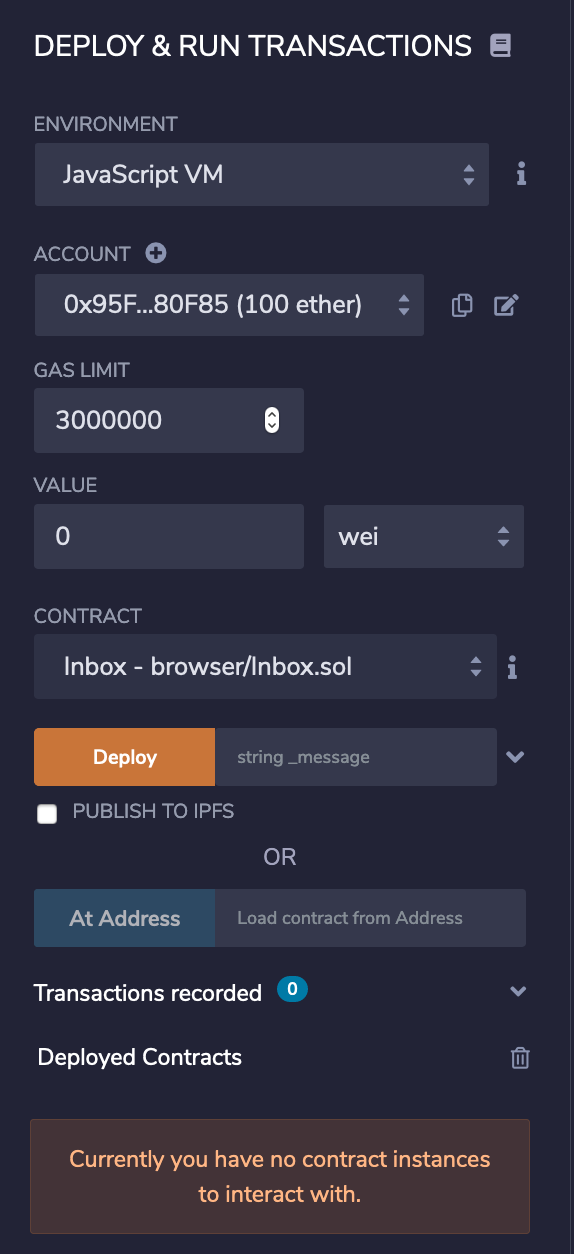
remix-15
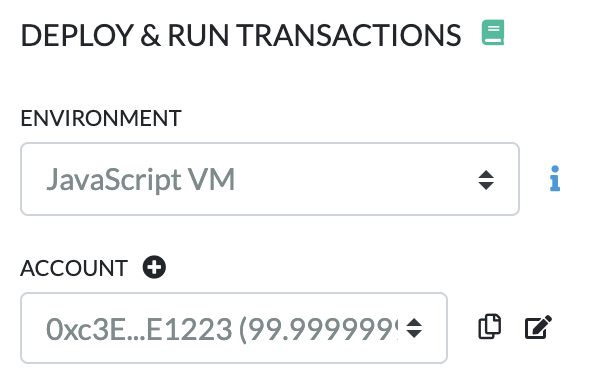
The first thing to take note of is the Environment. From this dropdown menu, you can select where you want to send your smart contract.
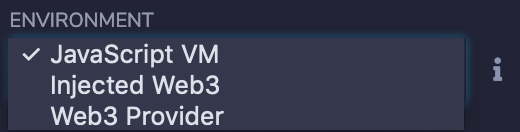
remix-16
There are three options:
- JavaScript VM : All the transactions will be executed in a sandbox blockchain in the browser. This means nothing will persist when you reload the page. The JsVM is its own blockchain. On each reload it will start a new blockchain and the old one will not be saved.
- Injected Web3 : Remix will connect to an injected Web3 provider. Metamask is an example that injects Web3.
- Web3 Provider : Remix will connect to a remote node. You will need to provide the URL to the selected provider: geth, parity or any Ethereum client.
The simplest way to get started is to select JavaScript VM, a local blockchain that will exist ONLY in your browser. This local blockchain will behave similarly to the Ethereum blockchain.
Once JavaScript VM is selected, you will notice that there are a set of accounts created for this local blockchain. Each account will be loaded with 100 fake ETH and can be used to interact with this mock blockchain. An account is already selected for you when you are working in Remix .
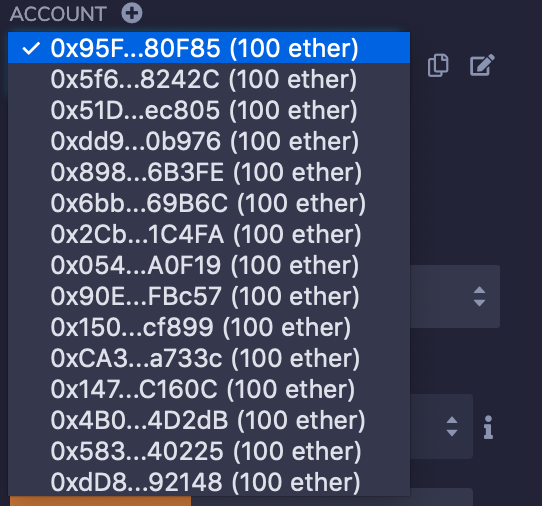
remix-17
The other options in this section include:
- gas limit
- value
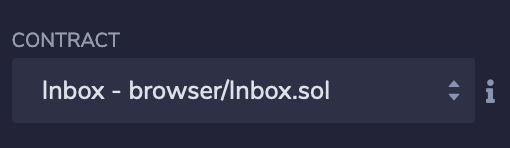
- contract (choose inbox.sol from the dropdown of compiled smart contracts)
- deploy or At Address options
We will leave gas limit and value alone for now.
remix-18
The Ethereum Virtual Machine is a runtime environment for smart contracts that are created on the Ethereum blockchain. This machine requires transaction fees to run and these fees are calculated as a unit of gas . Each computation that occurs on the EVM requires some amount of gas. If the complexity of the computation increases then the amount of gas required increases as well (Source).
The transaction fee is equal to the total gas used multiplied by the price of gas (Source).
Gas is priced in sub-units of ether (also known as gwei). The exact price of gas is determined by the network managers, or miners, who can decline to process transactions if the gas price does not meet their threshold. A single gwei is worth 0.000000001 ether.
Since creating a smart contract on a blockchain is proposing a transaction / state change on the Etheruem blockchain, gas is required to ensure that the EVM processes that state change.
Transaction Fee = ( Total Gas Use ) * ( Gas Price )
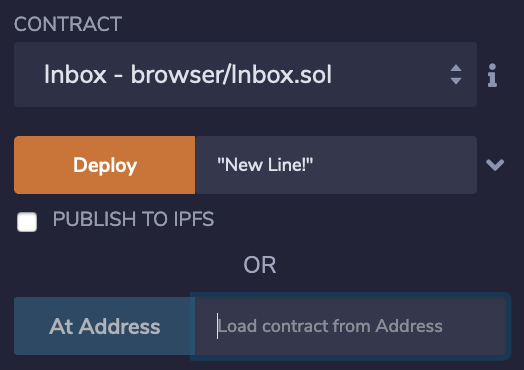
Add some text in quotes ( "" ) to the field next to the Deploy button. Then hit “Deploy” to send your smart contract to this mock blockchain.

remix-19
Interacting with a Deployed Smart Contract with Remix
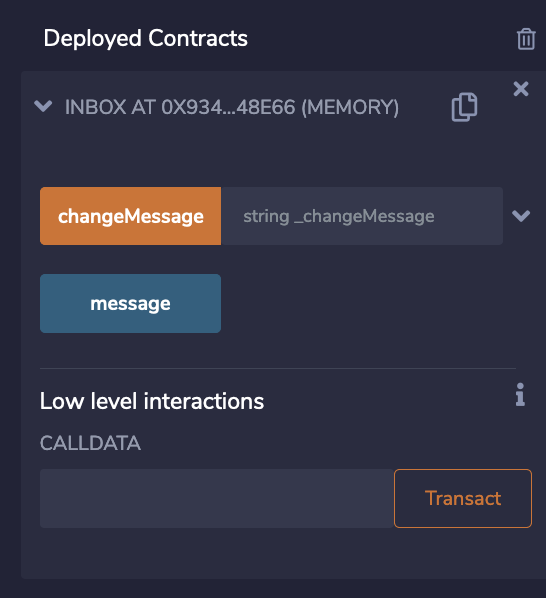
Upon successful deployment, you will see something appear under “Deployed Contracts” - scroll down the panel and click on the contract address starting “INBOX AT…” .
remix-20
There are a few things to notice here:
- You received an address for the contract you just deployed on the JavaScript VM blockchain
- There are two functions that are available for you to use -
changeMessageandmessage- although you only wrote one of them
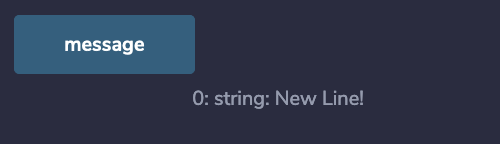
Let’s try using the message function to see what happens. Click it to invoke the contract we deployed. You should see the message that you entered while deploying the smart contract. As I put “New Line!” I now see that text show up next to the button.
remix-21
Why did this button return the string value that we created a smart contract with if we didn’t write a message function in our smart contract? The Solidity compiler has created a function for us because the message variable in the smart contract is a public variable . This tells the compiler that there should be a reader function available for users that are interested in reading the value of the variable.
Now, let’s actually test out the function that we created, changeMessage .

remix-22
Remix has created a button labeled changeMessage . It’s a different color to the message button because our function, changeMessage takes an input. Remix makes it easy to test out our smart contract because it informs us that we need to pass in a string message to ensure that this function works properly.
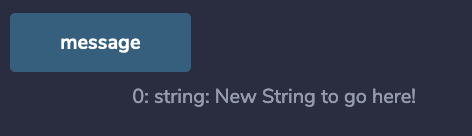
Let’s pass in a new string with the following format in the changeMessage field in Remix: "New String to go here!" (note that we have encapsulated the text with "" ). Now hit the changeMessage button to update the message variable on our local blockchain.

remix-23
We can now check if our function call worked by leveraging the function that was automatically generated by the Solidity compiler, message . If we click on the button labeled message , we can see that the message is now the updated value.
remix-24
Diving a Bit Deeper with Remix
Before we dive into a more complex smart contract, let’s learn a few more things about Remix which make it a super powerful tool to use.
What do I do with Contract Addresses?
We mentioned earlier that when we deployed our smart contract we were also issued with a smart contract address . To see why this is important, let’s jot down the current smart contract address that we have and then delete it from our Remix instance.
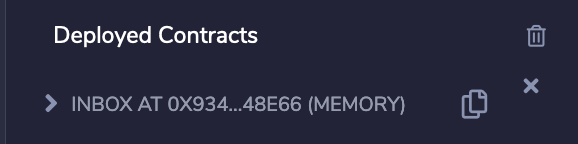
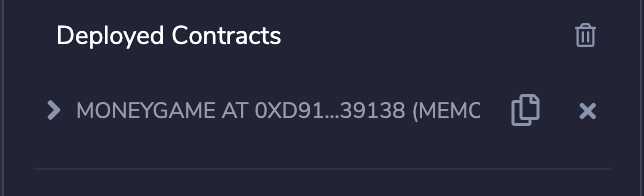
Under your deployed contracts section, you should see the smart contract you deployed in your Remix instance.

remix-25
To copy the address, click the copy button

remix-26
Once you click it you should have the address of the smart contract you deployed to the JavaScript VM. You can verify if this is true by pasting what is on your clipboard into an empty file.
The contract address that I received once I copied the address is 0x9344862B68a54fe1F4195Fee134A233e29248e66 .
Let’s delete the smart contract that we deployed and then leverage this smart contract address to bring it back into our Deployed Contracts section. This button will delete all of the smart contracts you’ve deployed:
![]()
remix-27
This one will delete only the one smart contract that it is next to:
![]()
remix-28
To load the smart contract back into the Deployed Contracts section, let’s copy the address we captured earlier and go back to the Contract section.
remix-29
Find the At Address box and paste the address that you copied. (Make sure you use the address from your own contract and not mine shown above! It will not work as it exists only on my JavaScript VM and is not being shared over the internet).

remix-31
After pasting in the address, click the At Address button and you should see the contract instance reappear under Deployed Contracts . Now you can interact with it in the same way as earlier in this section (the updated message should still be available).
remix-32
Is that a Console?!
After conducting all of these actions on Remix , you may have noticed a console continually update as we went through each event.

remix-33
The console is a powerful tool that Remix makes available to help users debug transactions that they make to the blockchain (whether the user is using a local blockchain or the main network blockchain).
The tool is a valuable asset when working with complex smart contracts that rely on other files or smart contracts. It is also very useful when using Remix to deploy to blockchain networks beyond the local instance we just worked with.
How crazy can smart contracts get?!
Awesome! You just created your first smart contract and learned how to use a powerful smart contract development tool called Remix. Now that we understand how smart contracts can be created and deployed, let’s look at some slightly more complex smart contracts.
Diving Deeper Into Smart Contracts
The code used in this section was inspired by StephenGrider. The MoneyGame.sol smart contract is a simple example to identify how to create functions that can interact with cryptocurrencies like Ether.
This section will introduce you to concepts in the Solidity programming language that are slightly more advanced. Once this section is complete we will be ready to start working on our ERC 20 token smart contract.
The concepts that we will cover in this chapter include:
- reviewing payable addresses and functions
- exploring the difference between public and private functions
- diving into other function types
- writing and using our own function modifiers
To walk through these concepts, we will be creating a simple smart contract to play a money game.
Designing the Money Game Smart Contract#
The Money Game smart contract that we are creating in this section will have the following capabilities:
- When the smart contract is created, there will be a random number that is generated by the smart contract
- Only the creator of the smart contract can read the number that is generated by the smart contract
- Other users can interact with the smart contract to try and guess that number
- Each time a user submits a guess, they have to submit 0.25 ETH
- The smart contract will not allow the creator of the game to play the game
- Once the number is guessed correctly, the smart contract will release the funds to whoever guessed the number correctly.
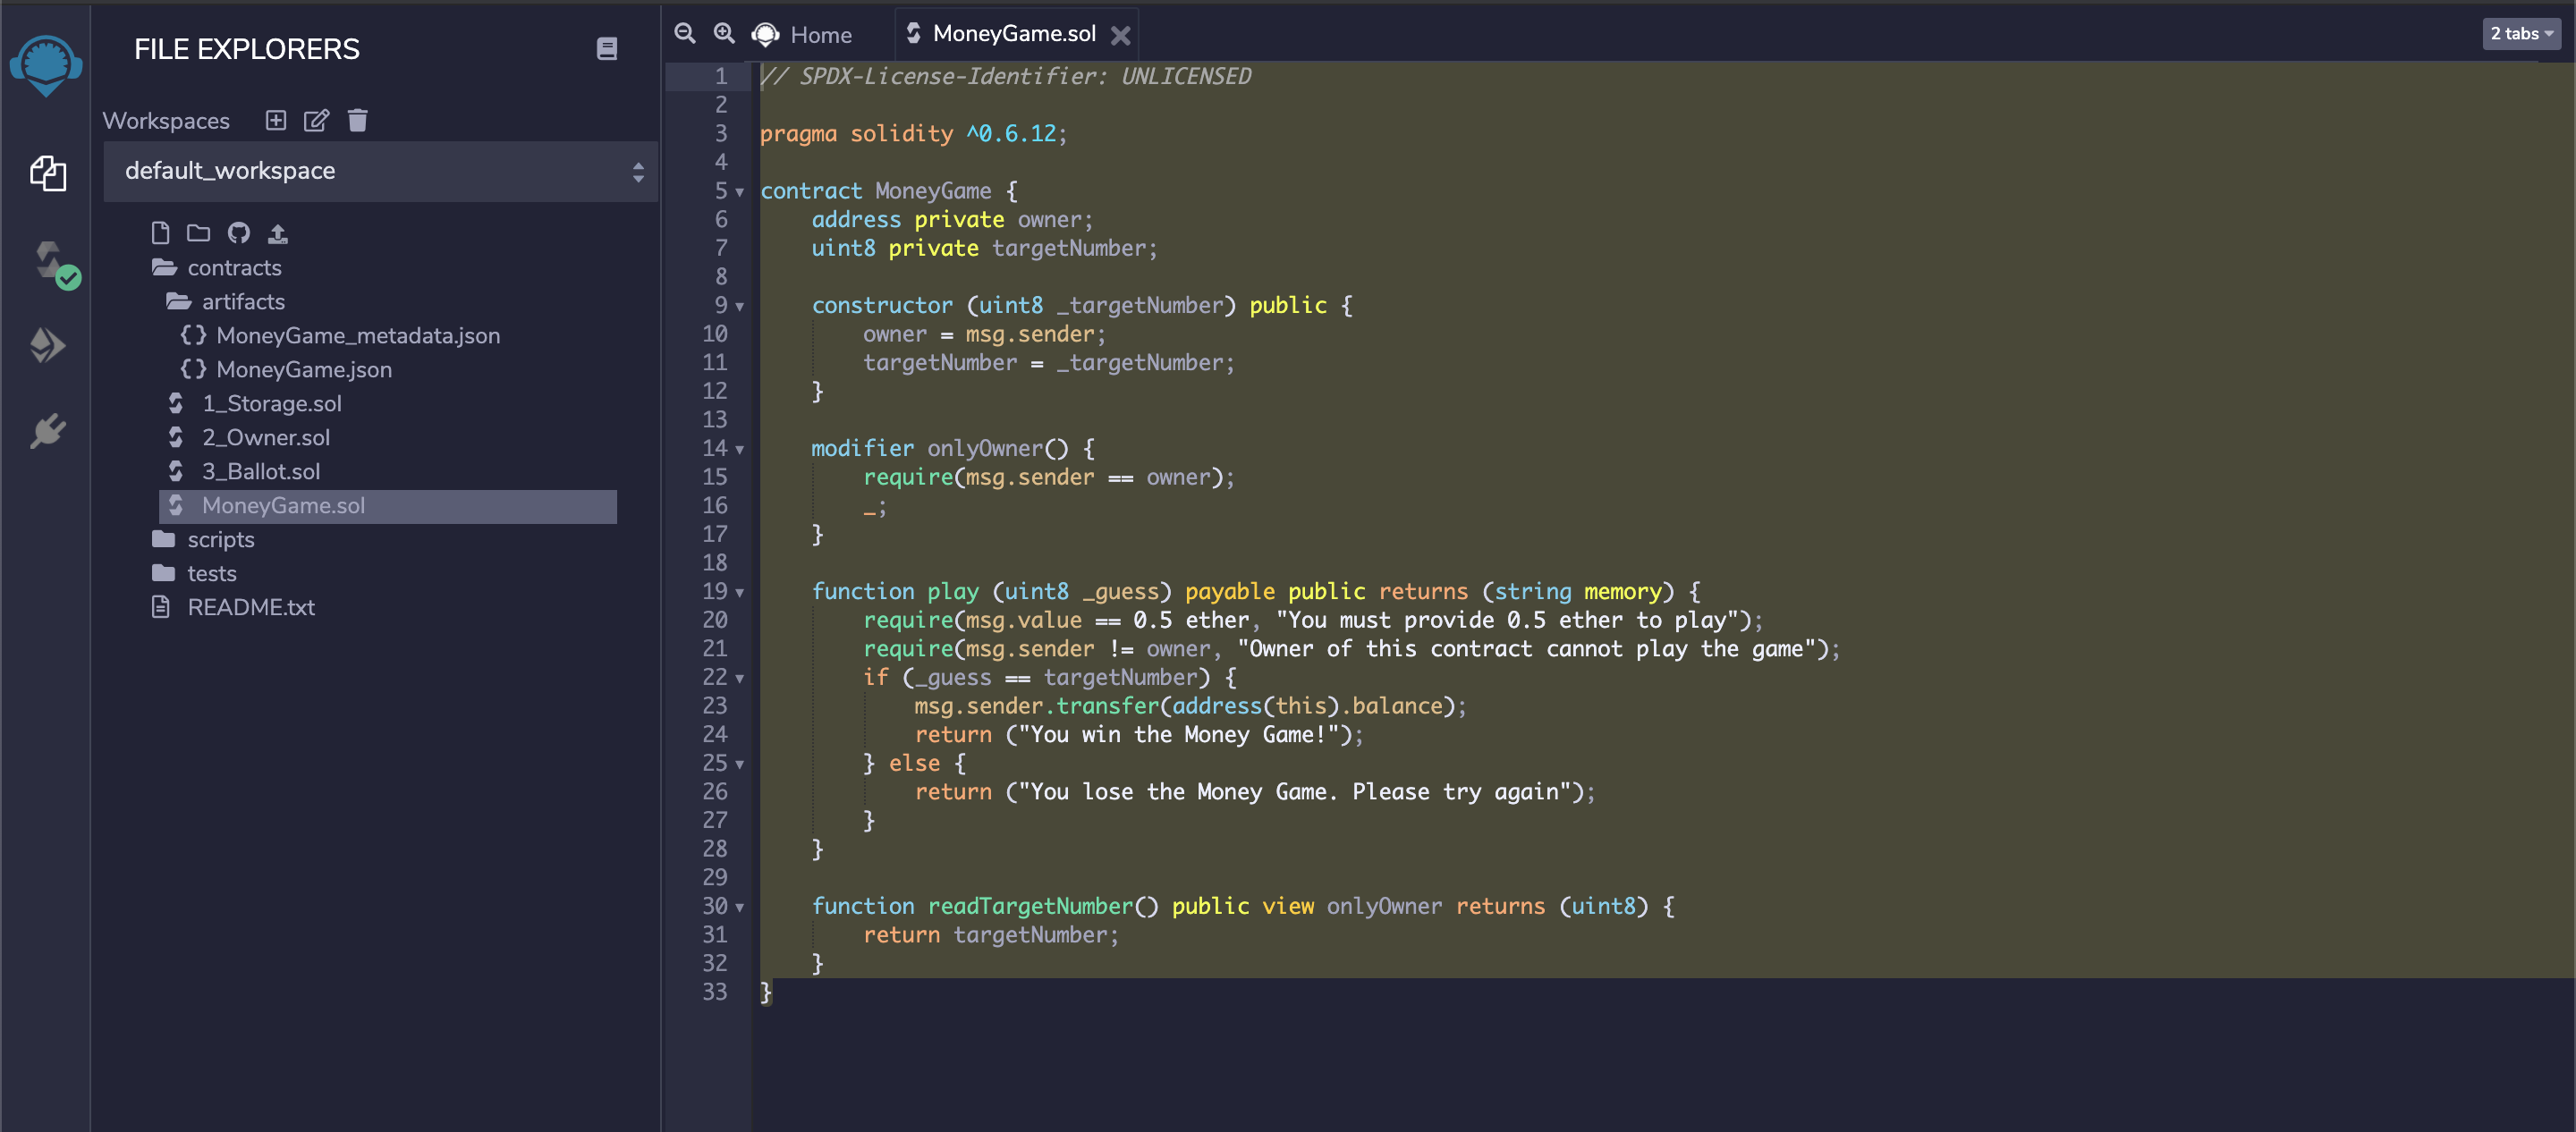
// SPDX-License-Identifier: UNLICENSED

pragma solidity ^0.6.12;

contract MoneyGame {
    address private owner;
    uint8 private targetNumber;

    constructor (uint8 _targetNumber) public {
        owner = msg.sender;
        targetNumber = _targetNumber;
    }

    modifier onlyOwner() {
        require(msg.sender == owner);
        _;
    }

    function play (uint8 _guess) payable public returns (string memory) {
        require(msg.value == 0.5 ether, "You must provide 0.5 ether to play");
        require(msg.sender != owner, "Owner of this contract cannot play the game");
        if (_guess == targetNumber) {
            msg.sender.transfer(address(this).balance);
            return ("You win the Money Game!");
        } else {
            return ("You lose the Money Game. Please try again");
        }
    }

    function readTargetNumber() public view onlyOwner returns (uint8) {
        return targetNumber;
    }
}
To kick things off, let’s dive into Remix and create a new file. Name the file MoneyGame.sol .
At the top of the file, add the compiler version of solidity (we are working with ^0.6.12). Once this is complete, declare the MoneyGame contract.
// SPDX-License-Identifier: UNLICENSED

pragma solidity ^0.6.12;

contract MoneyGame {

}
Next, we have to add the owner of the smart contract.
// SPDX-License-Identifier: UNLICENSED

pragma solidity ^0.6.12;

contract MoneyGame {
    address private owner;
}
Since we are creating a game where people have to guess a random number, we want to make sure that at least one person knows what that number is (for demonstrative purposes). The owner will be able to read that random number.
Before the owner is able to read the random number, the owner will pass in the random number. It is not simple to create random-ness on the Ethereum blockchain (we will explain why later)! Declare a variable called targetNumber. This variable will be of type uint8 and will be hidden from external users (make the number private).
Now that we have the owner variable and the target number variable, we are ready to initialize our smart contract. We can initialize our smart contract with a constructor method. Let’s declare the constructor method and then jump into the next section of this chapter!
// SPDX-License-Identifier: UNLICENSED

pragma solidity ^0.6.12;

contract MoneyGame {
    address private owner;
    uint8 private targetNumber;
}
We are now ready to dive into some new Solidity concepts.
Working with contract intializers#
In this section, we will complete the constructor function that we have.
Wrapping up the constructor
The constructor will be used to take a random number so that the money game can be played. The constructor will also keep track of who is the owner of the game (to the person who creates the MoneyGame).
Recall that we had created the following code in the previous section:
constructor () public {

}
Using msg.sender to identify who is interacting with the smart contract#
Let’s take care of the owner variable first. To ensure that we capture the address (blockchain account) that is creating the the MoneyGame smart contract, we can use the method msg.sender . This method keeps track of who is calling the smart contract.
Add owner = msg.sender; to the constructor method to ensure that we capture the owner. We will use this variable later to access the random number (which will be hidden from everyone else).
The msg is a global variable that is accessible by Solidity smart contracts. msg.sender identifies the account that is calling the smart contract. A few other things that the msg variable captures includes msg.data , msg.gas , msg.sig , and msg.value .
- msg.data — The complete calldata which is a non-modifiable, non-persistent area where function arguments are stored and behave mostly like memory
- msg.gas — Returns the available gas remaining for a current transaction (you can learn more about gas in Ethereum here)
- msg.sig — The first four bytes of the calldata for a function that specifies the function to be called (i.e., it’s function identifier)
- msg.value — The amount of wei sent with a message to a contract (wei is a denomination of ETH)
In this smart contract we will also use msg.value to figure out how much ether a user sends to the smart contract. More on that later.
constructor () public {
    owner = msg.sender;

    // Add code for targetNumber here
}
constructor () public {
owner = msg.sender;
// Add code for targetNumber here
}
Setting a target number#
The next thing we have to do is set our targetNumber variable. You may recall that this variable was of type uint8 .
The reason we are setting the targetNumber ourselves and not using a function to create a function is because it is not possible to create a random number in a Solidity smart contract.
- All transactions on the Ethereum blockchain modifies the global state of the entire network in a calculable way, with no uncertainty - this means that there is no source of randomness in Ethereum
- If we do want to introduce randomness into our smart contract, the source of the randomness must be external to the Ethereum blockchain
- One can create a function to generate a pseudo random number inside a Solidity smart. The reason that it is pseudo-random is because someone can potentially figure the random number being created with the code used to generate the random number.
To ensure that the contract creator can take the targetNumber, update the constructor declaration:
constructor (uint8 _targetNumber) public {
    // ... other code
}
In the constructor, add a line that sets the smart contract’s targetNumber variable the value of the variable that is being passed in. Your constructor should look something like this:
constructor (uint8 _targetNumber) public {
    owner = msg.sender;
    targetNumber = _targetNumber;
}
We are now ready to dive into some of the other functions of the Money Game smart contract. In the next section we will explore payable functions and how users may want to use payable functions.
Getting users to use crypto with smart contracts
In this section, we will jump into code that will enable our users to use crypto with our functions. To have our users interact with our functions with their crypto, we will need a modifier called payable .
Payable
The payable modifier is important to functions. It is a modifier that is native to the Solidity language. If a function is created with the payable modifier (or keyword), it means that the function will be able to accept ether . If a developer wants a function to take ether but they did not add the payable keyword, it will reject any ether sent to it.
In addition to having “payable” functions, it is also possible to have “payable” addresses. In the example that we are creating, we will have addresses that are payable because once the Money Game smart contract is required to pay out to the winner, ether will be sent to that “payable” address.
In our smart contract, we will use the payable to allow people to enter the Money Game smart contract with ether. We will call the function play . To kick things off, we will declare the function first. The function will be publicly accessible, and be a payable function. To play the game the user will have to guess the number that is stored in the smart contract. That means that the function we are writing will be required to take a number that will be the guess that the user takes. Let’s call the number _guess and we will have it as type uint8 since the number we are storing in the smart contract is also the same type.
    function play (uint8 _guess) payable public {

    }
Now that our function is declared, we need to use a require statement. Let’s say that for people to play the Money Game smart contract, they need to send exactly 0.5 ETH to the game. We can use our require statement to enforce this behavior.
    function play (uint8 _guess) payable public {
        require(msg.value == 0.5 ether, "You must provide 0.5 ether to play");
    }
Another require statement we can add can be used to check if the person that is entering the game is not the person that created the game.
    function play (uint8 _guess) payable public {
        require(msg.value == 0.5 ether, "You must provide 0.5 ether to play");
        require(msg.sender != owner, "Owner of this contract cannot play the game");
    }
Once our checks pass, we can now do a check to see if the user has guessed the number correctly. Let’s add an if statement block to handle the logic. If the user has correctly guessed the number, they will receive all of the ether in the smart contract. If the user has not guessed the number correctly, the ether that they sent gets added to the smart contract and the user will have to try again by calling the play function again with more ether . We’ll start off by creating the if statement block.
    function play (uint8 _guess) payable public {
        require(msg.value == 0.5 ether, "You must provide 0.5 ether to play");
        require(msg.sender != owner, "Owner of this contract cannot play the game");
        if (_guess == targetNumber) {
            // add code here release all the ether in the smart contract to the person calling the function
        } else {
            // add code here to take the ether from this user and ask them to play again or something
        }
    }
Now that we have the if statement block, we have to figure out what code is required for each section. In the first part, _guess == targetNumber implies that the person that is playing the game has guessed the targetNumber correctly. In this block we need to do the following:
- Conduct a transfer of ether from the smart contract to the person who called the function
To perform these actions, we can use a transfer method. In the transfer method we will pass in the current balance of the smart contract. To access the current balance of the smart contract, we can use address(this).balance . To use the transfer method, we can use msg.sender.transfer() .
Let’s put these two together.
    function play (uint8 _guess) payable public {
        require(msg.value == 0.5 ether, "You must provide 0.5 ether to play");
        require(msg.sender != owner, "Owner of this contract cannot play the game");
        if (_guess == targetNumber) {
            msg.sender.transfer(address(this).balance);
        } else {
            // add code here to take the ether from this user and ask them to play again or something
        }
    }
If the user does not guess the number correctly, let’s notify toe user that they have not won the Money Game and that they should try again if they are interested in winning. We cannot do that right now with how the function is created. To do this, let’s return a string object. Update the function so that it returns a string . After that, let’d add messages for both the success block and fail block of the if statement to tell the user what is going on.
    function play (uint8 _guess) payable public returns (string memory) {
        require(msg.value == 0.5 ether, "You must provide 0.5 ether to play");
        require(msg.sender != owner, "Owner of this contract cannot play the game");
        if (_guess == targetNumber) {
            msg.sender.transfer(address(this).balance);
            return ("You win the Money Game!");
        } else {
            return ("You lose the Money Game. Please try again");
        }
    }
Our function now has everything it needs for someone to play / enter our game. Let’s add a few more things in the next section so that we can have it ready to deploy.
Writing a Function Read the Target Number#
Now that we have a function that allows users to play the Money Game, let’s create a function that actually allows the owner of the MoneyGame to read the targetNumber . This function will be created to introduce the notion of creating function modifiers and applying them to the functions that we create.
Modifiers#
A function modifier creates additional features (or alternatively restrictions) on a function. To declare a modifier , after you write your modifier, add a _; to the function Source.
Example:
    modifier restricted () {
        require(msg.sender == owner);
        _;
    }
We will call our modifier onlyOwner . The code in the modifier will run on functions that use the modifier. In our case, this will ensure that the person calling a function is the manager set in the smart contract. We will also add _; to the modifier so that the compiler knows that we are creating a modifier.
Start off by declaring the modifier.
    modifier onlyOwner () {

    }
After that, add the code that you want to run every time the modifier is applied.
    modifier onlyOwner() {
        require(msg.sender == owner);
    }
Now to ensure that the compiler understands that this is a modifier, we have to add a _; at the end of the modifier. The final modifier will look like this.
    modifier onlyOwner() {
        require(msg.sender == owner);
        _;
    }
Reading the target number#
Let’s jump into the simple function that we will create so that we can apply the modifier we are creating.
The function will just return the private targetNumber variable to the user calling the function IF they are the owner of the contract.
We can start off by declaring the function. We want to make the function public, view only, and available to the owner. We also want to ensure that it returns the a uint8 value because that is the variable type of the targetNumber . The function will be called readTargetNumber .
    function readTargetNumber() public view onlyOwner returns (uint8) {

    }
The rest of the function is simple, we will simply add return targetNumber; . The onlyOwner modifier will take care of the check for us (to confirm that the owner is indeed the person calling the function) before returning the value.
Our function will look like this.
    function readTargetNumber() public view onlyOwner returns (uint8) {
        return targetNumber;
    }
At this point, we have a smart contract that we can send up to a blockchain. Let’s dive into this in the next chapter
Deploying the Smart Contract#
Now that we have a smart contract ready, let’s see how it works on a JavaScript Virtual Machine.
Let’s ensure that Remix is ready to send our Solidity smart contract to the JavaScript VM.
From the main menu, look under Environments to specify to the application that we will be using a Solidity environment to process our smart contract. Select Solidity and it will open up the Solidity Compiler on the toolbar on the left of the screen.
In this section we will specify the environment details we need to get our smart contract to compile and work on Remix . We will have to ensure that the following fields are set:
- Compiler: v0.6.12+commit.27d51765
- Language: Solidity
- EVM version: compiler default
- Auto compile: selected
- Enable optimization: selected and set to 200
If the name of your smart contract, MoneyGame.sol does not appear in the Compile button then we need to take a few additional steps.

Go back to the file explorer (toggle the menu on the left).
From the file explorer, select MoneyGame.sol . The file should open in the Remix editor section.
Now you can go back to the compile page and your Compile button should have updated. Select the button that is now labeled “Compile MoneyGame.sol”.
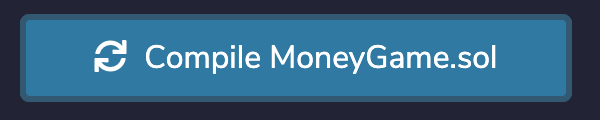
If the compilation is successful, the taskbar button for the compiler should now have a green check mark over it.
Let’s open the Deploy and Run Transactions section so that we can take our compiled smart contract and send it to the JavaScript Virtual Machine. Click the icon below to get started:
This will open up the Deploy and Run Transaction section, as shown below. From here we will configure and confirm a few settings before actually taking our compiled smart contract and sending it to the JavaScript VM.
- Environment should be set to
JavaScript VM. TheJavaScript VMcreates 10 fake Ethereum accounts that are loaded with 100 ETH. The accounts can be used to deploy smart contracts, interact with smart contracts, etc. - Account should be set to a blockchain account that has 100 ETH (or at least more than 1 ETH if you have been using your
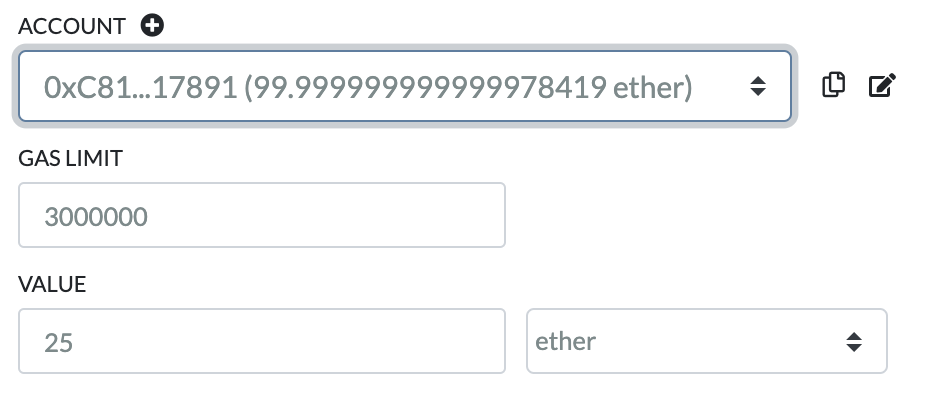
Remixinstance for other smart contract deployments) - Gas Limit should be set to 300,000 and Value should be set to 0
- Contract should be set to
MoneyGame - browser/MoneyGame.sol - Set a targetNumber in the field after the
Deployfunction (we are setting ours to 5 for demo purposes)
With these parameters set, the Deploy button should be yellow and ready to click and your final set up should be similar to the one shown below.

Upon clicking Deploy , you will see in Remix 's JavaScript console that the smart contract is deployed to the JavaScript VM, and the instance of that contract will show up under “Deployed Contracts”.
Using the Deployed Smart Contract in Remix#
To interact with our smart contract, let’s look at the functionality we have available. Under Deployed Contracts, expand your deployed lottery smart contract to see its functions:
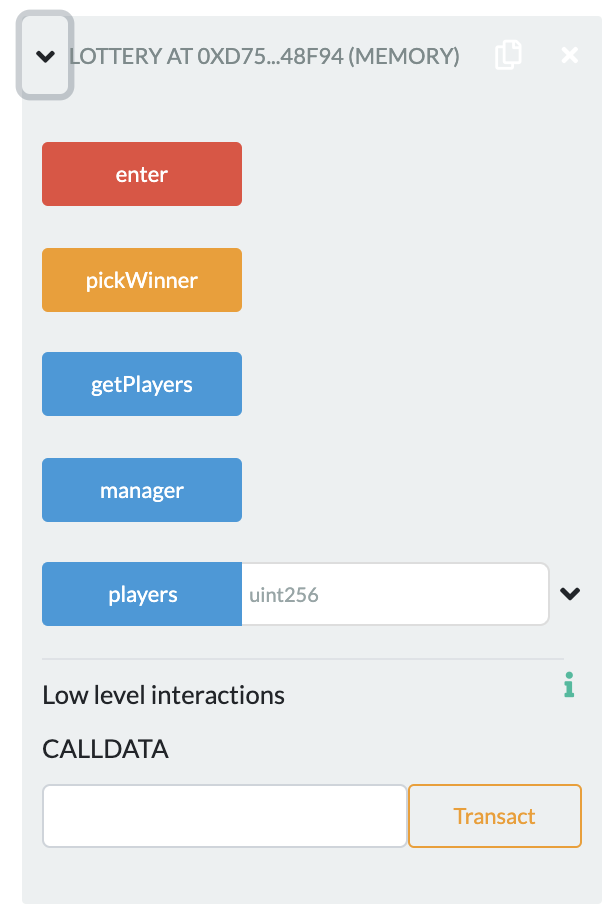
We have the following functions:
-
enter : allows a user with a blockchain address to join the current lottery - the red button means it’s a
payablefunction and we need to pass in ether to call it - pickWinner : picks a winner from the players that enter the lottery smart contract
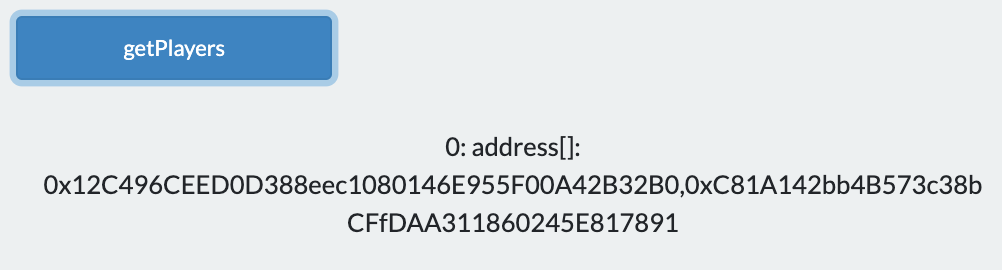
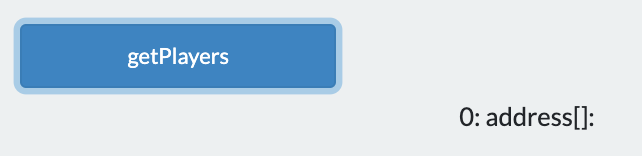
- getPlayers : returns the array of players (blockchain addresses) that are in the lottery
- manager : returns the blockchain address of the manager of the lottery
- players : allows you to return one player from the array of players (blockchain addresses) based on the array index you pass in
Finding the Manager#
When a smart contract gets deployed on the Ethereum blockchain, you have a piece of software that lives on the blockchain. The software we have created is the Lottery game. This section will teach you how to interact with a deployed smart contract on Remix (i.e. play the Lottery game that we created on the Ethereum blockchain). To use the Lottery smart contract we will invoke various functions (the ones we created) using Remix.
The address that we used to deploy the smart contract has been set as the “manager”. To verify this, look at the address you deployed the contract with in the JavaScript console or if you haven’t changed the Account field under the Deploy & Run Transactions section.
These are all the accounts that are loaded with the JavaScript VM running on my computer (yours will look slightly different).
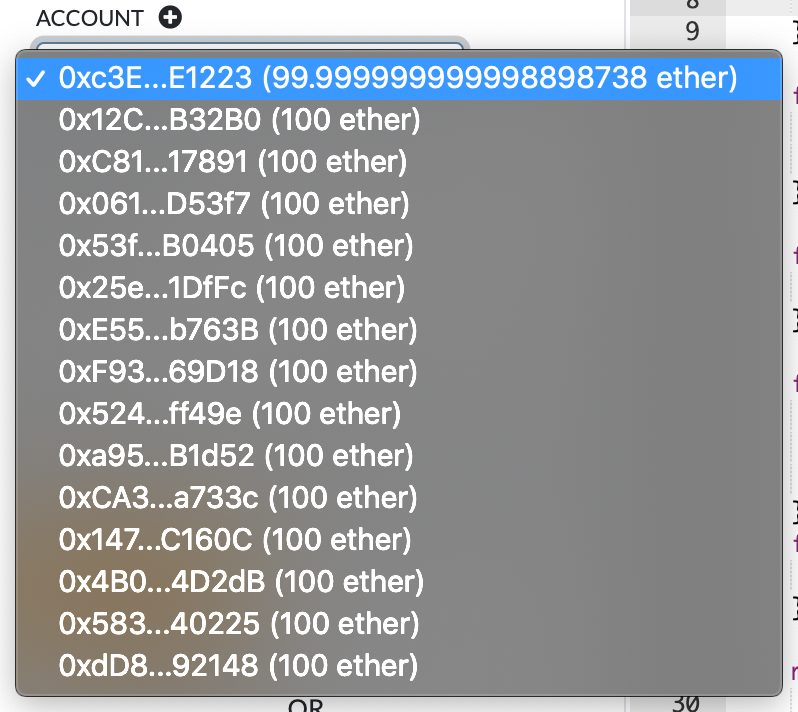
I take note that the account that I deployed with started with 0xc3E and ends with E1223 .
Now if I cross-reference with what I see in the JavaScript console, the section of Remix where I can see my blockchain transactions, I will see the corresponding transaction that I executed to deploy my smart contract.

Now that we can confirm the address that I used to deploy the smart contract, let’s ask the smart contract manager function if the account that manages the lottery smart contract is indeed the account I deployed with. Upon clicking the button labeled manager , I see that the address that I deployed with is the manager address of the smart contract.

The manager of the Lottery game can invoke functions that other users cannot (e.g. selecting a winner for the Lottery game).
Entering the Lottery#
To enter the lottery, let’s leverage the other accounts that we have. From my list of fifteen accounts, I will be using accounts 2 and 3 to participate in the lottery.
Account 1 is already the manager so I will leave the blockchain address out of the lottery. If you recall, when we wrote the smart contract, we ensured that only the manager was allowed to pick a winner.
To enter the lottery, we have to invoke the enter function with account 2 and 3.
For Account 2#
Let’s switch to the second account in the list.

Once you select it and confirm that it is set under accounts, let’s change the Value field as well.

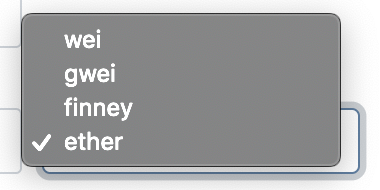
Initially, this value is set to 0. Let’s get account 2 to pass in 25 ETH. You can set the value on the right to be equal to ether so that the value passed in is actually 25 ETH.

Once these parameters are set, select the enter button.
To confirm that the player was entered into the lottery, let’s use one of our other functions to confirm that it worked correctly.
Let’s leverage the getPlayers function to see if we get an array of one element (blockchain address) returned from our smart contract. After clicking on the getPlayers button, I see that account 2 is now a player in the lottery.

For Account 3#
For this account we will follow a similar process to account 2. Before we do that, let’s see what happens if we try to join the lottery without adding in any ether to our enter function call.
Let’s switch to the third account in the list. Take a note of the second account being shy approximately 25 ether. This implies that our previous function call worked.

Instead of setting a value, I will call the enter function right away.
Once I do that, I see my JavaScript console update with an error. The console tells me that I need to send more than 0.1 ether to this contract. This is good because that’s the error message we set when we were writing this smart contract.

Now that we confirmed that our function is working, let’s add another 25 ether into the lottery smart contract. This time we’ll see that our balance for account 3 went down a bit because we tried invoking a function. The JavaScript VM is programmed to take some fees from the account even if the execution of the function failed.
I will call the enter function and now account 3 is also a part of the lottery and our total pool for the lottery is 50 ether.

Picking a Winner#
Let’s try this while still being in account 3. We created a restricted modifier which should lock the pickWinner function to only the manager of this smart contract. Let’s confirm that the modifier works.
From account 3 I will select the pickWinner function. This button is yellow because it is a function that will kick off a transaction (i.e. not a read only / payable function).

Upon clicking the button, the JavaScript console shows an error and the total amount of funds in the smart contract is still 50 ether.

Let’s select a winner properly. To do this we must switch back to the account that deployed this smart contract. In our case, it was account 1. In the account section, ensure that your managing / deployment blockchain address is selected.

Now that the managing account, also known as account 1, is selected, I will click pickWinner again.
This time I get a successful transaction.

Let’s confirm a few things upon receiving this successful transactions. We need to confirm that one of the accounts that was playing has received the 50 ether in the lottery smart contract and we also need to confirm that the array of players has been reset.
To check that the balances for account 2 or 3 have been updated - let’s take a look at the accounts drop down near the top.

We can see that account 3 has won the lottery and now has almost 125 ether in their account. Account 2 has around 75 ether in their account which makes sense because they lost the lottery and did not get more ether after sending 25 ether to the lottery smart contract.
The last thing we need to check is that the lottery smart contract has wiped the players array so that the next time people send ether to the smart contract, they are starting a new round with new players. To do this we can leverage the getPlayers function.

Upon clicking this button, I see that the array is now empty and the game has been reset.
Play games… win money!
As we slowly climb deeper into this world of smart contracts, let’s quickly review what we have learned in this chapter.
The smart contract we encountered was slightly more complex than the Inbox.sol contract that we wrote in Chapter 4. It allowed us to work with smart contracts that interact with the ether cryptocurrency. We used various functions to facilitate a Money Game in our smart contract MoneyGame.sol . We learned about functions, payable functions, and function modifiers. With this information, we will now jump into the more complicated realm of creating smart contracts for the decentralized finance space.
Let’s go!
Thank you again to StephenGrider. Both the Inbox.sol and Lottery.sol contracts were excellent inspirations for the Money Game smart contract. They explain a lot of the key concepts in Solidity programming.
Creating a Token Smart Contracts for the Blockchain Part 1
In recent years, blockchain developers have explored various aspects of having tokens exist on blockchain networks. There are two main categories of tokens, fungible and non-fungible tokens.
Before we dive into these, just a quick reminder that these tokens are also known as cryptocurrencies. Furthermore, cryptocurrencies are a digital asset designed to work as a medium of exchange. The medium is leveraging strong cryptography to secure financial transactions, control the creation of additional units, and verify the transfer of assets.
To create tokens on a blockchain network, you can use Solidity (or other smart contract languages). In this book we will write smart contracts in Solidity to create fungible tokens.
Fungible Tokens#
Fungible tokens imply that there is equal value between the assets being considered. The definition of fungible is “mutually interchangeable”.
Fungible tokens have the following properties:
- interchangeable - a fungible token can be exchanged with other tokens of the same type. An example of this is if I give you one fungible token and you give me one back, then it makes no difference in terms of value to the two of us.
- uniform - fungible tokens are all of the same type and identical in specification, functionality and valuation method.
- divisible - a fungible token can be broken down into smaller units. Each will still represent a part of the larger token.
Fungible Token Standards#
A popular implementation of fungible tokens is the ERC-20 token standard. Tokens can be created with Solitiy smart contracts and sent to the Ethereum blockchain. These token smart contracts can be used to represent value and be held by Ethereum accounts (wallets, other smart contracts, etc.).
To create an ERC-20 token with Solidity, there are different methods and events that need to be implemented. The methods and methods are predefined in something called a smart contract interface . The interface is written in Solidity. The token smart contract that we will write will inherit from the interface we create. The interface we create will have all of the requirements of the ERC-20 token standard found here.
ERC-20 Token Standard#
The ERC-20 Token Standard helps developers write Solidity (or any coding language) for token smart contracts. The ERC-20 Token Standard defines requirements for the token smart contracts (e.g. methods, events, variables) that need to be implemented.
Events#
For an ERC-20 token implementation, two events are required: Transfer and Approval.
The Transfer event must be triggered when tokens are transferred, even for zero-value transfers. The Transfer event should also be called when a token contract creates new tokens. The _from field should be set to 0x0 .
The Approval event must be called whenever the approve method is called, which we will explore in the next section on Methods.
Methods#
In addition to events, the ERC-20 token that we are creating with Solidty also has a set of methods that require implementation. They include the following.
Below are the methods that must be implemented in an ERC-20 token. Note that in this section, we are only creating the interface smart contract.
totalSupply returns the total token supply.
balanceOf returns the account balance of another account with the address _owner .
transfer transfers the amount _value of tokens to address _to , and MUST fire the Transfer event. The method SHOULD throw an error if the message caller’s account balance does not have enough tokens available to spend.
transferFrom transfers the amount _value of tokens from address _from to address _to , and MUST fire the Transfer event.
The transferFrom method is used for a withdraw workflow, allowing contracts to transfer tokens on your behalf and/or to charge fees in sub-currencies. The method SHOULD throw an error unless the _from account has deliberately authorized the sender of the message via some mechanism.
approve allows a _spender to withdraw from your account multiple times, up to an amount _value . If this method is called again it overwrites the current allowance with _value .
allowance returns the amount which _spender is still allowed to withdraw from _owner .
If we put all of this together we get the interface smart contract required for an ERC-20 token smart contracts. Don’t worry about doing that just yet - we will be covering another token standard before we jump into actually coding the ERC-20 token smart contracts.
Non-Fungible Tokens#
This is a token that is used to represent digital scarcity and uniqueness. The token is driven by cryptography, meaning that it uses code and cryptography to create a unique identifier. Similar to the fungible ERC-20 token, one can write Solidity smart contracts to create non-fungible tokens on the Ethereum blockchain as well.
Over the past few years, blockchain developers have come together and determined the requirements for a smart contract to be considered a non-fungible token, which can also be referred to as a “deed”.
Non-Fungible Tokens, common referred to as NFTs, are owned and transacted by a unique party (or a consignment to a third party). NFTs can represent ownership of digital or physical assets. Some examples include:
- physical property (houses, original artwork)
- virtual collectables (unique pictures of kittens, collectable cards)
- “negative value” assets (loans, burdens and other responsibilities)
All houses are distinct and no two kittens are alike. NFTs are uniquely identifiable and users must track the ownership of each one separately.
These tokens are typically assigned to a blockchain address (Ethereum wallet, Bitcoin wallet, etc). If a user has a NFT in their wallet, they may be able to use it across multiple blockchain applications which use blockchain wallets to let users to access the application’s functionality.
A token standard for non-fungible tokens on blockchains is the ERC-721 token standard. Solidity developers can refer to the ERC-721 token standard to create non-fungible token smart contracts.
More information on NFTs and the non-fungible token standard ERC-721 is found here. There is an example of an ERC-721 smart contract later in this section however we will not be exploring it further since it won’t be relevant to the project we are building.
Writing Smart Contracts for Fungible Tokens#
In this section we will be writing Solidity smart contracts that will create the ERC-20 token on the Ethereum blockchain. The smart contracts we create will implement the ERC-20 Token Standard. There are multiple smart contracts that we will write and they will all be used to create the ERC-20 token smart contract that we want to use on the Ethereum blockchain.
The smart contracts that we will implement for the main ERC-20 token smart contract include the following:
Interfaces:
- IERC20.sol
Libraries:
- SafeMath
- Role.sol
- MinterRole.sol
- Context.sol
Contracts:
- ERC20.sol
- ERC20Detailed.sol
- ERC20Burnable.sol
- ERC20Mintable.sol
We will use these contracts to create an ERC-20 tokens smart contracts on the Ethereum blockchain. The smart contract that will combine all of these smart contracts will be called ERC20Combined.sol . This smart contract will represent the token we want to create. The ERC20Combined.sol smart contract will also be the code that we deploy to the Ethereum blockchain.
As we create each smart contract in this section, we will walk through what each of these contracts do. We will talk about how interface and library smart contracts are used by smart contracts that represent tokens. We will also talk about how different contracts can be imported into one another since Soliduty is an object oriented programming language.
To compile and deploy the smart contracts we will use Remix and Truffle on test Ethereum blockchains rather than a local one.
We will leverage a lot of learning from OpenZeppelin, an organization that focuses on creating secure smart contracts in Solidity. Smart contracts related to tokens, DeFi and exchanges are often under attack, so to assist our security, we will create contracts that align closely to their contract work.
Smart Contract Development on a Local Machine#
Till now, we have been using Remix to test our smart contracts. In this section, we will learn how to write and test smart contracts locally. That way we can create a consolidated development environment with all of our code in case you ever want to tie in your smart contract development with any fullstack web / mobile development that you do.
To kick off development, create a new project folder. In this project folder we will write the token smart contracts. In your dev folder (on your desktop if you are following this book), create a folder called erc-20-token . The erc-20-token folder will contain all of the token smart contracts and the configurations required to develop smart contracts locally.
Open this folder in VS Code and add a few things. The first is a contracts folder. The second is the migrations folder. Finally we will create a file in the root folder called truffle-config.js .
We will be using a smart contract testing platform called Truffle Framework. In previous chapters, we used Remix to write and deploy our smart contracts, but we will now be developing more complex contracts with multiple files, for which Truffle provides a solid set of tools and frameworks.
Truffle Suite#
Truffle is a company that has created a set of tools for smart contract development, of which we will be using Truffle and Ganache .
Truffle#
Truffle is a development environment, testing framework, and asset pipeline for blockchains using the Ethereum Virtual Machine. To install truffle on your computer, go to any terminal (yes - even in the folder you just created) and run npm install -g truffle . You may need to run it as a super-user as you are installing a global JavaScript library with the node package manager (by using the command sudo npm install -g truffle ).
Ganache#
Ganache lets developers create a personal blockchain for Ethereum development. A developer can use this personal blockchain to deploy contracts, develop applications, and run tests. It is available as a desktop application and a command line tool. In this book we will be using the command line tool. To install ganache on your computer, run npm install -g ganache-cli . Again, as you are installing a global JavaScript library, you may need to run it as a super-user (by using the command sudo npm install -g ganache-cli ).
To ensure that Truffle is installed correctly, you can run the following command:
truffle --version
If you receive the following output (or something similar) then that means that you have installed Truffle correctly:
Truffle v5.1.46 - a development framework for Ethereum

Usage: truffle <command> [options]

Commands:
  build     Execute build pipeline (if configuration present)
  compile   Compile contract source files
  config    Set user-level configuration options
  console   Run a console with contract abstractions and commands available
  create    Helper to create new contracts, migrations and tests
  debug     Interactively debug any transaction on the blockchain
  deploy    (alias for migrate)
  develop   Open a console with a local development blockchain
  exec      Execute a JS module within this Truffle environment
  help      List all commands or provide information about a specific command
  init      Initialize new and empty Ethereum project
  install   Install a package from the Ethereum Package Registry
  migrate   Run migrations to deploy contracts
  networks  Show addresses for deployed contracts on each network
  obtain    Fetch and cache a specified compiler
  opcode    Print the compiled opcodes for a given contract
  publish   Publish a package to the Ethereum Package Registry
  run       Run a third-party command
  test      Run JavaScript and Solidity tests
  unbox     Download a Truffle Box, a pre-built Truffle project
  version   Show version number and exit
  watch     Watch filesystem for changes and rebuild the project automatically

See more at http://trufflesuite.com/docs
To confirm that you have ganache-cli installed, run ganache-cli --version in your terminal and you should see the following (or something similar):
$ Ganache CLI v6.10.1 (ganache-core: 2.11.2) // for ganache-cli
Smart Contract Interfaces#
Now that we have our Truffle tools installed and the folders ready for smart contract development on a local machine, let’s dive into the first part of creating an ERC-20 token - the interface smart contract.
Solidity contracts are like object-oriented classes. They have variables and methods that can persist and manipulate data. An interface can be thought of as a contract that does not implement the method. They are used as base contracts to identify how the contracts that inherit from them should behave.
Some general rules about interfaces:
- Methods cannot be implemented
- Structs, enums, variables, and constructors cannot be defined
- They cannot inherit other interfaces / contracts
We won’t be working with structs or enums for the contracts we are covering in this book, but if you are interested in learning more check out this link: Source. We will dive into variables and constructors later in this chapter.
Since we are starting with an ERC-20 token interface, let’s review the Ethereum Implementation Proposal (EIP) that will guide our code writing for this chapter. The EIP can be found here.
The key features in an ERC-20 token are:
- version of Solidity must be v0.4.17 or above
-
optional methods
name,symbol,decimals -
mandatory methods
totalSupply,balanceOf,transfer,transferFrom,approve,allowance -
events
TransferandApproval
To start writing the interface, create a folder in the contracts folder called interfaces , and within that create a file called IERC20.sol . The I at the beginning of the name identifies to future developers that the contract inside is an interface.
Now that we have the interface file created, open the file and start off by specifying the version of Solidity that we will be using.
pragma solidity ^0.5.0;
Next, you can create the interface with the following code:
interface IERC20 {

}
The interface is very simple. Based on what was identified in the EIP standard above, we only have to specify the methods totalSupply , balanceOf , transfer , transferFrom , approve , and allowance , and the two events - Transfer and Approve .
Once these are all in place, will specify the method inputs and outputs.
Methods for the Interface Contract#
Let’s start with the methods. First is the totalSupply method, which will return the amount of tokens in existence. This method can be created within the brackets of IERC20 like this:
interface IERC20 {

    function totalSupply() external view returns (uint256);

    // All the other methods will go within this interface...

}
A few reminders before we start adding the other methods:
-
uint256is an integer type for the Solidity programming language. This variable type can store a number in 256 bits unsigned number ranging from 0 to (2**256)-1. -
functiondeclaration is how you write methods in the Solidity programming language
Next we will create balanceOf which returns the amount of tokens owned by a certain account. To specify which account we are querying the balance for, we must provide an address variable into the function. Add the following code beneath the totalSupply function:
function balanceOf(address account) external view returns (uint256);
For the transfer function, we will need to specify the recipient ( address ) and the amount of the token ( uint256 ) that we want to transfer. In addition we want this function to be callable by anyone ( external ) and for it to return a value on transaction success or fail ( bool ). Add the following code below balanceOf .
function transfer(address recipient, uint256 amount) external returns (bool);
For the allowance method, we will create a method that will take in two address variables, owner and spender. This will be a read-only method (add the view flag) that will return the amount that the spender is allowed to spend on behalf of the owner. By default, this value is zero. The value can change after approve or transferFrom is called.
function allowance(address owner, address owner) external view returns(uint256);
The next method we will add is approve . This will set the allowance amount for a spender and a boolean value will be returned to indicate success. The address value will represent the spender account and uint256 the token amount the spender is allowed to spend. Add the following code after the allowance method:
function approve(address spender, uint256 amount) external returns(bool);
The last method we will add is transferFrom . This will move an amount of tokens from the spender account to a recipient account. It will use the allowance method to ensure that the accounts involved are allowed to move the tokens. Once the operation is complete the method will return a boolean value. Add the following code to create the method template:
function transferFrom(address spender, address recipient, uint256 amount) external returns (bool);
Events#
To finish IERC20 interface we will add the two events. Every time an approval or a transfer takes place, we want to capture a few items. This means that when we actually implement the methods for the ERC-20 smart contract token, we will have to ensure that these events are called.Add the code below to ensure events are implemented in any ERC-20 token that leverages this interface:
    event Transfer(address indexed from, address indexed to, uint256 value);
    event Approval(address indexed owner, address indexed spender, uint256 value);
Some of the variables we are capturing are indexed . This means that when events are logged, you can search the indexed parameters as filters.
Great - your IERC20 interface smart contract is complete! We can now start working on library smart contracts that we’ll need for the ERC-20 token we are creating.
pragma solidity ^0.5.0;

interface IERC20 {
    function totalSupply() external view returns (uint256);
    function balanceOf(address account) external view returns (uint256);
    function transfer(address recipient, uint256 amount) external returns (bool);
    function allowance(address owner, address spender) external view returns (uint256);
    function approve(address spender, uint256 amount) external returns (bool);
    function transferFrom(address sender, address recipient, uint256 amount) external returns (bool);

    event Transfer(address indexed from, address indexed to, uint256 value);
    event Approval(address indexed owner, address indexed spender, uint256 value);
}