Smart Contract Libraries#
There are two smart contract libraries that we will use to start the development of our ERC-20 tokens, both recommended by the OpenZeppelin team: SafeMath and Context . SafeMath will ensure that there are no errors when doing math in Solidity contracts (e.g. adding, subtracting, multiplying and division), and Context will be used to track some metadata for the token smart contract we deploy.
SafeMath Library#
Let’s start off by writing the SafeMath library. To start writing the library, create a folder in the contracts folder called libraries . In that folder, create a file called SafeMath.sol . Now open this library file and start by specifying the version of Solidity that we will be using.
pragma solidity ^0.5.0;
The SafeMath library that we will create will be simple, with methods add , sub and mul . Since token smart contracts interact with large numbers, this library will ensure that we don’t have any overflows in the numbers we are adding, subtracting, or multiplying. This is because numbers in Solidity are capped by the uint256 variable (uint256 has a maximum value of (2**256)-1).
Identify the library in Solidity like this:
    library SafeMath {

    }
This library has been vetted by OpenZeppelin and another organization called DappHub. Each method we add to the library will be responsible for interacting with two uint256 numbers. The methods will all be internal, pure, and return a uint256 value to the method caller.
    function add(uint256 x, uint256 y) internal pure returns(uint256 z){}
    function sub(uint256 x, uint256 y) internal pure returns(uint256 z){}
    function mul(uint256 x, uint256 y) internal pure returns(uint256 z){}
Now that we have the placeholders for our add , sub and mul functions, let’s write the code to ensure that when we work with large numbers in our ERC-20 tokens we don’t run into any overflow errors.
Normally, to add two numbers together we can simply write x + y . If we combine that with a require statement then we can do the addition that we require (with the proper checks in place) in one line. When the two numbers are added together, we have to make sure that the sum that we get from x and y is greater than one of the values. Add the following code between the {} for the add function:
require((z = x + y) >= x, "ds-math-add-overflow"); // if the first part of the require statement fails, our function will print ds-math-add-overflow
We can apply similar principles for the sub and mul function. For the sub function, we want to check the opposite of the add function:
require((z = x - y) <= x, "ds-math-sub-underflow"); // if the first part of the require statement fails, our function will print ds-math-sub-underflow
For the mul function, we can make two checks:
- if one of the values is 0 then there is no way that an overflow can occur
- if the multiplication of x and y divided by y is equal to x then we can confirm that an overflow did not occur
require(y == 0 || (z = x * y) / y == x, "ds-math-mul-overflow"); // if the first part of the require statement fails, our function will print ds-math-mul-overflow
These three functions are the only things that we will add in our SafeMath library - nice! The final contract should look something like this:
pragma solidity ^0.5.0;

library SafeMath {
    function add(uint256 x, uint256 y) internal pure returns (uint256 z) {
        require((z = x + y) >= x, "ds-math-add-overflow");
    }

    function sub(uint256 x, uint256 y) internal pure returns (uint256 z) {
        require((z = x - y) <= x, "ds-math-sub-underflow");
    }

    function mul(uint256 x, uint256 y) internal pure returns (uint256 z) {
        require(y == 0 || (z = x * y) / y == x, "ds-math-mul-overflow");
    }
}
Context Library Smart Contract#
Let’s move on to the next library smart contract. In the contracts/libraries/ folder, add the following file: Context.sol . As before, we will add the version of Solidity and create a placeholder for the library smart contract we are writing. Though we will be treating this contract like a library, we will name it contract according to OpenZeppelin’s recommendation.
pragma solidity ^0.5.0;

contract Context {

}
In this library smart contract, we will simply track the sender and the data that is sent while creating an ERC-20 token with our contracts. We will need two methods: _msgSender and _msgData . These will be view-only methods that will return the msg.sender and the msg.data parameters that are sent when the token smart contract is being created.
We will also have an empty constructor method to prevent people from accidentally deploying this contract - the contract can only be activated through inheritance.
The empty constructor method will look something like this:
constructor() internal {}
The _msgSender method will simply return the address of the person / contract that is deploying the ERC-20 contracts. The method will look like this:
    function _msgSender() internal view returns (address payable) {
        return msg.sender;
    }
The _msgData method will return the data value that is passed in by the person / address that is deploying the ERC-20 contracts. It will look like this:
    function _msgData() internal view returns (bytes memory) {
        this; // silence state mutability
        return msg.data;
    }
After getting these methods fleshed out, the final Context library will look something like this:
pragma solidity ^0.5.0;

contract Context {
    constructor() internal {}

    function _msgSender() internal view returns (address payable) {
        return msg.sender;
    }

    function _msgData() internal view returns (bytes memory) {
        this;
        return msg.data;
    }
}
The wraps up the smart contract libraries that we will need to create the token smart contract. Next, let’s dive into some of smart contracts that we will be using to create our ERC-20 token smart contract.
Token foundation is now ready
Now that we have the interface and library smart contracts that we need to create our main ERC-20 token smart contract, we will now move on to creating some of the smart contracts that provide additional functionality for the ERC-20 token smart contract. These smart contracts will build on the ERC-20 token standard we are implementing. The ERC-20 token standard does not cover these additional capabilities as they are not required to create an ERC-20 smart contract token. In the next section, we will explore why we are adding these additional capabilities to the smart contract token that we are writing in this book. Once these contracts are implemented, we will have everything we need to create the ERC-20 smart contract token we will send to the Ethereum blockchain.
Creating a Token Smart Contracts for the Blockchain Part 2#
In the last chapter we looked at what it takes to create an ERC 20 token. There are a set of smart contracts that need to be created before we actually write a smart contract for the ERC-20 token. The ERC-20 smart contract token that we are writing will follow the ERC-20 Token Standard shared in the previous chapter. Here are smart contracts that we will be implementing:
As per the ERC-20 Token Standard:
Interfaces:
- IERC20.sol // necessary
Libraries:
- SafeMath.sol // necessary
- Context.sol // necessary
- Role.sol
- MinterRole.sol
Contracts:
- ERC20.sol // necessary
- ERC20Detailed.sol // introduces additional capabilities
- ERC20Burnable.sol // introduces additional capabilities
- ERC20Mintable.sol // introduces additional capabilities
Contracts we will deploy:
- ERC20Combined.sol // combines everything together
In the last chapter we created IERC20.sol , SafeMath.sol , Context.sol . In the next few chapters, we will write the rest!
Smart Contract for ERC-20 Tokens#
The first contract we are writing is the ERC20.sol smart contract. This contract will be inherited by the main token smart contract we will be writing later. For now, this ERC20.sol smart contract will implement the methods specified in the ERC-20 token standard.
ERC20.sol#
To kick things off, create a file in the contracts folder and name it ERC20.sol . As we do with all smart contracts, start off by declaring the version of Solidity that we are writing the smart contract with.
In addition to declaring the version of Solidity we will be using, we will also import the interface and libraries that we created in the previous chapter.
pragma solidity ^0.5.0;

import "./interfaces/IERC20.sol";
import "./libraries/Context.sol";
import "./libraries/SafeMath.sol";
Now we need to specify that the contract will inherit from the IERC20 interface and the Context library. Below the imports, let’s add the contract declaration:
    contract ERC20 is Context, IERC20 {

    }
Let’s revisit the IERC20 interface to help write the required methods and events for this contract. If our contract is not as specified in the IERC20 interface, we will run into errors at compilation.
In this ERC20.sol smart contract, we will be implementing the methods and events that we said needed to exist using the interface smart contract. In some of the methods we write, we will also trigger the events that we add to this smart contract.
There are a handful of methods we need to implement in the ERC-20 token we are creating, including: totalSupply , balanceOf , transfer , allowance , approve and transferFrom . There are also two major events that an ERC-20 token needs to capture: Transfer and Approval . We will look at each of these in a bit more detail as we implement them.
Let’s add a few variables that will allow us to track this information. Whenever we have uint256 variables, we want to use the implementation we specified in SafeMath , and ensure protection from overflow and underflow errors. Inside the contract brackets, add:
using SafeMath for uint256;
Next we will add two mapping variables. Mappings act as hash tables that consist of key types and corresponding value type pairs. To define a mapping, you can write: mapping(_KeyType => _ValueType) public mappingName .
A more tangible example for our token is to actually keep track of everyone’s balances. Let’s use a mapping to ensure that information is available. Add the following code to introduce a mapping that tracks balances.
mapping(address => uint256) private _balances;
Another mapping will check how much different users are allowed to send for the token we are creating. ERC-20 tokens should only be spent by the owners of the token. However, since Ethereum is a world of smart contracts, we may need to delegate the “spending” ability to a smart contract address.
To keep track of allowances, add the following code:
mapping(address => mapping(address => uint256)) private _allowances;
Here we created a mapping inside a mapping because we want to check if the user has delegated spending ability to anyone else and by how much.
The last variable we will add is total supply - it will keep track of how many tokens we have in circulation. Simply add:
uint private _totalSupply;
We kept these variables private, but now we will be writing public methods for the ERC20.sol smart contract so that people can use the information we are capturing for the token.
Transfer Event#
This is an event for the ERC20.sol smart contract. It will be called whenever tokens are transferred from one address to another. Since we declared the event in the IERC20.sol interface, we don’t need to add a new declaration for the event here, but simply call emit Transfer(sender, recipient, amount) whenever we need it.
Approval Event#
This is another event, which will be called whenever the approval amount of an address (ie how much it can spend) is updated. Again, as the event is declared in the interface, we don’t need to declare it here and just call emit Approval(owner, spender, amount) whenever we need it.
Now - let’s look at the methods we need to add to the ERC20.sol smart contract:
totalSupply Method#
Add this method to the contract ERC20.sol . It will just return the _totalSupply variable we added.
    function totalSupply() public view returns (uint256) {
        return _totalSupply;
    }
A few things to note:
- the method is public and view only
- the method returns a uint256 value (the same value as the
_totalSupplyvariable we declared above) - the name of the method must match the name of the method in
IERC20.sol. (This will be the case for the next set of methods and events we create)
balanceOf Method#
This public method gets information from our private mapping. To get the balance of a specific address, we can also add an input variable. Add this method to ERC20.sol :
    function balanceOf(address account) public view returns (uint256) {
        return _balances[account];
    }
Note the way we access mappings in Solidity methods. Though it is a hash object, we follow this convention: mappingName[_key];
transfer Method#
We need to create two methods to implement this properly, one public and another internal.
The internal method will take in three variables and carry out a few checks.
Variables:
-
sender(will be anaddress) -
recipient(will be anaddress) -
amount(will be auint256)
Checks:
- ensure that the sender and receiver are not a zero address. The zero address on the Ethereum blockchain (i.e. 0x0000000000000000000000000000000000000000). No one has access to the zero address. If the zero address is interacting with your smart contracts, it means that something is very wrong.
    function _transfer(
        address sender,
        address recipient,
        uint256 amount
    ) internal {
        require(sender != address(0), "ERC20: transfer from the zero address");
        require(recipient != address(0), "ERC20: transfer to the zero address");

        _balances[sender] = _balances[sender].sub(amount);
        _balances[recipient] = _balances[recipient].add(amount);
        emit Transfer(sender, recipient, amount);
    }
We create two separate transfer functions (internal _transfer and public transfer ) to be able to implement additional functionality in the public function (e.g. automatic token fees, slashing mechanisms, etc.). The reason we have two transfer functions is because the internal public transfer function has additional functionality, whereas the one that is used internally only needs to perform the transfer method.
Now, let’s create the actual transfer function that will fulfil the requirement of our IERC20.sol interface. It will call the _transfer function and return true if the call succeeds. The function takes in two variables that will be passed through to _transfer , the address of the spender and amount they want to transfer. Beneath the internal _transfer function, add the following:
    function transfer(address recipient, uint256 amount) public returns (bool) {
        _transfer(_msgSender(), recipient, amount);
        return true;
    }
allowance Function#
This simple function returns the allowance amount of a blockchain address. It takes two inputs: owner and spender and returns the remaining number of tokens that the spender will be allowed to spend on behalf of owner through the transferFrom function (yet to be implemented). This is zero by default.
    function allowance(address owner, address spender) public view returns (uint256) {
        return _allowances[owner][spender];
    }
approve Functions#
This function follows the same implementation pattern as transfer . We need to create an internal function and a public function. The internal function must:
- take in variables for an owner (who is calling the function), a spender (will be allowed to spend the token), and the amount (what limit the spender can use)
- check if the addresses that are being passed in are non-zero
- update the
_allowancesmapping to reflect the request - create an event that will identify the approval amount for the spender address being passed in
    function _approve(address owner, address spender, uint256 amount) internal {
        require(owner != address(0), "ERC20: approve from the zero address");
        require(spender != address(0), "ERC20: approve to the zero address");
        _allowances[owner][spender] = amount;
        emit Approval(owner, spender, amount);
    }
Now, let’s create the public approve function that will fulfil the requirement of our interface. It will call the _approve function and return true if the function call succeeds. It will take in two variables that will be passed through to _approve , address of the spender and amount we want to approve. Beneath the _approve function, you can add the following:
    function approve(address spender, uint256 amount) public returns (bool) {
        _approve(_msgSender(), spender, amount);
        return true;
    }
transferFrom Function#
This function will rely on the _transfer and _approve functions we created earlier in this chapter. A few things we need to ensure are in place:
- function is public and returns a boolean value depending on the status of the function call
- inputs include
senderaddress,recipientaddress, andamountin uint256 - caller must have an allowance for the sender’s token of at least the amount that is being passed in
We will call the _transfer function first to ensure that the token amount is sent from the sender to the recipient. After that is completed, we will need to update the allowance amount with the _approve function.
    function transferFrom(address sender, address recipient, uint256 amount) public returns (bool) {
        _transfer(sender, recipient, amount);
        _approve(sender, _msgSender(), _allowances[sender][_msgSender()].sub(amount));
        return true;
    }
We can add more functions to customize our token further. These internal functions will be responsible for creating and destroying tokens. We will create other smart contracts that we can leverage later on to call these internal functions.
_mint Function#
When you create a token, the act of it is called minting . We will write an internal _mint function to do the following:
- take in two variables -
accountto receive the new tokens and theamountof tokens it will receive - check that the account that is receiving tokens is not a zero address
- update the balance of the account that gets the new tokens
- emit a Transfer event to ensure that the creation of the token is captured
    function _mint(address account, uint256 amount) internal {
        require(account != address(0), "ERC20: mint to the zero address");

        _totalSupply = _totalSupply.add(amount);
        _balances[account] = _balances[account].add(amount);
        emit Transfer(address(0), account, amount);
    }
_burn Function#
Just as we can create a token, so we want the ability to destroy a token. The internal _burn function will:
- receive two variables,
accountandamount - check that the account being passed in is not a zero address
- update balances and total supply of the token contract
- emit a Transfer event to ensure that the burning of the token is captured
    function _burn(address account, uint256 amount) internal {
        require(account != address(0), "ERC20: burn from the zero address");

        _balances[account] = _balances[account].sub(amount);
        _totalSupply = _totalSupply.sub(amount);
        emit Transfer(account, address(0), amount);
    }
The final ERC-20 token smart contract will look like this:
pragma solidity ^0.5.0;

import "./IERC20.sol";
import "./Context.sol";
import "./SafeMath.sol";

contract ERC20 is Context, IERC20 {
    using SafeMath for uint256;
    mapping(address => uint256) private _balances;
    mapping(address => mapping(address => uint256)) private _allowances;
    uint256 private _totalSupply;

    function totalSupply() public view returns (uint256) {
        return _totalSupply;
    }

    function balanceOf(address account) public view returns (uint256) {
        return _balances[account];
    }

    function transfer(address recipient, uint256 amount) public returns (bool) {
        _transfer(_msgSender(), recipient, amount);
        return true;
    }

    function allowance(address owner, address spender)
        public
        view
        returns (uint256)
    {
        return _allowances[owner][spender];
    }

    function approve(address spender, uint256 amount) public returns (bool) {
        _approve(_msgSender(), spender, amount);
        return true;
    }

    function transferFrom(
        address sender,
        address recipient,
        uint256 amount
    ) public returns (bool) {
        _transfer(sender, recipient, amount);
        _approve(
            sender,
            _msgSender(),
            _allowances[sender][_msgSender()].sub(amount)
        );
        return true;
    }

    function _transfer(
        address sender,
        address recipient,
        uint256 amount
    ) internal {
        require(sender != address(0), "ERC20: transfer from the zero address");
        require(recipient != address(0), "ERC20: transfer to the zero address");

        _balances[sender] = _balances[sender].sub(amount);
        _balances[recipient] = _balances[recipient].add(amount);
        emit Transfer(sender, recipient, amount);
    }

    function _mint(address account, uint256 amount) internal {
        require(account != address(0), "ERC20: mint to the zero address");

        _totalSupply = _totalSupply.add(amount);
        _balances[account] = _balances[account].add(amount);
        emit Transfer(address(0), account, amount);
    }

    function _burn(address account, uint256 amount) internal {
        require(account != address(0), "ERC20: burn from the zero address");

        _balances[account] = _balances[account].sub(amount);
        _totalSupply = _totalSupply.sub(amount);
        emit Transfer(account, address(0), amount);
    }

    function _approve(
        address owner,
        address spender,
        uint256 amount
    ) internal {
        require(owner != address(0), "ERC20: approve from the zero address");
        require(spender != address(0), "ERC20: approve to the zero address");

        _allowances[owner][spender] = amount;
        emit Approval(owner, spender, amount);
    }

}
Token (almost) ready
At this point, you can create a new smart contract and import the ERC20.sol and have it function as a token on the Ethereum blockchain. The token that is created leveraging all of the code we have so far will be compliant to the ERC-20 token standard.
However, in the next few sections of this book, we will be introducing additional functionality for the token that we are creating for the Ethereum blockchain. The functionality will be introduced with additional smart contracts so that we can stay aligned to object-oriented programming.
Once all of the functionality is created, then we will create tie it all together with one final smart contract (the token smart contract).
Creating a Token Smart Contracts for the Blockchain Part 3#
In the last chapter we created the ERC20.sol smart contract. This file imported the libraries and interface that we created and has all of the requirements of the ERC-20 token standard.
Let’s take another look at the smart contracts that are required to write the token smart contract for this book once again.
As per the ERC-20 Token Standard:
Interfaces:
- IERC20.sol // necessary
Libraries:
- SafeMath.sol // necessary
- Context.sol // necessary
- Role.sol // plays a role with ERC20Mintable.sol
- MinterRole.sol // plays a role with ERC20Mintable.sol
Contracts:
- ERC20.sol // necessary
- ERC20Detailed.sol // introduces additional capabilities
- ERC20Burnable.sol // introduces additional capabilities
- ERC20Mintable.sol // introduces additional capabilities
Contracts we will deploy:
- ERC20Combined.sol // combines everything together
In this chapter, we will be adding additional functionality to our ERC-20 token smart contract with the ERC20Detailed.sol , ERC20Burnable.sol , and ERC20Mintable.sol smart contracts. Once we write the contracts mentioned, we will combined it all together with ERC20Combined.sol .
In addition to the contracts mentioned, we will also need to introduce a few more libraries so that the ERC20Mintable.sol smart contract works as desired.
ERC20Detailed.sol#
This contract implements the optional parameters of an ERC-20 token, including name , symbol and decimals .
To kick things off, let’s create the contract declaration in a new file called ERC20Detailed.sol (in your /contracts folder). We will have to import the interface IERC20.sol because we want to ensure that contracts that inherit the ERC20Detailed contract also implement the methods in IERC20.sol .
pragma solidity ^0.5.0; import “./IERC20.sol”; contract ERC20Detailed is IERC20.sol { }
pragma solidity ^0.5.0;

import "./IERC20.sol";

contract ERC20Detailed is IERC20.sol {

}
Within the contract brackets we need to create three private variables name , symbol and decimals , and three public methods to read them.
    // Variables
    string private _name;
    string private _symbol;
    uint8 private _decimals;

    // Methods to read the details of this token
    function name() public view returns (string memory) {
        return _name;
    }

    function symbol() public view returns (string memory) {
        return _symbol;
    }

    function decimals() public view returns (uint8) {
        return _decimals;
    }
A few notes on the decimals method:
- Solidity can’t handle decimals and performs all math required using fixed-point numbers
- if
decimalsis equal to 2, a balance of 505 tokens should be displayed to the user as 505 / 10 ** 2 - tokens usually use a value of 18 for
decimalsbecause it follows the relationship between wei and ether (1 ** 18 wei = 1 ether) - this is for display purposes only - does not affect the math of the contract (e.g. balanceOf, transfer, etc.)
The last thing we need for this contract is a constructor method, to initialize the variables we just created. It will take in two string values and a uint8 value so that we can update the variables that we are tracking in this contract. This method will run whenever the contract is deployed. Upon deploying, we will need to pass in the name, symbol, and decimals we want for this token.
    constructor(string memory name, string memory symbol, uint8 decimals) public {
        _name = name;
        _symbol = symbol;
        _decimals = decimals;
    }
Typically, constructors should be placed before the other methods of the smart contract so our final ERC20Detailed.sol contract will look like this:
pragma solidity ^0.5.0;

import "./IERC20.sol";

contract ERC20Detailed is IERC20 {
    string private _name;
    string private _symbol;
    uint8 private _decimals;

    constructor(
        string memory name,
        string memory symbol,
        uint8 decimals
    ) public {
        _name = name;
        _symbol = symbol;
        _decimals = decimals;
    }

    function name() public view returns (string memory) {
        return _name;
    }

    function symbol() public view returns (string memory) {
        return _symbol;
    }

    function decimals() public view returns (uint8) {
        return _decimals;
    }
}
ERC20Burnable.sol#
This will be a simple smart contract that will be used to burn (destroy) tokens. The contract will be inherited by the main token contract that we will create at the end of the chapter. To kick things off, create a file in the contracts folder called ERC20Burnable.sol .
This is an extension of an ERC-20 token which will allow token holders to destroy their own tokens. The user will use a public smart contract method that we define here to destroy their tokens. The requirements of this method are as follows:
- the
_burnmethod is declared inERC20.solwhere it carries out a requirements check, so we just have to call it here - the function needs to import
ERC20.solto ensure that we have access to the_burnmethod
Our contract will look something like this:
pragma solidity ^0.5.0;

import "./Context.sol";
import "./ERC20.sol";

contract ERC20Burnable is Context, ERC20 {

    function burn(uint256 amount) public {
        _burn(_msgSender(), amount);
    }
}
Nice and simple! Now let’s look at the opposite requirement - creating tokens with a contract called ERC20Mintable.sol .
ERC20Mintable.sol#
The difference between a library and a contract in Solidity is that a library is a type of contract and the library contract does not have any storage (no variables allowed) and cannot hold any ether.
This will be a smart contract that will be used to mint (create) tokens. The contract will be inherited by the main token contract that we will create at the end of the chapter. Before we create the ERC20Mintable.sol smart contract, there are a few things we need to create first.
- Library:
Role.sol - Contract:
MinterRole.sol - Contract:
ERC20Mintable.sol
Role.sol#
This contract will exist in the /contracts/libraries folder. Its purpose is to add some logic to our contracts around managing addresses assigned to a specific role. It will be a generic library (not tied to minting or destroying yet).
The library will have a handful of methods that will be used to check who has access, or to give or remove access. The information will be stored in a struct variable in the library contract.
In the libraries folder, create a file called Roles.sol . Start off by adding the Solidity version and the contract declaration.
pragma solidity ^0.5.0;

library Roles {

}
The struct that we create will have a mapping in it to check if a specific address is able to do something wherever this library is being used. Inside the library brackets, add the following:
    struct Role {
        mapping(address => bool) bearer;
    }
Next, we need methods to update the status of an address in the struct . Let’s create a few methods, add , remove and has , to interact with the struct.
The first method we will write is has . It will be used to check if an account has a particular role. Based on the status it will return true or false.
function has(Role storage role, address account) internal view returns (bool) {
    require(account!=address(0), "Roles: account is the zero address");
    return role.bearer[account];
}
The add method will update the struct to give an address access.
    function add(Role storage role, address account) internal {
        require(!has(role,account), "Roles: account already has role");
        role.bearer[account] = true;
    }
The remove method will update the struct to remove access from an address.
    function remove(Role storage role, address account) internal {
        require(!has(role,account), "Roles: account already has role");
        role.bearer[account] = false;
    }
Note that for both add and remove we put a check in place to ensure that the method doesn’t update the mapping if it doesn’t need to. The final Role library should look something like this:
pragma solidity ^0.5.0;

library Roles {
    struct Role {
        mapping(address => bool) bearer;
    }
    function has(Role storage role, address account)
        internal
        view
        returns (bool)
    {
        require(account != address(0), "Roles: account is the zero address");
        return role.bearer[account];
    }
    function add(Role storage role, address account) internal {
        require(!has(role, account), "Roles: account already has role");
        role.bearer[account] = true;
    }

    function remove(Role storage role, address account) internal {
        require(has(role, account), "Roles: account does not have role");
        role.bearer[account] = false;
    }
}
Now that we have this library, let’s make a smart contract to leverage it for a role responsible for minting tokens for contract.
MinterRole.sol#
For simplicity’s sake, we will only set the minter when our ERC 20-token is created. If you want, you can modify this contract so additional minters (token creators) can be added later on. Start off by creating a file in your contracts folder named MinterRole.sol . In the file, import the Role library that you just created and the Context library as well. Your contract should look something like this:
    pragma solidity ^0.5.0;

    import "./libraries/Context.sol";
    import "./libraries/Roles.sol";

    contract MinterRole is Context {
        using Roles for Roles.Role; // We are creating a role struct in this contract that is derived from our library
    }
Now that we have imported our two libraries, let’s work on the key functionality of this contract. We need a constructor method, an internal _addMinter method and a few other methods that will improve the developer experience for those using this contract to validate information. We will also add a few events to help us keep track of when minters are being added or removed.
The events are straight forward - inside the contract brackets let’s create one event for when minters are added, and another for when minters are removed. Both events will take an address value.
    event MinterAdded(address index account);
    event MinterRemoved(address index account);
Let’s add a variable to track the minters of the token we are creating.
Roles.Role private _minters;
Let’s first create an internal _addMinter method. This method will update the Roles struct with addresses that can mint the token we are creating. After updating the _minters struct, we can emit a MinterAdded event.
    function _addMinter(address account) internal {
        _minters.add(account);
        emit MinterAdded(account);
    }
The constructor will simply check who is calling the method and set them as the person who can mint tokens.
    constructor() internal {
        _addMinter(_msgSender());
    }
Another method that we will use to check if someone (a blockchain address) can mint a token is isMinter . We can pass in the blockchain address that we are curious about and the method will check the to see the status of the address.
    function isMinter(address account) public view returns (bool) {
        return _minters.has(account);
    }
Now that we have our methods in place, let’s add a method modifier (a way to check something without repeating a lot of code) for the minter role. We will call it onlyMinter and it will ensure that before a method can be called, the minter struct is checked to ensure that the person calling the method (probably to mint more tokens) is a valid minter.
    modifer onlyMinter() {
        require(isMinter(_msgSender()), "MinterRole: caller doesn't have the minter role");
        _;
    }
That’s all we will add for our MinterRole contract for this chapter. If you want to add methods to add or remove other addresses (eg someone who is not the creator of the token), you can modify this contract to do so. Your final contract will look something like this:
pragma solidity ^0.5.0;

import "./libraries/Context.sol";
import "./libraries/Roles.sol";

contract MinterRole is Context {
    using Roles for Roles.Role;

    event MinterAdded(address indexed account);
    event MinterRemoved(address indexed account);

    Roles.Role private _minters;

    constructor() internal {
        _addMinter(_msgSender());
    }

    modifier onlyMinter() {
        require(
            isMinter(_msgSender()),
            "MinterRole: caller does not have the Minter role"
        );
        _;
    }

    function isMinter(address account) public view returns (bool) {
        return _minters.has(account);
    }

    function _addMinter(address account) internal {
        _minters.add(account);
        emit MinterAdded(account);
    }


}
Adding Roles and MinterRole to our ERC20Mintable.sol#
We now have the libraries and contracts we need for ERC20Mintable.sol , so create this file in the contracts folder. In it, we will import ERC20.sol and MinterRole.sol . We will add a simple method, mint to ensure that we can create tokens from the token contract we deploy.
The contract will have the following properties:
- it will inherit from
ERC20.solandMinterRole.sol - the
mintmethod will use the modifier we created inMinterRole - the
mintmethod will also be public since we have the appropriate checks in place - we will be calling the internal
_mintmethod from theERC20.solcontract we wrote earlier in this chapter - if the method call succeeds it will return true, otherwise it will return false
pragma solidity ^0.5.0;

import "./ERC20.sol";
import "./MinterRole.sol";

contract ERC20Mintable is ERC20, MinterRole {
    function mint(address account, uint256 amount) public onlyMinter returns (bool) {
        _mint(account, amount);
        return true;
    }
}
Now that we have everything in place - let’s finally create the token we want to launch. We will now tie all the contracts and libraries into a single contract.
ERC20Combined.sol#
For illustrative purposes, you can call the smart contract that will combine all of the contracts above ERC20Combined.sol . This file will be the token that will live on the Ethereum blockchain. Alternatively, you can name it whatever you want. For example, you can use your name: EveToken.sol or SamToken.sol .
So, create the file in the contracts folder and name it however you like. We want this file to combine all of the things we worked on in this chapter.
In the file, we only have to import the contracts we want to use, and not the libraries. The libraries are being used by the contracts we are using so we are covered. If you do want to add additional functionality later with the libraries we wrote, you can definitely import them directly and use them in this contract.
pragma solidity ^0.5.0;

import "./ERC20.sol";
import "./ERC20Detailed.sol";
import "./ERC20Mintable.sol";
import "./ERC20Burnable.sol";
Next we will add the contract declaration. This declaration will be inheriting from all of the contracts above.
ERC20Combined is ERC20, ERC20Detailed, ERC20Mintable, ERC20Burnable {

}
The only thing we will have in this contract is a constructor. This constructor will call the constructor of ERC20Detailed and set the name, symbol, and decimals of the token contract we are creating.
constructor(string memory name, string memory symbol, uint8 decimals) public ERC20Detailed(name, symbol, decimals) {}
Token complete!
That’s it! Our smart contracts to create a burnable, mintable, detailed ERC-20 token on the Ethereum blockchain contract is now ready to be compiled and deployed. We will be exploring this further in the next chapter.
Compiling and Deploying the ERC-20 Smart Contract#
In this section we will apply some of the things we learned in previous chapters about compiling and deploying contracts. We will be using Truffle to compile and deploy the token contracts we just created. You can also use Remix to compile and deploy the token smart contract we’ve been working on, but this chapter will focus on Truffle.
Truffle enables developers to write and test smart contracts locally. This becomes useful when users want to write and test smart contracts on a local / test blockchain instead of working on the main Ethereum blockchain. In addition to working locally, the developer can also easily use the information created during compilation or deployment in web applications that they are also writing to compliment their smart contracts (as opposed to tracking it down on Remix).
In this chapter we will deploy a few the ERC20Combined.sol smart contract we created to represent our ERC-20 standard compliant token. At the end of the chapter, we will become more familiar with compiling and deploying contracts with Truffle.
Truffle and Ganache#
If you need a refresher on Truffle, you can jump back into chapter 6 of this book. In that section we talk about the developer tools we use and we also talk about how you can install it on your computer.
Using Ganache#
Now that Truffle and Ganache are installed, let’s learn about running a local blockchain on our computer. We want to do this so we’re not reliant on a third-party service to test it. By running our blockchain locally, we can simulate the main Ethereum blockchain and confirm if our Solidity smart contract code works.
Open a terminal and run the following command to get Ganache started: ganache-cli . This command can be run from anywhere.
You should see something like this:
Ganache CLI v6.10.1 (ganache-core: 2.11.2)

Available Accounts
==================
(0) 0xf77F3e80c8F5FCbF8ed3C02A89ed003ba8912b2F (100 ETH)
(1) 0x79126D30690EC89Ec0aa28EEE9caa5859873aAdF (100 ETH)
(2) 0x45E26b4fFF6eF36c9fB56d8ac22cE65B52Cd175b (100 ETH)
(3) 0x069aa75514Bec3815a0e7F4bF35cbd894feA6EC9 (100 ETH)
(4) 0xFa8a3DaAC64B19C2f0Be2C130A75d6a34Ee3a0d0 (100 ETH)
(5) 0x1BAfdDE43773fd1B0cea419EFD69B3cc87998122 (100 ETH)
(6) 0x90DBBDEABeE10f09C21c9f2bF4324825cFa02409 (100 ETH)
(7) 0x3E049A88424aDF89a387E69487C1c6D52557f65f (100 ETH)
(8) 0xB9C2AF5cfC26d17511FF9E0eF11245ad88232448 (100 ETH)
(9) 0xc824d8712E4ca035D9243fB3a1ea21D16c019955 (100 ETH)

Private Keys
==================
(0) 0xeecee3b6c873859302a594f67f4f4ab52ede0a7f7610ac891bf61675aed16825
(1) 0x4136c36f9436cca3b29b735fc1460677f902b7aa1d8dd596479ed86669c9ddc1
(2) 0x426a040395e959e0c87225a550cc4b8290516cf7368f7a44b937e448d3f7ff8b
(3) 0xdd02f898ec2ef1f13daba5108a0d897d427fa0e3dc37e6755ccda2857fb66866
(4) 0x57f5d71dbc11a136e85aca57ed36665af3c84b396c5b5f7c592a8c8d2453df5b
(5) 0x0d872fe21d188c03d1aaab0a823b9b78b85cd056f6db178a4f20550dadd07658
(6) 0xe2a35f2471bc8f95460d5635197d2c34a60c874fc13df182133b38d5bb310103
(7) 0x7df571d47cd4bb1800397aa33fa5f525697411df5508862de0fa503c2997b7a6
(8) 0x4955ec3d03dc453adf79f569f87f8b6705c6dcf85f8376562e64d7b045906c72
(9) 0xec142e03391a003ba9184999985352815a55d9ee33231805a608a36c250ebc4d

HD Wallet
==================
Mnemonic:      coil minute repeat way main private keep exotic access forward hero crazy
Base HD Path:  m/44'/60'/0'/0/{account_index}

Gas Price
==================
20000000000

Gas Limit
==================
6721975

Call Gas Limit
==================
9007199254740991

Listening on 127.0.0.1:8545
Let’s take a look at what all of this means. The first thing we see is the Ganache CLI v6.10.1 (ganache-core: 2.11.2) . This is just ganache-cli specifying what version of the tool we are using. Next is a list of blockchain addresses:
Available Accounts
==================
(0) 0xf77F3e80c8F5FCbF8ed3C02A89ed003ba8912b2F (100 ETH)
(1) 0x79126D30690EC89Ec0aa28EEE9caa5859873aAdF (100 ETH)
(2) 0x45E26b4fFF6eF36c9fB56d8ac22cE65B52Cd175b (100 ETH)
(3) 0x069aa75514Bec3815a0e7F4bF35cbd894feA6EC9 (100 ETH)
(4) 0xFa8a3DaAC64B19C2f0Be2C130A75d6a34Ee3a0d0 (100 ETH)
(5) 0x1BAfdDE43773fd1B0cea419EFD69B3cc87998122 (100 ETH)
(6) 0x90DBBDEABeE10f09C21c9f2bF4324825cFa02409 (100 ETH)
(7) 0x3E049A88424aDF89a387E69487C1c6D52557f65f (100 ETH)
(8) 0xB9C2AF5cfC26d17511FF9E0eF11245ad88232448 (100 ETH)
(9) 0xc824d8712E4ca035D9243fB3a1ea21D16c019955 (100 ETH)
These are the accounts that are available to us on the test blockchain that ganache-cli gives us. All of the accounts that we can see (you may see different accounts) are loaded with 100 ETH.
With any blockchain account, there is a set of private keys that allow you to control the account. When you control a blockchain account it means that you can sign transactions and send the funds as you please. You will notice that under the accounts, there are a set of private keys that look similar to this:
Private Keys
==================
(0) 0xeecee3b6c873859302a594f67f4f4ab52ede0a7f7610ac891bf61675aed16825
(1) 0x4136c36f9436cca3b29b735fc1460677f902b7aa1d8dd596479ed86669c9ddc1
(2) 0x426a040395e959e0c87225a550cc4b8290516cf7368f7a44b937e448d3f7ff8b
(3) 0xdd02f898ec2ef1f13daba5108a0d897d427fa0e3dc37e6755ccda2857fb66866
(4) 0x57f5d71dbc11a136e85aca57ed36665af3c84b396c5b5f7c592a8c8d2453df5b
(5) 0x0d872fe21d188c03d1aaab0a823b9b78b85cd056f6db178a4f20550dadd07658
(6) 0xe2a35f2471bc8f95460d5635197d2c34a60c874fc13df182133b38d5bb310103
(7) 0x7df571d47cd4bb1800397aa33fa5f525697411df5508862de0fa503c2997b7a6
(8) 0x4955ec3d03dc453adf79f569f87f8b6705c6dcf85f8376562e64d7b045906c72
(9) 0xec142e03391a003ba9184999985352815a55d9ee33231805a608a36c250ebc4d
Some more information follows. We will be leveraging some of this information later on, but we don’t need to focus too heavily on these items yet since we won’t be using the test blockchain in an extensive manner to deploy our token smart contracts.
HD Wallet
==================
Mnemonic:      coil minute repeat way main private keep exotic access forward hero crazy
Base HD Path:  m/44'/60'/0'/0/{account_index}

Gas Price
==================
20000000000

Gas Limit
==================
6721975

Call Gas Limit
==================
9007199254740991

Listening on 127.0.0.1:8545
The only thing to highlight here is that ganache-cli is listening on 127.0.0.1:8545 . We will need this information later on when we are configuring Truffle .
Configuring Truffle#
When we first set up Truffle , we created a file in the erc-20-token folder called truffle-config.js . Open a terminal in the erc-20-token folder with all of the contracts. Your folder should look something like this:
erc-20-token/
- contracts/
- migrations/
- truffle-config.js
The first thing that we will do is edit the truffle-config.js file. In this file you can configure the following:
- the network you want to send the smart contracts to
- the compiler that you want to compile your contracts
- additional parameters we can play around with, which we’ll explore later in the chapter
At the top of the truffle-config.js file, create a module.exports object.
module.exports = {

}
In this empty export object, we will add an object for networks and another for compilers.
module.exports = {
    networks: {

    },
    compilers: {

    }
}
Let’s go through what information we can capture in each of these objects.
Compilers#
We will tell Truffle what version of the Solidity compiler to use to process the smart contracts we are writing. In addition to specifying the version we can also specify other parameters for the compiler.
In the compilers section, add an object: solc , so our compilers object will look like this:
    compilers: {
        solc: {

        }
    }
solc is the compiler we will be using to process our smart contracts. In solc , we will configure the version and the settings. In the settings object we can modify the optimizer settings and state the evmVersion as well.
Our compilers object for our set of smart contracts will look like this:
    compilers: {
        solc: {
            version: "0.6.12",
            settings: {
                optimizer: {
                    enabled: true
                    runs: 1
                },
                evmVersion: "istanbul"
            }
        }
    }
Networks#
Now that we told Truffle what compiler to use, we need to tell it where to send the compiled contracts once they are ready to go.
Let’s create an object that will allow us to specify the network that Truffle will use (from a deployment perspective). In the networks object we added earlier, let’s create another object called development so that Truffle can send our contracts to a development blockchain that we will create with ganache-cli .
networks: {
    development: {

    }
}
In the development object, add host, port and network_id parameters:
networks: {
    development: {
        host: '',
        port: '',
        network_id: ''
    }
}
The local blockchain tool, ganache-cli , runs its local blockchain with the following settings:
- host: localhost or 127.0.0.1
- port: 8545
- network_id: *
So your object should look something like this:
    networks: {
        development: {
            host: '127.0.0.1',
            port: '8545',
            network_id: '*'
        }
    },
Now with the finished config file you are ready to send your smart contracts to a local blockchain with Truffle.
Compiling Contracts using Truffle#
We have everything in place to use a Truffle script to compile (and eventually deploy) our smart contracts for us. The script is called truffle compile .
At this point, you should have one terminal running Ganache . In a new terminal, jump into the erc-20-token folder and run truffle compile in the root of that folder.
After running this command, Truffle will read all the files in the contracts/ folder and run them through a Solidity compiler (according to the version we specified in the truffle-config.js file).
After running the truffle compile script, we see something like this:
Compiling your contracts...
===========================
> Compiling ./contracts/ERC20.sol
> Compiling ./contracts/ERC20Burnable.sol
> Compiling ./contracts/ERC20Combined.sol
> Compiling ./contracts/ERC20Detailed.sol
> Compiling ./contracts/ERC20Mintable.sol
> Compiling ./contracts/Interfaces/IERC20.sol
> Compiling ./contracts/WETH.sol
> Compiling ./contracts/access/Roles.sol
> Compiling ./contracts/access/roles/MinterRole.sol
> Compiling ./contracts/interfaces/IERC20.sol
> Compiling ./contracts/libraries/GSN/Context.sol
> Compiling ./contracts/libraries/SafeMath.sol
> Artifacts written to /Users/mehranhydary/Desktop/books/fullstack-ethereum/manuscript/code/project/contracts/token/build/contracts
> Compiled successfully using:
   - solc: 0.6.12+commit.27d51765.Emscripten.clang
This script creates a folder in your root folder called build . In that folder there is another folder called contracts that contains some metadata which you can use later in a front-end (client) application, so don’t delete it (unless you change your contracts and recompile). The key thing we need from the generated files are the application binary interfaces (also known as ABIs). These ABIs allow front end applications to parse the information from smart contracts that have been deployed to the Ethereum blockchain.
Deploying Contracts on a Local Blockchain with Truffle#
Now that the smart contracts we wrote (including the one for the ERC-20 token), we are now ready to send our smart contracts to the Ethereum blockchain.
To do this, we can use another Truffle script called deploy . If we run truffle deploy in the root folder of erc-20-token , the contracts will be sent to the ganche-cli instance that you have running.
Before we can run the truffle deploy script, we will have to add scripts to the migrations folder we created in chapter 6.
The folder, erc-20-token should look like this now.
erc-20-token/
- build/
- contracts/
- migrations/
- truffle-config.js
In the migrations folder, add 1_deploy_contracts.js . In this file, we will add very simple code to tell Truffle to deploy two tokens for us. The first thing we need to do is import the ERC20Combined contract.
const ERC20Combined = artifacts.require("ERC20Combined");
Next we create a module.exports function that will deploy the smart contract with the three parameters name of token, symbol of token and the decimal places required.
module.exports = function(deployer) {
  deployer.deploy(ERC20Combined, "TOKEN1", "T1", 18);
  deployer.deploy(ERC20Combined, "TOKEN2", "T2", 18);
};
If you now run truffle deploy (from the root folder, erc-20-token ) the scripts will send information to the ganache-cli local blockchain we have running.
You will see both consoles (Truffle and Ganache) update as the script runs. The information in the two sections will correspond as well (i.e. as contracts get created on the blockchain ( ganache-cli ), you will see the Truffle script capture that information.
// Truffle
Starting migrations...
======================
> Network name:    'development'
> Network id:      1605402028022
> Block gas limit: 6721975 (0x6691b7)


1_deploy_tokens.js
==================

   Deploying 'ERC20Combined'
   -------------------------
   > transaction hash:    0xfe97a8c93644e8748e7832a74969216c19fa09b5ddae6513d8d86c0e31313cb5
   > Blocks: 0            Seconds: 0
   > contract address:    0x2Bd49F95Ca75C0b562b89077ea550cC62F1B1c48
   > block number:        1
   > block timestamp:     1605402036
   > account:             0x5d7bC7Dd7A2108AE7f9DEF532A4347853ba12493
   > balance:             99.97999104
   > gas used:            1000448 (0xf4400)
   > gas price:           20 gwei
   > value sent:          0 ETH
   > total cost:          0.02000896 ETH


   Replacing 'ERC20Combined'
   -------------------------
   > transaction hash:    0xfaf29736aa5de06f7ac5072e0a144b169a79e2a4a15e5cedb4d1182ddc4d524a
   > Blocks: 0            Seconds: 0
   > contract address:    0x8A21f43d70E3185932ec4351fd563de84d98611e
   > block number:        2
   > block timestamp:     1605402037
   > account:             0x5d7bC7Dd7A2108AE7f9DEF532A4347853ba12493
   > balance:             99.95998208
   > gas used:            1000448 (0xf4400)
   > gas price:           20 gwei
   > value sent:          0 ETH
   > total cost:          0.02000896 ETH

   > Saving artifacts
   -------------------------------------
   > Total cost:          0.04001792 ETH


Summary
=======
> Total deployments:   2
> Final cost:          0.04001792 ETH

// Ganache

  Transaction: 0xfe97a8c93644e8748e7832a74969216c19fa09b5ddae6513d8d86c0e31313cb5
  Contract created: 0x2bd49f95ca75c0b562b89077ea550cc62f1b1c48
  Gas usage: 1000448
  Block Number: 1
  Block Time: Sat Nov 14 2020 20:00:36 GMT-0500 (Eastern Standard Time)

  Transaction: 0xfaf29736aa5de06f7ac5072e0a144b169a79e2a4a15e5cedb4d1182ddc4d524a
  Contract created: 0x8a21f43d70e3185932ec4351fd563de84d98611e
  Gas usage: 1000448
  Block Number: 2
  Block Time: Sat Nov 14 2020 20:00:37 GMT-0500 (Eastern Standard Time)
The key things we need to keep track of here are the contract addresses that get generated on the “Contract created” line:
- Token 1 contract address: 0x2bd49f95ca75c0b562b89077ea550cc62f1b1c48
- Token 2 contract address: 0x8a21f43d70e3185932ec4351fd563de84d98611e
We have successfully compiled and deployed smart contracts on our local ganache-cli blockchain! We could stop here but that’s no fun. Let’s figure out how to deploy our smart contracts to a test blockchain with nodes distributed around the world. Let’s dive into the Ropsten test network.
Creating an Infura Account
Infura is a service that allows developers instant, scalable API access to the Ethereum blockchain. The API can be used to send transactions to test and main blockchains. To get the Infura API endpoints, we have to create an account on Infura.
To get started, visit https://infura.io . On this site you should land on something that looks like this:
infura1
From this page, select the GET STARTED FOR FREE button and follow the steps to create an account. Please be sure to read the Terms of Service and Privacy Policy before creating your account.
Upon creating an account, you will be able to log in to the Infura platform. The dashboard will look fairly straightforward. There is plenty of documentation to make your onboarding process simpler. For our purposes, we will be focusing on Ethereum services provided by Infura.
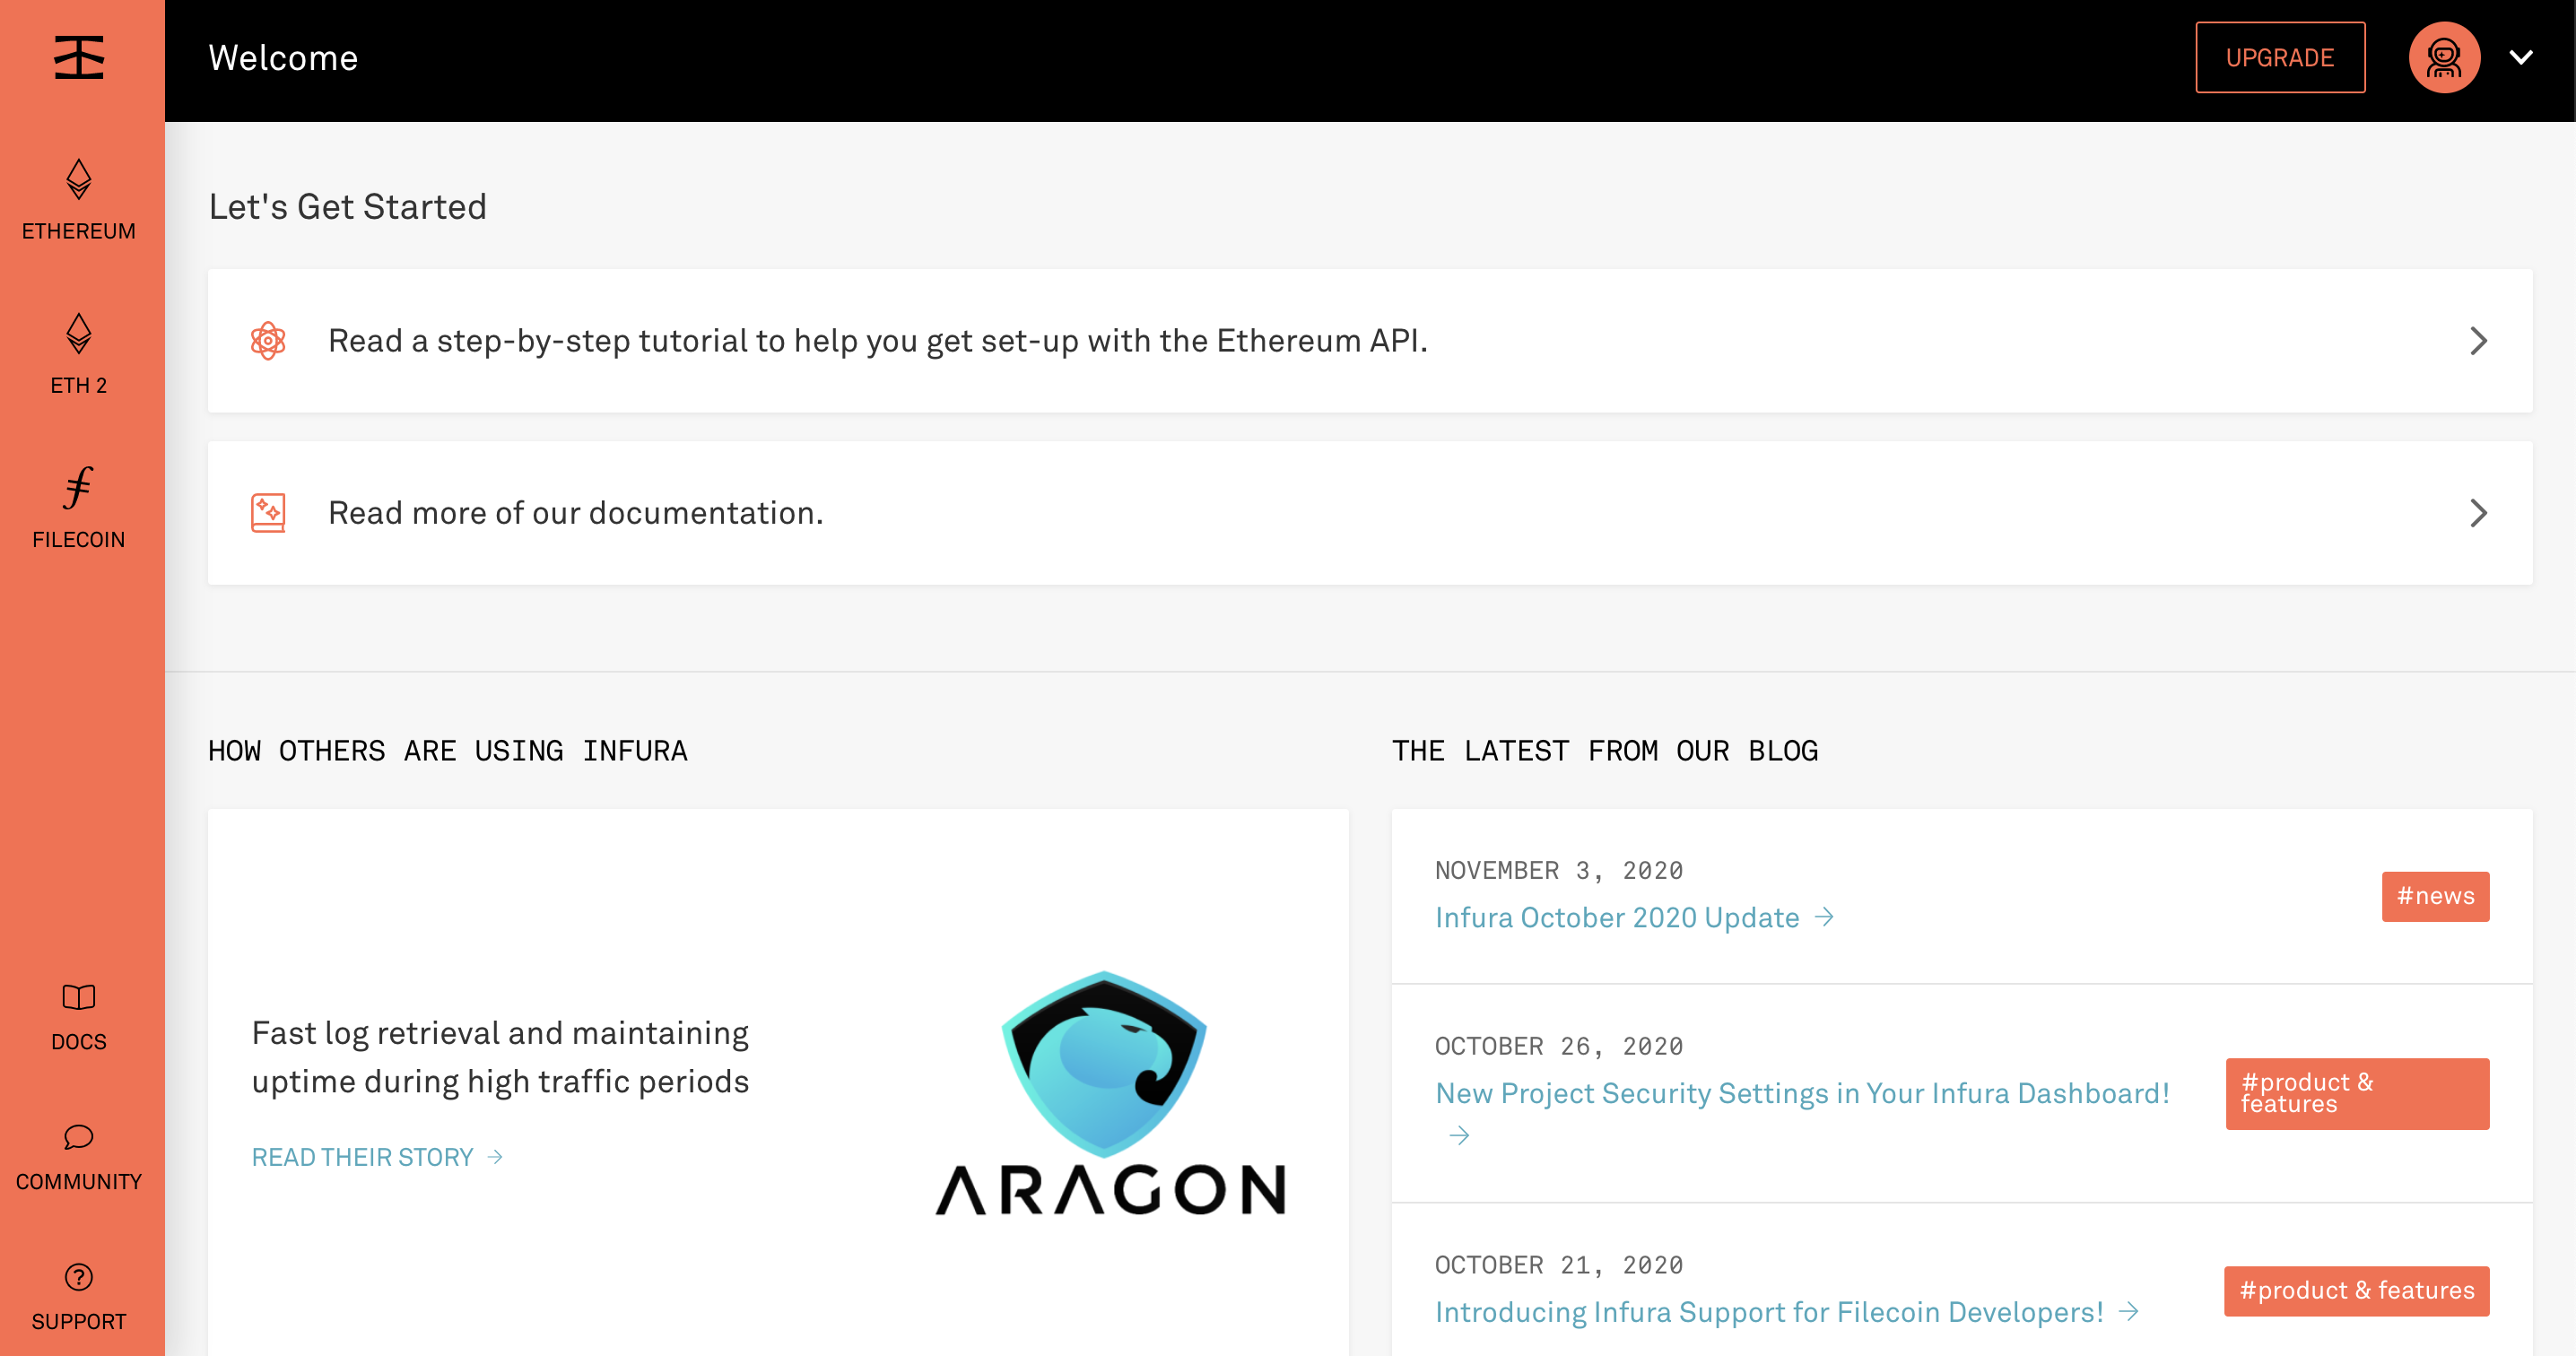
infura3
Click on the Ethereum icon on the left-hand menu bar.

infura5
Upon clicking into the Ethereum section, you will see an empty dashboard. From here, you can create a new project for the application we are creating. With the endpoints that we get from Infura, we will be deploying smart contracts and potentially using our web application to talk to smart contracts.
To create a project from this dashboard, click CREATE NEW PROJECT , provide a name for your project, and click CREATE .

infura7
I will be naming mine: fullstack-ethereum-test . After hitting create you should be taken to a page that looks like this. This is the project details page for the Infura project we just created.
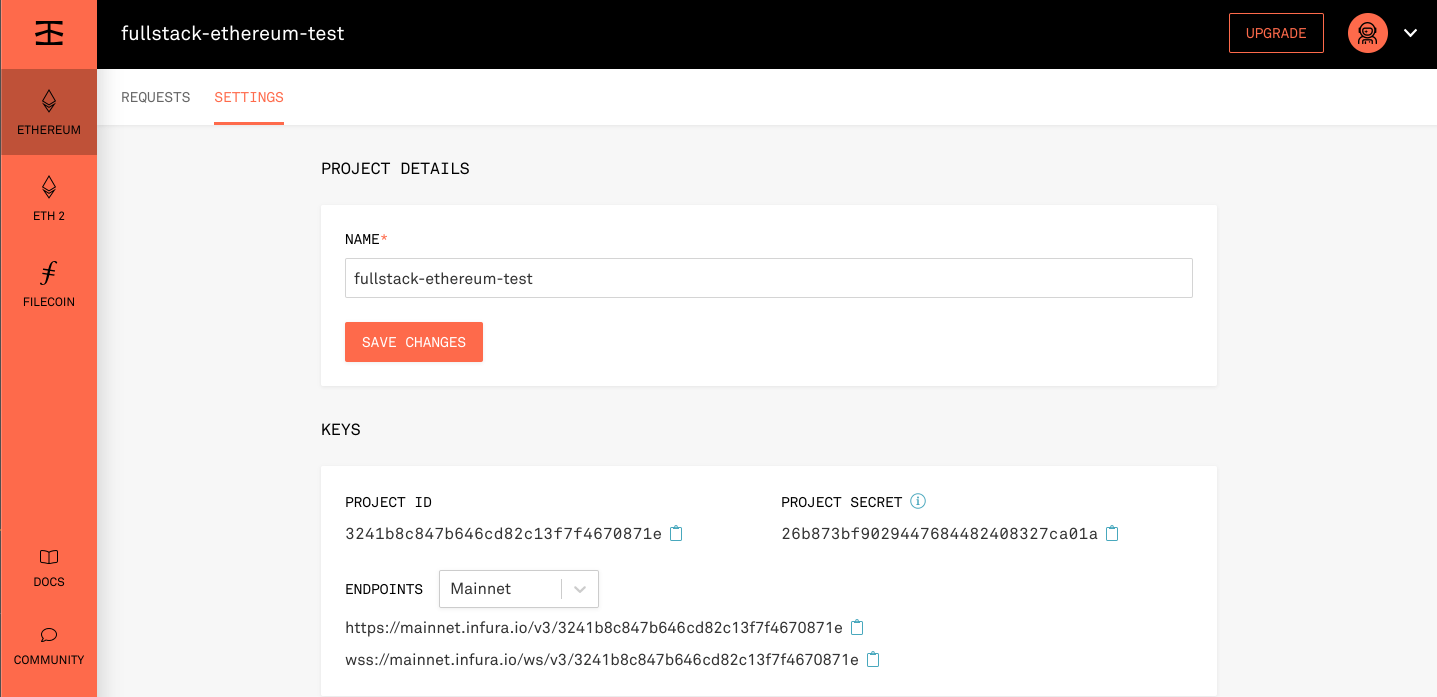
infura9
From this Project Details section we can see the following:
- Name
- Keys
- Security settings
- Delete button
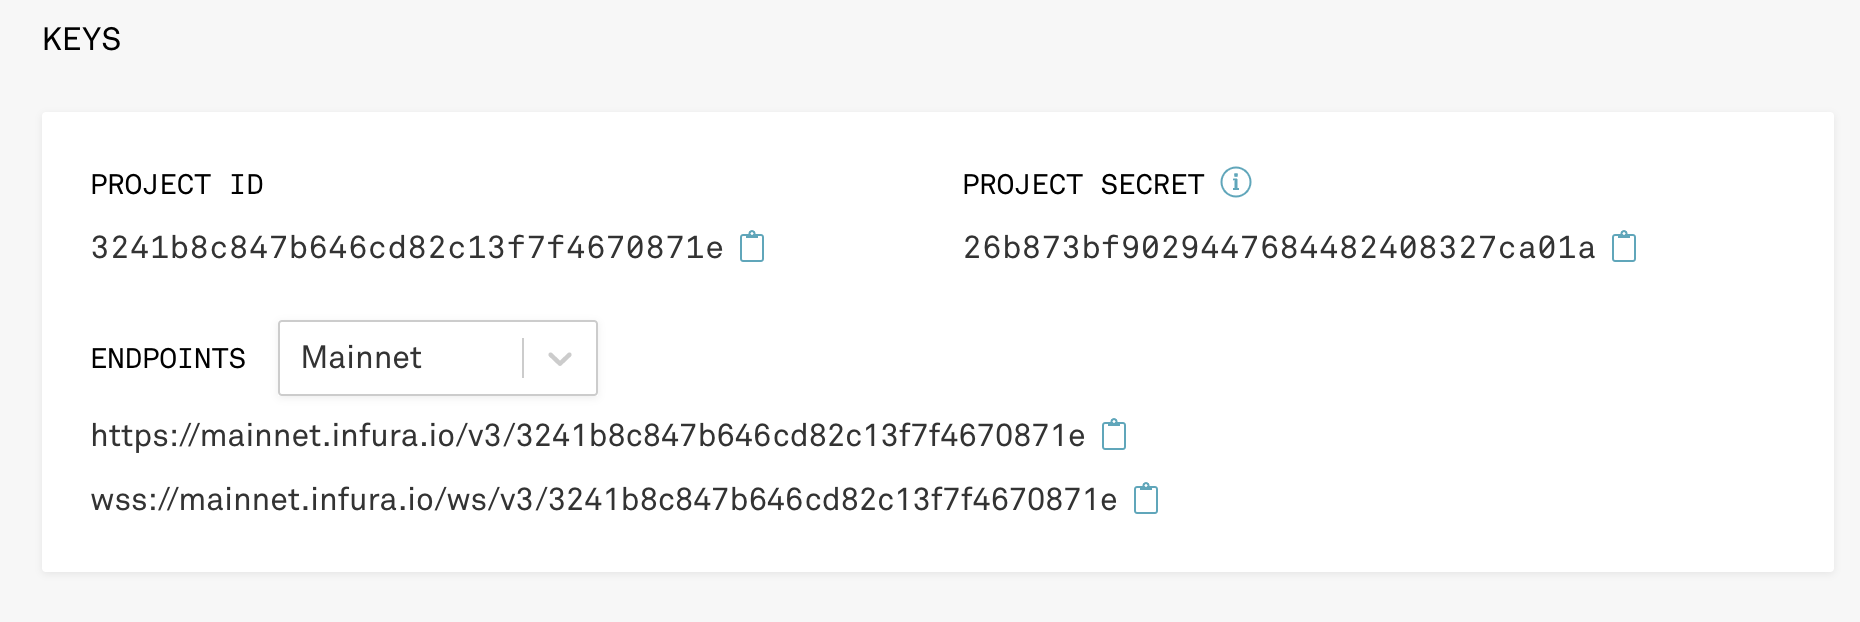
We will be focusing on Keys . In this section we can see the following parameters:
- Project ID
- Project secret
- Endpoints
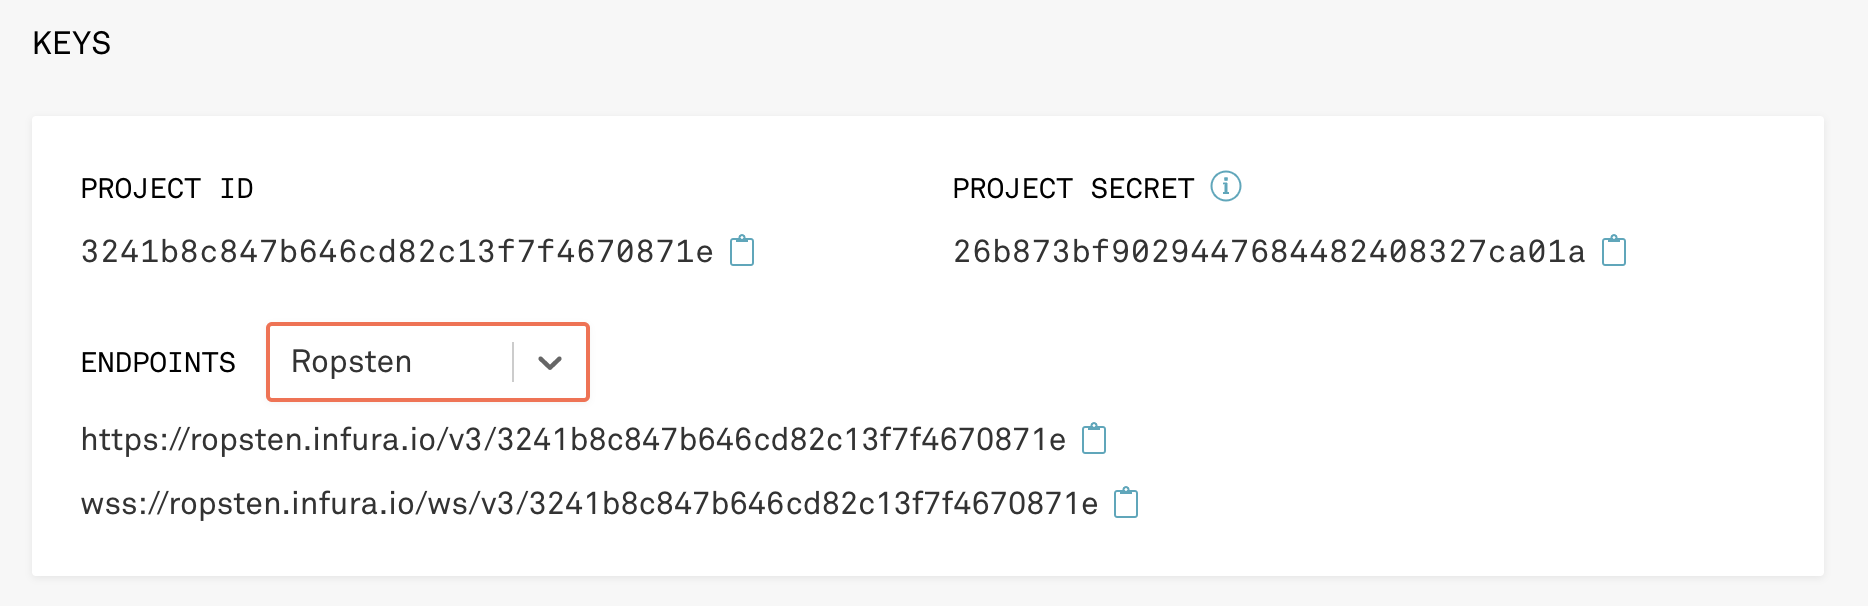
For the application we are building, we need to take note of the project ID and the endpoints. To create an endpoint to use to deploy our token smart contracts, in the dropdown beside Endpoints select Ropsten . We will now see the Ropsten endpoints listed below the dropdown. Let’s take a note of the first endpoint (mine is: https://ropsten.infura.io/v3/3241b8c847b646cd82c13f7f4670871e). Yours will be a little different.
One thing to note here is that the Project ID listed is also visible in the URL.
infura12
Deploying Contracts on a Test Blockchain with Truffle#
Now that we have our endpoints from Infura, we need to update our Truffle configuration so that we can deploy our token contracts to the Ropsten network. There are a few things we need to consider when updating our development environment. Right now, we have the following in place:
/build
/contracts
/migrations
truffle-config.js
Since we are sending information to a public test network, we need a way to hide our secrets (Infura, private keys, etc.). To do this, we will leverage a library called dotenv. To get dotenv installed, we need to initialize node package manager.
Run npm init -y from the root directory of the erc-20-token folder. This will now allow you to bring node libraries into the folder. The first one we will install is dotenv . Before we jump into the dotenv library, confirm that your folder looks like this:
/build
/contracts
/migrations
truffle-config.js
package.json
Run npm install dotenv . Once the command finishes running, you should see the package.json file has been updated with the dotenv library. To use dotenv we need to create an .env file. This file will contain our secrets. To ensure that you don’t send your file full of secrets to GitHub (or another version control software), add a gitignore file to your folder as well and add .env and node_modules to the file.
// Folder:
/contracts
truffle-config.js
package.json
.gitignore
.env

// .gitignore file
node_modules
.env
Now we need to update the .env with the Infura credentials that we have. Let’s call the variable in the .env file INFURA_ID . Instead of taking the entire URL from Infura, we will only take the Project ID.
The .env file should look like this:
INFURA_ID=3241b8c847b646cd82c13f7f4670871e
Now we need to update our truffle-config.js file. From an earlier section of this chapter, the last time we worked with the truffle-config.js , it contained the following:
module.exports = {
    networks: {
        development: {
            host: '127.0.0.1',
            port: '8545',
            network_id: '*'
        }
    },
    compilers: {
        solc: {
            version: '0.5.16',
            settings: {
                optimizer: {
                    enabled: true,
                    runs: 1
                },
                evmVersion: 'istanbul'
            }
        }
    }
}
To ensure that we can send our compiled smart contracts to Infura we need to add the dotenv library that we will be using.
Add a require("dotenv").config(); to the top of the file. With this line, we will have access to the variables we are storing in the .env file by referring to process.env in our truffle-config.js file.
We need to import a set of private keys so that we can send transactions to a test Ethereum network. Our recommendation is to use a test account (e.g. one generated by ganache-cli ).
Let’s run it again (if you’ve closed it) in a new terminal with the following command ganache-cli . Once the script runs, you should see something like this:
Ganache CLI v6.10.1 (ganache-core: 2.11.2)

Available Accounts
==================

(0) 0x507E5A5d7076D8D73828C971FB8e2B614e0B0dF9 (100 ETH)
(1) 0x9DB2d6B5D2Ea11BF4cA766529b25CB4d5DEc0432 (100 ETH)
(2) 0xdFBdD36D9C23df4FFEb31A4EDDf9FE31B27e131F (100 ETH)
(3) 0xff9F7FCeDE44a329Dd9dDBa3ba503e0e1f6A4fB9 (100 ETH)
(4) 0xa874aABC71467345C7dc64554226D9806139BD4A (100 ETH)
(5) 0xbddE000807782Bc3b713B209F35eFfa517B3884b (100 ETH)
(6) 0x2C8a4Db3dc5Fa3fAbE24E36A9c7E22608C224163 (100 ETH)
(7) 0x0327052200355A53cdd085767770975CcA1Bb4b2 (100 ETH)
(8) 0x4b99B3ECA37C432dBEACE5f65F4c7FAA94C5F880 (100 ETH)
(9) 0x4256d4035e3DE2Ca15C9Be20Bd00c83223DE2789 (100 ETH)

Private Keys
==================

(0) 0xf4e51b41dc308969a1ebeeec7690420f31272a397a1793e85867b40f922df274
(1) 0xb74f095ca74134632cece2f592fab2db8956113150b2a7361330a06af3b46721
(2) 0xdaa873e311b81a184ee96137db0e60d0f71f06449a796aa182f96fc46f36ca79
(3) 0x48c21b9e0d4f3272fd22654eb04c03d8c713e02e2046f478e477cc4421faefe3
(4) 0x32fa4bcaf73e118bfb04fbd376f83b857c3ea8e47b45e638d3fe71490c39df9a
(5) 0xef109a7d58a951047ebb674e1e1aa3a2dafcad592ccbe71161222ef1bb093be0
(6) 0x6d4c82e1c1f822eccff7c6a03d7a9898315a34924104d1f5a03edb6d0b73b922
(7) 0x4a22b722842151ff245649f8950ee9630b824043e38220570c60ec28c7b2dd54
(8) 0x69ad8c36ffa85f99ed80f1e2c1dd790cfa8e8e80f0cfcc3237b3cfaa8aa28bed
(9) 0x0ae71fc86d1934a740e86e461df0f0e849354d8bc20fc54361f4e861e2277dca
Let’s assume that we want to deploy our smart contracts on the test blockchain with the first account listed:
- Available account: 0x507E5A5d7076D8D73828C971FB8e2B614e0B0dF9
- Corresponding private key: 0xf4e51b41dc308969a1ebeeec7690420f31272a397a1793e85867b40f922df274
DO NOT USE THE INFORMATION ABOVE TO STORE ETHER FROM THE MAIN ETHEREUM BLOCKCHAIN
For this application, we will be deploying the ERC-20 token (and the other smart contracts we write) on the Ropsten Ethereum Test Network. That means we need to load our Ethereum address with test ether on the Ropsten network. This is also known as Ropsten testnet ether.
Ropsten Test Network#
Ethereum blockchain developers have created a few test Ethereum networks. The Ropsten Ethereum Test Network allows blockchain developers to test Solidity (and Vyper) smart contracts in a live setting. The advantage of using a test network is that you don’t use real ether to pay for transaction fees. The test network closely resembles the main Ethereum network in its workings.
As the main Ethereum network requires ether, so the Ropsten test network requires Ropsten ether . Let’s go to a “faucet” to get some Ropsten ether in the blockchain wallet we got from Ganache.
A faucet is a website or app that dispenses cryptocurrencies to users. Typically a user has to complete a simple task before the cryptocurrency is dispensed.
The faucet that we will use in this book is here: https://faucet.dimensions.network/.
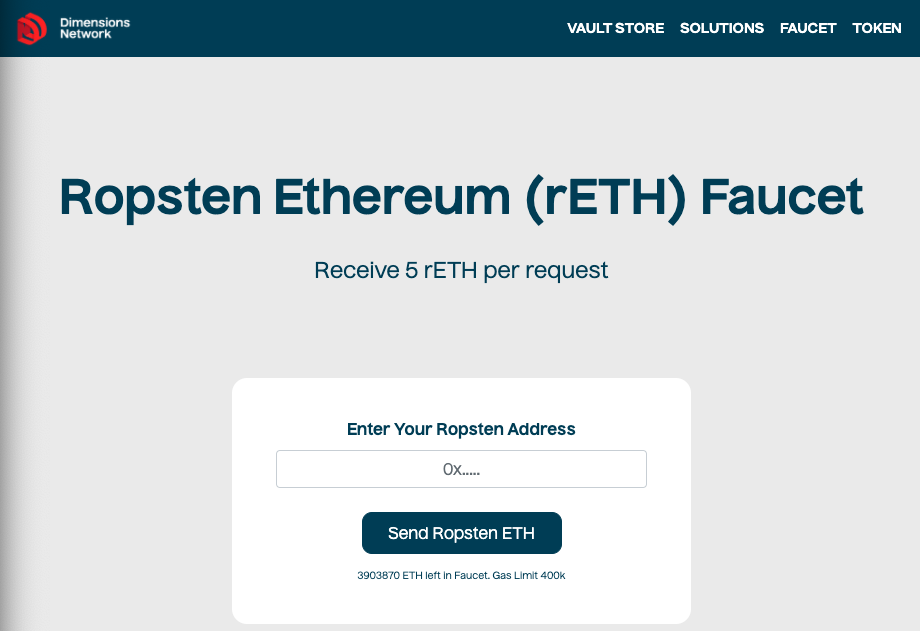
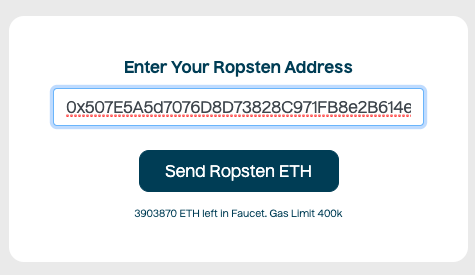
Let’s copy the public address that we are testing with and paste it into the form that is available on the web page, then hit “Send Ropsten ETH”.
After clicking the button, you can visit a block explorer to confirm that you receive the Ropsten Ether. The block explorer we will use in this book is called Etherscan, and it has visibility into both the main Ethereum and the Ropsten Ethereum networks (and many more!).
To go into the block explorer, visit this link: https://ropsten.etherscan.io/.

From this link, you can query your blockchain address in the search box.
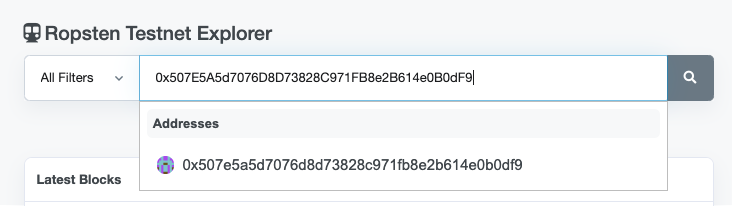
When your address is found and the transaction from the faucet is complete, you can see a screen that looks similar to this:

From this link, we can see that there is a balance of 5 ETH. This will only be true for the Ropsten Test Network. Now we are ready to send our smart contracts to the Ropsten Test Network with your testnet ether!
Truffle Configuration for the Ropsten Test Network#
Now that we have the Ropsten Ether in an account that we control and the Infura endpoint, let’s continue updating our Truffle configuration to work with this new information. Recall that we had the following in place:
// Folder structure:
/contracts
truffle-config.js
package.json
.gitignore
.env

// .gitignore file
node_modules
.env

// .env file

INFURA_ID=3241b8c847b646cd82c13f7f4670871e

// truffle-config.js file
    require("dotenv").config();
    module.exports = {
        networks: {
            development: {
                host: '127.0.0.1',
                port: '8545',
                network_id: '*'
            }
        },
        compilers: {
            solc: {
                version: '0.5.16',
                settings: {
                    optimizer: {
                        enabled: true,
                        runs: 1
                    },
                    evmVersion: 'istanbul'
                }
            }
        }
    }
Let’s update our .env file to add our blockchain private key. We will keep it a secret here so that we can use it later to send our smart contracts to the blockchain.
// Updated .env file
INFURA_ID=3241b8c847b646cd82c13f7f4670871e
BLOCKCHAIN_PRIVATE_KEY=0xf4e51b41dc308969a1ebeeec7690420f31272a397a1793e85867b40f922df274
Now that our .env file is updated, we can start focusing on our truffle-config.js file. We will install the hdwallet-provider library from Truffle to import the private key securely into our truffle config file. It allows us to sign transactions with addresses that are derived from a 12 or 24 word mnemonic (or the private key that we have).
Run npm install @truffle/hdwallet-provider from the command line in your erc-20-token folder.
After installing, we can import the library into truffle-config.js .
const HDWalletProvider = require('@truffle/hdwallet-provider');
Our file now looks like this:
// truffle-config.js file

    require("dotenv").config();
    const HDWalletProvider = require('@truffle/hdwallet-provider');

    module.exports = {
        networks: {
            development: {
                host: '127.0.0.1',
                port: '8545',
                network_id: '*'
            }
        },
        compilers: {
            solc: {
                version: '0.5.16',
                settings: {
                    optimizer: {
                        enabled: true,
                        runs: 1
                    },
                    evmVersion: 'istanbul'
                }
            }
        }
    }
The next thing we need to do is update the networks object in the config file. We need to create a ropsten object inside it so we can send information to the Ropsten test network. Its parameters will be slightly different from the development object:
- provider: this is where we’ll configure the wallet and the endpoint we need to send the smart contract (i.e. the Ropsten test network)
- network_id: this is where we will specify 3 for the Rospten test network
- gas: this is the maximum amount of gas that we will use to deploy our tokens
- confirmations: we will wait for two confirmations to occur before the Truffle script returns
The provider field will be a function which will return our wallet at the Infura endpont. Remember that dotenv will read our .env file and make the variables available in our process.env variable (a global variable provided by Node.js). To do that, we will need the following code:
function() { return new HDWalletProvider(process.env.BLOCKCHAIN_PRIVATE_KEY, https://ropsten.infura.io/v3/${process.env.INFURA_ID}) }
function() {
    return new HDWalletProvider(process.env.BLOCKCHAIN_PRIVATE_KEY, `https://ropsten.infura.io/v3/${process.env.INFURA_ID}`)
}
Putting this together with the rest of the object will now get us something like this:
    ropsten: {
       provider: function () {
         return new HDWalletProvider(
           process.env.MNEMONIC,
           `https://ropsten.infura.io/v3/${process.env.INFURA_ID}`
         );
       },
       network_id: 3,
       gas: 4000000,
      confirmations: 2
    },
After putting this in with the rest of our truffle-config.js file, we will have the following and we will be ready to run our Truffle commands.
// truffle-config.js file

require("dotenv").config();
const HDWalletProvider = require("@truffle/hdwallet-provider");

module.exports = {
  networks: {
    development: {
      host: "127.0.0.1",
      port: 8545,
      network_id: "*", // Match any network id
    },
    ropsten: {
      provider: function () {
        return new HDWalletProvider(
          process.env.MNEMONIC,
          `https://ropsten.infura.io/v3/${process.env.INFURA_ID}`
        );
      },
      network_id: 3,
      gas: 4000000, // make sure this gas allocation isn't over 4M, which is the max
      confirmations: 2, // # of confs to wait between deployments. (default: 0)
      skipDryRun: true,
    },
  },
  compilers: {
    solc: {
      version: "0.5.16", // Fetch exact version from solc-bin (default: truffle's version)
      settings: {
        optimizer: {
          enabled: true,
          runs: 1,
        },
        evmVersion: "istanbul"
      },
    },
  },
}
Deploying to Ropsten with Truffle Updated#
The cool thing about Truffle is that we can use the same scripts that we created when we deployed to a local blockchain with Truffle as when we are deploying to the Ropsten test network. The major difference will be how we call the Truffle scripts.
Another script that is available through Truffle is called truffle migrate . This combines the truffle compile and truffle deploy script into one.
Recall that to send the contracts to a local blockchain we had to have a local blockchain running and then you can run truffle migrate . This would compile the contracts and send them to the ganache-cli instance that we had running.
This time, to deploy our contracts to the Ropsten test network, we will have to add a flag to the Truffle scripts. This will allow us to use the ropsten configuration that we just added. Instead of running just truffle migrate , we will be running truffle migrate --network ropsten . The --network flag allows us to select the ropsten object we just added.
Let’s try it out! Run truffle migrate --network ropsten . After running the script we’ll see our contracts compile. After they compile (they may not compile because we didn’t change anything in the contracts since the beginning of this chapter) the migrations will start.
Starting migrations...
======================
> Network name:    'ropsten'
> Network id:      3
> Block gas limit: 8000000 (0x7a1200)
Confirm that the network name and id are ropsten and 3 respectively. The contracts will start deploying after that and it’ll take between 30 and 60 seconds for the contracts to be processed by the Ropsten test network. This is because this behaves closer like the Ethereum blockchain in having nodes around the world validate your proposed transactions.
After one of my tokens deployed, I saw the following information from Truffle:
1_deploy_tokens.js
==================

   Deploying 'ERC20Combined'
   -------------------------
   > transaction hash:    0x3fbc98e3451ea5955dd6f42015996bad2313252a8676dc5a016dd2142548b68d
   > Blocks: 1            Seconds: 16
   > contract address:    0x5e15F48F17d7dF502527711B12057C92A6128825
   > block number:        9070976
   > block timestamp:     1605393240
   > account:             0x507E5A5d7076D8D73828C971FB8e2B614e0B0dF9
   > balance:             4.8999552
   > gas used:            1000448 (0xf4400)
   > gas price:           20 gwei
   > value sent:          0 ETH
   > total cost:          0.02000896 ETH

   Pausing for 2 confirmations...
   ------------------------------
   > confirmation number: 1 (block: 9070977)
   > confirmation number: 2 (block: 9070978)
The second token also provides similar information, and when the migration is complete I see the following:
Summary
=======
> Total deployments:   2
> Final cost:          0.04001792 ETH
The key things we need to keep track of here are the contract addresses that get generated.
I also see that some ETH was used to deploy the contracts and I can confirm that on Etherscan as well.
- token 1 contract address: 0x5e15F48F17d7dF502527711B12057C92A6128825
- token 2 contract address: 0x155196F05Facea828c322cA9A40eF8bCc4Ac2640
If you want to learn how to use the token smart contract that you deployed, reach out to the Newline team and we can walk you through how you can use either Remix, Truffle, or other blockchain libraries to interact with your smart contract. We can also address questions around having a front-end application interact with the smart contracts you send to the Ropsten (or main) Ethereum blockcha
Tokens awayyyy (on the Ethereum blockchain)
There you have it! You have a set of smart contracts that allows you to create an ERC-20 standard compliant token for the Etheruem blockchain. In addition to the smart contracts, you also have the tools available to send the smart contracts to the Ethereum blockchain. If you have questions specific about deploying to the main network, please don’t hesitate to reach out!