INTRODUCTION TO THE AIRBNB CLONE PROJECT
In this course, we’re going to create an Airbnb clone with React and Next.js.
If you are completely new to React, or to React Hooks, download my React Handbook and use that as a companion reference.
Also get my Next.js Handbook.
It contains in-depth explanations to many of the features provided by Next.js that we’re going to use.
THE PROJECT GOALS
This project will be full-stack: frontend and backend, with server-side rendering and routing. It’s going to have a huge set of features: browsing homes, logging in, booking a home, having the logic to determine if dates are already booked, paying the stay using Stripe, and then becoming hosts, adding our own homes with all the details, and selling them!
Of course, we only have limited time and we cannot build everything Airbnb provides, but we’ll replicate a significant part of the website.
Let me tell you upfront what we’re not going to do:
- we’re not going to implement experiences, just stays (homes renting)
- we drop search, since we’ll have just a few sample homes and search is not an optimal way when you can provide other discoverability tools
- we drop many of the options you can have on a home
- we drop comments and communication between host and guest
- we are not going to implement multiple currencies, we’ll just use US dollars
But we’ll have lots of things:
- Visualizing homes
- Booking homes
- Managing payments
- Private area for you to run the site, have a look at what’s happening, etc
- and more!
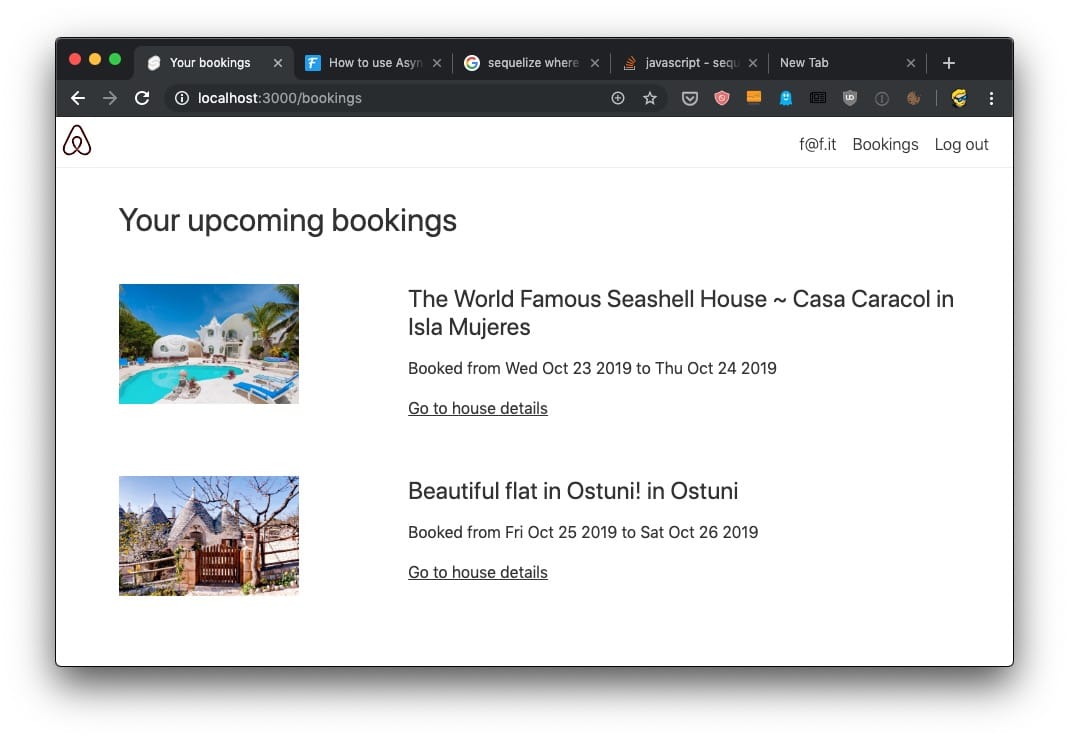
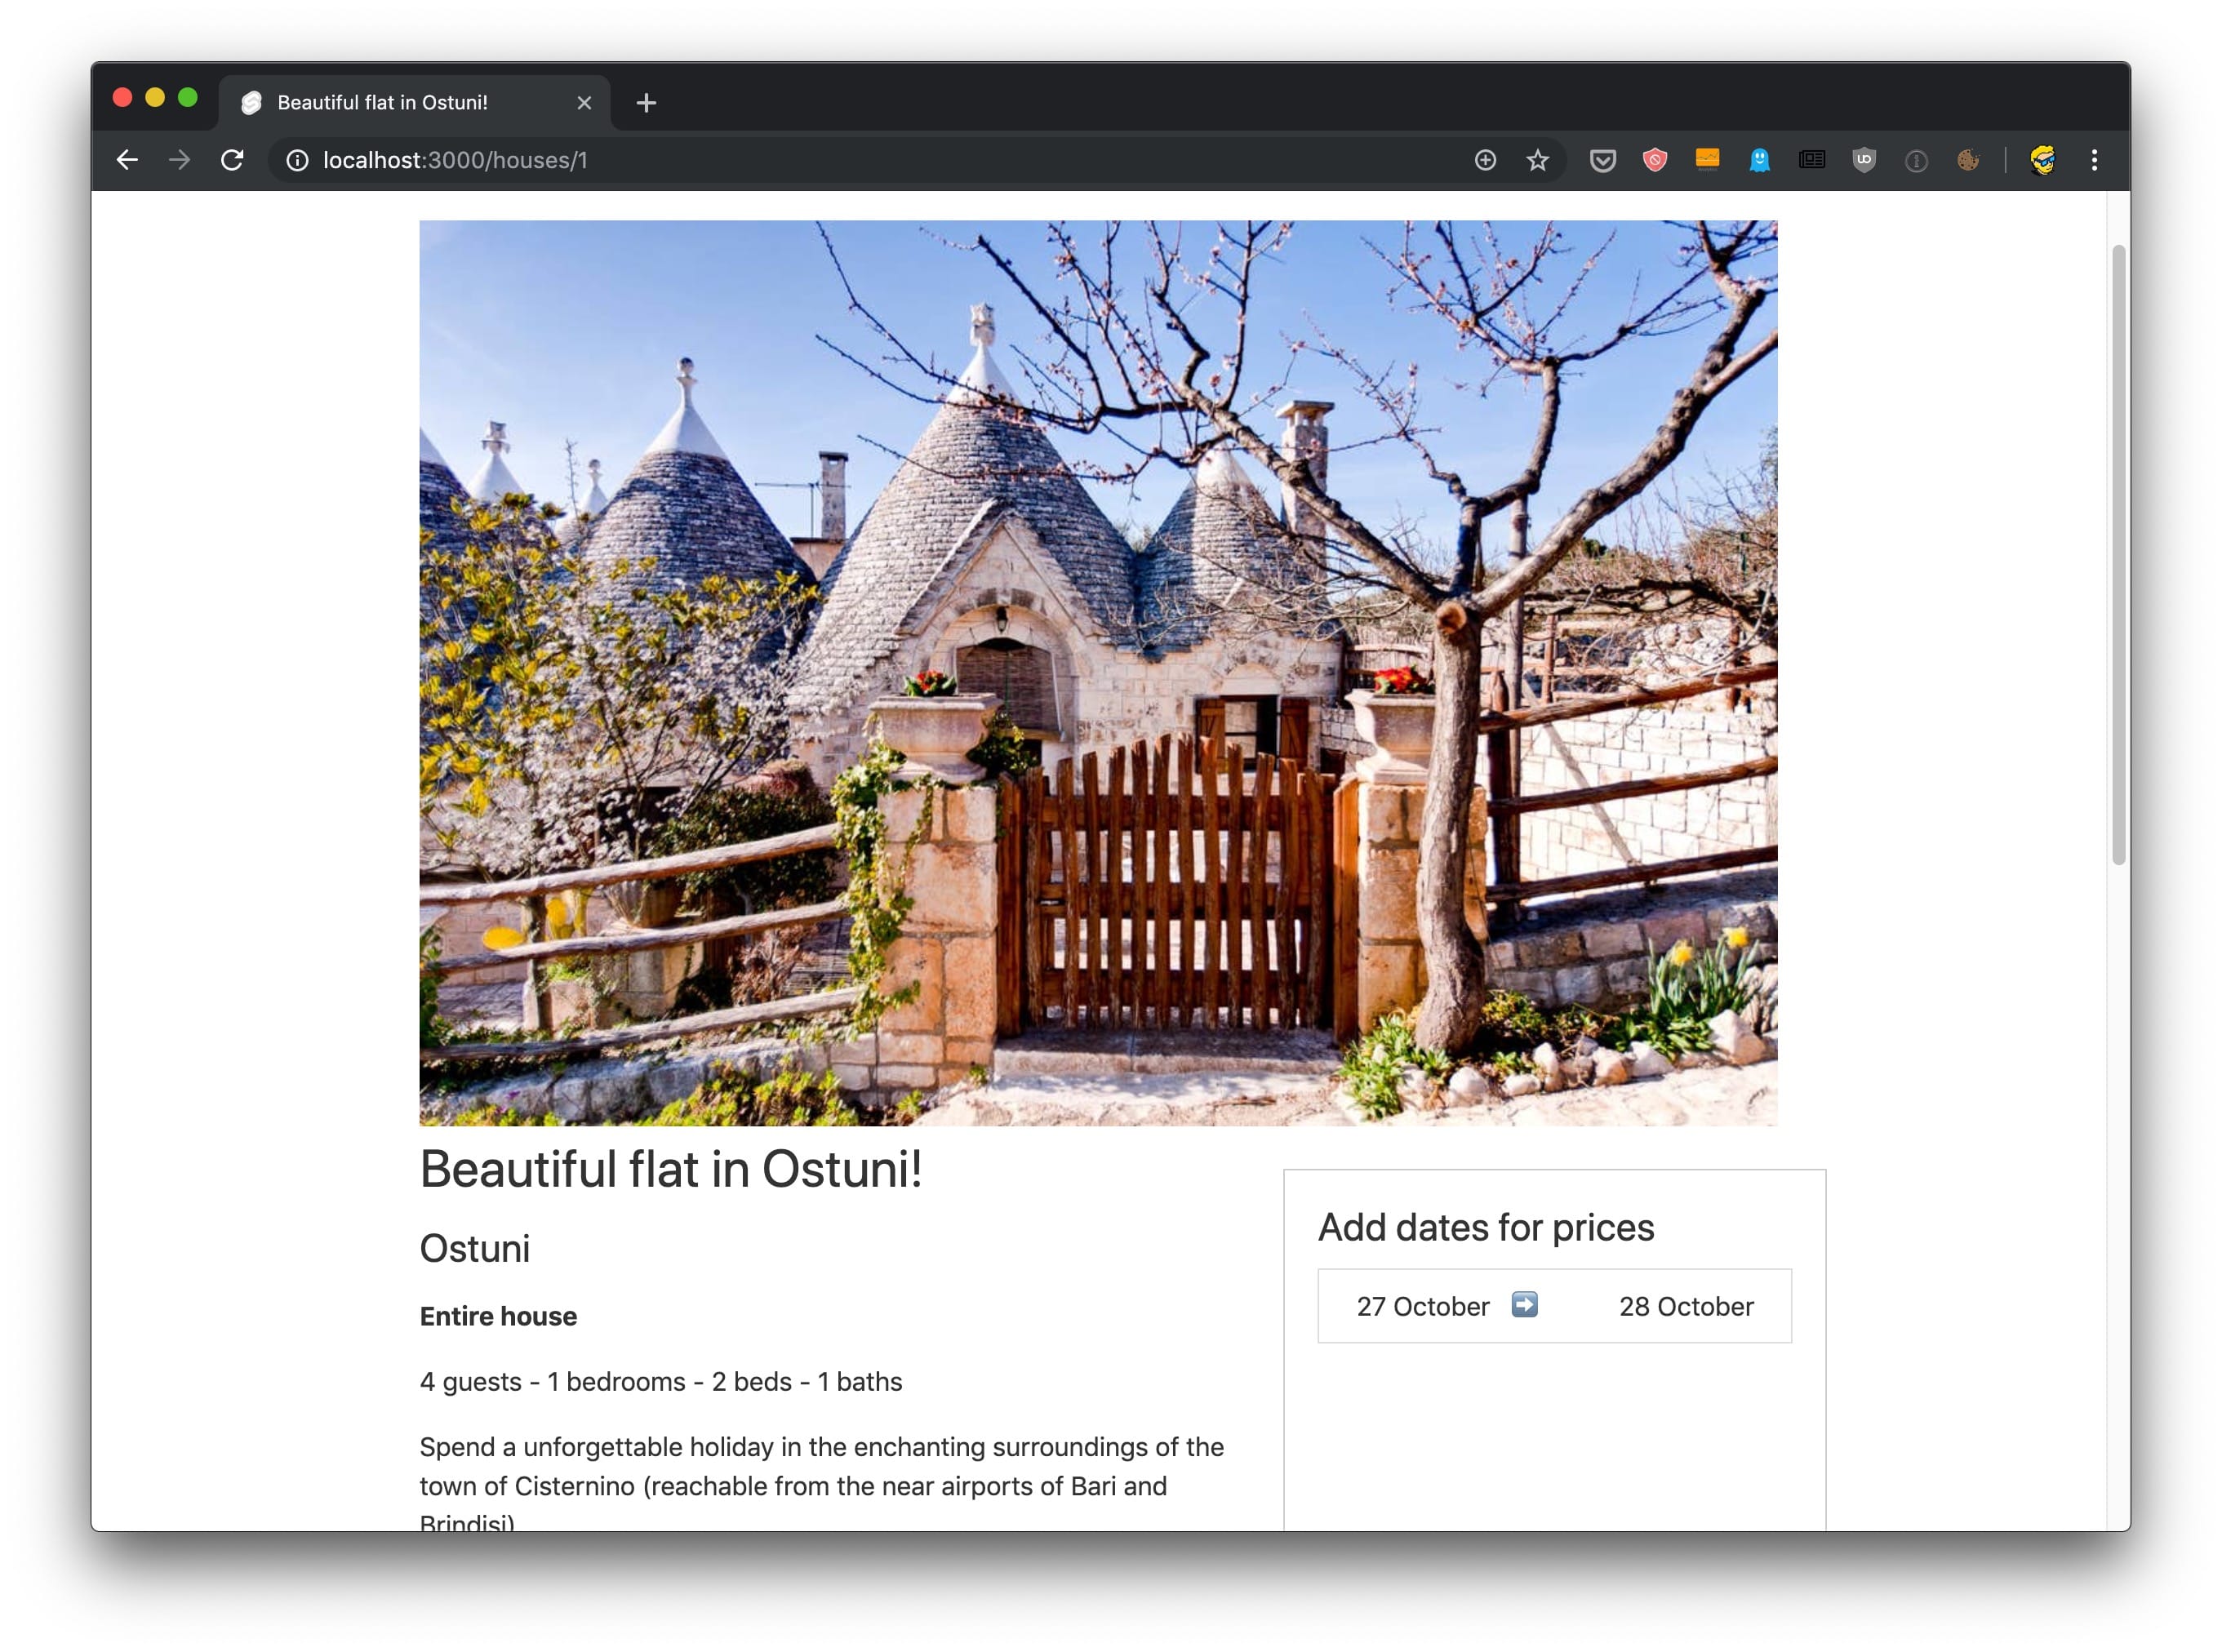
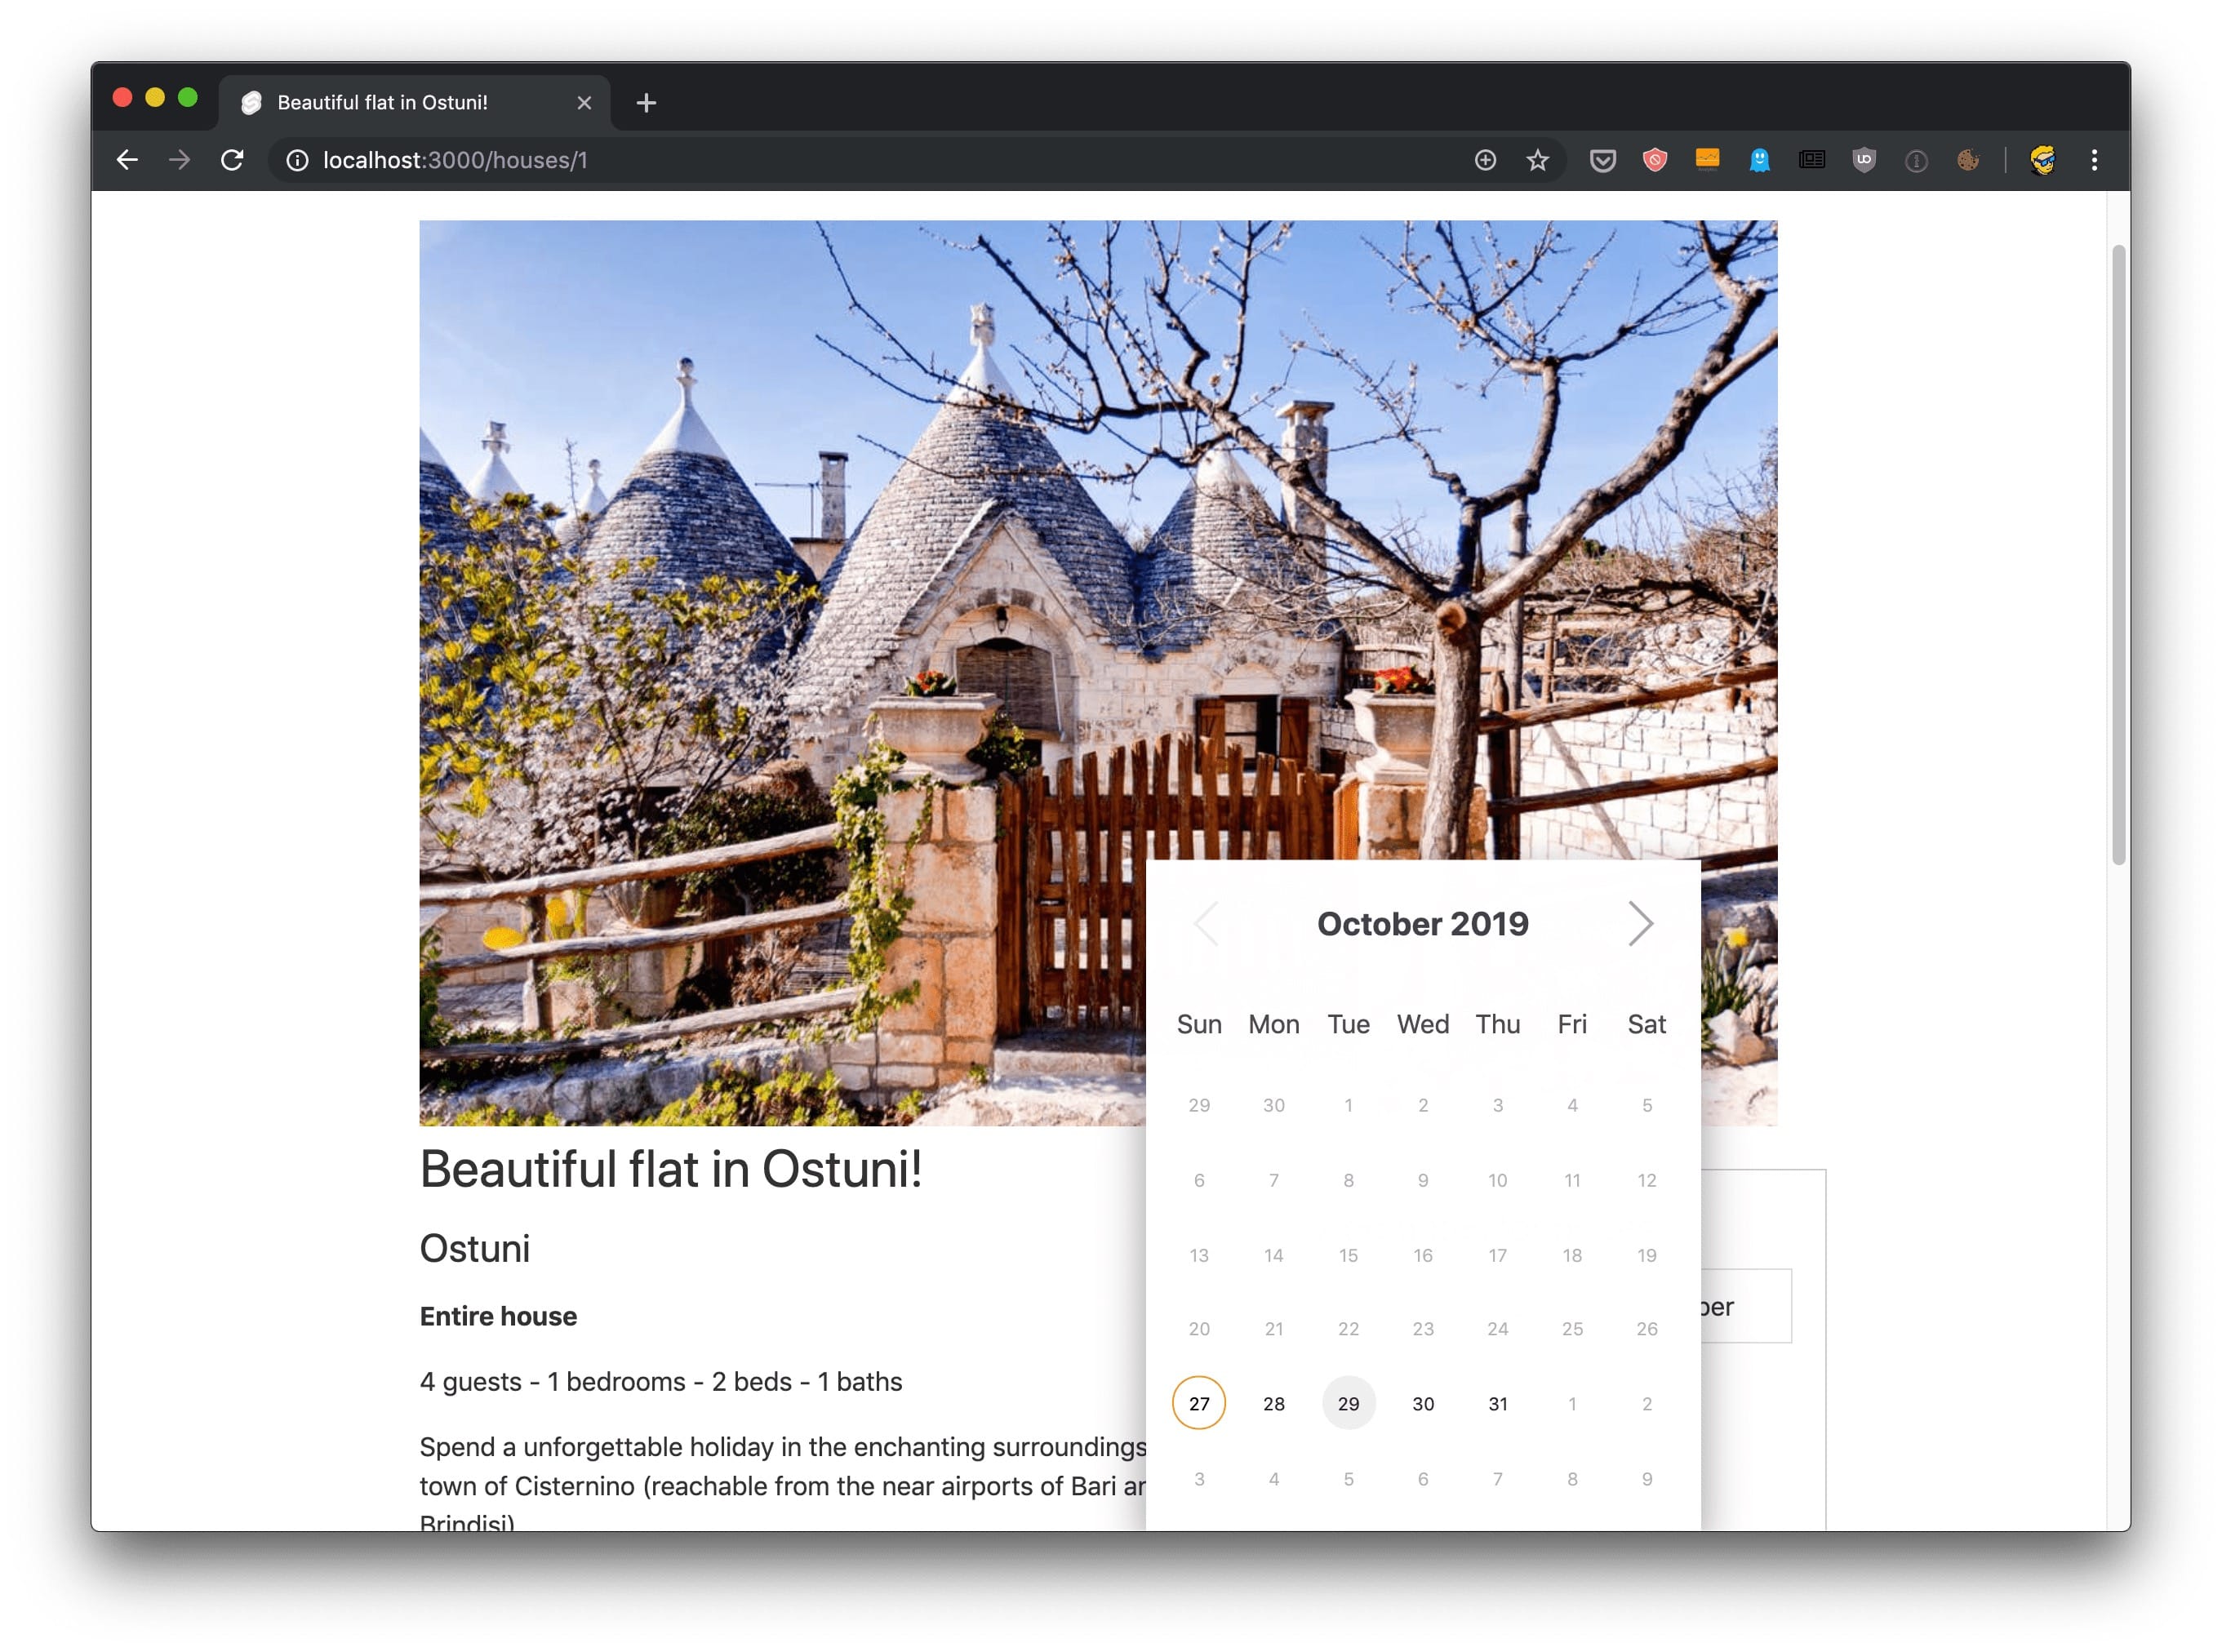
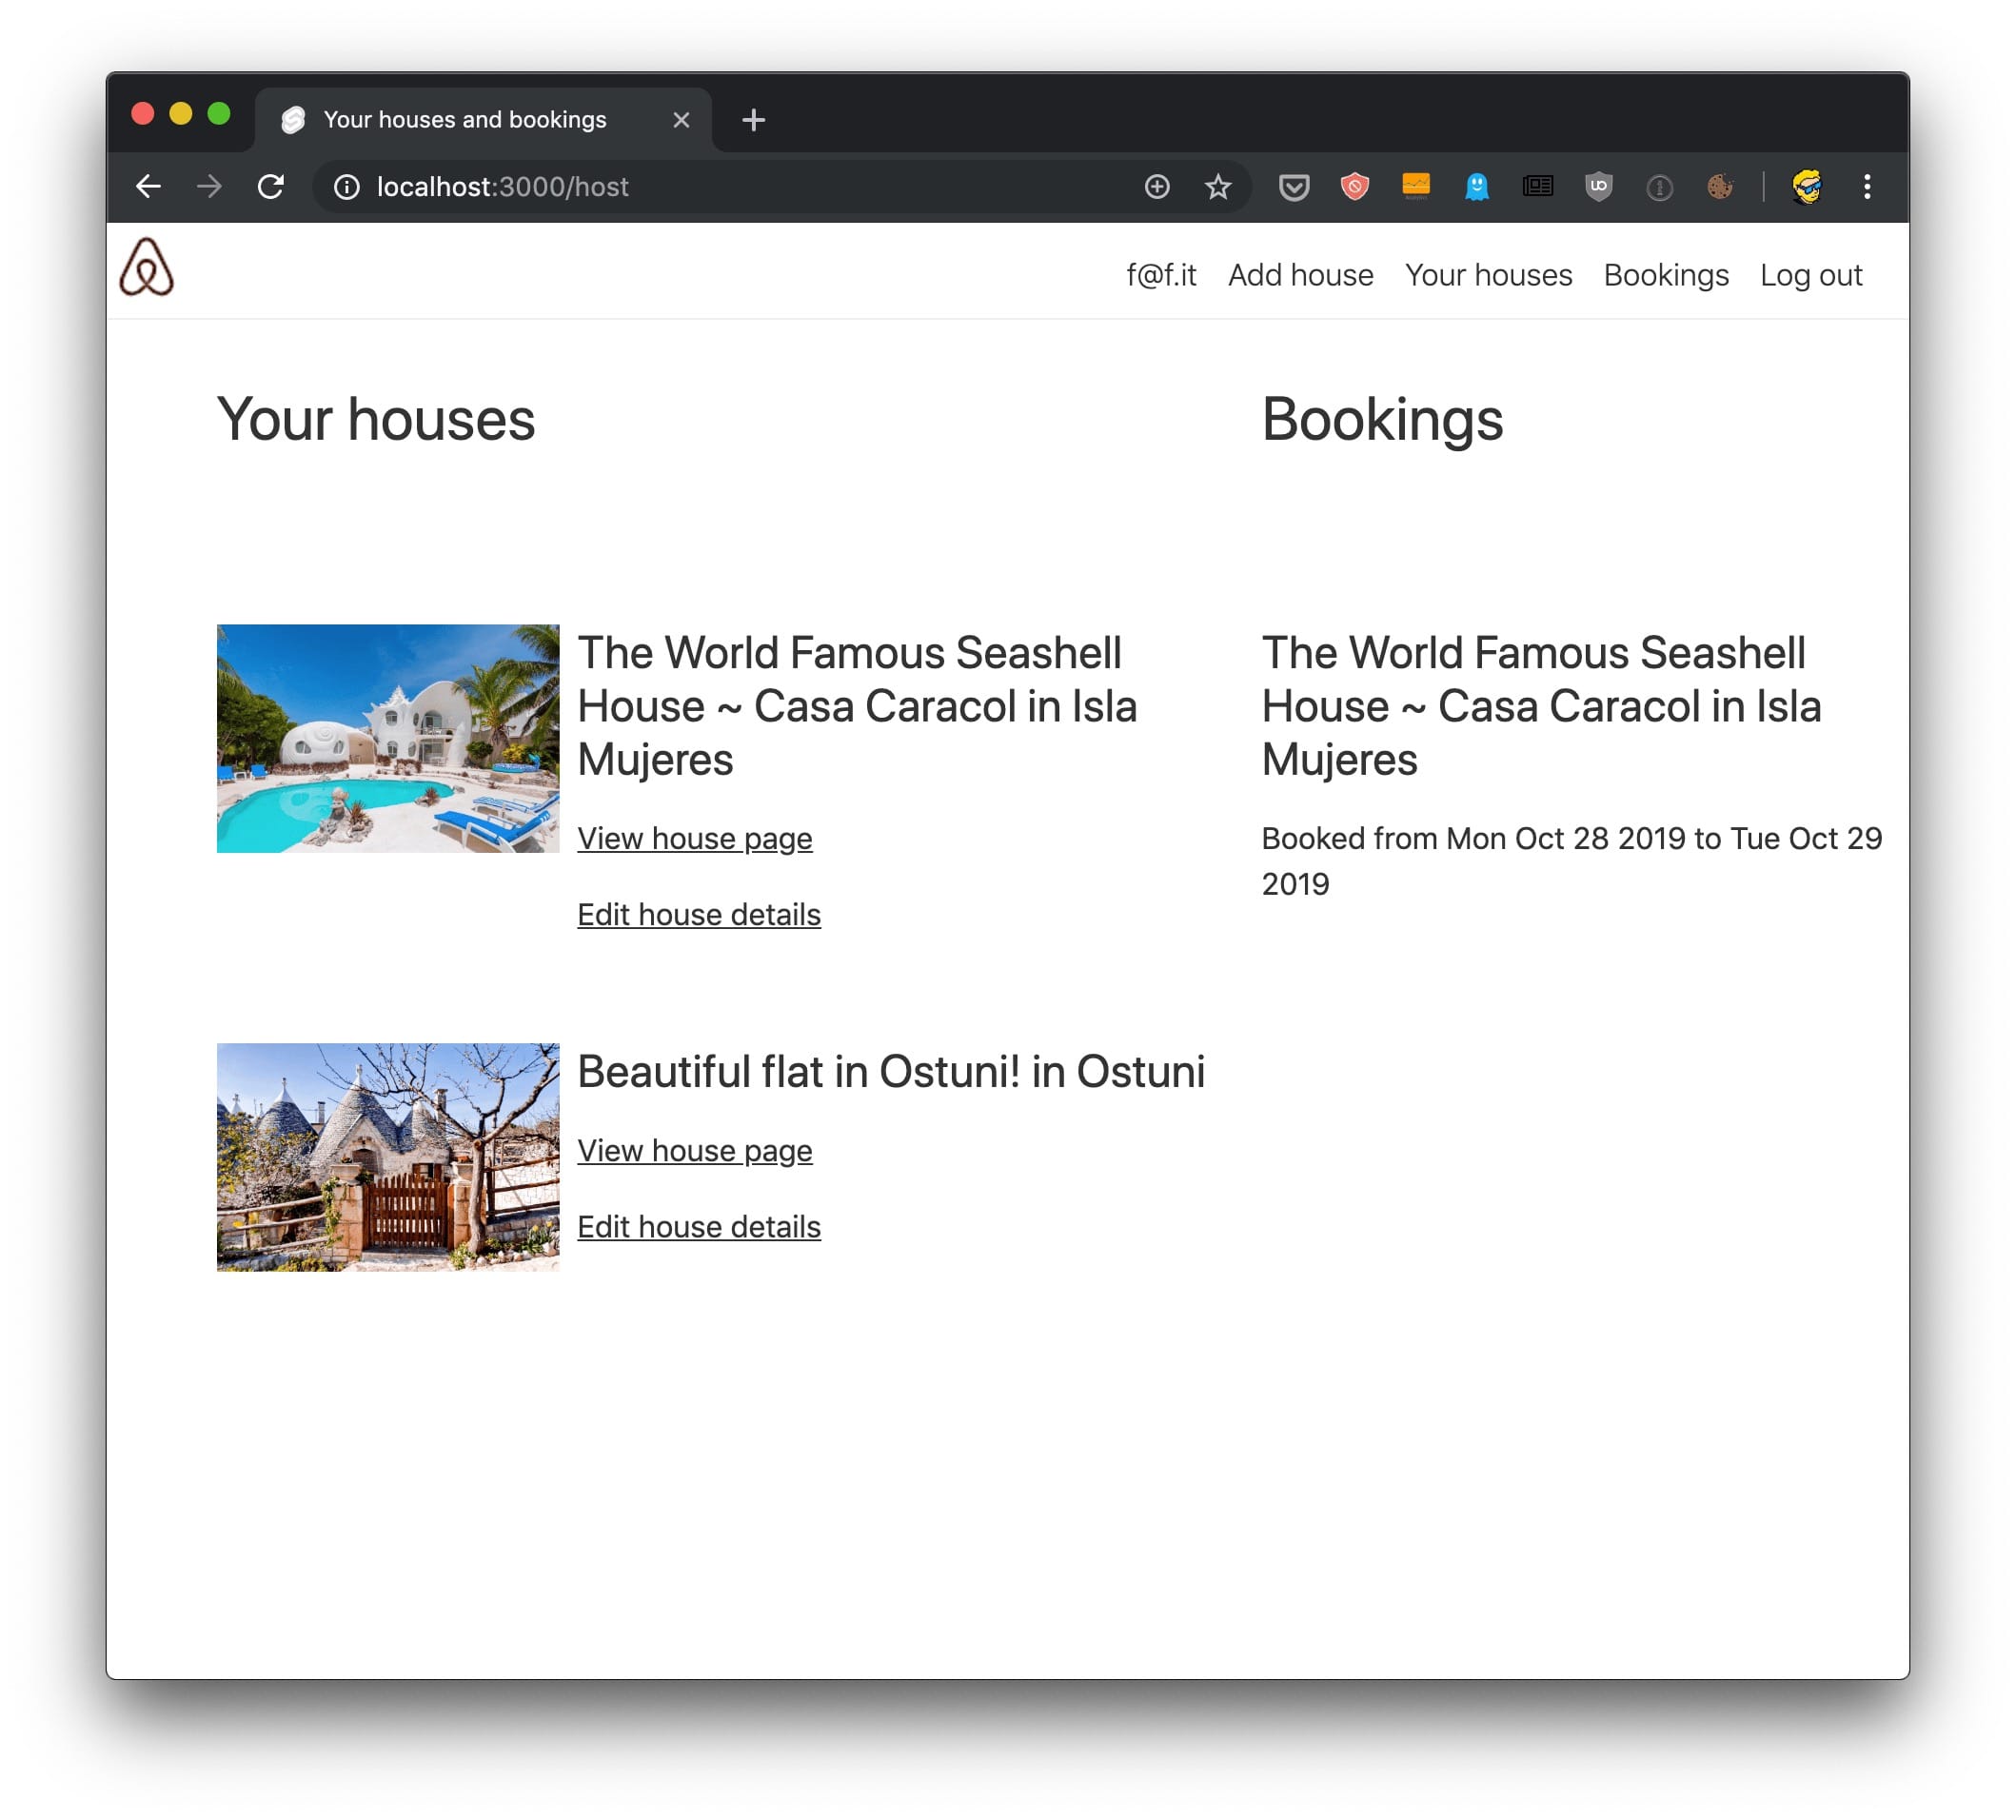
Here are some pictures that will give you a good idea of the final result we’ll achieve in this project:


LET’S START WITH INSTALLING NEXT.JS
The first thing we’re going to do is… we’re going to install Next.js!
You need to have Node.js installed. Check out my how to install Node.js post if you don’t have it already! mkd And make sure it’s the latest version (see how to update Node.js).
Installing Node.js will make the npm command available into your command line.
If you are new to using the command line, recommend reading An introduction to the npm package manager, the Unix Shells Tutorial, How to use the macOS terminal and The Bash Shell.
Now that you have npm , create an empty folder anywhere you like, for example in your home folder, and go into it:
mkdir nextbnb
cd nextbnb
and then initialize it as a Next.js project using create-next-app :
npx create-next-app .
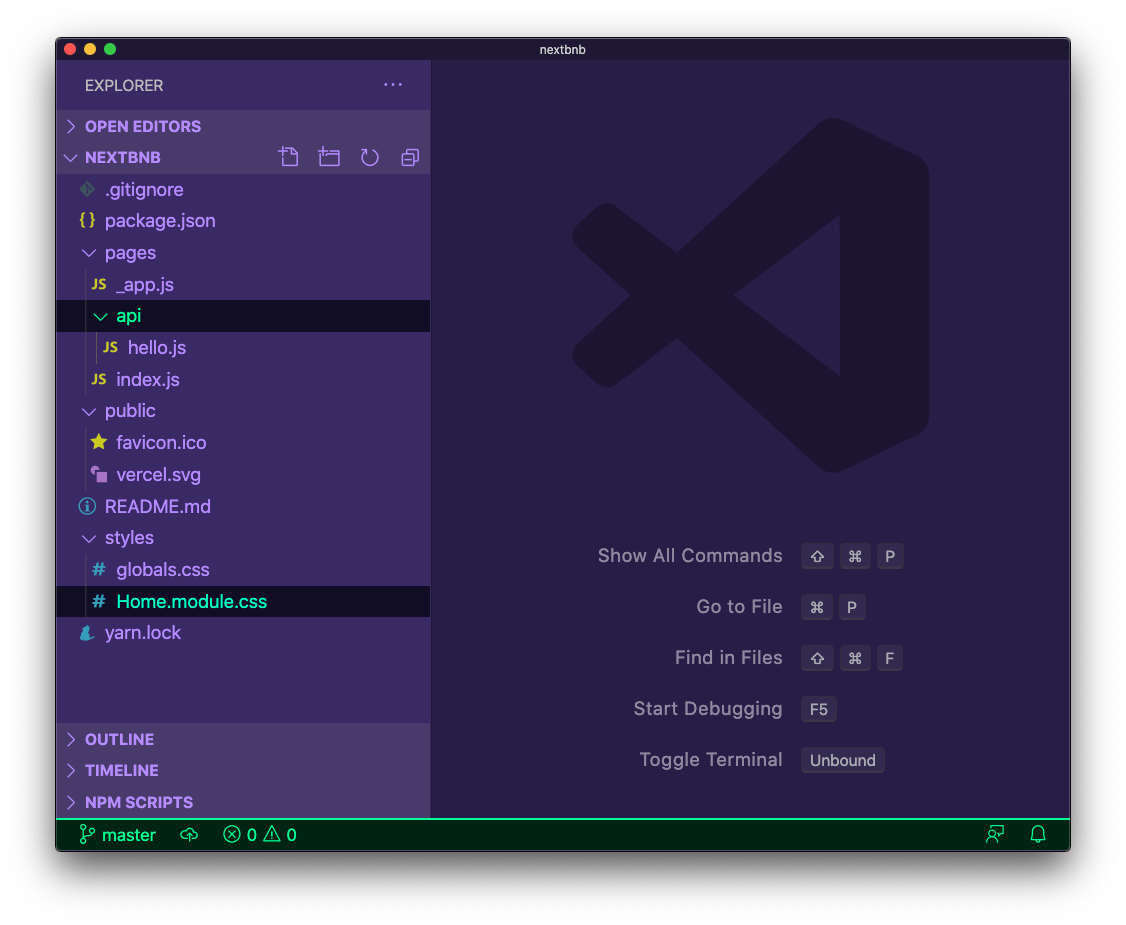
Open the project folder using your favorite editor. My favorite editor is VS Code. If you have that installed, you can run code . in your terminal to open the current folder in the editor (see this)
The sample project structure should contain a few files already:
Now using the terminal, run npm run dev to start the Next development server.
This will make the app available on port 3000, on localhost.
Open http://localhost:3000 in your browser:
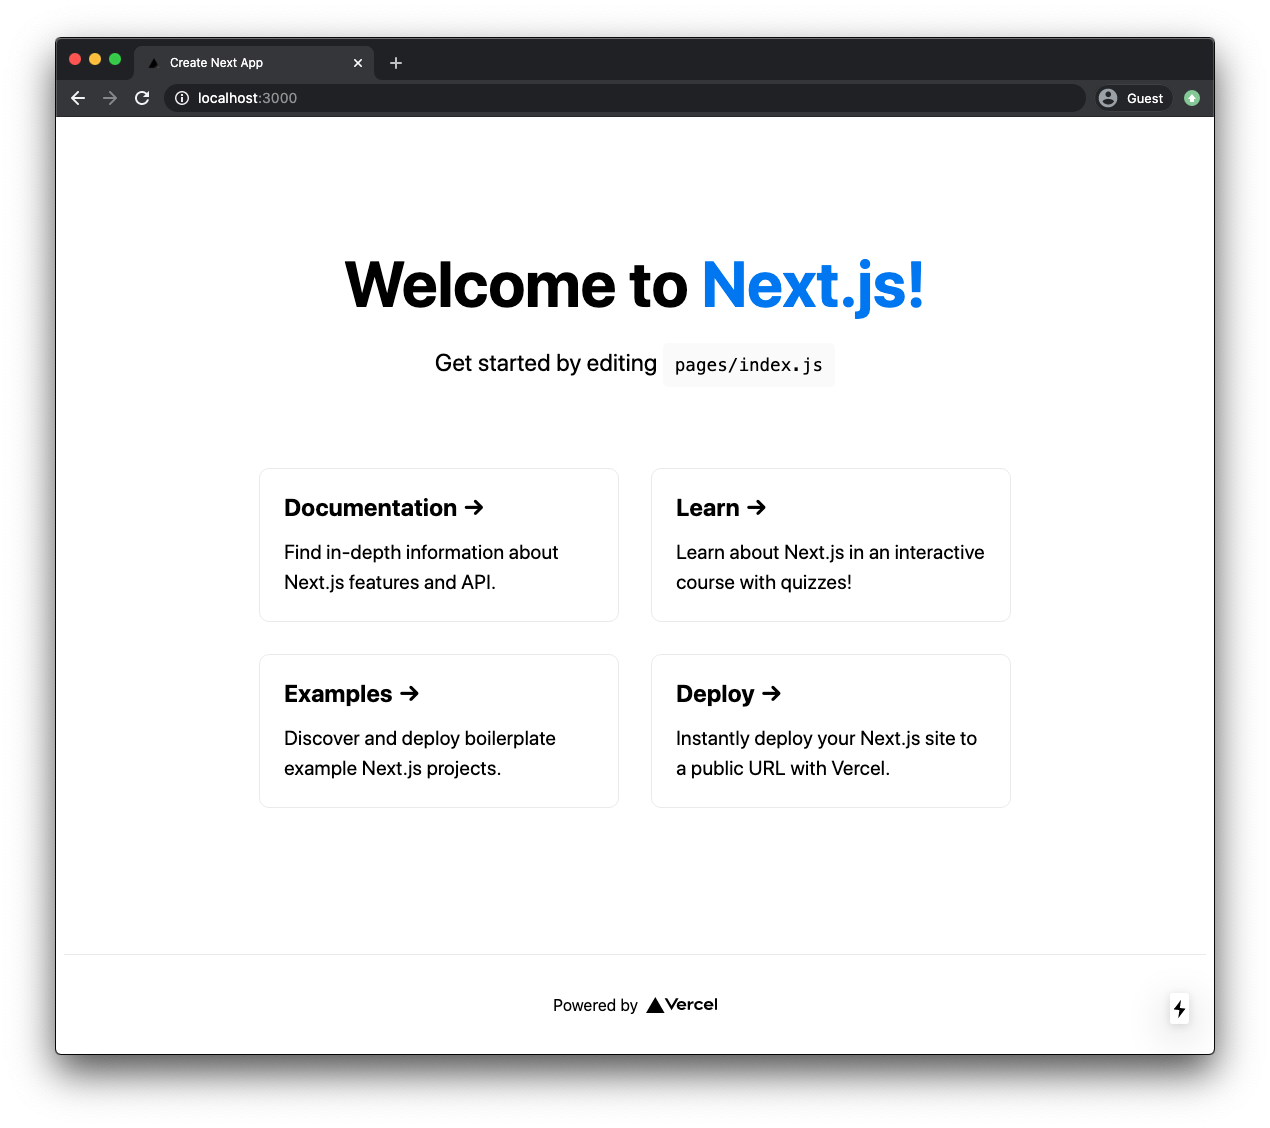
It’s working! That’s pretty cool. You can play around with the sample app a little bit, if you want.
If this is the first time you see a Next.js app, I recommend you look at it along with a copy of my free Next.js Handbook.
Once you’re ready we can start diving directly into the application we are going to build, starting from creating a list of houses .
The code for this lesson is available at https://github.com/flaviocopes/airbnb-clone-react-nextjs-2020/tree/2-1
LIST OF HOUSES
I want to start with creating the list of houses view .
We’ll implement that in the homepage of the project, which is defined by the pages/index.js file that Next.js created for us.
Right now the content of that file contains some sample code. You can go ahead and remove some of that, and just leave this:
export default function Home() {
  return <div></div>
}
We’ll add the rest later on.
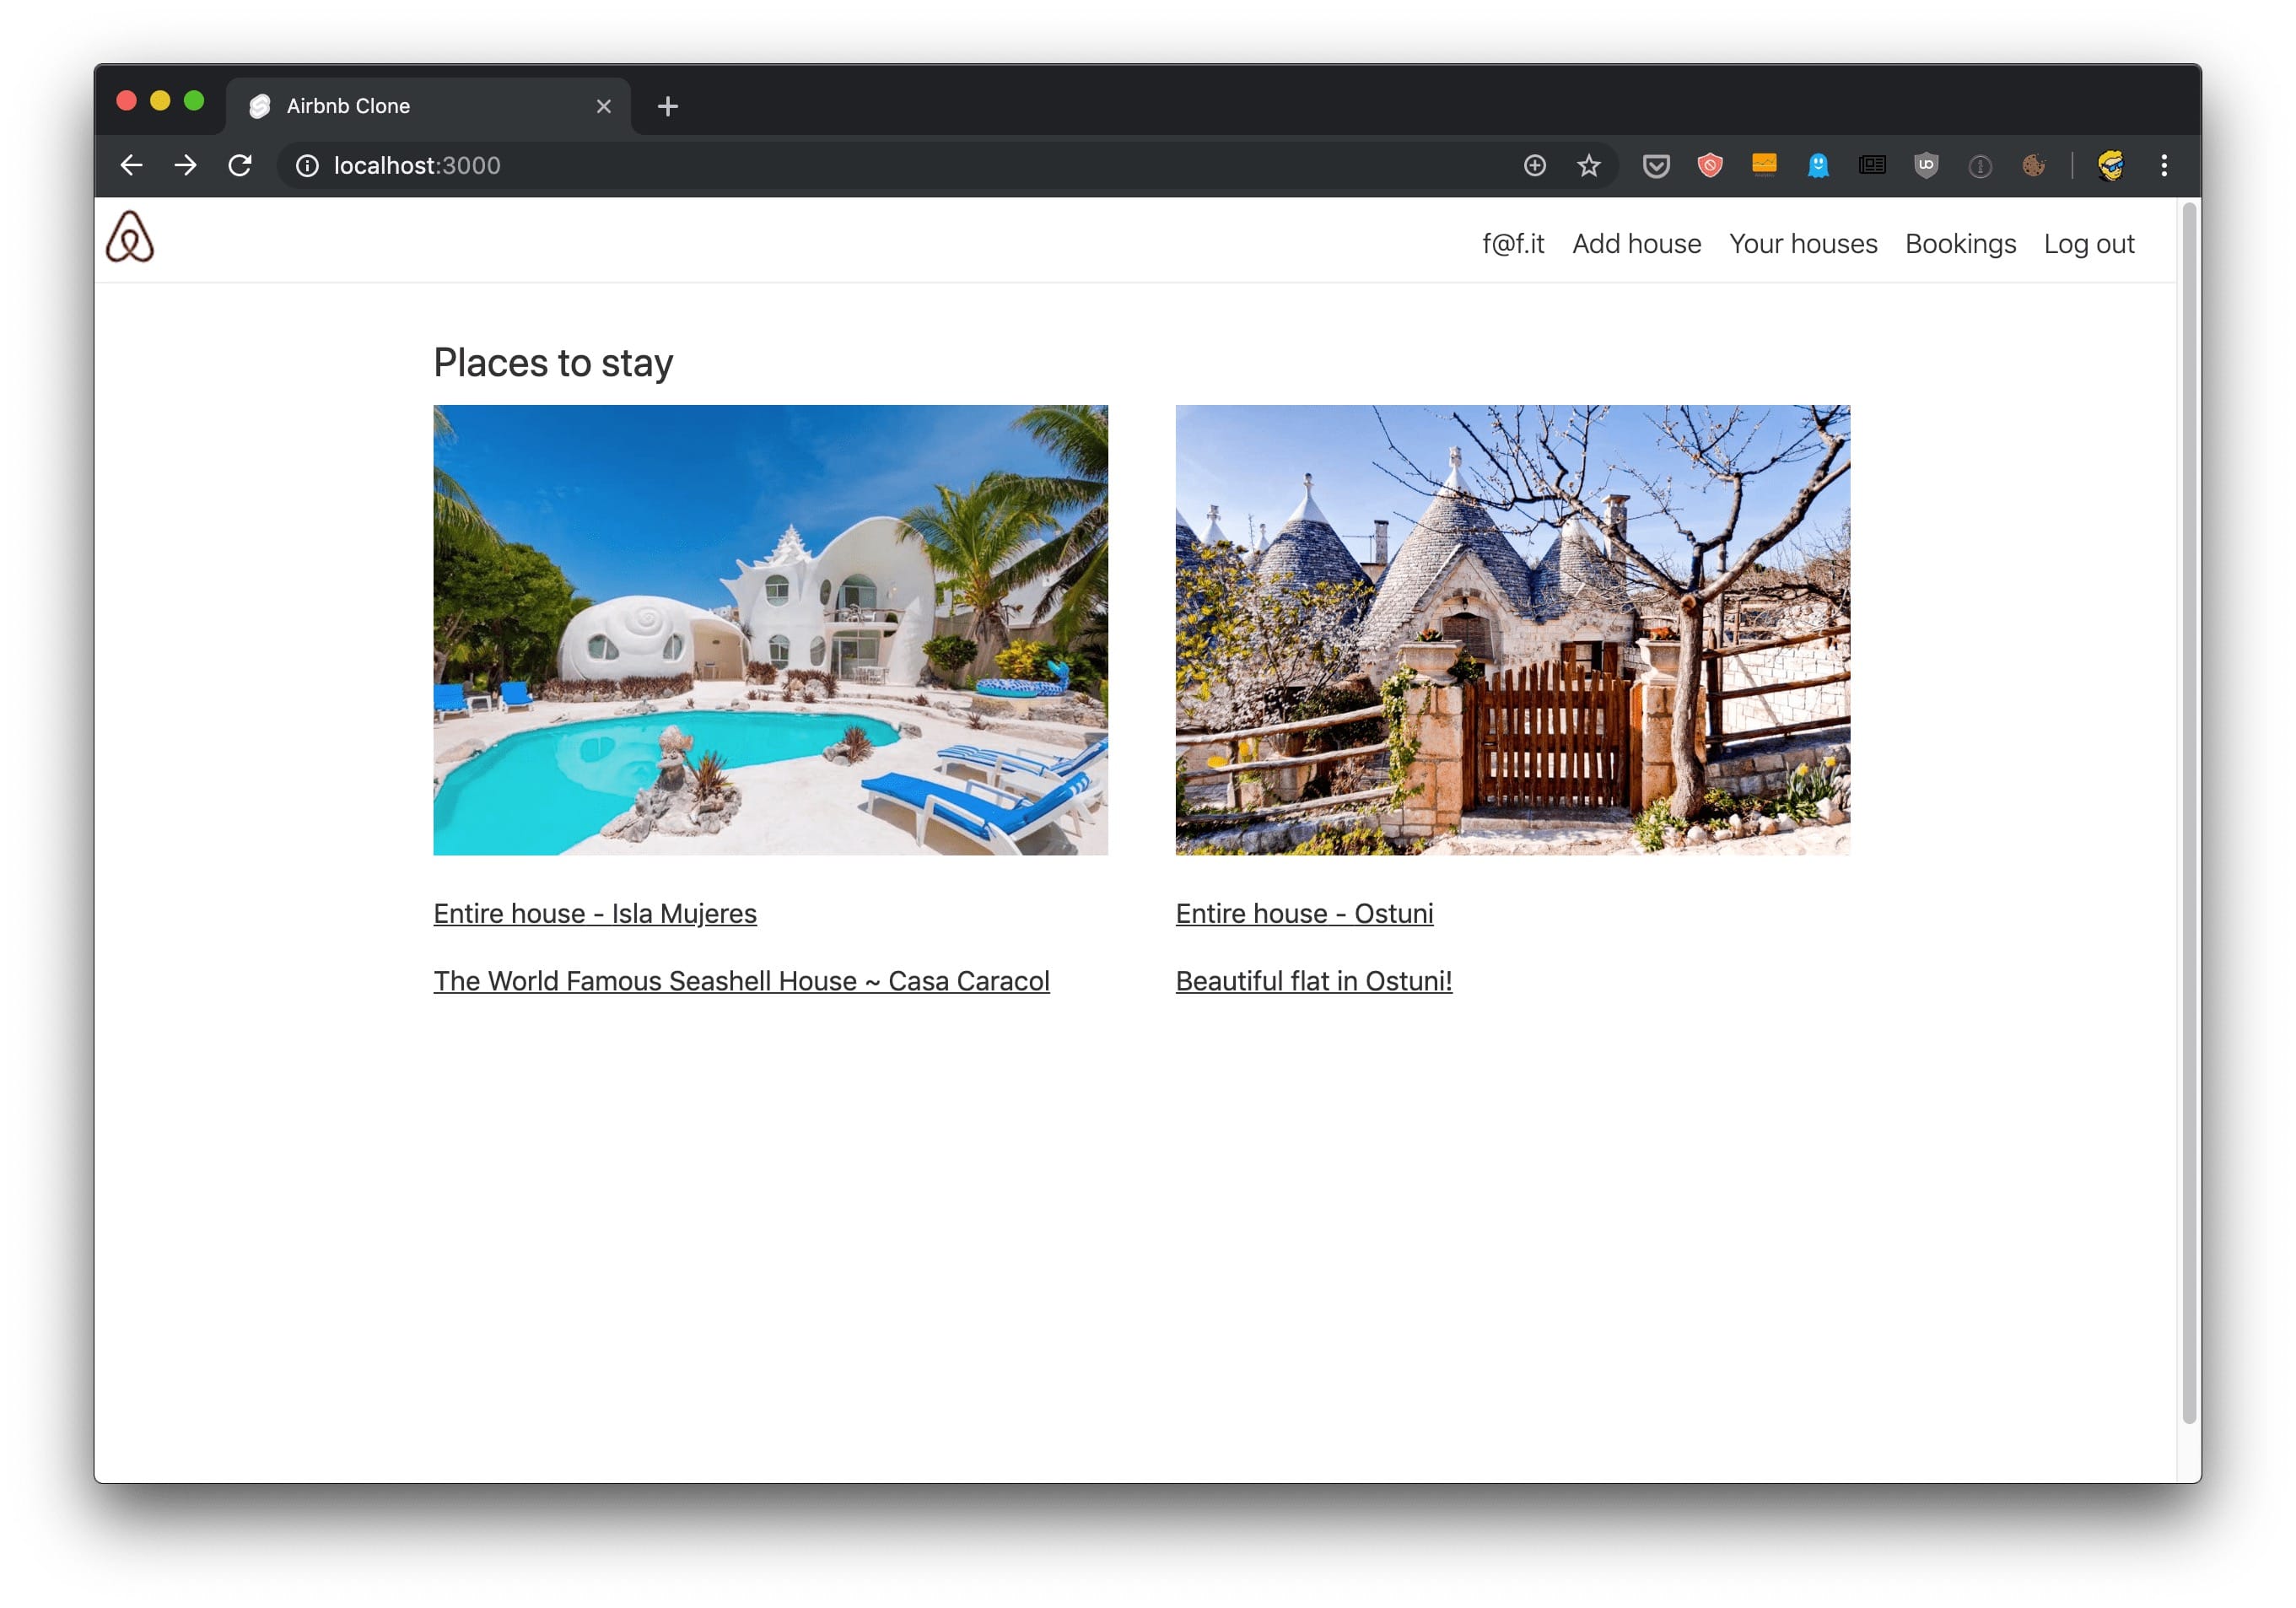
Now let’s take a look at the original Airbnb stays listing, which at this time looks something like this:
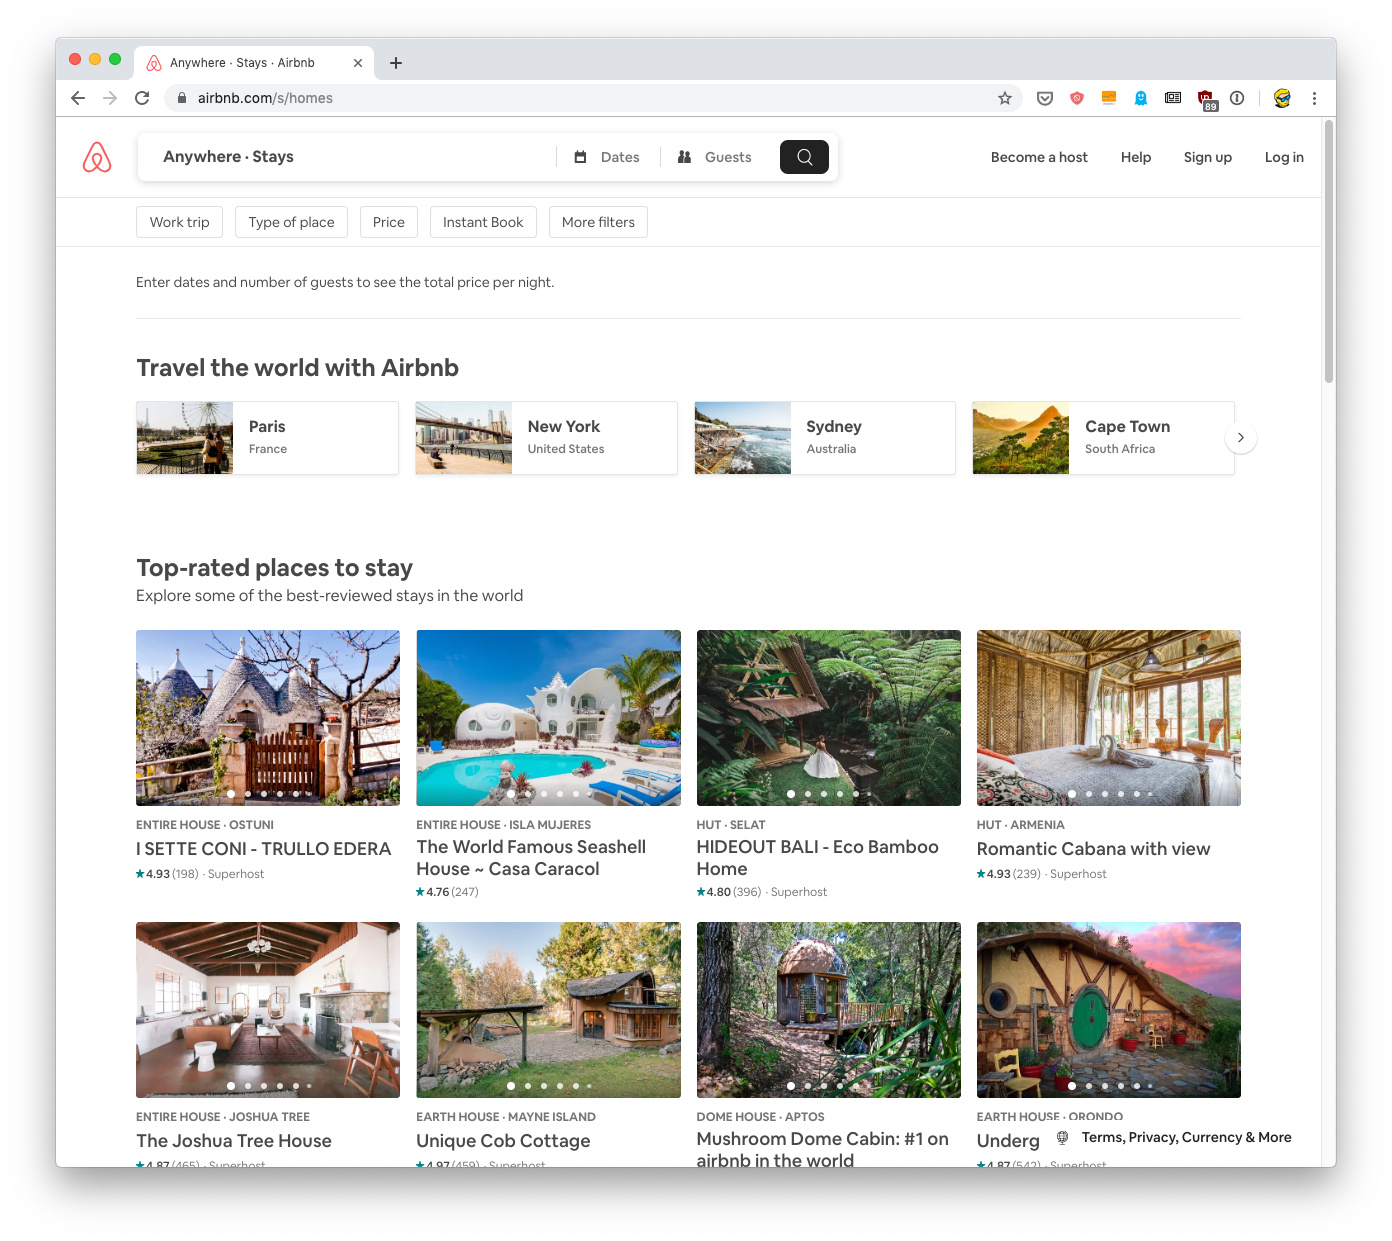
I’d like to create something similar. Not pixel perfect, of course. I just want to implement similar functionality, but since I’m not a designer, I’m also going to borrow some of the style used here. We’ll adhere to that as much as possible without going too crazy about that.
The first thing we’re going to do is, we are going to define 2 houses. We’ll do that in a JavaScript file which I’m going to call houses.js , in the root folder of the project
Inside this file, we’ll define a houses array with 2 entries, which contain data I got from the Airbnb homepage I opened in my browser. You can add any data you want, of course. I copied the default picture of 2 houses and stored them in the public/img/ folder (create it in your project), with some details about the houses, which we’ll use to build the houses list:
houses.js
export default [
  {
    picture: '/img/1.jpg',
    type: 'Entire house',
    town: 'New York',
    title: 'Beautiful flat in New York!',
  },
  {
    picture: '/img/2.jpg',
    type: 'Entire house',
    town: 'Amsterdam',
    title: 'A flat in Amsterdam with a great view',
  },
]
I used the images from https://unsplash.com/photos/uY2kic9wlmc and https://unsplash.com/photos/sqc9yv6iueE, and I copied them in the public/img folder.
Files in the
publicfolder are automatically served statically by Next.js. You can immediately see the house image by opening your browser at http://localhost:3000/img/1.jpg
Later on, we’ll extract houses from the database instead of this JSON file, but for the time being let’s stick to this static catalog.
Let’s switch back to our pages/index.js file.
Now we can import this JSON into our page component using the syntax
pages/index.js
import houses from '../houses.js'
Now we can iterate over those houses in our component JSX, wrapping all of them in a div with class houses :
pages/index.js
import houses from '../houses.js'

export default function Home() {
  return (
    <div>
      <h2>Places to stay</h2>

      <div className='houses'>
        {houses.map((house, index) => {
          //...
        })}
      </div>
    </div>
  )
}
Let’s now create a separate component to render the single house in the list.
Create a new components folder in the project root.
Let’s create a House.js file in here, and just return a basic “House” text from it:
components/House.js
export default function House() {
  return (
    <div>
      <h2>House</h2>
    </div>
  )
}
In pages/index.js we can now import it:
pages/index.js
import House from '../components/House'
and we can use it inside the JSX to render it for every house in the houses array:
pages/index.js
{
  houses.map((house, index) => {
    return <House key={index} {...house} />
  })
}
We pass all the house properties as props using the {...house} syntax.
We also add a key inside the list, because React wants that property in all lists, otherwise it will complain with warnings in the devtools.
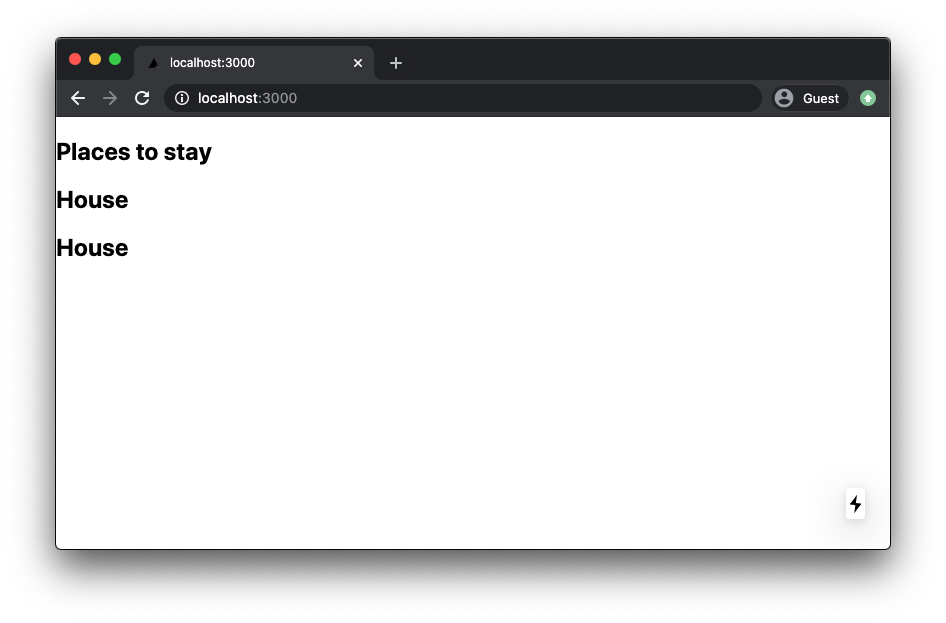
This is what you should see now in the browser:
Now open the components/House.js file and accept the props argument, then log its content before returning the JSX:
components/House.js
export default function House(props) {
  console.log(props)

  return (
    <div>
      <h2>House</h2>
    </div>
  )
}
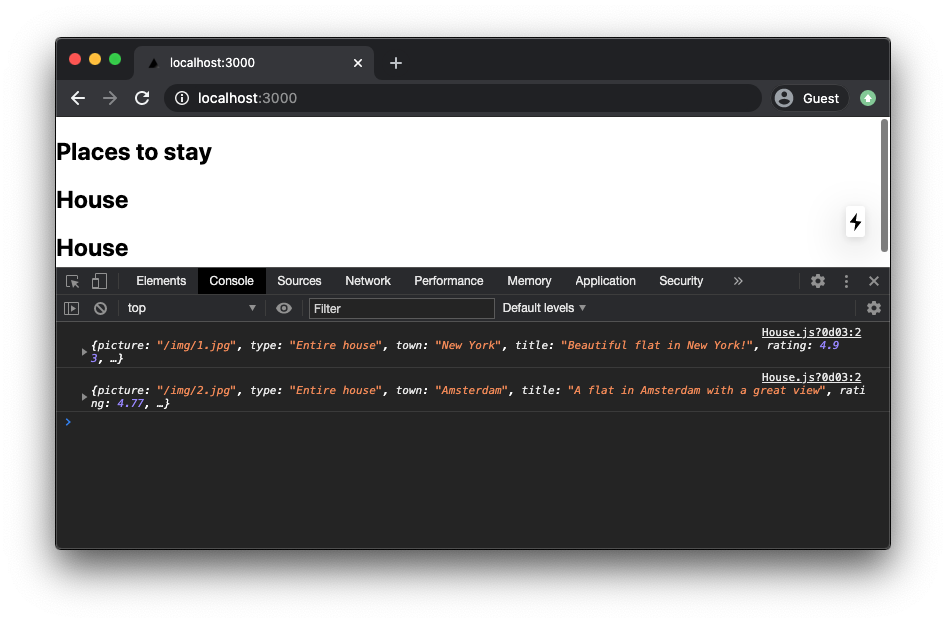
If you open the browser console, you should see this:
Now that we have those props coming in, we can render them in the output of the component:
components/House.js
export default function House(props) {
  return (
    <div>
      <img src={props.picture} width='100%' alt='House picture' />
      <p>
        {props.type} - {props.town}
      </p>
      <p>{props.title}</p>
    </div>
  )
}
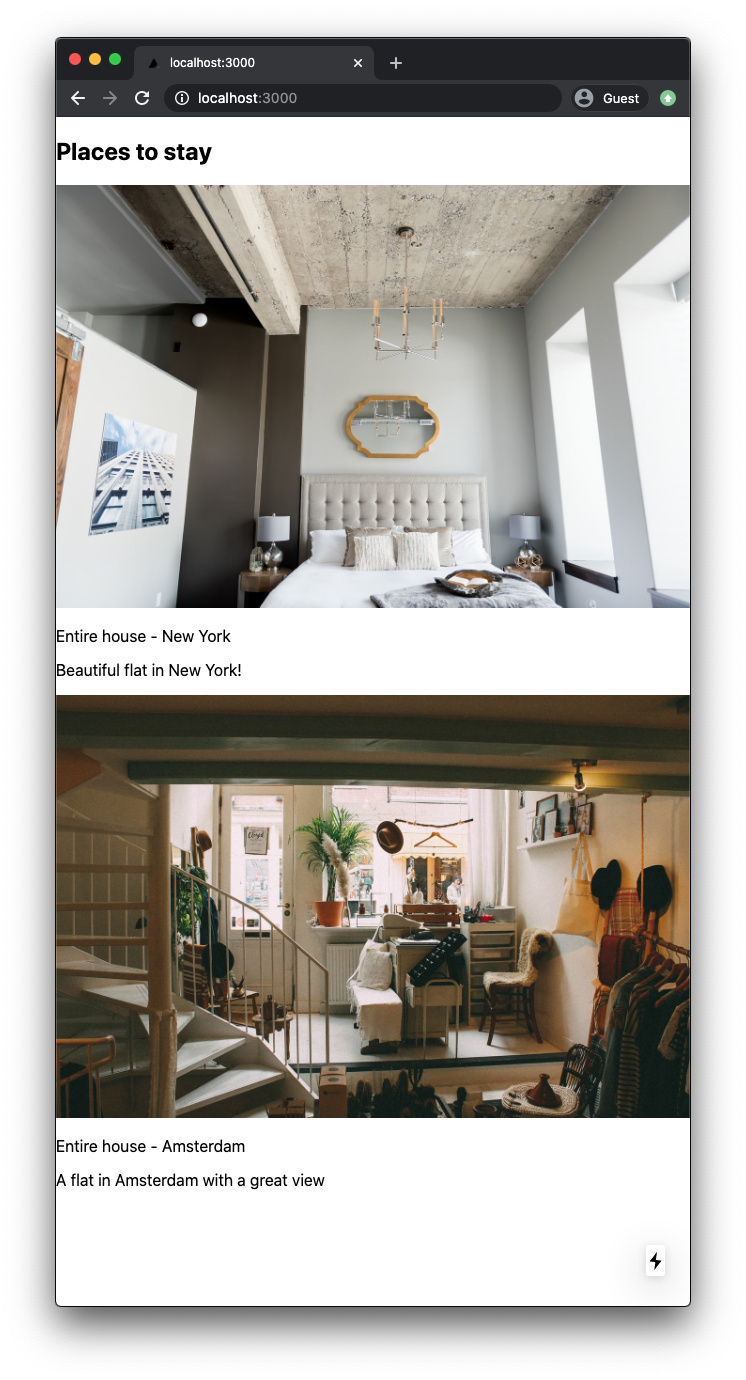
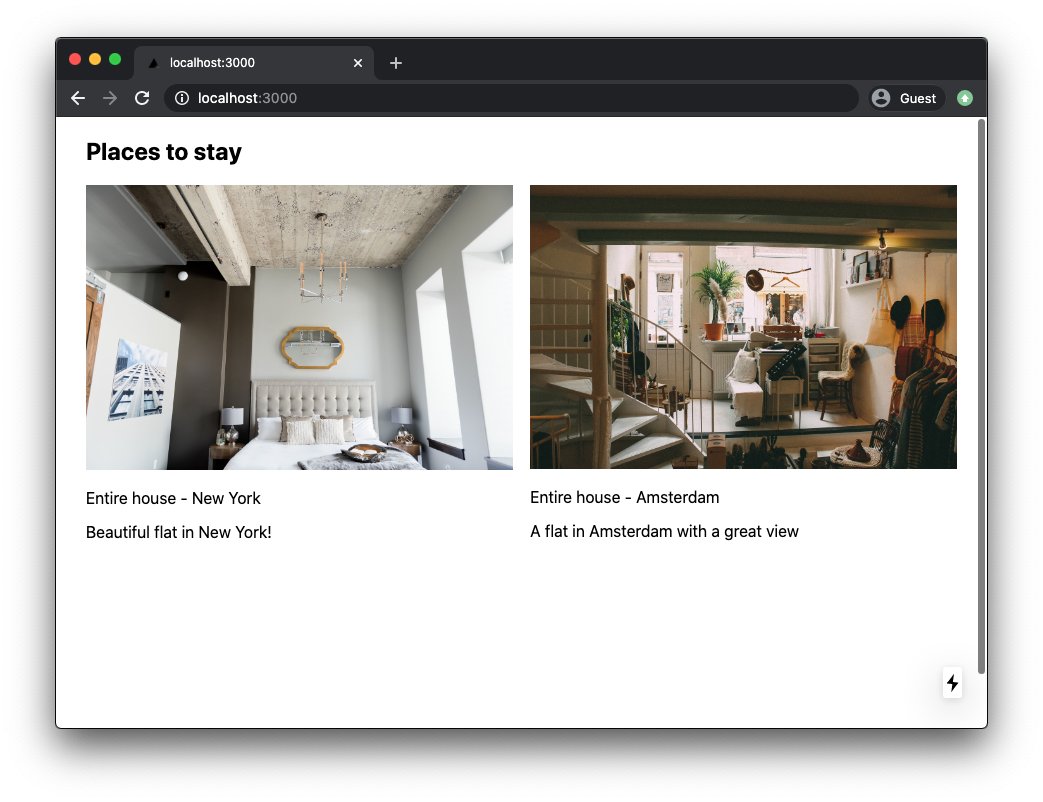
Now the home page of the site should look similar to this:
Using Next.js we have the ability to use styled-jsx in our components, to add scoped CSS (CSS that is applied only to the component it’s added to, and does not leak outside).
Let’s use CSS Grid to style this list a little bit better. In pages/index.js , add the following block inside the JSX:
pages/index.js
<style jsx>{`
  .houses {
    display: grid;
    grid-template-columns: 49% 49%;
    grid-template-rows: 300px 300px;
    grid-gap: 2%;
  }
`}</style>
Like this:
pages/index.js
import houses from '../houses.js'
import House from '../components/House'

export default function Home() {
  return (
    <div>
      <h2>Places to stay</h2>

      <div className='houses'>
        {houses.map((house, index) => {
          return <House key={index} {...house} />
        })}
      </div>

      <style jsx>{`
        .houses {
          display: grid;
          grid-template-columns: 49% 49%;
          grid-template-rows: 300px 300px;
          grid-gap: 2%;
        }
      `}</style>
    </div>
  )
}
Also add this line of CSS:
body {
  padding-left: 30px;
  padding-right: 30px;
}
to the styles/global.css .
This should be the result of all our work in this module:
The code for this lesson is available at https://github.com/flaviocopes/airbnb-clone-react-nextjs-2020/tree/2-2
HOUSE DETAIL VIEW
In the previous lesson we generated a list of houses.
In this lesson the goal is to make each of them clickable, and once clicked, we’ll transition the page to a new URL, which contains the ID of the house, and the site should show us a detail view.
The list will disappear and instead we’ll get more details about the house we selected.
First, I’m going to assign an id number to each house in the houses.js file:
houses.js
export default [
  {
    id: 1,
    picture: '/img/1.jpg',
    type: 'Entire house',
    town: 'New York',
    title: 'Beautiful flat in New York!',
  },
  {
    id: 2,
    picture: '/img/2.jpg',
    type: 'Entire house',
    town: 'Amsterdam',
    title: 'A flat in Amsterdam with a great view',
  },
]
Then we’ll use this id to build a unique URL to each house, like /house/1 and /house/2 .
Let’s add a link to a house from the components/House.js component, which now has this content:
components/House.js
export default function House(props) {
  return (
    <div>
      <img src={props.picture} width='100%' alt='House picture' />
      <p>
        {props.type} - {props.town}
      </p>
      <p>{props.title}</p>
    </div>
  )
}
Normally, to add a link we’d use the HTML a tag.
Not in Next.js.
Well, we could use the a tag, but then client-side navigation will not work, and instead we’ll get the normal full page reload when nagivating across different pages. Next.js is great because a site using it will have that immediate feel, that fast feel that we can get using client side rendering.
Let’s import the Link component, the one that can help us with this problem.
components/House.js
import Link from 'next/link'
Then to link to a house, we wrap all inside an a tag, and we wrap this tag inside a Link tag, which will come with 2 attributes, href and as , which determine the page component that will be used and the URL:
components/House.js
import Link from 'next/link'

export default function House(props) {
  return (
    <Link href='/houses/[id]' as={'/houses/' + props.id}>
      <a>
        <img src={props.picture} width='100%' alt='House picture' />
        <p>
          {props.type} - {props.town}
        </p>
        <p>{props.title}</p>
      </a>
    </Link>
  )
}
Now houses in the list are a link to the detail page.
Clicking the link won’t get us anywhere right now. We still need to build that detail page URL.
Now, let’s add more information to each house. We’re going to have a detail view, and this detail view will display more information. I am only going to update the first house (we’ll test our interface with that), and we’ll use the second to make sure the house page renders nicely even if we don’t have all the information.
I am going to add the following fields:
-
descriptioncontains an HTML string to render as the house description, which now is just a placeholder -
gueststhe number of guests the house can host
houses.js
export default [
  {
    id: 1,
    picture: '/img/1.jpg',
    type: 'Entire house',
    town: 'New York',
    title: 'Beautiful flat in New York!',
    description:
      'Sed ut perspiciatis unde omnis iste natus error sit voluptatem accusantium doloremque laudantium, totam rem aperiam, eaque ipsa quae ab illo inventore veritatis et quasi architecto beatae vitae dicta sunt explicabo. Nemo enim ipsam voluptatem quia voluptas sit aspernatur aut odit aut fugit, sed quia consequuntur magni dolores eos qui ratione voluptatem sequi nesciunt. Neque porro quisquam est, qui dolorem ipsum quia dolor sit amet, consectetur, adipisci velit, sed quia non numquam eius modi tempora incidunt ut labore et dolore magnam aliquam quaerat voluptatem. Ut enim ad minima veniam, quis nostrum exercitationem ullam corporis suscipit laboriosam, nisi ut aliquid ex ea commodi consequatur? Quis autem vel eum iure reprehenderit qui in ea voluptate velit esse quam nihil molestiae consequatur, vel illum qui dolorem eum fugiat quo voluptas nulla pariatur',
    guests: 4,
  },
  {
    id: 2,
    picture: '/img/2.jpg',
    type: 'Entire house',
    town: 'Amsterdam',
    title: 'A flat in Amsterdam with a great view',
    description:
      'Sed ut perspiciatis unde omnis iste natus error sit voluptatem accusantium doloremque laudantium, totam rem aperiam, eaque ipsa quae ab illo inventore veritatis et quasi architecto beatae vitae dicta sunt explicabo. Nemo enim ipsam voluptatem quia voluptas sit aspernatur aut odit aut fugit, sed quia consequuntur magni dolores eos qui ratione voluptatem sequi nesciunt. Neque porro quisquam est, qui dolorem ipsum quia dolor sit amet, consectetur, adipisci velit, sed quia non numquam eius modi tempora incidunt ut labore et dolore magnam aliquam quaerat voluptatem. Ut enim ad minima veniam, quis nostrum exercitationem ullam corporis suscipit laboriosam, nisi ut aliquid ex ea commodi consequatur? Quis autem vel eum iure reprehenderit qui in ea voluptate velit esse quam nihil molestiae consequatur, vel illum qui dolorem eum fugiat quo voluptas nulla pariatur',
    guests: 4,
  },
]
Let’s now create the template for the single house. We’re going to do so in a file pages/houses/[id].js . The name is a bit weird, right? But there’s a reason. Next.js will use it any time the URL point to that /houses path, and has a path that points to an ID, like /houses/2 .
Create the pages/houses/[id].js file with this content:
pages/houses/[id].js
export default function House() {
  return (
    <div>
      <p>Test</p>
    </div>
  )
}
Then manually point your browser to open that /houses/2 URL:
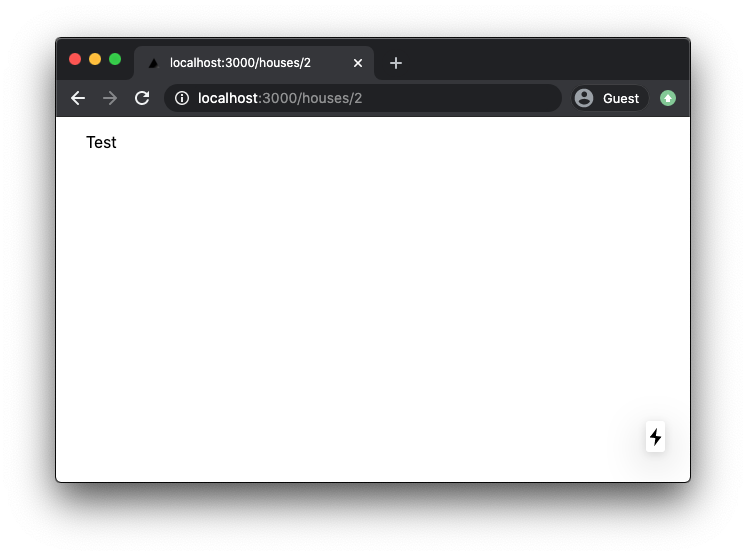
If the number in the URL changes, like /houses/1 , it does not matter - the same component will render, but with different data. This is called a dynamic page .
Now we must add a function in this file, called getServerSideProps .
The job of this function is to retrieve the house id from the URL, and look it up in the data (our JSON file, at the moment), and return it.
Everything returned from this function will be available as part of the component props .
Let’s start by defining it:
pages/houses/[id].js
export async function getServerSideProps() {}
This function gets a context object which has the query property. We just need this at the moment, so we can use object destructuring to retrieve it in the parameters:
pages/houses/[id].js
export async function getServerSideProps({ query }) {
  console.log(query)
}
If you open the browser now, you’ll see an error - Next.js expects this to return an object with a props property, so let’s return it:
pages/houses/[id].js
export async function getServerSideProps({ query }) {
  console.log(query)
  return { props: {} }
}
The terminal will now list the id you called the page with, for example { id: '2329' } if the page URL was http://localhost:3000/houses/2329 .
Now let’s get the id value, and we can use it to filter the house from the JSON file that holds all the houses data:
pages/houses/[id].js
import houses from '../../houses.js'

//

export async function getServerSideProps({ query }) {
  const { id } = query

  return {
    props: {
      house: houses.filter((house) => house.id === parseInt(id))[0],
    },
  }
}
Great! Now we can reference the house object in the component props:
pages/houses/[id].js
import houses from '../../houses.js'

export default function House(props) {
  return (
    <div>
      <p>{props.house.title}</p>
    </div>
  )
}

export async function getServerSideProps({ query }) {
  const { id } = query

  return {
    props: {
      house: houses.filter((house) => house.id === parseInt(id))[0],
    },
  }
}
Now we can write the exact same template we used in the list, previously, except every field is now prepended with house. :
pages/houses/[id].js
import houses from '../houses.js'

const House = (props) => (
  <div>
    <img src={props.house.picture} width='100%' alt='House picture' />
    <p>
      {props.house.type} - {props.house.town}
    </p>
    <p>{props.house.title}</p>
  </div>
)

House.getInitialProps = ({ query }) => {
  const { id } = query

  return {
    house: houses.filter((house) => house.id === id)[0],
  }
}

export default House
Here’s the result so far:
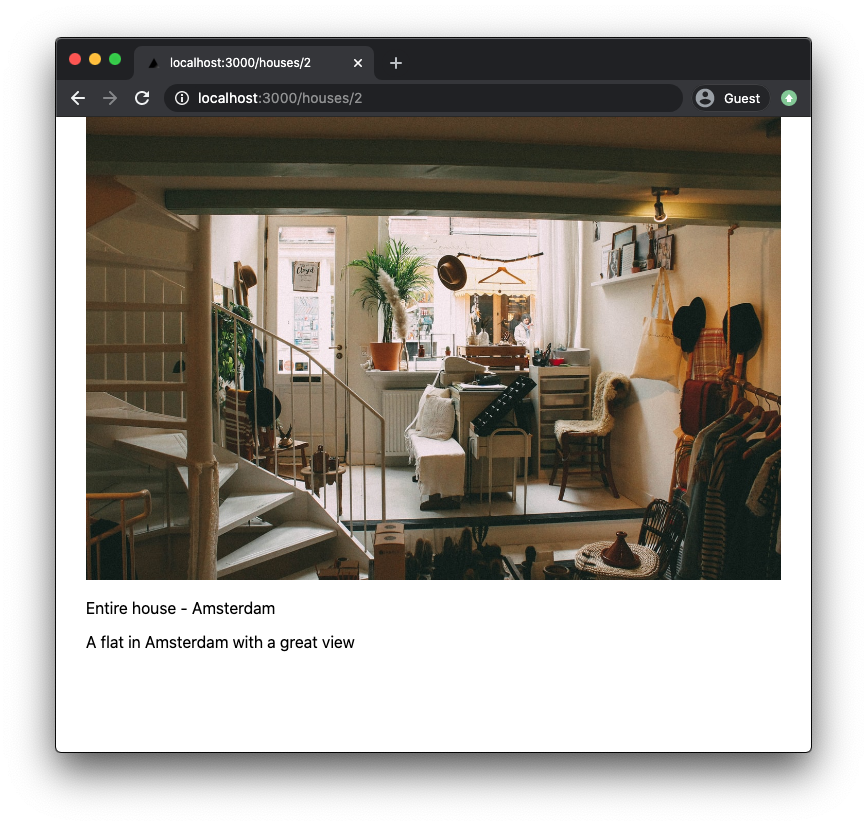
Make sure you hit a URL that points to one of the id we added in the JSON, like http://localhost:3000/houses/2 .
You can go to the homepage and then click one of the houses, then click the back button (or the Home link) and click another house, you’ll see both the URL and the page content change.
The thing I want to do now is: improve the template.
First, we’re going to use the house title as the title of the page.
We import the Head component from next/head :
pages/houses/[id].js
import Head from 'next/head'
then inside the component JSX we can include this component with a title tag inside, which will add it to the page head section during rendering:
pages/houses/[id].js
import Head from 'next/head'
import houses from '../../houses.js'

export default function House(props) {
  return (
    <div>
      <Head>
        <title>{props.house.title}</title>
      </Head>
      <img src={props.house.picture} width='100%' alt='House picture' />
      <p>
        {props.house.type} - {props.house.town}
      </p>
      <p>{props.house.title}</p>
    </div>
  )
}

export async function getServerSideProps({ query }) {
  const { id } = query

  return {
    props: {
      house: houses.filter((house) => house.id === parseInt(id))[0],
    },
  }
}
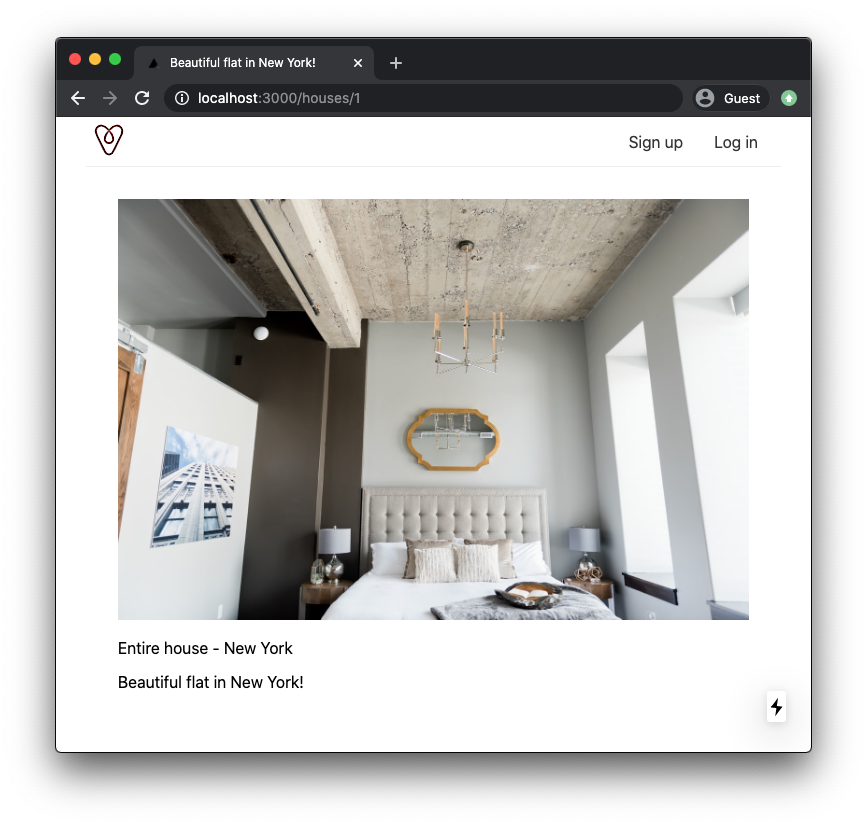
This is the result:
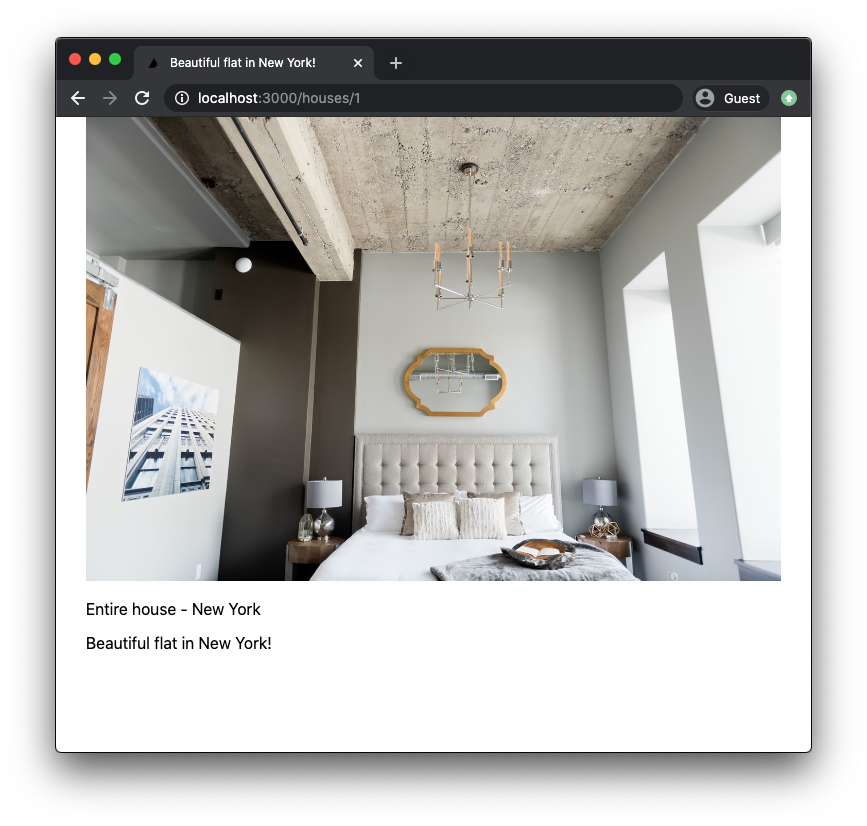
Awesome!
The code for this lesson is available at https://github.com/flaviocopes/airbnb-clone-react-nextjs-2020/tree/2-3
CSS AND NAVIGATION BAR
What we did up to now is pretty cool!
In this lesson we’ll add a navigation bar to the page, and we’ll also add some styling to make the app look nicer.
First, I’m going to add a logo image in public/img/logo.png . It reminds the Airbnb logo, just upside down and with a different color:
![]()
Feel free to use any image you want.
I’m going to include this image in the header, which will be present in every page.
Let’s create a new file in the components directory, called Layout.js .
In there, we’ll create the shell of our application: we’ll include it in every page component to provide common UI, including basic CSS and the heading.
In this component we take the props, and we render the content props in a main tag:
components/Layout.js
export default function Layout(props) {
  return (
    <div>
      <main>{props.content}</main>
    </div>
  )
}
Then in the pages/index.js and pages/houses/[id].js we import this Layout component, and we return that component, passing the JSX as its content prop:
pages/index.js
import houses from '../houses.js'
import House from '../components/House'
import Layout from '../components/Layout'

const content = (
  <div>
    <h2>Places to stay</h2>

    <div className='houses'>
      {houses.map((house, index) => {
        return <House key={index} {...house} />
      })}
    </div>

    <style jsx>{`
      .houses {
        display: grid;
        grid-template-columns: 49% 49%;
        grid-template-rows: 300px 300px;
        grid-gap: 2%;
      }
    `}</style>
  </div>
)

export default function Home() {
  return <Layout content={content} />
}
See? We have wrapped our JSX in a content variable, and we pass that to the Layout component content prop, so we can access it in components/Layout.js .
Now we can do the same for the other page component we have, pages/houses/[id].js . In there, we do things a little differently: instead of creating a content variable, we directly put the component JSX inside the content prop:
pages/houses/[id].js
import Head from 'next/head'
import houses from '../../houses.js'
import Layout from '../../components/Layout'

export default function House(props) {
  return (
    <Layout
      content={
        <div>
          <Head>
            <title>{props.house.title}</title>
          </Head>
          <img src={props.house.picture} width='100%' alt='House picture' />
          <p>
            {props.house.type} - {props.house.town}
          </p>
          <p>{props.house.title}</p>
        </div>
      }
    />
  )
}

export async function getServerSideProps({ query }) {
  const { id } = query

  return {
    props: {
      house: houses.filter((house) => house.id === parseInt(id))[0],
    },
  }
}
Why? Because in this component JSX we access the props values, so we can’t define the JSX outside of the component. I could have also written
pages/houses/[id].js
export default function House(props) {
  const content = (
    <div>
      <Head>
        <title>{props.house.title}</title>
      </Head>
      <img src={props.house.picture} width='100%' alt='House picture' />
      <p>
        {props.house.type} - {props.house.town}
      </p>
      <p>{props.house.title}</p>
    </div>
  )

  return <Layout content={content} />
}
but it’s mostly the same, and I think a little bit more complicated to grasp at a first look.
Cool! So now we have both pages use the Layout component as their base.
We can now go back to it, and we add a little bit of CSS, using styled-jsx :
components/Layout.js
export default function Layout(props) {
  return (
    <div>
      <main>{props.content}</main>

      <style jsx>{`
        main {
          position: relative;
          max-width: 56em;
          background-color: white;
          padding: 2em;
          margin: 0 auto;
          box-sizing: border-box;
        }
      `}</style>
    </div>
  )
}
Now, I’m going to add a header to the page. I’ll do that in a separate component, which I call Header.js , and I place it into the components folder.
Here’s a start, we include the logo and a first nav container for a couple links we’re going to add later:
components/Header.js
export default function Header(props) {
  return (
    <div className='nav-container'>
      <img src='/img/logo.png' alt='' />

      <nav></nav>

      <style jsx>{`
        .nav-container {
          border-bottom: 1px solid #eee;
          height: 50px;
        }

        img {
          float: left;
        }
      `}</style>
    </div>
  )
}
Now let’s add those links I was talking about. I add two links, one is Sign up and the other is Log in . We’ll use them soon. I also make the logo link to the home page. I also add some CSS to style them nicely:
components/Header.js
import Link from 'next/link'

export default function Header(props) {
  return (
    <div className='nav-container'>
      <Link href='/'>
        <a>
          <img src='/img/logo.png' alt='' />
        </a>
      </Link>

      <nav>
        <ul>
          <li>
            <Link href='/register'>
              <a>Sign up</a>
            </Link>
          </li>
          <li>
            <Link href='/login'>
              <a>Log in</a>
            </Link>
          </li>
        </ul>
      </nav>

      <style jsx>{`
        ul {
          margin: 0;
          padding: 0;
        }

        li {
          display: block;
          float: left;
        }

        a {
          text-decoration: none;
          display: block;
          margin-right: 15px;
          color: #333;
        }

        nav a {
          padding: 1em 0.5em;
        }

        .nav-container {
          border-bottom: 1px solid #eee;
          height: 50px;
        }

        img {
          float: left;
        }

        ul {
          float: right;
        }
      `}</style>
    </div>
  )
}
Now in Layout.js , import and include the Header component:
import Header from './Header'

export default function Layout(props) {
  return (
    <div>
      <Header />
      <main>{props.content}</main>
      <style jsx>{`
        main {
          position: relative;
          max-width: 56em;
          background-color: white;
          padding: 2em;
          margin: 0 auto;
          box-sizing: border-box;
        }
      `}</style>
    </div>
  )
}
Awesome! This should be the end result so far:
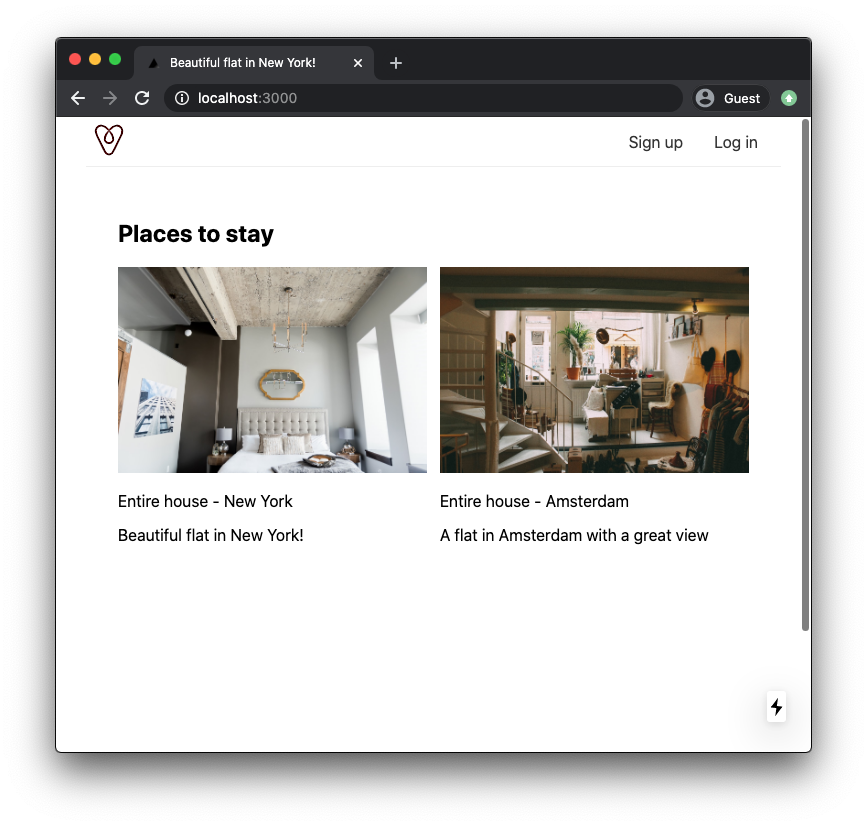
The code for this lesson is available at https://github.com/flaviocopes/airbnb-clone-react-nextjs-2020/tree/2-4