INTRODUCTION
In this module we’re going to add a date picker to the single house page.
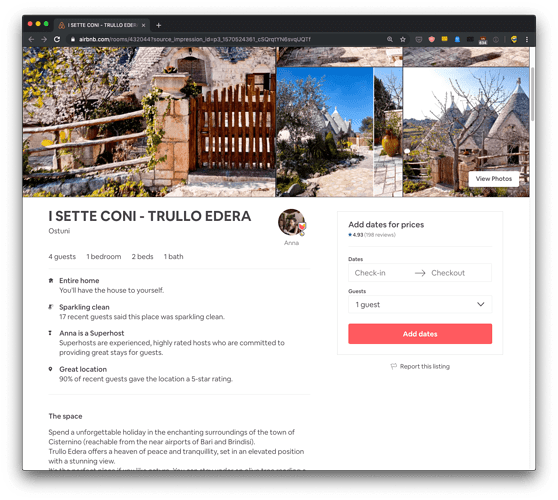
On Airbnb on a single house page you can see a date picker. You need to enter the dates to display the prices:
here is what happens when you click the “Check-in” box, a date picker appears:
I want to add something similar.
We’ll start simple, in this module what I want to do is to show a similar view, just for the dates, with a start and end date. We’ll display a date picker when we click the check-in and check-out inputs, and we’ll let the person choose 2 dates.
With some rules:
- the start date can’t be in the past
- the end date can’t be today
- the end date can’t be before the start date
- when we change the start date, the end date will point to the day after it, unless the end date is still a valid one (e.g. it’s still after the start date)
We’ll use a pre-built date picker, and we’ll build all our logic around that.
Let’s start!
ADD THE SIDEBAR
The first thing I want to do here is to add a sidebar to the single house page.
Here’s Airbnb:
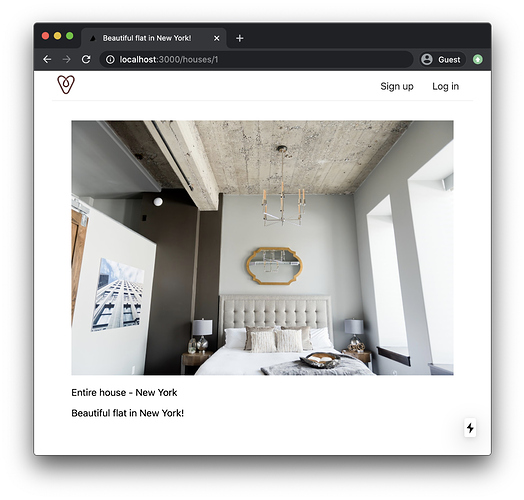
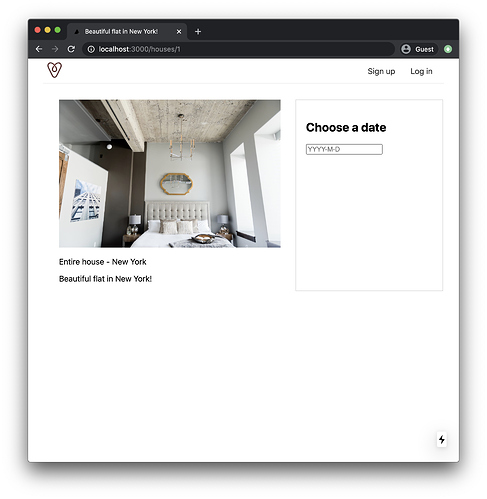
and here’s our page now:
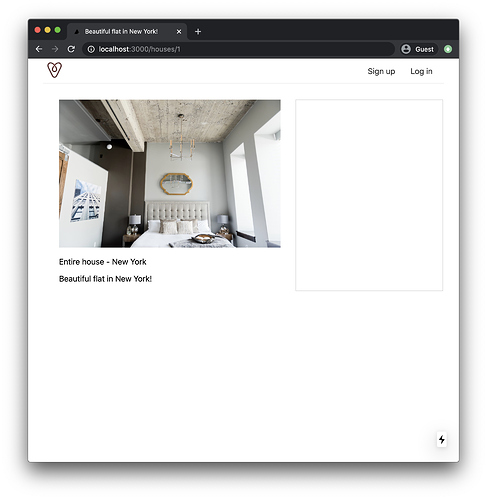
I want to add a little sidebar in our page, to host the calendar.
The first thing we’ll do is the markup.
Right now this is the markup generated by the pages/houses/[id].js page:
pages/houses/[id].js
export default function House(props) {
  return (
    <Layout
      content={
        <div>
          <Head>
            <title>{props.house.title}</title>
          </Head>
          <img src={props.house.picture} width='100%' alt='House picture' />
          <p>
            {props.house.type} - {props.house.town}
          </p>
          <p>{props.house.title}</p>
        </div>
      }
    />
  )
}
I want to wrap all this content in a article tag, and add an aside tag, at the end of the <div> container (I’m also going to assign a container class to it):
pages/houses/[id].js
export default function House(props) {
  return (
    <Layout
      content={
        <div className='container'>
          <Head>
            <title>{props.house.title}</title>
          </Head>
          <article>
            <img src={props.house.picture} width='100%' alt='House picture' />
            <p>
              {props.house.type} - {props.house.town}
            </p>
            <p>{props.house.title}</p>
          </article>
          <aside></aside>
        </div>
      }
    />
  )
}
The aside tag is generally used to add a piece of content that is related to the main content. In our case, it’s perfect.
Let’s add some CSS to make the main part of the page and the aside align like in the Airbnb page:
<style jsx>{`
  .container {
    display: grid;
    grid-template-columns: 60% 40%;
    grid-gap: 30px;
  }

  aside {
    border: 1px solid #ccc;
    padding: 20px;
  }
`}</style>
Here’s the full code of pages/houses/[id].js right now:
pages/houses/[id].js
import Head from 'next/head'
import houses from '../../houses.js'
import Layout from '../../components/Layout'

export default function House(props) {
  return (
    <Layout
      content={
        <div className='container'>
          <Head>
            <title>{props.house.title}</title>
          </Head>
          <article>
            <img src={props.house.picture} width='100%' alt='House picture' />
            <p>
              {props.house.type} - {props.house.town}
            </p>
            <p>{props.house.title}</p>
          </article>
          <aside></aside>

          <style jsx>{`
            .container {
              display: grid;
              grid-template-columns: 60% 40%;
              grid-gap: 30px;
            }

            aside {
              border: 1px solid #ccc;
              padding: 20px;
            }
          `}</style>
        </div>
      }
    />
  )
}

export async function getServerSideProps({ query }) {
  const { id } = query

  return {
    props: {
      house: houses.filter((house) => house.id === parseInt(id))[0],
    },
  }
}
Here’s our result:
The code for this lesson is available at https://github.com/flaviocopes/airbnb-clone-react-nextjs-2020/tree/3-2
ADD THE 3RD PART COMPONENT REACT-DAY-PICKER
As mentioned in the introduction of this module, we’re going to make use of a 3rd part component to implement the date picker.
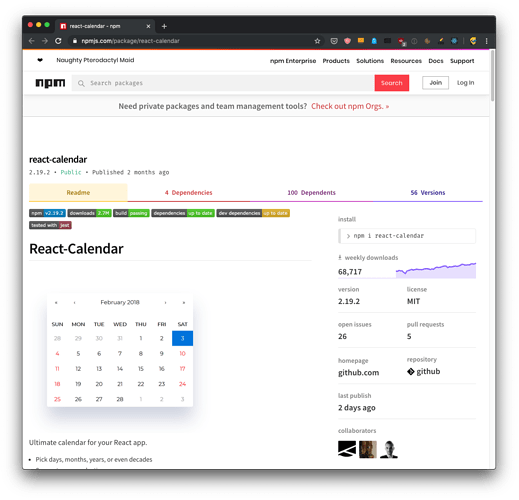
I searched “React calendar” and “React date picker” on Google, and I went on to analyze all the results.
The requirements for this date picker are quite a few.
In particular, it needs to support disabling dates, something that not every date picker does.
Eventually I settled on https://react-day-picker.js.org/ because it supports disabling dates, and it also has an extensive examples library.
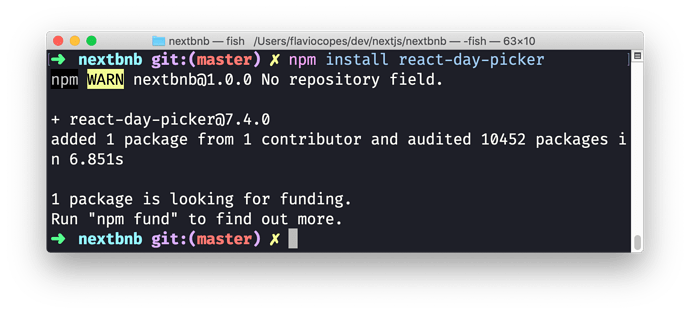
From the terminal, in the main project folder, run npm install react-day-picker .
You can run this command in a separate terminal window, or in the same one if you prefer, by killing the npm run dev command hitting ctrl-C 2 times (then, remember to run npm run dev to start Next.js again).
The code for this lesson is available at https://github.com/flaviocopes/airbnb-clone-react-nextjs-2020/tree/3-3
ADD THE CALENDAR TO THE PAGE
Now that we have the react-day-picker library in place, we can start using it.
Let’s first define a component to hold it. We call it DateRangePicker . I give it this name since we must define the range of dates for the booking.
Create a components/DateRangePicker.js file. In it, we import the react-day-picker component, and we just output a string to make sure our component displays in the page:
import DayPickerInput from 'react-day-picker/DayPickerInput'

export default function DateRangePicker() {
  return (
    <div>
      <DayPickerInput />
    </div>
  )
}
Import this in the pages/houses/[id].js file:
pages/houses/[id].js
//...
import DateRangePicker from '../../components/DateRangePicker'

export default function House(props) {
  return (
    <Layout
    content={
      <div className='container'>
        ...
        <aside>
            <h2>Choose a date</h2>
            <DateRangePicker />
        </aside>
        ...
      </div>
    }
    />
  )
)
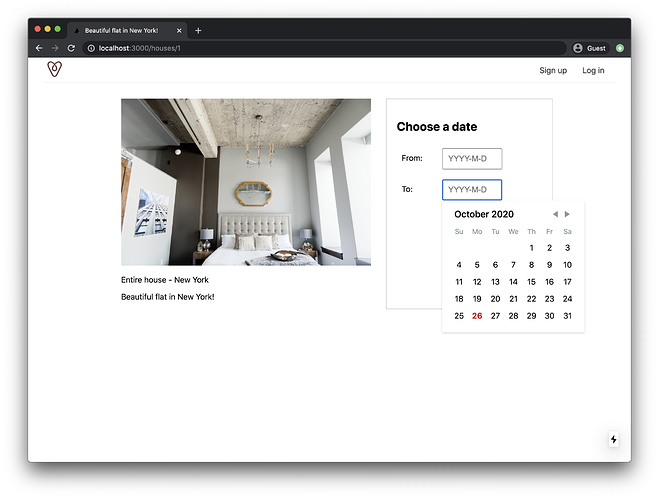
Here’s the output
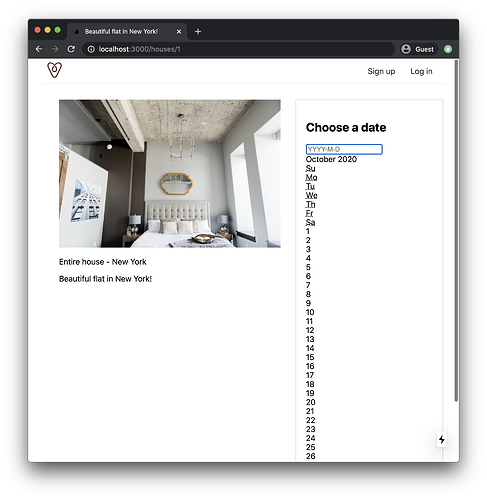
But if you click the input element, ooops:
Go back to components/DateRangePicker.js and also import the component’s CSS file provided in the npm package (not every package has a CSS file, this was mentioned in the package documentation):
components/DateRangePicker.js
import DayPickerInput from 'react-day-picker/DayPickerInput'
import 'react-day-picker/lib/style.css'

export default () => (
  <div>
    <DayPickerInput />
  </div>
)
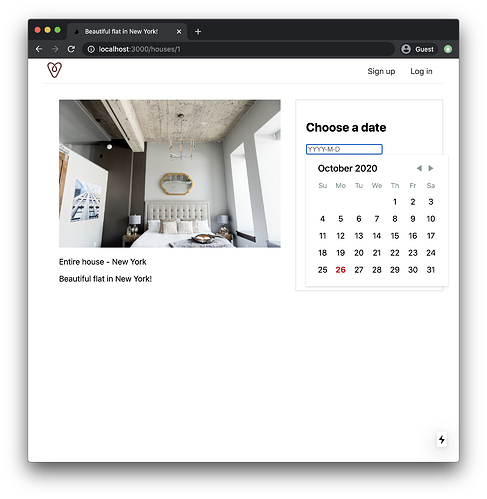
Now we’ll get the date picker rendered nicely:
Great!
Now let’s go back to our components/DateRangePicker.js file. We need to have a “check-in” box, and a “check-out” box. We can put them in 2 separate rows, with 2 labels:
export default function DateRangePicker() {
  return (
    <div className='date-range-picker-container'>
      <div>
        <label>From:</label>
        <DayPickerInput />
      </div>
      <div>
        <label>To:</label>
        <DayPickerInput />
      </div>
    </div>
  )
}
Let’s add this bit of CSS to display this markup nicely:
import DayPickerInput from 'react-day-picker/DayPickerInput'
import 'react-day-picker/lib/style.css'

export default function DateRangePicker() {
  return (
    <div className='date-range-picker-container'>
      <div>
        <label>From:</label>
        <DayPickerInput />
      </div>
      <div>
        <label>To:</label>
        <DayPickerInput />
      </div>
      <style jsx>
        {`
          .date-range-picker-container div {
            display: grid;
            grid-template-columns: 30% 70%;
            padding: 10px;
          }
          label {
            padding-top: 10px;
          }
        `}
      </style>
      <style jsx global>
        {`
          .DayPickerInput input {
            width: 120px;
            padding: 10px;
            font-size: 16px;
          }
        `}
      </style>
    </div>
  )
}
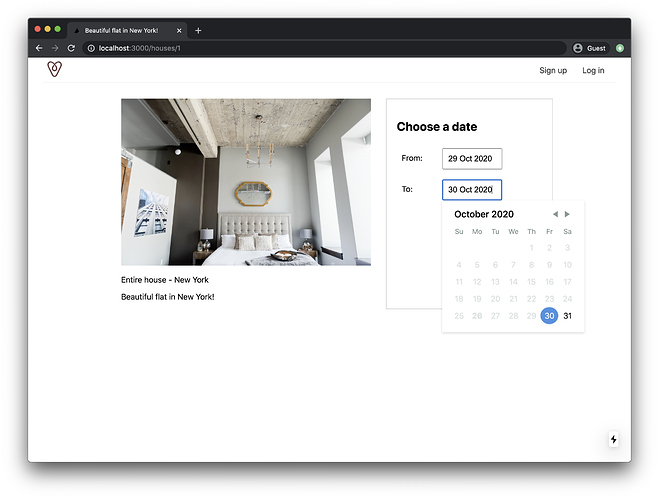
This should be the final result of our lesson:
The code for this lesson is available at https://github.com/flaviocopes/airbnb-clone-react-nextjs-2020/tree/3-4
CONFIGURE THE DAYPICKERINPUT COMPONENT
So now we are ready to configure the calendar.
Let’s start by setting the format for the dates.
I found some instructions in the date picker documentation, and I’m going to follow them.
First install date-fns . This is a library useful to handle dates.
npm install date-fns
Then we import the date-fns/format and date-fns/parse functions in the DateRangePicker.js component:
components/DateRangePicker.js
import dateFnsFormat from 'date-fns/format'
import dateFnsParse from 'date-fns/parse'
and we define the parseDate and formatDate functions:
const parseDate = (str, format, locale) => {
  const parsed = dateFnsParse(str, format, new Date(), { locale })
  return DateUtils.isDate(parsed) ? parsed : null
}

const formatDate = (date, format, locale) =>
  dateFnsFormat(date, format, { locale })
We’ll pass them to the DayPickerInput component.
We also define the format for the date. I like the format day monthname year, for example 20 Nov 2019 . This is how we define it:
const format = 'dd MMM yyyy'
Cool! Now in the JSX we change <DayPickerInput /> to
<DayPickerInput
  formatDate={formatDate}
  format={format}
  parseDate={parseDate}
  placeholder={`${dateFnsFormat(new Date(), format)}`}
/>
in the 2 places where it appears.
This is the code so far:
import DayPickerInput from 'react-day-picker/DayPickerInput'
import 'react-day-picker/lib/style.css'
import dateFnsFormat from 'date-fns/format'
import dateFnsParse from 'date-fns/parse'

const parseDate = (str, format, locale) => {
  const parsed = dateFnsParse(str, format, new Date(), { locale })
  return DateUtils.isDate(parsed) ? parsed : null
}

const formatDate = (date, format, locale) =>
  dateFnsFormat(date, format, { locale })

const format = 'dd MMM yyyy'

export default function DateRangePicker() {
  return (
    <div className='date-range-picker-container'>
      <div>
        <label>From:</label>
        <DayPickerInput
          formatDate={formatDate}
          format={format}
          parseDate={parseDate}
          placeholder={`${dateFnsFormat(new Date(), format)}`}
        />
      </div>
      <div>
        <label>To:</label>
        <DayPickerInput
          formatDate={formatDate}
          format={format}
          parseDate={parseDate}
          placeholder={`${dateFnsFormat(new Date(), format)}`}
        />
      </div>
      <style jsx>
        {`
          .date-range-picker-container div {
            display: grid;
            grid-template-columns: 30% 70%;
            padding: 10px;
          }
          label {
            padding-top: 10px;
          }
        `}
      </style>
      <style jsx global>
        {`
          .DayPickerInput input {
            width: 120px;
            padding: 10px;
            font-size: 16px;
          }
        `}
      </style>
    </div>
  )
}
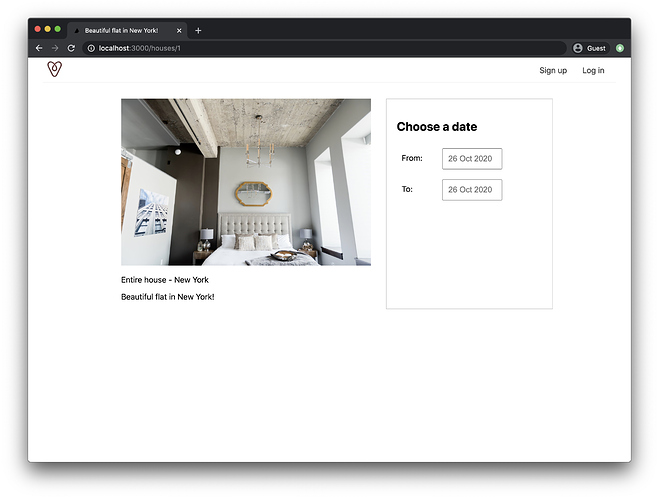
And the result:
See? The date is now displayed nicely in the date picker.
Now we need to disable the ability to select all dates in the past.
Why? Because we can’t book dates in the past. Only in the future. We can’t go back in time.
We can do so by configuring DayPickerInput . I found a guide on the official website https://react-day-picker.js.org/docs/matching-days in “Matching days with modifiers” but this was talking about the DayPicker component, which is a different one than the DayPickerInput we’re using.
DayPicker is the calendar that appears when we click the input element with the formatted date.
Turns out we can pass properties to DayPicker by using the dayPickerProps prop on DayPickerInput :
<DayPickerInput
  formatDate={formatDate}
  format={format}
  parseDate={parseDate}
  placeholder={`${dateFnsFormat(new Date(), format)}`}
  dayPickerProps={{
    modifiers: {
      disabled: {
        before: new Date(),
      },
    },
  }}
/>
This part is a little confusing, but every time we use a library, we must first understand how it works from the docs, and adapt to it. It’s always work we need to do.
In this particular case, I found the docs about dayPickerProps in this page: https://react-day-picker.js.org/docs/input, in “Customizing the DayPicker”.
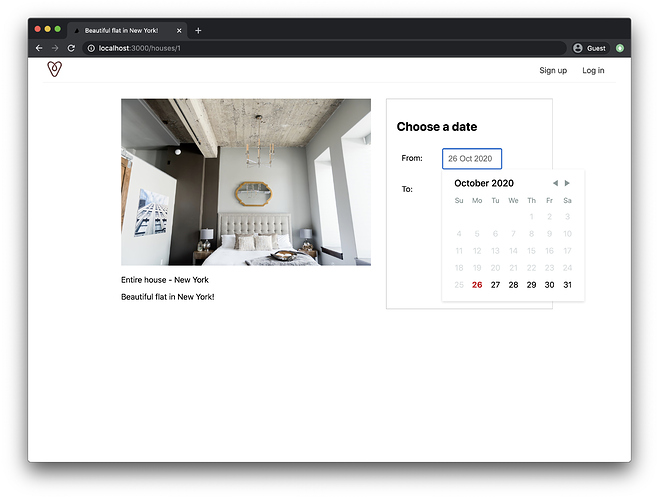
See, we can’t select dates in the past now:
Ok so now that we denied selecting dates in the past, let’s add 2 variables in the components/DateRangePicker.js component, and we will update them when the selected dates change.
First import useState from React:
import { useState } from 'react'
Then:
components/DateRangePicker.js
///

export default function DateRangePicker() {
  const [startDate, setStartDate] = useState(new Date())
  const [endDate, setEndDate] = useState(new Date())

  return (
    //...the component JSX
  )
}
Now, inside the JSX we add a new prop to DayPickerInput to update those state variables when a new date has been selected:
<DayPickerInput
  formatDate={formatDate}
  format={format}
  parseDate={parseDate}
  placeholder={`${dateFnsFormat(new Date(), format)}`}
  dayPickerProps={{
    modifiers: {
      disabled: {
        before: new Date(),
      },
    },
  }}
  onDayChange={(day) => {
    setStartDate(day)
  }}
/>
and here’s the end date
<DayPickerInput
  formatDate={formatDate}
  format={format}
  parseDate={parseDate}
  placeholder={`${dateFnsFormat(new Date(), format)}`}
  dayPickerProps={{
    modifiers: {
      disabled: {
        before: new Date(),
      },
    },
  }}
  onDayChange={(day) => {
    setEndDate(day)
  }}
/>
The code for this lesson is available at https://github.com/flaviocopes/airbnb-clone-react-nextjs-2020/tree/3-5
SYNC THE START AND END DATES
Now we can select a start and end date to book a place (something we’ll implement later!) but we have one thing to do: start and end dates are not synced!
To start with, the end date can’t be today : it must default to “tomorrow” if the start date is set to “today” by default
Then, we must make and ensure a relationship between the start and end date: the end date can’t be before the start date. When we change the start date, the end date will point to the day after it, unless the end date is still a valid one (e.g. it’s still after the start date)
Let’s start.
First, I’m going to set that “today” is not a valid selectable date for the end day:
components/DateRangePicker.js
dayPickerProps={{
  modifiers: {
    disabled: [
      new Date(),
      {
        before: new Date()
      }
    ]
  }
}}
Then, I am going to set the end date to “tomorrow” by default. I do so by passing the value prop to the DayPickerInput component. To the first I pass startDate, to the second endDate, which correspond, at page load time, at today and tomorrow’s dates:
import { useState } from 'react'

const today = new Date()
const tomorrow = new Date(today)
tomorrow.setDate(tomorrow.getDate() + 1)

//...

export default function DateRangePicker() {
  const [startDate, setStartDate] = useState(today)
  const [endDate, setEndDate] = useState(tomorrow)

  return (
    <div className='date-range-picker-container'>
      <div>
        <label>From:</label>
        <DayPickerInput
          formatDate={formatDate}
          format={format}
          value={startDate}
          parseDate={parseDate}
          placeholder={`${dateFnsFormat(new Date(), format)}`}
          dayPickerProps={{
            modifiers: {
              disabled: {
                before: new Date()
              }
            }
          }}
          onDayChange={day => {
            setStartDate(day)
          }}
        />
      </div>
      <div>
        <label>To:</label>
        <DayPickerInput
          formatDate={formatDate}
          format={format}
          value={endDate}
          parseDate={parseDate}
          placeholder={`${dateFnsFormat(new Date(), format)}`}
          dayPickerProps={{
            modifiers: {
              disabled: [
                new Date(),
                {
                  before: new Date()
                }
              ]
            }
          }}
          onDayChange={day => {
            setEndDate(day)
          }}
        />
      </div>

      ....
Cool!
Now let’s make the end date adjust when I choose a start date after the end date. I am going to +1 on the end date, so if I select, let’s say, January 21 and the end date is January 4, the end date will be changed to January 22.
How? Let’s first add this function that counts the difference of days between 2 dates:
const numberOfNightsBetweenDates = (startDate, endDate) => {
  const start = new Date(startDate) //clone
  const end = new Date(endDate) //clone
  let dayCount = 0

  while (end > start) {
    dayCount++
    start.setDate(start.getDate() + 1)
  }

  return dayCount
}
I picked it from https://flaviocopes.com/how-to-count-days-between-dates-javascript/.
Now inside the onDayChange prop of the first DayPickerInput, which now contains:
onDayChange={day => {
  setStartDate(day)
}}
I add:
onDayChange={day => {
  setStartDate(day)
  if (numberOfNightsBetweenDates(day, endDate) < 1) {
    const newEndDate = new Date(day)
    newEndDate.setDate(newEndDate.getDate() + 1)
    setEndDate(newEndDate)
  }
}}
Now, let’s make sure we can’t select an end date prior to startDate . How?
In the end date’s DayPickerInput I change the dayPickerProps to:
dayPickerProps={{
  modifiers: {
    disabled: [
      startDate,
      {
        before: startDate
      }
    ]
  }
}}
so we can’t select startDate (which defaults to “today”) and we can’t select dates prior to startDate .
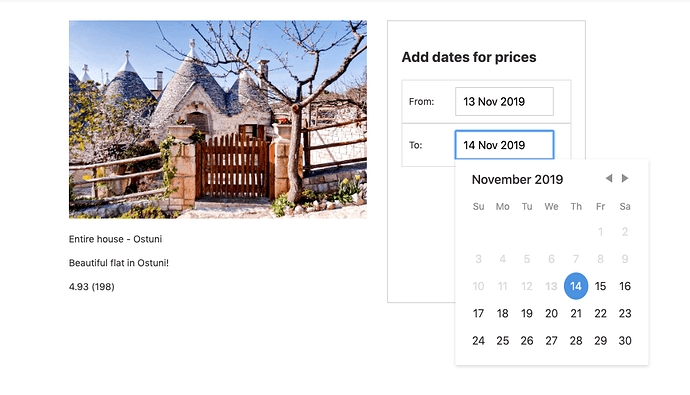
That’s it! Now if you choose a checkin date in the future, or the same day of the checkout date, the checkout date will change!
The code for this lesson is available at https://github.com/flaviocopes/airbnb-clone-react-nextjs-2020/tree/3-6
SHOW THE PRICE FOR THE DATES CHOSEN
In this module we’re going to expand on the work we’ve done so far.
In particular in the last module we added the date picker.
Once the person that want to book chooses a start date and an end date, we can calculate the cost of the stay.
Let’s keep things simple and just show a fixed price, without additional taxes and fees that the real Airbnb might factor in.
Also, we’ll keep the price equal for all days, and we’ll not have any discount for longer stays.
The price refers to the whole booking, with no additional bonus for multiple guests.
We’ll work on those things later.
Let’s store the price in the houses.js file, after each title field:
export default [
  {
    id: 1,
    picture: '/img/1.jpg',
    type: 'Entire house',
    town: 'New York',
    title: 'Beautiful flat in New York!',
    price: '150.00',
  },
  {
    id: 2,
    picture: '/img/2.jpg',
    type: 'Entire house',
    town: 'Amsterdam',
    title: 'A flat in Amsterdam with a great view',
    price: '90.00',
  },
]
Now that we have the price information, we can present the information in the pages/houses/[id].js template.
The DateRangePicker.js component handles the startDate and endDate information. When those things change, we want to alert the parent component.
How?
We pass a function as a prop, and we call this function when they change.
So, we first assume that we have a datesChanged function passed as a prop to our DateRangePicker.js component:
components/DateRangePicker.js
export default function DateRangePicker({ datesChanged }) {
  //...
}
then we call this function, passing the start date and the end date for the stay of the user. Where do we call it? Well, we have 2 places where we do call setStartDate() and/or setEndDate() , and right after we do this call, we’ll call datesChanged() .
We need to pay attention though: when we call setStartDate() , which is our update function from the hook const [startDate, setStartDate] = useState(today) , we don’t immediately have access to the new startDate value - that’s only going to happen in the next rerender.
So when we call datesChanged() , we need to pass the same value we passed to setStartDate() . Same for setEndDate() of course.
Otherwise we’d reference the old value of the start/end date.
So basically in the first DayPickerInput onDayChange prop function becomes:
onDayChange={day => {
  setStartDate(day)
  const newEndDate = new Date(day)
  if (numberOfNightsBetweenDates(day, endDate) < 1) {
    newEndDate.setDate(newEndDate.getDate() + 1)
    setEndDate(newEndDate)
  }
  datesChanged(day, newEndDate)
}}
Notice that I moved const newEndDate = new Date(day) outside of the if block, so we can access it outside of it, after the block ends.
In the second DayPickerInput , onDayChange becomes:
onDayChange={day => {
  setEndDate(day)
  datesChanged(startDate, day)
}}
Great!
Now in pages/houses/[id].js , change the DateRangePicker component in the JSX and add a datesChanged prop, with a function as its value:
pages/houses/[id].js
<DateRangePicker />
becomes:
pages/houses/[id].js
<DateRangePicker
  datesChanged={(startDate, endDate) => {
    console.log(startDate, endDate)
  }}
/>
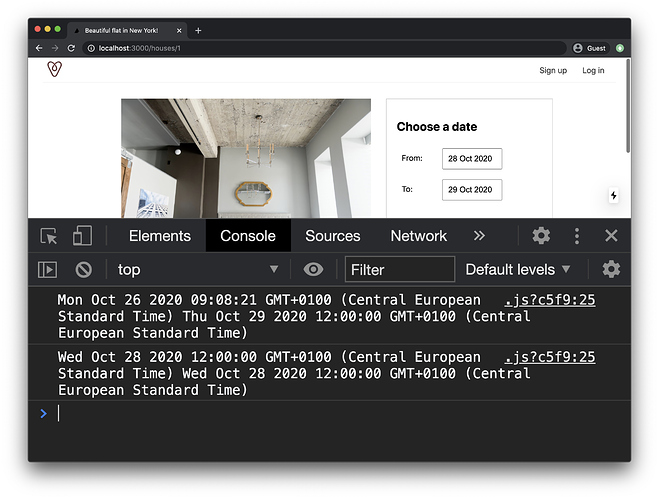
We just log the startDate and endDate values, and you can try it. Try changing the start or end date, and every time you change something, you should see it logged in the DevTools:
In the pages/houses/[id].js component, let’s use useState to create a new dateChosen state value. Remember that when we use hooks, we always need to define them in the body of the component.
Import useState from React:
import { useState } from 'react'
Before the return line, inside the component, we add:
const [dateChosen, setDateChosen] = useState(false)
to create this new dateChosen state property, which defaults to false :
export default function House(props) {
  const [dateChosen, setDateChosen] = useState(false)

  return <Layout>{/* ... */}</Layout>
}
Now inside the component JSX we can call setDateChosen() to update the value to true when datesChanged() is invoked inside DateRangePicker :
<DateRangePicker
  datesChanged={(startDate, endDate) => {
    console.log(startDate, endDate)
    setDateChosen(true)
  }}
/>
Let’s now show the price for the total stay. I want to count the number of nights that a person had to pay to rent a house and sleep in it, depending on the checkin date, and the checkout date.
I looked at different solutions, and the one that gave me the least problems, considering all the issues with dates (including DST), was this: starting from the starting date, we add one day until the date represents a date after the end date.
I first clone the dates we are given, because dates are objects, and we get a reference to that object. If we forget this, using setDate() in the function would also affect the variable outside of this function, which would change the date in the datepicker!
Here’s the code:
const calcNumberOfNightsBetweenDates = (startDate, endDate) => {
  const start = new Date(startDate) //clone
  const end = new Date(endDate) //clone
  let dayCount = 0

  while (end > start) {
    dayCount++
    start.setDate(start.getDate() + 1)
  }

  return dayCount
}
I define a new component state property using:
const [numberOfNightsBetweenDates, setNumberOfNightsBetweenDates] = useState(0)
and we call setNumberOfNightsBetweenDates() inside the datesChanged prop of DateRangePicker :
<DateRangePicker
  datesChanged={(startDate, endDate) => {
    setNumberOfNightsBetweenDates(
      calcNumberOfNightsBetweenDates(startDate, endDate)
    )
    setDateChosen(true)
  }}
/>
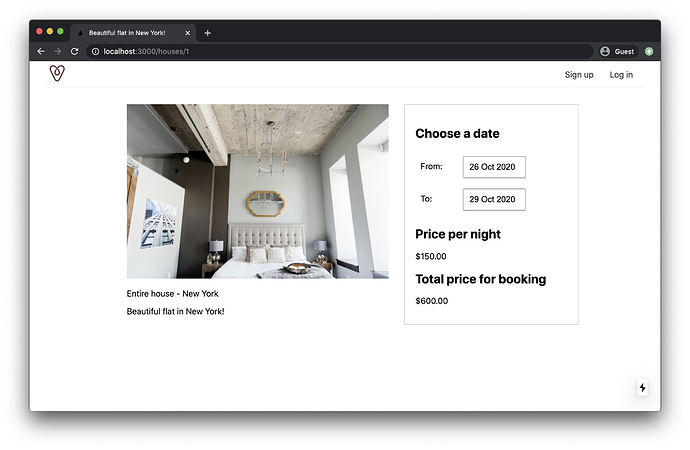
Great, now we have the number of days we want to book in numberOfNightsBetweenDates , and I’m going to use it to calculate the cost, to display it to the user using conditional rendering:
{
  dateChosen && (
    <div>
      <h2>Price per night</h2>
      <p>${props.house.price}</p>
      <h2>Total price for booking</h2>
      <p>${(numberOfNightsBetweenDates * props.house.price).toFixed(2)}</p>
    </div>
  )
}
That’s the result we should have right now:
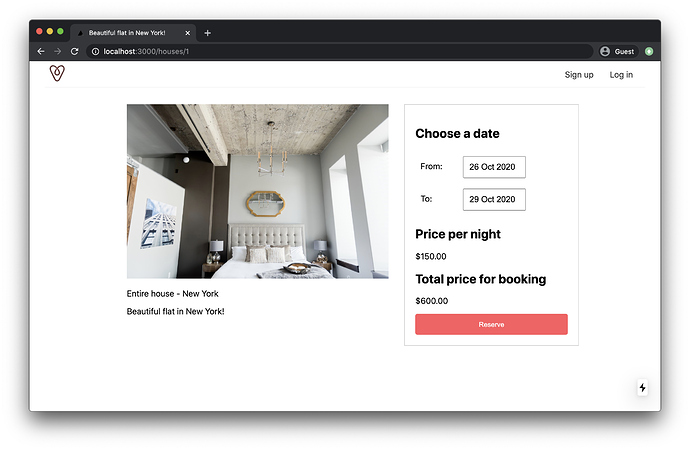
We can also add a new button at the end:
{
  dateChosen && (
    <div>
      <h2>Price per night</h2>
      <p>${props.house.price}</p>
      <h2>Total price for booking</h2>
      <p>${(numberOfNightsBetweenDates * props.house.price).toFixed(2)}</p>
      <button className='reserve'>Reserve</button>
    </div>
  )
}
and let’s style it a bit in the CSS below:
button {
  background-color: rgb(255, 90, 95);
  color: white;
  font-size: 13px;
  width: 100%;
  border: none;
  height: 40px;
  border-radius: 4px;
  cursor: pointer;
}
Once people click the “Reserve” button, we are soon going to do 2 things based on the logged in state.
If you’re logged in, we’ll go on with the registration process, and if you are not logged in, we’re going through the login process.
I know, we don’t have a login management process, yet !
That’s what we’re going to do in the next lessons.
The code for this lesson is available at https://github.com/flaviocopes/airbnb-clone-react-nextjs-2020/tree/4-1


