s21e105 - Redux animation intro
Animating with React, Redux, and d3
And now for some pure nerdy fun: A particle generator… or, well, as close as you can get with React and D3. You’d need WebGL for a real particle generator.
We’re making tiny circles fly out of your mouse cursor. Works on mobile with your finger, too.
To see the particle generator in action, go here. Github won’t let me host different branches, so you’ll see the advanced 20,000 particle version from next chapter.
We’re using the game loop approach to animation and Redux to store the state tree and drive changes for each frame.
You can see the full code on GitHub. I’ve merged the SVG and Canvas branches. Redux part is the same, some parameters differ. We’re focusing on the Redux part because that’s what’s new.
It’s going to be great.
{aside} Code in this example uses the .jsx file extension. I originally wrote it back when that was still a thing, and while I did update everything to React 16+, I felt that changing filenames was unnecessary. {/aside}
s21e106 - Here’s how it works
Here’s how it works
We use React to render everything : the page, the SVG element, the particles inside. This lets us tap into React’s algorithms that decide which nodes to update and when to garbage collect old nodes.
Then we use some d3 calculations and event detection . D3 has great random generators, so we take advantage of that. D3’s mouse and touch event handlers calculate coordinates relative to our SVG. We need those, but React’s click handlers are based on DOM nodes, which don’t correspond to (x, y) coordinates. D3 looks at real cursor position on screen.
All particle coordinates are in a Redux store . Each particle also has a movement vector. The store holds some useful flags and general parameters, as well. This lets us treat animation as data transformations. I’ll show you what that means.
We use actions to communicate user events like creating particles, starting the animation, changing mouse position, and so on. On each requestAnimationFrame, we dispatch an “advance animation” action .
On each action, the reducer calculates a new state for the whole app. This includes new particle positions for each step of the animation.
When the store updates, React flushes changes via props and because coordinates are state, the particles move .
The result is smooth animation. Just like the game loop example from before.
s21e107 - Some basic terminology
Some basic terminology
We’re about to throw around some terms. You’ll understand what they mean in detail after this chapter.
Until then, here’s a quick glossary so you don’t feel lost:
The store, or the state , is Redux state. Held globally and shared by all components. It’s like the App local state from earlier chapters.
Actions are packets of information that tell us what happened.
Reducers are functions that take the current state and an action, and use that information to generate a new state.
Got it? No worries. You will soon 
s21e108 - 3 presentation components
3 presentation components
We start with the presentation components because they’re the simplest. To render a collection of particles, we need:
- a stateless
Particle - a stateless
Particles - a class-based
App
None of them contain state, but App has to be a class-based component so that we can use componentDidMount . We need it to attach D3 event listeners.
Particle
The Particle component is a circle. It looks like this:
// src/components/Particles/Particle.jsx
import React from 'react';

const Particle = ({ x, y }) => (
  <circle cx={x} cy={y} r="1.8" />
);

export default Particle;
It takes x and y coordinates and returns an SVG circle.
Particles
The Particles component isn’t much smarter – it returns a list of circles wrapped in a grouping element, like this:
// src/components/Particles/index.jsx
import React from 'react';
import Particle from './Particle';

const Particles = ({ particles }) => (
  <g>{particles.map(particle =>
    <Particle key={particle.id} {...particle} />
    )}
  </g>
);

export default Particles;
Walk through the array of particles, render a Particle component for each. Declarative rendering that you’ve seen before
We can take an array of {id, x, y} objects and render SVG circles. Now comes our first fun component: the App .
App
App takes care of rendering the scene and attaching d3 event listeners. It gets actions via props and ties them to mouse events. You can think of actions as callbacks that work on the global data store directly. No need to pass them through many levels of props.
The rendering part looks like this:
// src/components/index.jsx

import React, { Component } from 'react';
import { select as d3Select, mouse as d3Mouse, touches as d3Touches } from 'd3';

import Particles from './Particles';
import Footer from './Footer';
import Header from './Header';

class App extends Component {
  // ..
  render() {
    return (
      <div onMouseDown={e => this.props.startTicker()} style={{overflow: 'hidden'}}>
           <Header />
           <svg width={this.props.svgWidth}
                height={this.props.svgHeight}
                ref="svg"
                style={{background: 'rgba(124, 224, 249, .3)'}}>
               <Particles particles={this.props.particles} />
           </svg>
           <Footer N={this.props.particles.length} />
       </div>
    );
  }
}

export default App;
There’s more going on, but the gist is that we return a <div> with a Header , a Footer , and an <svg> . Inside <svg> , we use Particles to render many circles. The Header and Footer components are just some helpful text.
Notice that the core of our rendering function only says “Put all Particles here, please” . There’s nothing about what’s moved, what’s new, or what’s no longer needed. We don’t have to worry about that.
We get a list of coordinates and naively render some circles. React takes care of the rest.
Oh, and we call startTicker() when a user clicks on our scene. No reason to have the clock running before any particles exist.
D3 event listeners
To let users generate particles, we have to wire up some functions in componentDidMount . That looks like this:
// src/components/index.jsx

class App extends Component {
    svgWrap = React.createRef();

    componentDidMount() {
        let svg = d3Select(this.svgWrap.current);

        svg.on('mousedown', () => {
            this.updateMousePos();
            this.props.startParticles();
        });
        svg.on('touchstart', () => {
            this.updateTouchPos();
            this.props.startParticles();
        });
        svg.on('mousemove', () => {
            this.updateMousePos();
        });
        svg.on('touchmove', () => {
            this.updateTouchPos();
        });
        svg.on('mouseup', () => {
            this.props.stopParticles();
        });
        svg.on('touchend', () => {
            this.props.stopParticles();
        });
        svg.on('mouseleave', () => {
            this.props.stopParticles();
        });
    }

    updateMousePos() {
        let [x, y] = d3Mouse(this.svgWrap.current);
        this.props.updateMousePos(x, y);
    }

    updateTouchPos() {
        let [x, y] = d3Touches(this.svgWrap.current)[0];
        this.props.updateMousePos(x, y);
    }
There are several events we take into account:
-
mousedownandtouchstartturn on particle generation -
mousemoveandtouchmoveupdate the mouse location -
mouseup,touchend, andmouseleaveturn off particle generation
Inside our event callbacks, we use updateMousePos and updateTouchPos to update Redux state. They use d3Mouse and d3Touches to get (x, y) coordinates for new particles relative to our SVG element and call Redux actions passed-in via props. The particle generation step uses this data as each particle’s initial position.
You’ll see that in the next section. I agree, it smells kind of convoluted, but it’s for good reason: We need a reference to a mouse event to get the cursor position, and we want to decouple particle generation from event handling.
Remember, React isn’t smart enough to figure out mouse position relative to our drawing area. React knows that we clicked a DOM node. D3 does some magic to find exact coordinates.
Touch events return lists of coordinates. One for each finger. We use only the first coordinate because shooting particles out of multiple fingers would make this example too hard.
That’s it for rendering and user events. 107 lines of code.
s21e109 - 6 Redux Actions
6 Redux Actions
Redux actions are a fancy way of saying “Yo, a thing happened!” . They’re functions you call to get structured metadata that’s passed into Redux reducers.
Our particle generator uses 6 actions:
-
tickTimesteps our animation to the next frame -
tickerStartedfires when everything begins -
startParticlesfires when we hold down the mouse -
stopParticlesfires when we release -
updateMousePoskeeps mouse position saved in state -
resizeScreensaves new screen size so we know where edges lie
Our actions look something like this:
export function updateMousePos(x, y) {
    return {
        type: UPDATE_MOUSE_POS,
        x: x,
        y: y
    };
}
A function that accepts params and returns an object with a type and meta data. Technically this is an action generator and the object is an action, but that distinction has long since been lost in the community.
Actions must have a type . Reducers use the type to decide what to do. The rest is optional.
You can see all the actions on GitHub.
I find this to be the least elegant part of Redux. Makes sense in large applications, but way too convoluted for small apps. Simpler alternatives exist like doing it yourself with React Context.
s21e110 - 1 Container component
1 Container component
Containers are React components that talk to the Redux data store.
You can think of presentation components as templates that render stuff and containers as smart-ish views that talk to controllers. Or maybe they’re the controllers.
Sometimes it’s hard to tell. In theory presentation components render and don’t think, containers communicate and don’t render. Redux reducers and actions do the thinking.
I’m not sure this separation is necessary in small projects.
Maintaining it can be awkward and sometimes cumbersome in mid-size projects, but I’m sure it makes total sense at Facebook scale. We’re using it in this project because the community has decided that’s the way to go.
We use the idiomatic connect() approach. Like this:
// src/containers/AppContainer.jsx

import { connect } from "react-redux";
import React, { Component } from "react";
import * as d3 from "d3";

import App from "../components";
import {
    tickTime,
    tickerStarted,
    startParticles,
    stopParticles,
    updateMousePos
} from "../actions";

class AppContainer extends Component {
    startTicker = () => {
        const { isTickerStarted } = this.props;

        if (!isTickerStarted) {
            console.log("Starting ticker");
            this.props.tickerStarted();
            d3.timer(this.props.tickTime);
        }
    };

    render() {
        const { svgWidth, svgHeight, particles } = this.props;

        return (
            <App
                svgWidth={svgWidth}
                svgHeight={svgHeight}
                particles={particles}
                startTicker={this.startTicker}
                startParticles={this.props.startParticles}
                stopParticles={this.props.stopParticles}
                updateMousePos={this.props.updateMousePos}
            />
        );
    }
}

const mapStateToProps = ({
    generateParticles,
    mousePos,
    particlesPerTick,
    isTickerStarted,
    svgWidth,
    svgHeight,
    particles
}) => ({
    generateParticles,
    mousePos,
    particlesPerTick,
    isTickerStarted,
    svgWidth,
    svgHeight,
    particles
});

const mapDispatchToProps = {
    tickTime,
    tickerStarted,
    startParticles,
    stopParticles,
    updateMousePos
};

export default connect(
    mapStateToProps,
    mapDispatchToProps
)(AppContainer);
I love the smell of boilerplate in the morning. 
We import dependencies and define AppContainer as a class-based React Component so we have somewhere to put the D3 interval. The render method outputs our <App> component using a bunch of props to pass relevant actions and values.
The startTicker method is a callback we pass into App. It runs on first click and starts the D3 interval if necessary. Each interval iteration triggers the tickTime action.
AppContainer talks to the store
// src/containers/AppContainer.jsx

const mapStateToProps = ({
    generateParticles,
    mousePos,
    particlesPerTick,
    isTickerStarted,
    svgWidth,
    svgHeight,
    particles
}) => ({
    generateParticles,
    mousePos,
    particlesPerTick,
    isTickerStarted,
    svgWidth,
    svgHeight,
    particles
});

const mapDispatchToProps = {
    tickTime,
    tickerStarted,
    startParticles,
    stopParticles,
    updateMousePos
};

export default connect(
    mapStateToProps,
    mapDispatchToProps
)(AppContainer);
We’re using the connect() idiom to connect our AppContainer to the Redux store. It’s a higher order component that handles all the details of connection to the store and staying in sync.
We pass two arguments into connect. This returns a higher order component function, which we wrap around AppContainer.
The first argument is mapStateToProps . It accepts current state as an argument, which we immediately deconstruct into interesting parts, and returns a key:value dictionary. Each key becomes a component prop with the corresponding value.
You’d often use this opportunity to run ad-hoc calculations, or combine parts of state into single props. No need for that in our case, just pass it through.
Dispatching actions
mapDispatchToProps is a dictionary that maps props to actions. Each prop turns into an action generator wrapped in a store.dispatch() call. To fire an action inside a component we just call the function in that prop.
But Swiz, we’re not writing key:value dictionaries, we’re just listing stuff!
That’s a syntax supported in most modern JavaScript environments, called object literal property value shorthand. Our build system expands that mapDispatchToProps dictionary into something like this:
const mapDispatchToProps = {
    tickTime: tickTime,
    tickerStarted: tickerStarted,
    startParticles: startParticles,
    stopParticles: stopParticles,
    updateMousePos: updateMousePos
};
And you thought previous code had a lot of boilerplate … imagine if this was how you’d do it in real life 
connect wraps each of these action generators in store.dispatch() calls. You can pass the resulting function into any component and fire actions by calling that method.
The Redux loop
To make a change therefore, a Redux loop unfolds:
- Call our action triggerer, passed in through props
- Calls the generator, gets a
{type: ...}object - Dispatches that object on the store
- Redux calls the reducer
- Reducer creates new state
- Store updates triggering React’s engine to flow updates through the props
So that’s the container. 71 lines of boilerplate pretty code.
The remaining piece of the puzzle is our reducer. Two reducers in fact.
s21e111 - 2 Redux Reducers
2 Redux Reducers
With the actions firing and the drawing done, it’s time to look at the business logic of our particle generator. We’ll get it done in just 33 lines of code and some change.
Well, it’s a bunch of change. But the 33 lines that make up CREATE_PARTICLES and TIME_TICK changes are the most interesting. The rest just flips various flags.
All our logic and physics goes in the reducer. Dan Abramov says to think of reducers as the function you’d put in .reduce() . Given a state and a set of changes, how do I create the new state?
A “sum numbers” example would look like this:
let sum = [1,2,3,4].reduce((sum, n) => sum+n, 0);
For each number, take the previous sum and add the number.
Our particle generator is a more advanced version of the same concept: Takes current application state, incorporates an action, and returns new application state.
Start with a default state and some D3 random number helpers.
import { randomNormal } from "d3";

const Gravity = 0.5,
    randNormal = randomNormal(0.3, 2),
    randNormal2 = randomNormal(0.5, 1.:sunglasses:;

const initialState = {
    particles: [],
    particleIndex: 0,
    particlesPerTick: 30,
    svgWidth: 800,
    svgHeight: 600,
    isTickerStarted: false,
    generateParticles: false,
    mousePos: [null, null],
    lastFrameTime: null
};
Using D3’s randomNormal random number generator creates a better random distribution than using JavaScript’s own Math.random . The rest is a bunch of default state 
-
particlesholds an array of particles to draw -
particleIndexdefines the ID of the next generated particle -
particlesPerTickdefines how many particles we create on each requestAnimationFrame -
svgWidthis the width of our drawing area -
svgHeighis the height -
isTickerStartedspecifies whether the animation is running -
generateParticlesturns particle generation on and off -
mousePosdefines the origination point for new particles -
lastFrameTimehelps us compensate for dropped frames
To manipulate all this state, we use two reducers and manually combine them. Redux does come with a combineReducers function, but I wanted to keep our state flat and that doesn’t fit combineReducers ’s view of how life should work.
// src/reducers/index.js

// Manually combineReducers
export default function(state = initialState, action) {
    return {
        ...appReducer(state, action),
        ...particlesReducer(state, action)
    };
}
This is our reducer. It takes current state , sets it to initialState if undefined, and an action. To create new state, it spreads the object returned from appReducer and from particlesReducer into a new object. You can combine as many reducers as you want in this way.
The usual combineReducers approach leads to nested hierarchical state. That often works great, but I wanted to keep our state flat.
Lesson here is that there are no rules. You can make your reducers whatever you want. Combine them whichever way fits your use case. As long as you take a state object and an action and return a new state object.
appReducer will handle the constants and booleans and drive the metadata for our animation. particlesReducer will do the hard work of generating and animating particles.
Driving the basics with appReducer
Our appReducer handles the boring actions with a big switch statement. These are common in the Redux world. They help us decide what to do based on action type.
// src/reducers/index.js
function appReducer(state, action) {
    switch (action.type) {
        case "TICKER_STARTED":
            return Object.assign({}, state, {
                isTickerStarted: true,
                lastFrameTime: new Date()
            });
        case "START_PARTICLES":
            return Object.assign({}, state, {
                generateParticles: true
            });
        case "STOP_PARTICLES":
            return Object.assign({}, state, {
                generateParticles: false
            });
        case "UPDATE_MOUSE_POS":
            return Object.assign({}, state, {
                mousePos: [action.x, action.y]
            });
        case "RESIZE_SCREEN":
            return Object.assign({}, state, {
                svgWidth: action.width,
                svgHeight: action.height
            });
        default:
            return state;
    }
}
Gotta love that boilerplate
Even though we’re only changing values of boolean flags and two-digit arrays, we have to create a new state . Redux relies on application state being immutable.
Well, JavaScript doesn’t have real immutability. We pretend and make sure to never change state without making a new copy first. There are libraries that give you proper immutable data structures, but that’s a whole different course.
We use Object.assign({}, ... to create a new empty object, fill it with the current state, then overwrite specific values with new ones. This is fast enough even with large state trees thanks to modern JavaScript engines.
Note that when a reducer doesn’t recognize an action, it has to return the same state it received. Otherwise you end up wiping state. 
So that’s the boilerplatey state updates. Manages starting and stopping the animation, flipping the particle generation switch, and resizing our viewport.
The fun stuff happens in particleReducer .
Driving particles with particleReducer
Our particles live in an array. Each particle has an id, a position, and a vector. That tells us where to draw the particle and how to move it to its future position.
On each tick of the animation we have to:
- Generate new particles
- Remove particles outside the viewport
- Move every particle by its vector
We can do all that in one big reducer, like this:
// src/reducers/index.js
function particlesReducer(state, action) {
    switch (action.type) {
        case "TIME_TICK":
            let {
                    svgWidth,
                    svgHeight,
                    lastFrameTime,
                    generateParticles,
                    particlesPerTick,
                    particleIndex,
                    mousePos
                } = state,
                newFrameTime = new Date(),
                multiplier = (newFrameTime - lastFrameTime) / (1000 / 60),
                newParticles = state.particles.slice(0);

            if (generateParticles) {
                for (let i = 0; i < particlesPerTick; i++) {
                    let particle = {
                        id: state.particleIndex + i,
                        x: mousePos[0],
                        y: mousePos[1]
                    };

                    particle.vector = [
                        particle.id % 2 ? -randNormal() : randNormal(),
                        -randNormal2() * 3.3
                    ];

                    newParticles.unshift(particle);
                }

                particleIndex = particleIndex + particlesPerTick + 1;
            }

            let movedParticles = newParticles
                .filter(p => {
                    return !(p.y > svgHeight || p.x < 0 || p.x > svgWidth);
                })
                .map(p => {
                    let [vx, vy] = p.vector;
                    p.x += vx * multiplier;
                    p.y += vy * multiplier;
                    p.vector[1] += Gravity * multiplier;
                    return p;
                });

            return {
                particles: movedParticles,
                lastFrameTime: new Date(),
                particleIndex
            };
        default:
            return {
                particles: state.particles,
                lastFrameTime: state.lastFrameTime,
                particleIndex: state.particleIndex
            };
    }
}
That’s a lot of code, I know. Let me explain
The first part takes important values out of state , calculates the dropped frame multiplier, and makes a new copy of the particles array with .slice(0) . That was the fastest way I could find.
Then we generate new particles.
We loop through particlesPerTick particles, create them at mousePos coordinates, and insert at the beginning of the array. In my tests that performed best. Particles get random movement vectors.
This randomness is a Redux faux pas. Reducers are supposed to be functionally pure: produce the same result every time they are called with the same argument values. Randomness is impure.
We don’t need our particle vectors to be deterministic, so I think this is fine. Let’s say our universe is stochastic instead 
{aside} Stochastic means that our universe/physic simulation is governed by probabilities. You can still model such a universe and reason about its behavior. A lot of real world physics is stochastic in nature. {/aside}
We now have an array full of old and new particles. We remove all out-of-bounds particles with a filter , then walk through what’s left to move each particle by its vector.
To simulate gravity, we update vectors’ vertical component using our Gravity constant. That makes particles fall down faster and faster creating a nice parabola.
Our reducer is done. Our particle generator works. Our thing animates smoothly. \o/
s21e112 - What we learned
What we learned
Building a particle generator in React and Redux, we made three important discoveries:
- Redux is much faster than you’d think . Creating a new copy of the state tree on each animation loop sounds crazy, but it works. Most of our code creates shallow copies, which explains the speed.
- Adding to JavaScript arrays is slow . Once we hit about 300 particles, adding new ones becomes slow. Stop adding particles and you get smooth animation. This indicates that something about creating particles is slow: either adding to the array, or creating React component instances, or creating SVG DOM nodes.
- SVG is also slow . To test the above hypothesis, I made the generator create 3000 particles on first click. The animation speed is terrible at first and becomes okayish at around 1000 particles. This suggests that making shallow copies of big arrays and moving existing SVG nodes around is faster than adding new DOM nodes and array elements. Here’s a gif
There you go: Animating with React, Redux, and D3. Kind of a new superpower 
Here’s the recap:
- React handles rendering
- D3 calculates stuff, detects mouse positions
- Redux handles state
- element coordinates are state
- change coordinates on every
requestAnimationFrame - animation!
Now let’s render to canvas and push this sucker to 20,000 smoothly animated elements. Even on a mobile phone.
s22e113 - Speed intro
Speed optimizations
Welcome to the speed optimization chapter. This is where we make our code harder to read and faster to run.
You might never need any techniques discussed here.
You already know how to build performant data visualization components. For 99% of applications, plain code that’s easy to read and understand is faster than fast code that’s hard to read.
You and your team spend most of your time reading code. Optimize for that. The faster you can code, the faster your system can evolve. Leave runtime optimization to React and its ecosystem of library authors for as long as you can get away with.
Do you really need to save that tenth of a second at runtime if it means an extra hour of head scratching every time there’s a bug?
Be honest.
That said, there are cases where faster code is also easier to read. And there are cases where your visualization is so massive, that you need every ounce of oomph you can get.
For the most part, we’re going to talk about three things:
- using Canvas to speed up rendering
- using React-like libraries to speed up the core rendering engine
- avoiding unnecessary computation and redraws
- reaching for WebGL when even Canvas isn’t fast enough
We’ll start with Canvas because it’s the best bang for buck improvement you can make.
s23e114 - Intro
Using canvas
So far we’ve been rendering our visualizations with SVG. SVG is great because it follows a familiar structure, offers infinitely scalable vector graphics, and works everywhere. There are some advanced SVG features you can’t use everywhere, but the core is solid.
However, SVG has a big flaw: it’s slow.
Anything more than a few hundred SVG nodes and your browser starts to struggle. Especially if those thousands of elements move around.
A web animation panel moderator at ForwardJS once asked me, “But why would you want thousands of SVG elements?” .
It was my first time participating in a panel, stage lights shining upon me, a mildly disinterested audience staring into their phones … I bombed: “Errr … because you can?” .
What I should have said was: “Because there have been thousands of UFO sightings, there are thousands of counties in the US, millions of taxi rides, hundreds of millions of people having this or that datapoint. And you want to show change over time.”
That’s the real answer.
Sometimes, when you’re visualizing data, you have a lot of data. The data changes over time. Animation is the best way to show change over time.
Once upon a time, I worked on a D3 video course for Packt and used UFO sightings as an example. At peak UFO sighting, right before smartphones become a thing, the animation takes up to 2 seconds to redraw a single frame.
Terrible.
So if SVG is slow and you need to animate thousands of elements, what are you to do? HTML5 Canvas.
s23e115 - Why canvas
Why Canvas
Unlike SVG, HTML5 Canvas lets you draw rasterized images. This means you’re no longer operating at the level of shapes because you’re working with pixels on the screen.
With SVG and other vector formats, you tell the browser what you want to render. With Canvas and other raster formats, you tell the browser how you want to render. The browser doesn’t know what you’re doing; it gets a field of pixel colors and renders them as an image.
That’s much faster for computers to handle. In some cases browsers can even use hardware acceleration – the GPU – to render HTML5 Canvas elements. With a bit of care, you can do almost anything you want, even on a mobile phone.
Phones these days have amazing GPUs and kind of terrible CPUs in comparison. The CPU burns more battery, works slower, warms up your phone more, etc.
If SVG wasn’t so easy to use, I’d almost suggest going straight to Canvas for any sort of complex animation. Mobile traffic is, what, 60% to 70% of web traffic these days?
s23e116 - Isn’t canvas too hard?
Isn’t that too hard?
You might think all this pixel stuff sounds complicated. We’ve stayed in shape and component land so far. We didn’t care about any pixels or rendering details. Draw a rectangle and a wild rectangle appears.
How do you know which pixel should do what when you render with Canvas?
HTML5 Canvas does offer some shape primitives. It has circles and rectangles and things like that, but they suffer from the same problem that SVG does. The browser has to use your CPU to calculate those, and at around 10,000 elements, things break down.
10,000 elements is still a hell of a lot more than the 3,000 or so that SVG gives you.
If your app allows it, you can use sprites: Tiny images copy-pasted on the Canvas as bytestreams. I have yet to find an upper bound for those. My JavaScript became the bottleneck
But I’m getting ahead of myself. We’ll talk about sprites later.
s23e117 - The trouble with Canvas
The trouble with HTML5 Canvas
The tricky thing with HTML5 Canvas is that the API is low level and that canvas is flat. As far as your JavaScript and React code are concerned, it’s a flat image. It could be anything.
The lack of structure makes it difficult to detect clicks on elements, interactions between shapes, when something covers something else, how the user interacts with your stuff and so on Anything that requires understanding what’s rendered.
You have to move most of that logic into your data store and manually keep track.
As you can imagine, this becomes cumbersome. And you still can’t detect user interaction because all you get is “User clicked on coordinate (x, y). Have fun.”
At the same time, the low level API makes abstractions difficult. You can’t create components for “this is a map” or “histogram goes here”. You’re always down to circles and rectangles and basic shapes.
Your code soon looks like the D3.js spaghetti we tried to avoid in the first place.
s23e118 - Declarative Canvas with Konva and react-konva
Declarative HTML5 Canvas with Konva and react-konva
Enter Konva and react-konva. All the benefits of declarative code, but rendered on the canvas.
I’m gonna let Anton Lavrenov, the author of Konva, explain:
Konva is an HTML5 Canvas JavaScript framework that enables high performance animations, transitions, node nesting, layering, filtering, caching, event handling for desktop and mobile applications, and much more.
You can draw things onto the stage, add event listeners to them, move them, scale them, and rotate them independently from other shapes to support high performance animations, even if your application uses thousands of shapes. Served hot with a side of awesomeness.
That.
It’s exactly what we need to push our animated React apps to thousands of elements without spending too much time thinking about the how of rendering. Best leave the hairy details to somebody else.
Let’s try out two examples:
- Pushing our particle generator to 20,000 elements
- An n-body collision simulator built with MobX
s24e119 - A particle generator pushed to the max
A particle generator pushed to 20,000 elements with Canvas
Our SVG-based particle generator caps out at a few thousand elements. Animation becomes slow as times between iterations of our game loop increase.
Old elements leave the screen and get pruned faster than we can create new ones. This creates a natural upper limit to how many elements we can push into the page.
We can render many more elements if we take out SVG and use HTML5 Canvas instead. I was able to push the code up to almost 20,000 smoothly animated elements. Then JavaScript became the bottleneck.
Well, I say JavaScript was the bottleneck, but monitor size plays a role too. It goes up to 20,000 on my laptop screen, juuuust grazes 30,000 on my large desktop monitor, and averages about 17,000 on my iPhone 5SE.
Friends with newer laptops got it up to 35,000.
You can see it in action hosted on Github pages.
We’re keeping most of our existing code. The real changes happen in src/components/index.jsx , where a Konva stage replaces the <svg> element, and in src/components/Particles.jsx , where we change what we render. There’s a small tweak in the reducer to generate more particles per tick.
You should go into your particle generator directory, install Konva and react-konva, and then make the changes below. Trying things out is better than just reading my code
$ npm install --save konva react-konva
{aside} react-konva is a thin wrapper on Konva itself. There’s no need to think about it as its own thing. For the most part, you can go into the Konva docs, read about something, and it Just Works™ in react-konva. {/aside}
s24e120 - Prepare canvas layer
Preparing a canvas layer
Our changes start in src/components/index.jsx . We have to throw away the <svg> element and replace it with a Konva stage.
You can think of a Konva stage as a Canvas element with a bunch of helper methods attached. Some of them Konva uses internally; others are exposed as an API. Functions like exporting to an image file, detecting intersections, etc.
// src/components/index.jsx

// ...
import { Stage } from 'react-konva';

// ...
class App extends Component {
    // ..
    render() {
        return (
            // ..
                     <Stage width={this.props.svgWidth} height={this.props.svgHeight}>
                         <Particles particles={this.props.particles} />

                     </Stage>

                 </div>
                 <Footer N={this.props.particles.length} />
             </div>
        );
    }
}
We import Stage from react-konva , then use it instead of the <svg> element in the render method. It gets a width and a height .
Inside, we render the Particles component. It’s going to create a Konva layer and use low-level Canvas methods to render particles as sprites.
s24e121 - Use sprites for max redraw speed
Using sprites for max redraw speed
Our SVG-based Particles component was simple. Iterate through a list of particles, render a <Particle> component for each.
We’re going to completely rewrite that. Our new approach goes like this:
- Cache a sprite on
componentDidMount - Clear canvas
- Redraw all particles
- Repeat
Because the new approach renders a flat image, and because we don’t care about interaction with individual particles, we can get rid of the Particle component. The unnecessary layer of nesting was slowing us down.
The new Particles component looks like this:
// src/components/Particles.jsx

import React, { Component } from 'react';
import { FastLayer } from 'react-konva';

class Particles extends Component {
    layerRef = React.createRef();

    componentDidMount() {
        this.canvas = this.layerRef.current.canvas._canvas;
        this.canvasContext = this.canvas.getContext('2d');

        this.sprite = new Image();
        this.sprite.src = 'https://i.imgur.com/m5l6lhr.png';
    }

    drawParticle(particle) {
        let { x, y } = particle;

        this.canvasContext.drawImage(this.sprite, 0, 0, 128, 128, x, y, 15, 15);
    }

    componentDidUpdate() {
        let particles = this.props.particles;

        console.time('drawing');
        this.canvasContext.clearRect(0, 0, this.canvas.width, this.canvas.height);

        for (let i = 0; i < particles.length; i++) {
            this.drawParticle(particles[i]);
        }
        console.timeEnd('drawing');
    }

    render() {
        return (
            <FastLayer ref={this.layerRef} listening="false" />
        );
    }
}

export default Particles;
40 lines of code is a lot all at once. Let’s walk through step by step.
componentDidMount
// src/components/Particles.jsx

// ...
componentDidMount() {
    this.canvas = this.refs.layer.canvas._canvas;
    this.canvasContext = this.canvas.getContext('2d');

    this.sprite = new Image();
    this.sprite.src = 'https://i.imgur.com/m5l6lhr.png';
}
React calls componentDidMount when our component first renders. We use it to set up 3 instance properties.
this.canvas is a reference to the HTML5 Canvas element. We get it through a ref to the Konva layer, then spelunk through Konva internals to get the canvas itself. As the _ prefix indicates, Anton Lavrenov did not intend this to be a public API.
Thanks to JavaScript’s permissiveness, we can use it anyway. 
this.canvasContext is a reference to our canvas’s CanvasRenderingContext2D. It’s the interface we use to draw basic shapes, perform transformations, and so on. Context is the only part of canvas you ever interact with as a developer.
Why it’s not just Canvas, I don’t know.
this.sprite is a cached image. A small minion that we are going to copy-paste all over as our particle. Creating a new image object with new Image() and setting the src property downloads our sprite from the internet into browser memory.
It looks like this:

Our minion particle
You might think it’s unsafe to copy references to rendered elements into component properties like that, but it’s okay. Our render function always renders the same thing, so the reference never changes. It just makes our code cleaner.
Should our component unmount and re-mount, React will call componentDidMount again and update our reference.
drawParticle
// src/components/Particles.jsx

// ...
drawParticle(particle) {
    let { x, y } = particle;

    this.canvasContext.drawImage(this.sprite, 0, 0, 128, 128, x, y, 15, 15);
}
drawParticle draws a single particle on the canvas. It gets coordinates from the particle argument and uses drawImage to copy our sprite into position.
We use the whole sprite, corner (0, 0) to corner (128, 128) . That’s how big our sprite is. And we copy it to position (x, y) with a width and height of 15 pixels.
drawImage is the fastest method I’ve found to put pixels on canvas. I don’t know why it’s so fast, but here’s a helpful benchmark so you can see for yourself.
componentDidUpdate
// src/components/Particles.jsx

// ...
componentDidUpdate() {
    let particles = this.props.particles;

    console.time('drawing');
    this.canvasContext.clearRect(0, 0, this.canvas.width, this.canvas.height);

    for (let i = 0; i < particles.length; i++) {
        this.drawParticle(particles[i]);
    }
    console.timeEnd('drawing');
}
componentDidUpdate is where the magic happens. React calls this lifecycle method every time our list of particles changes. After the render method.
Just like the D3 blackbox approach, we move rendering out of the render method and into componentDidUpdate .
Here’s how it works:
-
this.canvasContext.clearRectclears the entire canvas from coordinate(0, 0)to coordinate(width, height). We delete everything and make the canvas transparent. - We iterate our
particleslist with aforloop and calldrawParticleon each element.
Clearing and redrawing the canvas is faster than moving individual particles. For loops are faster than .map or any other form of iteration. I tested. A lot.
Open your browser console and see how long each frame takes to draw. The console.time - console.timeEnd pair measures how long it takes your code to get from time to timeEnd . You can have as many of these timers running as you want as long as you give them different names.
render
// src/components/Particles.jsx

// ...
render() {
    return (
        <FastLayer ref={this.layerRef} listening="false" />
    );
}
After all that work, our render method is quite short.
We render a Konva FastLayer , give it a ref and turn off listening for mouse events. That makes the fast layer even faster.
Ideas for this combination of settings came from Konva’s official performance tips documentation. This makes sense when you think about it.
A FastLayer is faster than a Layer . It’s in the name. Ignoring mouse events means you don’t have to keep track of elements. It reduces computation.
This was empirically the fastest solution with the most particles on screen.
s24e122 - But why so many elements?
But why, Swizec?
I’m glad you asked. This was a silly example. I devised the experiment because at my first React+D3 workshop somebody asked, “What if we have thousands of datapoints, and we want to animate all of them?” . I didn’t have a good answer.
Now I do. You put them in Canvas. You drive the animation with a game loop. You’re good.
You can even do it as an overlay. Have an SVG for your graphs and charts, overlay with a transparent canvas for your high speed animation.
s25e123 - Simulating billiards with MobX, Canvas, and Konva
Build a declarative billiards simulation with MobX, Canvas, and Konva
Billiards game
We’re building a small game. You have 11 glass balls – marbles, if you will. Grab one, throw it at the others, watch them bounce around. There is no score, but it looks cool, and it’s a fun way to explore how Konva and React give you interactive Canvas features.
We’re using React and Konva to render our 11 marbles on an HTML5 Canvas element, MobX to drive the animation loop, and D3 to help with collision detection. Because this example is declarative, we can split it into two parts:
- Part 1: Rendering the marbles
- Part 2: Building the physics
You can see the finished code on Github and play around with a hosted version of the code you’re about to build.
I know this example comes late in the book, and you’re feeling like you know all there is to React and visualizations. You can think of this example as practice. Plus it’s a good way to learn the basics of MobX.
s25e124 - Decorators
Decorators
Before we begin, let me tell you about decorators.
MobX embraces them to make its API easier to use. You can use MobX without decorators, but decorators make it better.
A couple years ago, decorators got very close to becoming an official spec, then got held back. I don’t know why , but they’re a great feature whose syntax is unlikely to change. So even if MobX has to change its implementation when decorators do land in the JavaScript spec, you’re not likely to have to change anything.
You can think of decorators as function wrappers. Instead of code like this:
inject('store', ({ store }) => <div>A thing with {store.value}</div>);
You can write the same code like this:
@inject('store')
({ store }) => <div>A thing with {store.value}</div>
Not much of a difference, but it becomes better looking when you work with classes or combine multiple decorators. That’s when they shine. No more })))})) at the end of your functions.
By the way, inject is to MobX much like connect is to Redux. I’ll explain in a bit.
s25e125 - Part 0: Some setup
Part 0: Some setup
Because decorators aren’t in the JavaScript spec, we have to tweak how we start our project. We can still use create-react-app , but there’s an additional step.
You should start a new project like this:
$ create-react-app billiards-game --scripts-version custom-react-scripts
This creates a new directory with a full setup for React. Just like you’re used to.
The addition of --scripts-version custom-react-scripts employs @kitze’s custom-react-scripts project to give us more configuration options. Like the ability to enable decorators.
We enable them in the .env file. Add this line:
// billiards-game/.env
// ...
REACT_APP_DECORATORS=true
No installation necessary. I think custom-react-scripts uses the transform-decorators-legacy Babel plugin behind the scenes. It’s pre-installed, and we enable it with that .env change.
Before we begin, you should install some other dependencies as well:
$ npm install --save konva react-konva mobx mobx-react \
d3-timer d3-scale d3-quadtree
This gives you Konva, MobX, and the parts of D3 that we need. You’re now ready to build the billiards game.
s25e126 - A quick MobX primer
A quick MobX primer
Explaining MobX in detail is beyond the scope of this book. You can learn it by osmosis as you follow the code in our billiards example.
That said, here’s a quick rundown of the concepts we’re using.
MobX is based on reactive programming. There are values that are observable and functions that react when those values change. MobX ensures only the minimal possible set of observers is triggered on every change.
So, we have:
@observable – a property whose changes observers subscribe to @observer – a component whose render() method observes values @computed – a method whose value can be fully derived from observables @action – a method that changes state, analogous to a Redux reducer @inject – a decorator that injects global stores into a component’s props
That’s all you need to know. Once your component is an @observer , you never have to worry about what it’s observing. MobX ensures it reacts to changes in values used during rendering.
Making your component an observer and injecting the global store is the same as using connect in Redux. It gives your component access to your state, and it triggers a re-render when something changes.
Importantly, it doesn’t trigger a re-render when something that the component isn’t using changes. That little tidbit is what makes many other reactive libraries difficult to use.
s25e127 - Part 1: Rendering our marbles
Part 1: Rendering our marbles
Our marbles render on Canvas using Konva. Each marble is its own sprite rendered as a Konva element. This makes it easier to implement user and marble interactions.
Rendering happens in 3 components:
-
Appholds everything together -
MarbleListrenders a list of marbles -
Marblerenders an individual marble
We’re also using 2 MobX stores:
-
Spriteto load the marble sprite and define coordinates within -
Physicsas our physics engine
Sprite and Physics are hold almost all of our game logic. A bit of drag & drop logic goes in the Marble component. Other than that, all our components are presentational. They get props and render stuff.
Let’s start with App and work our way down.
App
Our App component doesn’t do much. It imports MobX stores, triggers sprite loading, and starts the game loop.
// src/components/App.js

import React, { Component } from 'react';
import { Provider as MobXProvider, observer } from 'mobx-react';

import Physics from '../logic/Physics';
import Sprite from '../logic/Sprite';
import MarbleList from './MarbleList';

@observer
class App extends Component {
    componentDidMount() {
        Sprite.loadSprite(() => Physics.startGameLoop());
    }

    render() {
        return (
            <div className="App">
                <div className="App-header">
                    <h2>Elastic collisions</h2>
                    <p>Rendered on canvas, built with React and Konva</p>
                </div>
                <div className="App-intro">
                    <MobXProvider physics={Physics} sprite={Sprite}>
                        <MarbleList />
                    </MobXProvider>
                </div>
            </div>
        );
    }
}

export default App;
We import our dependencies: React itself, a MobXProvider that’s similar to the Redux provider (puts stuff in react context), both of our MobX stores which export singleton instances, and the main MarbleList component.
App itself is a full featured component that initiates sprite loading in componentDidMount and calls startGameLoop when the sprite is ready. We know the sprite is ready because it calls a callback. You’ll see how that works in a bit.
The render method outputs some descriptive text and the MarbleList component wrapped in a MobXProvider . The provider puts instances of our stores – sprite and physics – in React context.
This makes them available to all child components via the inject decorator.
MarbleList
MarbleList is an important component that renders the whole game, yet it can still be small and functional. Every prop it needs comes from our two stores.
Like this:
// src/components/MarbleList.js

import React from 'react';
import { inject, observer } from 'mobx-react';
import { Stage, Layer, Group } from 'react-konva';

import Marble from './Marble';

const MarbleList = inject('physics', 'sprite')(observer(({ physics, sprite }) => {
    const { width, height, marbles } = physics;
    const { marbleTypes } = sprite;

    return (
        <Stage width={width} height={height}>
            <Layer>
                <Group>
                    {marbles.map(({ x, y, id }, i) => (
                        <Marble x={x}
                                y={y}
                                type={marbleTypes[i%marbleTypes.length]}
                                draggable="true"
                                id={id}
                                key={`marble-${id}`} />
                    ))}
                </Group>
            </Layer>
        </Stage>
    );
}));

export default MarbleList;
We import dependencies and create a MarbleList component. Instead of decorators, we’re using with functional composition.
This shows you that MobX can work without decorators, but there’s no deep reason behind this choice. Over time, I’ve developed a preference for composition for functional components and decorators for class-based components.
inject takes values out of context and puts them in component props. observer declares that our component observes those props and reacts to them.
It’s generally a good idea to use both inject and observer together. I have yet to find a case where you need just one or the other.
The rendering itself takes values out of our stores and returns a Konva Stage with a single Layer , which contains a Group . Inside this group is our list of marbles.
Each marble gets a position, a type that defines how it looks, an id , and a key . We set draggable to true so Konva knows that this element is draggable.
Yes, that means we get draggability on an HTML5 Canvas without any extra effort. I like that.
Marble
Each Marble component renders a single marble and handles dragging and dropping. That’s how you “shoot” marbles.
Dragging and dropping creates a vector that accelerates, or shoots, the marble in a certain direction with a certain speed. Putting this logic in the component itself makes sense because the rest of our game only cares about that final vector.
The Marble component looks like this:
// src/components/Marble.js

import React, { Component } from 'react';
import { Circle } from 'react-konva';
import { inject, observer } from 'mobx-react';

@inject('physics', 'sprite') @observer
class Marble extends Component {
    onDragStart = () => {
        // set drag starting position
    }

    onDragMove = () => {
        // update marble position
    }

    onDragEnd = () => {
        // shoot the marble
    }

    render() {
        const { sprite, type, draggable, id, physics } = this.props;
        const MarbleDefinitions = sprite.marbleDefinitions;
        const { x, y, r } = physics.marbles[id];

        return (
            <Circle x={x} y={y} radius={r}
                    fillPatternImage={sprite.sprite}
                    fillPatternOffset={MarbleDefinitions[type]}
                    fillPatternScale={{ x: r*2/111, y: r*2/111 }}
                    shadowColor={MarbleDefinitions[type].c}
                    shadowBlur="15"
                    shadowOpacity="1"
                    draggable={draggable}
                    onDragStart={this.onDragStart}
                    onDragEnd={this.onDragEnd}
                    onDragMove={this.onDragMove}
                    ref="circle"
                    />
        );
    }
}

export default Marble;
We @inject both stores into our component and make it an @observer . The render method takes values out of our stores and renders a Konva Circle . The circle uses a chunk of our sprite as its background, has a colorful shadow, and has a bunch of drag callbacks.
Those callbacks make our game playable.
In onDragStart , we store the starting position of the dragged marble. In onDragMove , we update the marble’s position in the store, which makes it possible for other marbles to bounce off of ours while it’s moving, and in onDragEnd , we shoot the marble.
Shoot direction depends on how we dragged. That’s why we need the starting positions.
Drag callbacks double as MobX actions. Makes our code simpler. Instead of specifying an extra @action in the MobX store, we manipulate the values directly.
MobX makes this okay. It keeps everything in sync and our state easy to understand. MobX even batches value changes before triggering re-renders.
The code inside those callbacks is pretty mathsy.
// src/components/Marble.js

class Marble extends Component {
    onDragStart = () => {
        const { physics, id } = this.props;

        this.setState({
            origX: physics.marbles[id].x,
            origY: physics.marbles[id].y,
            startTime: new Date()
        });
    }

    onDragMove = () => {
        const { physics, id } = this.props;
        const { x, y } = this.refs.circle.attrs;

        physics.marbles[id].x = x;
        physics.marbles[id].y = y;
    }

    onDragEnd = () => {
        const { physics } = this.props,
              circle = this.refs.circle,
              { origX, origY } = this.state,
              { x, y } = circle.attrs;


        const delta_t = new Date() - this.state.startTime,
              dist = (x - origX) ** 2 + (y - origY) ** 2,
              v = Math.sqrt(dist)/(delta_t/16); // distance per frame (= 16ms)

        physics.shoot({
           x: x,
           y: y,
           vx: (x - origX)/(v/3), // /3 is a speedup factor
           vy: (y - origY)/(v/3)
           }, this.props.id);
    }

    // ...
}
In onDragStart , we store original coordinates and start time in local state. These are temporary values that nothing outside this user action cares about. Local state makes sense.
We’ll use them to determine how far the user dragged our marble.
In onDragMove we update the MobX store with new coordinates for this particular marble. You might think we’re messing with mutable state here, and we might be, but these are MobX observables. They’re wrapped in setters that ensure everything is kept in sync, changes logged, observers notified, etc.
onDragEnd shoots the marble. We calculate drag speed and direction, then we call the shoot() action on the physics store.
The math we’re doing is called euclidean distance by the way. Distance between two points is the root of the sum of squares of distance on each axis.
Sprite store
Now that we know how rendering works, we need to load our sprite. It’s an icon set I bought online. Can’t remember where or who from.
Here’s what it looks like:
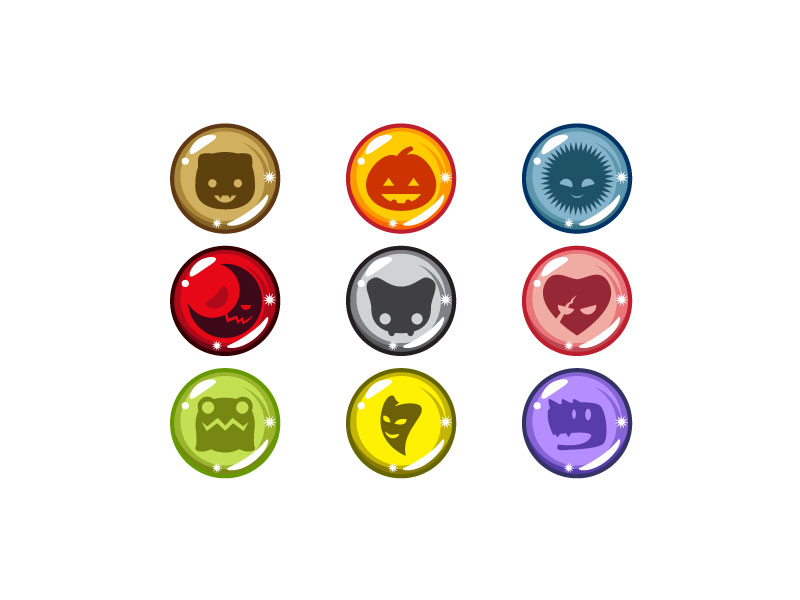
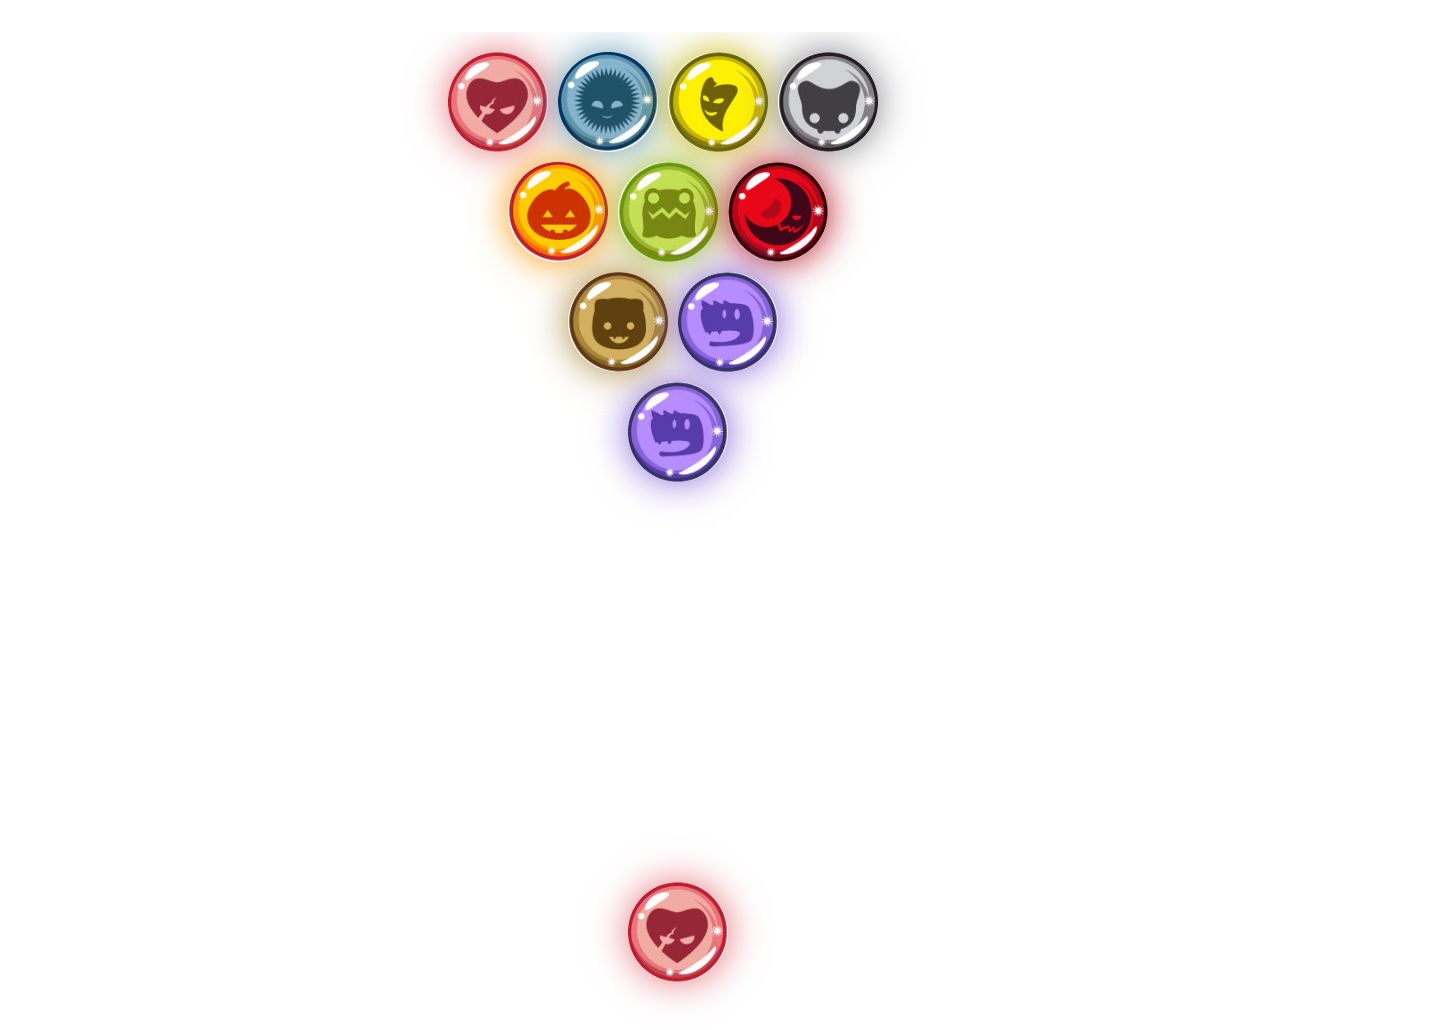
Marbles sprite
To use this sprite, we need two things:
- A way to tell where on the image each marble lies
- A MobX store that loads the image into memory
The first is a MarbleDefinitions dictionary. We used it in Marble component’s render method. If you’re playing along, you should copy paste this. Too much typing
// src/logic/Sprite.js

const MarbleDefinitions = {
    dino: { x: -222, y: -177, c: '#8664d5' },
    redHeart: { x: -222, y: -299, c: '#e47178' },
    sun: { x: -222, y: -420, c: '#5c96ac' },

    yellowHeart: { x: -400, y: -177, c: '#c8b405' },
    mouse: { x: -400, y: -299, c: '#7d7e82' },
    pumpkin: { x: -400, y: -420, c: '#fa9801' },

    frog: { x: -576, y: -177, c: '#98b42b' },
    moon: { x: -575, y: -299, c: '#b20717' },
    bear: { x: -576, y: -421, c: '#a88534' }
};

export { MarbleDefinitions };
Each type of marble has a name, a coordinate, and a color. The coordinate tells us where on the sprite image it is, and the color helps us create a nice shadow.
All values painstakingly assembled by hand. You’re welcome. 
The MobX store that loads our sprite into memory and helps us use it looks like this:
// src/logic/Sprite.js

import { observable, action, computed } from 'mobx';
import MarbleSprite from '../monster-marbles-sprite-sheets.jpg';

class Sprite {
    @observable sprite = null;

    @action loadSprite(callback = () => null) {
        const sprite = new Image();
        sprite.src = MarbleSprite;

        sprite.onload = () => {
            this.sprite = sprite;

            callback();
        };
    }

    @computed get marbleTypes() {
        return Object.keys(MarbleDefinitions);
    }

    @computed get marbleDefinitions() {
        return MarbleDefinitions;
    }
}

export default new Sprite();
A MobX store is a JavaScript object. It has @observable values, @actions , and @computed getters. That’s all there is to it.
No complicated reducers and action generators. Just JavaScript functions and properties. There’s plenty going on behind the scenes, but we don’t have to think about it.
That’s why I like MobX more than Redux. Feels easier to use 
In the Sprite store, we have an @observable sprite . Changing this value triggers a re-render in al @observer components that rely on it. In our case that’s every marble.
Then we have a loadSprite action. It creates a new Image object and loads the sprite. After the image loads, we set this.sprite .
The @computed getters make it easier to access MarbleDefinitions . marbleTypes gives us a list of available types of marbles and marbleDefinitions returns the definitions object.
Running your code won’t work just yet. We need the physics store first because it defines marble positions.
s25e128 - Part 2: Building the physics
Part 2: Building the physics
Our whole physics engine fits into a single MobX store. It contains the collision detection, marble movement calculations, and drives the game loop itself.
The general approach goes like this:
- Have an observable array of marbles
- Run a
simulationStepon eachrequestAnimationFrameusingd3.timer - Change marble positions and speed
- MobX observables and observers trigger re-renders of marbles that move
The whole Physics store is some 120 lines of code. We’ll go slow. Here’s the skeleton:
// src/logic/Physics.js

class Physics {
    @observable MarbleR = 25;
    @observable width = 800;
    @observable height = 600;
    @observable marbles = [];
    timer = null;

    @computed get initialPositions() {

    }

    @action startGameLoop() {

    }

    @action simulationStep() {

    }

    @action shoot({ x, y, vx, vy }, i) {

    }
}
We have four observable properties, a timer , a @computed property for initial positions, and 3 actions. startGameLoop starts our game, simulationStep holds the main logic, and shoot shoots a particular marble.
Let’s walk through.
initialPositions
// src/logic/Physics.js
class Physics {
    // ..
    @computed get initialPositions() {
        const { width, height, MarbleR } = this,
              center = width/2;

        const lines = 4,
              maxY = 200;

        let marbles = range(lines, 0, -1).map(y => {
            if (y === lines) return [{ x: center, y: maxY,
                                       vx: 0, vy: 0, r: this.MarbleR}];

            const left = center - y*(MarbleR+5),
                  right = center + y*(MarbleR+5);

            return range(left, right, MarbleR*2+5).map(x => ({
                x: x,
                y: maxY-y*(MarbleR*2+5),
                vx: 0,
                vy: 0,
                r: this.MarbleR
            }));
        }).reduce((acc, pos) => acc.concat(pos), []);

        marbles = [].concat(marbles, {
            x: width/2,
            y: height-150,
            vx: 0,
            vy: 0,
            r: this.MarbleR
        });

        marbles.forEach((m, i) => marbles[i].id = i);

        return marbles;
    }
    // ..
}
Believe it or not, this is like one of those “Arrange things in a triangle” puzzles you’d see in an old Learn How To Program book. Or a whiteboard interview.
It took me 3 hours to build. Easy to get wrong, fiddly to implement.
We start with a range of numbers. From lines to 0 in descending order. We iterate through this list of rows and change each into a list of marbles.
4 marbles in the first row, 3 in the next, all the way down to 1 in last row.
For each row, we calculate how much space we have on the left and right of the center and make a range of horizontal positions from left to right with a step of “1 marble size”. Using these positions and the known row, we create marbles as needed.
We use a .reduce to flatten nested arrays and add the last marble. That’s a corner case I couldn’t solve elegantly, but I’m sure it’s possible.
In the end, we add an id to each marble. We’re using index as the id, that’s true, but that still ensures we use consistent values throughout our app. Positions in the array may change.
shoot and startGameLoop
// src/logic/Physics.js
class Physics {
    // ...

    @action startGameLoop() {
        this.marbles = this.initialPositions;

        this.timer = timer(() => this.simulationStep());
    }

    // ...

    @action shoot({ x, y, vx, vy }, i) {
        const maxSpeed = 20;

        this.marbles[i].x = x;
        this.marbles[i].y = y;
        this.marbles[i].vx = vx < maxSpeed ? vx : maxSpeed;
        this.marbles[i].vy = vy < maxSpeed ? vy : maxSpeed;
    }
}
shoot and startGameLoop are the simplest functions in our physics engine. startGameLoop gets the initial marbles array and starts a D3 timer. shoot updates a specific marble’s coordinates and speed vector.
s25e129 - Collision detection
simulationStep – where collisions collision
Here comes the fun part. The one with our game loop.
There’s also a video explaining how this works  Watch it on YouTube. With hand-drawn sketches that explain the math, and I think that’s neat.
@action simulationStep() {
    const { width, height, MarbleR } = this;

    const moveMarble = ({x, y, vx, vy, id}) => {
        let _vx = ((x+vx < MarbleR) ? -vx : (x+vx > width-MarbleR) ? -vx : vx)*.99,
            _vy = ((y+vy < MarbleR) ? -vy : (y+vy > height-MarbleR) ? -vy : vy)*.99;

        // nearest marble is a collision candidate
        const subdividedSpace = quadtree().extent([[-1, -1],
                                                   [this.width+1, this.height+1]])
                                          .x(d => d.:satisfied:
                                          .y(d => d.y)
                                          .addAll(this.marbles
                                                      .filter(m => id !== m.id)),
              candidate = subdividedSpace.find(x, y, MarbleR*2);

        if (candidate) {

            // borrowing @air_hadoken's implementation from here:
            // github.com/airhadoken/game_of_circles/
            //   blob/master/circles.js#L64
            const cx = candidate.x,
                  cy = candidate.y,
                  normx = cx - x,
                  normy = cy - y,
                  dist = (normx ** 2 + normy ** 2),
                  c = (_vx * normx + _vy * normy) / dist * 2.3;

            _vx = (_vx - c * normx)/2.3;
            _vy = (_vy - c * normy)/2.3;

            candidate.vx += -_vx;
            candidate.vy += -_vy;
            candidate.x += -_vx;
            candidate.y += -_vy;
        }

        return {
            x: x + _vx,
            y: y + _vy,
            vx: _vx,
            vy: _vy
        }
    };

    this.marbles.forEach((marble, i) => {
        const { x, y, vx, vy } = moveMarble(marble);

        this.marbles[i].x = x;
        this.marbles[i].y = y;
        this.marbles[i].vx = vx;
        this.marbles[i].vy = vy;
    });
}
That’s a lot of code . Let’s break it down.
You can think of simulationStep as a function and a loop. At the bottom, there is a .forEach that applies a moveMarble function to each marble.
    this.marbles.forEach((marble, i) => {
        const { x, y, vx, vy } = moveMarble(marble);

        this.marbles[i].x = x;
        this.marbles[i].y = y;
        this.marbles[i].vx = vx;
        this.marbles[i].vy = vy;
    });
We iterate over the list of marbles, feed them into moveMarble , get new properties, and save them in the main marbles array. MobX should allows us to change these values inside moveMarble and let MobX observables do the heavy lifting, but more explicit code is easier to read.
moveMarble
moveMarble is itself a hairy function. Stuff happens in 3 steps:
- Handle collisions with walls
- Find collision with closest other marble
- Handle collision with marble
Handling collisions with walls happens in two lines of code. One per axis.
let _vx = ((x+vx < MarbleR) ? -vx : (x+vx > width-MarbleR) ? -vx : vx)*.99,
    _vy = ((y+vy < MarbleR) ? -vy : (y+vy > height-MarbleR) ? -vy : vy)*.99;
Nested ternary expressions are kinda messy, but good enough. If a marble is beyond any boundary, we reverse its direction. We always apply a .99 friction coefficient so that marbles slow down.
Finding collisions with the next closest marble happens using a quadtree. Since we don’t have too many marbles, we can build a new quadtree every time.
{aside} A quadtree is a way to subdivide space into areas. It lets us answer the question of “What’s close enough to me to possibly touch me?” without making too many position comparisons.
Checking every marble with every other marble produces 81 comparisons. Versus 2 comparisons using a quadtree. {/aside}
// nearest marble is a collision candidate
const subdividedSpace = quadtree().extent([[-1, -1],
                                           [this.width+1, this.height+1]])
                                  .x(d => d.:satisfied:
                                  .y(d => d.y)
                                  .addAll(this.marbles
                                              .filter(m => id !== m.id)),
      candidate = subdividedSpace.find(x, y, MarbleR*2);
We’re using d3-quadtree for the quadtree implementation. It takes an extent , which tells it how big our space is. An x and y accessor tells it how to get coordinates out of our marble objects, and we use addAll to fill the quadtree with marbles.
To avoid detecting each marble as colliding with itself, we take each marble out of our list before feeding the quadtree.
Once we have a quadtree, we use .find to look for the nearest marble within two radiuses – MarbleR*2 – of the current marble. That’s exactly the one we’re colliding with!
Handling collisions with marbles involves math. The sort of thing you think you remember from high school, and suddenly realize you don’t when the time comes to use it.
Code looks like this:
if (candidate) {

    // borrowing @air_hadoken's implementation from here:
    // github.com/airhadoken/game_of_circles/
    //   blob/master/circles.js#L64
    const cx = candidate.x,
          cy = candidate.y,
          normx = cx - x,
          normy = cy - y,
          dist = (normx ** 2 + normy ** 2),
          c = (_vx * normx + _vy * normy) / dist * 2.3;

    _vx = (_vx - c * normx)/2.3;
    _vy = (_vy - c * normy)/2.3;

    candidate.vx += -_vx;
    candidate.vy += -_vy;
    candidate.x += -_vx;
    candidate.y += -_vy;
}

return {
    x: x + _vx,
    y: y + _vy,
    vx: _vx,
    vy: _vy
}
Ok, the return statement isn’t about handling collisions. It updates the current marble.
The rest looks like magic. I implemented it and it still looks like magic.
You can think of [normx, normy] as a vector that points from current marble to collision candidate. It gives us bounce direction. We use the euclidean distance formula to calculate the length of this vector. The distance between the centers of both marbles.
Then we calculate the dot product between our marble’s speed vector and the collision direction vector. And we normalize it by distance. Multiplying distance by 2 accounts for there being two marbles in the collision. That extra .3 made the simulation look better.
Fiddling and experimentation are your best tools for magic values like that
Then we use the dot product scalar to adjust the marble’s speed vector. Dividing by 2 takes into account that half the energy goes to the other marble. This is true because we assume their masses are equal.
Finally, we update the candidate marble and make sure it bounces off as well. We do it additively because that’s how it happens in real life.
Two marbles traveling towards each other in exactly opposite directions with exactly the same speed, will stop dead and stay there. As soon as there’s any misalignment, deflection happens. If one is stationary, it starts moving. If it’s moving in the same direction, it speeds up… etc.
The end result is a decent-looking simulation of billiards.