Render Props
There are two important things to note before we get started. First, what we’re going to talk about is just a pattern. It’s not even a React thing as much as it is a component architecture thing. Second, this isn’t required knowledge to build a React app. You could skip this post, never learn what we’re about to talk about, and still build fine React applications. However, just like building anything, the more tools you have available the better the outcome will be. If you write React apps, you’d be doing yourself a disservice by not having this in your “toolbox”.
You can’t get very far into studying software development before you hear the (almost cultish) mantra of Don't Repeat Yourself or D.R.Y . Sometimes it can be taken a bit too far, but for the most part, it’s a worthwhile goal. In this post, we’re going to look at the most popular pattern for accomplishing DRY in a React codebase, Higher-Order Components. However before we can explore the solution, we must first fully understand the problem.
Let’s say we were in charge of recreating a dashboard similar to Stripe’s. As most projects go, everything goes great until the very end. Just when you think you’re about to be done, you notice that the dashboard has a bunch of different tooltips that need to appear when certain elements are hovered over.
There are a few ways to approach this. The one you decide to go with is to detect the hover state of the individual components and from that state, show or not show the tooltip. There are three components you need to add this hover detection functionality to - Info , TrendChart and DailyChart .
Let’s start with Info . Right now it’s just a simple SVG icon.
class Info extends React.Component {
  render() {
    return (
      <svg
        className="Icon-svg Icon--hoverable-svg"
        height={this.props.height}
        viewBox="0 0 16 16" width="16">
          <path d="M9 8a1 1 0 0 0-1-1H5.5a1 1 0 1 0 0 2H7v4a1 1 0 0 0 2 0zM4 0h8a4 4 0 0 1 4 4v8a4 4 0 0 1-4 4H4a4 4 0 0 1-4-4V4a4 4 0 0 1 4-4zm4 5.5a1.5 1.5 0 1 0 0-3 1.5 1.5 0 0 0 0 3z" />
      </svg>
    )
  }
}
Now we need to add functionality to it so it can detect whether it’s being hovered over or not. We can use the onMouseOver and onMouseOut mouse events that come with React. The function we pass to onMouseOver will be invoked when the component is hovered over and the function we pass to onMouseOut will be invoked when the component is no longer being hovered over. To do this the React way, we’ll add a hovering state property to our component so that we can cause a re-render when the hovering state changes, showing or hiding our tooltip.
class Info extends React.Component {
  constructor(super) {
    super(props)

    this.state = {
      hovering: false
    }

    this.mouseOver = this.mouseOver.bind(this)
    this.mouseOut = this.mouseOut.bind(this)
  }
  mouseOver() {
    this.setState({hovering: true})
  }
  mouseOut() {
    this.setState({hovering: false})
  }
  render() {
    return (
      <>
        {this.state.hovering === true
          ? <Tooltip id={this.props.id} />
          : null}
        <svg
          onMouseOver={this.mouseOver}
          onMouseOut={this.mouseOut}
          className="Icon-svg Icon--hoverable-svg"
          height={this.props.height}
          viewBox="0 0 16 16" width="16">
            <path d="M9 8a1 1 0 0 0-1-1H5.5a1 1 0 1 0 0 2H7v4a1 1 0 0 0 2 0zM4 0h8a4 4 0 0 1 4 4v8a4 4 0 0 1-4 4H4a4 4 0 0 1-4-4V4a4 4 0 0 1 4-4zm4 5.5a1.5 1.5 0 1 0 0-3 1.5 1.5 0 0 0 0 3z" />
        </svg>
      </>
    )
  }
}
Now we need to add the same functionality to our other two components, TrendChart and DailyChart . If it’s not broke, don’t fix it. Our hover logic for Info worked great so let’s use that same code again.
class TrendChart extends React.Component {
  constructor(super) {
    super(props)

    this.state = {
      hovering: false
    }

    this.mouseOver = this.mouseOver.bind(this)
    this.mouseOut = this.mouseOut.bind(this)
  }
  mouseOver() {
    this.setState({hovering: true})
  }
  mouseOut() {
    this.setState({hovering: false})
  }
  render() {
    return (
      <>
        {this.state.hovering === true
          ? <Tooltip id={this.props.id}/>
          : null}
        <Chart
          type='trend'
          onMouseOver={this.mouseOver}
          onMouseOut={this.mouseOut}
        />
      </>
    )
  }
}
You probably know the next step. We can do the same thing for our final DailyChart component.
class DailyChart extends React.Component {
  constructor(super) {
    super(props)

    this.state = {
      hovering: false
    }

    this.mouseOver = this.mouseOver.bind(this)
    this.mouseOut = this.mouseOut.bind(this)
  }
  mouseOver() {
    this.setState({hovering: true})
  }
  mouseOut() {
    this.setState({hovering: false})
  }
  render() {
    return (
      <>
        {this.state.hovering === true
          ? <Tooltip id={this.props.id}/>
          : null}
        <Chart
          type='daily'
          onMouseOver={this.mouseOver}
          onMouseOut={this.mouseOut}
        />
      </>
    )
  }
}
And with that, we’re all finished. You may have written React like this before. It’s not the end of the world (#shipit), but it’s not very “DRY”. As you saw, we’re repeating the exact same hover logic in every one of our components.
At this point, the problem should be pretty clear, we want to avoid duplicating our hover logic anytime a new component needs it . So what’s the solution ? Well before we get to that, we need to get a refresh on two fundamental aspects of React. They are components which don’t render UI and passing functions as props.
No UI Components
In most cases whenever you build a React component, the end goal it to show some UI to the screen.
View = fn(state)
However, that doesn’t always need to be the case. It’s entirely reasonable to have components which act as “Wrapper” components. They’re responsible for handling some logic, but instead of rendering their own UI, they just render another component passing it data.
class Users extends React.Component {
  constructor(props) {
    super(props)

    this.state = {
      users: null
    }
  }
  componentDidMount() {
    getUsers()
      .then((users) => {
        this.setState({ users })
      })
  }
  render() {
    <Grid data={this.state.users} />
  }
}
In the example above, Users is responsible for getting the users, then passing them to the Grid component. It doesn’t have its own UI, instead, it uses the UI from the Grid component.
Passing functions as props
As you know, props are part of React’s component API that allow you to pass data into a component.
<User id='tylermcginnis' />
Then inside of the User component, the props object would have an id property referencing the string tylermcginnis .
function User (props) {
  const id = props.id // tylermcginnis
}
Now, what if instead of passing a string as a prop, we passed a function?
<User id={() => 'tylermcginnis'} />
Now the props object still has an id property, only now instead of being a string, it references a function. So in order to get the id, we need to invoke the function.
function User (props) {
  const id = props.id() // tylermcginnis
}
Now, what if we wanted to pass the function prop some data? Well, it’s just a function so we could do it just like we normally would by passing it an argument.
function User (props) {
  const id = props.id(true) // tylermcginnis
}

<User id={(isAuthed) => isAuthed === true ? 'tylermcginnis' : null} />
OK… but what do both of these have to do with the problem we saw earlier of duplicating our hover logic anytime a new component needs it? Well, we can combine both of these simple concepts in order to solve our problem.
First, we want to create a “Wrapper” component which is responsible for managing the hover state. We’ll call it, naturally, Hover and it’ll contain all the hover logic that we had to duplicate from earlier.
class Hover extends React.Component {
  constructor(super) {
    super(props)

    this.state = {
      hovering: false
    }

    this.mouseOver = this.mouseOver.bind(this)
    this.mouseOut = this.mouseOut.bind(this)
  }
  mouseOver() {
    this.setState({hovering: true})
  }
  mouseOut() {
    this.setState({hovering: false})
  }
  render() {
    return (
      <div onMouseOver={this.mouseOver} onMouseOut={this.mouseOut}>

      </div>
    )
  }
}
The next question becomes, what should Hover render? This is where are function prop knowledge comes into play. Let’s have Hover receive a prop called render . This render prop is going to be a function that we can pass the hovering state to and it will return some UI.
<Hover render={(hovering) =>
  <div>
    Is hovering? {hovering === true ? 'Yes' : 'No'}
  <div>
} />
Now the last change we need to make is in our Hover component. All we need to do is invoke this.props.render passing it this.state.hover .
class Hover extends React.Component {
  constructor(super) {
    super(props)

    this.state = {
      hovering: false
    }

    this.mouseOver = this.mouseOver.bind(this)
    this.mouseOut = this.mouseOut.bind(this)
  }
  mouseOver() {
    this.setState({hovering: true})
  }
  mouseOut() {
    this.setState({hovering: false})
  }
  render() {
    return (
      <div onMouseOver={this.mouseOver} onMouseOut={this.mouseOut}>
        {this.props.render(this.state.hovering)}
      </div>
    )
  }
}
Well, would you look at that? Now that we have our Hover component, any time we need a component to be aware of its hover state, we just wrap it inside of a Hover s render prop.
Finally, let’s head back to the original code we had and see how we no longer have to duplicate all the hover logic since we have our Hover component.
This is what we had before.
class Info extends React.Component {
  constructor(super) {
    super(props)

    this.state = {
      hovering: false
    }

    this.mouseOver = this.mouseOver.bind(this)
    this.mouseOut = this.mouseOut.bind(this)
  }
  mouseOver() {
    this.setState({hovering: true})
  }
  mouseOut() {
    this.setState({hovering: false})
  }
  render() {
    return (
      <>
        {this.state.hovering === true
          ? <Tooltip id={this.props.id} />
          : null}
        <svg
          onMouseOver={this.mouseOver}
          onMouseOut={this.mouseOut}
          className="Icon-svg Icon--hoverable-svg"
          height={this.props.height}
          viewBox="0 0 16 16" width="16">
            <path d="M9 8a1 1 0 0 0-1-1H5.5a1 1 0 1 0 0 2H7v4a1 1 0 0 0 2 0zM4 0h8a4 4 0 0 1 4 4v8a4 4 0 0 1-4 4H4a4 4 0 0 1-4-4V4a4 4 0 0 1 4-4zm4 5.5a1.5 1.5 0 1 0 0-3 1.5 1.5 0 0 0 0 3z" />
        </svg>
      </>
    )
  }
}

class TrendChart extends React.Component {
  constructor(super) {
    super(props)

    this.state = {
      hovering: false
    }

    this.mouseOver = this.mouseOver.bind(this)
    this.mouseOut = this.mouseOut.bind(this)
  }
  mouseOver() {
    this.setState({hovering: true})
  }
  mouseOut() {
    this.setState({hovering: false})
  }
  render() {
    return (
      <>
        {this.state.hovering === true
          ? <Tooltip id={this.props.id}/>
          : null}
        <Chart
          type='trend'
          onMouseOver={this.mouseOver}
          onMouseOut={this.mouseOut}
        />
      </>
    )
  }
}

class DailyChart extends React.Component {
  constructor(super) {
    super(props)

    this.state = {
      hovering: false
    }

    this.mouseOver = this.mouseOver.bind(this)
    this.mouseOut = this.mouseOut.bind(this)
  }
  mouseOver() {
    this.setState({hovering: true})
  }
  mouseOut() {
    this.setState({hovering: false})
  }
  render() {
    return (
      <>
        {this.state.hovering === true
          ? <Tooltip id={this.props.id}/>
          : null}
        <Chart
          type='daily'
          onMouseOver={this.mouseOver}
          onMouseOut={this.mouseOut}
        />
      </>
    )
  }
}

function App () {
  return (
    <>
      <Info />
      <TrendChart />
      <DailyChart />
    </>
  )
}
And now with our Hover component, instead of each component having to duplicate the hover logic, we can wrap each one inside of the render prop we pass to Hover and then pass down the hovering argument as a prop.
function Info (props) {
  return (
    <>
      {props.hovering === true
        ? <Tooltip id={this.props.id} />
        : null}
      <svg
        onMouseOver={this.mouseOver}
        onMouseOut={this.mouseOut}
        className="Icon-svg Icon--hoverable-svg"
        height={this.props.height}
        viewBox="0 0 16 16" width="16">
          <path d="M9 8a1 1 0 0 0-1-1H5.5a1 1 0 1 0 0 2H7v4a1 1 0 0 0 2 0zM4 0h8a4 4 0 0 1 4 4v8a4 4 0 0 1-4 4H4a4 4 0 0 1-4-4V4a4 4 0 0 1 4-4zm4 5.5a1.5 1.5 0 1 0 0-3 1.5 1.5 0 0 0 0 3z" />
      </svg>
    </>
  )
}

function TrendChart (props) {
  return (
    <>
      {props.hovering === true
        ? <Tooltip id={this.props.id}/>
        : null}
      <Chart
        type='trend'
        onMouseOver={this.mouseOver}
        onMouseOut={this.mouseOut}
      />
    </>
  )
}


function DailyChart (props) {
  return (
    <>
      {props.hovering === true
        ? <Tooltip id={this.props.id}/>
        : null}
      <Chart
        type='daily'
        onMouseOver={this.mouseOver}
        onMouseOut={this.mouseOut}
      />
    </>
  )
}

function App () {
  return (
    <>
      <Hover render={(hovering) =>
        <Info hovering={hovering}>
      } />

      <Hover render={(hovering) =>
        <TrendChart hovering={hovering}>
      } />

      <Hover render={(hovering) =>
        <DailyChart hovering={hovering}>
      } />
    </>
  )
}
This pattern, as you probably guessed by now, is called Render Props . Summarized in the React docs, “the term render prop refers to a technique for sharing code between React components using a prop whose value is a function”.
Another way to utilize the render props pattern is with React’s children prop. If you’ve never used props.children before, it’s just like any other prop. However, instead of you passing it explicitly to the component, React automatically does it for you and it references whatever between the opening and closing tags of the component.
function User (props) {
  return (
    <div>
      {props.children}
    </div>
  )
}

<User>
  This is props.children
</User>
In the example above, what’s going to get rendered to the UI is a div with the words This is props.children inside of it.
Now what if instead of having props.children be a string, it was a function? Just as we saw earlier, we’d need to invoke it to get the value.
function User (props) {
  return (
    <div>
      {props.children()}    </div>
  )
}

<User>
  {() => This is props.children}</User>
With our newly formed knowledge of props.children , let’s update our examples from earlier. Now instead of Hover having a render prop, let’s get rid of that all together and use props.children instead.
function App () {
  return (
    <>
      <Hover>
        {(hovering) => <Info hovering={hovering}>}
      </Hover>

      <Hover>
        {(hovering) => <TrendChart hovering={hovering}>}
      </Hover>

      <Hover>
        {(hovering) => <DailyChart hovering={hovering}>}
      </Hover>
    </>
  )
}
Now we need to update Hover so instead of invoking this.props.render , it invokes this.props.children .
class Hover extends React.Component {
  constructor(super) {
    super(props)

    this.state = {
      hovering: false
    }
    this.mouseOver = this.mouseOver.bind(this)
    this.mouseOut = this.mouseOut.bind(this)
  }
  mouseOver() {
    this.setState({hovering: true})
  }
  mouseOut() {
    this.setState({hovering: false})
  }
  render() {
    return (
      <div onMouseOver={this.mouseOver} onMouseOut={this.mouseOut}>
        {this.props.children(this.state.hovering)}
      </div>
    )
  }
}
Nice. Is this better? Not really, it’s just different. I prefer it, but there’s nothing objectively better about it.
If you read our post about Higher Order Components, you’ll be familiar with how HOCs have some pitfalls. The biggest one was with inversion of control and naming collisions. Because you have to pass your component over to the Higher-Order component, you have no control over how it’s rendered. We looked at an example with React Router’s withRouter HOC. withRouter will pass match , location , and history props to the wrapped component whenever it renders.
class Game extends React.Component {
  render() {
    const { match, location, history } = this.props // From React Router

    ...
  }
}

export default withRouter(Game)
If our Game component is already receiving match , location , or history as a prop, we’re going to have a naming collision and it’s going to be a hard bug to track down.
Does this same pitfall occur with Render Props? Nope. Instead of handing over the component, we hand over a function. Then, when that function is invoked, it’ll be passed the data we need — no inversion of control and no naming collisions since we can decide how the component is rendered.
<Hover>
  {(hovering) => {
    // We can do whatever we want here.
    // We decide how and when to render the component
    return <Info anyNameWeWant={hovering} />
  }}
</Hover>
Now the big question is, should you use Render Props or Higher Order Components? Well, that’s up to you. You now know how to use them both which means you have enough information to make an informed decision for yourself.
(Project) Hover Render Prop
The code for this video can be found here.
The commit for this video can be found here.
React Context
Whenever you’re utilizing a component architecture, as your application grows, the ability to share state amongst different components will inevitably become an issue.
Let’s pretend we had an app with the following architecture, each circle representing a different component.
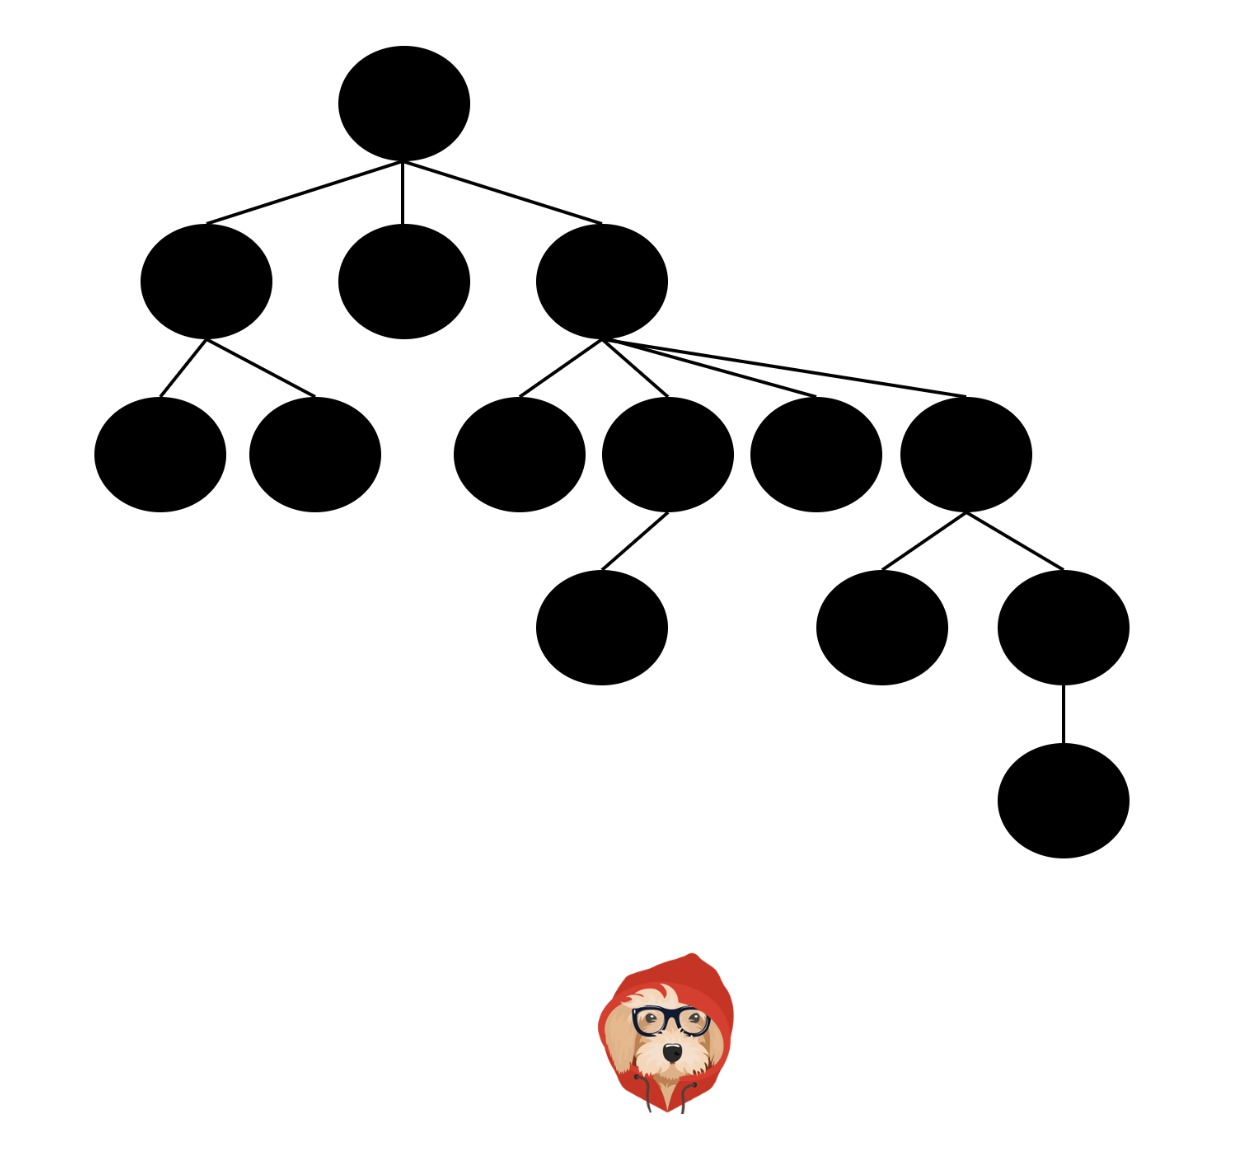
Now let’s pretend that we had a piece of state that was needed throughout various levels of our application, represented here as a diamond.

The recommended solution for this problem is to move that state up to the nearest parent component and then pass it down via props.

This works, and most of the time it’s the right solution. However, there are times when passing props through intermediate components can become overly redundant or downright unmanageable. Take a tool like React Router for example. React Router needs to have the ability to pass routing props to any component in the component tree, regardless of how deeply nested the components are. Because this is such a significant problem, React comes with a built-in API to solve it called Context.
Context provides a way to pass data through the component tree without having to pass props down manually at every level. - The React Docs
Now that we know the problem that Context solves, how do we use it?
The Context API
For our example, let’s say we’re building an app that is used by both English and Spanish speaking countries. We want to expose a button that when it’s clicked, can toggle the text of our entire application between English and Spanish.
From a high level, if you think about what’s needed to solve this problem, there are two aspects to it.
- We need a way to declare the data that we want available throughout our component tree. In our example, that data is a
localevalue that will be eitherenores. - We need a way for any component in the component tree that requires that data to be able to subscribe to it.
React gives us the ability to do both of those things whenever we create a new Context using the React.createContext method.
Typically, you create a new Context for each unique piece of data that needs to be available throughout your component tree. Based on our example, we’ll create a
LocaleContext.
const LocaleContext = React.createContext()
Now if we examine our LocaleContext , you’ll notice that it has two properties, both of which are React components, Provider , and Consumer .
Provider allows us to “declare the data that we want available throughout our component tree”.
Consumer allows “any component in the component tree that needs that data to be able to subscribe to it”.
Provider
You use Provider just like you would any other React component. It accepts a value prop which is the data that you want available to any of its children who need to consume it.
<MyContext.Provider value={data}>
  <App />
</MyContext.Provider>
In our example, we want locale to be available anywhere in the component tree. We also want to update the UI (re-render) whenever it changes, so we’ll stick it on our component’s state.
// LocaleContext.js
import React from "react"

const LocaleContext = React.createContext()

export default LocaleContext
import React from 'react'
import LocaleContext from './LocaleContext'

class App extends React.Component {
  constructor(props) {
    super(props)

    this.state = {
      locale: 'en'
    }
  }
  render() {
    return (
      <LocaleContext.Provider value={this.state.locale}>
        <Home />
      </LocaleContext.Provider>
    )
  }
}

export default App
Now, any component in our component tree that needs the value of locale will have the option to subscribe to it using LocaleContext.Consumer .
Consumer
Again, the whole point of the Consumer component is it allows you to get access to the data that was passed as a value prop to the Context’s Provider component. To do this, Consumer uses a render prop.
<MyContext.Consumer>
  {(data) => {
    return (
      <h1>
        The "value" prop passed to "Provider" was {data}
      </h1>
    )
  }}
</MyContext.Consumer>
Now in our example, because we passed this.state.locale as the value prop to LocaleContext.Provider , we can get access to it by passing LocaleContext.Consumer a render prop.
// Blog.js
import React from 'react'
import LocaleContext from './LocaleContext'

export default function Blog () {
  return (
    <LocaleContext.Consumer>
      {(locale) => <Posts locale={locale} />}
    </LocaleContext.Consumer>
  )
}
Updating Context State
At this point, we’ve seen that because we wrapped our whole app in <LocaleContext.Provider value={this.state.locale}> , any component in our application tree can get access to locale by using LocaleContext.Consumer . However, getting access to locale isn’t enough. We also want to be able to toggle it ( en -> es ) from anywhere inside of our component tree. So just as we did with this.state.locale , we’ll add a new property to the value prop of LocaleContext.Provider .
Your first intuition might be to do something like this.
class App extends React.Component {
  constructor(props) {
    super(props)

    this.state = {
      locale: 'en'
    }
  }
  render() {
    return (
      <LocaleContext.Provider
        value={{
          locale: this.state.locale,
          toggleLocale: : () => {
            this.setState(({ locale }) => ({
              locale: locale === "en" ? "es" : "en"
            }));
          }
        }}>
          <Home />
      </LocaleContext.Provider>
    )
  }
}
So what we’ve done is added a new property to the object we pass to value . Now, anywhere in our component tree, using ThemeContext.Consumer , we can grab locale OR toggleLocale .
Sadly, the idea is right, but the execution is wrong. Can you think of any downsides to this approach? Hint, it has to do with performance.
Just like React re-renders with prop changes, whenever the data passed to value changes, React will re-render every component which used Consumer to subscribe to that data. The way in which React knows if the data changes is by using “reference identity” (which is kind of a fancy way of saving oldObject === newObject ).
Currently, how we have it set up ( value={{}} ), we’re passing a new object to value every time that App re-renders. What this means is that when React checks if the data passed to value has changed, it’ll always think it has since we’re always passing in a new object. As a result of that, every component which used Consumer to subscribe to that data will re-render as well, even if nothing changed.
To fix this, instead of passing a new object to value every time, we want to give it a reference to an object it already knows about. Though it may look weird, our state object fits this need perfectly.
class App extends React.Component {
  constructor(props) {
    super(props)

    this.state = {
      locale: 'en',
      toggleLocale: () => {
        this.setState(({ locale }) => ({
          locale: locale === "en" ? "es" : "en"
        }));
      }
    }
  }
  render() {
    return (
      <LocaleContext.Provider value={this.state}>
        <Home />
      </LocaleContext.Provider>
    )
  }
}
Now, anywhere inside of our component tree, we can get access to the locale value or the ability to change it via toggleLocale .
// Blog.js
import React from 'react'
import LocaleContext from './LocaleContext'

export default function Blog () {
  return (
    <LocaleContext.Consumer>
      {({ locale, toggleLocale }) => (
        <React.Fragment>
          <Nav toggleLocal={toggleLocale} />
          <Posts locale={locale} />
        </React.Fragment>
      )}
    </LocaleContext.Consumer>
  )
}
Here’s the link to the full locale app if you want to play around with it. Admittedly, it’s not the best use of Context as it’s a pretty shallow app, but it gives you the general idea how to use Context in an app with multiple routes/components.
defaultValue
Whenever you render a Consumer component, it gets its value from the value prop of the nearest Provider component of the same Context object. However, what if there isn’t a parent Provider of the same Context object? In that case, it’ll get its value from the first argument that was passed to createContext when the Context object was created.
const MyContext = React.creatContext('defaultValue')
And adapted to our example.
const LocaleContext = React.createContext('en')
Now, if we use <LocaleContext.Consumer> without previously rendering a <LocaleContext.Provider> , the value passed to Consumer will be en .
Here’s a very clever example my good friend chantastic came up with. I’ve modified it a bit, but the core idea is his.
Here’s a live version you can play around with.
import React from 'react'
import ReactDOM from 'react-dom'

const ExpletiveContext = React.createContext('shit')

function ContextualExclamation () {
  return (
    <ExpletiveContext.Consumer>
      {(word ) => <span>Oh {word}!</span>}
    </ExpletiveContext.Consumer>
  )
}

function VisitGrandmasHouse () {
  return (
    <ExpletiveContext.Provider value='poop'>
      <h1>Grandma's House 🏡</h1>
      <ContextualExclamation />
    </ExpletiveContext.Provider>
  )
}

function VisitFriendsHouse () {
  return (
    <React.Fragment>
      <h1>Friend's House 🏚</h1>
      <ContextualExclamation />
    </React.Fragment>
  )
}

function App () {
  return (
    <React.Fragment>
      <VisitFriendsHouse />
      <VisitGrandmasHouse />
    </React.Fragment>
  )
}
Can you follow what’s going on? First, we create a new ExpletiveContext and set its default value to shit . Then we render two components, VisitFriendsHouse and VisitGrandmasHouse .
Because we’re allowed to swear at our friend’s house, VisitFriendsHouse renders ExpletiveContext.Consumer whose value will default to shit since there’s not a ExpletiveContext.Provider in the tree above it.
Unlike at our friends, with Grandma, we’re not allowed to swear. So instead of just rendering ExpletiveContext.Consumer , we wrap it in ExpletiveContext.Provider passing it a value of poop . This way when the Consumer looks for its nearest Provider , it’ll find it and get a value of poop rather than the default value of shit .
Warnings
Here’s the thing, when you’re a hammer, everything looks like a nail. Typically when you first learn about Context, it appears like it’s the solution to all your problems. Just remember, there’s nothing wrong with passing props down multiple levels, that’s literally how React was designed. I don’t have a universal rule for when you should and shouldn’t use Context, just be mindful that it’s common to overuse it.
(Project) Theme Provider
The code for this video can be found here.
The commit for this video can be found here.
(Project) Toggle Theme
The code for this video can be found here.
The commit for this video can be found here.
(Project) Consume Theme
The code for this video can be found here.
The commit for this video can be found here.
Introduction to React Router
If you’ve been in React land for the last few years, you know that React Router has gone through a few different iterations. Say what you will, but it’s clear that the React Router we have today (v5) is a huge improvement on previous versions. The reason for these changes are pretty standard - the authors today are more experienced React developers than they were when React Router was first built. You see, back in 2014, everyone was new to React. React itself was still under a year old and no one really knew to what extent this whole component thing would play out. With that in mind, it’s natural that the first commits of React Router looked something like this.
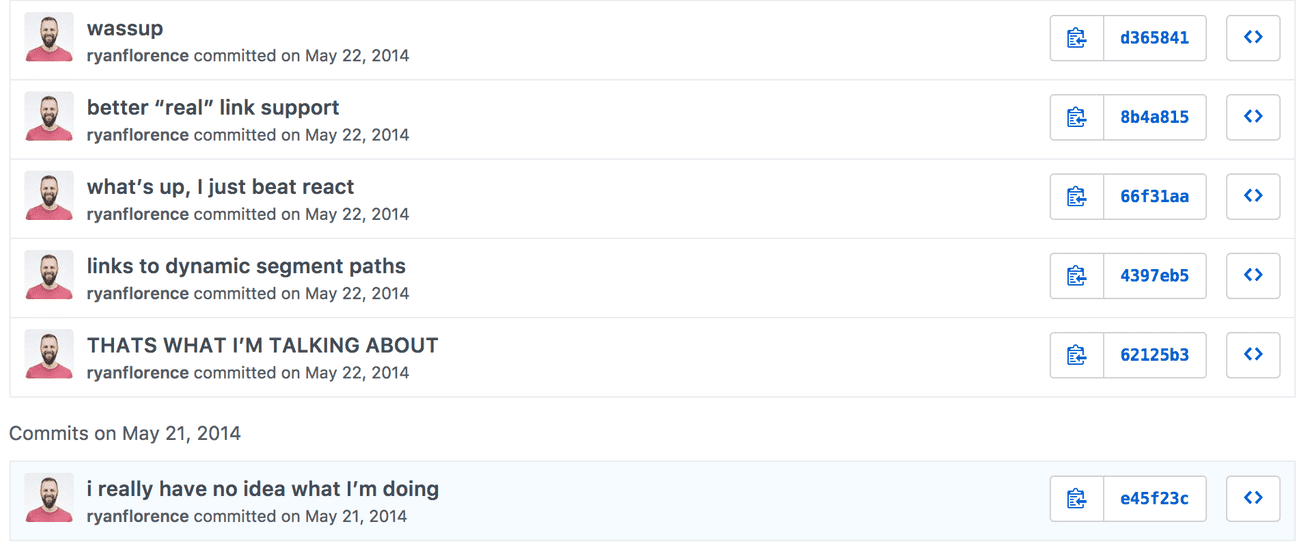
At the time, the creators of React Router were coming from Ember backgrounds. So naturally, the first version of React Router was similar in nature to that of Ember’s router. That is, with both routers you’d establish your routes statically as part of the app’s initialization process. In fact, mostly all of the router’s you’re probably familiar with are used this way - Express, Angular, Ember. Even React Router pre version 4 used static routes as well. Here’s some code from React Router before version 4. Typically you’d have a routes.js file where you’d establish your static routes.
// routes.js

const routes = (
  <Router>
    <Route path='/' component={Main}>
      <IndexRoute component={Home} />
      <Route path='playerOne' component={Prompt} />
      <Route path='playerTwo/:playerOne' component={Prompt} />
      <Route path='battle' component={ConfirmBattle} />
      <Route path='results' component={Results} />
      <Route onEnter={checkAuth} path='dashboard' component={Dashboard} />
    </Route>
  </Router>
)

export default routes
Then, when you’d initialize your app, you’d import your routes and render them.
// index.js

import React from 'react'
import ReactDOM from 'react-dom'
import routes from './config/routes'

ReactDOM.render(routes, document.getElementById('app'))
This brings up the question, “is static routing bad?”. The answer to that is obviously, no. One could argue it’s not really the “React way” of doing things though. Since its creation, the creators of React Router have gained more experience with React. What they found was the design patterns behind React didn’t align with the original API of React Router. Not only that, but in some places they were actually competing with the React API. Looking back at the previous example, we pass an onEnter prop to the <Route> component.
<Route onEnter={checkAuth} path='dashboard' component={Dashboard} />
The idea here is that before the user sees the Dashboard component, the checkAuth function verifies the user is authenticated. Well, doesn’t that sound similar to what should happen inside of Dashboard 's componentDidMount lifecycle hook? It is.
With previous versions of React Router, it was more of a router for React than an actual React router. React Router v4 was built to fix these inconsistencies and work with React, rather than against it. If you’re already familiar with the benefits of React and the benefits of component composition, React Router v4 is going to make you feel at home - you just need to forget everything you know about traditional static routers.
Now the question is why is it that React Router v4 aligns nicely with React when previous versions fought against it? The answer is because it ditched static routing in favor of dynamic routing and the entire API is just components. What that means is that you declare your routes as part of your application just like you would any other component.
Let’s take a look at some code.
The goal here is to start out with some very basic code, then slowly add routing functionality to it. Here’s our starting code.
import React, { Component } from 'react'

class App extends Component {
  render() {
    return (
      <div>
        React Router Course
      </div>
    )
  }
}

export default App
As I mentioned earlier, React Router v4 is “just components”. So the first thing we’ll need to do is import the ones we’ll need.
import {
  BrowserRouter as Router,
  Route,
  Link,
} from 'react-router-dom'
A few things to note here. First, we’re importing BrowserRouter and renaming it Router . That’s not necessary, but it’s pretty common. What BrowserRouter does is it allows React Router to pass the app’s routing information down to any child component it needs (via context). So to make React Router work, you’ll need to render BrowserRouter at the root of your application.
import React, { Component } from 'react'
import {
  BrowserRouter as Router,
  Route,
  Link,
} from 'react-router-dom'

class App extends Component {
  render() {
    return (
      <Router>
        <div>
          React Router Course
        </div>
      </Router>
    )
  }
}

export default App
Next, we have Route . Route is both the backbone and the genius behind React Router v4. When the app’s location matches a certain path, Route will render a specified component, when it doesn’t, it will render null. So say for example we had a Home component that we wanted to render when our app was at the index path / . Our code would look something like this
import React, { Component } from 'react'
import {
  BrowserRouter as Router,
  Route,
  Link,
} from 'react-router-dom'

const Home = () => (
  <h2>Home</h2>
)

class App extends Component {
  render() {
    return (
      <Router>
        <div>
          <Route path='/' component={Home} />
        </div>
      </Router>
    )
  }
}

export default App
With the code above, if we were at the index page (/), we would see the Home component. If we weren’t, we wouldn’t see anything (because Route would have rendered null).
Let’s add a few more routes now.
import React, { Component } from 'react'
import {
  BrowserRouter as Router,
  Route,
  Link,
} from 'react-router-dom'

const Home = () => (
  <div>
    <h2>Home</h2>
  </div>
)

const About = () => (
  <div>
    <h2>About</h2>
  </div>
)

const Topics = () => (
  <div>
    <h2>Topics</h2>
  </div>
)

class App extends Component {
  render() {
    return (
      <Router>
        <div>
          <Route path='/' component={Home} />
          <Route path='/about' component={About} />
          <Route path='/topics' component={Topics} />
        </div>
      </Router>
    )
  }
}

export default App
Notice that if we want to add more routes to our app, we just render more Route components. Again, this may feel a little weird to your brain if you’re coming from static based routers since we’re literally rendering our routes. One thing that helped me was to remember Route is just a normal React component with a render method. That render method is either rendering the component or it’s rendering null depending on if the path matches. So when we render multiple Route components like we’re doing above, those will either render the component or just render null.
So far, so good. One caveat that you might not have seen from the above code is that right now if you run the app and you head to the /about path, you’ll notice that both the About component and the Home component are rendered. This is because even though / doesn’t match the location exactly, it’s still considered a partial match so the Home component is rendered. To get around this, you simply need to add an exact prop to the / Route to specify that you only want it to match when the location matches exactly.
<Route exact path='/' component={Home} />
Now that we’re dynamically rendering UI based on the app’s location, the next thing we need to do is have some way for the user to change the app’s location. This is where the Link component comes into play. It’s a simple component that allows the user to declaratively navigate around the app. Now, using Link , let’s add a simple navbar to our app.
render() {
  return (
    <Router>
      <div>
        <ul>
          <li><Link to='/'>Home</Link></li>
          <li><Link to='/about'>About</Link></li>
          <li><Link to='/topics'>Topics</Link></li>
        </ul>

        <Route path='/' component={Home} />
        <Route path='/about' component={About} />
        <Route path='/topics' component={Topics} />
      </div>
    </Router>
  )
}
At this point, we’ve covered the absolute fundamentals of React Router v4. We’re dynamically changing the UI based on the location by rendering a few different Route components and we’re able to change the location of our app by rendering a few different Link components. Let’s go a little deeper and talk about nested routes. Nested routes were a fundamental aspect of previous versions of React Router and they continue to be today. The biggest difference is the way in which you go about creating nested routes now compared to previous versions of React Router. In previous, static versions, you’d just nest routes in your route config. Because React Router v4 is all about dynamic routing, you can’t do that. However, in my opinion, nested routes with React Router v4 is much more intuitive than with previous versions. Again, the key is to forget what you knew previously.
Looking back at our example, what if we wanted the Topics component to render a nested navbar and some nested routes? The answer to that doesn’t need to be complicated. Just like you would nest a div, you can nest Route s.
const Topic = () => {
  <div>
    <h3>TOPIC</h3>
  </div>
}

const Topics = () => (
  <div>
    <h2>Topics</h2>
    <ul>
      <li>
        <Link to={`/topics/rendering`}>
          Rendering with React
        </Link>
      </li>
      <li>
        <Link to={`/topics/components`}>
          Components
        </Link>
      </li>
      <li>
        <Link to={`/topics/props-v-state`}>
          Props v. State
        </Link>
      </li>
    </ul>

    <Route path={`/topics/rendering`} component={Topic} />
    <Route path={`/topics/components`} component={Topic} />
    <Route path={`/topics/props-v-state`} component={Topic} />
  </div>
)
Now when the user navigates to /topics , they’ll see a nested navbar and the UI will be dynamically changing - just like before - based on the location. The only difference is now we’re rendering the navbar and the Route s inside of another component, which is also being rendered by React Router.
You may have noticed that we hard coded the URLs instead of dynamically creating them based on the current nested location we’re on. When React Router renders a component, it passes that component three things: match , location , and history . In this example, what we want is match.url which will give us the current matched portion of the URL (in our example, /topics ). So anywhere where we’re hard coding /topic , we can replace with match.url .
const Topic = () => {
  <div>
    <h3>TOPIC</h3>
  </div>
}

const Topics = ({ match }) => (
  <div>
    <h2>Topics</h2>
    <ul>
      <li>
        <Link to={`${match.url}/rendering`}>
          Rendering with React
        </Link>
      </li>
      <li>
        <Link to={`${match.url}/components`}>
          Components
        </Link>
      </li>
      <li>
        <Link to={`${match.url}/props-v-state`}>
          Props v. State
        </Link>
      </li>
    </ul>

    <Route path={`${match.url}/rendering`} component={Topic} />
    <Route path={`${match.url}/components`} component={Topic} />
    <Route path={`${match.url}/props-v-state`} component={Topic} />
  </div>
)
Another thing you may have noticed is that we’re rendering three different Route s even though each are rendering the same component and the only difference is the nested URL. This is the perfect use case for using URL parameters.
const Topics = ({ match }) => (
  <div>
    ...

    <Route path={`${match.url}/:topicId`} component={Topic} />
  </div>
)
Now when React Router renders the Topic component, because we’re passed that match prop we talked about earlier, we’re also passed the topicId under match.params .
const Topic = ({ match }) => (
  <div>
    <h3>{match.params.topicId}</h3>
  </div>
)
Now lastly, when we’re at the /topics route, if a topic hasn’t already been selected, we want to render some text that says “Please select a topic”. We can make a component that renders that text or we can just use Route s render prop like so
<Route exact path={match.url} render={() => (
  <h3>Please select a topic.</h3>
)}/>
That’s it! Our final code now looks like this,
import React, { Component } from 'react'
import {
  BrowserRouter as Router,
  Route,
  Link
} from 'react-router-dom'

const Home = () => (
  <div>
    <h2>Home</h2>
  </div>
)

const About = () => (
  <div>
    <h2>About</h2>
  </div>
)

const Topic = ({ match }) => (
  <div>
    <h3>{match.params.topicId}</h3>
  </div>
)

const Topics = ({ match }) => (
  <div>
    <h2>Topics</h2>
    <ul>
      <li>
        <Link to={`${match.url}/rendering`}>
          Rendering with React
        </Link>
      </li>
      <li>
        <Link to={`${match.url}/components`}>
          Components
        </Link>
      </li>
      <li>
        <Link to={`${match.url}/props-v-state`}>
          Props v. State
        </Link>
      </li>
    </ul>

    <Route path={`${match.url}/:topicId`} component={Topic}/>
    <Route exact path={match.url} render={() => (
      <h3>Please select a topic.</h3>
    )}/>
  </div>
)

class App extends Component {
  render() {
    return (
      <Router>
        <div>
          <ul>
            <li><Link to="/">Home</Link></li>
            <li><Link to="/about">About</Link></li>
            <li><Link to="/topics">Topics</Link></li>
          </ul>

          <hr/>

          <Route exact path="/" component={Home}/>
          <Route path="/about" component={About}/>
          <Route path="/topics" component={Topics}/>
        </div>
      </Router>
    )
  }
}

export default App
By utilizing a component-based API, React Router v4 truly is a React router. I believe React will make you a better JavaScript developer and React Router v4 will make you a better React developer.
(Project) Adding Routes
The code for this video can be found here.
The commit for this video can be found here.
(Project) Navbar
The code for this video can be found here.
The commit for this video can be found here.
React Router Query Strings
When you’re building for the web, if you want to pass information via the URL (and it doesn’t make sense to use a URL parameter), you’d use a query string.
You’ve probably seen this before IRL. Here’s an example from Twitter’s analytics page that we’ll use throughout this post.

This URL has three route parameters and two query strings. Twitter is using query strings to tell its route to filter the Tweets by top (most popular) and that the origin was im (which I’m not sure what that means, TBH). With that said, odds are you’re not here to learn what query strings are but instead how to use them with React Router. The good news is that if you’re already comfortable with React Router, there are just a few small details you need to know.
Let’s say we were Twitter and we were building the Route for the URL above. It may look something like this
<Route path={`match.path/tweets`} component={Tweets} />
Notice at this point there’s nothing new. We don’t have to account for the query string when we create the Route . All we need to do is parse them inside the component that is being rendered when that path matches - in this case, Tweets .
Again, we’re assuming the URL looks like this https://analytics.twitter.com/user/tylermcginnis/tweets?filter=top&origin=im
class Tweets extends Component {
  componentDidMount() {
    // How do we get the values for filter and origin?
  }
  render() {
    ...
  }
}
Now the question becomes, how do we get access to the query string values from the URL? If you poke around on the location object that is passed to all components rendered by React Router, you’ll notice that it has a search property on it.
componentDidMount() {
  console.log(this.props.location.search) // "?filter=top&origin=im"
}
Cool, but this is the literal query string . You’ll need to somehow parse it before you can get the actual values. You may be surprised to hear that React Router doesn’t come with built-in with support for parsing query strings. The reason for this is because, over the years, there have been many requests to support different implementations. With that, the team decided it would be best for users to decide what the implementation looks like rather than baking in a “one size fits all” solution. Regardless, what that means is that you’ll need to use a browser API (that may not be supported by all the browsers you need) or use an external library for parsing the query string. The library I typically use is the query-string library on NPM.
With that library installed, all we need to do is call queryString.parse passing in our location.search . That will parse the query string into an object which we can then grab the values off of.
import queryString from 'query-string'

...

componentDidMount() {
  const values = queryString.parse(this.props.location.search)
  console.log(values.filter) // "top"
  console.log(values.origin) // "im"
}
That’s it. Go parse those query strings.
(Project) Query Strings
The code for this video can be found here.
The commit for this video can be found here.
404 with React Router
A common use case for when you’re building an app with React Router is to have a “catch all” route that will be rendered if none of your other routes match. A good example of this is if you wanted your client-side router to render a 404 page. To see how this works, let’s first render a navbar with the following paths - / , /will-match , /will-not-match , and /also/will/not/match .
import React from 'react'
import {
  BrowserRouter as Router,
  Route,
  Link
} from 'react-router-dom'

class App extends React.Component {
  render() {
    <Router>
      <div>
        <ul>
          <li><Link to="/">Home</Link></li>
          <li><Link to="/will-match">Will Match</Link></li>
          <li><Link to="/will-not-match">Will Not Match</Link></li>
          <li><Link to="/also/will/not/match">Also Will Not Match</Link></li>
        </ul>
      </div>
    </Router>
  }
}

export default App
Now that we have the navbar set up, let’s create three different components to render - Home , which will match on / , WillMatch which will match on /will-match , and NoMatch , which will be the catch-all component which will render if none of the other route’s match.
const Home = () => (
  <h1>
    Home
  </h1>
)

const WillMatch = () => <h3>Matched!</h3>

const NoMatch = ({ location }) => (
  <div>
    <h3>No match for <code>{location.pathname}</code></h3>
  </div>
)
Now that we have the components which are going to be rendered, we need to actually render some Route s. Home and WillMatch are straight forward, they just get rendered as they normally would.
render() {
  <Router>
    <div>
      <ul>
        <li><Link to="/">Home</Link></li>
        <li><Link to="/will-match">Will Match</Link></li>
        <li><Link to="/will-not-match">Will Not Match</Link></li>
        <li><Link to="/also/will/not/match">Also Will Not Match</Link></li>
      </ul>

      <Route path="/" exact component={Home}/>
      <Route path="/will-match" component={WillMatch}/>
    </div>
  </Router>
}
But how do we render NoMatch ? Here’s one tip that will get us closer. If you render a Route but don’t specify a path prop, that route will always be rendered. Knowing that, we could throw a new Route with no path that rendered NoMatch at the end of our routes?
<Route path="/" exact component={Home}/>
<Route path="/will-match" component={WillMatch}/>
<Route component={NoMatch} />
Ok, cool. But it still doesn’t work. Now the app renders the Home and WillMatch components properly but it also always renders the NoMatch component no matter what path we’re on, because the Route has no path , and if it has no path , it will always be rendered… 
What we need is a way to tell React Router that we only want to render the first Route that matches, even if there’s more than one match. This way, if the / or /will-match paths match, the router will render the associated component, and if not, it will render the NoMatch component. The good news is React Router comes with a component that does exactly this and it’s called Switch . All we need to do is wrap our Route s inside of a Switch then just as we wanted, only the first match will ever be rendered.
render() {
  <Router>
    <div>
      <ul>
        <li><Link to="/">Home</Link></li>
        <li><Link to="/will-match">Will Match</Link></li>
        <li><Link to="/will-not-match">Will Not Match</Link></li>
        <li><Link to="/also/will/not/match">Also Will Not Match</Link></li>
      </ul>

      <Switch>
        <Route path="/" exact component={Home}/>
        <Route path="/will-match" component={WillMatch}/>
        <Route component={NoMatch} />
      </Switch>
    </div>
  </Router>
}
 Now if the user isn’t at
 / or /will-match , the NoMatch component will be rendered.
(Project) 404
The code for this video can be found here.
The commit for this video can be found here.
Class Fields
My favorite part of the JavaScript community is that everyone seems to always be asking “why?” . Why do we do things the way we do them? Generally, the answer to that question is full of reason and historical context. But sometimes, the answer tends to be more simple - “because that’s what we’ve always done.”
Here’s a typical Player class.
class Player {
  constructor() {
    this.points = 0
    this.assists = 0
    this.rebounds = 0
    this.steals = 0
  }
  addPoints(amount) {
    this.points += amount
  }
  addAssist() {
    this.assists++
  }
  addRebound() {
    this.rebounds++
  }
  addSteal() {
    this.steals++
  }
}
Looking at that code, is there any way we can make it a little more intuitive? The methods are fine, those come pretty naturally. What about the constructor? What even is a constructor and why do we have to define instance values there? Now, there are answers to those questions but why can’t we just add state to our instances just like we did with the methods? Something like this
class Player {
  points = 0
  assists = 0
  rebounds = 0
  steals = 0
  addPoints(amount) {
    this.points += amount
  }
  addAssist() {
    this.assists++
  }
  addRebound() {
    this.rebounds++
  }
  addSteal() {
    this.steals++
  }
}
Turns out this is the foundation for the Class Fields Declaration proposal which is currently at Stage 3 in the TC-39 process. This proposal will allow you to add instance properties directly as a property on the class without having to use the constructor method. Pretty slick, but where this proposal really shines is if we look at some React code. Here’s a typical React component. It has local state, some methods, and a few static properties being added to the class.
class PlayerInput extends Component {
  constructor(props) {
    super(props)
    this.state = {
      username: ''
    }

    this.handleChange = this.handleChange.bind(this)
  }
  handleChange(event) {
    this.setState({
      username: event.target.value
    })
  }
  render() {
    ...
  }
}

PlayerInput.propTypes = {
  id: PropTypes.string.isRequired,
  label: PropTypes.string.isRequired,
  onSubmit: PropTypes.func.isRequired,
}

PlayerInput.defaultProps = {
  label: 'Username',
}
Let’s see how the new Class Fields proposal improves the code above First, we can take our state variable out of the constructor and define it directly as a property (or “field”) on the class.
class PlayerInput extends Component {
  state = {    username: ''  }  constructor(props) {
    super(props)

    this.handleChange = this.handleChange.bind(this)
  }
  handleChange(event) {
    this.setState({
      username: event.target.value
    })
  }
  render() {
    ...
  }
}

PlayerInput.propTypes = {
  id: PropTypes.string.isRequired,
  label: PropTypes.string.isRequired,
  onSubmit: PropTypes.func.isRequired,
}

PlayerInput.defaultProps = {
  label: 'Username',
}
Cool, but nothing to get too excited over. Let’s keep going.
You may have seen static class methods before.
class ClassWithStaticMethod {
  static staticMethod() {
    return 'static method has been called.';
  }
}
Unfortunately, according to the ES6 class specification, this only works with methods, not values. That’s why in the code above we have to add propTypes and defaultProps to PlayerInput after we define it and not in the class body. Again, why can’t those go directly on the class body just as a static method would? Well, the good news is this is encompassed in the Class Fields proposal as well. So now instead of just defining static methods in the class body, you can also define static values. What that means for our code is we can move propTypes and defaultProps up into the class definition.
class PlayerInput extends Component {
  static propTypes = {    id: PropTypes.string.isRequired,    label: PropTypes.string.isRequired,    onSubmit: PropTypes.func.isRequired,  }  static defaultProps = {    label: 'Username'  }  state = {
    username: ''
  }
  constructor(props) {
    super(props)

    this.handleChange = this.handleChange.bind(this)
  }
  handleChange(event) {
    this.setState({
      username: event.target.value
    })
  }
  render() {
    ...
  }
}
Much better, but we still have that ugly constructor method and super invocation. Again, the reason we need the constructor right now is in order to bind the handleChange method to the correct context. If we could figure out another way to make sure handleChange was always invoked in the correct context, we could get rid of the constructor altogether.
If you’ve used arrow functions before, you know that they don’t have their own this keyword. Instead, the this keyword is bound lexically . That’s a fancy way of saying when you use the this keyword inside of an arrow function, things behave how you’d expect them to. Taking that knowledge and combining it with the “Class Fields” proposal, what if we swapped out the handleChange method for an arrow function? Seems a little weird but by doing this we’d get rid of the bind issue altogether since, again, arrow functions bind this lexically.
class PlayerInput extends Component {
  static propTypes = {
    id: PropTypes.string.isRequired,
    label: PropTypes.string.isRequired,
    onSubmit: PropTypes.func.isRequired,
  }
  static defaultProps = {
    label: 'Username'
  }
  state = {
    username: ''
  }
  handleChange = (event) => {    this.setState({      username: event.target.value    })  }  render() {
    ...
  }
}
Well, would you look at that? That’s much better than the original class we started with and it’s all thanks to the Class Fields proposal which will be part of the official EcmaScript specification soon.
From a developer experience standpoint, Class Fields are a clear win. However, there are some downsides to them that are rarely talked about. You may know that ES6 classes are really just sugar over what’s called the “pseudo-classical” pattern. Meaning, when you add a method to a class, that’s really like adding a method to the function’s prototype.
class Animal {
  eat() {}
}

// Is equivalent to

function Animal () {}
Animal.prototype.eat = function () {}
This is performant because eat is defined once and shared across all instances of the class. What does this have to do with Class Fields? Well, as we saw above, Class Fields are added to the instance. This means that for each instance we create, we’ll be creating a new eat method.
class Animal {
  eat() {}
  sleep = () => {}
}

// Is equivalent to

function Animal () {
  this.sleep = function () {}
}

Animal.prototype.eat = function () {}
Notice how sleep gets put on the instance and not on Animal.prototype . Is this a bad thing? Well, it can be. Making broad statements about performance without measuring is generally a bad idea. The question you need to answer in your application is if the developer experience you gain from Class Fields outweighs the potential performance hit.
If you want to use any of what we’ve talked about so far in your app, you’ll need to use the babel-plugin-transform-class-properties plugin.
(Project) Migrating to Class Fields
The code for this video can be found here.
The commit for this video can be found here.
Code Splitting in React
It’s 2019. Your users shouldn’t have to download your entire app when all they need is a piece of it. If a user is creating a new post, it doesn’t make sense to have them download all the code for the Registration view. If a user is registering, they don’t need the huge rich text editor your app needs on the Settings view. It’s wasteful and some would argue disrespectful to those users who don’t have the privilege of unlimited bandwidth. This idea has not only gained much more popularity in recent years, but it’s also become exponentially easier to pull off - it even has a fancy cool name - code splitting.
The idea is simple, don’t download code until the user needs it. In practice, it can be a little more complicated. The reason for this isn’t because code splitting itself is terribly difficult, but that there are various tools to do it and everyone has an opinion on which is the best. When you’re first starting out, it can be hard to parse what is what.
The two most common approaches are using Webpack and its bundle loader or the ECMAScript dynamic
import()proposal which is currently stage 3. Any chance I get to not use webpack, I take, so we’ll be using dynamicimport()in this post.
If you’re familiar with ES modules, you know that they’re completely static. What that means is that you must specify what you’re importing and exporting at compile time, not run time. This also means that you can’t dynamically import a module based on some condition. import s need to be declared at the top of your file or they’ll throw an error.
if (!user) {
import * as api from './api' // 🙅♀️🚫. "import' and 'export' may only appear at the top level"
}
Now, what if import didn’t have to be static? Meaning what if the code above worked? What benefits would that give us? First, it would mean we could load certain modules on demand. That would be pretty powerful since it would enable us to get closer to the vision of only downloading code the user needs.
if (editPost === true) {
  import * as edit from './editpost'

  edit.showEditor()
}
Assuming editpost contained a pretty large rich text editor, we’d make sure we didn’t download it until the user was actually ready to use it.
Another cool use case of this would be for legacy support. You could hold off on downloading specific code until you were certain the user’s browser didn’t already have it natively.
Here’s the good news (that I kind of already alluded to earlier). This type of functionality does exist, it’s supported by Create React App, and it’s currently in Stage 3 of the ECMAScript process. The difference is that instead of using import as you typically would, you use it like a function that returns you a promise that resolves with the module once the module is completely loaded.
if (editPost === true) {
  import('./editpost')
    .then((module) => module.showEditor())
    .catch((e) => )
}
Pretty rad, right?
Now that we know how to import modules dynamically, the next step is figuring out how to use it with React and React Router.
The first (and probably biggest) question we need to ask ourselves when it comes to code splitting with React is where should we split at? Typically, there are two answers.
Split at the route level.
Split at the component level.


The more common approach is to split at the route level. You already split your app into different routes, so adding in code splitting on top of that feels pretty natural. How would this actually look?
Let’s start off with a basic React Router example. We’ll have three routes, / , /topics , /settings .
import React, { Component } from 'react'
import {
  BrowserRouter as Router,
  Route,
  Link,
} from 'react-router-dom'

import Home from './Home'
import Topics from './Topics'
import Settings from './Settings'

class App extends Component {
  render() {
    return (
      <Router>
        <div>
          <ul>
            <li><Link to='/'>Home</Link></li>
            <li><Link to='/topics'>Topics</Link></li>
            <li><Link to='/settings'>Settings</Link></li>
          </ul>

          <hr />

          <Route exact path='/' component={Home} />
          <Route path='/topics' component={Topics} />
          <Route path='/settings' component={Settings} />
        </div>
      </Router>
    )
  }
}

export default App
Now, say our /settings route was super heavy. It contains a rich text editor, an original copy of Super Mario Brothers, and an HD image of Guy Fieri. We don’t want the user to have to download all of that when they’re not on the /settings route. Let’s use our knowledge of dynamic imports and React to code split the /settings route.
Just like we solve any problem with React, let’s make a component. We’ll call it DynamicImport . The goal of DynamicImport is to dynamically load a module, then, once it’s loaded, to pass that module to its children .
const Settings = (props) => (
  <DynamicImport load={() => import('./Settings')}>
    {(Component) => Component === null
      ? <Loading />
      : <Component {...props} />}
  </DynamicImport>
)
The above code tells us two important details about DynamicImport . First, it will receive a load prop which when invoked, will dynamically import a module using the dynamic import syntax we covered earlier. Second, it will receive a function as its children which will need to be invoked with the imported module.
Before we dive into the implementation of DynamicImport , let’s think about how we might accomplish this. The first thing we need to do is to make sure we call props.load . That will return us a promise that when it resolves, should have the module. Then, once we have the module, we need a way to cause a re-render so we can invoke props.children passing it that module. How do you cause a re-render in React? By setting state. By adding the dynamically imported module to DynamicImport s local state, we follow the exact same process with React as we’re used to - fetch data -> set state -> re-render. Except for this time instead of “fetch data”, we have “import module”.
First, let’s add some initial state to DynamicImport . component will eventually be the component that we’re dynamically importing.
class DynamicImport extends Component {
  state = {
    component: null
  }
}
Now, we need to call props.load . That will return us a promise that when it resolves, should have the module.
class DynamicImport extends Component {
  state = {
    component: null
  }
  componentDidMount () {
    this.props.load()
      .then((component) => {
        this.setState(() => ({
          component
        }))
      })
  }
}
There’s one small gotcha here. If the module we’re dynamically importing is using ES modules (export default), it’ll have a .default property. If the module is using commonjs (module.exports), it won’t. Let’s change our code to adapt for that.
this.props.load()
  .then((component) => {
    this.setState(() => ({
      component: component.default ? component.default : component
    }))
  })
Now that we’re dynamically importing the module and adding it to our state, the last thing we need to do is figure out what the render method looks like. If you remember, when the DynamicImport component is used, it’ll look like this
const Settings = (props) => (
  <DynamicImport load={() => import('./Settings')}>
    {(Component) => Component === null
      ? <Loading />
      : <Component {...props} />}
  </DynamicImport>
)
Notice that we’re passing it a function as its “children” prop. That means we need to invoke children passing it the component state.
class DynamicImport extends Component {
  state = {
    component: null
  }
  componentDidMount () {
    this.props.load()
      .then((component) => {
        this.setState(() => ({
          component: component.default ? component.default : component
        }))
      })
  }
  render() {
    return this.props.children(this.state.component)
  }
}
Now anytime we want to import a module dynamically, we can wrap it in DynamicImport . If we were to do this to all our routes, our code would look like this.
import React, { Component } from 'react'
import {
  BrowserRouter as Router,
  Route,
  Link,
} from 'react-router-dom'

class DynamicImport extends Component {
  state = {
    component: null
  }
  componentDidMount () {
    this.props.load()
      .then((component) => {
        this.setState(() => ({
          component: component.default ? component.default : component
        }))
      })
  }
  render() {
    return this.props.children(this.state.component)
  }
}

const Home = (props) => (
  <DynamicImport load={() => import('./Home')}>
    {(Component) => Component === null
      ? <p>Loading</p>
      : <Component {...props} />}
  </DynamicImport>
)

const Topics = (props) => (
  <DynamicImport load={() => import('./Topics')}>
    {(Component) => Component === null
      ? <p>Loading</p>
      : <Component {...props} />}
  </DynamicImport>
)

const Settings = (props) => (
  <DynamicImport load={() => import('./Settings')}>
    {(Component) => Component === null
      ? <p>Loading</p>
      : <Component {...props} />}
  </DynamicImport>
)

class App extends Component {
  render() {
    return (
      <Router>
        <div>
          <ul>
            <li><Link to='/'>Home</Link></li>
            <li><Link to='/topics'>Topics</Link></li>
            <li><Link to='/settings'>Settings</Link></li>
          </ul>

          <hr />

          <Route exact path='/' component={Home} />
          <Route path='/topics' component={Topics} />
          <Route path='/settings' component={Settings} />
        </div>
      </Router>
    )
  }
}

export default App
How do we know this is actually working and code splitting our routes? If you run npm run build with an app created by Create React App, you’ll see our app’s been split.
<img src=’./split.png’ alt=‘code splitting in action’ />
Each chunk is each dynamic import() in our app.
At this point, you may be wondering why React doesn’t come with a built-in solution for code splitting similar to our DynamicImport component. I have good news, it does, but the implementation is a little different.
Wait, why did we spend all this time building
DynamicImportif React has a built-in solution that we can use? - YouCause you’re smarter now, and that’s all I care about - Me
With the DynamicImport component, we passed to it a load prop which was a function that when invoked, would resolve with the module.
const Settings = (props) => (
  <DynamicImport load={() => import('./Settings')}>

  </DynamicImport>
)
With React’s built-in solution, instead of passing the function which wraps a dynamic import as a prop to a component, you pass it as an argument to the React.lazy method.
const Settings = React.lazy(() => import('./Settings'))
The next difference is how we show the Loading component. With DynamicImport , we used null to check if the component was still loading. If it was, we rendered <Loading /> , if it wasn’t, we rendered the component.
const Settings = (props) => (
  <DynamicImport load={() => import('./Settings')}>
    {(Component) => Component === null
      ? <Loading />
      : <Component {...props} />}
  </DynamicImport>
)
With React.lazy , it’ll assume that the dynamic import will resolve to a module that exports a React component. What that means is that you don’t have to render the lazily loaded component yourself, instead, you render what React.lazy returns you and it’ll take care of rendering the actual component. What you do have to worry about though, is what you want to show when the module is still loading. To do this, you can use React’s Suspense component giving it a fallback prop which is a React element.
const Settings = React.lazy(() => import('./Settings'))

function App () {
  return (
    <div>
      <React.Suspense fallback={<Loading />}>
        <Settings />
      </React.Suspense>
    </div>
  )
}
What’s nice about React.Suspense that we weren’t able to do with our DynamicImport component is that Suspense can take in multiple, lazily loaded components while still only rendering one Loading element.
const AdDashboard = React.lazy(() => import('./AdDashboard'))
const Analytics = React.lazy(() => import('./Analytics'))
const Settings = React.lazy(() => import('./Settings'))

function App () {
  return (
    <div>
      <React.Suspense fallback={<Loading />}>
        <AdDashboard />
        <Analytics />
        <Settings />
      </React.Suspense>
    </div>
  )
}
Now let’s update our main app to use both our DynamicImport component as well as React.lazy to see the difference.
import React, { Component } from 'react'
import Loading from './Loading'
import DynamicImport from './DynamicImport'
import {
  BrowserRouter as Router,
  Route,
  Link,
} from 'react-router-dom'

const Home = (props) => (
  <DynamicImport load={() => import('./Home')}>
    {(Component) => Component === null
      ? <Loading />
      : <Component {...props} />}
  </DynamicImport>
)

const Topics = (props) => (
  <DynamicImport load={() => import('./Topics')}>
    {(Component) => Component === null
      ? <Loading />
      : <Component {...props} />}
  </DynamicImport>
)

const Settings = (props) => (
  <DynamicImport load={() => import('./Settings')}>
    {(Component) => Component === null
      ? <Loading />
      : <Component {...props} />}
  </DynamicImport>
)

const LazyHome = React.lazy(() => import('./Home'))const LazyTopics = React.lazy(() => import('./Topics'))const LazySettings = React.lazy(() => import('./Settings'))
class App extends Component {
  render() {
    return (
      <Router>
        <div>
          <ul>
            <li><Link to='/'>Home</Link></li>
            <li><Link to='/topics'>Topics</Link></li>
            <li><Link to='/settings'>Settings</Link></li>
          </ul>

          <hr />

          <Route exact path='/' component={Home} />
          <Route path='/topics' component={Topics} />
          <Route path='/settings' component={Settings} />

          <React.Suspense fallback={<Loading />}>            <Route exact path='/' component={LazyHome} />            <Route path='/topics' component={LazyTopics} />            <Route path='/settings' component={LazySettings} />          </React.Suspense>        </div>
      </Router>
    )
  }
}

export default App
Remember earlier when we talked about how there were two main ways to go about code splitting your app? We had this handy little guide.
Split at the route level.
Split at the component level.
So far we’ve only covered splitting at the route level. This is where a lot of people stop. Code splitting at the route level only is like brushing your teeth but never flossing. Your teeth will be mostly clean, but you’ll still get cavities.
Instead of thinking about code splitting as splitting your app up by its routes, you should think of it as splitting your app up by its components ( <Route> s are just components, after all). If you have a rich text editor that lives in a modal, splitting by the route only will still load the editor even if the modal is never opened.
At this point, it’s more of a paradigm shift that needs to happen in your brain rather than any new knowledge. You already know how to dynamically import modules with import() , now you just need to figure out which components in your app you can hold off downloading until your user needs them.