Introduction
Part 1, Chapter 1
Uber App Using Django Channels
Many apps rely on real-time, bi-directional communication to give users a great experience. One example is a ride-sharing app like Uber or Lyft, which is built on the messages that are sent between a rider and a driver. A rider selects a starting location and destination, then broadcasts a trip request to all nearby drivers. An available driver accepts the trip and meets the rider at the pick-up address. In the meantime, every move the driver makes is sent to the rider almost instantaneously and the rider can track the trip status as long as it is active.
In this course, we will demonstrate how to program a ride-sharing app using the bi-directional communication that WebSockets and Django Channels provide. We’ll then tie it all together by creating a nice UI with React.
The instruction will be given in three parts:
- Part 1 : Using test-driven development, we’ll write and test the server-side code powered by Django and Django Channels.
- Part 2 : We’ll set up the client-side React app along with authentication and authorization. Also, we’ll streamline the development workflow by adding Docker.
- Part 3 : Finally, we’ll walk through the process of creating the app UI with React.
In the end, you will have an app with two user experiences—one from the perspective of the driver and the other from the rider. You will be able to access both experiences simultaneously in order to see how a trip is planned and executed in real-time.
At any time, consult the taxi-react-app repository to compare your code to the source of truth.
Our server-side application uses:
- Python (v3.7.5)
- Django (v2.2.8)
- Django Channels (v2.3.1)
- Django REST Framework (v3.10.3)
- pytest (v5.3.1)
- Redis (v5.0.7)
- PostgreSQL (v12.1)
Client-side:
- React (v16.12.0)
We’ll also use Docker v19.03.5.
Objectives
By the end of Part 1, you will be able to:
- Create simple GET requests with Django REST Framework.
- Implement token-based authentication with JSON Web Tokens (JWT).
- Use Django Channels to create and update data on the server.
- Send messages to the UI from the server via WebSockets.
- Test asyncio coroutines with pytest.
Getting Started
Part 1, Chapter 3
Start by creating a new project directory called “taxi-app” to hold both the client and server applications.
$ mkdir taxi-app && cd taxi-app
Then, within “taxi-app”, create a new virtual environment to isolate our project’s dependencies:
$ mkdir server && cd server
$ python3.7 -m venv env
$ source env/bin/activate
(env)$
The above commands may differ depending on your OS as well as your Python virtual environment tool (i.e., venv, virtualenvwrapper, Pipenv).
Install Django, Django REST Framework, Django Channels, channel_redis, pytest-asyncio, pytest-django, and Pillow, and then create a new Django project and app:
(env)$ pip install \
       channels==2.3.1 \
       channels-redis==2.4.1 \
       Django==2.2.8 \
       djangorestframework==3.10.3 \
       djangorestframework-simplejwt==4.4.0 \
       Pillow==6.2.1 \
       psycopg2-binary==2.8.4 \
       pytest-asyncio==0.10.0 \
       pytest-django==3.7.0
(env)$ django-admin.py startproject taxi
(env)$ cd taxi
(env)$ python manage.py startapp trips
Next, download and install PostgreSQL using the method that works best for your system. Depending on your operating system and preferred installation, starting PostgreSQL may involve running a command in your terminal or starting an application. Make sure that PostgreSQL is running on its default port, 5432. We’ll use this port to connect Django to the database.
Next, download and install Redis. In a new terminal window start the Redis server and make sure that it is running on its default port, 6379. The port number will be important when we tell Django how to communicate with Redis.
$ redis-server
If you’re on a Mac, we recommend using Homebrew for both PostgreSQL and Redis:
$ brew install postgresql
$ brew services start postgresql
$ brew install redis
$ brew services start redis
Connect to Postgres using the psql client.
$(env) psql -U postgres
Create a new database and user with the following commands:
Exit psql by typing \q and hitting the RETURN button.
Then switch back to your original terminal window. Complete our project’s setup by updating INSTALLED_APPS in the settings.py file within your code editor of choice:
INSTALLED_APPS = [
    'django.contrib.admin',
    'django.contrib.auth',
    'django.contrib.contenttypes',
    'django.contrib.sessions',
    'django.contrib.messages',
    'django.contrib.postgres', # new
    'django.contrib.staticfiles',
    'rest_framework', # new
    'trips', # new
]

# changed
DATABASES = {
    'default': {
        'ENGINE': 'django.db.backends.postgresql',
        'NAME': os.getenv('PGDATABASE'),
        'USER': os.getenv('PGUSER'),
        'PASSWORD': os.getenv('PGPASSWORD'),
        'HOST': os.getenv('PGHOST', 'localhost'),
        'PORT': os.getenv('PGPORT', '5432'),
    }
}

AUTH_USER_MODEL = 'trips.User' # new
Here, alongside the boilerplate Django apps, we’ve added Django’s PostgreSQL package, Django REST Framework, and our own trips app.
We’ve replaced the default SQLite3 database with PostgreSQL. We’re getting the database settings from the environment variables. We’ll need to make sure that we set those variables in the same environment where we run the Django server. They can be anything you’d like, but for the purposes of this demo, I’ve decided to use the following:
export PGDATABASE=taxi
export PGUSER=taxi
export PGPASSWORD=taxi
I’ve chosen to use the default values for PGHOST and PGPORT .
We’ve also added an AUTH_USER_MODEL setting to make Django reference a user model of our design instead of the built-in one since we’ll need to store more user data than what the standard fields allow.
Since we’re creating this project from scratch, defining a custom user model is the right move. If we had made this change later in the project, we would have had to create a supplementary model and link it to the existing default user model.
Create a basic custom user model in the trips/models.py file.
from django.contrib.auth.models import AbstractUser


class User(AbstractUser):
    pass
Using this custom User model allows us to add fields to it later.
Then make our first migration:
(env)$ python manage.py makemigrations
Migrations for 'trips':
  trips/migrations/0001_initial.py
    - Create model User
Now we can run the Django management migrate command, which will properly set up our app to use our custom user model. All database tables will be created as well.
(env)$ python manage.py migrate
You should see something similar to:
  Apply all migrations: admin, auth, contenttypes, sessions, trips
Running migrations:
  Applying contenttypes.0001_initial... OK
  Applying contenttypes.0002_remove_content_type_name... OK
  Applying auth.0001_initial... OK
  Applying auth.0002_alter_permission_name_max_length... OK
  Applying auth.0003_alter_user_email_max_length... OK
  Applying auth.0004_alter_user_username_opts... OK
  Applying auth.0005_alter_user_last_login_null... OK
  Applying auth.0006_require_contenttypes_0002... OK
  Applying auth.0007_alter_validators_add_error_messages... OK
  Applying auth.0008_alter_user_username_max_length... OK
  Applying auth.0009_alter_user_last_name_max_length... OK
  Applying trips.0001_initial... OK
  Applying admin.0001_initial... OK
  Applying admin.0002_logentry_remove_auto_add... OK
  Applying admin.0003_logentry_add_action_flag_choices... OK
  Applying sessions.0001_initial... OK
Ensure all is well by running the server:
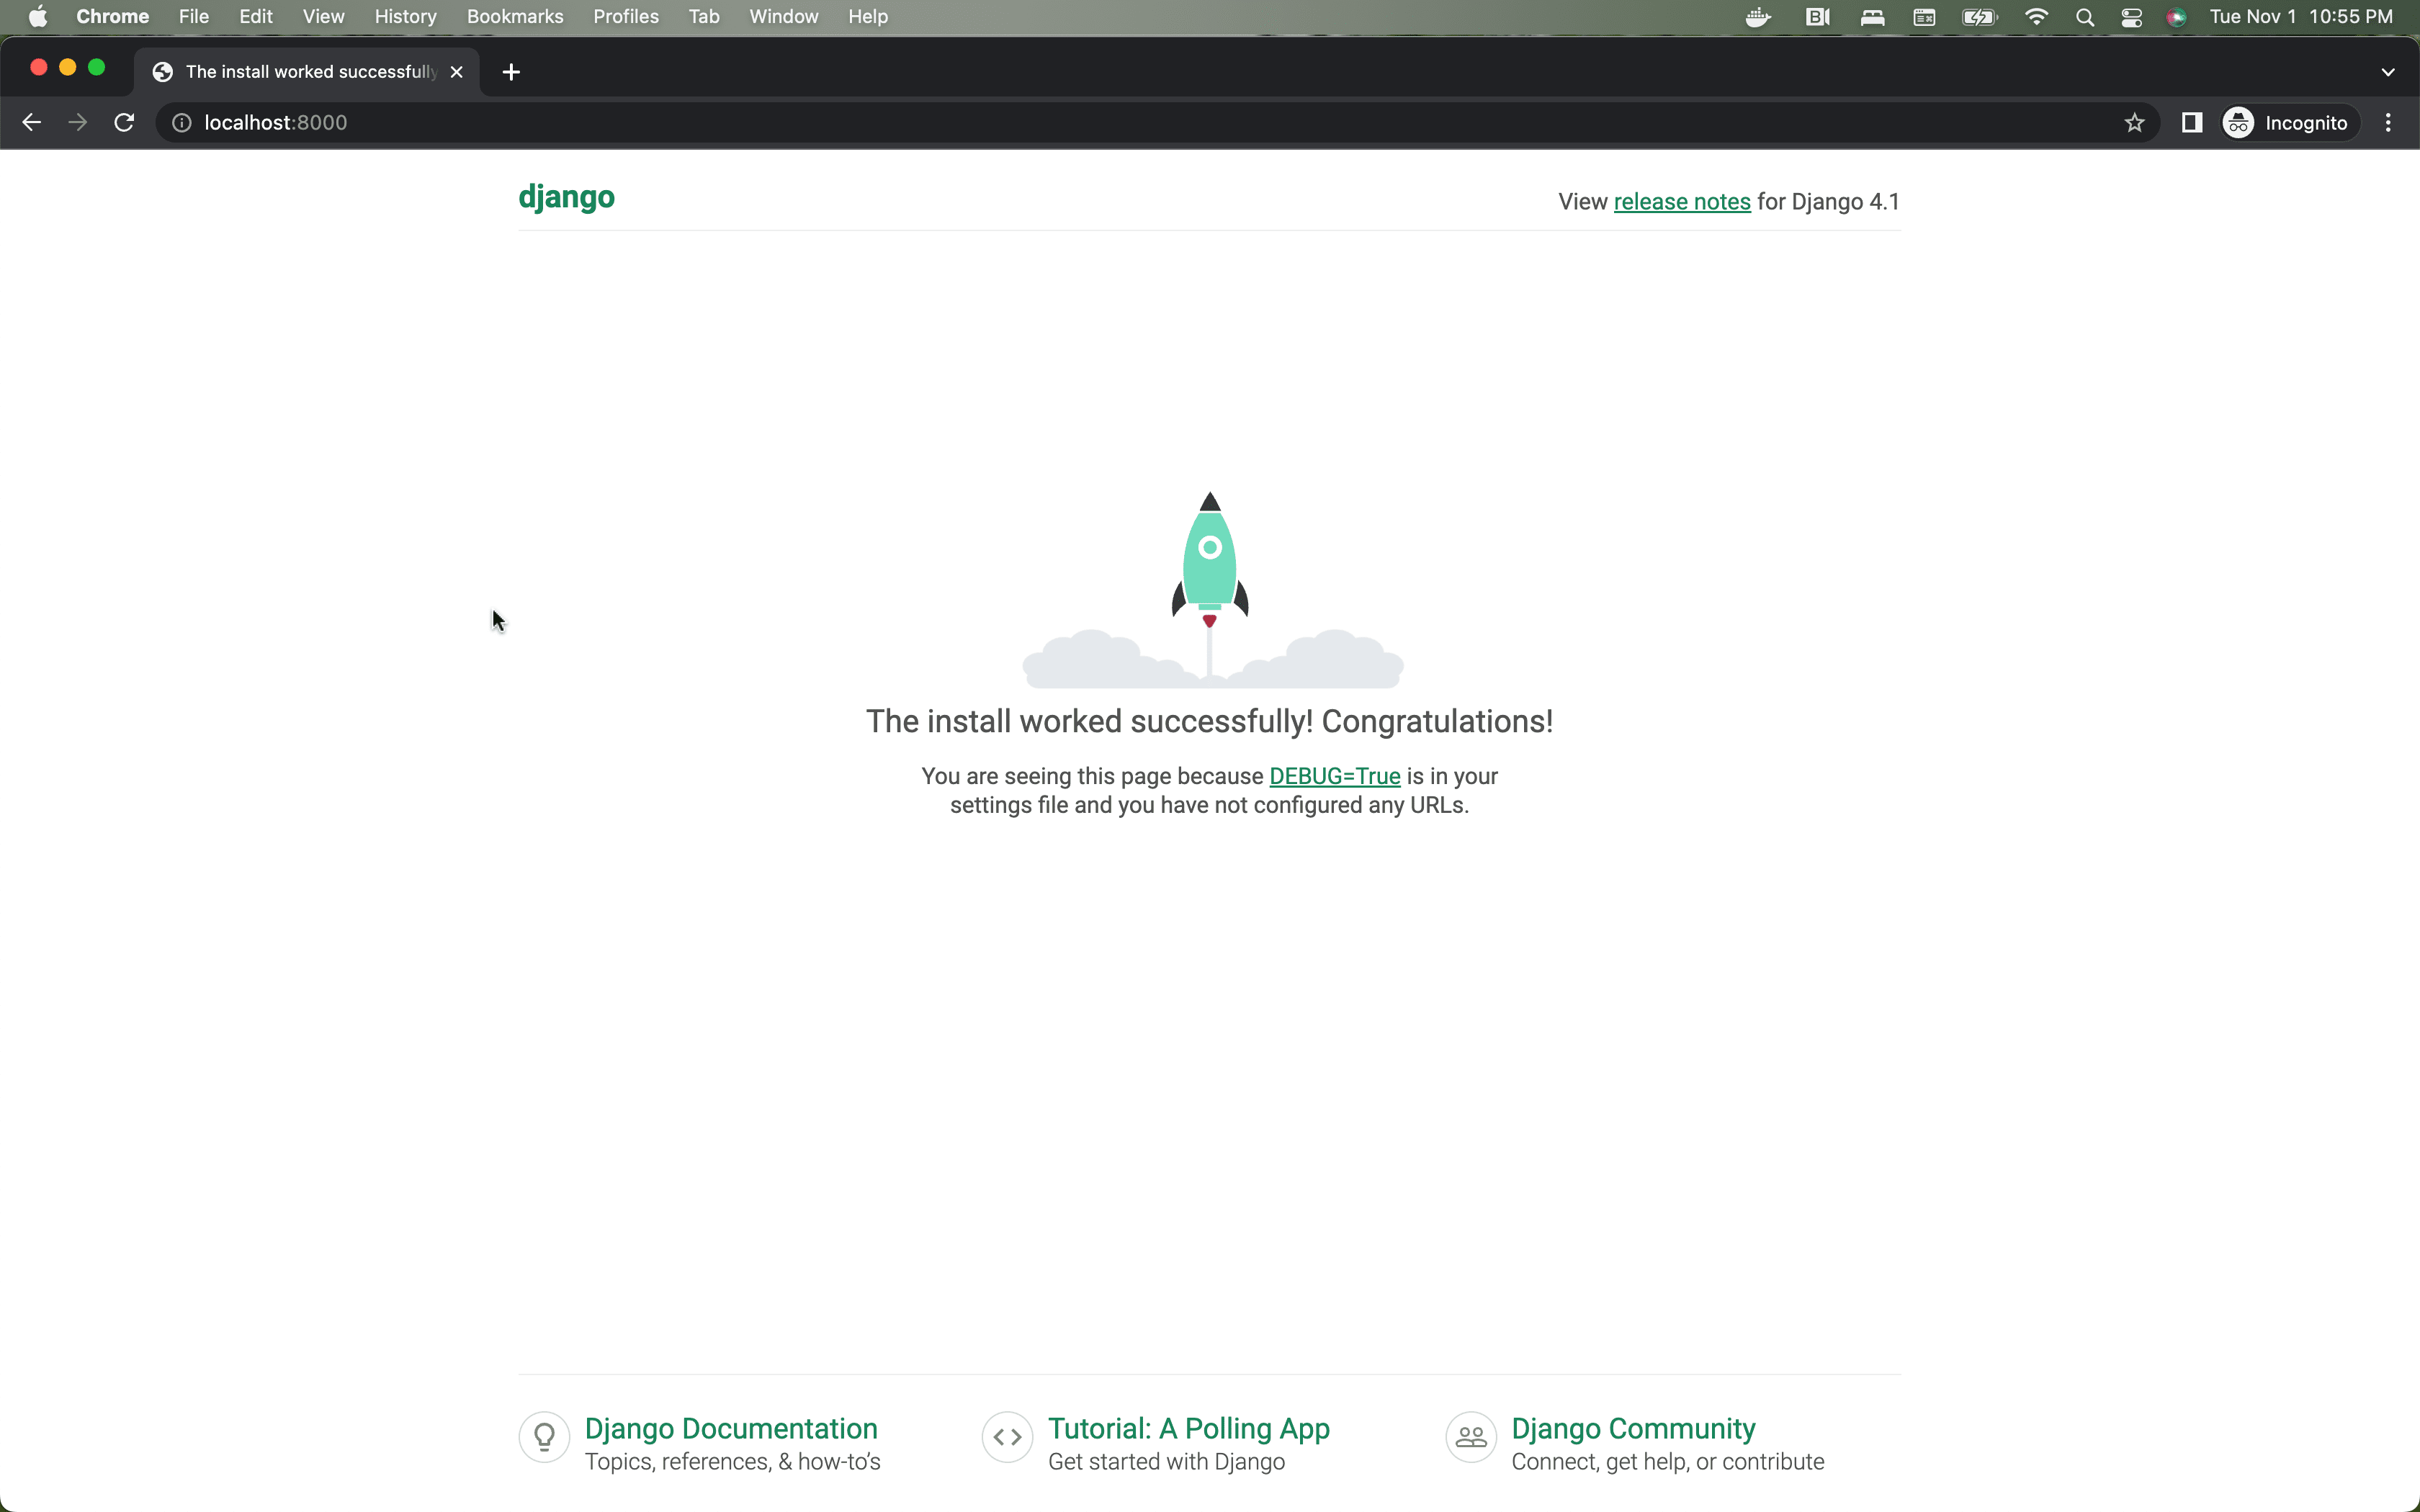
(env)$ python manage.py runserver
Then, navigate to http://localhost:8000/ within your browser of choice. You should see:
Kill the server by typing Control+C (the Control and “C” key at the same time).
Let’s set up the Django admin page next. Create a new superuser account with the createsuperuser management command. Choose a username, an email, and a password when prompted. (If Django deems your password “too common”, it will warn you.)
(env)$ python manage.py createsuperuser
Open your trips/admin.py file and replace the contents with the following code.
from django.contrib import admin
from django.contrib.auth.admin import UserAdmin as DefaultUserAdmin

from .models import User


@admin.register(User)
class UserAdmin(DefaultUserAdmin):
    pass
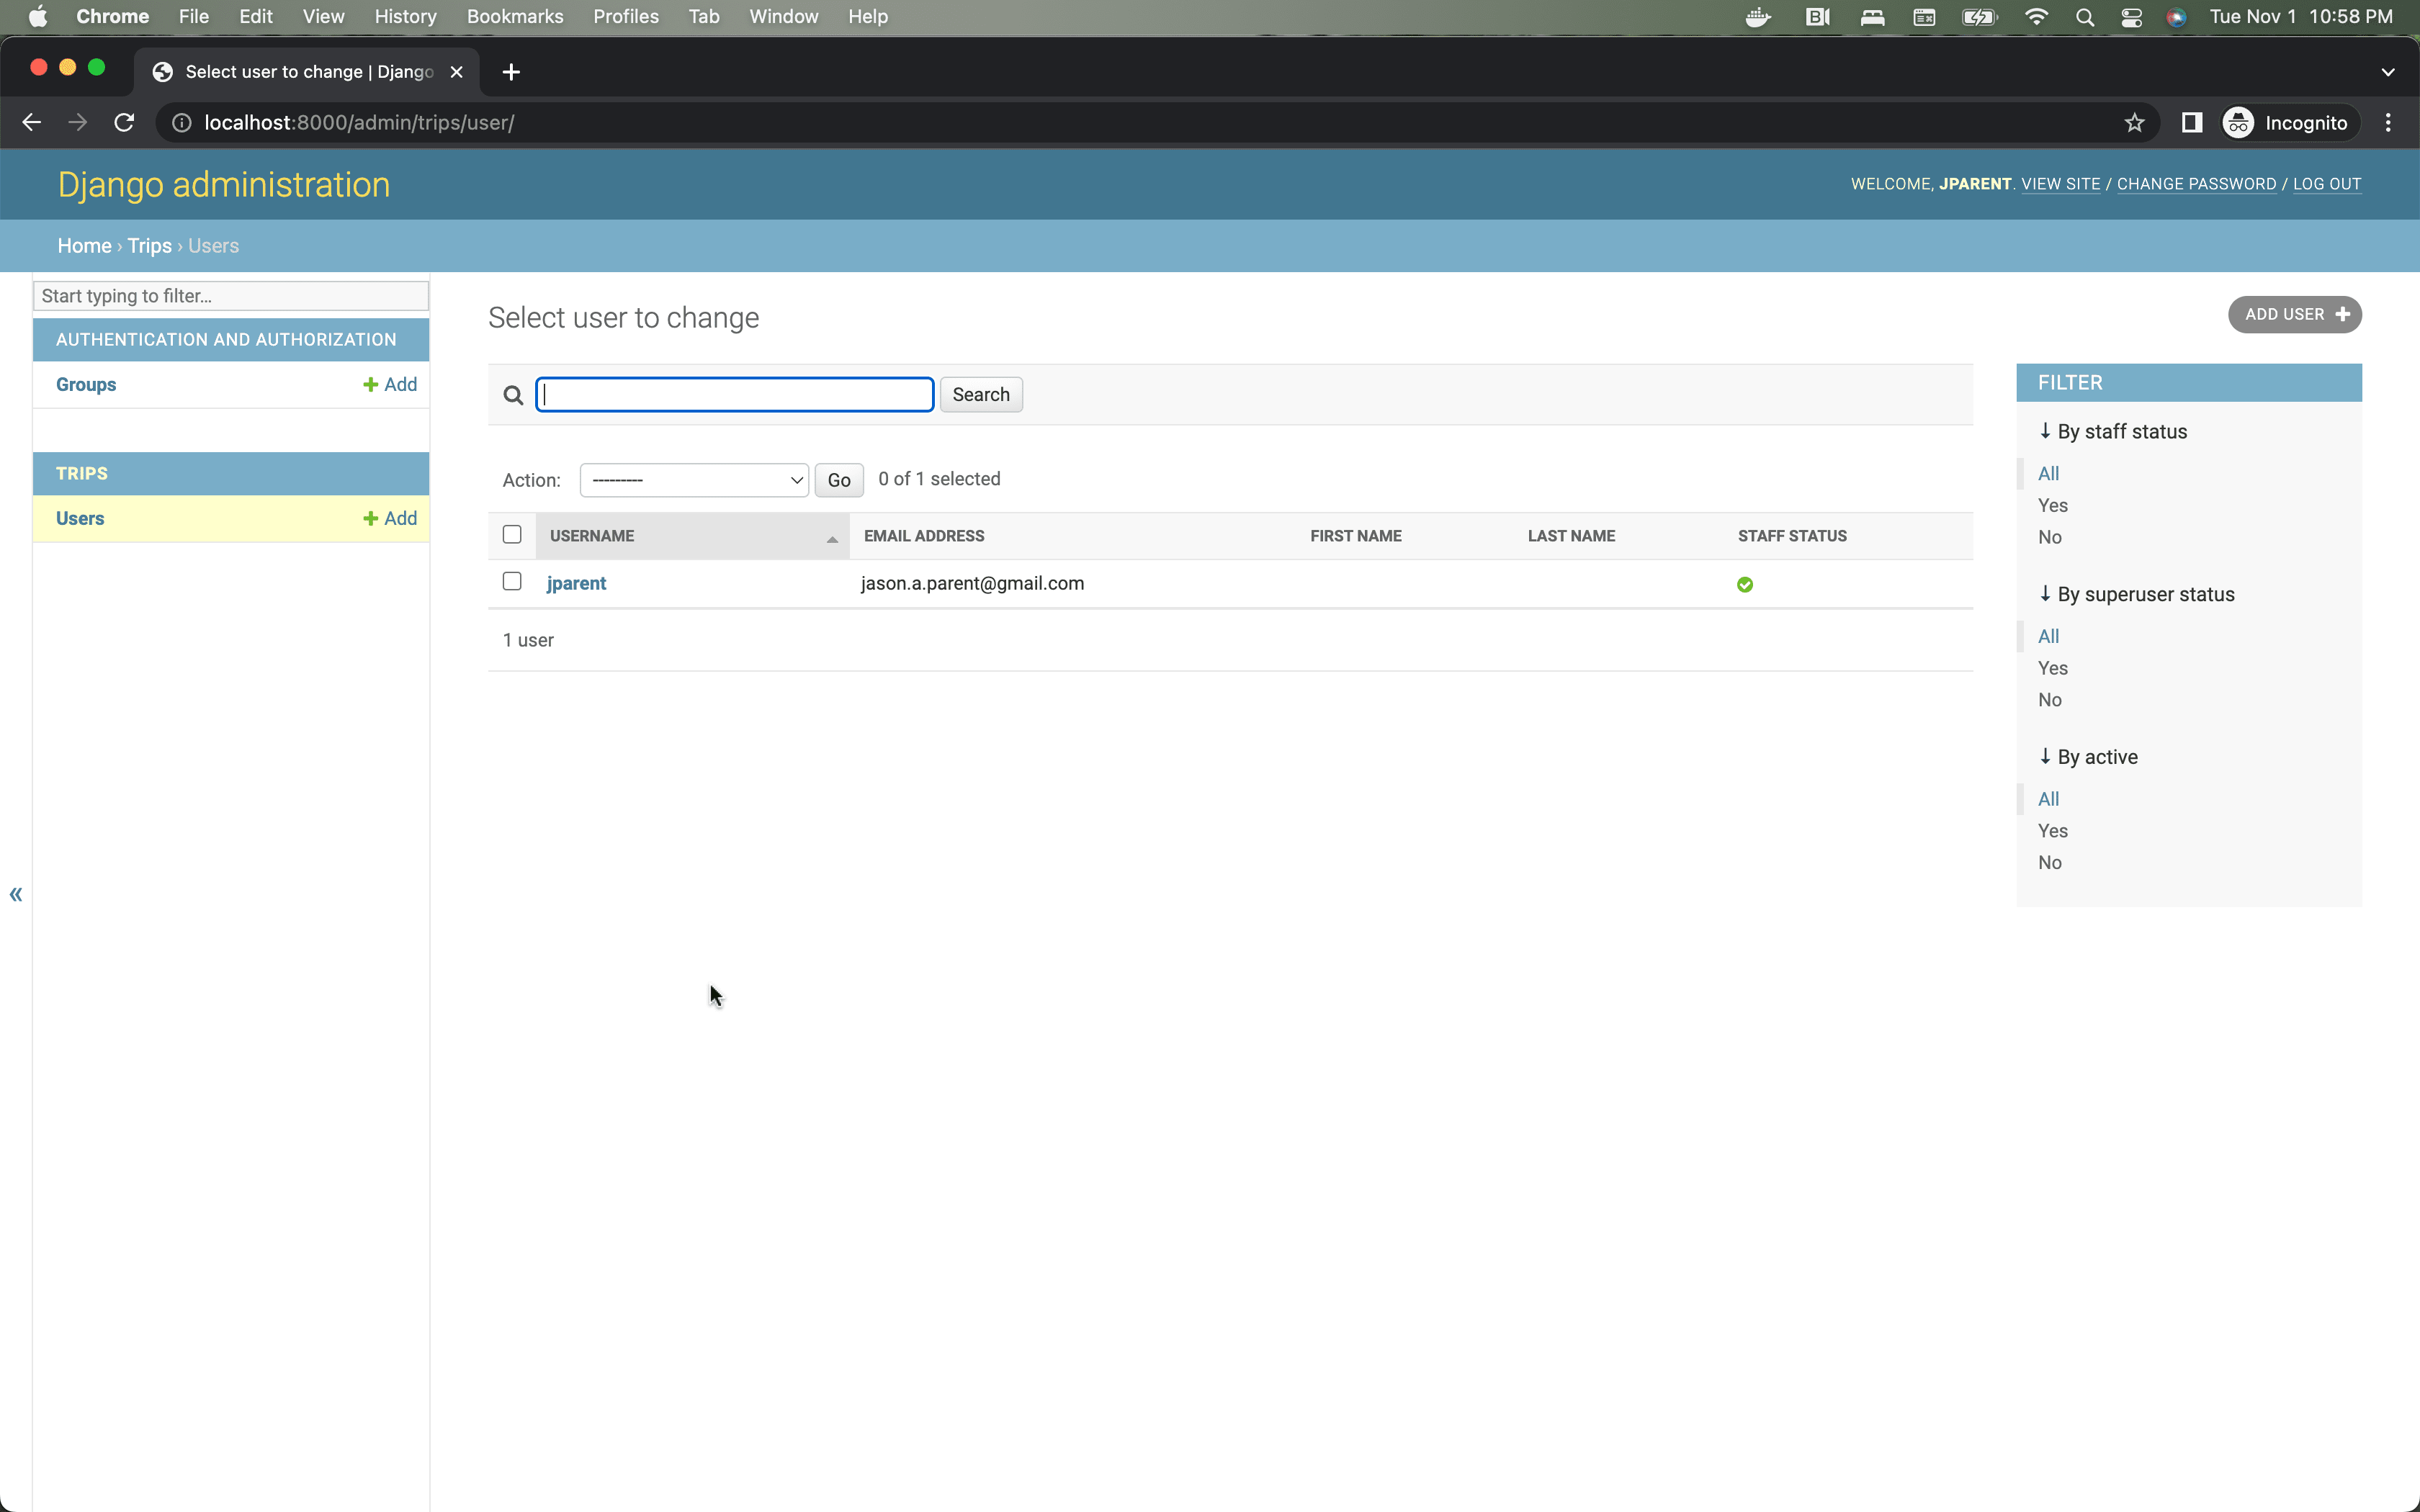
Visit http://localhost:8000/admin/ in your browser and log in with your superuser credentials. Click on the “Users” link to see your admin user’s record. (I chose admin@example.com as my username.)
Next, configure the CHANNEL_LAYERS by setting a default Redis backend and routing in the settings.py file. This can go on the bottom of the file.
REDIS_URL = os.getenv('REDIS_URL', 'redis://localhost:6379')

CHANNEL_LAYERS = {
    'default': {
        'BACKEND': 'channels_redis.core.RedisChannelLayer',
        'CONFIG': {
            'hosts': [REDIS_URL],
        },
    },
}
Then, add Django Channels to the INSTALLED_APPS 
INSTALLED_APPS = [
    'django.contrib.admin',
    'django.contrib.auth',
    'django.contrib.contenttypes',
    'django.contrib.sessions',
    'django.contrib.messages',
    'django.contrib.postgres',
    'django.contrib.staticfiles',
    'channels', # new
    'rest_framework',
    'trips',
]
Try running the server again with python manage.py runserver . You should see the following error:
(env) $ python manage.py runserver
CommandError: You have not set ASGI_APPLICATION, which is needed to run the server.
Create a new file called routing.py within our taxi app:
from channels.routing import ProtocolTypeRouter

application = ProtocolTypeRouter({})
Are you wondering why we didn’t pass any parameters to the ProtocolTypeRouter ? According to the documentation, the app initializes an HTTP router by default if one isn’t explicitly specified.
If an
httpargument is not provided, it will default to the Django view system’s ASGI interface,channels.http.AsgiHandler, which means that for most projects that aren’t doing custom long-poll HTTP handling, you can simply not specify anhttpoption and leave it to work the “normal” Django way.
Open your taxi/settings.py file one last time. Find the WSGI_APPLICATION setting and below that line add the following.
# taxi/settings.py

ASGI_APPLICATION = 'taxi.routing.application'
Also, add a new asgi.py file alongside the wsgi.py file.
import os
import django

from channels.routing import get_default_application

os.environ.setdefault('DJANGO_SETTINGS_MODULE', 'taxi.settings')
django.setup()
application = get_default_application()
Run with this for now. We’ll look at what’s happening here in an upcoming lesson.
Make sure the server now runs error-free.
(env)$ python manage.py runserver
There should no longer be any error messages.
Your directory structure should look like the following. (Virtual environment and other system files are excluded.)
└── server
    └── taxi
        ├── manage.py
        ├── taxi
        │   ├── __init__.py
        │   ├── asgi.py
        │   ├── routing.py
        │   ├── settings.py
        │   ├── urls.py
        │   └── wsgi.py
        └── trips
            ├── __init__.py
            ├── admin.py
            ├── apps.py
            ├── migrations
            │   ├── 0001_initial.py
            │   └── __init__.py
            ├── models.py
            ├── tests.py
            └── views.py
Before moving on, take a moment to review all that we’ve done thus far. Try to answer the “why” along with the “what” and “how”. For example, why did we use Redis over an in-memory layer for Django Channels?
Authentication
Part 1, Chapter 4
Authentication is the cornerstone of any app that handles user data. It allows users to maintain privacy within the app, while gaining access to the full set of features afforded with registration.
Authentication Classes
With Django REST Framework (DRF), we have four authentication classes to choose from:
BasicAuthenticationRemoteUserAuthenticationSessionAuthenticationTokenAuthentication
Here’s what you need know. Every authentication method requires the client to send a user’s credentials to the server at least once. In the case of basic authentication, the client must send the user’s credentials over the wire with every request . This stipulation gives bad actors more opportunities to steal a user’s password.
Remote authentication passes the responsibility of verifying a user’s identity to a third party. Most of the time, the third party is a centralized single sign-on server that supports a protocol such as LDAP, CAS, or SAML.
With both session and token authentication, the client exchanges a user’s credentials for an encrypted string. The client sends the secure string back to the server in subsequent requests to validate the user’s identity. The server stores a record that associates the user with the secure string, usually in a database table. When the user logs out of the application, the server deletes that record, invalidating any additional attempts to use the old string for authentication.
The method of exchanging a secure string between the client and the server is important. Session authentication passes the string back and forth using cookies. Token authentication requires the client to explicitly send the string in the request, typically in an authentication header.
Any of these authentication methods are straightforward to use over HTTP, but some of them are difficult to use with WebSockets. The JavaScript WebSocket API supports cookies but does not support custom headers. Session authentication can work nicely here, but since we’re designing this application to be run on a mobile device, token authentication is more desirable. We’ll have to find a creative way to send the token over a WebSocket connection.
Server Configuration
Let’s start by setting up our app to use both Django REST Framework’s session authentication and the djangorestframework-simplejwt 's JWTAuthentication class. Why use both? Although the main part of our app is meant to be run on a mobile device, we still need to support the Django admin, which will almost always be accessed from a desktop browser. Session authentication is the appropriate choice for our server-rendered static admin site and token authentication is the ideal option for authenticating our APIs. Add the following to the bottom of the taxi/settings.py file:
REST_FRAMEWORK = {
    'DEFAULT_AUTHENTICATION_CLASSES': (
        'rest_framework_simplejwt.authentication.JWTAuthentication',
        'rest_framework.authentication.SessionAuthentication',
    )
}

SIMPLE_JWT = {
    'ACCESS_TOKEN_LIFETIME': datetime.timedelta(minutes=5),
    'REFRESH_TOKEN_LIFETIME': datetime.timedelta(days=1),
    'USER_ID_CLAIM': 'id',
}
Don’t forget to add the import datetime statement to the top of the page.
During the course of this tutorial, we are going to be following test-driven development (TDD) to confirm that our code works. In the next part of the tutorial, we will be adding a user interface so that we can play with the app as an actual user.
Sign up
Let’s create a new user account via an API. Users should be able to download our app and immediately sign up for a new account by providing the bare minimum of information—username, password, and their names. The distinction between password1 and password2 correlates to users entering their passwords and then confirming them. Eventually, our app will present users a form with input fields and a submit button.
Remove the existing trips/tests.py file and create a new “tests” directory inside of “trips”. Within it add an empty init.py file along with a test_http.py file.
Your new directory structure should look like this:
.
└── server
    └── taxi
        ├── db.sqlite3
        ├── manage.py
        ├── taxi
        │   ├── __init__.py
        │   ├── asgi.py
        │   ├── routing.py
        │   ├── settings.py
        │   ├── urls.py
        │   └── wsgi.py
        └── trips
            ├── __init__.py
            ├── admin.py
            ├── apps.py
            ├── migrations
            │   ├── 0001_initial.py
            │   └── __init__.py
            ├── models.py
            ├── tests
            │   ├── __init__.py
            │   └── test_http.py
            └── views.py
from django.contrib.auth import get_user_model
from rest_framework import status
from rest_framework.reverse import reverse
from rest_framework.test import APITestCase

PASSWORD = 'pAssw0rd!'


class AuthenticationTest(APITestCase):
    def test_user_can_sign_up(self):
        response = self.client.post(reverse('sign_up'), data={
            'username': 'user@example.com',
            'first_name': 'Test',
            'last_name': 'User',
            'password1': PASSWORD,
            'password2': PASSWORD,
        })
        user = get_user_model().objects.last()
        self.assertEqual(status.HTTP_201_CREATED, response.status_code)
        self.assertEqual(response.data['id'], user.id)
        self.assertEqual(response.data['username'], user.username)
        self.assertEqual(response.data['first_name'], user.first_name)
        self.assertEqual(response.data['last_name'], user.last_name)
A couple things to note:
- We expect our API to return a 201 status code when the user account is created.
- The response data should be a JSON-serialized representation of our user model.
Run the test now:
(env)$ python manage.py test trips.tests
It should fail:
django.urls.exceptions.NoReverseMatch: Reverse for 'sign_up' not found.
'sign_up' is not a valid view function or pattern name.
Remember: A tenant of TDD is that we should write failing tests (red) before writing the code to get them to pass (green).
We need to create several pieces of code before our tests will pass.
Typically, a data model is the first thing we want to create in a situation like this. We’ve already created a user model, and since it extends Django’s built-in model, it already supports the fields we need.
The next bit of code we need is the user serializer. Create a new trips/serializers.py file and fill in the following code:
from django.contrib.auth import get_user_model
from rest_framework import serializers


class UserSerializer(serializers.ModelSerializer):
    password1 = serializers.CharField(write_only=True)
    password2 = serializers.CharField(write_only=True)

    def validate(self, data):
        if data['password1'] != data['password2']:
            raise serializers.ValidationError('Passwords must match.')
        return data

    def create(self, validated_data):
        data = {
            key: value for key, value in validated_data.items()
            if key not in ('password1', 'password2')
        }
        data['password'] = validated_data['password1']
        return self.Meta.model.objects.create_user(**data)

    class Meta:
        model = get_user_model()
        fields = (
            'id', 'username', 'password1', 'password2',
            'first_name', 'last_name',
        )
        read_only_fields = ('id',)
Remember: Right now our user data is basic (first name, last name, username, and password), so we only need access to a few fields. We should never need to read the password.
Next, open the trips/views.py file and add the following view to it:
from django.contrib.auth import get_user_model
from rest_framework import generics

from .serializers import UserSerializer


class SignUpView(generics.CreateAPIView):
    queryset = get_user_model().objects.all()
    serializer_class = UserSerializer
Here, we created a SignUpView that extends Django REST Framework’s CreateAPIView and leverages our UserSerializer to create a new user.
Here’s how it works behind the scenes:
- Django passes request data to the
SignUpView, which in turn attempts to create a new user with theUserSerializer. The serializer checks if the passwords match. - If all of the data is valid, the serializer creates and returns a new user. If it fails, then the serializer returns the errors. Even if the passwords match, validation could fail if the username is already taken or the password isn’t strong enough.
Finally, configure a URL to link to our view. We do this by updating the existing taxi/urls.py file.
# taxi/urls.py

from django.contrib import admin
from django.urls import path

from trips.views import SignUpView


urlpatterns = [
    path('admin/', admin.site.urls),
    path('api/sign_up/', SignUpView.as_view(), name='sign_up'),
]
Run the tests:
(env)$ python manage.py test trips.tests
They should pass!
Keep in mind that throughout this course we will only be testing the happy path(s). Adding tests for error handling is a separate, highly recommended exercise left to the reader.
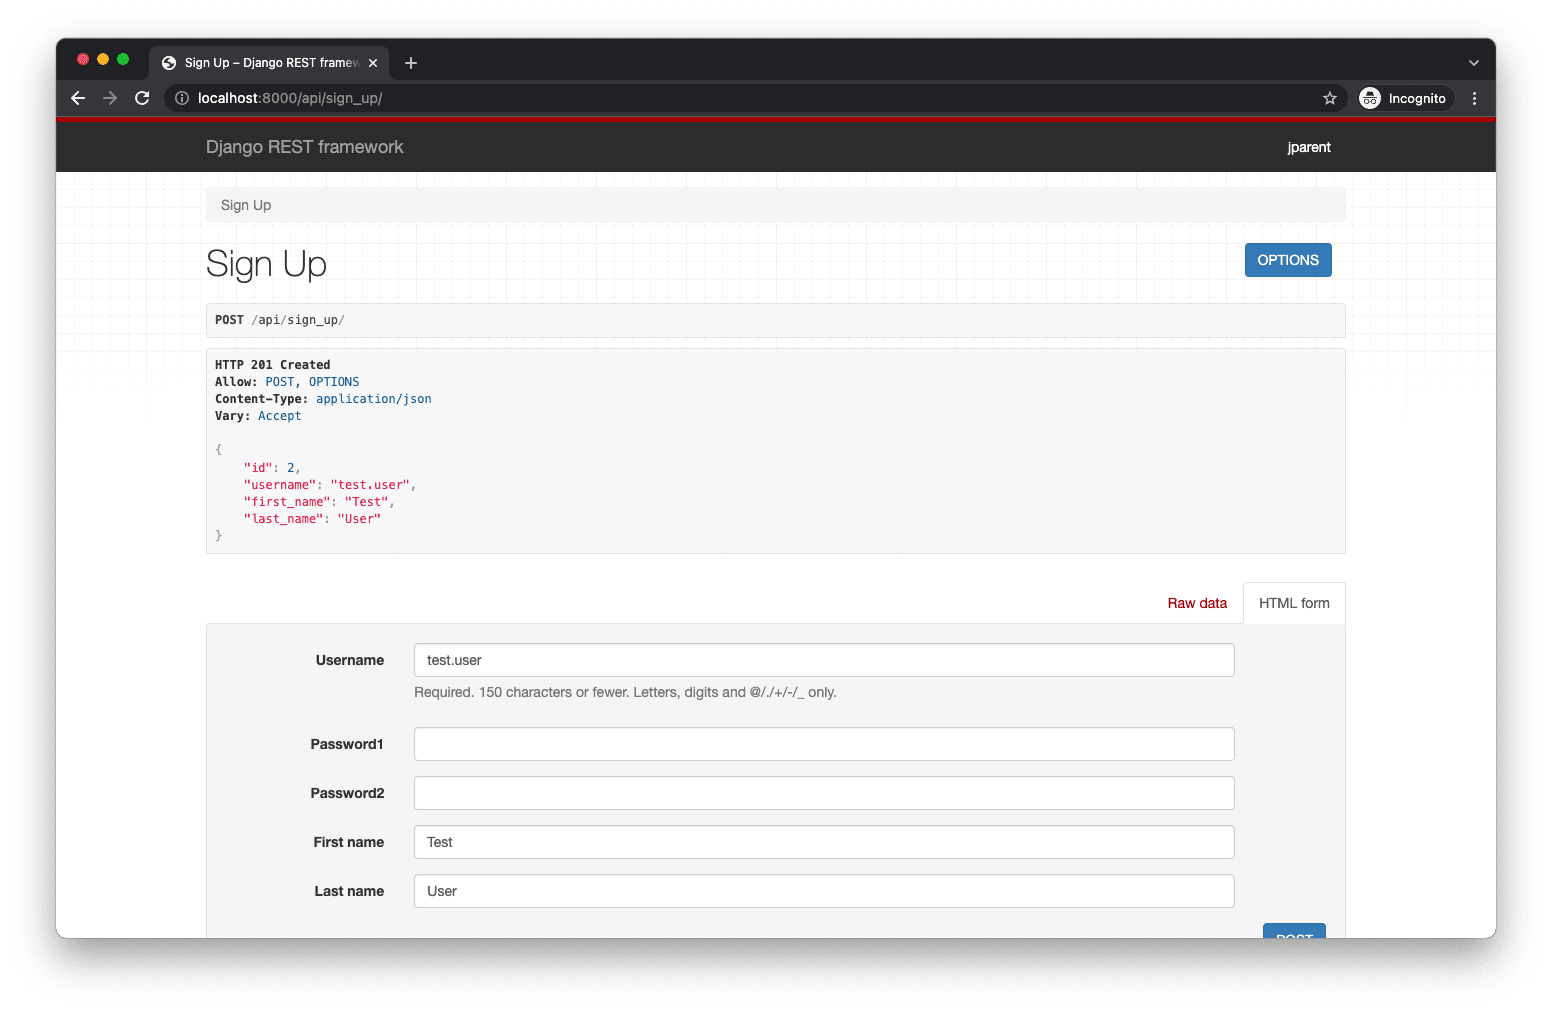
To manually test, fire up the server python manage.py runserver and navigate to the Browsable API at http://localhost:8000/api/sign_up/:
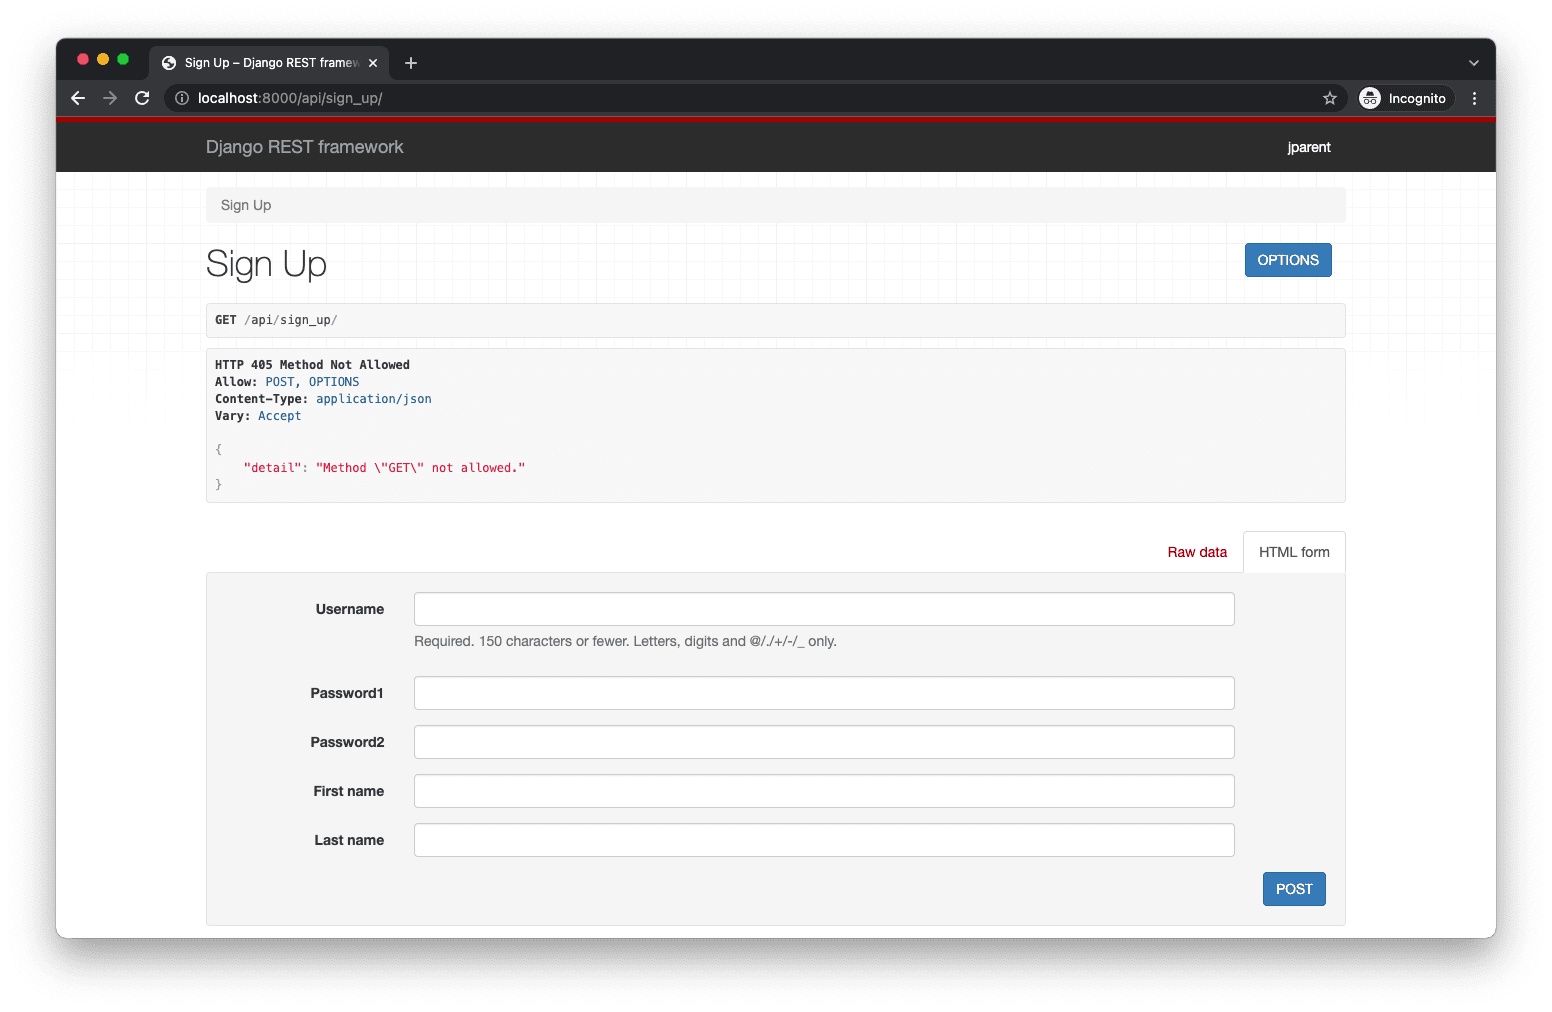
Take note of the following error:
HTTP 405 Method Not Allowed
Allow: POST, OPTIONS
Content-Type: application/json
Vary: Accept

{
    "detail": "Method \"GET\" not allowed."
}
That’s expected since we don’t have a GET route set up. You can still test out the POST functionality using the HTML form.
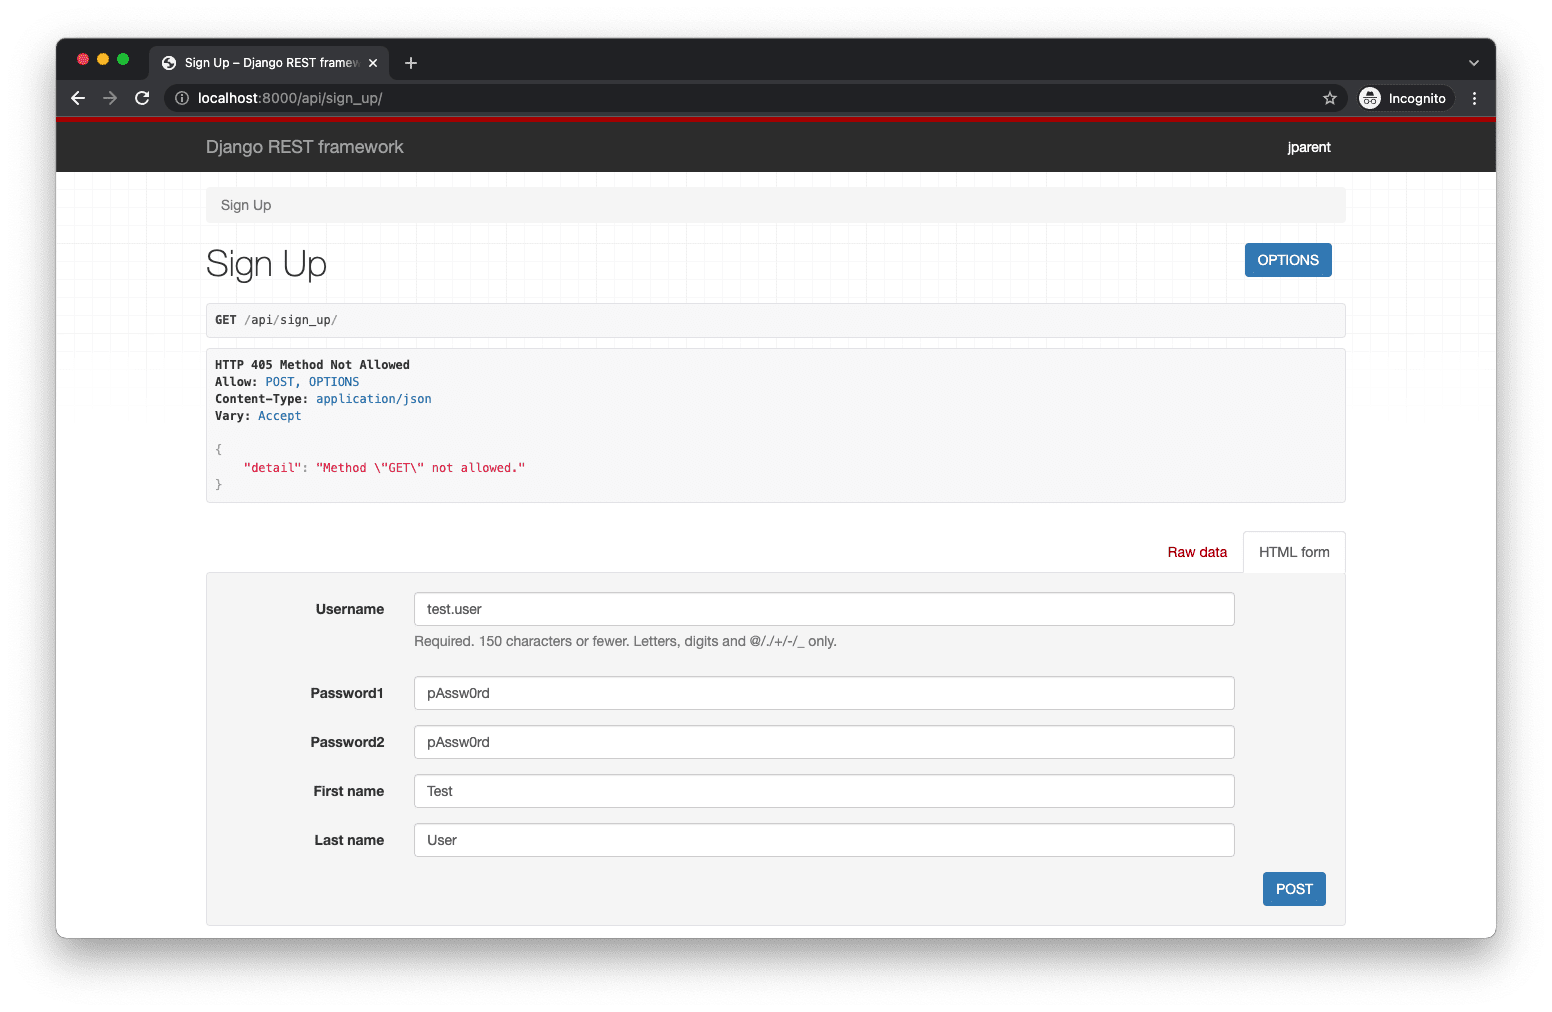
After clicking the “POST” button we will see it was successful.
Log in
Now that we can sign up a new user, the next logical step is to create the functionality to log the user in. With JSON Web Tokens, logging a user in means generating an access token and a refresh token for a user.
Let’s start by adding a new test to handle the log in behavior to trips/tests/test_http.py
# tests/test_http.py

import base64 # new
import json # new
from django.contrib.auth import get_user_model
from rest_framework import status
from rest_framework.reverse import reverse
from rest_framework.test import APITestCase

PASSWORD = 'pAssw0rd!'


def create_user(username='user@example.com', password=PASSWORD): # new
    return get_user_model().objects.create_user(
        username=username,
        first_name='Test',
        last_name='User',
        password=password
    )


class AuthenticationTest(APITestCase):
    # Function collapsed for clarity.
    def test_user_can_sign_up(self): ...

    def test_user_can_log_in(self): # new
        user = create_user()
        response = self.client.post(reverse('log_in'), data={
            'username': user.username,
            'password': PASSWORD,
        })

        # Parse payload data from access token.
        access = response.data['access']
        header, payload, signature = access.split('.')
        decoded_payload = base64.b64decode(f'{payload}==')
        payload_data = json.loads(decoded_payload)

        self.assertEqual(status.HTTP_200_OK, response.status_code)
        self.assertIsNotNone(response.data['refresh'])
        self.assertEqual(payload_data['id'], user.id)
        self.assertEqual(payload_data['username'], user.username)
        self.assertEqual(payload_data['first_name'], user.first_name)
        self.assertEqual(payload_data['last_name'], user.last_name)
Note that we added a
create_user()helper function to help keep our code DRY.
The process of logging in is as easy as signing up: The user enters her username and password and submits them to the server. We expect the server to generate tokens for the user and return a success status along with the serialized user data in the access token payload.
The JSON Web Token structure consists of a header, a payload, and a signature. The payload is a Base64Url encoded, JSON-serialized object containing data about the user. We leverage the base64 library to decode the payload. (We need to add back the == padding characters that JWT strips out to avoid errors.) Then we use json to parse the JSON string into an object.
Stop the local server and run the tests to ensure they fail:
django.urls.exceptions.NoReverseMatch: Reverse for 'log_in' not found.
'log_in' is not a valid view function or pattern name.
Now update our trips/views.py file.
from django.contrib.auth import get_user_model
from rest_framework import generics
from rest_framework_simplejwt.views import TokenObtainPairView # new

from .serializers import LogInSerializer, UserSerializer # changed


class SignUpView(generics.CreateAPIView):
    queryset = get_user_model().objects.all()
    serializer_class = UserSerializer


class LogInView(TokenObtainPairView): # new
    serializer_class = LogInSerializer
Then, let’s update our trips/serializers.py file.
from django.contrib.auth import get_user_model
from rest_framework import serializers
from rest_framework_simplejwt.serializers import TokenObtainPairSerializer # new


# Hidden for clarity
class UserSerializer(serializers.ModelSerializer): ...


class LogInSerializer(TokenObtainPairSerializer): # new
    @classmethod
    def get_token(cls, user):
        token = super().get_token(user)
        user_data = UserSerializer(user).data
        for key, value in user_data.items():
            if key != 'id':
                token[key] = value
        return token
We programmed our log in function as we planned in the test. Let’s break down the view:
- We create a
LogInViewthat simply extends theTokenObtainPairViewand uses a customLogInSerializer. - We create a
LogInSerializerthat serializes theUserobject and adds the data to the token payload as private claims. (We avoid overwriting theidclaim, since the token already includes it by default. Refer back to theUSER_ID_CLAIMsetting.)
Link our new view to a URL in the existing configuration in taxi/urls.py
# taxi/urls.py

from django.contrib import admin
from django.urls import path
from rest_framework_simplejwt.views import TokenRefreshView # new

from trips.views import SignUpView, LogInView # changed


urlpatterns = [
    path('admin/', admin.site.urls),
    path('api/sign_up/', SignUpView.as_view(), name='sign_up'),
    path('api/log_in/', LogInView.as_view(), name='log_in'), # new
    path('api/token/refresh/', TokenRefreshView.as_view(),
         name='token_refresh'), # new
]
Notice that we’re also adding Simple JWT’s token_refresh API endpoint. Users can submit the refresh token to this API to generate a new access token.
Run the authentication tests one last time to make sure they pass:
(env)$ python manage.py test trips.tests

Creating test database for alias 'default'...
System check identified no issues (0 silenced).
..
----------------------------------------------------------------------
Ran 2 tests in 0.657s

OK
Destroying test database for alias 'default'...
Sanity Check
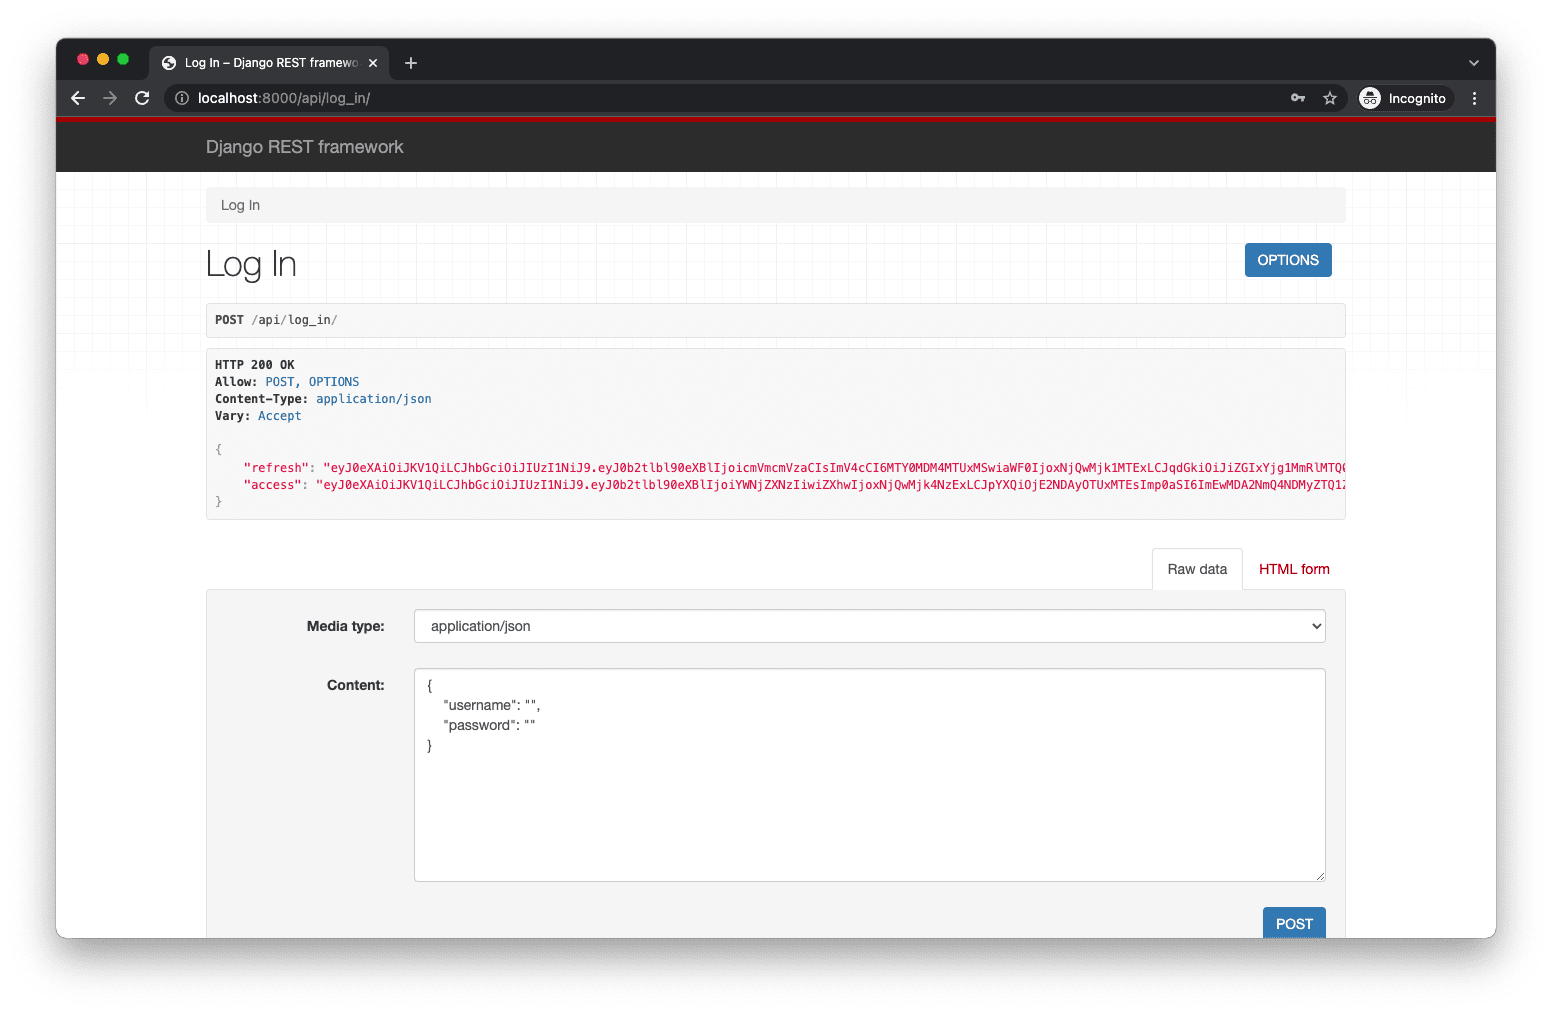
Our authentication work is done! But, before moving on, ensure you can log in at http://localhost:8000/api/log_in/. Make sure the server is running! Enter in the JSON for your username and password.
For example:
{
    "username": "michael@mherman.org",
    "password": "testpass123"
}
Then click the “POST” button.
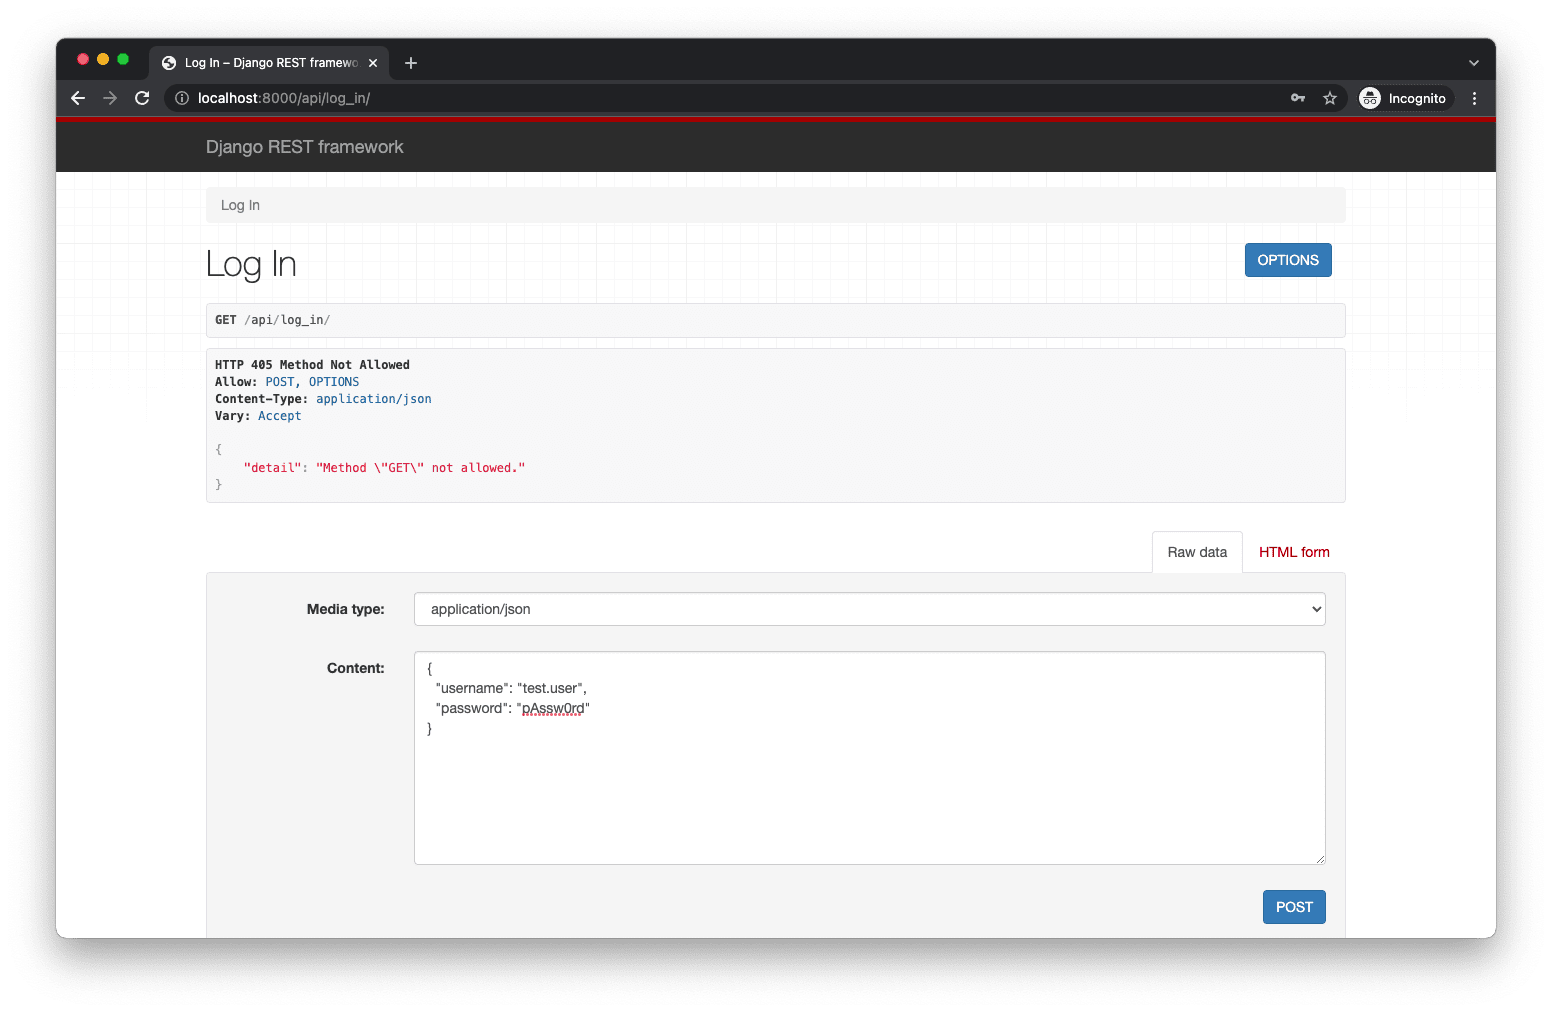
You should see the following success screen:
You can also test via cURL in a new Terminal console. Make sure the server is still running!
First sign up for a new account:
$ curl -X POST http://localhost:8000/api/sign_up/ \
-H 'Content-Type: application/json' \
-d '
{
    "username": "michael@something.com",
    "password1": "test",
    "password2": "test",
    "first_name": "michael",
    "last_name": "herman"
}
'
  "id": 3,
  "username": "michael@something.com",
  "first_name": "michael",
  "last_name": "herman"
}
And then attempt to log in with the same credentials:
$ curl -X POST http://localhost:8000/api/log_in/ \
-H 'Content-Type: application/json' \
-d '
{
    "username": "michael@something.com",
    "password": "test"
}
'
{
  "refresh": "<token>",
  "access": "<token>"
}
HTTP
Part 1, Chapter 5
After users log in, they should be taken to a dashboard that displays an overview of their user-related data. Even though we plan to use WebSockets for user-to-user communication, we still have a use for run-of-the-mill HTTP requests. Users should be able to query the server for information about their past, present, and future trips. Up-to-date information is vital to understanding where the user has travelled from or for planning where she is traveling next.
Our HTTP-related tests capture these scenarios.
All Trips
First, let’s add a feature to let users view all of the trips associated with their accounts. As an initial step, we will allow users to see all existing trips; later on in this tutorial, we will add better filtering.
Test
Add the following test case to the bottom of our existing tests in trips/tests/test_http.py :
# tests/test_http.py

class HttpTripTest(APITestCase):
    def setUp(self):
        user = create_user()
        response = self.client.post(reverse('log_in'), data={
            'username': user.username,
            'password': PASSWORD,
        })
        self.access = response.data['access']

    def test_user_can_list_trips(self):
        trips = [
            Trip.objects.create(pick_up_address='A', drop_off_address='B'),
            Trip.objects.create(pick_up_address='B', drop_off_address='C')
        ]
        response = self.client.get(reverse('trip:trip_list'),
            HTTP_AUTHORIZATION=f'Bearer {self.access}'
        )
        self.assertEqual(status.HTTP_200_OK, response.status_code)
        exp_trip_ids = [str(trip.id) for trip in trips]
        act_trip_ids = [trip.get('id') for trip in response.data]
        self.assertCountEqual(exp_trip_ids, act_trip_ids)
Update the imports as well:
# trips/tests/test_http.py

from trips.serializers import TripSerializer, UserSerializer # new
from trips.models import Trip # new
Our test creates two trips and then makes a call to the trip list API, which should successfully return the trip data.
For now, the test should fail:
(env)$ python manage.py test trips.tests
Error:
ImportError: cannot import name 'TripSerializer'
We have a lot of work to do in order to get the test passing.
Model
First, we need to create a model that represents the concept of a trip. Update the trips/models.py file as follows:
import uuid # new

from django.contrib.auth.models import AbstractUser
from django.db import models # new
from django.shortcuts import reverse # new


class User(AbstractUser):
    pass


class Trip(models.Model): # new
    REQUESTED = 'REQUESTED'
    STARTED = 'STARTED'
    IN_PROGRESS = 'IN_PROGRESS'
    COMPLETED = 'COMPLETED'
    STATUSES = (
        (REQUESTED, REQUESTED),
        (STARTED, STARTED),
        (IN_PROGRESS, IN_PROGRESS),
        (COMPLETED, COMPLETED),
    )

    id = models.UUIDField(primary_key=True, default=uuid.uuid4, editable=False)
    created = models.DateTimeField(auto_now_add=True)
    updated = models.DateTimeField(auto_now=True)
    pick_up_address = models.CharField(max_length=255)
    drop_off_address = models.CharField(max_length=255)
    status = models.CharField(
        max_length=20, choices=STATUSES, default=REQUESTED)

    def __str__(self):
        return f'{self.id}'

    def get_absolute_url(self):
        return reverse('trip:trip_detail', kwargs={'trip_id': self.id})
Since a trip is simply a transportation event between a starting location and a destination, we included a pick-up address and a drop-off address. At any given point in time, a trip can be in a specific state, so we added a status to identify whether a trip is requested, started, in progress, or completed. Lastly, we need to have a consistent way to identify and track trips that is also difficult for someone to guess. So, we use a UUID for our Trip model.
Let’s make a migration for our new model and run it to create the corresponding table.
(env)$ python manage.py makemigrations
(env)$ python manage.py migrate
Admin
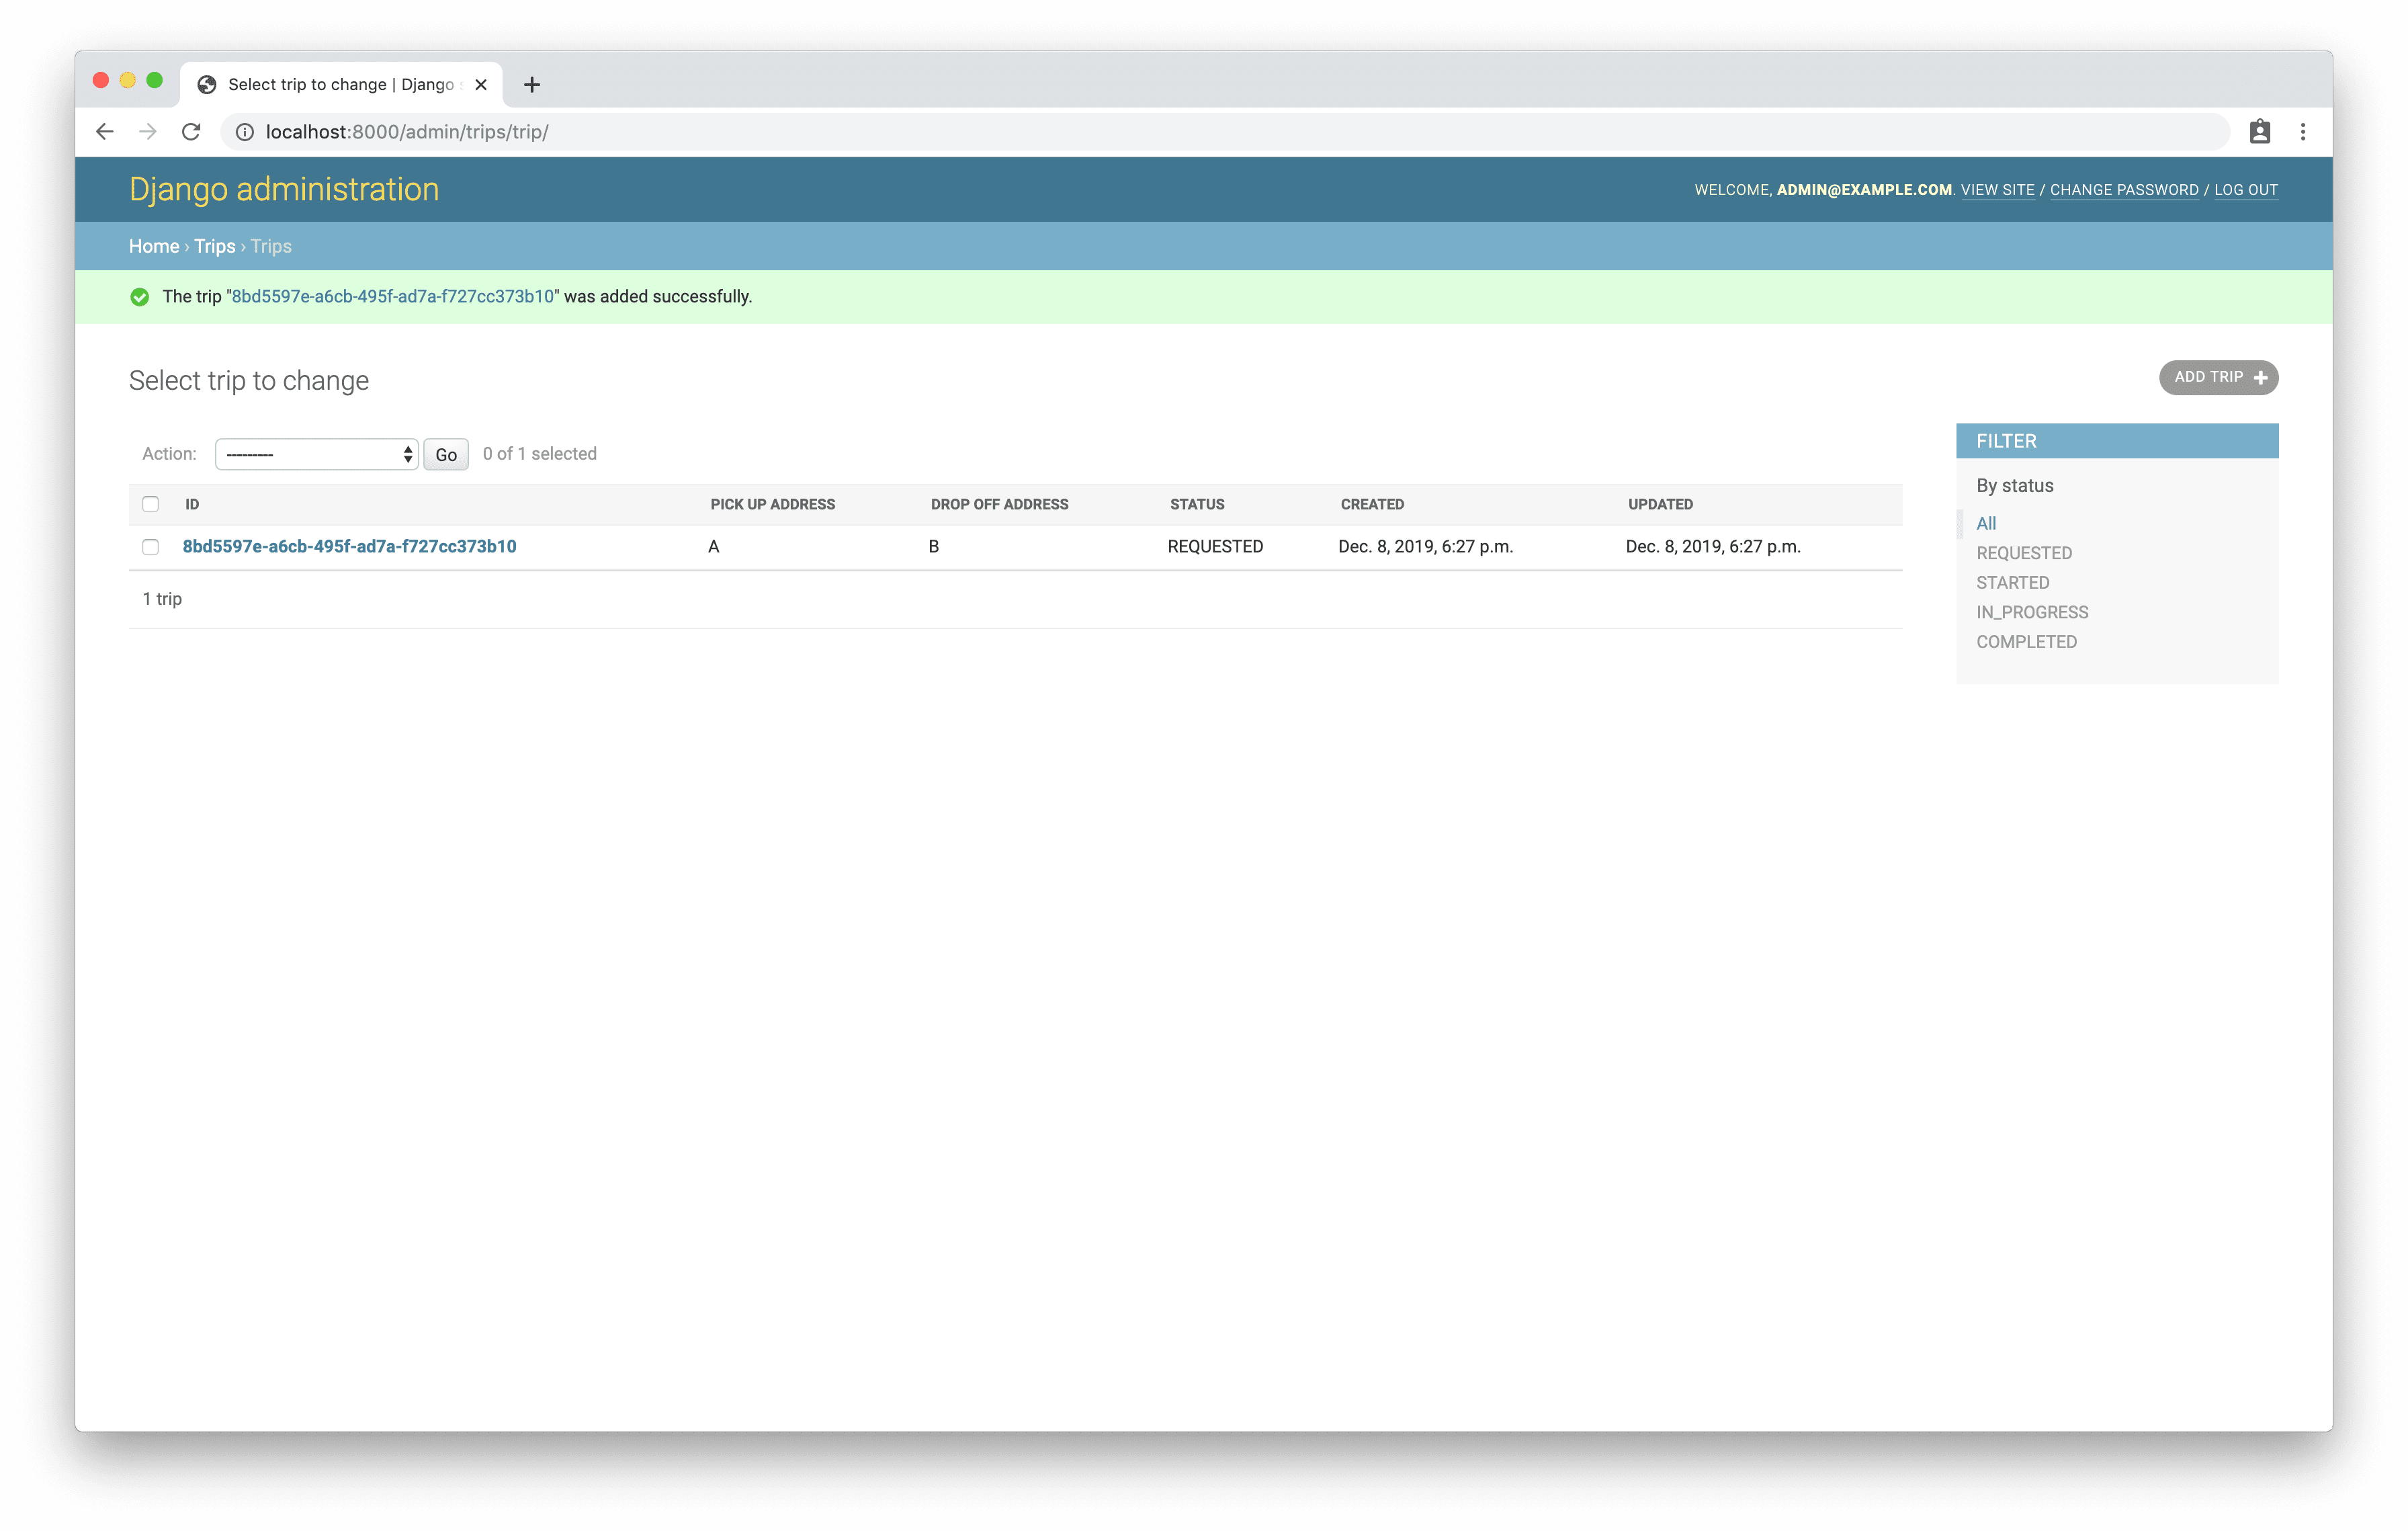
Now that our database has a Trip table, let’s set up the corresponding admin page. Open trips/admin.py and register a TripAdmin .
# trips/admin.py

from django.contrib import admin
from django.contrib.auth.admin import UserAdmin as DefaultUserAdmin

from .models import Trip, User # changed


@admin.register(User)
class UserAdmin(DefaultUserAdmin):
    pass


# new
@admin.register(Trip)
class TripAdmin(admin.ModelAdmin):
    fields = (
        'id', 'pick_up_address', 'drop_off_address', 'status', 'created', 'updated',
    )
    list_display = (
        'id', 'pick_up_address', 'drop_off_address', 'status', 'created', 'updated',
    )
    list_filter = (
        'status',
    )
    readonly_fields = (
        'id', 'created', 'updated',
Visit the admin page and add a new Trip record. You should see something like the following.
Serializer
Like the user data, we need a way to serialize the trip data to pass it between the client and the server, so add a new serializer to the bottom of the trips/serializers.py file:
# trips/serializers.py

class TripSerializer(serializers.ModelSerializer):
    class Meta:
        model = Trip
        fields = '__all__'
        read_only_fields = ('id', 'created', 'updated',)
Add at the top the import:
from .models import Trip
By identifying certain fields as “read only”, we can ensure that they will never be created or updated via the serializer. In this case, we want the server to be responsible for creating the id , created , and updated fields.
View
Add the TripView to trips/views.py
# trips/views.py

class TripView(viewsets.ReadOnlyModelViewSet):
    permission_classes = (permissions.IsAuthenticated,)
    queryset = Trip.objects.all()
    serializer_class = TripSerializer
As you can see, our TripView is incredibly basic. We leveraged the DRF ReadOnlyModelViewSet to support our trip list and trip detail views. For now, our view will return all trips. Note that like the LogOutView , a user needs to be authenticated in order to access this API.
Update the imports like so:
from django.contrib.auth import get_user_model
from rest_framework import generics, permissions, viewsets # changed
from rest_framework_simplejwt.views import TokenObtainPairView

from .models import Trip # new
from .serializers import LogInSerializer, TripSerializer, UserSerializer # changed
URLs
Include the trip-specific URL configuration in the main URLs file, taxi/urls.py :
# taxi/urls.py

from django.contrib import admin
from django.urls import include, path # new
from rest_framework_simplejwt.views import TokenRefreshView

from trips.views import SignUpView, LogInView


urlpatterns = [
    path('admin/', admin.site.urls),
    path('api/sign_up/', SignUpView.as_view(), name='sign_up'),
    path('api/log_in/', LogInView.as_view(), name='log_in'),
    path('api/token/refresh/', TokenRefreshView.as_view(),
         name='token_refresh'),
    path('api/trip/', include('trips.urls', 'trip',)), # new
]
Then, add our first trip-specific URL, which enables our TripView to provide a list of trips. Create a trips/urls.py file and populate it as follows:
from django.urls import path

from .views import TripView


app_name = 'taxi'

urlpatterns = [
    path('', TripView.as_view({'get': 'list'}), name='trip_list'),
]
If curious, you can read more about the need to set
app_namehere.
When we run our tests again, we get our list of trips:
(env)$ python manage.py test trips.tests
Single Trip
Our next, and last, HTTP test covers the trip detail feature. With this feature, users are able to retrieve the details of a trip identified by its primary key (UUID) value.
Add the following test to HttpTripTest in trips/tests/test_http.py
# tests/test_http.py

def test_user_can_retrieve_trip_by_id(self):
    trip = Trip.objects.create(pick_up_address='A', drop_off_address='B')
    response = self.client.get(trip.get_absolute_url(),
        HTTP_AUTHORIZATION=f'Bearer {self.access}'
    )
    self.assertEqual(status.HTTP_200_OK, response.status_code)
    self.assertEqual(str(trip.id), response.data.get('id'))
Here, we leveraged the use of the handy get_absolute_url function on our Trip model to identify the location of our Trip resource. We added asserts that get the serialized data of a single trip and a success status.
Of course, we create a failing test to begin:
(env)$ python manage.py test trips.tests
Error:
django.urls.exceptions.NoReverseMatch: Reverse for 'trip_detail' not found.
'trip_detail' is not a valid view function or pattern name.
Update the Tripview in trips/views.py , like so:
# trips/views.py

class TripView(viewsets.ReadOnlyModelViewSet):
    lookup_field = 'id' # new
    lookup_url_kwarg = 'trip_id' # new
    permission_classes = (permissions.IsAuthenticated,)
    queryset = Trip.objects.all()
    serializer_class = TripSerializer
Supporting our new functionality is as easy as adding two variables to our TripView :
- The
lookup_fieldvariable tells the view to get the trip record by itsidvalue. - The
lookup_url_kwargvariable tells the view what named parameter to use to extract theidvalue from the URL.
Add the URL to trips/urls.py
# trips/urls.py

from django.urls import path

from .views import TripView


app_name = 'taxi'

urlpatterns = [
    path('', TripView.as_view({'get': 'list'}), name='trip_list'),
    path('<uuid:trip_id>/', TripView.as_view({'get': 'retrieve'}), name='trip_detail'),  # new
]
We identified a trip_id in our URL configuration, which should be a UUID.
Ensure the tests pass:
(env)$ python manage.py test trips.tests
WebSockets - Part One
Part 1, Chapter 6
Up until now, we have dealt with users in a generic way: Users can authenticate and they can retrieve trips. The following section separates users into distinct roles, and this is where things get interesting. Fundamentally, users can participate in trips in one of two ways – they either drive the cars or they ride in them. A rider initiates the trip with a request, which is broadcasted to all available drivers. A driver starts a trip by accepting the request. At this point, the driver heads to the pick-up address. The rider is instantly alerted that a driver has started the trip and other drivers are notified that the trip is no longer up for grabs.
Instantaneous communication between the driver and the rider is vital here, and we can achieve it using WebSockets via Django Channels.
Connecting to the Server
Clients and servers using the HTTP Protocol establish a single connection per request . The client initiates communication and the server responds. It never works the other way around. After the request/response cycle finishes, the connection closes.
On the other hand, clients and servers using the WebSocket protocol establish just one connection total . Both the client and the server can send messages to each other over the same open connection until it disconnects.
Let’s wade into the topic of WebSockets before diving right in.
Create a new test_websocket.py file in the same directory as test_http.py and add the following code to it:
# tests/test_websocket.py

from channels.testing import WebsocketCommunicator
import pytest

from taxi.routing import application


TEST_CHANNEL_LAYERS = {
    'default': {
        'BACKEND': 'channels.layers.InMemoryChannelLayer',
    },
}


@pytest.mark.asyncio
class TestWebSocket:
    async def test_can_connect_to_server(self, settings):
        settings.CHANNEL_LAYERS = TEST_CHANNEL_LAYERS
        communicator = WebsocketCommunicator(
            application=application,
            path='/taxi/'
        )
        connected, _ = await communicator.connect()
        assert connected is True
        await communicator.disconnect()
Our first WebSocket test proves that a client can connect to the server.
One of the first things you’ll probably notice is that we’re using pytest instead of the built-in Django testing tools. We’re also using coroutines that were introduced with the asyncio module in Python 3.4. Django Channels mandates the use of both pytest and asyncio .
If you’re not familiar with asynchronous programming, we’d strongly encourage you to learn the basics, starting with the official asyncio Python documentation and the excellent Python & Async Simplified guide (by the maintainer of Django Channels, Andrew Godwin).
Remember how we created HTTP test classes by extending APITestCase ? Grouping multiple tests with pytest only requires you to write a basic class. We’ve named ours TestWebsocket . We’ve also decorated the class with a mark, which sets metadata on each of the test methods contained within. The @pytest.mark.asyncio mark tells pytest to treat tests as asyncio coroutines.
Pay attention to the fact that we’re including a TEST_CHANNEL_LAYERS constant at the top of the file after the imports. We’re using that constant in the first line of our test along with the settings fixture provided by pytest-django . This line of code effectively overwrites the application’s settings to use the InMemoryChannelLayer instead of the configured RedisChannelLayer . Doing this allows us to focus our tests on the behavior we are programming rather than the implementation with Redis. Rest assured that when we run our server in a non-testing environment, Redis will be used.
Run the pytest command in your terminal.
(env)$ pytest
The tests should fail with two errors. The first error occurs because we need to explicitly identify the Django settings file we want to use.
django.core.exceptions.ImproperlyConfigured: Requested setting REST_FRAMEWORK, but settings are not configured. You must either define the environment variable DJANGO_SETTINGS_MODULE or call settings.configure() before accessing settings.
Let’s fix that by creating a pytest configuration file. Create a new pytest.ini file in your root directory with the following code:
[pytest]
DJANGO_SETTINGS_MODULE = taxi.settings
Run the pytest command in your terminal again and you should only see one remaining error.
ImportError: cannot import name 'TaxiConsumer' from 'trips.consumers'
Create a new trips/consumers.py file with the following code:
from channels.generic.websocket import AsyncJsonWebsocketConsumer


class TaxiConsumer(AsyncJsonWebsocketConsumer):
    async def connect(self):
        await self.accept()

    async def disconnect(self, code):
        await super().disconnect(code)
A Channels consumer is like a Django view with extra steps to support the WebSocket protocol. Whereas a Django view can only process an incoming request, a Channels consumer can send and receive messages and react to the WebSocket connection being opened and closed.
For now, we’re explicitly accepting all connections.
Give the pytest command another try. One more error:
ValueError: No application configured for scope type 'websocket'
Update the taxi/routing.py file like the example below.
# taxi/routing.py

from django.urls import path # new
from channels.routing import ProtocolTypeRouter, URLRouter # changed

from trips.consumers import TaxiConsumer


application = ProtocolTypeRouter({
    'websocket': URLRouter([
        path('taxi/', TaxiConsumer),
    ]),
})
Whereas Channels implicitly handles the HTTP URL configuration, we need to explicitly handle WebSocket routing. (A router is the Channels counterpart to Django’s URL configuration.)
Let’s run pytest one last time to see the tests pass.
5 passed in 0.91s
Sending and Receiving Messages
Now that we’ve gotten our feet wet with opening and closing a connection, let’s walk in a little deeper and learn how to send and receive messages.
Add the following test:
# tests/test_websocket.py

async def test_can_send_and_receive_messages(self, settings):
    settings.CHANNEL_LAYERS = TEST_CHANNEL_LAYERS
    communicator = WebsocketCommunicator(
        application=application,
        path='/taxi/'
    )
    connected, _ = await communicator.connect()
    message = {
        'type': 'echo.message',
        'data': 'This is a test message.',
    }
    await communicator.send_json_to(message)
    response = await communicator.receive_json_from()
    assert response == message
    await communicator.disconnect()
In this test, after we establish a connection with the server, we send a message and wait to get one back. We expect the server to echo our message right back to us exactly the way we sent it. In fact, we need to program this behavior on the server.
Let’s open our trips/consumers.py file and add the following function to the class.
async def receive_json(self, content, **kwargs):
    message_type = content.get('type')
    if message_type == 'echo.message':
        await self.send_json({
            'type': message_type,
            'data': content.get('data'),
        })
The receive_json() function is responsible for processing all messages that come to the server. Our message is an object with a type and a data payload. Passing a type is a Channels convention that serves two purposes. First, it helps differentiate incoming messages and tells the server how to process them. Second, the type maps directly to a consumer function when sent from another channel layer. (We’ll talk about this use in the next section.)
Run pytest in your terminal. All tests should pass.
6 passed in 0.86s
Sending and Receiving Broadcast Messages
The water is up to our waists now. After this section, we’ll be floating.
We saw how to make the client and the server send each other messages through a single instance of an application. Now, let’s learn how to make one application talk to another through broadcast messaging.
Add the following test function to our class in tests/test_websocket.py
# tests/test_websocket.py

async def test_can_send_and_receive_broadcast_messages(self, settings):
    settings.CHANNEL_LAYERS = TEST_CHANNEL_LAYERS
    communicator = WebsocketCommunicator(
        application=application,
        path='/taxi/'
    )
    connected, _ = await communicator.connect()
    message = {
        'type': 'echo.message',
        'data': 'This is a test message.',
    }
    channel_layer = get_channel_layer()
    await channel_layer.group_send('test', message=message)
    response = await communicator.receive_json_from()
    assert response == message
    await communicator.disconnect()
Add to the top:
from channels.layers import get_channel_layer
This new test looks a lot like the last test we wrote, but it has one important difference: it uses a channel layer to broadcast a message to a group . Whereas the last test modeled a user talking to himself in an empty room, this most recent test represents a user talking to a room full of people.
We need to modify our consumer in two ways to get our newest test passing. Add the code as shown below:
# trips/consumers.py

from channels.generic.websocket import AsyncJsonWebsocketConsumer


class TaxiConsumer(AsyncJsonWebsocketConsumer):
    groups = ['test'] # new

    async def connect(self):
        await self.accept()

    async def receive_json(self, content, **kwargs):
        message_type = content.get('type')
        if message_type == 'echo.message':
            await self.send_json({
                'type': message_type,
                'data': content.get('data'),
            })

    async def echo_message(self, message): # new
        await self.send_json({
            'type': message.get('type'),
            'data': message.get('data'),
        })

    async def disconnect(self, code):
        await super().disconnect(code)
Do you remember how we mentioned that the message type maps to a consumer function? That statement is true when we’re talking about messages that are broadcast to groups. When a message comes from a channel layer, Channels looks for a function on the receiving consumer whose name matches the message type . It also converts any . characters to _ characters before it checks for the match.
Channel layers broadcast messages to specific groups, which are collections of other channel layers that are subscribed to the same topic. One way to subscribe to a group is by defining the membership in a class variable like the change we added above.
Make the following change to keep the same behavior while making group subscription more explicit:
# trips/consumers.py

from channels.generic.websocket import AsyncJsonWebsocketConsumer


class TaxiConsumer(AsyncJsonWebsocketConsumer):
    async def connect(self): # changed
        await self.channel_layer.group_add(
            group='test',
            channel=self.channel_name
        )
        await self.accept()

    async def receive_json(self, content, **kwargs):
        message_type = content.get('type')
        if message_type == 'echo.message':
            await self.send_json({
                'type': message_type,
                'data': content.get('data'),
            })

    async def echo_message(self, message):
        await self.send_json({
            'type': message.get('type'),
            'data': message.get('data'),
        })

    async def disconnect(self, code): # changed
        await self.channel_layer.group_discard(
            group='test',
            channel=self.channel_name
        )
        await super().disconnect(code)
With these changes, any client connected to the TaxiConsumer through WebSockets will automatically be subscribed to the test group. When a channel layer sends a broadcast message with the type echo.message , Channels will execute the echo_message() function for everyone in the test group.
Run pytest and confirm that the tests pass.
7 passed in 0.91s
Authenticating Socket Connections
Establishing a WebSocket connection starts with a “handshake” between the client and the server over HTTP. Anything that can be sent with an HTTP request can be sent with the handshake – headers and cookies, query string parameters and request bodies. Unfortunately, the JavaScript WebSocket API does not support custom headers. That means we need to find a different way to authenticate our WebSocket connection than an authorization header.
We have several different ways to get around the custom headers limitation, but the community at large seems to agree that sending the access token in a query string parameter is the way to go. Keep in mind that in a production environment, you need to be careful to protect the access token from bad actors.
Let’s write a test to show that a connection fails if the handshake request does not include a valid access token.
# tests/test_websocket.py

async def test_cannot_connect_to_socket(self, settings):
    settings.CHANNEL_LAYERS = TEST_CHANNEL_LAYERS
    communicator = WebsocketCommunicator(
        application=application,
        path='/taxi/'
    )
    connected, _ = await communicator.connect()
    assert connected is False
Create a new taxi/middleware.py file with the following code:
# taxi/middleware.py

from urllib.parse import parse_qs

from django.contrib.auth import get_user_model
from django.contrib.auth.models import AnonymousUser
from django.db import close_old_connections

from channels.auth import AuthMiddlewareStack
from rest_framework_simplejwt.tokens import AccessToken

User = get_user_model()


class TokenAuthMiddleware:
    def __init__(self, inner):
        self.inner = inner

    def __call__(self, scope):
        close_old_connections()
        query_string = parse_qs(scope['query_string'].decode())
        token = query_string.get('token')
        if not token:
            scope['user'] = AnonymousUser()
            return self.inner(scope)
        try:
            access_token = AccessToken(token[0])
            user = User.objects.get(id=access_token['id'])
        except Exception as exception:
            scope['user'] = AnonymousUser()
            return self.inner(scope)
        if not user.is_active:
            scope['user'] = AnonymousUser()
            return self.inner(scope)
        scope['user'] = user
        return self.inner(scope)


def TokenAuthMiddlewareStack(inner):
    return TokenAuthMiddleware(AuthMiddlewareStack(inner))
Our new middleware class plucks the JWT access token from the query string and retrieves the associated user. Once the WebSocket connection is opened, all messages can be sent and received without verifying the user again. Closing the connection and opening it again requires re-authorization.
Let’s implement the middleware. Open the taxi/routing.py file and make the following changes:
# taxi/routing.py

from django.urls import path
from channels.routing import ProtocolTypeRouter, URLRouter

from taxi.middleware import TokenAuthMiddlewareStack # new
from trips.consumers import TaxiConsumer


application = ProtocolTypeRouter({
    'websocket': TokenAuthMiddlewareStack( # changed
        URLRouter([
            path('taxi/', TaxiConsumer),
        ])
    ),
})
Here, we’re wrapping our URL router in our middleware stack, so all incoming connection requests will go through our authentication method.
With the middleware in place, let’s edit our consumer to reject any connection that does not have an authenticated user.
Edit the connect() function like so:
# trips/consumers.py

async def connect(self): # changed
    user = self.scope['user']
    if user.is_anonymous:
        await self.close()
    else:
        await self.channel_layer.group_add(
            group='test',
            channel=self.channel_name
        )
        await self.accept()
We need to add one more mark to our pytest test class in order to access the database.
# tests/test_websocket.py

@pytest.mark.asyncio
@pytest.mark.django_db(transaction=True) # new
class TestWebSocket: ...
Run the pytest command in your terminal.
2 failed, 6 passed in 2.05s
We need to refactor our other WebSocket tests to pass a JWT access token in the query string when connecting. Add the following create_user() helper function before after TEST_CHANNEL_LAYERS and before TestWebSocket
@database_sync_to_async
def create_user(username, password):
    user = get_user_model().objects.create_user(
        username=username,
        password=password
    )
    access = AccessToken.for_user(user)
    return user, access
We also need to add the following imports to the top of the page:
from django.contrib.auth import get_user_model
from channels.db import database_sync_to_async
from rest_framework_simplejwt.tokens import AccessToken
Our helper function creates a new user in the database and then generates an access token for it.
Edit the first test to match the code below:
# tests/test_websocket.py

async def test_can_connect_to_server(self, settings):
    settings.CHANNEL_LAYERS = TEST_CHANNEL_LAYERS
    _, access = await create_user(  # new
        'test.user@example.com', 'pAssw0rd'
    )
    communicator = WebsocketCommunicator(
        application=application,
        path=f'/taxi/?token={access}' # changed
    )
    connected, _ = await communicator.connect()
    assert connected is True
    await communicator.disconnect()
Make the same change to the next two functions. Call the create_user() function to get the access token and then pass it as a query string parameter in the communicator’s path .
Run pytest to see the tests passing.
8 passed in 1.21s
Now that you know the basics, we’re ready to build on that knowledge in the next chapter.
Confirm that your directory looks like this before moving on:
.
├── pytest.ini
└── server
    └── taxi
        ├── db.sqlite3
        ├── manage.py
        ├── taxi
        │   ├── __init__.py
        │   ├── asgi.py
        │   ├── middleware.py
        │   ├── routing.py
        │   ├── settings.py
        │   ├── urls.py
        │   └── wsgi.py
        └── trips
            ├── __init__.py
            ├── admin.py
            ├── apps.py
            ├── migrations
            │   ├── 0001_initial.py
            │   ├── 0002_trip.py
            │   └── __init__.py
            ├── models.py
            ├── serializers.py
            ├── tests
            │   ├── __init__.py
            │   ├── test_http.py
            │   └── test_websocket.py
            ├── urls.py
            └── views.py