Introduction
Part 2, Chapter 1
Introduction
In Part 1, we laid the foundation for our app by coding the server APIs. In Part 2, we’ll build a user interface on top of that structure.
Objectives
In Part 2, our goal is to learn the basics of building a React client. In each chapter, we’ll examine a common fundamental component of web applications through the lens of React.
Each chapter is colored by a common theme – authentication.
By the end of Part 2, you should be able to:
- Create a React app from scratch using the Create React App script.
- Make functional React components that use React Hooks.
- Configure routing to navigate between different views in your app.
- Write unit and end-to-end tests to confirm your code is working as expected.
- Implement Bootstrap to polish the look-and-feel of your UI.
- Code forms that send data to the server asynchronously.
- Run the server and the client as Docker services.
- Employ authentication so end users can sign up, log in, and log out of the application.
React Setup
Part 2, Chapter 2
Our application uses:
- React (v16.12.0)
- React Router DOM (v5.1.2)
- Bootstrap (v4.4.1)
- React Bootstrap (v1.0.0)
- React Router Bootstrap (v0.25.0)
- Formik (v2.0.6)
- Axios (v0.19.0)
- Cypress (v3.7.0)
Before you begin this tutorial, you will need a recent version of Node.js on your machine. If you are using Mac OS and don’t have Node.js, I recommend installing it using Homebrew. Along with Node.js, you get npm, a JavaScript package manager, and npx, a utility that can run scripts from your local directory or a central cache.
Once you have installed the required software on your machine, navigate to the taxi-app directory using the terminal.
$ cd taxi-app
From there, create a new single-page React app using the Create React App script. Since we don’t have any Node.js modules in our taxi-app directory, npx will download create-react-app and any dependencies from the npm central cache.
$ npx create-react-app client
After the installation has completed, you should see a new client/ directory added to the root with the following contents. (The node_modules/ directory is hidden from this view.)
.
├── README.md
├── package.json
├── public
│   ├── favicon.ico
│   ├── index.html
│   ├── logo192.png
│   ├── logo512.png
│   ├── manifest.json
│   └── robots.txt
├── src
│   ├── App.css
│   ├── App.js
│   ├── App.test.js
│   ├── index.css
│   ├── index.js
│   ├── logo.svg
│   ├── serviceWorker.js
│   └── setupTests.js
└── yarn.lock
Change directories into client/ and start the React development server.
$ cd client
$ npm start
You should see something like the following in your terminal.
Compiled successfully!

You can now view client in the browser.

  Local:            http://localhost:3000/
  On Your Network:  http://10.30.42.161:3000/

Note that the development build is not optimized.
To create a production build, use yarn build.
The terminal should also trigger your default browser to open and navigate to the development server’s local address. It is http://localhost:3000/ by default.
Kill the server in the terminal with CTRL+C . Let’s do some clean up before we proceed.
- Clear the src/App.css file.
- Clear the src/index.css file.
Next, replace the contents of public/index.html with the following code.
<!DOCTYPE html>
<html lang='en'>
  <head>
    <meta charset='utf-8' />
    <link rel='shortcut icon' href='%PUBLIC_URL%/favicon.ico' />
    <meta name='viewport' content='width=device-width, initial-scale=1' />
    <meta name='theme-color' content='#000000' />
    <link rel='manifest' href='%PUBLIC_URL%/manifest.json' />
    <title>Taxi</title>
  </head>
  <body>
    <noscript>You need to enable JavaScript to run this app.</noscript>
    <div id='root'></div>
  </body>
</html>
Edit the src/App.js component. Remove all the boilerplate code and replace it with the following:
// src/App.js

import React from 'react';

import './App.css';

function App () {
  return (
    <h1>Taxi</h1>
  );
}

export default App;
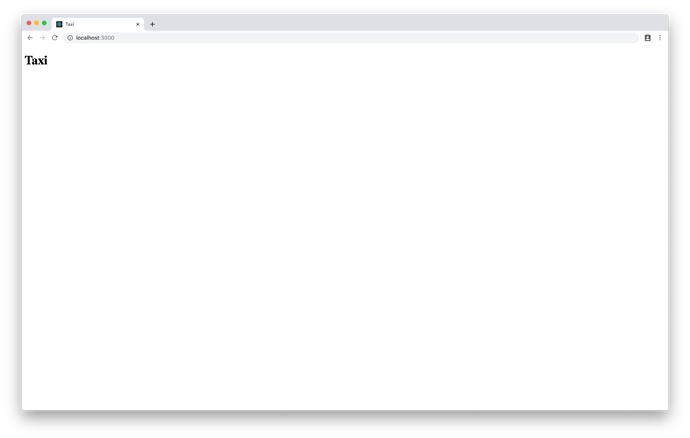
Start the development server and visit http://localhost:3000/.
React Routing
Part 2, Chapter 3
React does not include a native client-side routing library. Luckily, the React developer community provides many open source routing solutions. React Router is one of the most popular libraries with over 36,500 stars on GitHub and the one we’ll be using in this tutorial.
Let’s get started by installing the appropriate package from npm . Enter the following command into your terminal.
$ npm install react-router-dom --save
The simplest client-side routing configuration requires a Router and a Route . A Router maintains a specialized history object as you navigate between different views. A Route matches a URL and loads a component onto the screen. React Router recommends using the HashRouter for web applications that use a static file server. Recall that we’re using Django to serve API endpoints not templates, so HashRouter is exactly what we want. All HashRouter URLs will begin with #/ followed by a path.
Since we intend to use routing throughout our entire application, let’s wrap our App component in a HashRouter in the index.js file.
// src/index.js

import React from 'react';
import ReactDOM from 'react-dom';
import { HashRouter } from 'react-router-dom'; // new
import './index.css';
import App from './App';
import * as serviceWorker from './serviceWorker';

ReactDOM.render( // changed
  <HashRouter>
    <App />
  </HashRouter>,
  document.getElementById('root')
);

// If you want your app to work offline and load faster, you can change
// unregister() to register() below. Note this comes with some pitfalls.
// Learn more about service workers: https://bit.ly/CRA-PWA
serviceWorker.unregister();
With the router in place, we can add top-level routing the App component itself. Edit the App.js file to include a single Route that points to the home page.
// src/App.js

import React from 'react';
import { Route } from 'react-router-dom'; // new

import './App.css';

// changed
function App () {
  return (
    <Route exact path='/' render={() => (
      <h1>Taxi</h1>
    )} />
  );
}

export default App;
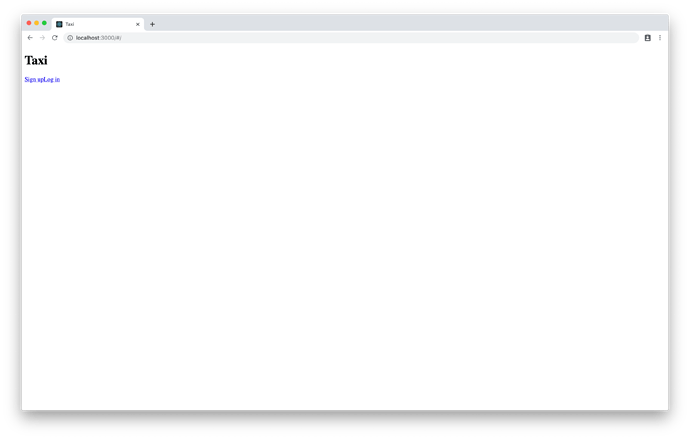
With the development server running, visit http://localhost:3000. Did you notice that the URL changes to http://localhost:3000/#/ ? The HashRouter is doing its job.
With basic routing implemented, let’s add a couple more component views to give our app life. Make a new src/components/ directory and then create two JavaScript files – SignUp.js and LogIn.js – inside it.
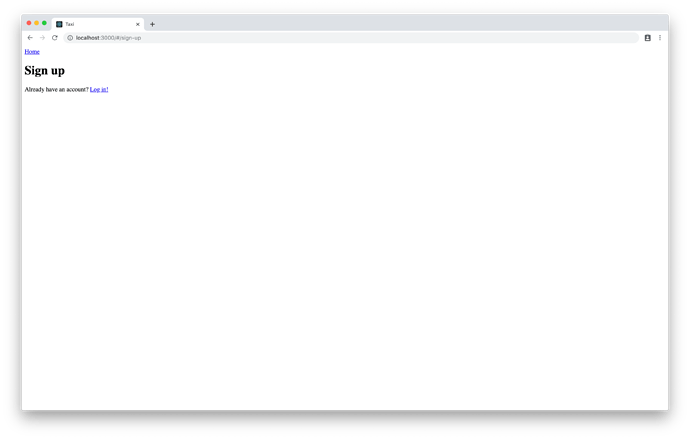
The SignUp component should include a link back to the home page and a link to the log in page. A <Link> is React Router’s equivalent of an HTML <a> element. We use the to attribute in the same way we use href in an anchor tag.
// src/components/SignUp.js

import React from 'react';
import { Link } from 'react-router-dom';

function SignUp (props) {
  return (
    <>
      <Link to='/'>Home</Link>
      <h1>Sign up</h1>
      <p>
        Already have an account? <Link to='/log-in'>Log in!</Link>
      </p>
    </>
  );
}

export default SignUp;
React Fragments
Are you wondering what
<>and</>mean? Those are short syntax forms of React Fragments. Fragments let you group child elements without needing to add extra nodes to the DOM.
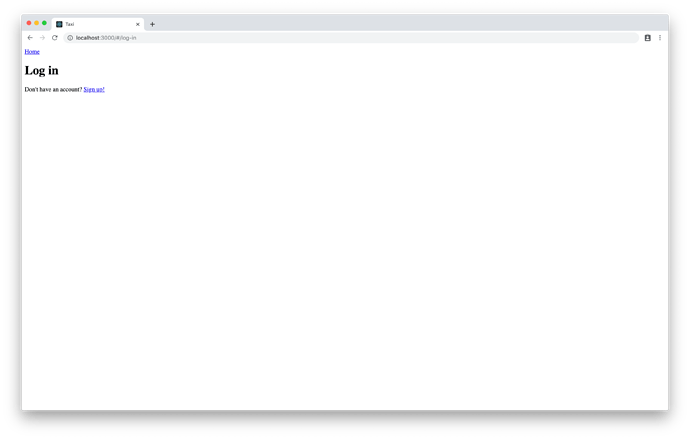
The LogIn component should look almost identical to the SignUp component with a link back home and a link to the sign up page.
// src/components/LogIn.js

import React from 'react';
import { Link } from 'react-router-dom';

function LogIn (props) {
  return (
    <>
      <Link to='/'>Home</Link>
      <h1>Log in</h1>
      <p>
        Don't have an account? <Link to='/sign-up'>Sign up!</Link>
      </p>
    </>
  );
}

export default LogIn;
Before we can test our application again, we need to add top-level routes for our new components. Open App.js again and add the following code.
// src/App.js

import React from 'react';
import { Link, Route, Switch } from 'react-router-dom'; // changed

import SignUp from './components/SignUp'; // new
import LogIn from './components/LogIn'; // new

import './App.css';

// changed
function App () {
  return (
    <Switch>
      <Route exact path='/' render={() => (
        <div>
          <h1>Taxi</h1>
          <Link to='/sign-up'>Sign up</Link>
          <Link to='/log-in'>Log in</Link>
        </div>
      )} />
      <Route path='/sign-up' component={SignUp} />
      <Route path='/log-in' component={LogIn} />
    </Switch>
  );
}

export default App;
Refresh the browser and click around the app. You should be able to navigate between the home , sign up , and log in pages.
Our directory structure should now look like the following.
.
├── README.md
├── package-lock.json
├── package.json
├── public
│   ├── favicon.ico
│   ├── index.html
│   ├── manifest.json
│   └── robots.txt
├── src
│   ├── App.css
│   ├── App.js
│   ├── App.test.js
│   ├── components
│   │   ├── LogIn.js
│   │   └── SignUp.js
│   ├── index.css
│   ├── index.js
│   ├── logo.svg
│   ├── serviceWorker.js
│   └── setupTests.js
└── yarn.lock
Cypress Testing
Part 2, Chapter 4
Testing client code is different than testing server code because with the client we care how our application works and how it looks. When testing the server, we assessed whether the units of code (the functions) processed the given inputs into the correct outputs. On the client, we need to think in terms of user experience. Here’s an example of behavior we want to test: when a user clicks the “Sign up” button, the app should show the Sign Up page.
In this case, we’re testing the application end-to-end. Behind the scenes, our app links UI components to functions that trigger communication between the client and the server. Instead of examining the minutiae of how the code works together, we want to test whether the application does what it is meant to do from the perspective of the user.
Cypress is software that lets you test anything that runs in a browser.
Open your terminal and install it. Then open it using the following commands.
$ npm install cypress --save-dev
$ npx cypress open
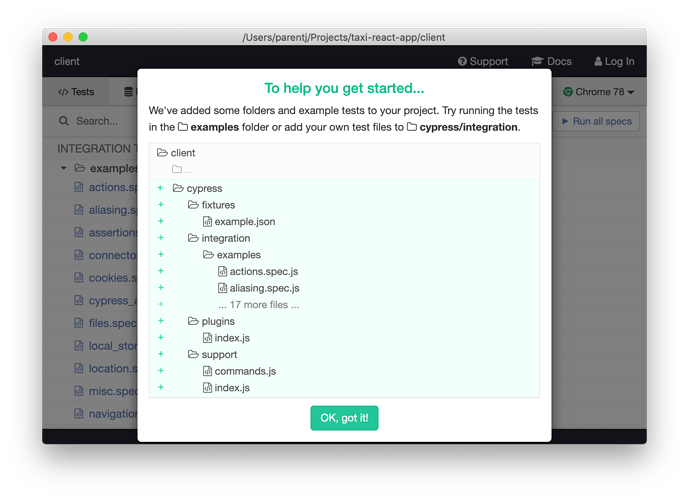
Cypress is installed with many example tests, which you can see when you open the software.
We’re going to start from scratch. Run the following commands in your terminal to clean the slate.
$ rm -rf cypress/fixtures/*
$ rm -rf cypress/integration/*
$ rm -rf cypress/plugins/*
$ rm -rf cypress/support/*
Now, our directory should have the following files. (The node_modules/ directory is hidden from this view.)
.
├── README.md
├── cypress
│   ├── fixtures
│   ├── integration
│   ├── plugins
│   └── support
├── cypress.json
├── package-lock.json
├── package.json
├── public
│   ├── favicon.ico
│   ├── index.html
│   └── manifest.json
├── src
│   ├── App.css
│   ├── App.js
│   ├── App.test.js
│   ├── index.css
│   ├── index.js
│   └── serviceWorker.js
└── yarn.lock
Notice that Cypress files are installed at the root of the client/ directory. Unlike many testing libraries, Cypress does not integrate with our code directly. In fact, you can point Cypress to any website and run tests against it!
Tip
{
  "compilerOptions": {
    "allowJs": true,
    "baseUrl": "../node_modules",
    "types": ["cypress"]
  },
  "include": ["**/*.*"]
}
If you’re using VSCode, create a tsconfig.json file in the cypress/ directory with the following content.
See other tips for setting up your development environment in the Cypress documentation.
Before we write our first test, let’s add one bit of configuration that will help us in the long run. Add a baseUrl to the cypress.json file that points to the development server’s local address.
// cypress.json

{
  "baseUrl": "http://localhost:3000"
}
With this configuration in place, we can avoid having to explicitly call out the complete URL every time we navigate somewhere in the browser or capture an API request.
Let’s get our feet wet with a simple test. Create a new navigation.spec.js file in the cypress/integration/ directory with the following code.
// cypress/integration/navigation.spec.js

describe('Navigation', function () {
  it('Can navigate to sign up from home', function () {
    cy.visit('/#/');
    cy.get('a').contains('Sign up').click();
    cy.hash().should('eq', '#/sign-up');
  });
});
Cypress tests read something close to plain English. This scenario says:
- Visit the home page.
- Look for a link with the text “Sign up” and click it.
- Confirm that the browser navigates to the Sign Up page.
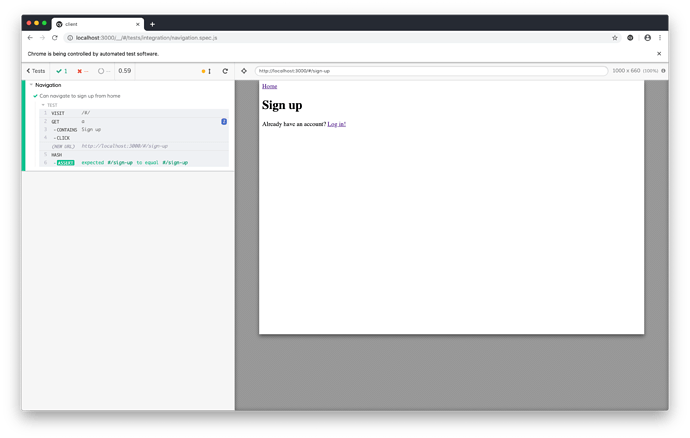
Open Cypress and click on the “Run all specs” button to launch the test. (Make sure the React development server is running too or Cypress will throw a warning!)
Our trivial test should pass.
Let’s add some more tests to capture the rest of the navigation scenarios.
// cypress/integration/navigation.spec.js

describe('Navigation', function () {
  it('Can navigate to sign up from home', function () {
    cy.visit('/#/');
    cy.get('a').contains('Sign up').click();
    cy.hash().should('eq', '#/sign-up');
  });

  // new
  it('Can navigate to log in from home', function () {
    cy.visit('/#/');
    cy.get('a').contains('Log in').click();
    cy.hash().should('eq', '#/log-in');
  });

  // new
  it('Can navigate to home from sign up', function () {
    cy.visit('/#/sign-up');
    cy.get('a').contains('Home').click();
    cy.hash().should('eq', '#/');
  });

  // new
  it('Can navigate to log in from sign up', function () {
    cy.visit('/#/sign-up');
    cy.get('a').contains('Log in').click();
    cy.hash().should('eq', '#/log-in');
  });

  // new
  it('Can navigate to home from log in', function () {
    cy.visit('/#/log-in');
    cy.get('a').contains('Home').click();
    cy.hash().should('eq', '#/');
  });

  // new
  it('Can navigate to sign up from log in', function () {
    cy.visit('/#/log-in');
    cy.get('a').contains('Sign up').click();
    cy.hash().should('eq', '#/sign-up');
  });
});
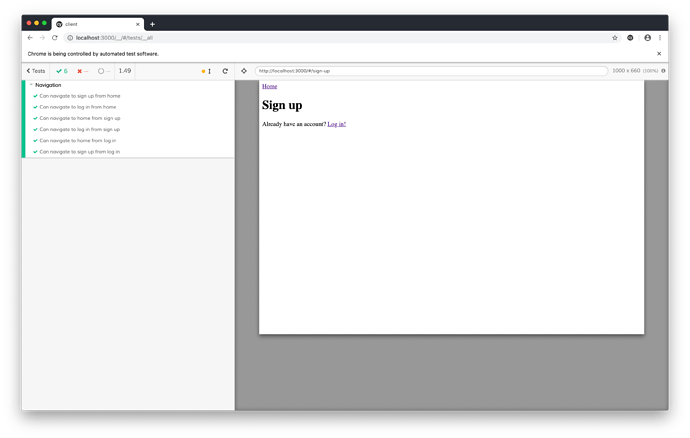
Check the Cypress runner again. All tests should be passing.
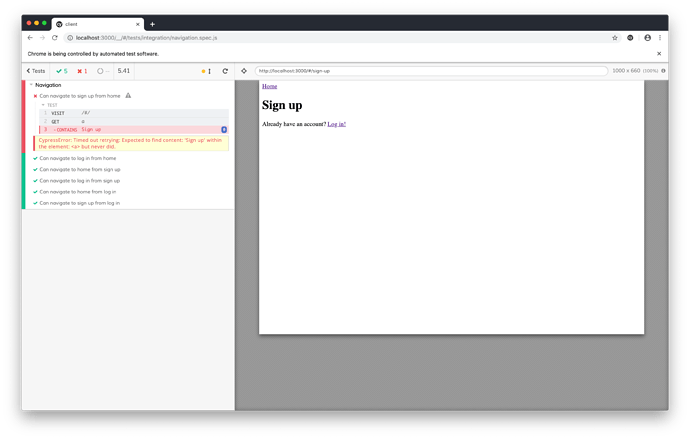
Are you wondering what a failing test looks like? Comment out the code that renders the “Sign up” button on the home page as shown below.
// src/App.js

import React from 'react';
import { Link, Route, Switch } from 'react-router-dom';

import SignUp from './components/SignUp';
import LogIn from './components/LogIn';

import './App.css';

function App () {
  return (
    <Switch>
      <Route exact path='/' render={() => (
        <div>
          <h1>Taxi</h1>
          {/* <Link to='/sign-up'>Sign up</Link> */}
          <Link to='/log-in'>Log in</Link>
        </div>
      )} />
      <Route path='/sign-up' component={SignUp} />
      <Route path='/log-in' component={LogIn} />
    </Switch>
  );
}

export default App;
After Cypress performs a hot reload, it should rerun our tests. Our first test should fail.
Make sure you remove the comment to get the test passing before you continue to the next chapter.
Here’s how our directory structure looks. (The node_modules/ directory is hidden from this view.)
.
├── README.md
├── cypress
│   ├── fixtures
│   ├── integration
│   │   └── navigation.spec.js
│   ├── plugins
│   ├── support
│   └── tsconfig.json
├── cypress.json
├── package-lock.json
├── package.json
├── public
│   ├── favicon.ico
│   ├── index.html
│   └── manifest.json
├── src
│   ├── App.css
│   ├── App.js
│   ├── App.test.js
│   ├── components
│   │   ├── LogIn.js
│   │   └── SignUp.js
│   ├── index.css
│   ├── index.js
│   └── serviceWorker.js
└── yarn.lock
React Bootstrap
Part 2, Chapter 5
Up to this point, we’ve only focused on coding and testing. Let’s turn our attention to making our app look appealing.
We’re going to install four dependencies:
- Bootstrap, a CSS component library
- React Bootstrap, DOM bindings for Bootstrap
- React Router Bootstrap, a library that integrates React Router and React Bootstrap
- Bootswatch, a collection of Bootstrap themes
Run the following code in your terminal.
$ npm install bootstrap react-bootstrap react-router-bootstrap bootswatch --save
We’re going to use Lumen as our default Bootstrap theme. Bootswatch only changes the way the Bootstrap components look. It doesn’t alter any functionality.
Import the Lumen theme in the src/index.js file as demonstrated below.
// src/index.js

import React from 'react';
import ReactDOM from 'react-dom';
import 'bootswatch/dist/lumen/bootstrap.css'; // new
import { HashRouter } from 'react-router-dom';
import './index.css';
import App from './App';
import * as serviceWorker from './serviceWorker';

ReactDOM.render(
  <HashRouter>
    <App />
  </HashRouter>,
  document.getElementById('root')
);

// If you want your app to work offline and load faster, you can change
// unregister() to register() below. Note this comes with some pitfalls.
// Learn more about service workers: https://bit.ly/CRA-PWA
serviceWorker.unregister();
While we’re making our app look good, let’s make a few small custom cosmetic upgrades. Update the root CSS.
/* src/App.css */

@import url('https://fonts.googleapis.com/css?family=Patua+One');

.logo {
  font-family: 'Patua One', sans-serif;
  font-weight: 400;
}

.landing {
  font-size: 72px;
}

.middle-center {
  top: 0;
  right: 0;
  bottom: 0;
  left: 0;
  width: 100%;
  height: 120px;
  margin: auto auto;
  position: absolute;
  text-align: center;
}
Update the components.
// src/App.js

import React from 'react';
import { Container, Navbar } from 'react-bootstrap'; // new
import { LinkContainer } from 'react-router-bootstrap'; // new
import { Link, Route, Switch } from 'react-router-dom';

import SignUp from './components/SignUp';
import LogIn from './components/LogIn';

import './App.css';

// changed
function App () {
  return (
    <>
      <Navbar bg='light' expand='lg' variant='light'>
        <LinkContainer to='/'>
          <Navbar.Brand className='logo'>Taxi</Navbar.Brand>
        </LinkContainer>
        <Navbar.Toggle />
        <Navbar.Collapse></Navbar.Collapse>
      </Navbar>
      <Container className='pt-3'>
        <Switch>
          <Route exact path='/' render={() => (
            <div className='middle-center'>
              <h1 className='landing logo'>Taxi</h1>
              <Link className='btn btn-primary' to='/sign-up'>Sign up</Link>
              <Link className='btn btn-primary' to='/log-in'>Log in</Link>
            </div>
          )} />
          <Route path='/sign-up' component={SignUp} />
          <Route path='/log-in' component={LogIn} />
        </Switch>
      </Container>
    </>
  );
}

export default App;
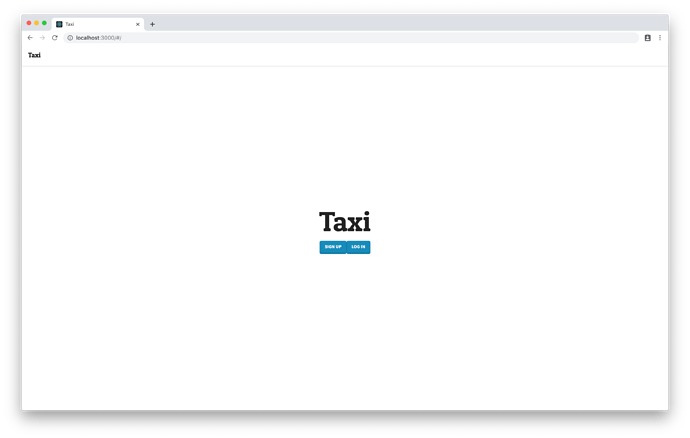
Before we continue, let’s compare the before and after. Start your app and visit the home page to see the new look.
Let’s continue with the facelift. Give the “Sign up” page a makeover.
// src/components/SignUp.js

import React from 'react';
import { Breadcrumb, Card, Col, Row } from 'react-bootstrap'; // new
import { Link } from 'react-router-dom';

// changed
function SignUp (props) {
  return (
    <Row>
      <Col lg={12}>
        <Breadcrumb>
          <Breadcrumb.Item href='/'>Home</Breadcrumb.Item>
          <Breadcrumb.Item active>Sign up</Breadcrumb.Item>
        </Breadcrumb>
        <Card>
          <Card.Header>Sign up</Card.Header>
          <Card.Body></Card.Body>
          <p className='mt-3 text-center'>
            Already have an account? <Link to='/log-in'>Log in!</Link>
          </p>
        </Card>
      </Col>
    </Row>
  );
}

export default SignUp;
And then do the same to the “Log in” page.
// src/components/LogIn.js

import React from 'react';
import { Breadcrumb, Card, Col, Row } from 'react-bootstrap'; // new
import { Link } from 'react-router-dom';

// changed
function LogIn (props) {
  return (
    <Row>
      <Col lg={12}>
        <Breadcrumb>
          <Breadcrumb.Item href='/'>Home</Breadcrumb.Item>
          <Breadcrumb.Item active>Log in</Breadcrumb.Item>
        </Breadcrumb>
        <Card>
          <Card.Header>Log in</Card.Header>
          <Card.Body></Card.Body>
          <p className='mt-3 text-center'>
            Don't have an account? <Link to='/sign-up'>Sign up!</Link>
          </p>
        </Card>
      </Col>
    </Row>
  );
}

export default LogIn;
Did changing the look and feel of our application break our tests? Let’s check Cypress.
All tests are still passing.
React Forms
Part 2, Chapter 6
Log In
Think about the last time you logged into a website. Picture the user interface in your mind. You’re probably recalling a username field, a password field, and a submit button. Logging into a site happens in a predictable way – you enter your username and password, you click a button, and if your credentials are valid, the site redirects you to the home page. This behavior is exactly what we want to program in our app.
Let’s start by writing a failing test, and then we’ll develop our code until it passes. Create a new Cypress test file to hold all scenarios involving authentication. Then add a login test.
// cypress/integration/authentication.spec.js

describe('Authentication', function () {
  it('Can log in.', function () {
    cy.visit('/#/log-in');
    cy.get('input#username').type('gary.cole@example.com');
    cy.get('input#password').type('pAssw0rd', { log: false });
    cy.get('button').contains('Log in').click();
    cy.hash().should('eq', '#/');
  });
});
Our test scenario navigates to the Login Page , types a username into the username field and a password into the password field, and then clicks a “Log in” button. After it clicks the button, it expects the app to navigate to the home page. This scenario is testing the happy path where a user has entered valid credentials for an active account.
Note
Adding
{ log: false }to thetype()function prevents Cypress from printing the content on the screen. Use it to hide sensitive information like passwords.
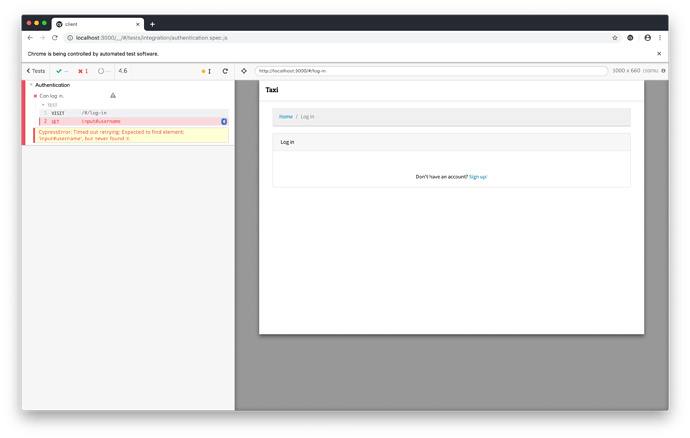
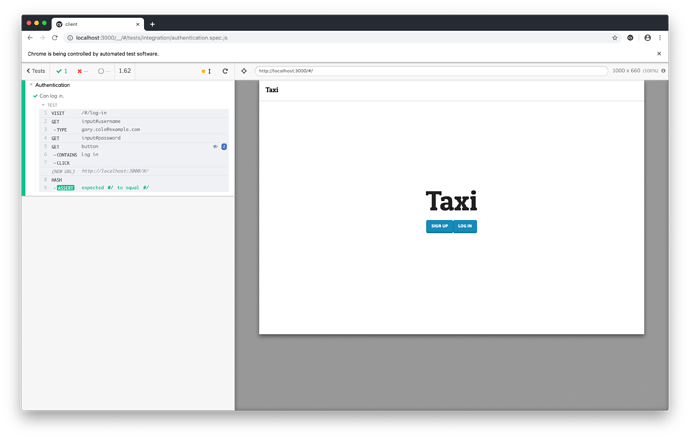
Start Cypress if you don’t already have it open and execute the new “Authentication” test suite.
Our users need to submit their credentials to the server using a form.
We have many options for how to build form components in React, but in this tutorial we’re going to use Formik. If you want some good arguments for why to choose Formik over other methods, check out Jared Palmer’s motivation for creating the library.
Open your terminal and install formik .
$ npm install formik --save
Open the components/LogIn.js file and add a new Formik component to the Card.Body component as demonstrated below. Be mindful to update the imports appropriately.
// src/components/LogIn.js

import React from 'react';
import { Formik } from 'formik'; // new
import {
  Breadcrumb, Button, Card, Col, Form, Row
} from 'react-bootstrap'; // changed
import { Link } from 'react-router-dom';

function LogIn (props) {
  return (
    <Row>
      <Col lg={12}>
        <Breadcrumb>
          <Breadcrumb.Item href='/'>Home</Breadcrumb.Item>
          <Breadcrumb.Item active>Log in</Breadcrumb.Item>
        </Breadcrumb>
        <Card>
          <Card.Header>Log in</Card.Header>
          <Card.Body>
            {/* new */}
            <Formik>
              {() => (
                <Form noValidate>
                  <Form.Group controlId='username'>
                    <Form.Label>Username:</Form.Label>
                    <Form.Control name='username' />
                  </Form.Group>
                  <Form.Group controlId='password'>
                    <Form.Label>Password:</Form.Label>
                    <Form.Control name='password' type='password' />
                  </Form.Group>
                  <Button block type='submit' variant='primary'>Log in</Button>
                </Form>
              )}
            </Formik>
          </Card.Body>
          <p className='mt-3 text-center'>
            Don't have an account? <Link to='/sign-up'>Sign up!</Link>
          </p>
        </Card>
      </Col>
    </Row>
  );
}

export default LogIn;
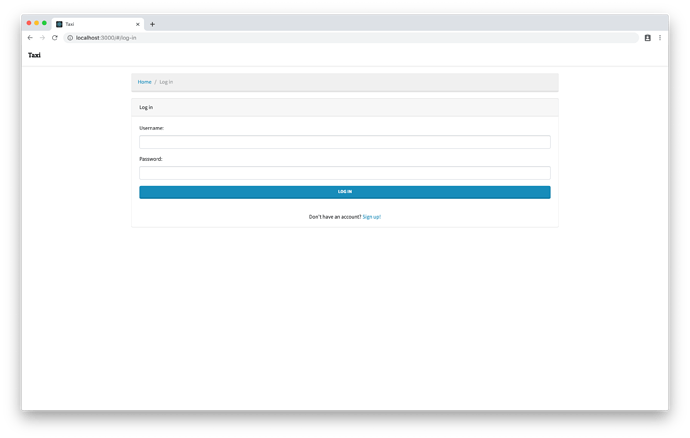
As a first step, we’ve merely instantiated a Formik component to render a simple form. Bring up the app and navigate to the Login Page to see it action. It’s sterile; you can enter text and click the “Log in” button, but nothing will happen.
Next, let’s make the form functional by adding the following code.
// src/components/LogIn.js

<Formik
  initialValues={{
    username: '',
    password: ''
  }}
  onSubmit={console.log}
>
  {({
    handleChange,
    handleSubmit,
    values
  }) => (
    <Form noValidate onSubmit={handleSubmit}>
      <Form.Group controlId='username'>
        <Form.Label>Username:</Form.Label>
        <Form.Control
          name='username'
          onChange={handleChange}
          value={values.username}
        />
      </Form.Group>
      <Form.Group controlId='password'>
        <Form.Label>Password:</Form.Label>
        <Form.Control
          name='password'
          onChange={handleChange}
          type='password'
          value={values.password}
        />
      </Form.Group>
      <Button block type='submit' variant='primary'>Log in</Button>
    </Form>
  )}
</Formik>
Notice that we’re passing a couple new props into the Formik component and referencing them in the form. We’re tracking the form fields’ values with values and we’re setting the initial values with the initialValues object. When the login form loads, both the username and password fields will be empty. We’re also leveraging some built-in Formik callback functions to change the values state ( handleChange ) and to submit the form ( handleSubmit ). Formik allows you to define an onSubmit() callback function to execute custom behavior when a user submits the form. For now, we’re just going to print the input to the console.
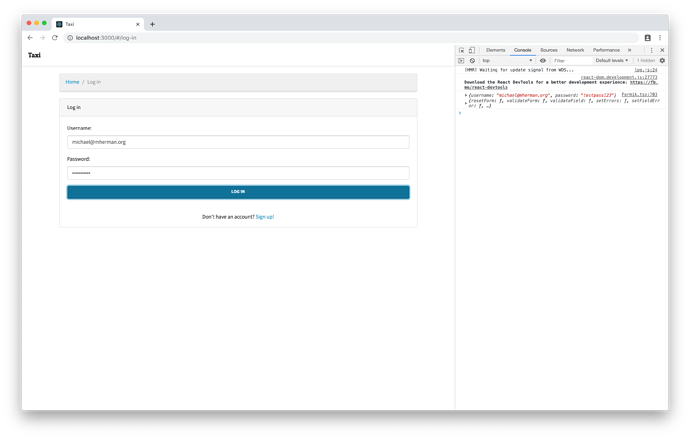
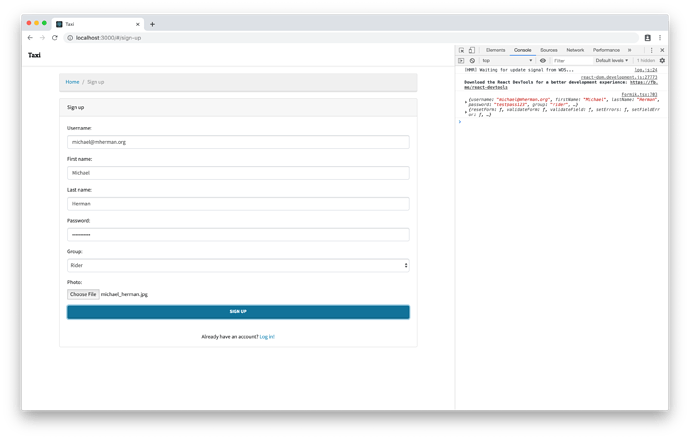
Open the developer panel in your browser, type some values into the fields, and click “Log in”. You should see the values you typed appear in the log.
We’re still missing one aspect of our form to get our test passing. We need our component to redirect the browser to the home page after the user logs into the app successfully. Make the following changes to the LogIn component.
// src/components/LogIn.js

import React, { useState } from 'react'; // changed
import { Formik } from 'formik';
import {
  Breadcrumb, Button, Card, Col, Form, Row
} from 'react-bootstrap';
import { Link, Redirect } from 'react-router-dom'; // changed

function LogIn (props) {
  // new
  const [isSubmitted, setSubmitted] = useState(false);

  // new
  const onSubmit = (values, actions) => setSubmitted(true);

  // new
  if (isSubmitted) {
    return <Redirect to='/' />;
  }

  return (
    <Row>
      <Col lg={12}>
        <Breadcrumb>
          <Breadcrumb.Item href='/'>Home</Breadcrumb.Item>
          <Breadcrumb.Item active>Log in</Breadcrumb.Item>
        </Breadcrumb>
        <Card>
          <Card.Header>Log in</Card.Header>
          <Card.Body>
            <Formik
              initialValues={{
                username: '',
                password: ''
              }}
              onSubmit={onSubmit} {/* changed */}
            >
              {/* hidden for clarity */}
            </Formik>
          </Card.Body>
          <p className='mt-3 text-center'>
            Don't have an account? <Link to='/sign-up'>Sign up!</Link>
          </p>
        </Card>
      </Col>
    </Row>
  );
}

export default LogIn;
We added a hook to set the isSubmitted state, and we added a conditional statement to redirect the browser to the home page if the form is submitted. We also defined a simple onSubmit() function that sets isSubmitted to true when invoked. We’ll refactor this function to actually call the server in a future lesson. Let’s check Cypress to confirm our tests are passing.
Sign Up
Users who want to have authenticated access to our app need to sign up for an account. During this stage, users create their usernames and passwords. We also gather information such as their first and last names, the groups they want to join (driver or rider), and their photos. All of this information is required so that users can safely identify each other before they start a trip.
Let’s start by setting up a Cypress test like we did in the previous section.
First, create a fixture/images directory, save any image file in it, and name the file photo.jpg .
Next, create an index.js file in the support directory with the following line of code:
// cypress/support/index.js

import 'cypress-file-upload';
Then, install the cypress-file-upload command via npm in your terminal:
$ npm install --save-dev cypress-file-upload
Now for the code:
// cypress/integration/authentication.spec.js

it('Can sign up.', function () {
  cy.visit('/#/sign-up');
  cy.get('input#username').type('gary.cole@example.com');
  cy.get('input#firstName').type('Gary');
  cy.get('input#lastName').type('Cole');
  cy.get('input#password').type('pAssw0rd', { log: false });
  cy.get('select#group').select('driver');
  cy.fixture('images/photo.jpg').then(photo => {
      cy.get('input#photo').upload({
        fileContent: photo,
        fileName: 'photo.jpg',
        mimeType: 'application/json'
      });
    });
  cy.get('button').contains('Sign up').click();
  cy.hash().should('eq', '#/log-in');
});
Some of the test steps should look familiar, but we also have some new form field types we need to handle. We’re going to use a <select> field to let users choose their groups from a dropdown list. We’re also going to use a <input type='file'> field to let users upload their photos from their computers. Handling the <select> field is straightforward, but handling file uploads is a little tricky. Let’s break the process down.
First, we tell Cypress to load a fixture file. In this case, our fixture is an image file. Create an images/ directory in the cypress/fixtures/ folder and then paste an image inside. I use Random User Generator to get fake user data (including photos). Feel free to use any photo you like. Name the file photo.jpg to work with the test.
When the fixture loads, we get the <input type='file'> field and we programmatically add the loaded image file to it. This simulates what would happen if a user browsed his files and selected one on his computer.
We expect the happy path to lead our users back to the login page. Again, we’re starting with a failing test and we’ll keep checking to see if it passes as we build our sign up form.
Open the components/SignUp.js file and add a new Formik component to the Card.Body component like in the following example.
// src/components/SignUp.js

import React from 'react';
import { Formik } from 'formik'; // new
import {
  Breadcrumb, Button, Card, Col, Form, Row
} from 'react-bootstrap'; // changed
import { Link } from 'react-router-dom';

function SignUp (props) {
  return (
    <Row>
      <Col lg={12}>
        <Breadcrumb>
          <Breadcrumb.Item href='/'>Home</Breadcrumb.Item>
          <Breadcrumb.Item active>Sign up</Breadcrumb.Item>
        </Breadcrumb>
        <Card className='mb-3'>
          <Card.Header>Sign up</Card.Header>
          <Card.Body>
            <Formik
              initialValues={{
                username: '',
                firstName: '',
                lastName: '',
                password: '',
                group: 'rider',
                photo: []
              }}
              onSubmit={console.log}
            >
              {({
                handleChange,
                handleSubmit,
                values
              }) => (
                <Form noValidate onSubmit={handleSubmit}>
                  <Form.Group controlId='username'>
                    <Form.Label>Username:</Form.Label>
                    <Form.Control
                      name='username'
                      onChange={handleChange}
                      values={values.username}
                    />
                  </Form.Group>
                  <Form.Group controlId='firstName'>
                    <Form.Label>First name:</Form.Label>
                    <Form.Control
                      name='firstName'
                      onChange={handleChange}
                      values={values.firstName}
                    />
                  </Form.Group>
                  <Form.Group controlId='lastName'>
                    <Form.Label>Last name:</Form.Label>
                    <Form.Control
                      name='lastName'
                      onChange={handleChange}
                      values={values.lastName}
                    />
                  </Form.Group>
                  <Form.Group controlId='password'>
                    <Form.Label>Password:</Form.Label>
                    <Form.Control
                      name='password'
                      onChange={handleChange}
                      type='password'
                      value={values.password}
                    />
                  </Form.Group>
                  <Form.Group controlId='group'>
                    <Form.Label>Group:</Form.Label>
                    <Form.Control
                      as='select'
                      name='group'
                      onChange={handleChange}
                      value={values.group}
                    >
                      <option value='rider'>Rider</option>
                      <option value='driver'>Driver</option>
                    </Form.Control>
                  </Form.Group>
                  <Form.Group controlId='photo'>
                    <Form.Label>Photo:</Form.Label>
                    <Form.Control
                      name='photo'
                      onChange={handleChange}
                      type='file'
                      value={values.photo}
                    />
                  </Form.Group>
                  <Button block type='submit' variant='primary'>Sign up</Button>
                </Form>
              )}
            </Formik>
          </Card.Body>
          <p className='mt-3 text-center'>
            Already have an account? <Link to='/log-in'>Log in!</Link>
          </p>
        </Card>
      </Col>
    </Row>
  );
}

export default SignUp;
We have a functional form that logs the user’s inputs to the developer console. Try it out in your browser.
We need our component to redirect the browser to the login page after the user signs up for an account in the app successfully. Make the following changes to the SignUp component.
// src/components/SignUp.js

import React, { useState } from 'react'; // changed
import { Formik } from 'formik';
import {
  Breadcrumb, Button, Card, Col, Form, Row
} from 'react-bootstrap';
import { Link, Redirect } from 'react-router-dom'; // changed

function SignUp (props) {
  // new
  const [isSubmitted, setSubmitted] = useState(false);

  // new
  const onSubmit = (values, actions) => setSubmitted(true);

  // new
  if (isSubmitted) {
    return <Redirect to='/log-in' />
  }

  return (
    <Row>
      <Col lg={12}>
        <Breadcrumb>
          <Breadcrumb.Item href='/'>Home</Breadcrumb.Item>
          <Breadcrumb.Item active>Sign up</Breadcrumb.Item>
        </Breadcrumb>
        <Card className='mb-3'>
          <Card.Header>Sign up</Card.Header>
          <Card.Body>
            <Formik
              initialValues={{
                username: '',
                firstName: '',
                lastName: '',
                password: '',
                group: 'rider',
                photo: []
              }}
              onSubmit={onSubmit} {/* changed */}
            >
              {/* hidden for clarity */}
            </Formik>
          </Card.Body>
          <p className='mt-3 text-center'>
            Already have an account? <Link to='/log-in'>Log in!</Link>
          </p>
        </Card>
      </Col>
    </Row>
  );
}

export default SignUp;
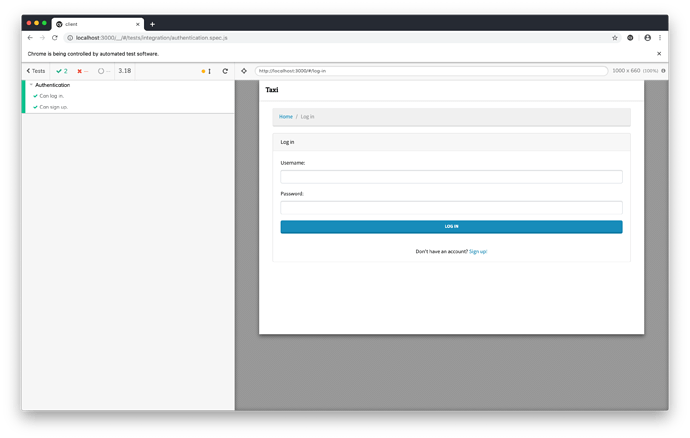
Like with the login form, we’ll refactor this function to actually call the server in a future lesson. Let’s check Cypress to confirm our tests are passing.
Here’s how our directory structure looks now.
.
├── README.md
├── cypress
│   ├── fixtures
│   │   └── images
│   │       └── photo.jpg
│   ├── integration
│   │   ├── authentication.spec.js
│   │   └── navigation.spec.js
│   ├── plugins
│   └── support
│       └── index.js
├── cypress.json
├── package-lock.json
├── package.json
├── public
│   ├── favicon.ico
│   ├── index.html
│   ├── manifest.json
│   └── robots.txt
├── src
│   ├── App.css
│   ├── App.js
│   ├── App.test.js
│   ├── components
│   │   ├── LogIn.js
│   │   └── SignUp.js
│   ├── index.css
│   ├── index.js
│   ├── logo.svg
│   ├── serviceWorker.js
│   └── setupTests.js
└── yarn.lock

