Cypress Tasks
Part 3, Chapter 1
IMPORTANT
Make sure that you are connecting to the test database when running Cypress tests from this point forward. We will be running code that manipulates and deletes data in our database tables.
Cypress lets you define and run tasks in Node using the Plugins API. These tasks can do almost anything you want them to – read and write to the file system, create and delete database records – the possibilities are endless.
In this chapter, we’re going to learn how to use Cypress tasks to perform queries directly on our database. The purpose of these queries will be to support our tests by seeding the database and clearing data between test scenarios.
Getting Started
We’re going to be using the Knex.js library to connect to our PostgreSQL database and compose queries. Knex is a lot like the Django ORM – you build SQL queries by chaining function calls together.
Let’s start by installing Knex as a development dependency. We’re also installing the pg package to connect to PostgreSQL. Open your terminal to the client directory and run the following code:
$ npm install knex pg --save-dev
Next, we need to tell Knex how to connect to our database. We can create a PostgreSQL client and pass it an object that includes all of the elements of a connection (host, user, password, database).
Let’s put this data in our Cypress configuration file:
// cypress.json

{
  "baseUrl": "http://localhost:8080",
  "env": {
    "credentials": {
      "username": "gary.cole@example.com",
      "password": "pAssw0rd"
    },
    // new
    "database": {
      "host": "localhost",
      "user": "taxi",
      "password": "taxi",
      "database": "test",
      "port": "5433"
    }
  }
}
The values we’re adding match up to the environment variables in the dev.env file on the server. Again, make sure that the database value is test . Our database Docker container exposes port 5433 and maps it to the default PostgreSQL port 5432 inside the container.
Database Queries
Next, let’s write some Cypress tasks that run queries on our test database. We’ll start by writing one task that inserts data into a table and another that reads it.
Create a new index.js file inside of the cypress/plugins directory.
$ touch index.js
Add the following code to that new file:
// plugins/index.js

const knex = require('knex');

module.exports = (on, config) => {
  on('task', {
    async tableInsert ({ table, rows, truncate }) {
      const client = await knex({
        client: 'pg',
        connection: config.env.database
      });
      if (truncate) {
        await client.raw(`TRUNCATE ${table} RESTART IDENTITY CASCADE`);
      }
      return client.insert(rows, ['id']).into(table);
    }
  });
}
The code we just added connects to the PostgreSQL client and optionally truncates the database table. We’re using raw SQL here because the Knex truncate() method doesn’t give us access to all of the PostgreSQL command’s parameters. For example, we need to use RESTART IDENTITY to reset the table sequence. Then, our task inserts the rows data into the database table. The insert documentation tells us that the insert() command can return data from the inserted records if the returning parameter is given. We’re passing ['id'] to get a list of the IDs.
Let’s write a quick test to prove that our code is working correctly. Create a new database.spec.js file in the cypress/integration directory.
$ touch database.spec.js
Add the following code to that file:
// integration/database.spec.js

describe('The database client', function () {
  it('can insert data into a table', function () {
    cy.task('tableInsert', {
      table: 'trips_user',
      rows: [
        {
          username: 'test.user@example.com',
          password: 'pAssw0rd',
          first_name: 'Test',
          last_name: 'User',
          email: 'test.user@example.com',
          date_joined: new Date(),
          is_staff: false,
          is_superuser: false,
          is_active: true
        }
      ],
      truncate: true
    }).then((ids) => {
      cy.wrap(ids).should('have.length', 1);
    });
  });
});
Our code will call the tableInsert task with two parameters – a table name and a list of data to insert. The task should execute and return a list of IDs corresponding to the records it adds to the database. We expect only one record to be created and we test that assumption.
Start the Cypress application and run the new test.
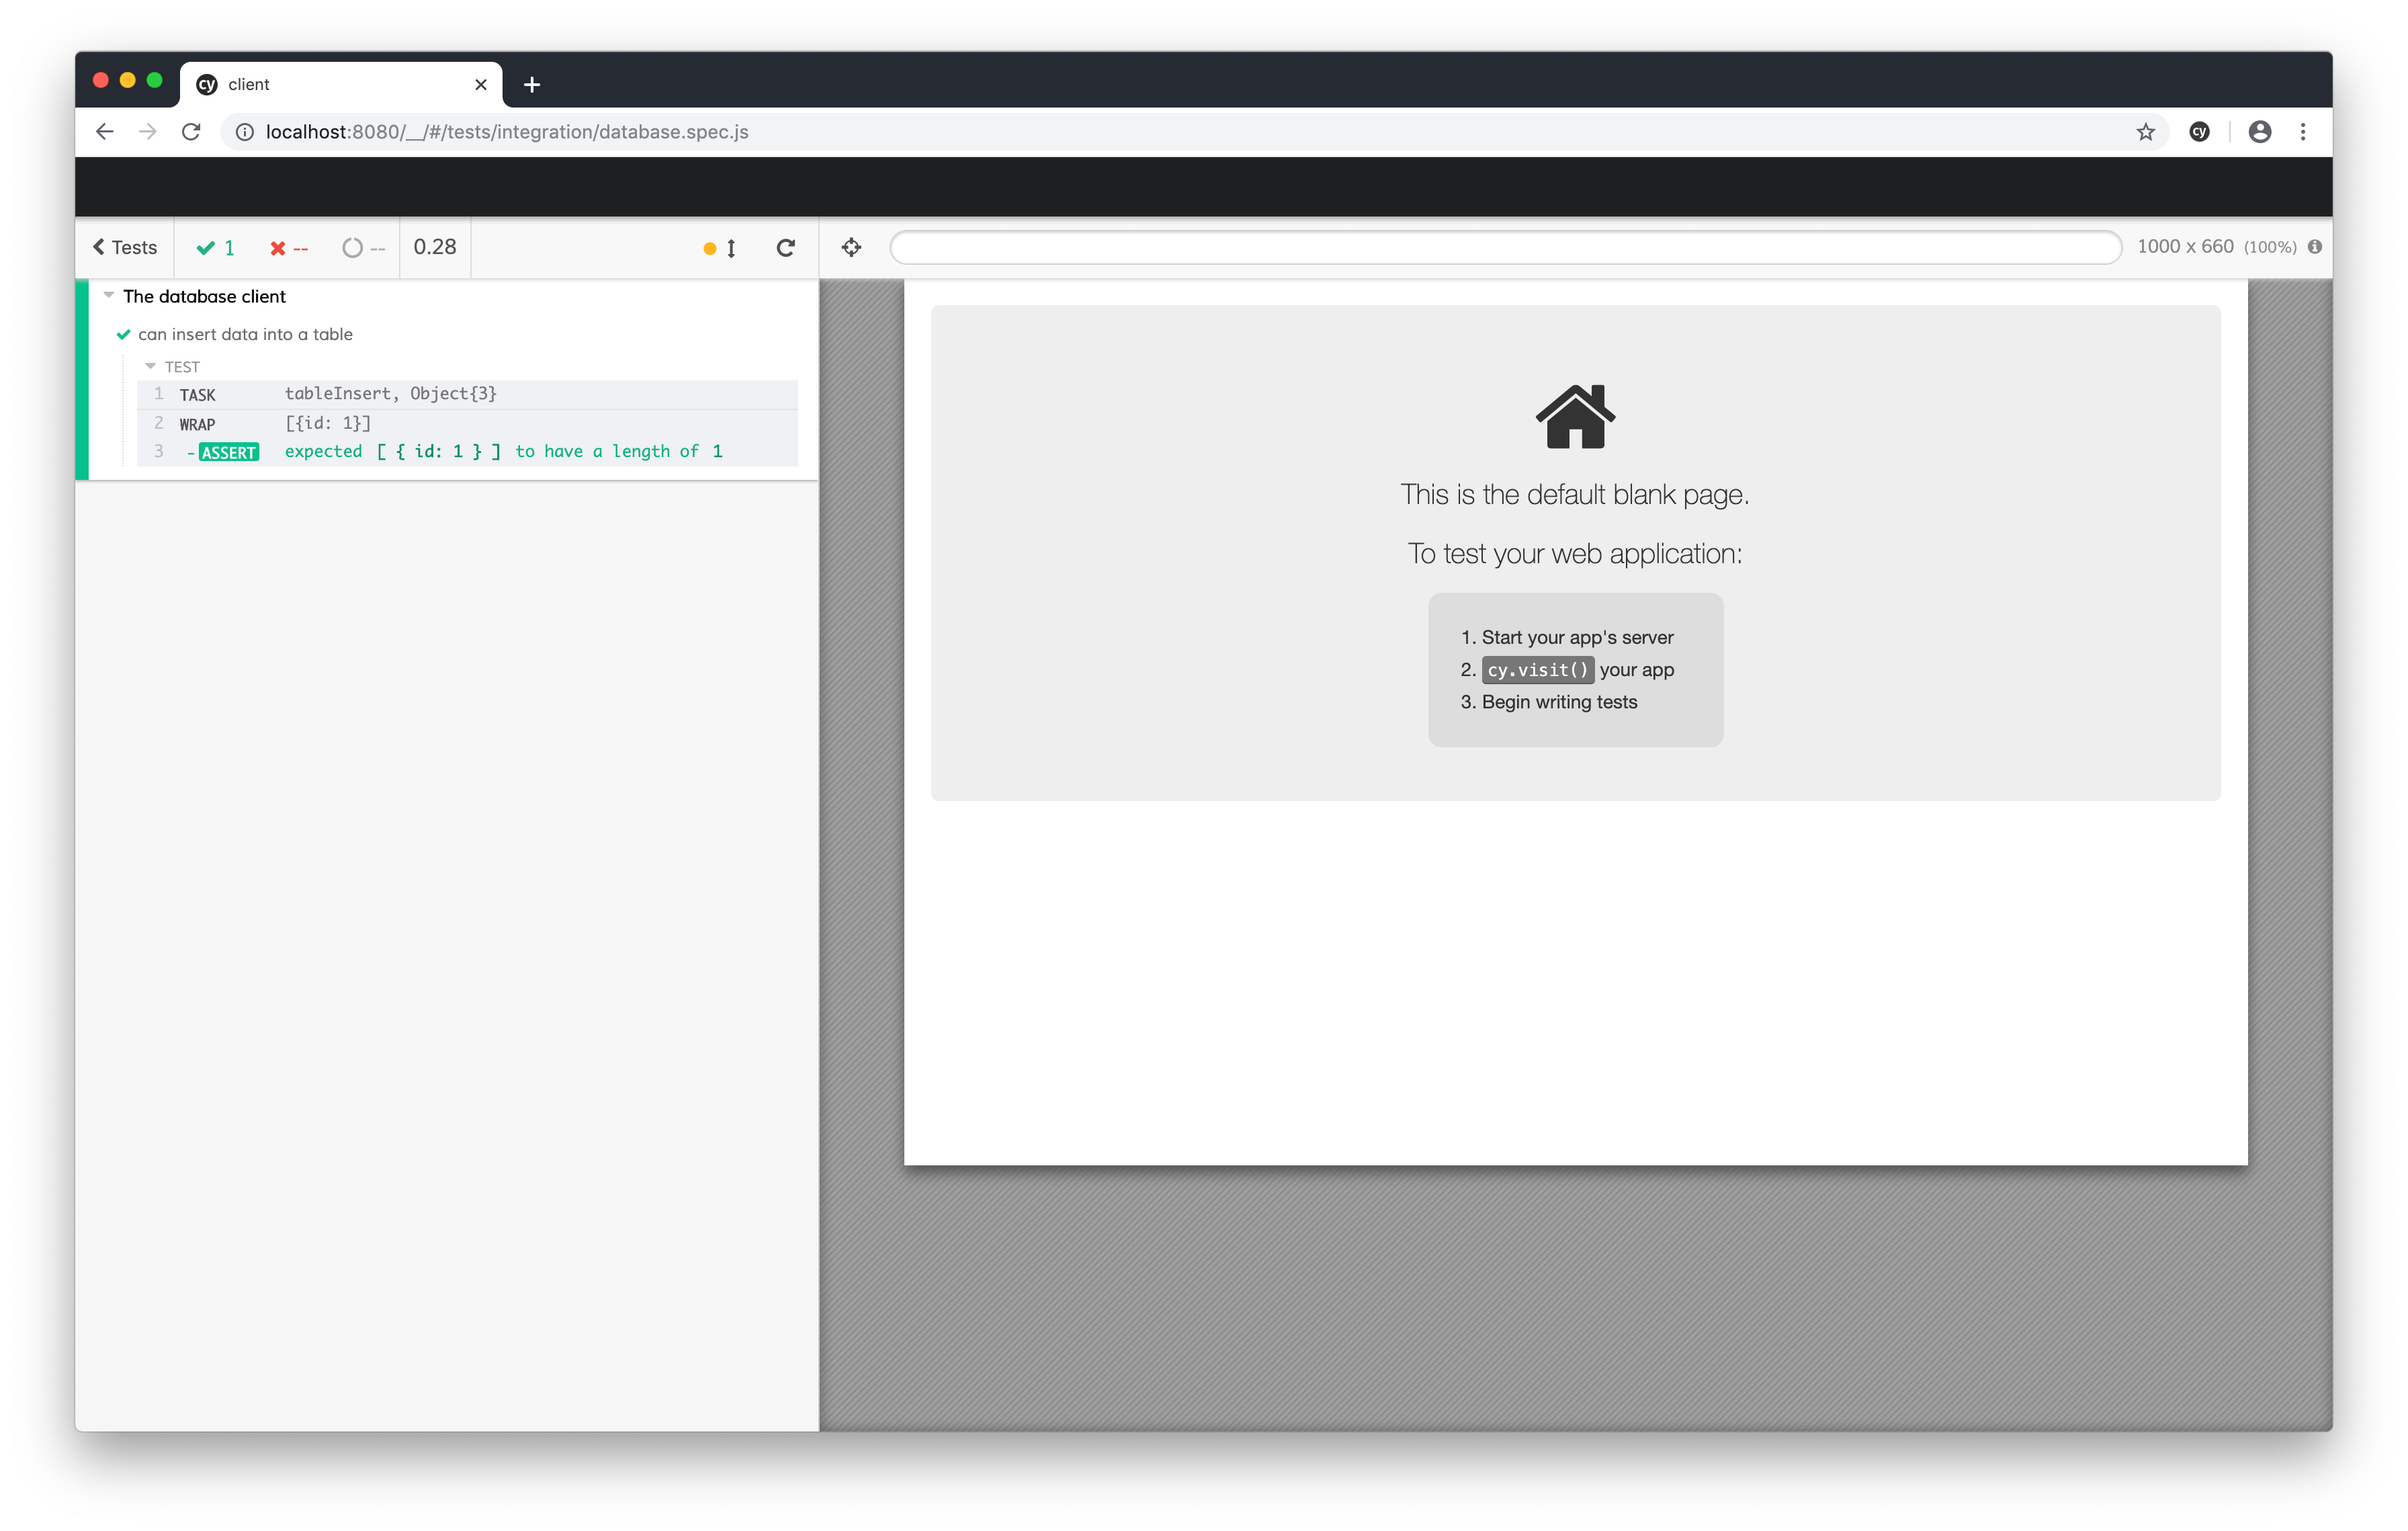
It works!
Let’s refactor our test so that it loads the user data from a fixture instead of hardcoding it in the test itelf.
Create a new fixtures/data directory and put a users.json file inside it.
$ mkdir -p fixtures/data && touch fixtures/data/users.json
Copy the users data to the new JSON file.
// data/users.json

[
  {
    "username": "test.user@example.com",
    "password": "pAssw0rd",
    "first_name": "Test",
    "last_name": "User",
    "email": "test.user@example.com",
    "date_joined": "2019-12-31T00:00:00.000Z",
    "is_staff": false,
    "is_superuser": false,
    "is_active": true
  }
]
Next, let’s refactor the test to load and use the fixture data.
// integration/database.spec.js

describe('The database client', function () {
  it('can insert data into a table', function () {
    cy.fixture('data/users.json').then((users) => {
      cy.task('tableInsert', {
        table: 'trips_user', rows: users, truncate: true
      }).then((ids) => {
        cy.wrap(ids).should('have.length', 1);
      });
    });
  });
});
Run the tests again… still passing!
Let’s add another task to read from a database table.
// plugins/index.js

const knex = require('knex');

module.exports = (on, config) => {
  on('task', {
    async tableInsert ({ table, rows, truncate }) {
      const client = await knex({
        client: 'pg',
        connection: config.env.database
      });
      if (truncate) {
        await client.raw(`TRUNCATE ${table} RESTART IDENTITY CASCADE`);
      }
      return client.insert(rows, ['id']).into(table);
    },
    // new
    async tableSelect ({ table }) {
      const client = await knex({
        client: 'pg',
        connection: config.env.database
      });
      return client.select().table(table);
    }
  });
}
This code runs a query that is equivalent to the following SQL:
SELECT * FROM table;
In other words, it returns all records from the table.
Let’s change our existing test file so that we load user data into the database before the test executes and then read it from the table right afterwards.
// integration/database.spec.js

describe('The database client', function () {
  // new
  beforeEach(function () {
    cy.fixture('data/users.json').then((users) => {
      cy.task('tableInsert', {
        table: 'trips_user', rows: users, truncate: true
      }).then((ids) => {
        cy.wrap(ids).should('have.length', 1);
      });
    });
  });

  // new
  it('can read data from a table', function () {
    cy.task('tableSelect', {
      table: 'trips_user'
    }).then((users) => {
      cy.wrap(users).should('have.length', 1);
    })
  });
});
Our new code clears the database and loads user data from a fixture into the database before each test runs. Then, it executes a test to read from the database. It confirms that the database contains a single record.
Run the code.
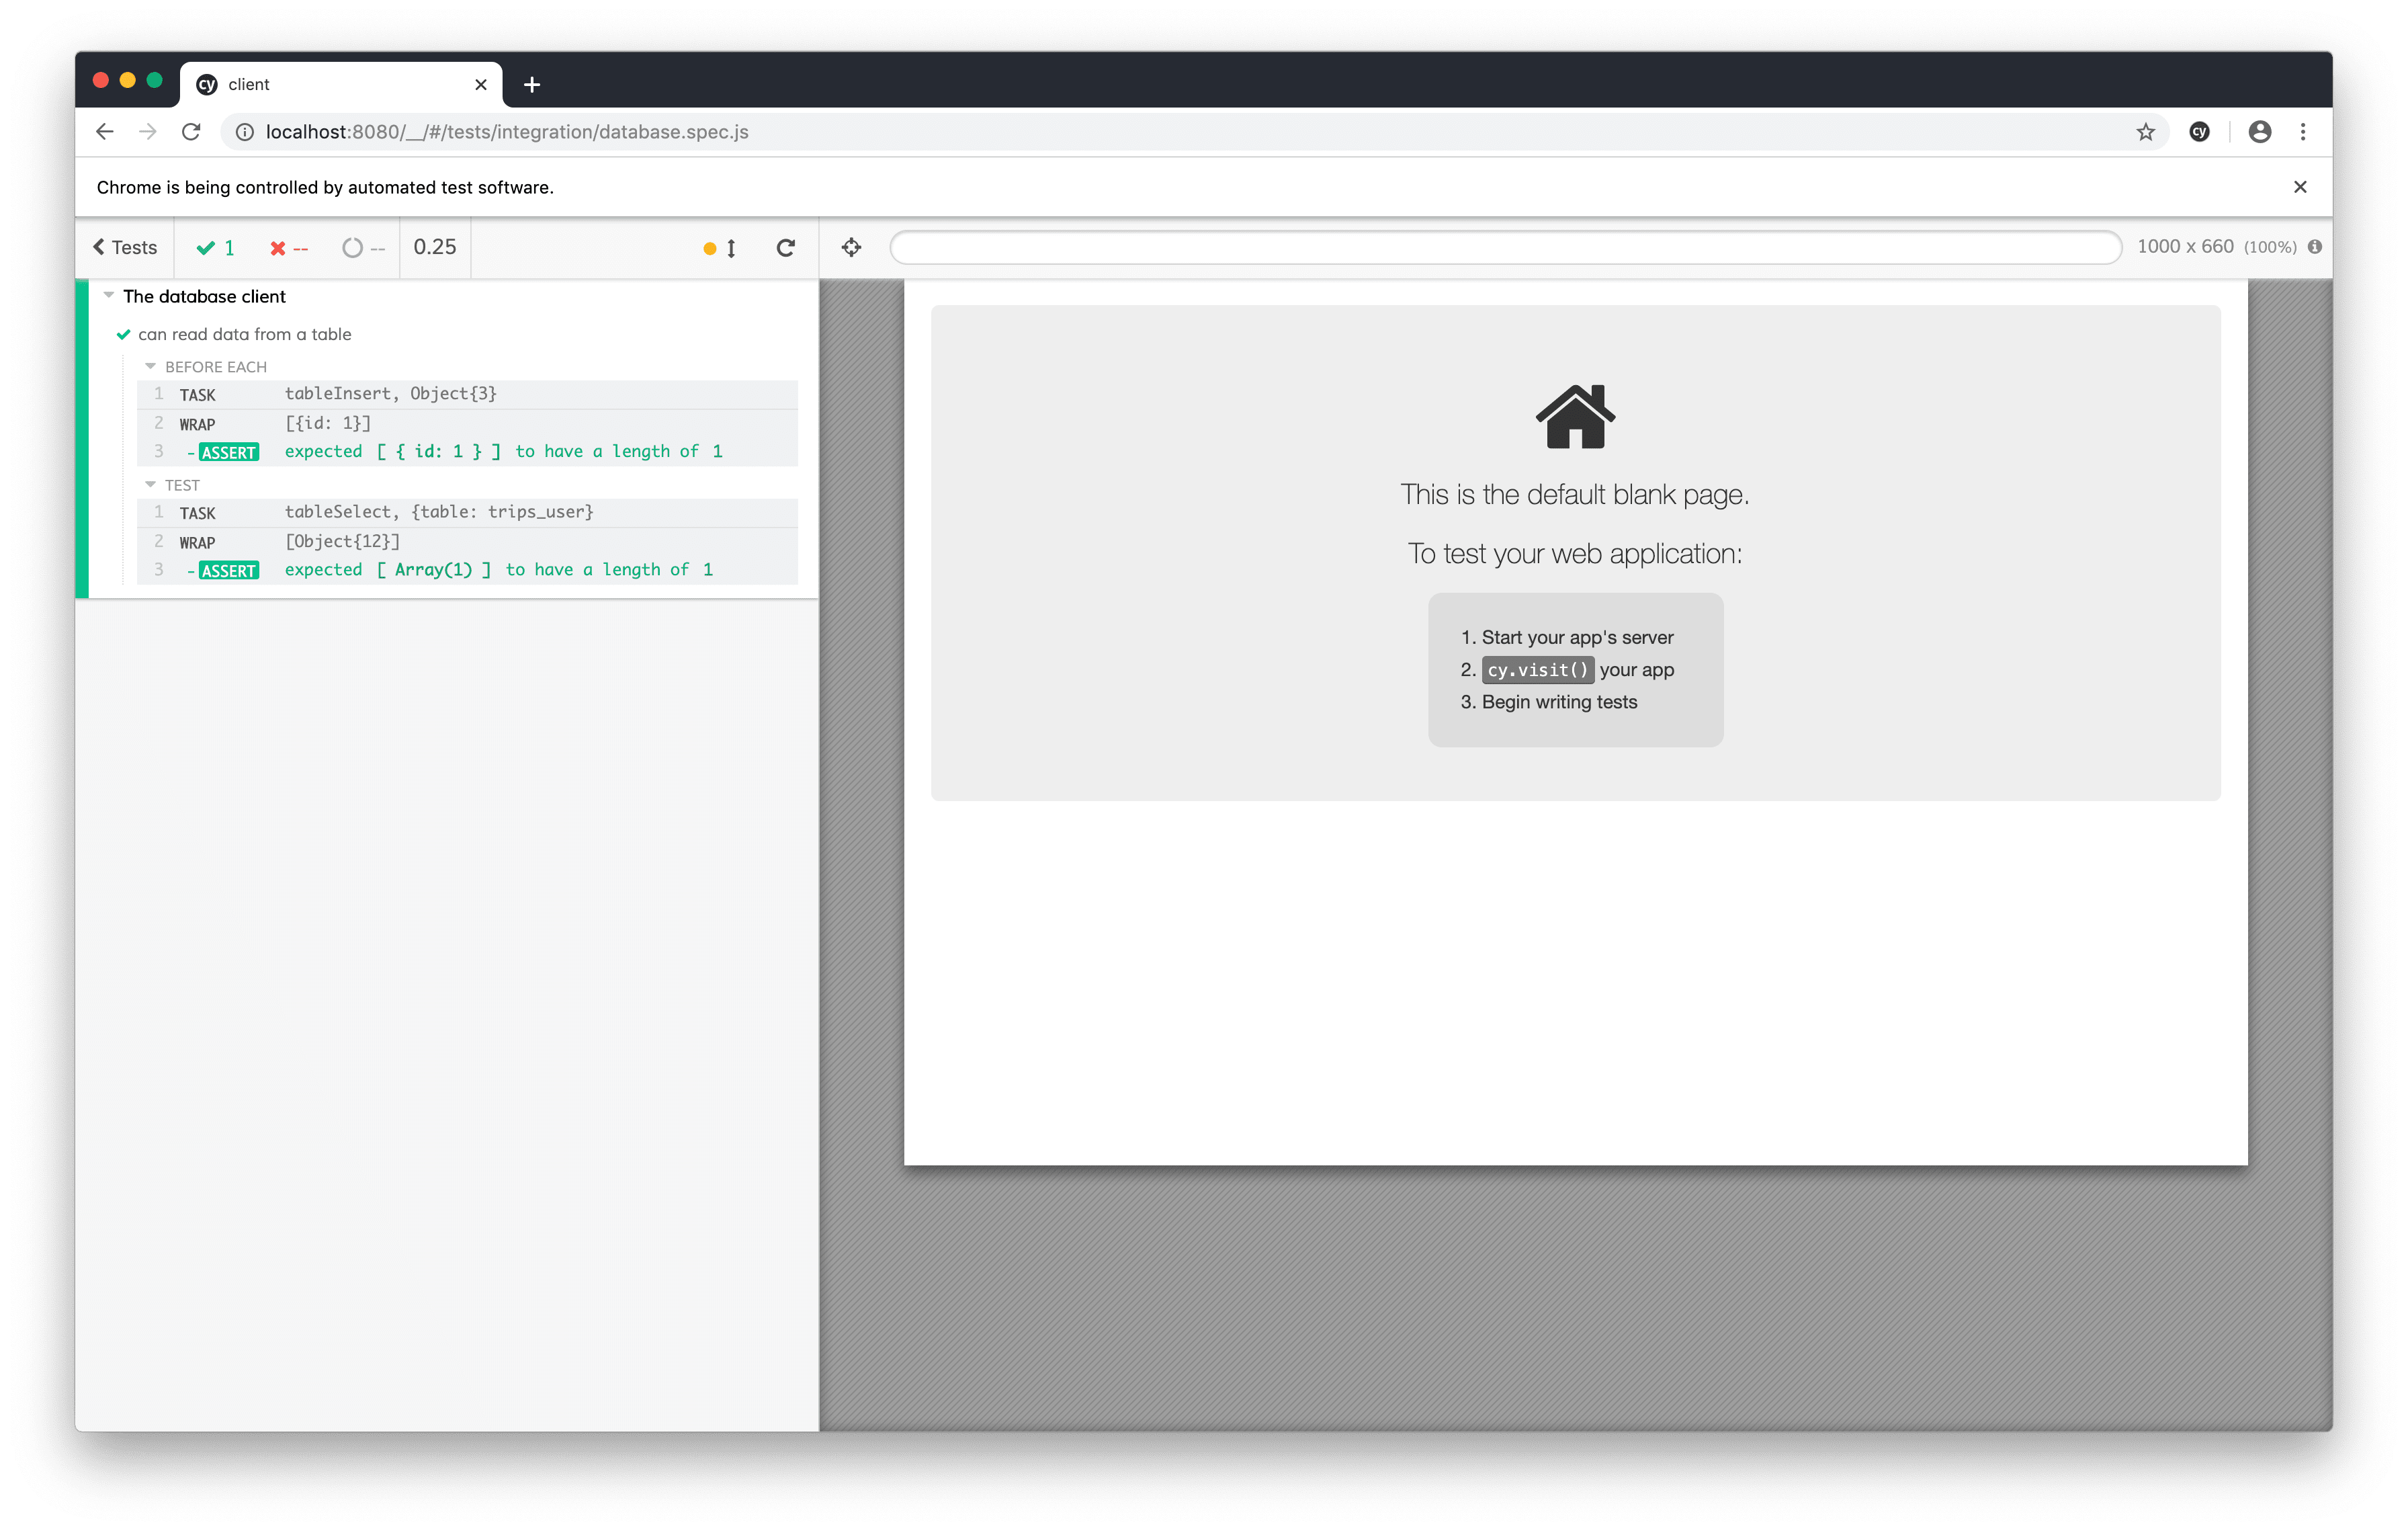
Again, it works!
More Tasks
Let’s add one more task to round out our database queries. We need a function that can truncate our database table without adding new data.
Add the following code to the plugins/index.js file:
const knex = require('knex');

module.exports = (on, config) => {
  on('task', {
    // new
    async tableTruncate ({ table }) {
      const client = await knex({
        client: 'pg',
        connection: config.env.database
      });
      return client.raw(`TRUNCATE ${table} RESTART IDENTITY CASCADE`);
    },
    async tableInsert ({ table, rows, truncate }) {
      const client = await knex({
        client: 'pg',
        connection: config.env.database
      });
      if (truncate) {
        await client.raw(`TRUNCATE ${table} RESTART IDENTITY CASCADE`);
      }
      return client.insert(rows, ['id']).into(table);
    },
    async tableSelect ({ table }) {
      const client = await knex({
        client: 'pg',
        connection: config.env.database
      });
      return client.select().table(table);
    }
  });
}
We’re not going to write anymore tests, and you can feel free to delete the integrations/database.spec.js file if you’d like. Future tests will depend on the efficacy of our database tasks, so we don’t need to test them independently.
Your file directory should look like this now:
.
├── Dockerfile
├── README.md
├── cypress
│   ├── fixtures
│   │   ├── data
│   │   │   └── users.json
│   │   └── images
│   │       └── photo.jpg
│   ├── integration
│   │   ├── authentication.spec.js
│   │   ├── database.spec.js
│   │   └── navigation.spec.js
│   ├── plugins
│   │   └── index.js
│   └── support
│       └── index.js
├── cypress.json
├── package-lock.json
├── package.json
├── public
│   ├── favicon.ico
│   ├── index.html
│   ├── manifest.json
│   └── robots.txt
├── src
│   ├── App.css
│   ├── App.js
│   ├── App.test.js
│   ├── components
│   │   ├── LogIn.js
│   │   └── SignUp.js
│   ├── index.css
│   ├── index.js
│   ├── logo.svg
│   ├── serviceWorker.js
│   └── setupTests.js
└── yarn.lock
The User
Part 3, Chapter 2
In the previous part, we completed programming our user authentication. A user can sign up for an account and then can log into the app using the credentials he chose. When he logs in, the server returns a response containing JSON Web Tokens. The client can use the access token to verify the user’s identity in subsequent requests to the server.
The access token also includes data about the user in the form of a Base 64 encoded, JSON-serialized string. As it stands, our frontend application tracks whether a user is logged in, but it cannot read the user’s data. In this chapter, we’ll add a service that decodes and parses the user’s data from the access token. We’ll also add a dashboard that the app will redirect the user to after he logs in.
Auth Service
Let’s start by creating a new services/AuthService.js file. You can create the new directory and file in your favorite code editor or by using the terminal. From the client/src directory, run the following command in your terminal:
$ mkdir -p src/services && touch src/services/AuthService.js
Then, add the following code to the new file.
// services/AuthService.js

export const getUser = () => {
  const auth = JSON.parse(window.localStorage.getItem('taxi.auth'));
  if (auth) {
    const [,payload,] = auth.access.split('.');
    const decoded = window.atob(payload);
    return JSON.parse(decoded);
  }
  return undefined;
};
Our auth service defines a single function. It retrieves the taxi.auth item from the browser’s local storage. Remember, taxi.auth is the key we use to store the JSON Web Tokens that get returned when a user logs in. If the item is in local storage, then we take the access token string and split it into it’s three constituent parts – the header , the payload , and the signature . (We ignore the header and the signature because we don’t need them.) Next, we decode the payload data using the window.atob() function. We’re left with our JSON-serialized user data and we parse and return that to the caller. If the user has not logged into the app, then our getUser() function will return undefined .
This getUser() function can be imported into any component and invoked to get the authenticated user’s data. Let’s remind ourselves what the user data looks like.
{
  "id": 1,
  "username": "jason.parent@example.com",
  "first_name": "Jason",
  "last_name": "Parent",
  "group": "rider",
  "photo": "/media/images/image.jpg"
}
Now that we have a way to get the user’s data, we can do all sorts of things with it. For example, we can display the user’s name and photo to other people using the app, and we can give the user the appropriate experience for the group they belong to. In fact, distinguishing between riders and drivers is a main part of our app. Let’s add some helper functions to get the user’s group.
Return to your services/AuthService.js file and add the following functions:
// services/AuthService.js

export const isDriver = () => {
  const user = getUser();
  return user && user.group === 'driver';
};

export const isRider = () => {
  const user = getUser();
  return user && user.group === 'rider';
};
Components can call these functions to easily get a user’s group.
Dashboard
Right now, when a user logs into our app, we hide the “Sign Up” and “Log In” buttons and we display the “Log Out” button. The next step is to redirect the user to his dashboard. Since we support two different user groups that have different user workflows and functionality, we need to design our application in a way that can manage both experiences.
We have a couple of options for dealing with the programming. One strategy we can take is to have one set of components that have conditional logic to control the functionality and display according to the user’s group. Another method we can follow is to use two different sets of components – one for each user group – and direct the user to either set when they log in. The second idea is more streamlined, and given the reusability of React components, it’s the better choice.
Let’s start by creating a Rider component and a Driver component. First, create a new components/Rider.js file with the following code:
// components/Rider.js

import React from 'react';
import {
  Breadcrumb, Card, Col, Row
} from 'react-bootstrap';

function Rider (props) {
  return (
    <Row>
      <Col lg={12}>
        <Breadcrumb>
          <Breadcrumb.Item href='/'>Home</Breadcrumb.Item>
          <Breadcrumb.Item active>Dashboard</Breadcrumb.Item>
        </Breadcrumb>
        <Card className='mb-3'>
          <Card.Header>Current Trip</Card.Header>
          <Card.Body>
            No trips.
          </Card.Body>
        </Card>
        <Card className='mb-3'>
          <Card.Header>Recent Trips</Card.Header>
          <Card.Body>
            No trips.
          </Card.Body>
        </Card>
      </Col>
    </Row>
  );
}

export default Rider;
The rider should see the trip that he is currently on and the trips that he recently took.
Let’s create a similar dashboard for the driver:
// components/Driver.js

import React from 'react';
import {
  Breadcrumb, Card, Col, Row
} from 'react-bootstrap';

function Driver (props) {
  return (
    <Row>
      <Col lg={12}>
        <Breadcrumb>
          <Breadcrumb.Item href='/'>Home</Breadcrumb.Item>
          <Breadcrumb.Item active>Dashboard</Breadcrumb.Item>
        </Breadcrumb>
        <Card className='mb-3'>
          <Card.Header>Current Trip</Card.Header>
          <Card.Body>
            No trips.
          </Card.Body>
        </Card>
        <Card className='mb-3'>
          <Card.Header>Requested Trips</Card.Header>
          <Card.Body>
            No trips.
          </Card.Body>
        </Card>
        <Card className='mb-3'>
          <Card.Header>Recent Trips</Card.Header>
          <Card.Body>
            No trips.
          </Card.Body>
        </Card>
      </Col>
    </Row>
  );
}

export default Driver;
The only difference between the riders’ and drivers’ dashboards is that the drivers’ dashboard also shows a list of requested trips.
Next, let’s add some new routes to our main App component. Add the following Route s to the Switch component:
// src/App.js

import Driver from './components/Driver.js';
import Rider from './components/Rider.js';

<Route path='/driver' render={() => (
  <Driver />
)} />
<Route path='/rider' render={() => (
  <Rider />
)} />
Let’s test our code to make sure it works. We’ll test the rider experience first and then we’ll test the driver. Let’s make a new Cypress test file.
$ mkdir -p integration/rider.spec.js
Add the following tests:
// integration/rider.spec.js
describe('The rider dashboard', function () {
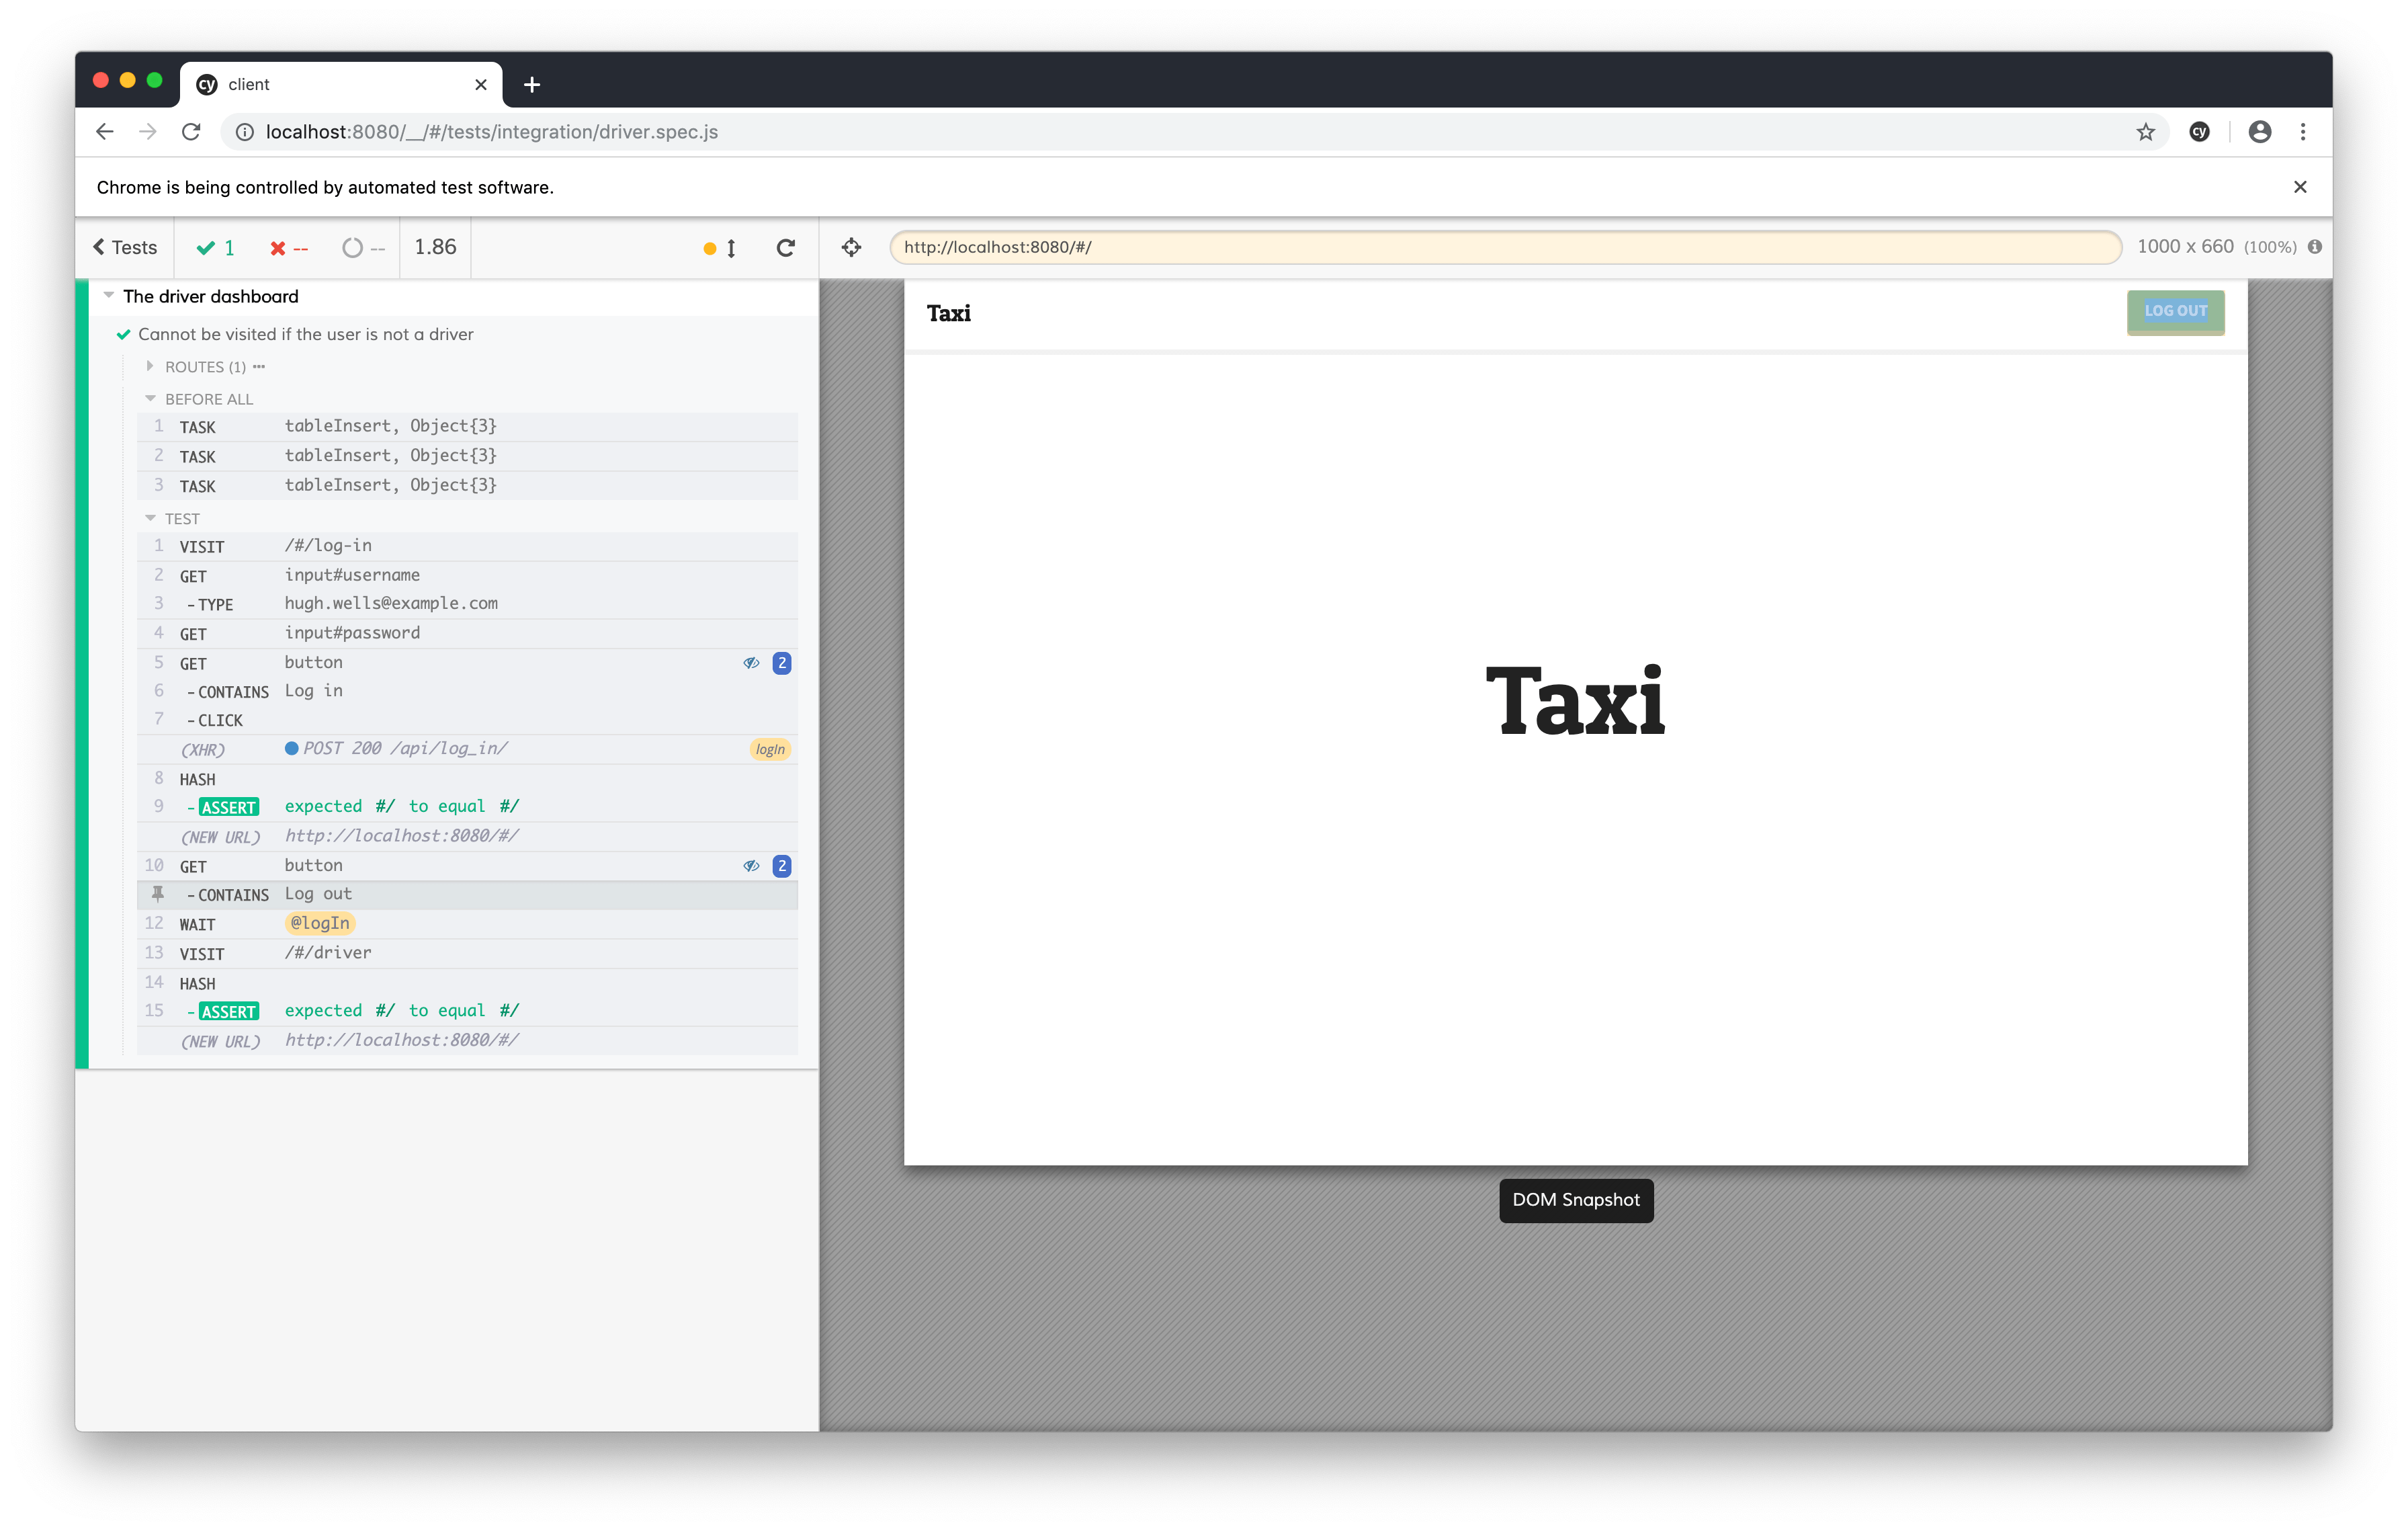
it('Cannot be visited if the user is not a rider', function () {
const { username, password } = Cypress.env('driver')
// Capture API calls.
cy.server()
cy.route('POST', '**/api/log_in/').as('logIn')
// Log in.
cy.visit('/#/log-in')
cy.get('input#username').type(username)
cy.get('input#password').type(password, { log: false })
cy.get('button').contains('Log in').click()
cy.hash().should('eq', '#/')
cy.get('button').contains('Log out')
cy.wait('@logIn')
cy.visit('/#/rider')
cy.hash().should('eq', '#/')
})
})
As the description suggests, this test will log a driver into the app and show that the user cannot visit the rider’s dashboard.
If you run this test, it will fail with a timeout error because the rider does not exist in the database.
Before continuing, we need to learn something about how Django stores passwords in the database. Django encrypts passwords at rest using the PBKDF2 algorithm. When a user creates or updates a password, Django transforms it from plaintext into an encrypted string. If you query the password field in the database, you will get the encrypted string.
Since we’re writing data directly to the database in our tests, we need to create user data fixtures that have encrypted passwords. The quickest way to get the encrypted version of a plaintext password is to create a user in the Django shell and read the password from it.
With the Docker containers running, copy the following code into your terminal:
$ docker-compose exec taxi-server python manage.py shell
Inside the Django shell, copy the following commands:
user = get_user_model().objects.create_user(
    username='test',
    password='pAssw0rd',
    email='test@example.com'
)
user.password
On my machine, this yields:
# NOTE: This value will be different on every machine!
'pbkdf2_sha256$150000$l2u6JfEUQJKb$S+s3b41F7myUWR+zPGgwGCfyy9ogAHaqeN6Q0Iz23QA='
Let’s edit the user data fixture that we added in a previous chapter to include a rider and a driver.
// fixtures/data/users.json

[
  {
    "id": 1,
    "username": "gary.cole@example.com",
    "password": "pbkdf2_sha256$150000$l2u6JfEUQJKb$S+s3b41F7myUWR+zPGgwGCfyy9ogAHaqeN6Q0Iz23QA=",
    "first_name": "Gary",
    "last_name": "Cole",
    "email": "gary.cole@example.com",
    "date_joined": "2019-12-31T00:00:00.000Z",
    "is_staff": false,
    "is_superuser": false,
    "is_active": true
  },
  {
    "id": 2,
    "username": "hugh.wells@example.com",
    "password": "pbkdf2_sha256$150000$l2u6JfEUQJKb$S+s3b41F7myUWR+zPGgwGCfyy9ogAHaqeN6Q0Iz23QA=",
    "first_name": "Hugh",
    "last_name": "Wells",
    "email": "hugh.wells@example.com",
    "date_joined": "2019-12-31T00:00:00.000Z",
    "is_staff": false,
    "is_superuser": false,
    "is_active": true
  }
]
Let’s add a driver and a rider environment object to our cypress.json file.
// cypress.json

{
  "baseUrl": "http://localhost:8080",
  "env": {
    "credentials": {
      "username": "gary.cole@example.com",
      "password": "pAssw0rd"
    },
    "database": {
      "host": "localhost",
      "user": "taxi",
      "password": "taxi",
      "database": "test",
      "port": "5433"
    },
    // new
    "driver": {
      "username": "gary.cole@example.com",
      "password": "pAssw0rd"
    },
    // new
    "rider": {
      "username": "hugh.wells@example.com",
      "password": "pAssw0rd"
    }
  }
}
We need two more data fixtures – one to create (rider and driver) groups and one to link our users to those groups.
Create a new data/groups.json file and add the following code:
// data/groups.json

[
  {
    "id": 1,
    "name": "driver"
  },
  {
    "id": 2,
    "name": "rider"
  }
]
Now, let’s add the logic to load the user data fixture before the tests run.
// integration/rider.spec.js

describe('The rider dashboard', function () {
  // new
  before(function () {
    cy.fixture('data/users.json').then((users) => {
      cy.task('tableInsert', {
        table: 'trips_user', rows: users, truncate: true
      })
    });
    cy.fixture('data/groups.json').then((groups) => {
      cy.task('tableInsert', {
        table: 'auth_group', rows: groups, truncate: true
      })
    });
    cy.fixture('data/user_groups.json').then((groups) => {
      cy.task('tableInsert', {
        table: 'trips_user_groups', rows: groups, truncate: true
      })
    });
  })

  it('Cannot be visited if the user is not a rider', function () {
    const { username, password } = Cypress.env('driver')

    // Capture API calls.
    cy.server()
    cy.route('POST', '**/api/log_in/').as('logIn')

    // Log in.
    cy.visit('/#/log-in')
    cy.get('input#username').type(username)
    cy.get('input#password').type(password, { log: false })
    cy.get('button').contains('Log in').click()
    cy.hash().should('eq', '#/')
    cy.get('button').contains('Log out')
    cy.wait('@logIn')

    cy.visit('/#/rider')
    cy.hash().should('eq', '#/')
  })
})
When we run the tests, we should see this test fail because we don’t have any logic that blocks a driver from accessing the rider’s dashboard.
Make the following update to the rider dashboard.
// components/Rider.js

import React from 'react';
import {
  Breadcrumb, Card, Col, Row
} from 'react-bootstrap';
import { Redirect } from 'react-router-dom'; // new

import { isRider } from '../services/AuthService'; // new

function Rider (props) {
  // new
  if (!isRider()) {
    return <Redirect to='/' />
  }

  return (
    {/* Hidden for clarity. */}
  );
}

export default Rider;
Our new code checks to see if the user is a rider. If he is, then the code execution proceeds, and if he’s not, then the code immediately redirects the user to the home screen.
With these changes in place, the tests should pass.

Let’s apply the same functionality to the driver’s dashboard.
// components/Driver.js

import React from 'react';
import {
  Breadcrumb, Card, Col, Row
} from 'react-bootstrap';
import { Redirect } from 'react-router-dom'; // new

import { isDriver } from '../services/AuthService'; // new

function Driver (props) {
  // new
  if (!isDriver()) {
    return <Redirect to='/' />
  }

  return (
    {/* Hidden for clarity. */}
  );
}

export default Driver;
And let’s create a new test file for the driver.
$ mkdir -p integration/driver.spec.js
Add the following tests:
// integration/driver.spec.js

describe('The driver dashboard', function () {
  before(function () {
    cy.fixture('data/users.json').then((users) => {
      cy.task('tableInsert', {
        table: 'trips_user', rows: users, truncate: true
      })
    });
    cy.fixture('data/groups.json').then((groups) => {
      cy.task('tableInsert', {
        table: 'auth_group', rows: groups, truncate: true
      })
    });
    cy.fixture('data/user_groups.json').then((groups) => {
      cy.task('tableInsert', {
        table: 'trips_user_groups', rows: groups, truncate: true
      })
    });
  })

  it('Cannot be visited if the user is not a driver', function () {
    const { username, password } = Cypress.env('rider')

    // Capture API calls.
    cy.server()
    cy.route('POST', '**/api/log_in/').as('logIn')

    // Log in.
    cy.visit('/#/log-in')
    cy.get('input#username').type(username)
    cy.get('input#password').type(password, { log: false })
    cy.get('button').contains('Log in').click()
    cy.hash().should('eq', '#/')
    cy.get('button').contains('Log out')
    cy.wait('@logIn')

    cy.visit('/#/driver')
    cy.hash().should('eq', '#/')
  })
})
These tests should pass.
Let’s create one more test for each the rider and the driver to prove that authenticated users can visit the dashboard according to their groups.
In integration/rider.spec.js add the following test spec to the test suite:
// integration/rider.spec.js

it('Can be visited if the user is a rider', function () {
  const { username, password } = Cypress.env('rider')

  // Capture API calls.
  cy.server()
  cy.route('POST', '**/api/log_in/').as('logIn')

  // Log in.
  cy.visit('/#/log-in')
  cy.get('input#username').type(username)
  cy.get('input#password').type(password, { log: false })
  cy.get('button').contains('Log in').click()
  cy.hash().should('eq', '#/')
  cy.get('button').contains('Log out')
  cy.wait('@logIn')

  cy.visit('/#/rider')
  cy.hash().should('eq', '#/rider')
})
Write a similar test for the driver.
// integration/driver.spec.js

it('Can be visited if the user is a driver', function () {
  const { username, password } = Cypress.env('driver')

  // Capture API calls.
  cy.server()
  cy.route('POST', '**/api/log_in/').as('logIn')

  // Log in.
  cy.visit('/#/log-in')
  cy.get('input#username').type(username)
  cy.get('input#password').type(password, { log: false })
  cy.get('button').contains('Log in').click()
  cy.hash().should('eq', '#/')
  cy.get('button').contains('Log out')
  cy.wait('@logIn')

  cy.visit('/#/driver')
  cy.hash().should('eq', '#/driver')
})
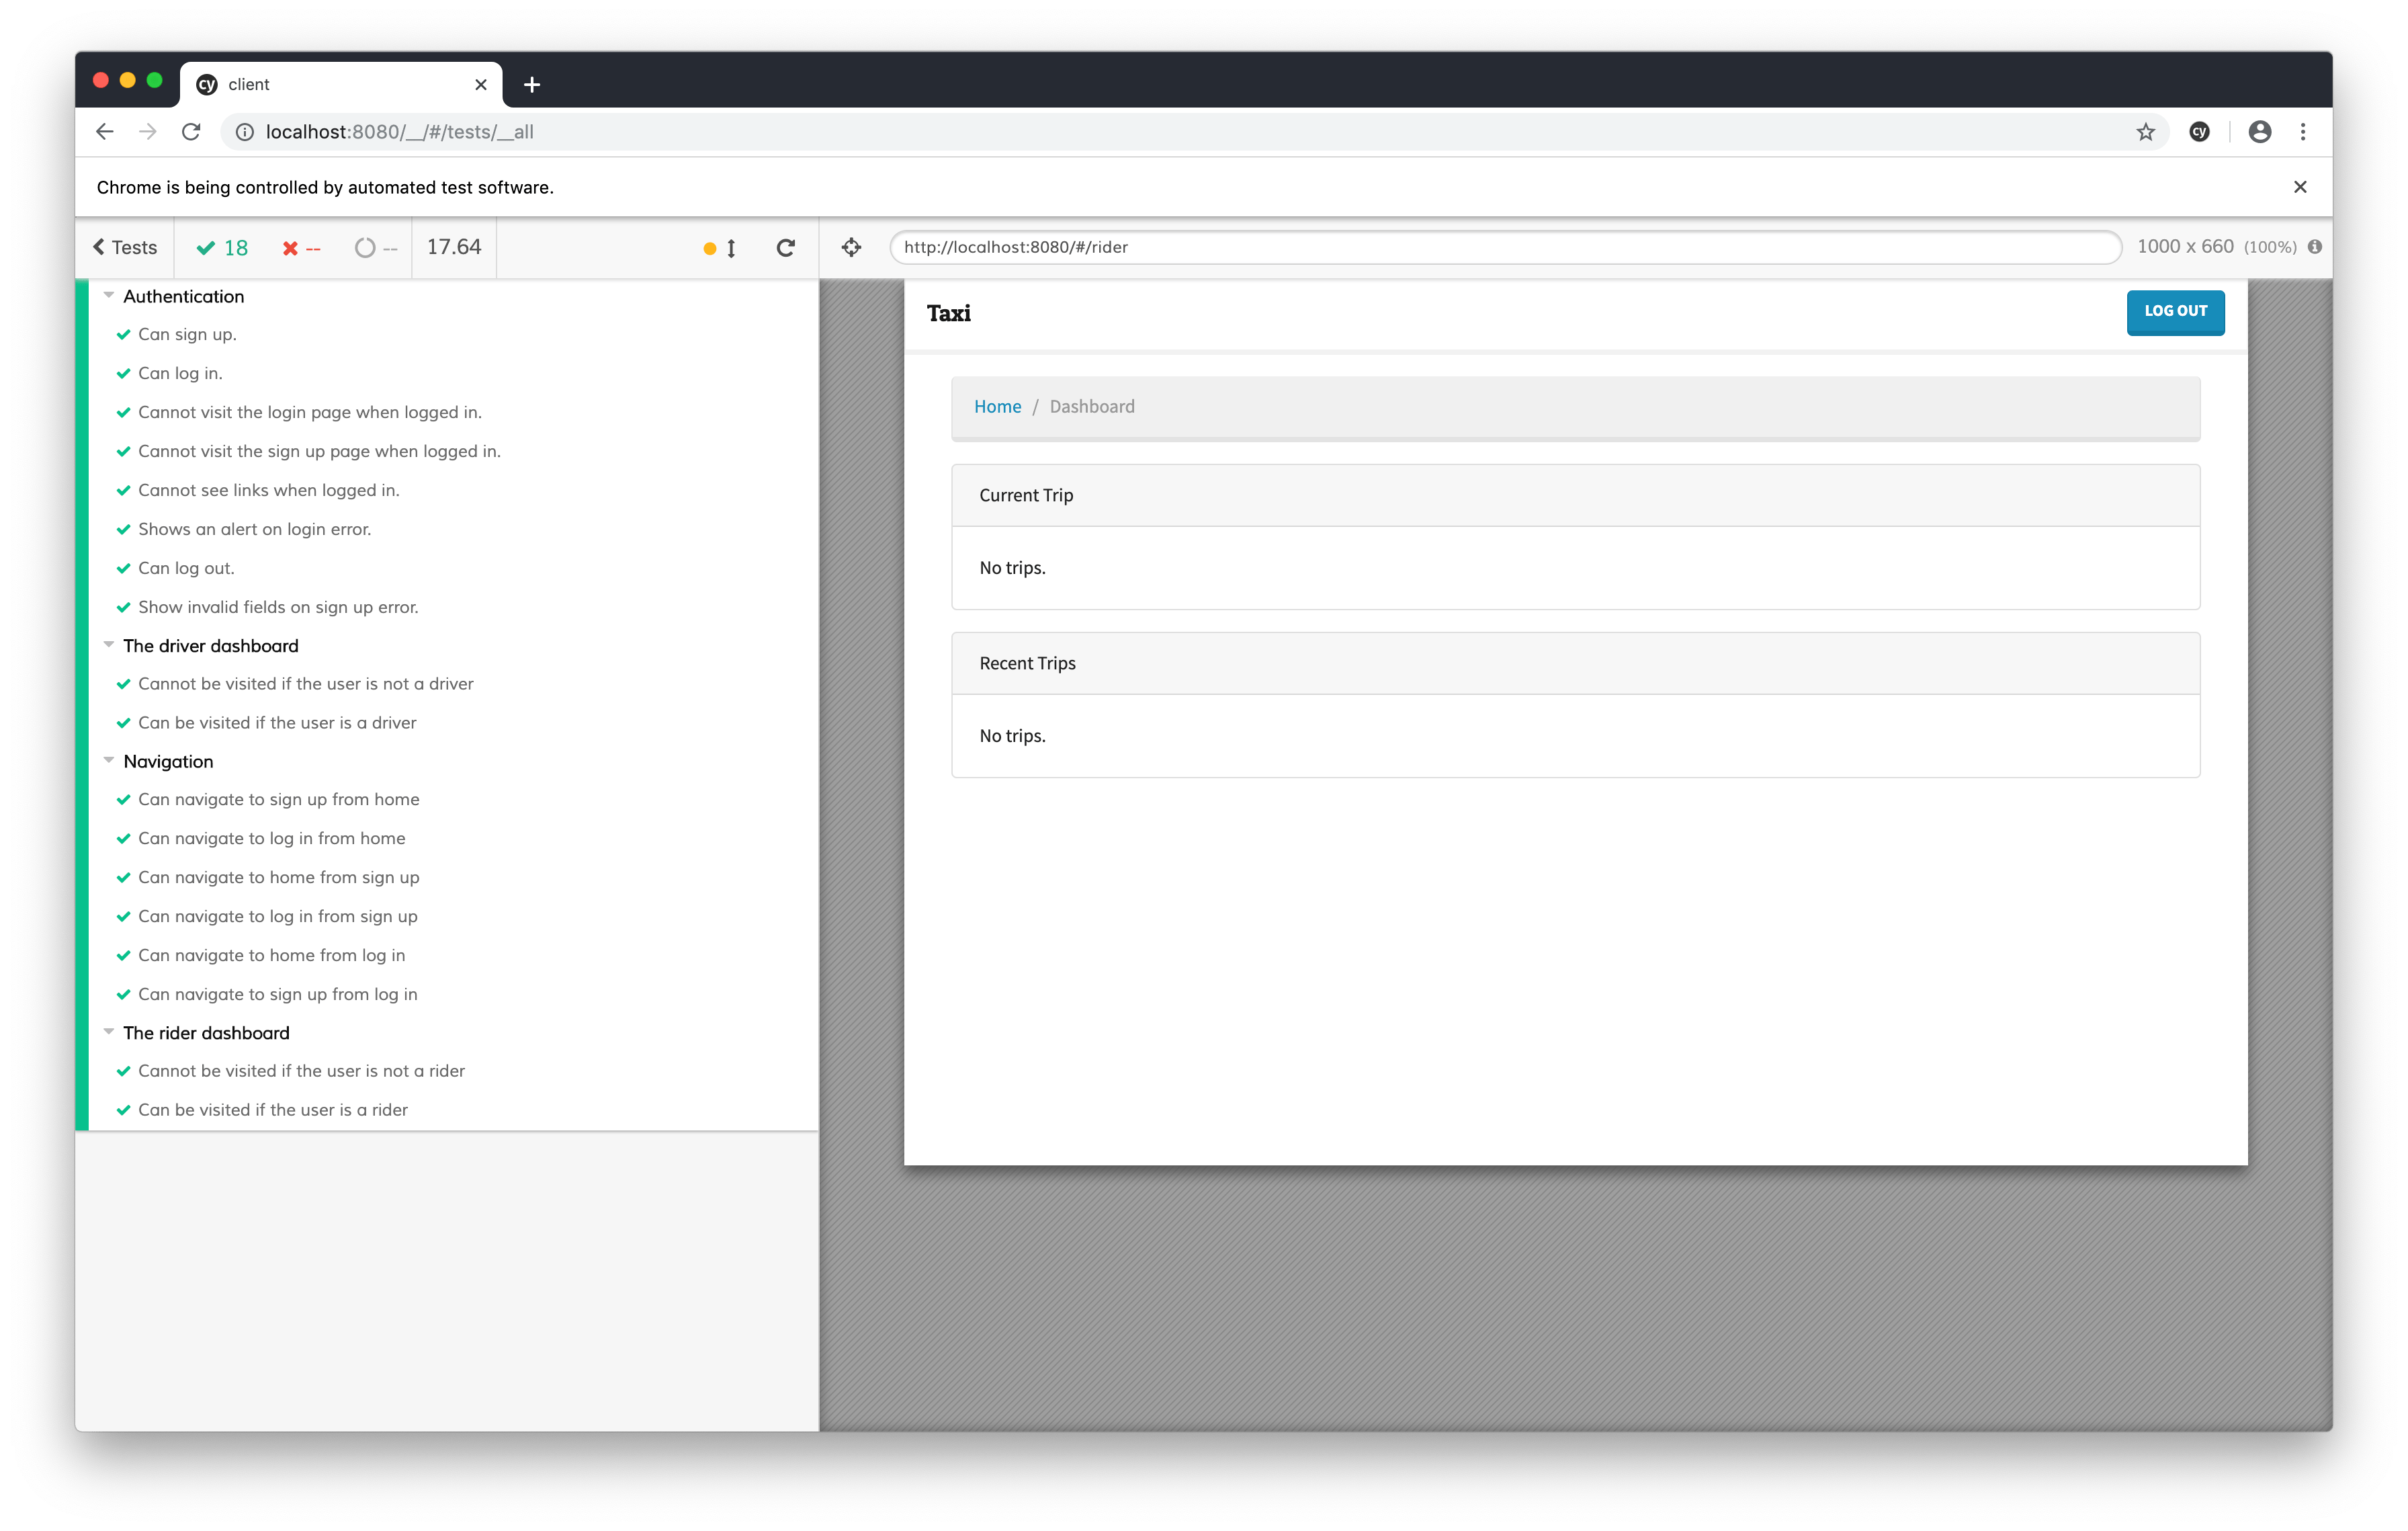
Run both tests. They should pass without issue.
Refactoring: Cypress Commands
You may have noticed that we use the same code in two places. Before all tests in the driver.spec.js file and in the rider.spec.js file, we ran code to seed the database with users. Let’s refactor this code into a Cypress command.
Open the support/index.js file and move the code from the before() function into the new file.
// support/index.js

import 'cypress-file-upload';

// new
const loadUserData = () => {
  cy.fixture('data/users.json').then((users) => {
    cy.task('tableInsert', {
      table: 'trips_user', rows: users, truncate: true
    })
  });
  cy.fixture('data/groups.json').then((groups) => {
    cy.task('tableInsert', {
      table: 'auth_group', rows: groups, truncate: true
    })
  });
  cy.fixture('data/user_groups.json').then((groups) => {
    cy.task('tableInsert', {
      table: 'trips_user_groups', rows: groups, truncate: true
    })
  });
}

// new
Cypress.Commands.add('loadUserData', loadUserData);
Next, replace the code with the Cypress command in the driver.spec.js file.
// integration/driver.spec.js

describe('The driver dashboard', function () {
  // new
  before(function () {
    cy.loadUserData();
  });

  // Tests hidden for clarity.
}
And in the rider.spec.js file.
// integration/rider.spec.js

describe('The rider dashboard', function () {
  // new
  before(function () {
    cy.loadUserData();
  });

  // Tests hidden for clarity.
}
Run all of the Cypress tests again to confirm that they still finish successfully.
If your “Can sign up.” test is failing every time you run your complete test suite, then clear the user data before the authentication tests run with the following command: ```js // cypress/integration/authentication.spec.js
before(function () { cy.task(‘tableTruncate’, { table: ‘trips_user’ }); }); ```
Refactoring: Reusable Functions
Before we finish this chapter, let’s refactor one more time. Remember when we added a logIn() function to our authentication tests in Part II? Let’s do the same thing for our driver and rider tests.
Add the following code to the top of the driver.spec.js file:
// integration/driver.spec.js

// new
const logIn = () => {
  const { username, password } = Cypress.env('driver');
  cy.server();
  cy.route('POST', '**/api/log_in/').as('logIn');
  cy.visit('/#/log-in');
  cy.get('input#username').type(username);
  cy.get('input#password').type(password, { log: false });
  cy.get('button').contains('Log in').click();
  cy.wait('@logIn');
};

describe('The driver dashboard', function () {
  // Hidden for clarity.
});
Then refactor the second test to use the logIn() function.
// integration/driver.spec.js

it('Can be visited if the user is a driver', function () {
  logIn();
  cy.visit('/#/driver');
  cy.hash().should('eq', '#/driver');
});
Follow the same steps for the rider.spec.js file, but make sure you load the rider credentials instead of the driver credentials in the logIn() function.
// integration/rider.spec.js

// new
const logIn = () => {
  const { username, password } = Cypress.env('rider');
  cy.server();
  cy.route('POST', '**/api/log_in/').as('logIn');
  cy.visit('/#/log-in');
  cy.get('input#username').type(username);
  cy.get('input#password').type(password, { log: false });
  cy.get('button').contains('Log in').click();
  cy.wait('@logIn');
};

describe('The rider dashboard', function () {
  before(function () {
    cy.loadUserData();
  });

  it('Cannot be visited if the user is not a rider', function () {
    // Hidden for clarity.
  });

  // changed
  it('Can be visited if the user is a rider', function () {
    logIn();
    cy.visit('/#/rider');
    cy.hash().should('eq', '#/rider');
  });
});
Run all of the tests to confirm that they’re still passing.
Here’s the directory structure:
.
├── Dockerfile
├── README.md
├── cypress
│   ├── fixtures
│   │   ├── data
│   │   │   ├── groups.json
│   │   │   ├── user_groups.json
│   │   │   └── users.json
│   │   └── images
│   │       └── photo.jpg
│   ├── integration
│   │   ├── authentication.spec.js
│   │   ├── driver.spec.js
│   │   ├── navigation.spec.js
│   │   └── rider.spec.js
│   ├── plugins
│   │   └── index.js
│   └── support
│       └── index.js
├── cypress.json
├── package-lock.json
├── package.json
├── public
│   ├── favicon.ico
│   ├── index.html
│   ├── manifest.json
│   └── robots.txt
├── src
│   ├── App.css
│   ├── App.js
│   ├── App.test.js
│   ├── components
│   │   ├── Driver.js
│   │   ├── LogIn.js
│   │   ├── Rider.js
│   │   └── SignUp.js
│   ├── index.css
│   ├── index.js
│   ├── logo.svg
│   ├── serviceWorker.js
│   ├── services
│   │   └── AuthService.js
│   └── setupTests.js
└── yarn.lock