Loading Trips
Part 3, Chapter 3
Our dashboard only benefits users when it displays data about their trips. Luckily, our server exposes an API that provides that data.
Trip Service#
Both the rider’s dashboard and the driver’s dashboard will need to use similar functions to load trip data. Let’s create a special service to hold those functions. Make a new services/TripService.js file.
$ touch services/TripService.js
Inside, add the following code:
// services/TripService.js

import axios from 'axios';

import { getAccessToken } from './AuthService';

export const getTrip = async (id) => {
  const url = `/api/trip/${id}/`;
  const token = getAccessToken();
  const headers = { Authorization: `Bearer ${token}` };
  try {
    const response = await axios.get(url, { headers });
    return { response, isError: false };
  } catch (response) {
    return { response, isError: true };
  }
};

export const getTrips = async () => {
  const url = '/api/trip/';
  const token = getAccessToken();
  const headers = { Authorization: `Bearer ${token}` };
  try {
    const response = await axios.get(url, { headers });
    return { response, isError: false };
  } catch (response) {
    return { response, isError: true };
  }
};
We’ve created one function to retrieve a single trip and another function to list all of the trips for the user. We’re importing the getAccessToken() function to retrieve the access token from local storage. We haven’t actually created this function yet, so let’s go ahead and add it to the AuthService .
export const getAccessToken = () => {
  const auth = JSON.parse(window.localStorage.getItem('taxi.auth'));
  if (auth) {
    return auth.access;
  }
  return undefined;
};
This code loads the taxi.auth item from local storage, parses it, and returns the access token.
The Rider
The next step is to actually fetch the trips. When the rider’s dashboard loads, it should automatically get the trips from the database and display them on the page.
Add the following code to the RiderDashboard component:
// components/Rider.js

import React, { useEffect, useState } from 'react'; // changed
import {
  Breadcrumb, Card, Col, Row
} from 'react-bootstrap';
import { Redirect } from 'react-router-dom';

import TripCard from './TripCard'; // new
import { isRider } from '../services/AuthService';
import { getTrips } from '../services/TripService'; // new

function Rider (props) {
  // new
  const [trips, setTrips] = useState([]);

  // new
  useEffect(() => {
    const loadTrips = async () => {
      const { response, isError } = await getTrips();
      if (isError) {
        setTrips([]);
      } else {
        setTrips(response.data);
      }
    }
    loadTrips();
  }, []);

  if (!isRider()) {
    return <Redirect to='/' />
  }

  return (
    {/* Hidden for clarity. */}
  );
}

export default Rider;
Since we’re using functional components and React hooks, we’re leveraging the useState() and useEffect() functions to handle our data loads. You’ve seen useState() before, but useEffect() should look new.
The useEffect() function takes two arguments. The first argument is a function that gets executed whenever the Rider component refreshes. The second argument is a list of variables that React should monitor. When the monitored code changes, it should trigger React to reload the useEffect() function. Passing an empty list ensures that the useEffect() function only runs once.
Inside our useEffect() , we’re defining a loadTrips() function that calls the getTrips() service function and then updates the trips data. The trips data is an empty list by default, before the component loads.
Next, let’s make our component display the trips data on the page. Add two helper functions to the Rider component.
// components/Rider.js

const getCurrentTrips = () => {
  return trips.filter(trip => {
    return (
      trip.driver !== null &&
      trip.status !== 'REQUESTED' &&
      trip.status !== 'COMPLETED'
    );
  });
};

const getCompletedTrips = () => {
  return trips.filter(trip => {
    return trip.status === 'COMPLETED';
  });
};
These functions filter the trips so that we can put them in the right buckets. Current trips are any trips that have been requested but not started yet. A trip that does not have a driver and is not completed is considered a current trip. Completed trips are ones that have a COMPLETED status.
Next, our goal is to display the user data and the trip data for each trip. For the rider, that data includes the driver’s name and photo and the trip request details – pick up and drop off addresses, status, etc.
Since we need to use the same types of data for each part of the dashboard, let’s create a reusable component.
Create a new components/TripMedia.js file with the following code:
// components/TripMedia.js

import React from 'react';
import { Button, Media } from 'react-bootstrap';
import { LinkContainer } from 'react-router-bootstrap';

function TripMedia ({ trip, group, otherGroup }) {
  const user = trip[otherGroup];
  const href = group ? `/${group}/${trip.id}` : undefined;

  return (
    <Media as='li'>
      <img
        alt={user}
        className='mr-3 rounded-circle'
        src={user.photo}
        width={80}
        height={80}
      />
      <Media.Body>
        <h5 className='mt-0 mb-1'>{user.first_name} {user.last_name}</h5>
        {trip.pick_up_address} to {trip.drop_off_address}<br />
        {trip.status}
        {
          href &&
          <LinkContainer to={href}>
            <Button variant='primary' block>Detail</Button>
          </LinkContainer>
        }
      </Media.Body>
    </Media>
  );
}

export default TripMedia;
The TripMedia component takes a trip and an otherGroup property and uses them to display data. The otherGroup property is used to find the user of the opposite group. In other words, if the user is a rider, then the other user is the driver, and vice versa.
Create a new components/TripCard.js file with the following code:
// components/TripCard.js

import React from 'react';
import { Card } from 'react-bootstrap';

import TripMedia from './TripMedia';

function TripCard ({ title, trips, group, otherGroup }) {
  let cardBody;
  let mediaList;

  if (trips.length === 0) {
    cardBody = <>No trips.</>
  } else {
    mediaList = trips.map(trip =>
      <TripMedia
        trip={trip}
        group={group}
        otherGroup={otherGroup}
        key={trip.id}
      />
    )
    cardBody = <ul className='list-unstyled mb-0'>{mediaList}</ul>
  }
  return (
    <Card className='mb-3' data-cy='trip-card'>
      <Card.Header>{title}</Card.Header>
      <Card.Body>{cardBody}</Card.Body>
    </Card>
  )
}

export default TripCard;
The TripCard component will draw a Bootstrap Card using the properties supplied by the caller. If the provided trips are empty, then the component will display a “No trips” message. If trips exist, then the component will display a list of Media components.
TIP
Did you notice that we included a
data-cyattribute on eachTripCardcomponent? Usingdata-*attributes instead ofidorclassattributes to select HTML elements is a Cypress best practice.
Now, let’s apply the TripCard components where appropriate in the Rider component.
// components/Rider.js

return (
  <Row>
    <Col lg={12}>
      <Breadcrumb>
        <Breadcrumb.Item href='/'>Home</Breadcrumb.Item>
        <Breadcrumb.Item active>Dashboard</Breadcrumb.Item>
      </Breadcrumb>

      {/* changed */}
      <TripCard
        title='Current Trip'
        trips={getCurrentTrips()}
        group='rider'
        otherGroup='driver'
      />

      {/* changed */}
      <TripCard
        title='Recent Trips'
        trips={getCompletedTrips()}
        group='rider'
        otherGroup='driver'
      />

    </Col>
  </Row>
);
The Driver
Let’s make similar changes to the driver’s dashboard. The trip cards should look like the following:
// components/Driver.js

return (
  <Row>
    <Col lg={12}>
      <Breadcrumb>
        <Breadcrumb.Item href='/'>Home</Breadcrumb.Item>
        <Breadcrumb.Item active>Dashboard</Breadcrumb.Item>
      </Breadcrumb>

      {/* changed */}
      <TripCard
        title='Current Trip'
        trips={getCurrentTrips()}
        group='driver'
        otherGroup='rider'
      />

      {/* changed */}
      <TripCard
        title='Requested Trips'
        trips={getRequestedTrips()}
        group='driver'
        otherGroup='rider'
      />

      {/* changed */}
      <TripCard
        title='Recent Trips'
        trips={getCompletedTrips()}
        group='driver'
        otherGroup='rider'
      />

    </Col>
  </Row>
);
The functions should include this code:
// components/Driver.js

import React, { useEffect, useState } from 'react'; // changed
import {
  Breadcrumb, Card, Col, Row
} from 'react-bootstrap';
import { Redirect } from 'react-router-dom';

import TripCard from './TripCard'; // new
import { isDriver } from '../services/AuthService';
import { getTrips } from '../services/TripService'; // new

function Driver (props) {
  // new
  const [trips, setTrips] = useState([]);

  // new
  useEffect(() => {
    const loadTrips = async () => {
      const { response, isError } = await getTrips();
      if (isError) {
        setTrips([]);
      } else {
        setTrips(response.data);
      }
    }
    loadTrips();
  }, []);

  if (!isDriver()) {
    return <Redirect to='/' />
  }

  // new
  const getCurrentTrips = () => {
    return trips.filter(trip => {
      return trip.driver !== null && trip.status !== 'COMPLETED';
    });
  }

  // new
  const getRequestedTrips = () => {
    return trips.filter(trip => {
      return trip.status === 'REQUESTED';
    });
  }

  // new
  const getCompletedTrips = () => {
    return trips.filter(trip => {
      return trip.status === 'COMPLETED';
    });
  }

  return (
    {/* Hidden for clarity. */}
  );
}

export default Driver;
Accessing the Dashboard from Home
We need to take one last step to tie everything together. Open the App.js file and add the following imports to the top of the page:
// src/App.js

import React, { useState } from 'react';
import axios from 'axios';
import {
  Button, Container, Form, Nav, Navbar
} from 'react-bootstrap'; // changed
import { LinkContainer } from 'react-router-bootstrap';
import { Link, Redirect, Route, Switch } from 'react-router-dom';

import { isDriver, isRider } from './services/AuthService'; // new
import SignUp from './components/SignUp';
import LogIn from './components/LogIn';
import Driver from './components/Driver';
import Rider from './components/Rider';

import './App.css';
Then, change the default Route to look like the following:
// src/App.js

<Route exact path='/' render={() => (
  <div className='middle-center'>
    <h1 className='landing logo'>Taxi</h1>
    {
      !isLoggedIn && (
        <>
          <Link
            id='signUp'
            className='btn btn-primary'
            to='/sign-up'
          >Sign up</Link>
          <Link
            id='logIn'
            className='btn btn-primary'
            to='/log-in'
          >Log in</Link>
        </>
      )
    }
    {
      isRider() && (
        <Link
          className='btn btn-primary'
          to='/rider'
        >Dashboard</Link>
      )
    }
    {
      isDriver() && (
        <Link
          className='btn btn-primary'
          to='/driver'
        >Dashboard</Link>
      )
    }
  </div>
)} />
This code adds two conditional views. If the user is a rider, then the app adds a button that links to the riders’ dashboard. If the user is a driver, then the app adds a button that links to the drivers’ dashboard.
Open the app and navigate to the different users’ dashboards to see how they look.
Testing Loading Trips
Part 3, Chapter 4
In the previous chapter, we added the HTTP calls to fetch each user’s trips and we updated our components to display the data. In this chapter, we’ll add some Cypress tests.
No Trips
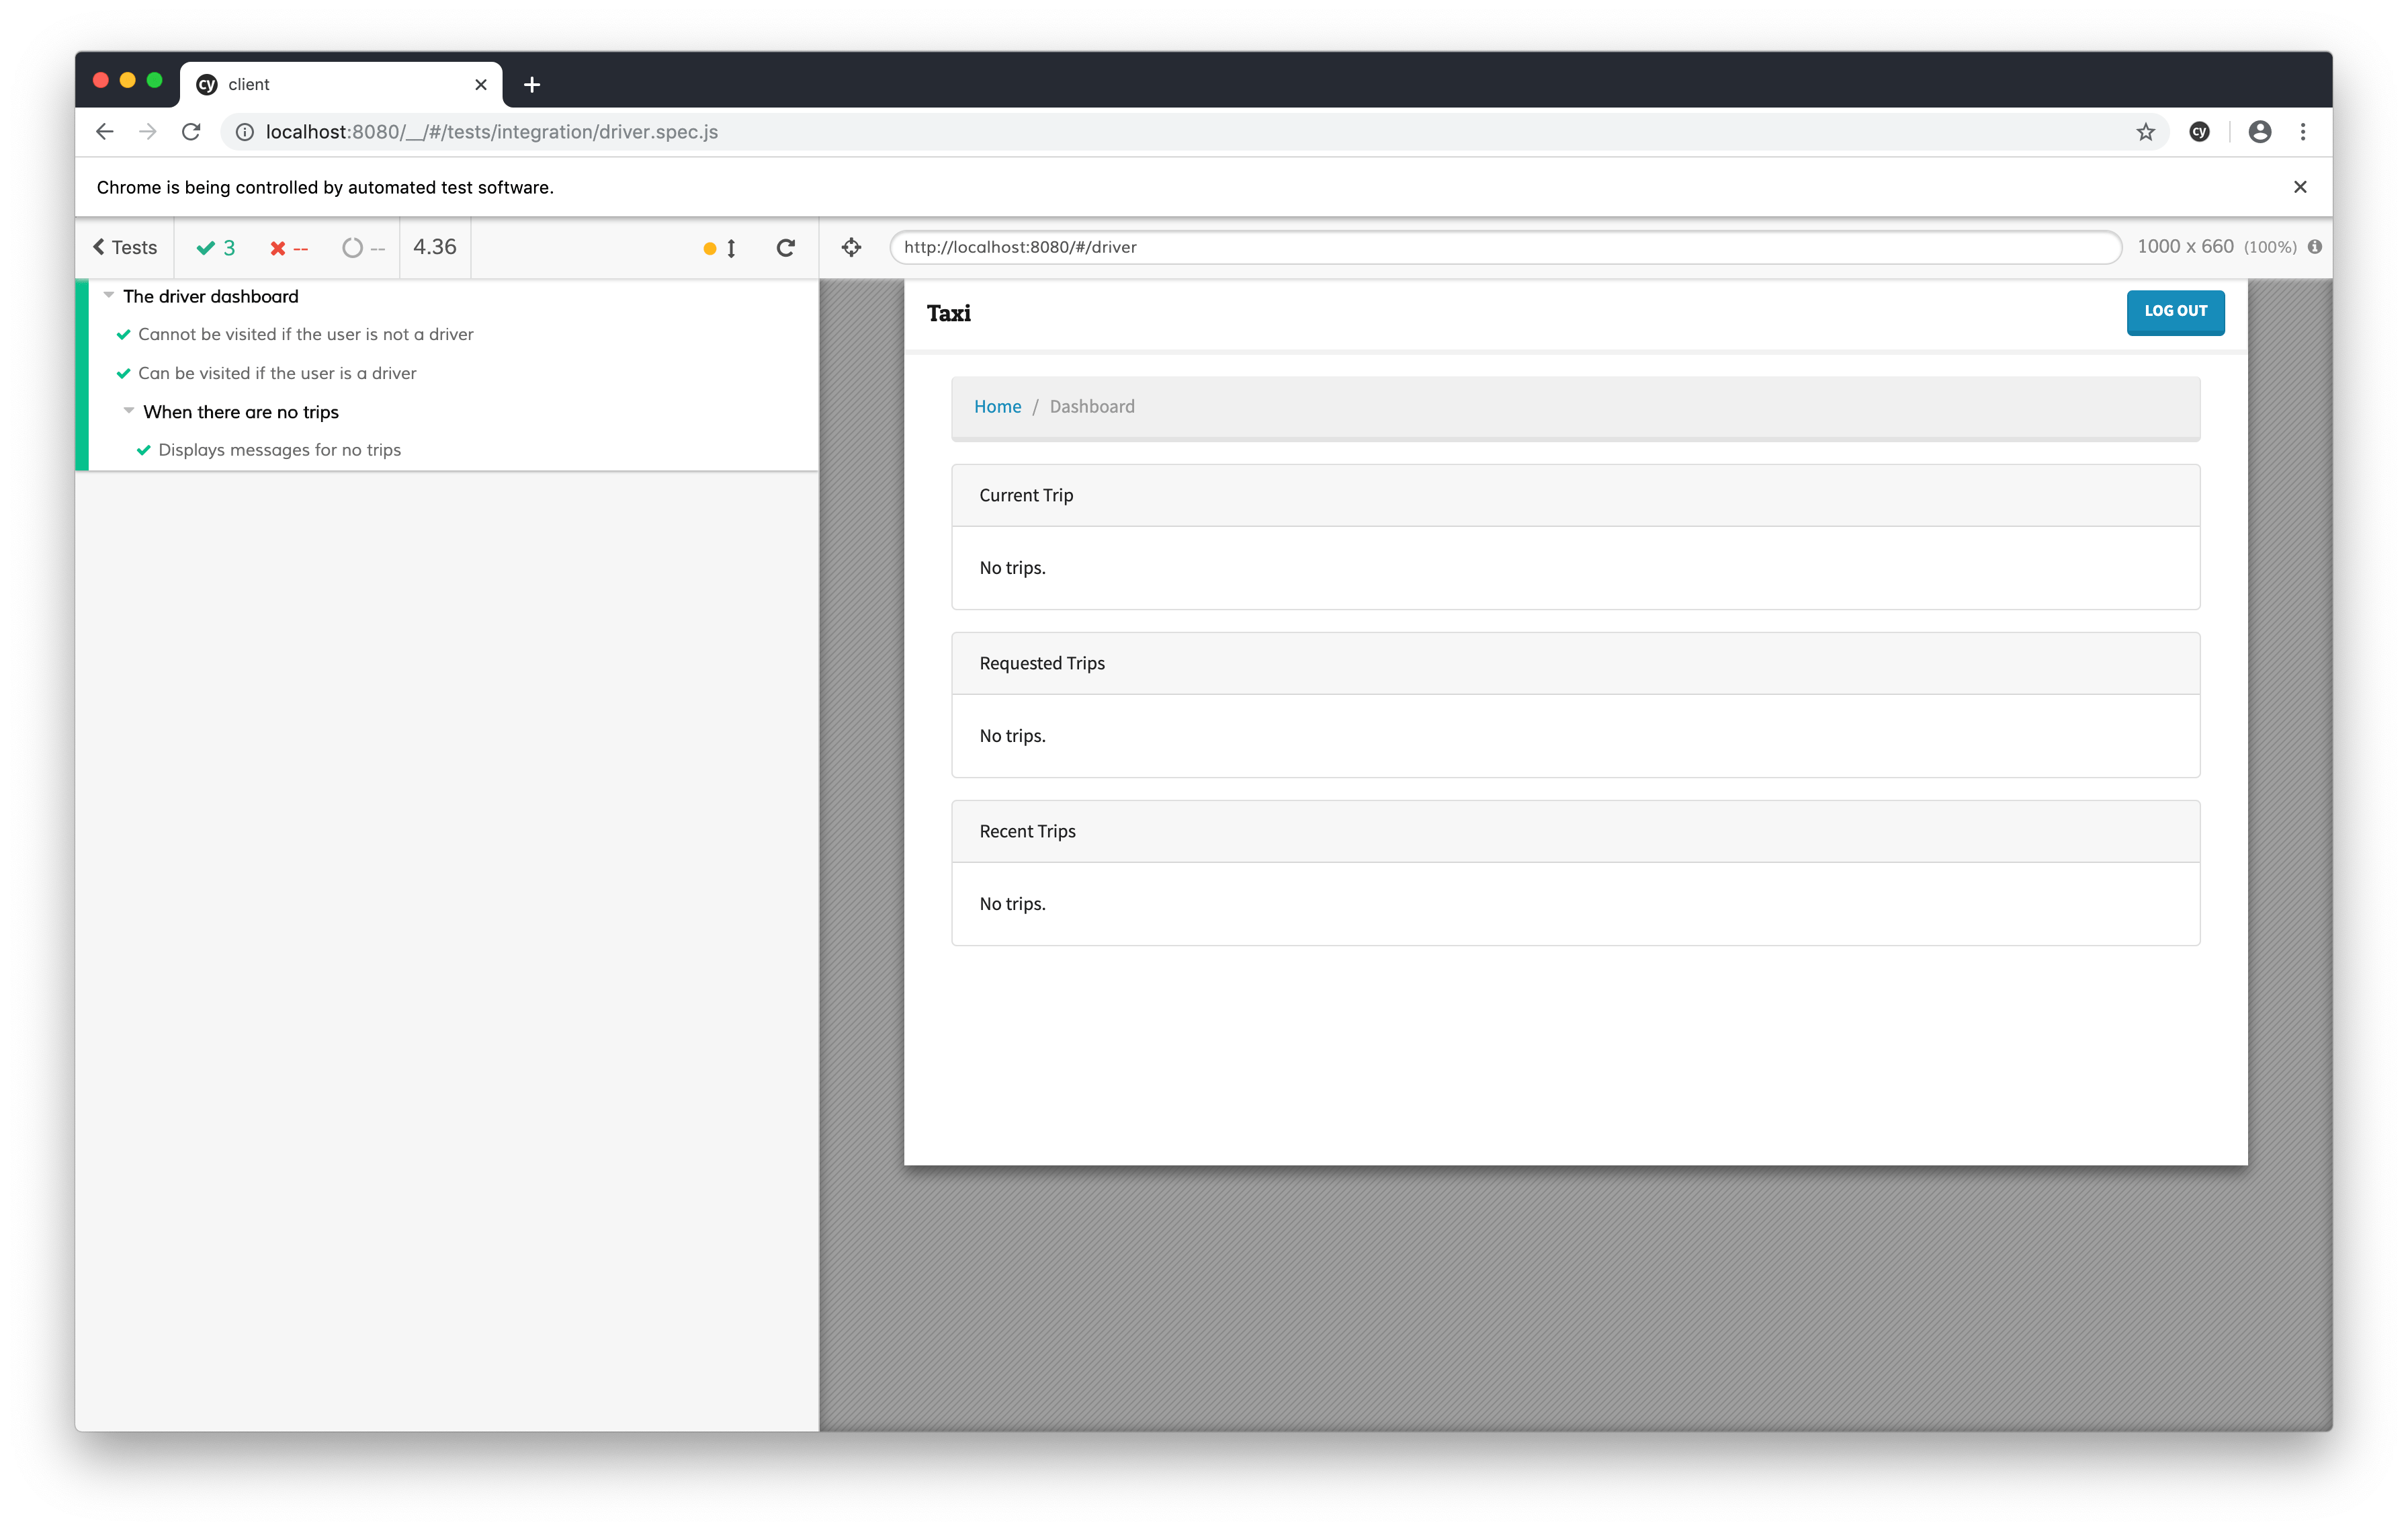
Each dashboard includes a collection of panels that displays information about a user’s trips. If the user is a rider, then he sees two panels – current trips and completed trips. If the user is a driver, then he sees three panels – current trips, requested trips, and completed trips.
Trip data is displayed using TripMedia components, which include users’ photos and their public information. If a panel does not have any trips, then it simply displays a “no trips” message.
Let’s create a test for each dashboard that confirms the presence of a “no trips” message when the panel is empty. Place the following code after the “can be visited if the user is a driver” test.
// integration/driver.spec.js

context('When there are no trips', function () {
  before(function () {
    cy.task('tableTruncate', {
      table: 'trips_trip'
    });
  });

  it('Displays messages for no trips', function () {
    cy.server();
    cy.route('GET', '**/api/trip/').as('getTrips');

    logIn();

    cy.visit('/#/driver');
    cy.wait('@getTrips');

    // Current trips.
    cy.get('[data-cy=trip-card]')
      .eq(0)
      .contains('No trips.');

    // Requested trips.
    cy.get('[data-cy=trip-card]')
      .eq(1)
      .contains('No trips.');

    // Completed trips.
    cy.get('[data-cy=trip-card]')
      .eq(2)
      .contains('No trips.');
  });
});
Let’s review our code. First, we’re defining a context() , which is just an alias for describe() . (It’s a way to group tests within another group of tests.) Next, we’re calling before() to clear the trips_trip database table. In the test itself, we’re monitoring calls to the GET /api/trip/ API. Then, we’re logging a driver into the app; navigating to the driver dashboard; waiting for the trips API to resolve; and checking that no trips loaded into any of the three panels.
Run the driver.spec.js Cypress tests.
Let’s add similar code to the rider.spec.js file.
// integration/rider.spec.js

context('When there are no trips', function () {
  before(function () {
    cy.task('tableTruncate', {
      table: 'trips_trip'
    });
  });

  it('Displays messages for no trips', function () {
    cy.server();
    cy.route('GET', '**/api/trip/').as('getTrips');

    logIn();

    cy.visit('/#/rider');
    cy.wait('@getTrips');

    // Current trips.
    cy.get('[data-cy=trip-card]')
      .eq(0)
      .contains('No trips.');

    // Completed trips.
    cy.get('[data-cy=trip-card]')
      .eq(1)
      .contains('No trips.');
  });
});
Run all of the Cypress tests and confirm that they pass.
Trips
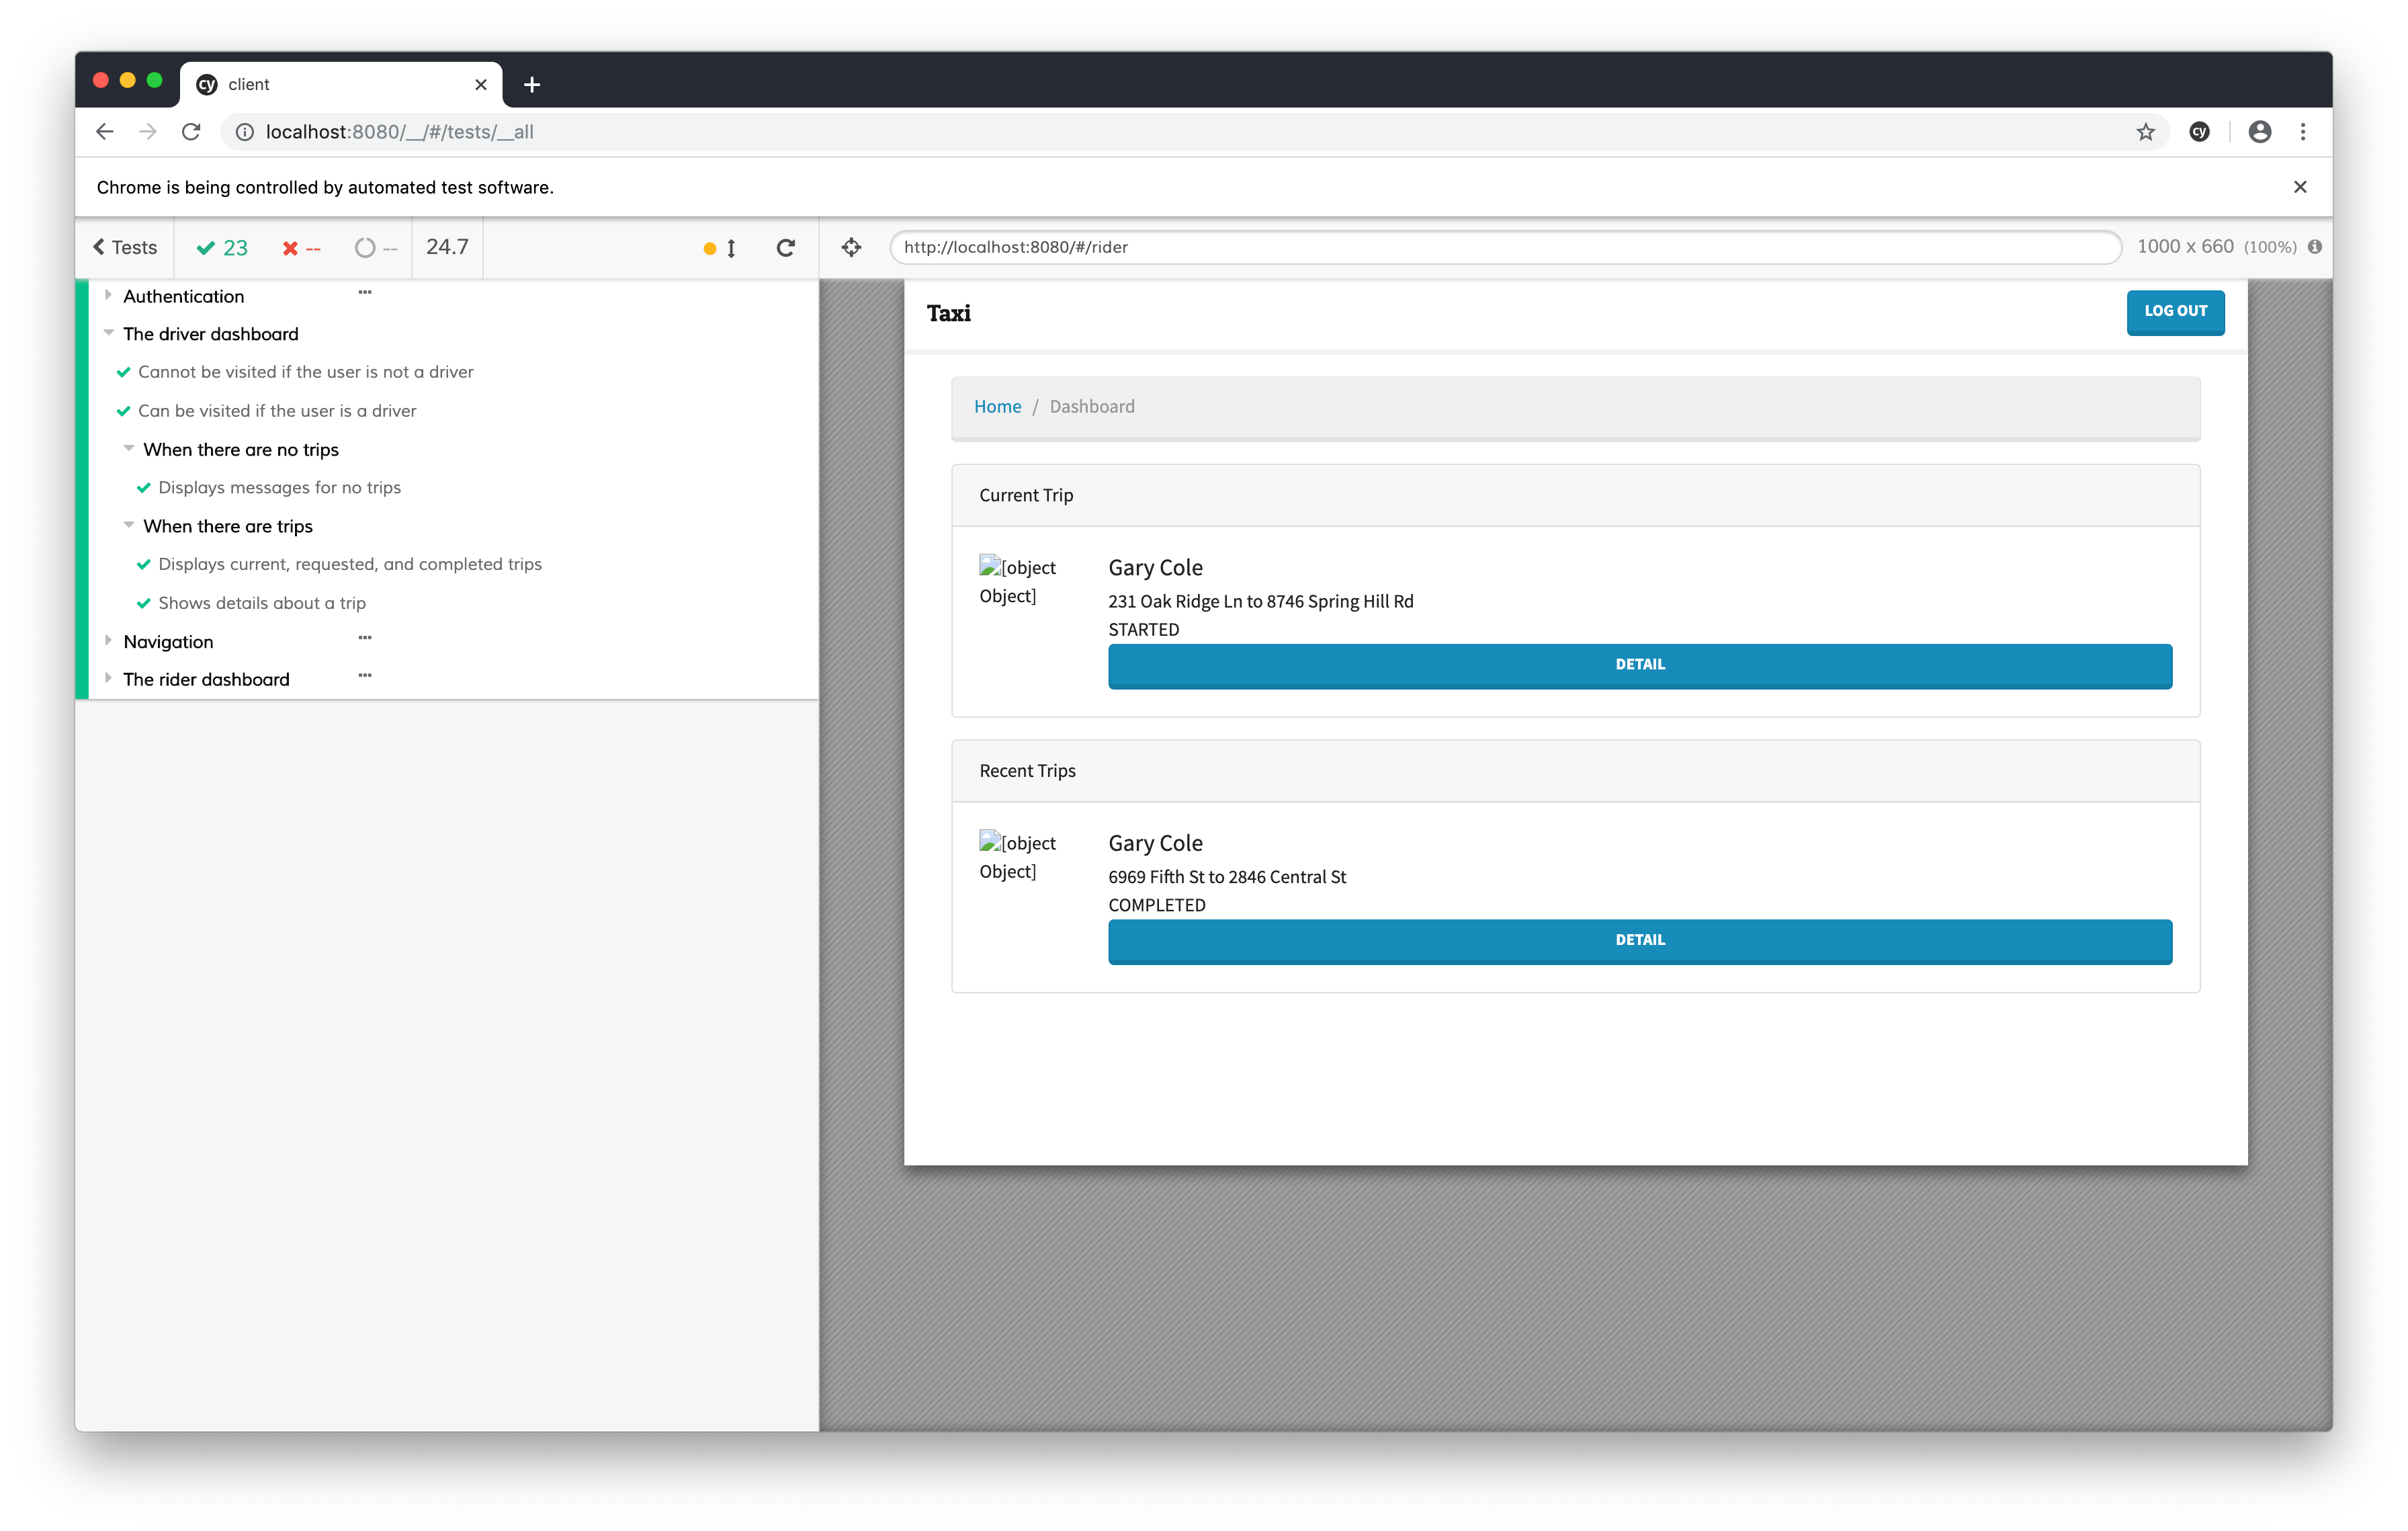
When a rider requests a trip, the app creates a Trip record with a REQUESTED status. When a driver accepts it, both the rider and the driver are engaged in the same trip and it’s status changes to STARTED . That is the current trip for both parties until the driver brings the rider to his destination. During the course of the ride, the trip’s status changes to IN_PROGRESS , and when the ride finishes, the status changes to COMPLETED .
In the last section, we created a context to group tests that dealt with no trips. In this section, we need to create a context to group tests that require trip data. We also need to create trip data fixtures, and while we’re at it, we should create a Cypress command to load trip data too.
Let’s start with the fixtures. Create a new trips.json file inside the fixtures/data directory with the following code:
// data/trips.json

[
  {
    "id": "f0a132af-97d1-4b50-ba2a-0bff0b4a32ed",
    "created": "2019-06-01 00:00:00",
    "updated": "2019-06-01 00:00:00",
    "pick_up_address": "6969 Fifth St",
    "drop_off_address": "2846 Central St",
    "status": "COMPLETED",
    "rider_id": 2,
    "driver_id": 1
  },
  {
    "id": "676cb20b-d51d-44b5-951a-3e3c72a42668",
    "created": "2019-06-02 00:00:00",
    "updated": "2019-06-02 00:00:00",
    "pick_up_address": "231 Oak Ridge Ln",
    "drop_off_address": "8746 Spring Hill Rd",
    "status": "STARTED",
    "rider_id": 2,
    "driver_id": 1
  },
  {
    "id": "987a8e30-ca2f-4019-bbd9-1c7441e2ab1d",
    "created": "2019-06-03 00:00:00",
    "updated": "2019-06-03 00:00:00",
    "pick_up_address": "8061 College St",
    "drop_off_address": "2782 E Pecan St",
    "status": "REQUESTED",
    "rider_id": 2,
    "driver_id": 1
  }
]
Next, open the support/index.json file and add the following command:
// support/index.js

const loadTripData = () => {
  cy.fixture('data/trips.json').then((trips) => {
    cy.task('tableInsert', {
      table: 'trips_trip', rows: trips, truncate: true
    });
  });
};

Cypress.Commands.add('loadTripData', loadTripData);
Finally, add the following code right after the existing context() function call in the driver.spec.js file:
// integration/driver.spec.js

context('When there are trips', function () {
  before(function () {
    cy.loadTripData();
  });

  it('Displays current, requested, and completed trips', function () {
    cy.server();
    cy.route('GET', '**/api/trip/').as('getTrips');

    logIn();

    cy.visit('/#/driver');
    cy.wait('@getTrips');

    // Current trips.
    cy.get('[data-cy=trip-card]')
      .eq(0)
      .contains('STARTED');

    // Requested trips.
    cy.get('[data-cy=trip-card]')
      .eq(1)
      .contains('REQUESTED');

    // Completed trips.
    cy.get('[data-cy=trip-card]')
      .eq(2)
      .contains('COMPLETED');
  });
});
Let’s add a similar test to the rider.spec.js file:
// integration/rider.spec.js

context('When there are trips', function () {
  before(function () {
    cy.loadTripData();
  });

  it('Displays current and completed trips', function () {
    cy.server();
    cy.route('GET', '**/api/trip/').as('getTrips');

    logIn();

    cy.visit('/#/rider');
    cy.wait('@getTrips');

    // Current trips.
    cy.get('[data-cy=trip-card]')
      .eq(0)
      .contains('STARTED');

    // Completed trips.
    cy.get('[data-cy=trip-card]')
      .eq(1)
      .contains('COMPLETED');
  });
});
All tests should pass!

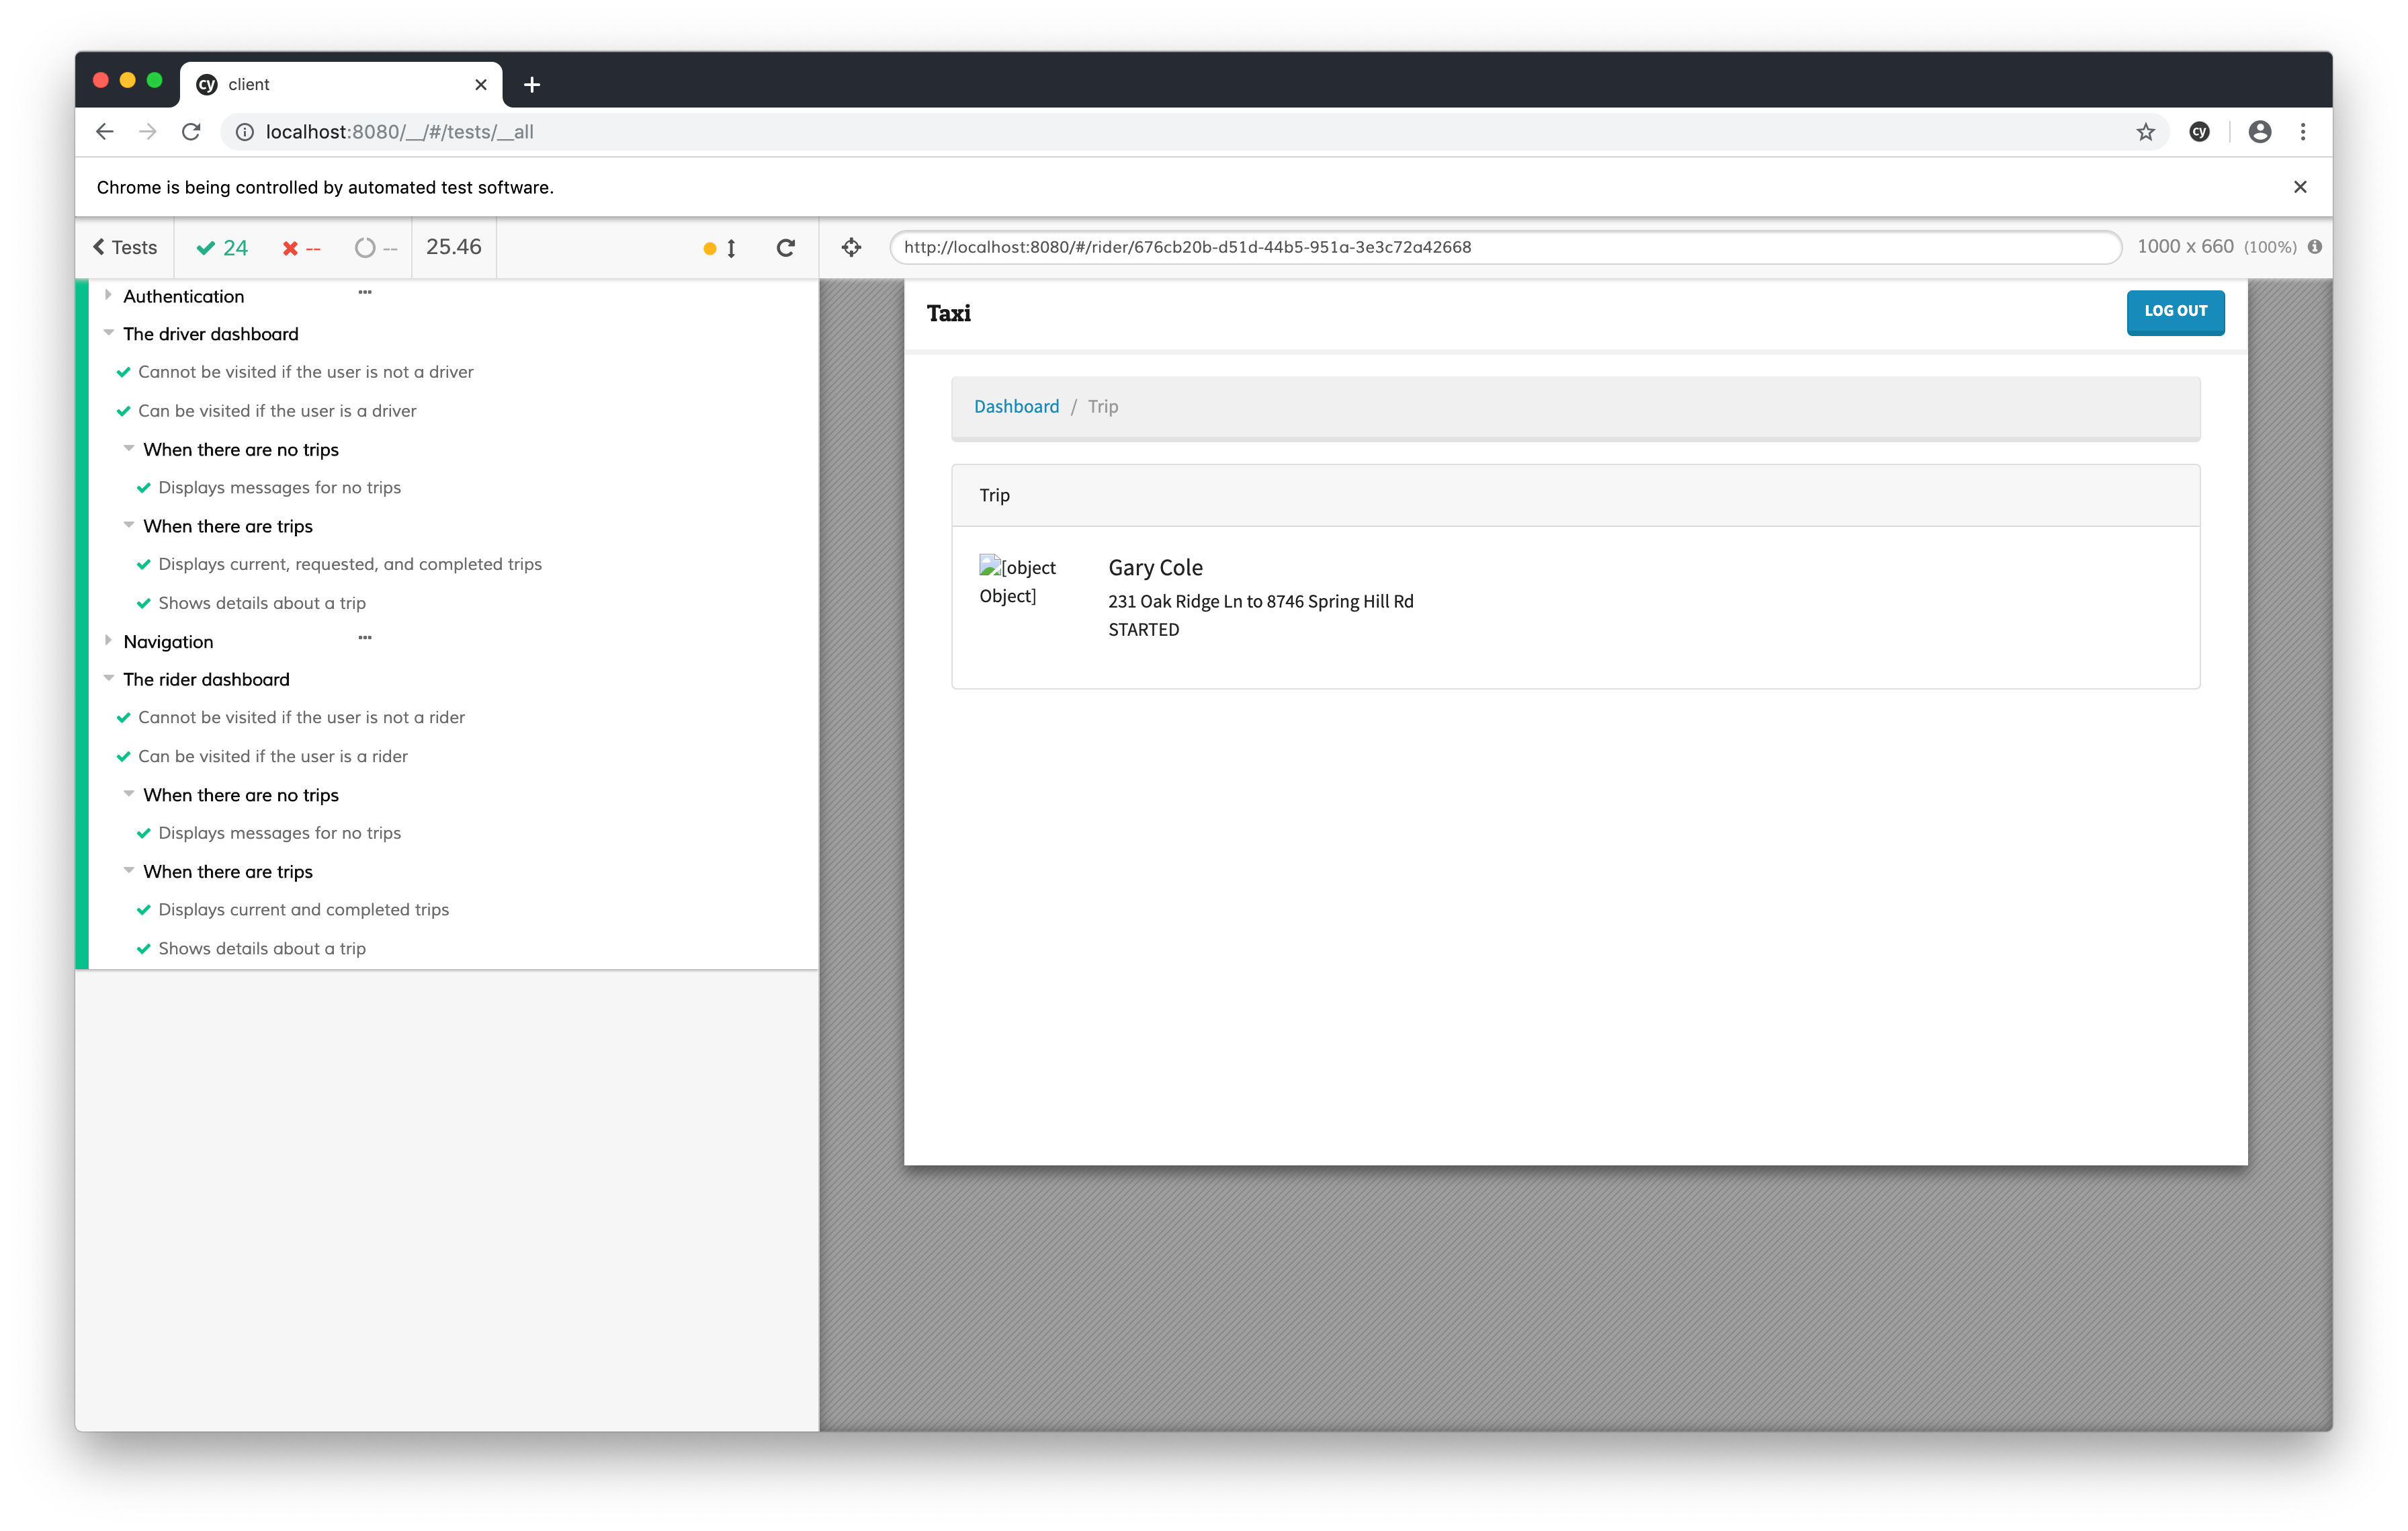
Loading Trip Details
Part 3, Chapter 5
Our dashboard displays our trip data at a glance. Users can see information such as who requested or accepted the ride, the origin and the destination, and the status. But there is only so much you can fit on a small card. Users need a way to see all of a trip’s information and take action on the trip they’re viewing.
Trip Detail View
Both drivers and riders should be able to view details about a particular trip, but each of our user groups needs to take different actions. Drivers need the ability to accept incoming ride requests. They also need a machanism to complete the trip when they arrive at the rider’s destination. On the other hand, riders need a way to cancel a ride request, split fares with other riders, and track the progress of the trip.
The user workflows are different enough that they necessitate two separate trip detail components.
Let’s start by creating the driver’s detail view. Make a new DriverDetail.js file in the components directory with the following code:
// components/DriverDetail.js

import React, { useEffect, useState } from 'react';
import {
  Breadcrumb, Card, Col, Row
} from 'react-bootstrap'
import { LinkContainer } from 'react-router-bootstrap';

import TripMedia from './TripMedia';
import { getTrip } from '../services/TripService';

function DriverDetail ({ match }) {
  const [trip, setTrip] = useState(null);

  useEffect(() => {
    const loadTrip = async (id) => {
      const { response, isError } = await getTrip(id);
      if (isError) {
        setTrip(null);
      } else {
        setTrip(response.data);
      }
    }
    loadTrip(match.params.id);
  }, [match]);

  let tripMedia;

  if (trip === null) {
    tripMedia = <>Loading...</>;
  } else {
    tripMedia = (
      <TripMedia
        trip={trip}
        otherGroup='rider'
      />
    )
  }

  return (
    <Row>
      <Col lg={12}>
        <Breadcrumb>
          <LinkContainer to='/driver'>
            <Breadcrumb.Item>Dashboard</Breadcrumb.Item>
          </LinkContainer>
          <Breadcrumb.Item active>Trip</Breadcrumb.Item>
        </Breadcrumb>
        <Card className='mb-3' data-cy='trip-card'>
          <Card.Header>Trip</Card.Header>
          <Card.Body>{tripMedia}</Card.Body>
        </Card>
      </Col>
    </Row>
  );
}

export default DriverDetail;
Let’s review the important parts of the component we just created. Our DriverDetail component expects a match property to be passed to it. As the React Router documentation states, “a match object contains information about how a <Route path> matched the URL.” When a user clicks on a trip card from the dashboard, it will link to the detail via the trip’s ID.
The useEffect() hook listens for changes to the match object and loads the data for the given trip into the component. Whenever the data finishes loading, the component will display the trip information.
Let’s write a new test to prove that our code works. Add the following test to the “when there are trips” context in the integration/driver.spec.js file:
// integration/driver.spec.js

it('Shows details about a trip', () => {
  const tripId = '676cb20b-d51d-44b5-951a-3e3c72a42668';

  cy.server();
  cy.route('GET', '**/api/trip/*/').as('getTrip');

  logIn();

  cy.visit(`/#/driver/${tripId}`);
  cy.wait('@getTrip');

  cy.get('[data-cy=trip-card]')
    .should('have.length', 1)
    .and('contain.text', 'Hugh Wells')
    .and('contain.text', 'STARTED');
});
This test should fail because we haven’t implemented the trip detail route.
Routing Changes
Our new test requires a nested driver route, so we need to make some changes to the way we handle routing. Our plan involves the following steps:
- Create a
DriverDashboardcomponent and copy all of the code fromDrivertoDriverDashboard. - Add a
Switchstatement toDriverwith routes to two child components –DriverDashboardandDriverDetail. - Make
DriverDashboardthe default component, so that when a user visits the/#/driverendpoint he is brought to the dashboard.
Let’s start by working on Step #1. Create a new DriverDashboard component and copy the code from Driver , so that the two files have the following code:
// components/DriverDashboard.js

import React, { useEffect, useState } from 'react';
import {
  Breadcrumb, Col, Row
} from 'react-bootstrap';

import TripCard from './TripCard';
import { getTrips } from '../services/TripService';

function DriverDashboard (props) {
  const [trips, setTrips] = useState([]);

  useEffect(() => {
    const loadTrips = async () => {
      const { response, isError } = await getTrips();
      if (isError) {
        setTrips([]);
      } else {
        setTrips(response.data);
      }
    }
    loadTrips();
  }, []);

  const getCurrentTrips = () => {
    return trips.filter(trip => {
      return trip.driver !== null && trip.status !== 'COMPLETED';
    });
  }

  const getRequestedTrips = () => {
    return trips.filter(trip => {
      return trip.status === 'REQUESTED';
    });
  }

  const getCompletedTrips = () => {
    return trips.filter(trip => {
      return trip.status === 'COMPLETED';
    });
  }

  return (
    <Row>
      <Col lg={12}>
        <Breadcrumb>
          <Breadcrumb.Item href='/'>Home</Breadcrumb.Item>
          <Breadcrumb.Item active>Dashboard</Breadcrumb.Item>
        </Breadcrumb>

        <TripCard
          title='Current Trip'
          trips={getCurrentTrips()}
          group='driver'
          otherGroup='rider'
        />

        <TripCard
          title='Requested Trips'
          trips={getRequestedTrips()}
          group='driver'
          otherGroup='rider'
        />

        <TripCard
          title='Recent Trips'
          trips={getCompletedTrips()}
          group='driver'
          otherGroup='rider'
        />

      </Col>
    </Row>
  );
}

export default DriverDashboard;
// components/Driver.js

import React from 'react';
import { Redirect } from 'react-router-dom';

import { isDriver } from '../services/AuthService';

function Driver (props) {
  if (!isDriver()) {
    return <Redirect to='/' />
  }

  return <></>;
}

export default Driver;
Onto Steps #2 and #3. Add the routing to the Driver component like so:
// components/Driver.js

import React from 'react';
import { Redirect, Route, Switch } from 'react-router-dom'; // changed

import DriverDashboard from './DriverDashboard'; // new
import DriverDetail from './DriverDetail'; // new
import { isDriver } from '../services/AuthService';

function Driver (props) {
  if (!isDriver()) {
    return <Redirect to='/' />
  }

  // changed
  return (
    <Switch>
      <Route path='/driver/:id' component={DriverDetail} />
      <Route component={DriverDashboard} />
    </Switch>
  );
}

export default Driver;
Note how the Switch component will automatically load the DriverDashboard component by default.
With these changes in place, run the tests again and watch them pass.
It’s time to apply the same steps to the rider components and routing. Create a components/RiderDashboard.js file and copy the contents from the Rider component to the RiderDashboard component like so:
// components/RiderDashboard.js

import React, { useEffect, useState } from 'react';
import {
  Breadcrumb, Col, Row
} from 'react-bootstrap';

import TripCard from './TripCard';
import { getTrips } from '../services/TripService';

function RiderDashboard (props) {
  const [trips, setTrips] = useState([]);

  useEffect(() => {
    const loadTrips = async () => {
      const { response, isError } = await getTrips();
      if (isError) {
        setTrips([]);
      } else {
        setTrips(response.data);
      }
    }
    loadTrips();
  }, []);

  const getCurrentTrips = () => {
    return trips.filter(trip => {
      return (
        trip.driver !== null &&
        trip.status !== 'REQUESTED' &&
        trip.status !== 'COMPLETED'
      );
    });
  };

  const getCompletedTrips = () => {
    return trips.filter(trip => {
      return trip.status === 'COMPLETED';
    });
  };

  return (
    <Row>
      <Col lg={12}>
        <Breadcrumb>
          <Breadcrumb.Item href='/'>Home</Breadcrumb.Item>
          <Breadcrumb.Item active>Dashboard</Breadcrumb.Item>
        </Breadcrumb>

        <TripCard
          title='Current Trip'
          trips={getCurrentTrips()}
          group='rider'
          otherGroup='driver'
        />

        <TripCard
          title='Recent Trips'
          trips={getCompletedTrips()}
          group='rider'
          otherGroup='driver'
        />

      </Col>
    </Row>
  );
}

export default RiderDashboard;
// components/Rider.js

import React from 'react';
import { Redirect, Route, Switch } from 'react-router-dom';

import RiderDashboard from './RiderDashboard';
import RiderDetail from './RiderDetail';
import { isRider } from '../services/AuthService';

function Rider (props) {
  if (!isRider()) {
    return <Redirect to='/' />
  }

  return (
    <Switch>
      <Route path='/rider/:id' component={RiderDetail} />
      <Route component={RiderDashboard} />
    </Switch>
  )
}

export default Rider;
We also have to create the RiderDetail component. Make a new RiderDetail.js file in the components directory with the following code:
// components/RiderDetail.js

import React, { useEffect, useState } from 'react';
import {
  Breadcrumb, Card, Col, Row
} from 'react-bootstrap'
import { LinkContainer } from 'react-router-bootstrap';

import TripMedia from './TripMedia';
import { getTrip } from '../services/TripService';

function RiderDetail ({ match }) {
  const [trip, setTrip] = useState(null);

  useEffect(() => {
    const loadTrip = async (id) => {
      const { response, isError } = await getTrip(id);
      if (isError) {
        setTrip(null);
      } else {
        setTrip(response.data);
      }
    }
    loadTrip(match.params.id);
  }, [match]);

  let tripMedia;

  if (trip === null) {
    tripMedia = <>Loading...</>;
  } else {
    tripMedia = (
      <TripMedia
        trip={trip}
        otherGroup='driver'
      />
    )
  }

  return (
    <Row>
      <Col lg={12}>
        <Breadcrumb>
          <LinkContainer to='/rider'>
            <Breadcrumb.Item>Dashboard</Breadcrumb.Item>
          </LinkContainer>
          <Breadcrumb.Item active>Trip</Breadcrumb.Item>
        </Breadcrumb>
        <Card className='mb-3' data-cy='trip-card'>
          <Card.Header>Trip</Card.Header>
          <Card.Body>{tripMedia}</Card.Body>
        </Card>
      </Col>
    </Row>
  );
}

export default RiderDetail;
Finally, let’s add a test to our rider.spec.js file. Put it in the “when there are trips” context.
// integration/rider.spec.js

it('Shows details about a trip', () => {
  const tripId = '676cb20b-d51d-44b5-951a-3e3c72a42668';

  cy.server();
  cy.route('GET', '**/api/trip/*/').as('getTrip');

  logIn();

  cy.visit(`/#/rider/${tripId}`);
  cy.wait('@getTrip');

  cy.get('[data-cy=trip-card]')
    .should('have.length', 1)
    .and('contain.text', 'Gary Cole')
    .and('contain.text', 'STARTED');
});
All tests should run successfully.
Ride Requests
Part 3, Chapter 6
The time has finally come to use a WebSocket connection on the client side. If you recall the code we wrote way back in Part I, then you’ll remember that we make GET requests over HTTP and we create and update trips over WebSocket.
When we programmed our drivers’ dashboard, we added a panel to display trips requested by riders. In this chapter, we’re going to develop a component that riders can use to make those requests. We’re also going to write the code necessary to update the drivers’ dashboard when a new ride request is delivered.
Make a Request
Let’s start by creating a form that can be used to submit details about a desired trip.
First, open your terminal and install RxJs:
$ npm install rxjs --save
If you’re not familiar with the rxjs library or its core concepts, take a moment to read the RxJs Introduction. We’ll talk more about the various functions as we encounter them.
Make a new RiderRequest.js file in the components directory with the following code:
// components/RiderRequest.js

import React, { useState } from 'react';
import { Formik } from 'formik';
import {
  Breadcrumb, Button, Card, Col, Form, Row
} from 'react-bootstrap';
import { Redirect } from 'react-router-dom';
import { LinkContainer } from 'react-router-bootstrap';
import { webSocket } from 'rxjs/webSocket';

import { getAccessToken, getUser } from '../services/AuthService';

function RiderRequest (props) {
  const [isSubmitted, setSubmitted] = useState(false);

  const onSubmit = (values, actions) => {
    const rider = getUser();
    const token = getAccessToken();
    const ws = webSocket(`ws://localhost:8080/taxi/?token=${token}`);
    ws.subscribe();
    ws.next({
      type: 'create.trip',
      data: {
        pick_up_address: values.pickUpAddress,
        drop_off_address: values.dropOffAddress,
        rider: rider.id
      }
    });
    setSubmitted(true);
  };

  if (isSubmitted) {
    return <Redirect to='/rider' />
  }

  return (
    <Row>
      <Col lg={12}>
        <Breadcrumb>
          <LinkContainer to='/rider'>
            <Breadcrumb.Item>Dashboard</Breadcrumb.Item>
          </LinkContainer>
          <Breadcrumb.Item active>Request</Breadcrumb.Item>
        </Breadcrumb>
        <Card className='mb-3'>
          <Card.Header>Request Trip</Card.Header>
          <Card.Body>
            <Formik
              initialValues={{
                pickUpAddress: '',
                dropOffAddress: ''
              }}
              onSubmit={onSubmit}
            >
              {({
                handleChange,
                handleSubmit,
                isSubmitting,
                values
              }) => (
                <Form noValidate onSubmit={handleSubmit}>
                  <Form.Group controlId='pickUpAddress'>
                    <Form.Label>Pick up address:</Form.Label>
                    <Form.Control
                      data-cy='pick-up-address'
                      name='pickUpAddress'
                      onChange={handleChange}
                      values={values.pickUpAddress}
                      required
                    />
                  </Form.Group>
                  <Form.Group controlId='dropOffAddress'>
                    <Form.Label>Drop off address:</Form.Label>
                    <Form.Control
                      data-cy='drop-off-address'
                      name='dropOffAddress'
                      onChange={handleChange}
                      values={values.dropOffAddress}
                    />
                  </Form.Group>
                  <Button
                    block
                    data-cy='submit'
                    disabled={isSubmitting}
                    type='submit'
                    variant='primary'
                  >Submit</Button>
                </Form>
              )}
            </Formik>
          </Card.Body>
        </Card>
      </Col>
    </Row>
  )
}

export default RiderRequest;
Everything but the contents of the onSubmit() function should look familiar to you, so let’s analyze the code we added there.
The rxjs library provides a handy webSocket() function that is a wrapper around the WebSocket API provided by JavaScript. The webSocket() function establishes a WebSocket connection with the server and returns a Subject (an event emitter).
After we invoke webSocket() , we immediately subscribe to the Subject it returns in order to activate it. Once activated, we can invoke the next() method on the Subject to send data to the server over the open WebSocket connection.
Next, let’s create a test. Open the rider.spec.js file and add the following test within the “when there are no trips” context:
// integration/rider.spec.js

it('Can request a new trip', function () {
  cy.server();
  cy.route('GET', '**/api/trip/').as('getTrips');

  logIn();

  cy.visit('/#/rider/request');

  cy.get('[data-cy=pick-up-address]').type('123 Main Street');
  cy.get('[data-cy=drop-off-address]').type('456 South Street');
  cy.get('[data-cy=submit]').click();

  cy.wait('@getTrips');
  cy.hash().should('eq', '#/rider');
});
This test proves that once a user submits the rider request form, the app redirects him back to the riders’ dashboard. If you run the test, then it will fail because we haven’t hooked up the routing yet.
Open the Rider.js file and make the changes shown below:
// components/Rider.js

import React from 'react';
import { Redirect, Route, Switch } from 'react-router-dom';

import RiderDashboard from './RiderDashboard';
import RiderDetail from './RiderDetail';
import RiderRequest from './RiderRequest'; // new
import { isRider } from '../services/AuthService';

function Rider (props) {
  if (!isRider()) {
    return <Redirect to='/' />
  }

  return (
    <Switch>
      {/* new */}
      <Route path='/rider/request' component={RiderRequest} />
      <Route path='/rider/:id' component={RiderDetail} />
      <Route component={RiderDashboard} />
    </Switch>
  )
}

export default Rider;
This new code adds the routing to explicitly point to the RiderRequest component. Note that the /rider/request route comes before the /rider/:id route. This is important because the /rider/:id route will match any /rider/* pattern. The order matters.
Let’s write another test that proves that drivers receive ride requests. Add the following test to the “when there are no trips” context in the driver.spec.js file:
// integration/driver.spec.js

// Add to the top of the file
import { webSocket } from 'rxjs/webSocket';

it('Can receive a ride request', function () {
  cy.server();
  cy.route('GET', '**/api/trip/').as('getTrips');

  logIn();

  cy.visit('/#/driver');
  cy.wait('@getTrips');

  // Requested trips.
  cy.get('[data-cy=trip-card]')
    .eq(1)
    .contains('No trips.');

  // Make trip request as rider.
  cy.request({
    method: 'POST',
    url: '/api/log_in/',
    body: Cypress.env('rider')
  }).then((response) => {
    const token = response.body.access;
    const ws = webSocket(`ws://localhost:8080/taxi/?token=${token}`);
    ws.subscribe();
    ws.next({
      type: 'create.trip',
      data: {
        pick_up_address: '123 Main Street',
        drop_off_address: '456 Elm Street',
        rider: 2
      }
    });
  });

  // Requested trips.
  cy.get('[data-cy=trip-card]')
    .eq(1)
    .contains('REQUESTED');
});
In this test, we simulate a driver logging in and we confirm that he has no trips. Next, we simulate a rider logging in, connecting to the server, and sending a ride request through a WebSocket connection. Lastly, we confirm that the ride request appears on the drivers’ dashboard.
If you run this test now, then it will fail because we haven’t programmed the drivers’ dashboard to listen to the WebSocket. Add the following code to the DriverDashboard.js file:
// components/DriverDashboard.js

useEffect(() => {
  const token = getAccessToken();
  const ws = webSocket(`ws://localhost:8080/taxi/?token=${token}`);
  const subscription = ws.subscribe((message) => {
    setTrips(prevTrips => [
      ...prevTrips.filter(trip => trip.id !== message.data.id),
      message.data
    ]);
  });
  return () => {
    subscription.unsubscribe();
  }
}, []);
This code establishes a WebSocket connection to the server and listens for incoming messages. When the server pushes a message to the client, the component updates the list of trips. Note that our useEffect() hook returns a function that unsubscribes from the WebSocket subscription. This function will be called when the DriverDashboard component is destroyed.
Don’t forget to add these imports at the top of the file:
// components/DriverDashboard.js

import { webSocket } from 'rxjs/webSocket';
import { getAccessToken } from '../services/AuthService';
All of our tests should be passing at this point, but we need to complete one more task. A rider should be able to access the ride request form from a link in the navigation bar. Change the code within the Navbar.Collapse component in the App.js file like so:
// components/App.js

<Navbar.Collapse>
  {/* new */}
  {
    isRider() && (
      <Nav className='mr-auto'>
        <LinkContainer to='/rider/request'>
          <Nav.Link>Request a trip</Nav.Link>
        </LinkContainer>
      </Nav>
    )
  }
  {
    isLoggedIn && (
      <Form inline className='ml-auto'>
        <Button
          type='button'
          onClick={() => logOut()}
        >Log out</Button>
      </Form>
    )
  }
</Navbar.Collapse>
Click through the new components and test the app manually.