INTRODUCTION TO THE PROJECT
The goal of this project is to create a Telegram Bot.
If you are not familiar with Telegram, it’s one of the biggest chat networks.
What is a Telegram bot? It’s a program that listens for commands and can interact with you.
Our bot will be called @botranslate .
Its job is to translate every message we send to it .
By default it will try to interpret the origin language, and will translate it t‘o english.
However you can perform some operations through special commands:
-
/from <language>will change the origin language to a specific one -
/to <language>will translate messages to that language
The preferences will be stored by the bot in its own database.
It will also remember all your commands by default, storing them in a safe place, so you can also see your entire history by running /history .
The bot is privacy-savvy, so you can run /clear to clear all your history, and /dnt (do not track) to stop tracking your messages. /dt (do track) will revert that decision.
Sounds good? Let’s go!
CREATE THE BOT
First thing we must do is to obtain a bot token from Telegram.
How do we do that? We must talk to the Botfather

I’m not joking! This is the official Telegram bot that grants access to other bots.
First thing, install Telegram and get an account there if you don’t have one yet.
Next, inside Telegram search for “botfather”:
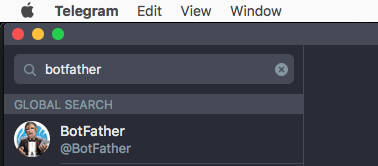
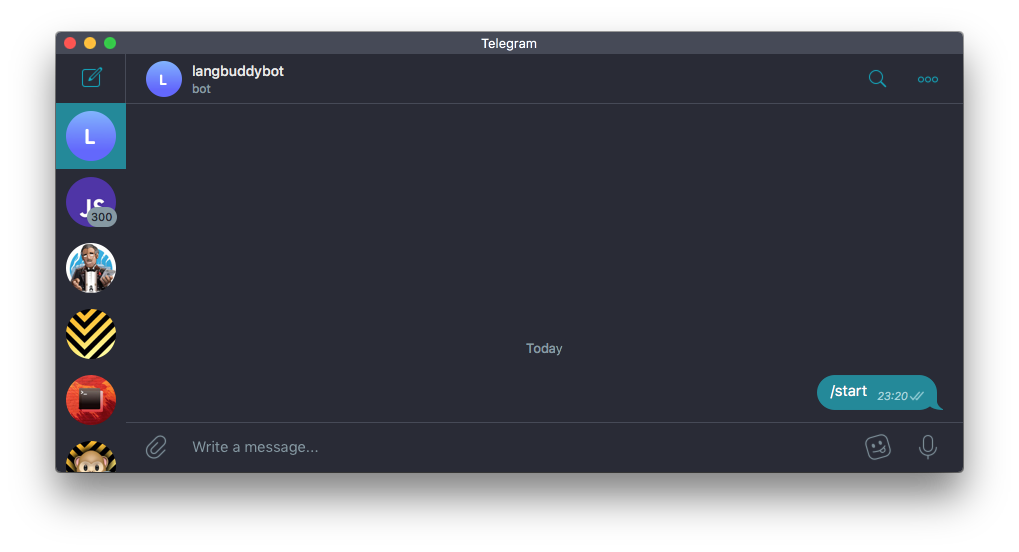
Click it, and then press the Start button at the bottom
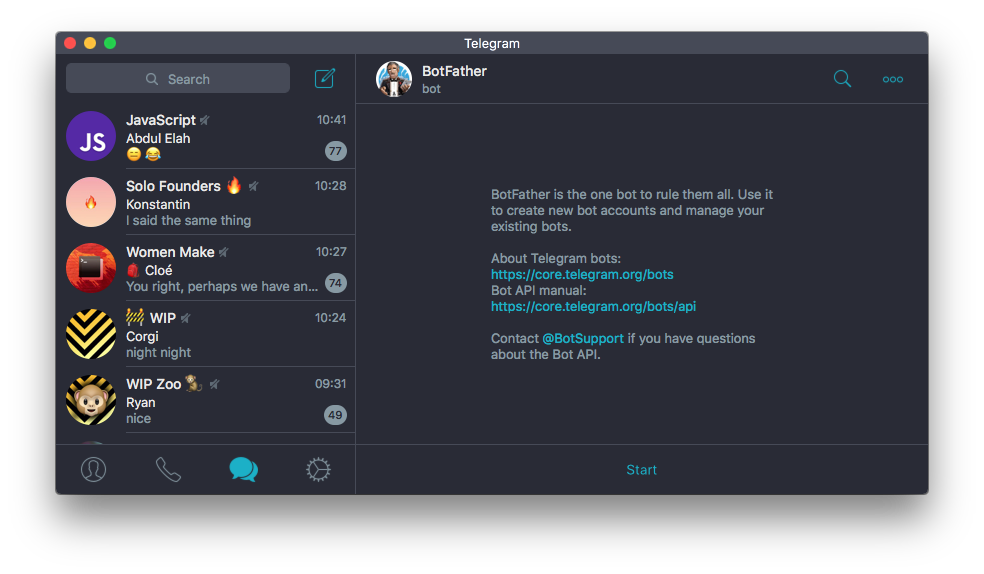
The bot will reply to the /start command (sent automatically when you click “Start”) with a list of the commands you can send it:
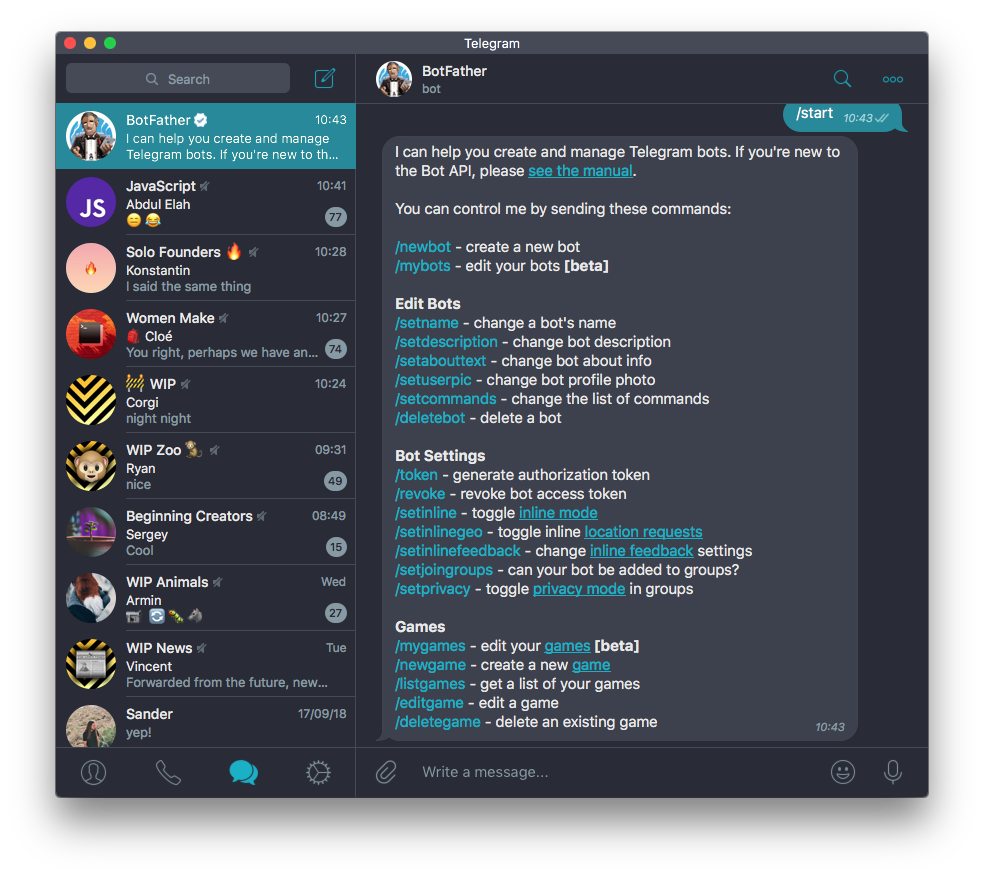
We need to use the /newbot command, here described as “create a new bot”.
You follow the instructions which basically ask for the bot name. I used langbuddybot , you can pick any name you want (you’ll have to choose your unique bot name):
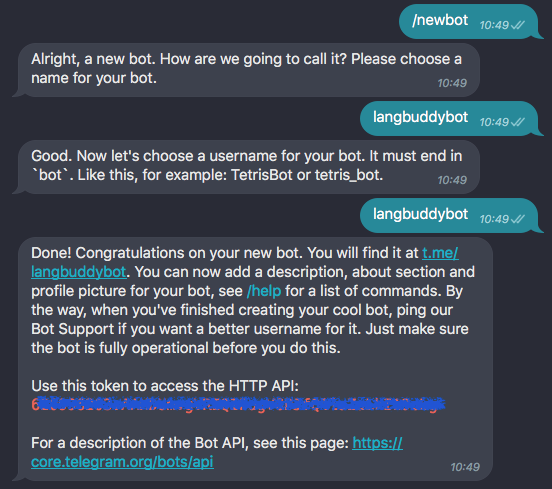
Note down the token. We’ll use that in our Node.js app.
The bot is now reachable at t.me/langbuddybot! We can talk to it, but nothing will happen. It’s just an empty placeholder.
We need to actually create the bot code.
GET STARTED WITH TELEGRAF
Although we could use the raw REST API that Telegram offers, we’re going to use a library called Telegraf .
Read a little about it on its official site and on GitHub.
Why use a library? Because every abstraction that can make things easy for us, the better!
This library in particular is very well done, well maintained and has lots of users (all good signs).
Tip: as a general rule I avoid libraries that have one or more years without any update (sign of possible abandon) or a small user base (like very few stars), unless you know what you are doing.
Install the library using npm i telegraf locally, or add it to the package.json file on Glitch.
Add the Telegram token that Botfather gave you to the .env file, to a variable named TELEGRAM_BOT_TOKEN :
TELEGRAM_BOT_TOKEN="XXXXXXXXXXXXX"
Then create a bot.js file and require telegraf:
const Telegraf = require('telegraf')
and initialize it using new Telegraf() :
const bot = new Telegraf(process.env.TELEGRAM_BOT_TOKEN)
START UP THE BOT
Remember when we started with Botfather? We had to click the “Start” button.
This is common to all bots. Until you click start, nothing happens.
Using Telegraf we can set our bot to respond to this command by simply adding a callback function to the start() method:
bot.start(ctx => ctx.reply('Welcome'))
Then all we need to do to create a fully functional bot is to call
bot.startPolling()
so that it automatically listens for new messages and chats.
Now we can press the “Start” button on our bot profile in Telegram and it will reply “Welcome”!
If you already pressed it before, right-click the profile and press “Clear History”. You will then start from a clean slate.
The start() command only runs once. Now that we started our interaction with the bot, we can listen for other things that are sent in the chat.
RESPONDING TO /HELP
We can react to the /help command, which is a standard command you can send to any bot. Bots usually explain how to use them.

How do we do that? We add a callback to the help() method:
bot.help(ctx => ctx.reply('Here\'s all the help I can give!'))
THE CONTEXT
What is ctx ? We saw it in start() as well. It’s the context object. Every request gets its own context object, and you can inspect it to gain more information about the message, including
-
ctx.messagethe received message -
ctx.inlineQuerythe received inline query (more on this later) -
ctx.fromthe message sender info
The ctx object also exposes some methods we’ll use to interact with the chat, including:
-
ctx.reply()sends a message to the chat
INTERCEPT ANY MESSAGE
Using the on() method you can intercept any message coming in from the chat, and do something. In this case we reply “Hey!”:
bot.on('message', ctx => ctx.reply('Hey!'))
INTERCEPT A SPECIFIC MESSAGE
You can listen for a specific message in the chat using
bot.hears('hi', ctx => ctx.reply('Hey there'))
Warning: this is case sensitive.
To respond to a command whatever the case is, use a regular expression:
bot.hears('/hi/i', ctx => ctx.reply('Hey there'))
Check out a guide to JavaScript Regular Expressions to know more about regular expressions.
USE THE YANDEX TRANSLATE API
I really wanted to use the Google Translate API. Just because I always use their app.
But, turns out the API is paid, so I looked at an alternative and I found Yandex Translate to be a good one.
Go to https://tech.yandex.com/translate/. If you don’t have a Yandex account, create one for free.
Then create an API key from the interface.
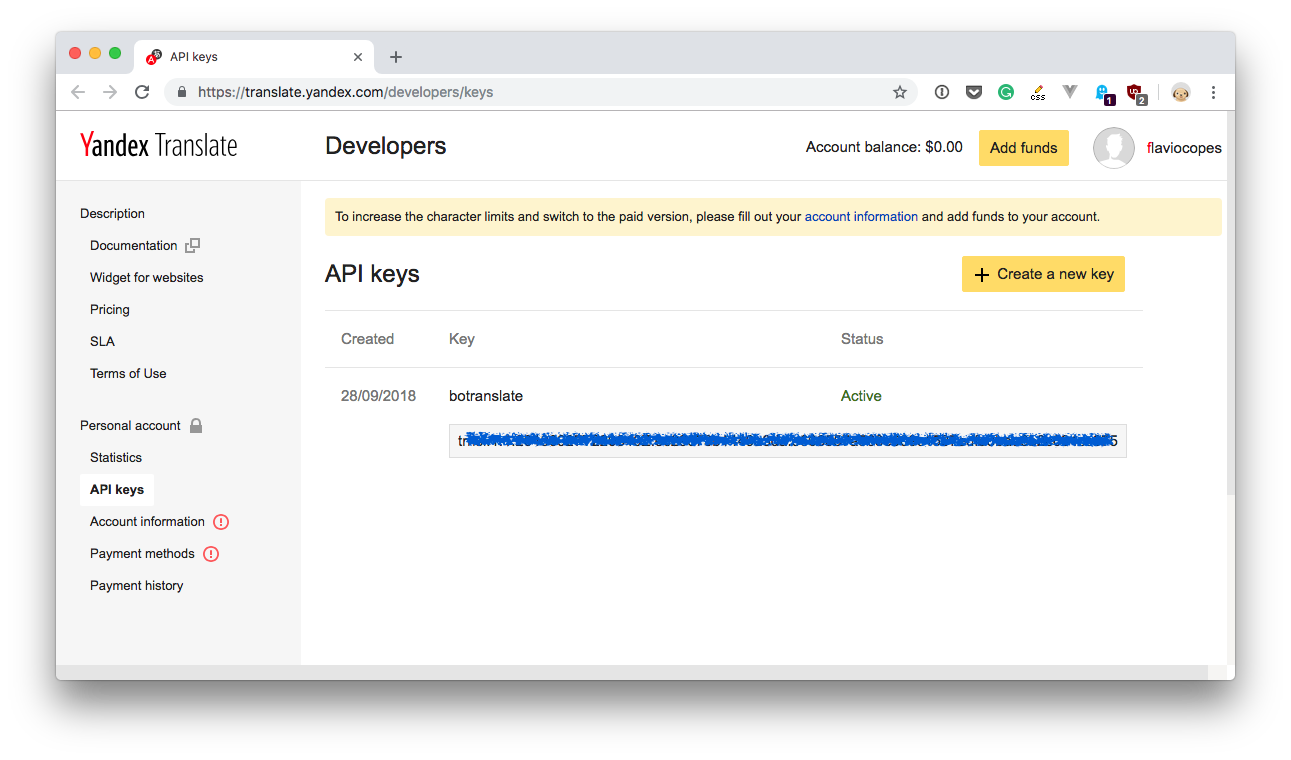
According to the Terms of Use for the Yandex.Translate service, the text Powered by Yandex.Translate must be shown above or below the translation result, with a clickable link to the page http://translate.yandex.com/. As this is just a private sample application, I won’t do it, but just be aware.
Now, store this API key in the .env file as YANDEX_API_KEY .
The Yandex Translate API documentation (https://tech.yandex.com/translate/doc/dg/reference/translate-docpage/) tells us to build an API request in this way:
https://translate.yandex.net/api/v1.5/tr.json/translate
 ?key=<API key>
 &text=<text to translate>
 &lang=<translation direction>
In the project introduction I mentioned we’ll use two commands to set the languages:
-
/from <language>will change the origin language to a specific one -
/to <language>will translate messages to that language
The preferences will be stored by the bot in the session, so every subsequent message will use those preferences.
The lang in the query parameter can take the form <from>-<to> or just <to> (in this case “from” will be guessed from the message). For example en or it-en .
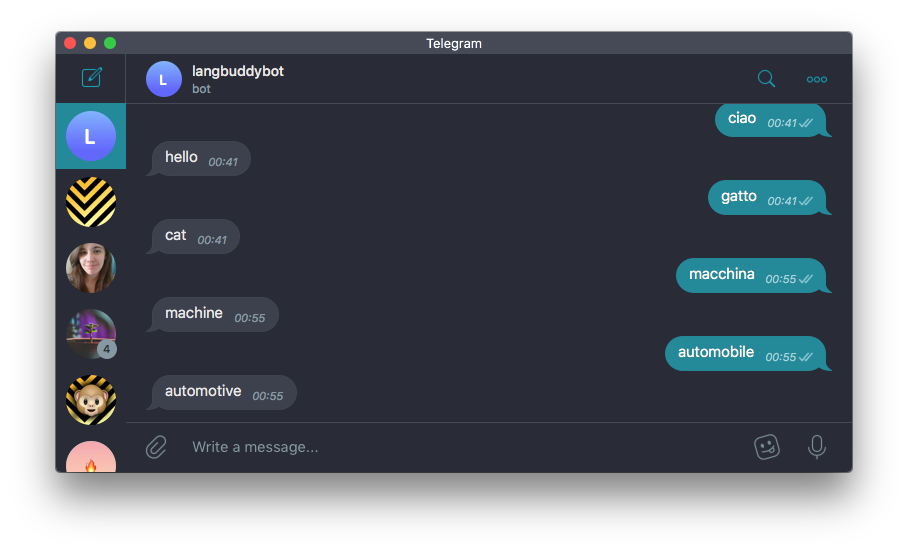
Let’s try this and translate to english every message that comes in.
We listen to every message using on() :
bot.on('message', ctx => {})
Using Axios ( npm i axios ) we’ll perform a network request to the Yandex Translate API.
See https://flaviocopes.com/axios to get an intro to Axios
We pass in the
paramsobject, and we listen for the promise to complete in thethen()callback:
const axios = require('axios')

//...
bot.on('message', ctx => {
  axios.get('https://translate.yandex.net/api/v1.5/tr.json/translate', {
    params: {
      key: process.env.YANDEX_API_KEY,
      text: ctx.message.text,
      lang: 'en'
    }
  }).then(res => {
    ctx.reply(res.data.text[0])
  })
})
See, we post the response in the chat by calling ctx.reply() and passing res.data.text[0] , which contains the response from the API.
Try it, it should work!
SET LANGUAGES IN THE SESSION
Right now our bot translates to english the language it detects.
We need to do 2 things now:
- manually set the
fromlanguage 2) change thetolanguage
We will provide the users of our bot these 2 commands:
-
/from <language>will change the origin language to a specific one (if nothing is specified, we’ll get back to guessing the from language) -
/to <language>will translate messages to that language. In this case we don’t allow an empty option.
Let’s do it!
First we add a from command. We look at the parameter passed, and we determine the language we need to set, doing some rough validation for the language code:
bot.command('from', ctx => {
  const lang = ctx.message.text.substring(6)

  if (lang.length > 2 || lang.length === 1) {
    ctx.reply('🤔 language code must be 2 chars, e.g. "en" or "fr"')
    return
  }

  ctx.reply(lang ? '✅ "from" language set to ' + lang : '✅ autodetect "from" language')
})
Then we add this parameter to the context session, which allows us to store some piece of data to the user chat:
const session = require('telegraf/session')
//...
bot.use(session())
//...

bot.command('from', ctx => {
  const lang = ctx.message.text.substring(6)
  //...validation

  ctx.session.from = lang
})
Now we do the same for to . We detect the language code, by using substring() on ctx.message.text , then we do a little bit of validation and we set it to the ctx.session.to property:
bot.command('to', ctx => {
  const lang = ctx.message.text.substring(4)
  if (lang.length === 0) {
    ctx.reply('🤔 please specify a language code! It must be 2 chars, e.g. "en" or "fr"')
    return
  }

  if (lang.length > 2 || lang.length === 1) {
    ctx.reply('🤔 language code must be 2 chars, e.g. "en" or "fr"')
    return
  }

  ctx.session.to = lang
  ctx.reply('✅ "to" language set to ' + lang)
})
In this case, just to be different, we don’t allow an empty value for the to language. We could have defaulted to english.
Last, we must use this language in the on() method which listens for messages, to translate to the correct language.
I use a ternary operator to determine the lang value in a concise way:
const lang = (ctx.session.from ? ctx.session.from + '-' : '') + (ctx.session.to || 'en')
This line means: if there is a from value, add it and add - . If there is no from value, just use the to value, and fallback to en .
Here it is this line in use:
bot.on('message', ctx => {
  const lang = (ctx.session.from ? ctx.session.from + '-' : '') + (ctx.session.to || 'en')
  console.log(lang)
  axios.get('https://translate.yandex.net/api/v1.5/tr.json/translate', {
    params: {
      key: process.env.YANDEX_API_KEY,
      text: ctx.message.text,
      lang: lang
    }
  }).then(res => {
    ctx.reply(res.data.text[0])
  })
})
STICKY SESSION DATA
There is a problem however, if the program relaunches, the session data is lost.
We can use a session storage middleware to solve this.
There are many options available on npm: https://www.npmjs.com/search?q=telegraf-session
I picked https://www.npmjs.com/package/telegraf-session-local which allows us to save the session to a local file. We’ll store it to .data/session.json in Glitch, as .data is a smart folder that’s not copied over when a project is remixed.
Install telegraf-session-local using npm.
The usage is super simple. Just require it:
const LocalSession = require('telegraf-session-local')
and now instead of calling
bot.use(session())
like we did above, run
bot.use((new LocalSession({ database: '.data/session.json' })).middleware())
This will make sure the session data is stored in the JSON file specified, and now if the app reloads, the session data will stick!
The current bot code is available at https://glitch.com/edit/#!/node-course-project-telegram-bot-a?path=bot.js
THE TRANSLATIONS HISTORY
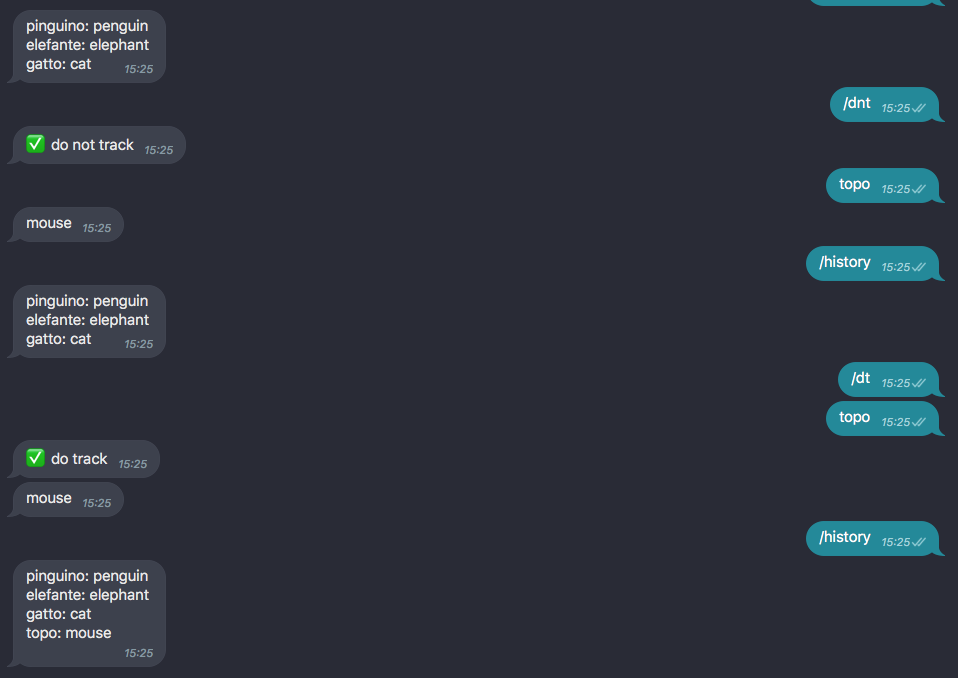
We’re going to store every translation requested, and the result of the translation, so the user can request it back using the / history command.
We’ll also allow the user to clear the history using /clear .
Plus, calling /dnt we’ll disable storing to the history for this particular user, and using /dt we can restore this functionality.
Let’s start by storing every message in the session, with its translation, right after we get it in the message event handler:
const translation = res.data.text[0]
ctx.reply(translation)

let messages = JSON.parse(ctx.session.messages) || []
messages.push({text: ctx.message.text, translation: translation})
ctx.session.messages = JSON.stringify(messages)
Now we can add a /history command handler:
bot.command('history', ctx => {
  try {
    ctx.reply(JSON.parse(ctx.session.messages).map(message => `${message.text}: ${message.translation}`).join('\n'))
  } catch (err) {
    console.error(err)
  }
})
See how we reply to the person. We parse the messages from the session (since they are stored as JSON), then we create a new array which is formatted as text: translation , and we join the array using new lines as separators, so we are pushing a string to the user.
Let’s also add a command to clear the chat history:
bot.command('clear', ctx => {
  ctx.session.messages = JSON.stringify([])
  ctx.reply('✅ history cleared')
})
We simply assign an empty array (as an array JSON-encoded to a string).
Let’s give the user the “do not track” option by typing the /dnt command. We store a dnt flag in the session:
bot.command('dnt', ctx => {
  ctx.session.dnt = true
  ctx.reply('✅ do not track')
})
and we also add a corresponding /dt command that restores the option to the original state. By default, we do track.
bot.command('dt', ctx => {
  ctx.session.dnt = false
  ctx.reply('✅ do track')
})
Let’s now add this flag in the on('message') callback:
//...
if (ctx.session.dnt === true) {
  return
}
let messages = JSON.parse(ctx.session.messages) || []
//...
The code for the project is available at https://glitch.com/edit/#!/node-course-project-telegram-bot-b?path=bot.js
CHALLENGES
If you got the mentoring package, you can clone the project at https://github.com/flaviocopes/node-course-project-telegram-bot and implement the following coding challenges. Once you are done, email me and I will review your work (if you got the mentoring package!)
- Add a handler for the
/helpcommand. Search in the Telegraf documentation how to respond to this command, and tell the user how they can interact with the bot - Make the bot work inline, so that when mentioned in any chat using @botranslate it will translate your message from/to the language you set, and send it instead of the message you wrote. Real-time translation!