Welcome to TinyHouse - Newline’s first Masterclass! In this Masterclass, we’ll learn how to build production web apps using React , GraphQL , Node , MongoDB , and TypeScript . The Masterclass is geared to be a hand’s on, project-based experience and we’re incredibly excited to have you with us!
We’re your instructors for this course - Hassan and Jing. Between us, we’ve authored Fullstack Vue, published a series of different publications under the Fullstack/Newline umbrella, worked on our own start-ups, and have built large-scale production apps with React, GraphQL, and TypeScript.
PART I & PART II
We’ve broken the course down into two parts. In Part I, we introduce all of the core technologies we’ll need to develop a full-stack web app. We’ll learn about Node, TypeScript, GraphQL & Apollo, MongoDB, and React Hooks. We’ll use these technologies to build a web app that presents listing data that is kept in a MongoDB database and accessed through a GraphQL API.
In Part II, we take everything we’ve learned from Part I to focus on building an actual production-ready application. We maintain and use all the things we learned in Part I but instead focus on building the TinyHouse application. We discuss the relationships and flow within our app as well as handle topics like Google OAuth for Sign In, Google’s Geocode to resolve location-based searches, image storage with Cloudinary, Stripe for handling payments, deployment and more.

Part II is currently under progress and is slated for completion in Q1 2020
!
NEWLINE
We’re excited to launch our Masterclass on the Newline platform. The Newline platform provides access to source code, screencast videos, and detailed manuscripts.
To reinforce learning material, the Masterclass also contains supplementary learning material such as quizzes, project challenges, lecture slides, and a lot more!
We’re incredibly excited to have you and we’ll see you in the course!
–
Hassan , Jing , and Nate
Welcome to Newline’s first Masterclass - TinyHouse .
TinyHouse is a structured, self-paced, online learning course designed to help you build a Universal JavaScript application. We’ll be working with a variety of different technologies such as React , GraphQL , and TypeScript to learn how we can build a real home-sharing app including authentication, data persistence, payments, and deployment.
TECHNOLOGIES
In this course, we learn how to build a full-stack JavaScript application with some of the most popular technologies being used today.
REACT
We use React extensively to build dynamic client UI and take a deep dive and use React Hooks to manage all component logic.
NODE
We create a web server with Node and Express to serve our GraphQL API and handle API requests by querying and manipulating data from the MongoDB database.
GRAPHQL
We build a robust GraphQL API within the Node environment. We first highlight the benefits of GraphQL over traditional REST APIs before using and implementing the GraphQL JavaScript library, the GraphQL Schema Language, GraphQL Scalar Types, Resolvers, etc.
APOLLO
With the help of the Apollo platform, we build a well documented, production-ready GraphQL API with the Apollo Server package. We utilize React Apollo (i.e. the Apollo Client utility) to have our React client request and cache data from the API and update the UI.
MONGODB
We construct a MongoDB cluster and database with the database as a service, MongoDB Atlas . Querying and manipulation of data is done with the help of the official Node Mongo Driver .
TYPESCRIPT
TypeScript is used extensively both on the client and the server to build a robust and type-safe application. We learn how to configure a project’s TypeScript compiler, use basic types and advanced types, use the DefinitelyTyped repository, and see how TypeScript can be used within a JSX environment.
ANT DESIGN
We leverage and use the Ant Design React UI framework to help build presentable and beautiful React components.
PART I
The TinyHouse course is broken down into two parts .
In Part I , we take an introductory approach to introduce all the different tools we’ll need to build the TinyHouse application. We’ll:
- Build our server with Node & Express.
- Introduce and use TypeScript.
- Set up a GraphQL API with Apollo Server.
- Persist data with MongoDB.
- Create a React project with
create-react-app. - Introduce and use React Hooks.
- Use Apollo Client to make our GraphQL requests.
- Finally, use the Ant Design UI framework to help style our client application.
By the end of Part I, we’ll have our React client application present a list of listings where the data is to live in a MongoDB collection. Our Node server will set up a GraphQL API where our client application will be able to query for listings or trigger a mutation to delete a certain listing.
Part I of the course contains:
- 65+ screencast videos (over 7hrs of recorded material ).
- Detailed manuscript (and code) for every single screencast video.
- 110+ multiple choice quiz questions.
- In-depth challenge projects.
- 8+ PDF cheat sheets
PART II
Part II is currently under progress and is slated for completion in Q1 2020!
In Part II , we take everything we’ve learned from Part I of the course and focus our efforts on building the TinyHouse home sharing application. We’ll:
- Establish client-side routing with React Router.
- Handle authentication with Google Sign In (and OAuth 2.0).
- Permit persistent login sessions with cookies and session storage.
- Handle payments with Stripe.
- Enable location searching with Google’s Geocode API.
- Handle image uploads with Cloudinary.
- Deploy with Heroku.
By the end of Part II, we’ll have a fully functioning home-sharing application where users will be able to sign in, create a listing, and book other listings.
Markup (i.e. HTML) and CSS/styling is not a primary lesson of this course . In Part II, we’ll provide all the custom CSS we’ll need from the beginning and move a little quicker in areas where we spend our time creating the HTML (i.e JSX) markup.
PREREQUISITES
Students should have an understanding of HTML, CSS, and JavaScript. Prior development experience working with a newer front-end technology (e.g. React) and Git/NPM is preferable.
Students are assumed to understand spoken and written English.
COURSE MATERIAL
Each part of the TinyHouse Masterclass is broken down into modules that each govern a section of the course that is to be addressed and learned. Course material contains the following:
- Screencast videos
- Manuscript
- Code samples
- Quiz questions
- Project challenges
- Cheatsheets
- Lecture slides
For every lesson, students are expected to proceed through the screencast video, survey the lesson manuscript, run code samples, and answer the lesson quiz questions to reinforce specific lesson topics.
HOW WE HELP
We’ve structured this course to be more than just screencast videos by providing a detailed manuscript, live code samples, and more.
- Proceed at your own time : We understand everyone has their own schedule which is why we’ve provided all the material for the course the moment you’ve enrolled. Feel free to venture through the material as fast as possible or to take your time.
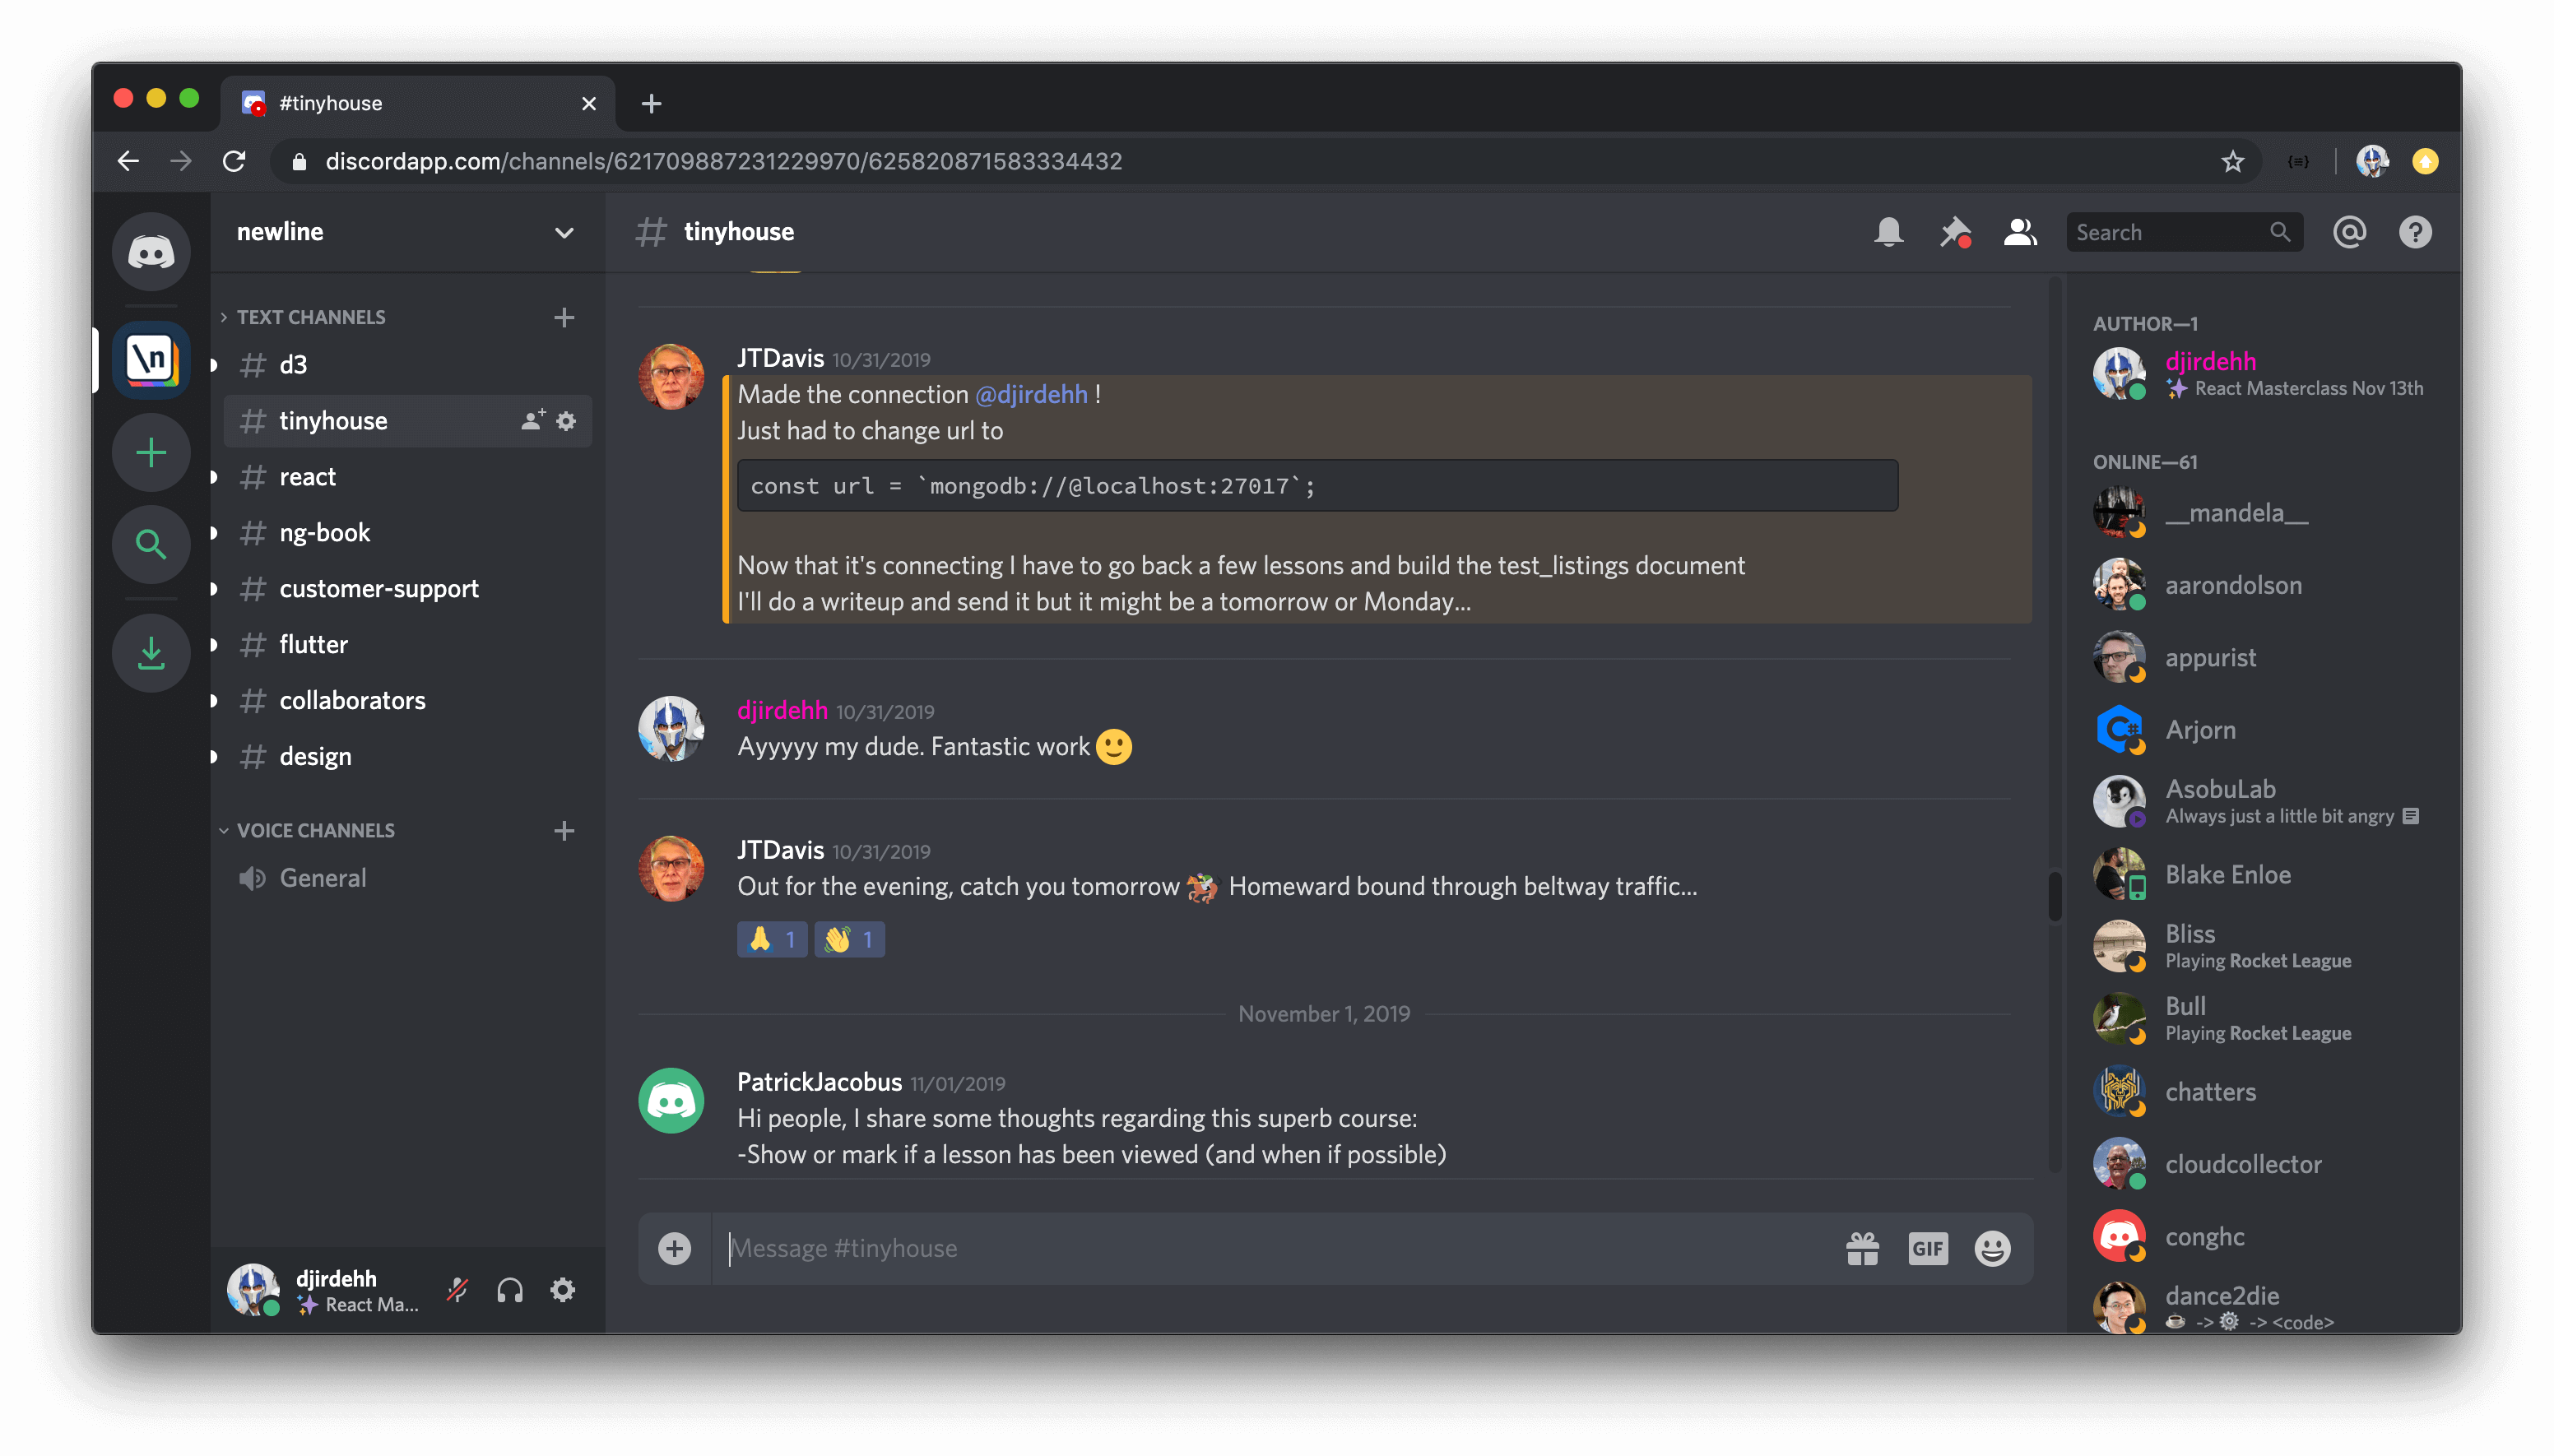
- Live online community : Feel stuck somewhere or need guidance on a certain topic? Hop on to the #tinyhouse channel in our Discord organization where you’ll be able to find help (and help others!). We (the instructors) will be on the channel as well.
While we’ve made every effort to be clear, precise, and accurate; you may find that when you’re writing your code, you may find an inaccuracy in how we describe something or feel a concept can be made more clear. If so, email us at us@fullstack.io! Similarly, if you’ve found a bug in our code we want to hear about it.
PART I STRUCTURE
In Part I, we introduce and learn all the patterns and concepts we’ll need to know to build the TinyHouse application. We’ll focus our efforts to build a simple page that surfaces a list of rental listings kept in a MongoDB database and available through a GraphQL API.
MODULE 1: GETTING STARTED WITH OUR SERVER
Node is a JavaScript runtime environment that was first introduced in 2009 by Ryan Dahl as a response to how slow web servers were at the time. We’ll learn how to set up a Node web server with the help of the Express framework.
- Learn what Node is.
- Run JavaScript with Node.
- Create a minimal Node/Express server.
- Enable automatic reloading with Nodemon.
- Introduce TypeScript.
- Add TypeScript to our server.
- Compile our TypeScript project.
- Lint our code with ESLint.
- Introduce mock listings.
- Create GET and POST Express routes.
MODULE 2: COMPARING GRAPHQL/REST APIS
GraphQL is a powerful query language for APIs that allow client applications to request the specific data they need. In this module, we explain and introduce GraphQL and some of its core concepts.
- Learn what GraphQL is.
- Compare Github’s REST & GraphQL APIs.
- Learn some of the core concepts of GraphQL.
MODULE 3: USING APOLLO SERVER
GraphQL, as a specification, can be implemented in many different programming languages. We’ll create a GraphQL API with the Apollo Server package to interact with the mock data in our app.
- Install Apollo Server and GraphQL JS library.
- Create a GraphQL Schema with the GraphQL JS library.
- Query and mutate listings data with GraphQL.
- Recreate the Schema with the GraphQL Schema Language.
MODULE 4: STORING DATA WITH MONGODB
We move away from handling mock data and use a database to contain any data we want to be persisted in our application. We establish this database with MongoDB and use a database as a service known as MongoDB Atlas.
- Learn what MongoDB is and how non-relational databases work.
- Set up a new MongoDB Cluster with MongoDB Atlas.
- Connect the Node server with MongoDB with the official Node Mongo driver.
- Learn how TypeScript Generics can help add types to our database collections.
- Set up environment variables.
- Seed mock data to the database.
- Modularize our GraphQL Resolvers.
MODULE 5: GETTING STARTED WITH REACT
React is a JavaScript library for building interactive user interfaces. React changes the way we do front-end development by allowing us to build UI in a declarative manner, with reusable components, and the JSX syntax.
- Learn important React concepts.
- Use the
create-react-appcommand line to scaffold a new Webpack bundled React application. - Walkthrough the files and folder structure of a
create-react-appscaffolded project.
MODULE 6: BUILDING OUT LISTINGS
With our new React project created, we’ll work towards having our React client app make API requests to our server through GraphQL.
- Create a functional
<Listings>component. - Investigate how we can type check for
propsin a component. - Investigate how we can define the type of a functional component.
- Create a POST request to query listings information from the API.
- Abstract the type of data being requested with the help of Generics.
- Have the client be able to trigger the mutation to delete a listing.
MODULE 7: GRAPHQL AND REACT HOOKS
React Hooks have been one of the biggest paradigm changes to the React ecosystem and are essentially functions that allow components to hook into specific features.
- Introduce and understand how React Hooks work.
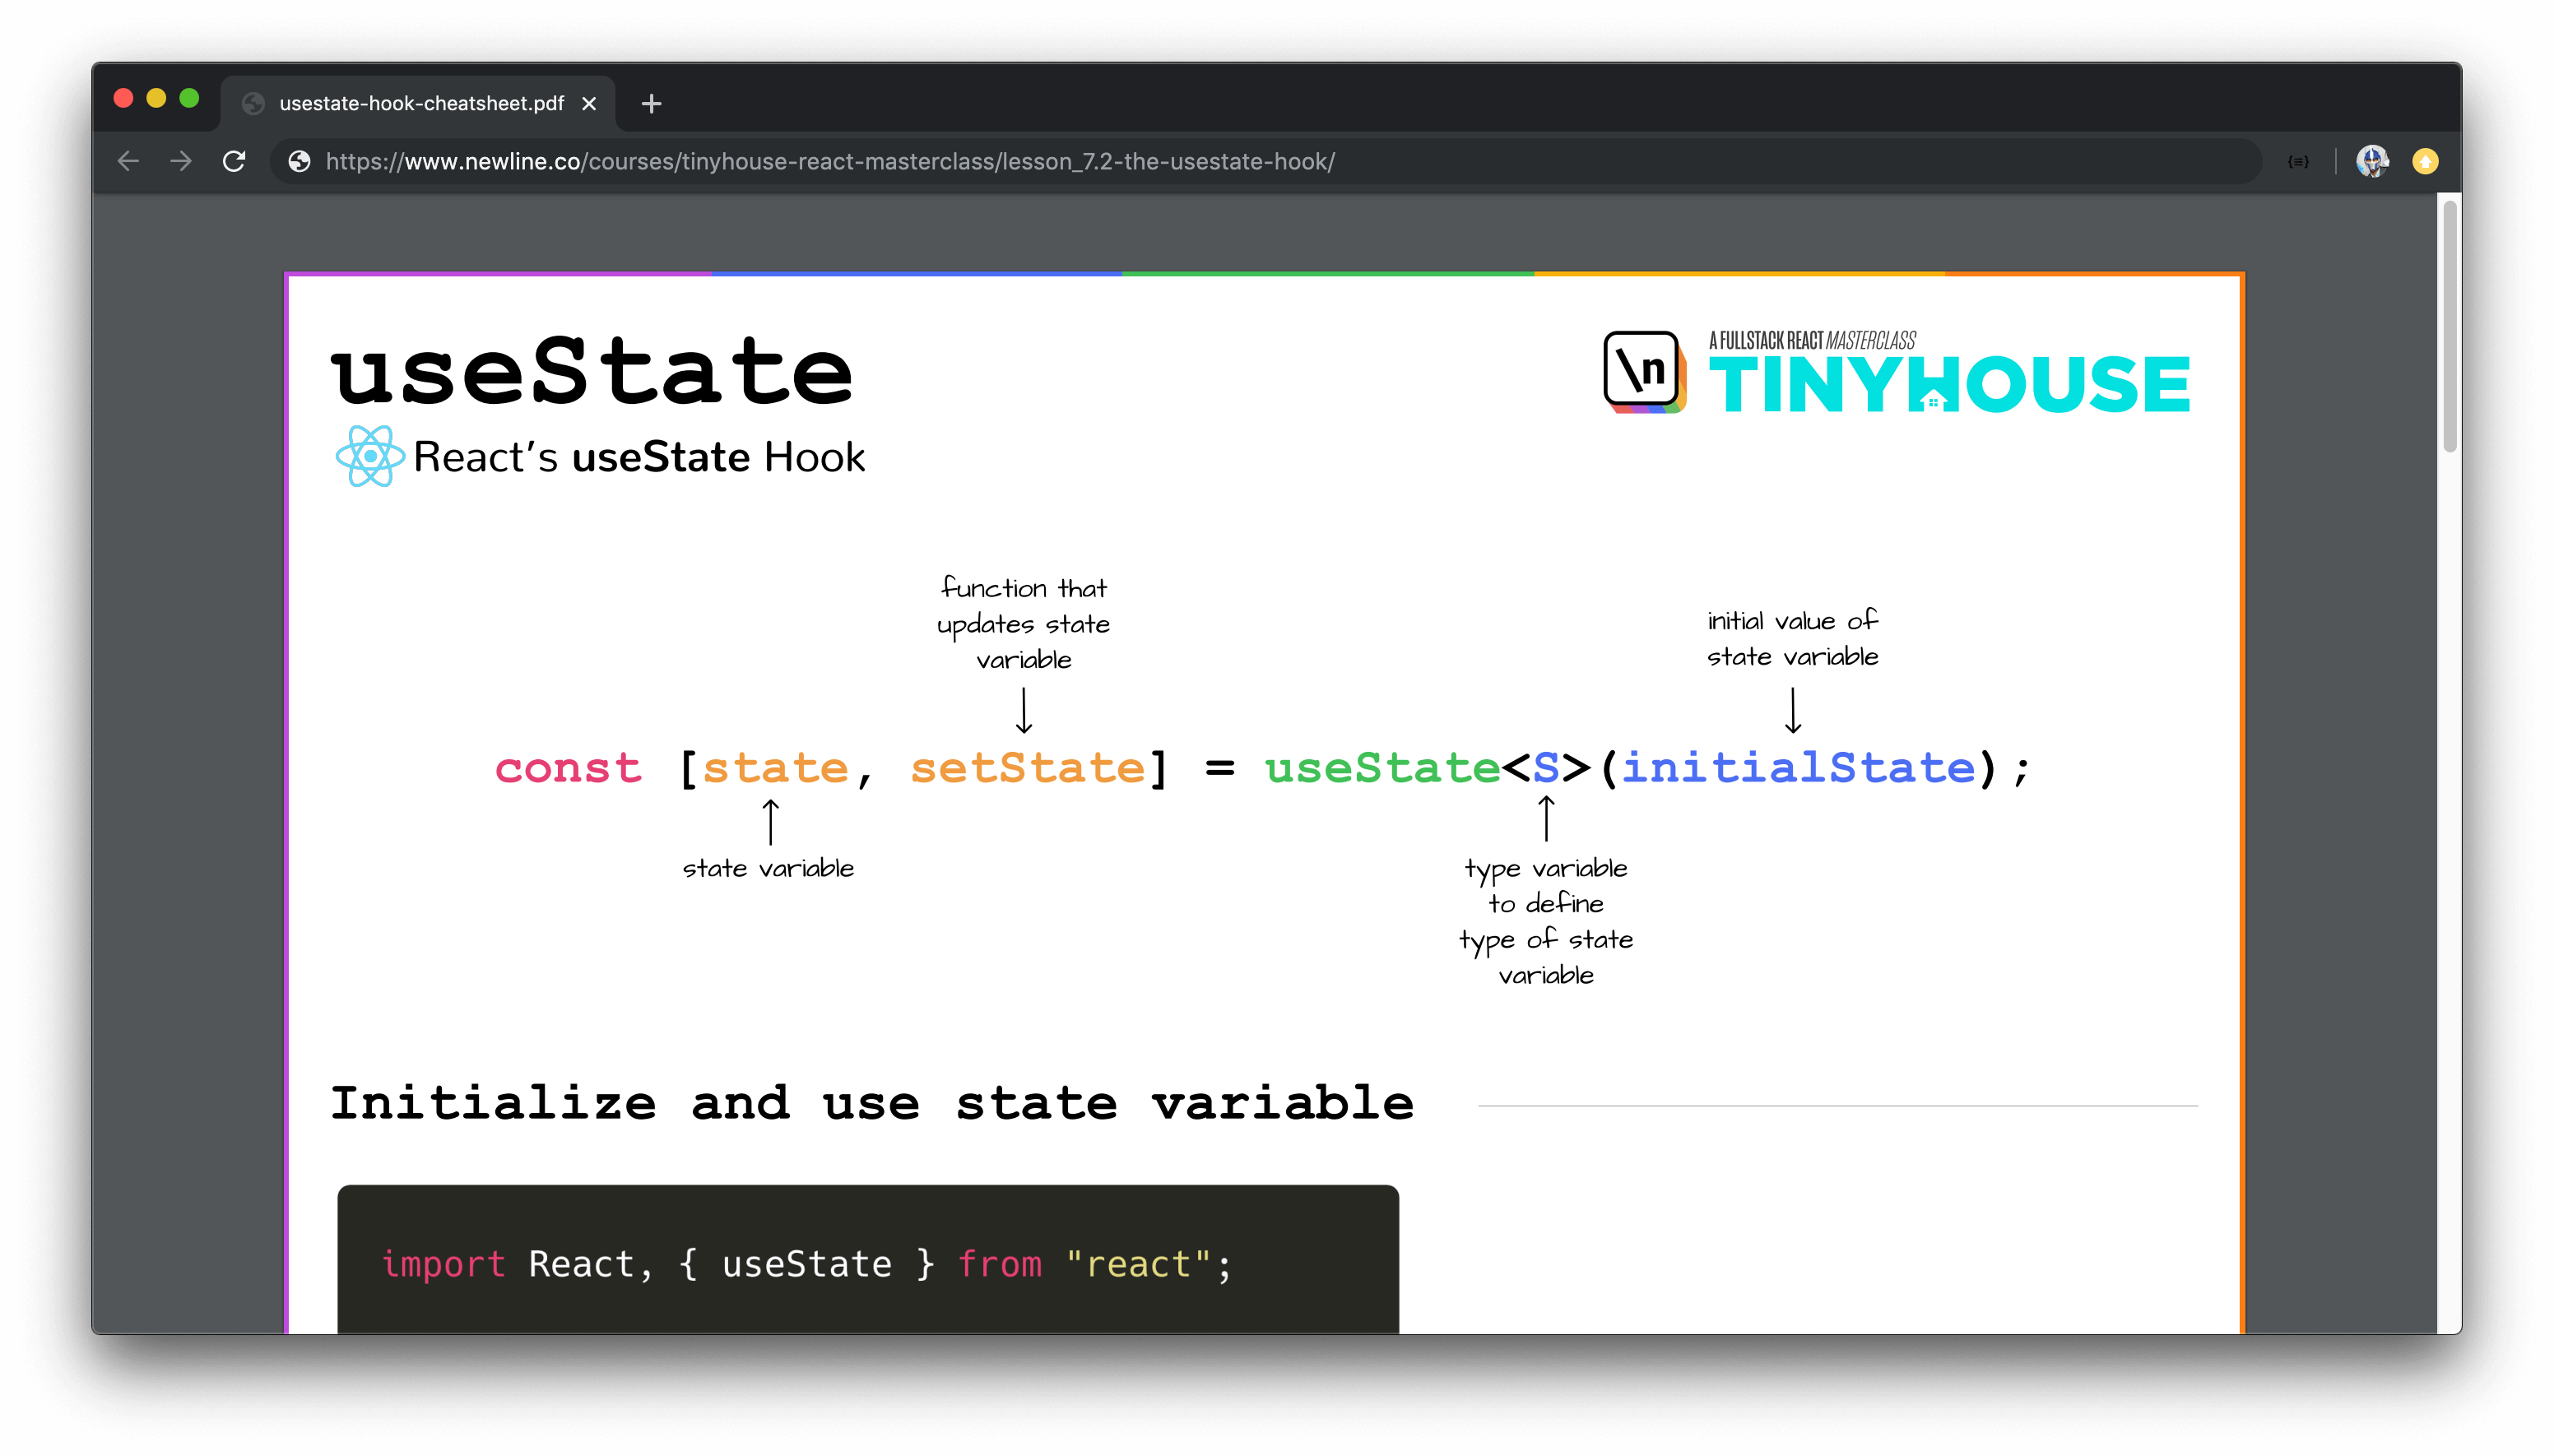
- Use the
useStateHook to track state in our component. - Use the
useEffectHook to have our GraphQL query be made when our component first renders. - Create and use a custom
useQueryHook to consolidate how components can execute GraphQL queries. - Extrapolate the capability to refetch a query from the
useQueryHook. - Have loading and error information be returned from the
useQueryHook. - Create and use a custom
useMutationHook to consolidate how components can execute GraphQL mutations. - Investigate and use React’s
useReducerHook to handle state and state changes in a more controlled manner.
MODULE 8: INTRODUCING REACT APOLLO
Though our custom Hooks implementation for interacting with the GraphQL API works, there are limitations for performing more complicated functionality which is why we’ll switch over to using Apollo. Apollo Client from the Apollo ecosystem provides a declarative API and intelligent caching to help client applications query GraphQL fields in a predictable and declarative manner.
- Create our Apollo Client.
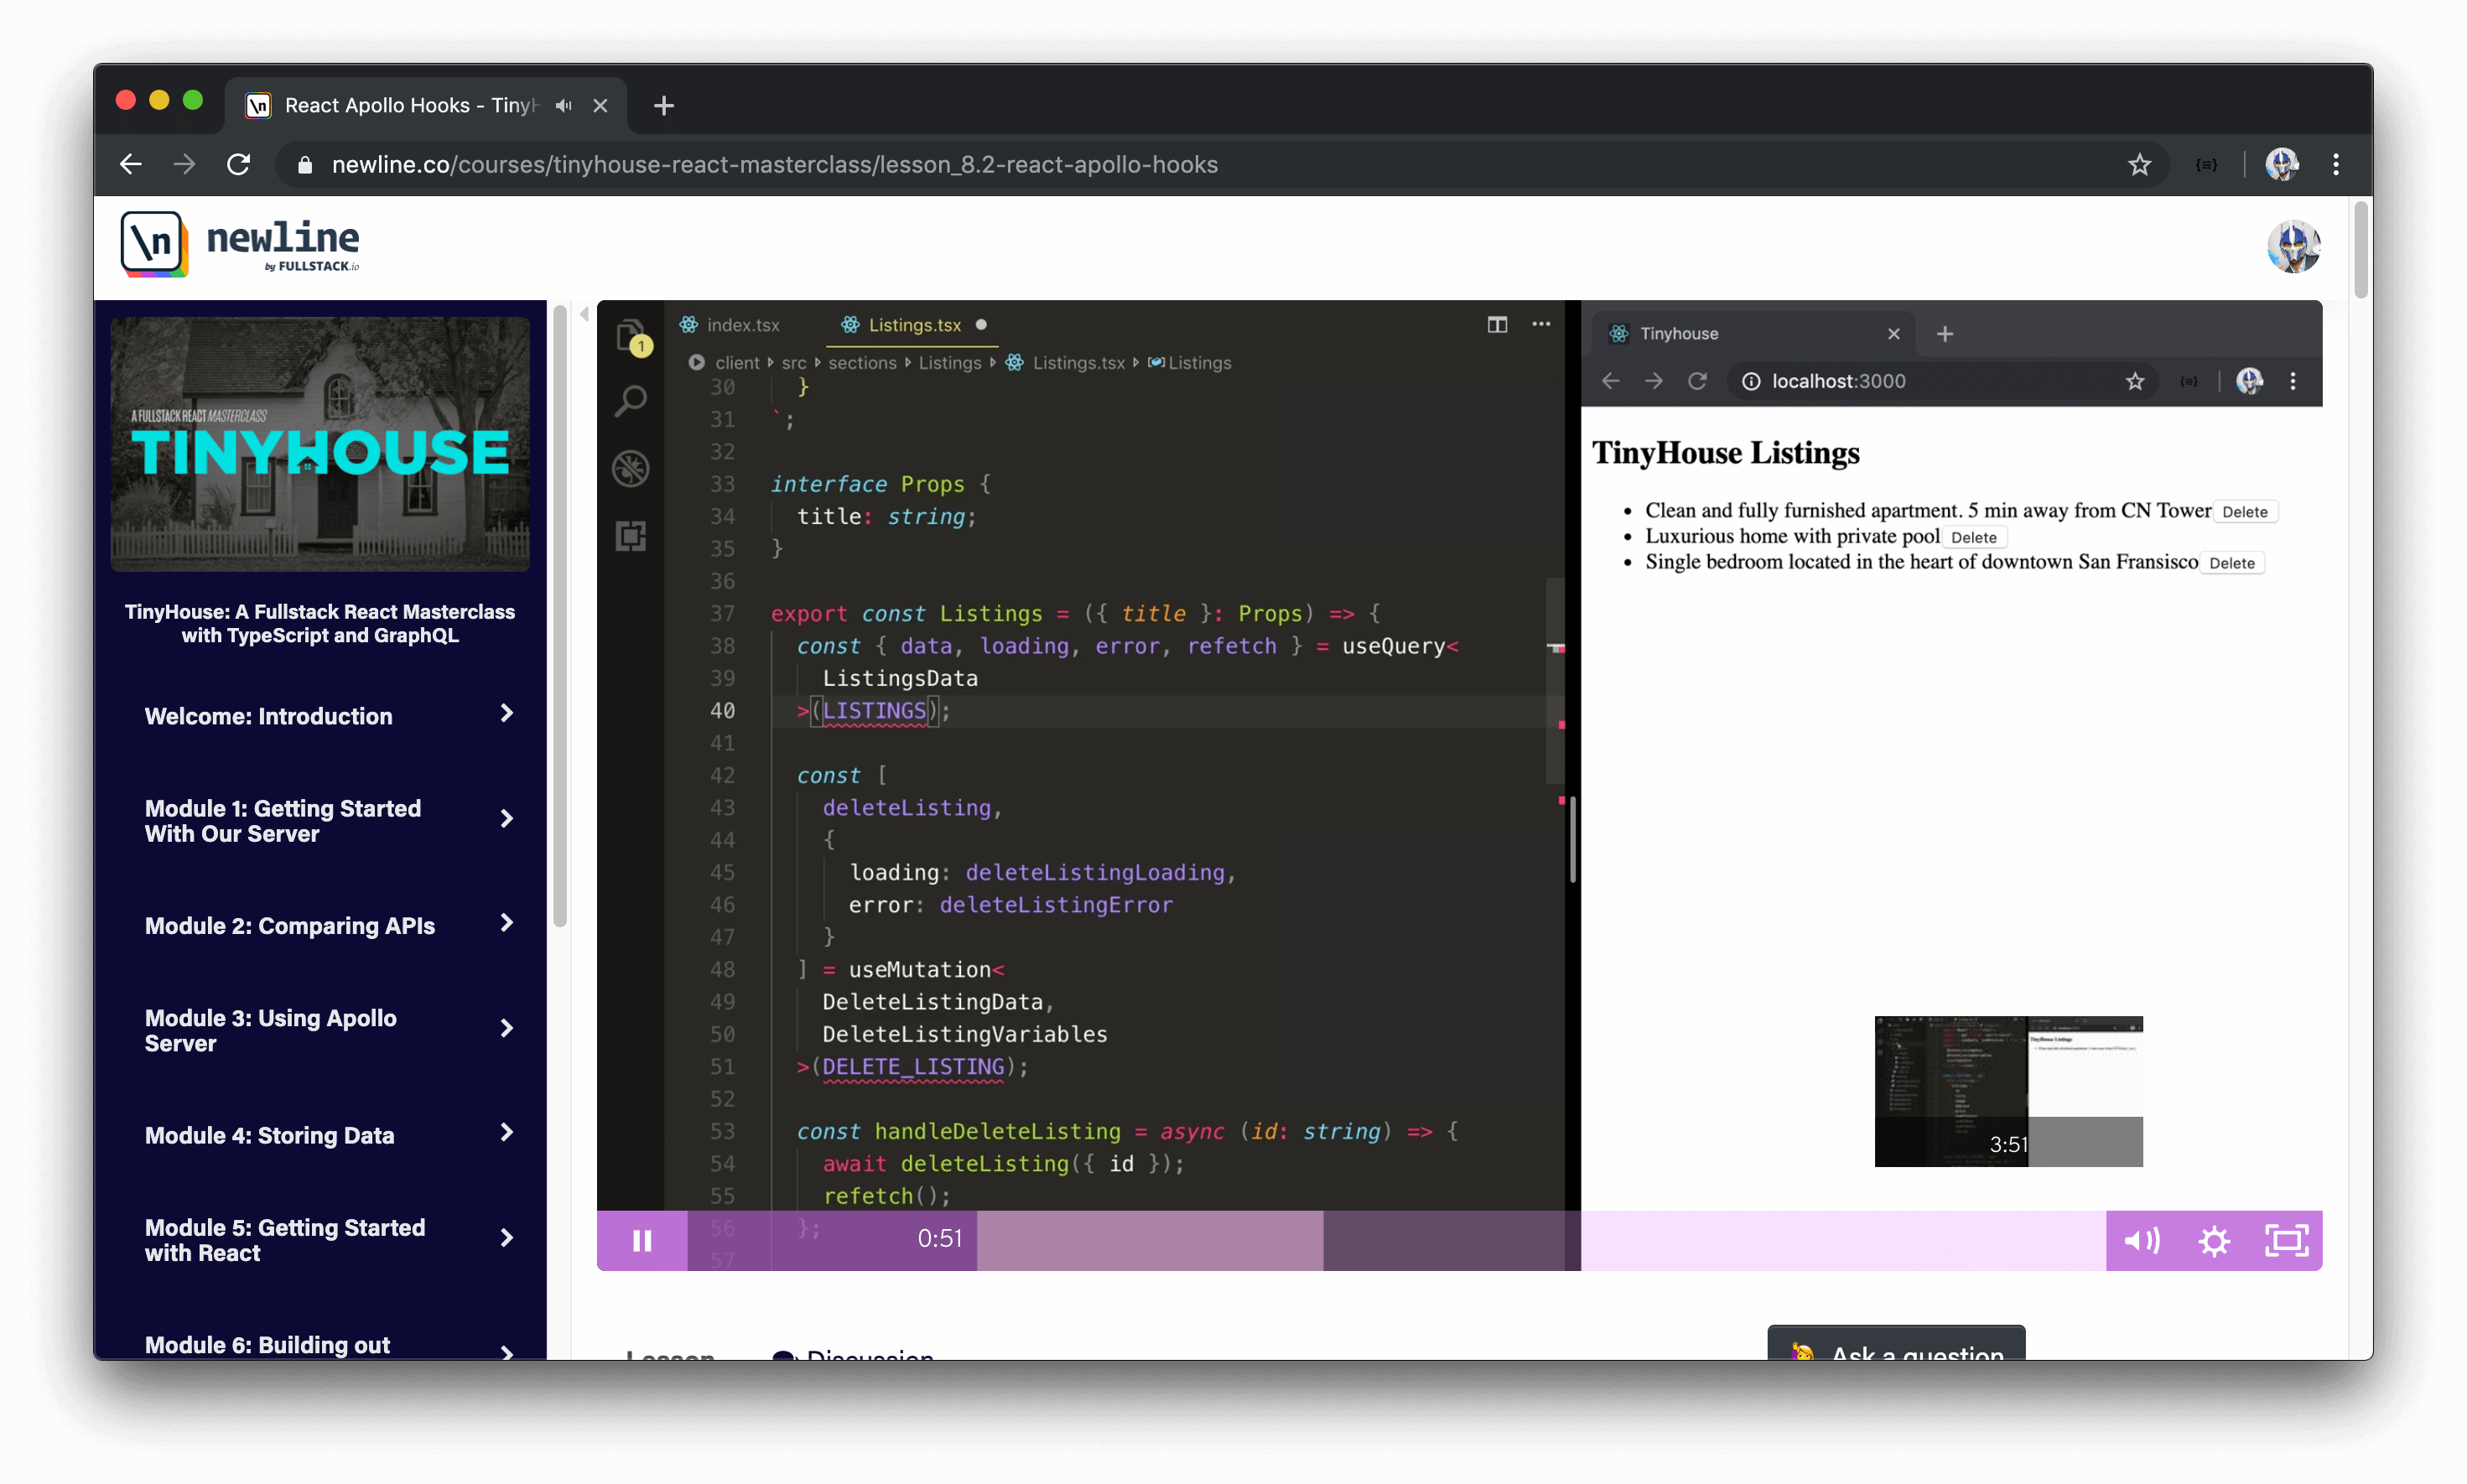
- Utilize and use React Apollo’s Hooks to conduct GraphQL requests.
- Autogenerate TypeScript definitions with the Apollo CLI.
MODULE 9: STYLING WITH ANT DESIGN
UI/CSS frameworks are packages containing pre-written, standardized, and often well-tested template and CSS code to help speed up development in providing a consistent UI experience. We introduce and use the Ant Design React UI framework to make our client look a lot more presentable.
- Discuss how certain UI/CSS frameworks work and introduce Ant Design.
- Utilize components from the Ant Design framework to style our client application.
PART II STRUCTURE
Part II is currently under progress and is slated for completion in Q1 2020!
HOW TO GO THROUGH THE COURSE
NEWLINE PLATFORM
The Newline Platform is where you’ll be able to access the vast majority of material available in the TinyHouse course. The Newline platform is newly built and TinyHouse is the first Masterclass and course to be part of it. It’s where you’ll find the screencast videos , lesson manuscript , links to accompanying course material , and other course material .
When enrolled in the course, you should be able to find TinyHouse as an available course in your account’s library dashboard.
LESSON VIDEOS
The lesson videos are a core component of the TinyHouse course. Every single lesson contains a clear recorded screencast video where every line of code is explained and shown for you to follow along.
There are a few different types of lecture videos.
Module Introductions
At the beginning of every module, you’ll see a video of us (the instructors) summarizing the gameplan of that respective module. In these lecture videos, we’ll discuss what we might have learned from the previous module, what we intend to learn from the upcoming module, and the steps we’re going to take to complete the module.
Lectures
When we introduce a new technology or concept, we might explain the technology (or concept) in a lecture video. These lecture videos take a more informative approach where we’ll go through lecture slides that will be used to explain the topic.
Writing Code
The videos where we write code to build the applications in the course make up the majority of lesson videos. Each of these lesson videos is broken down into a concise format whereby the end of the lesson video, we’ll have a sample of runnable code that conveys what we intended to do in the lesson.
Module Conclusions
For the larger modules in the course, we’ll have a conclusion video at the end of the module that will summarize what we’ve done to complete the module.
LESSON MANUSCRIPT
A big piece of this course is the lesson manuscript. Every lesson comes with a complete transcript alongside the video.

Within the manuscript, we’ve embedded concise code samples as we proceed through the lesson. If interested, you can treat the manuscript with all the code samples as a Newline book of its own!
QUIZ QUESTIONS (AND SOLUTIONS)
For the vast majority of lessons, multiple-choice quiz questions (and their solutions) are available to you.
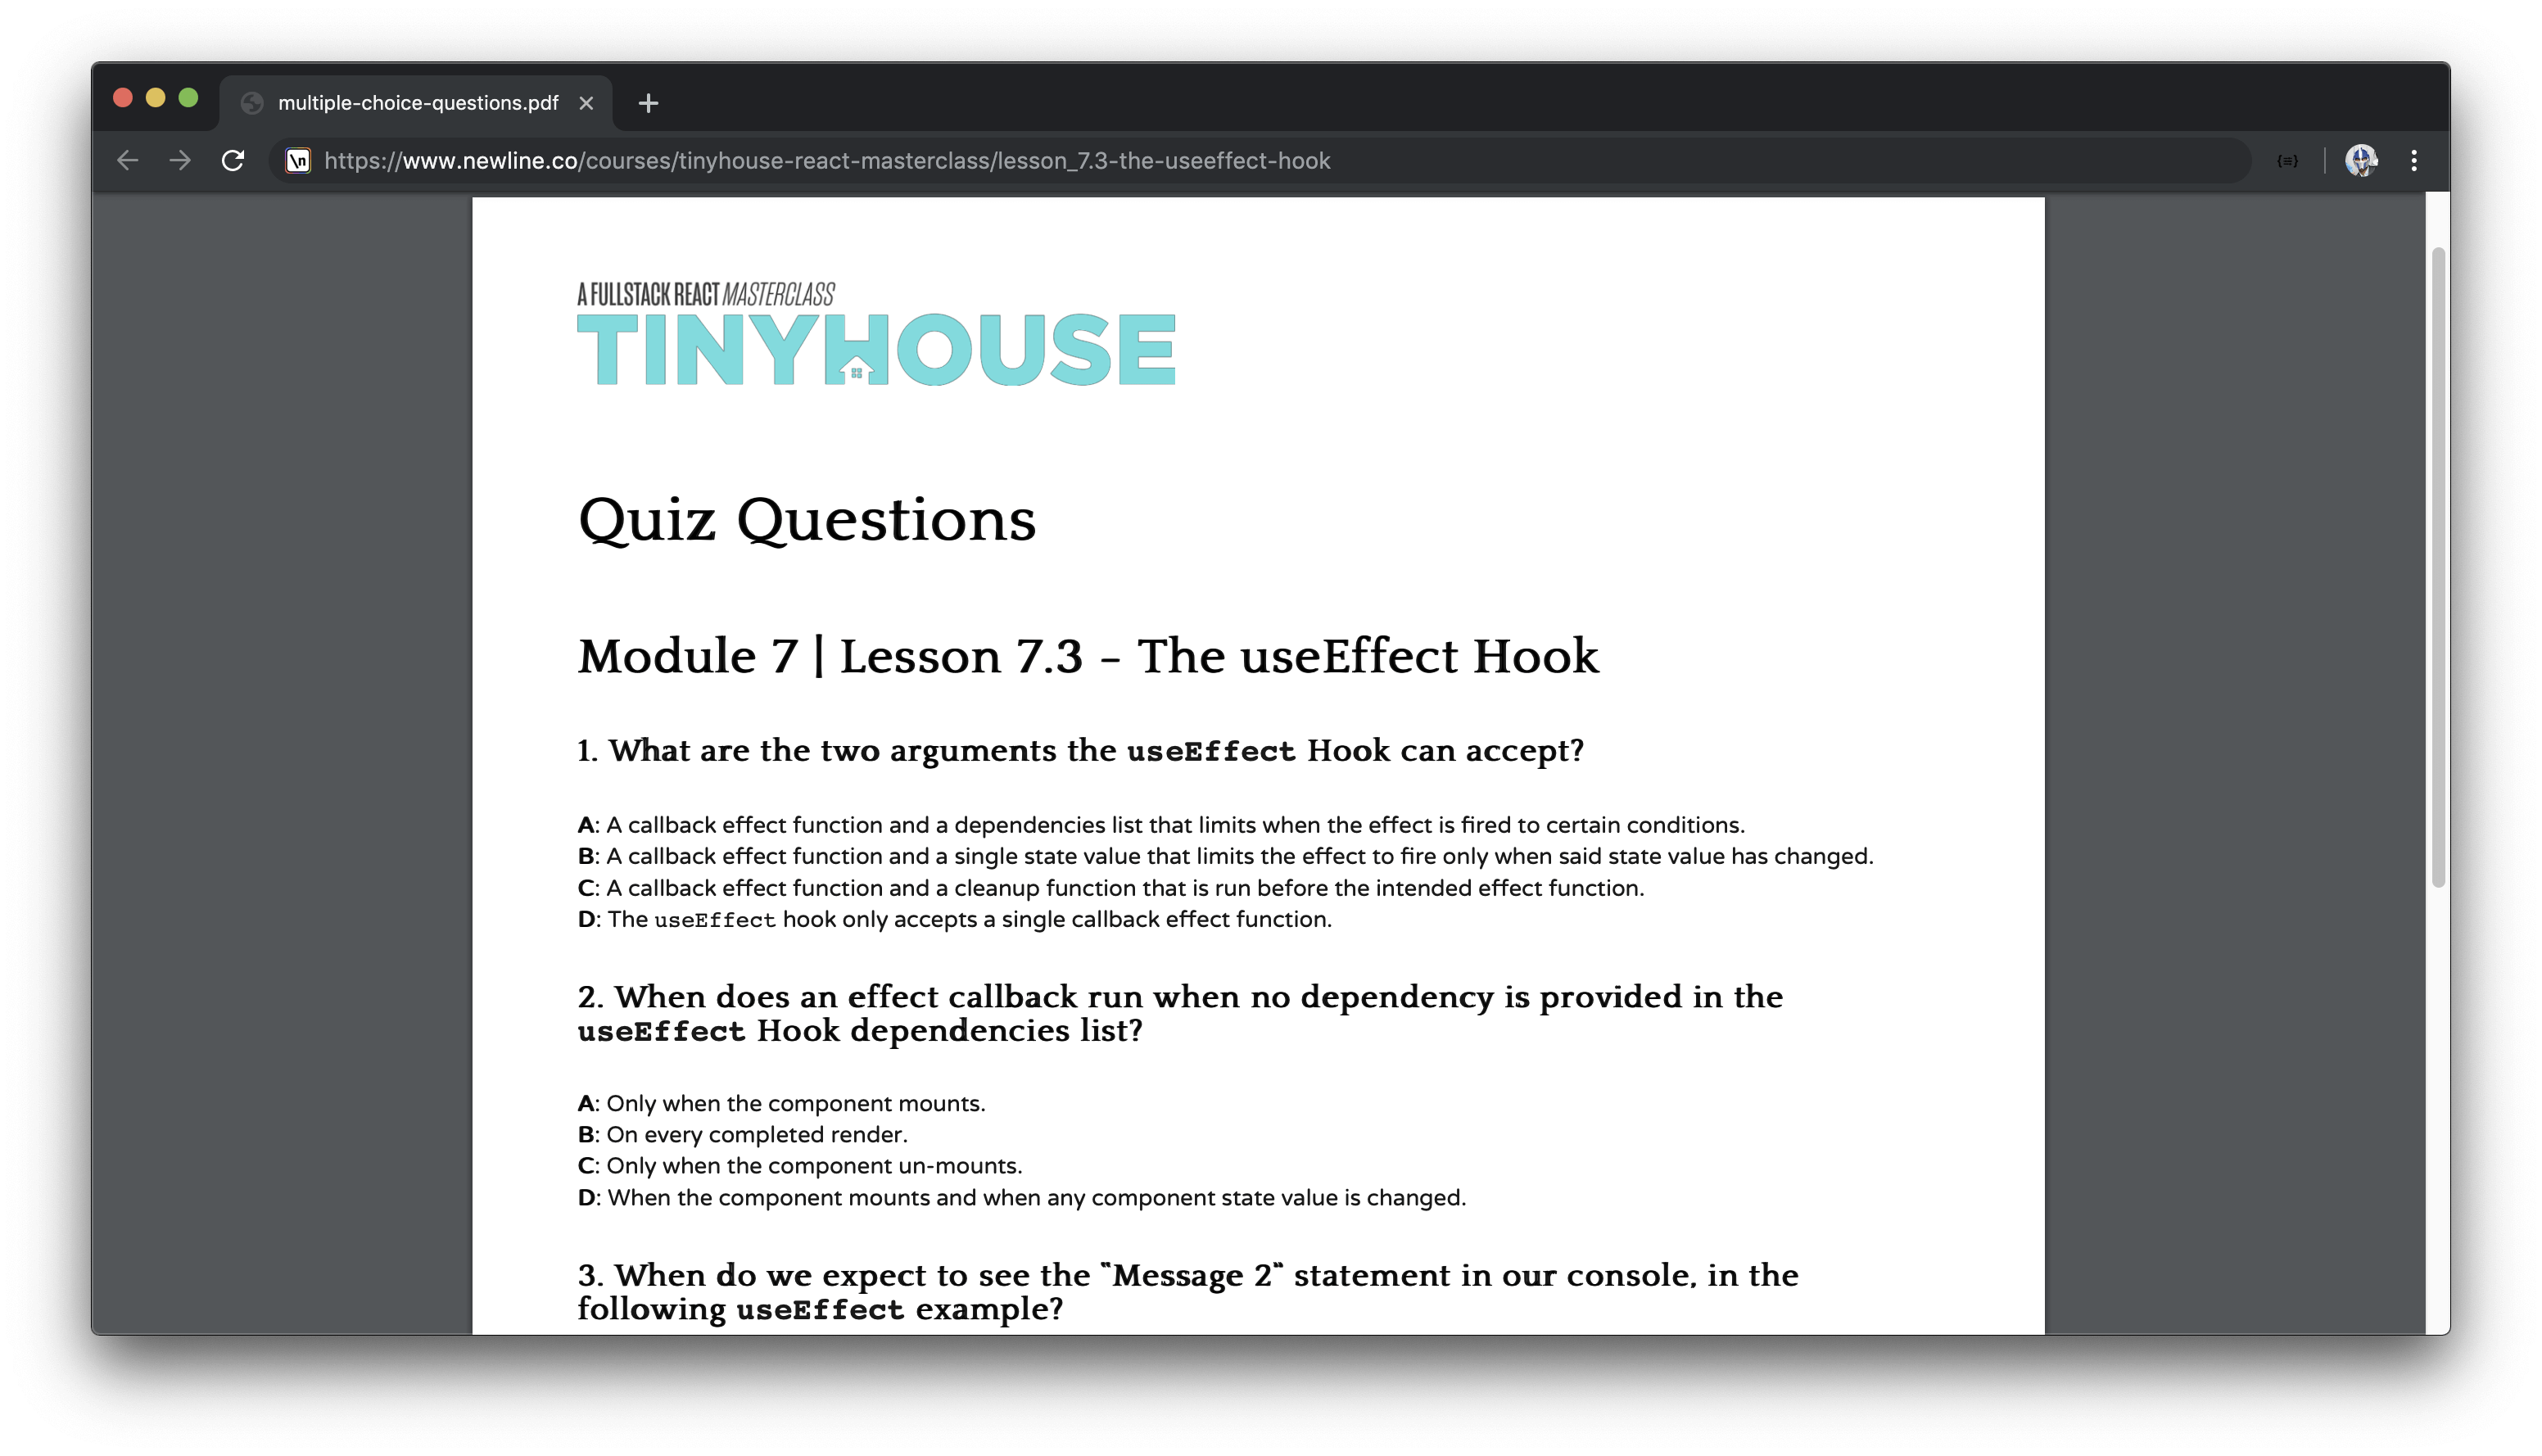
The quiz questions aren’t intended to be very difficult (or tricky) but are intended to reaffirm important concepts within lessons.
CHEAT SHEETS
For a few lessons within the course, we’ve provided cheat sheets to summarize certain topics/patterns we’ll notice in our code.
Note that the cheat sheets provided are not intended to cover every single use case of a particular topic but are geared towards documenting repetitive patterns that we might refer to often.
LECTURE SLIDES
For the lesson videos that have lecture slides, we’ll share those lecture slides as downloadable assets as well.
COMPLETE CODE PROJECT
The code project directory, shared with you in the first lesson of the course, contains the complete code samples for every lesson where code is written.
In the project code directory, every lesson folder also contains the assets and material for that lesson such as the lesson manuscript, lecture slides, quizzes, etc.
PROJECT CHALLENGES
Project challenges can only be found in the project code directory shared with you and are intended to be structured code problems that allow you to try your skills in a new domain.
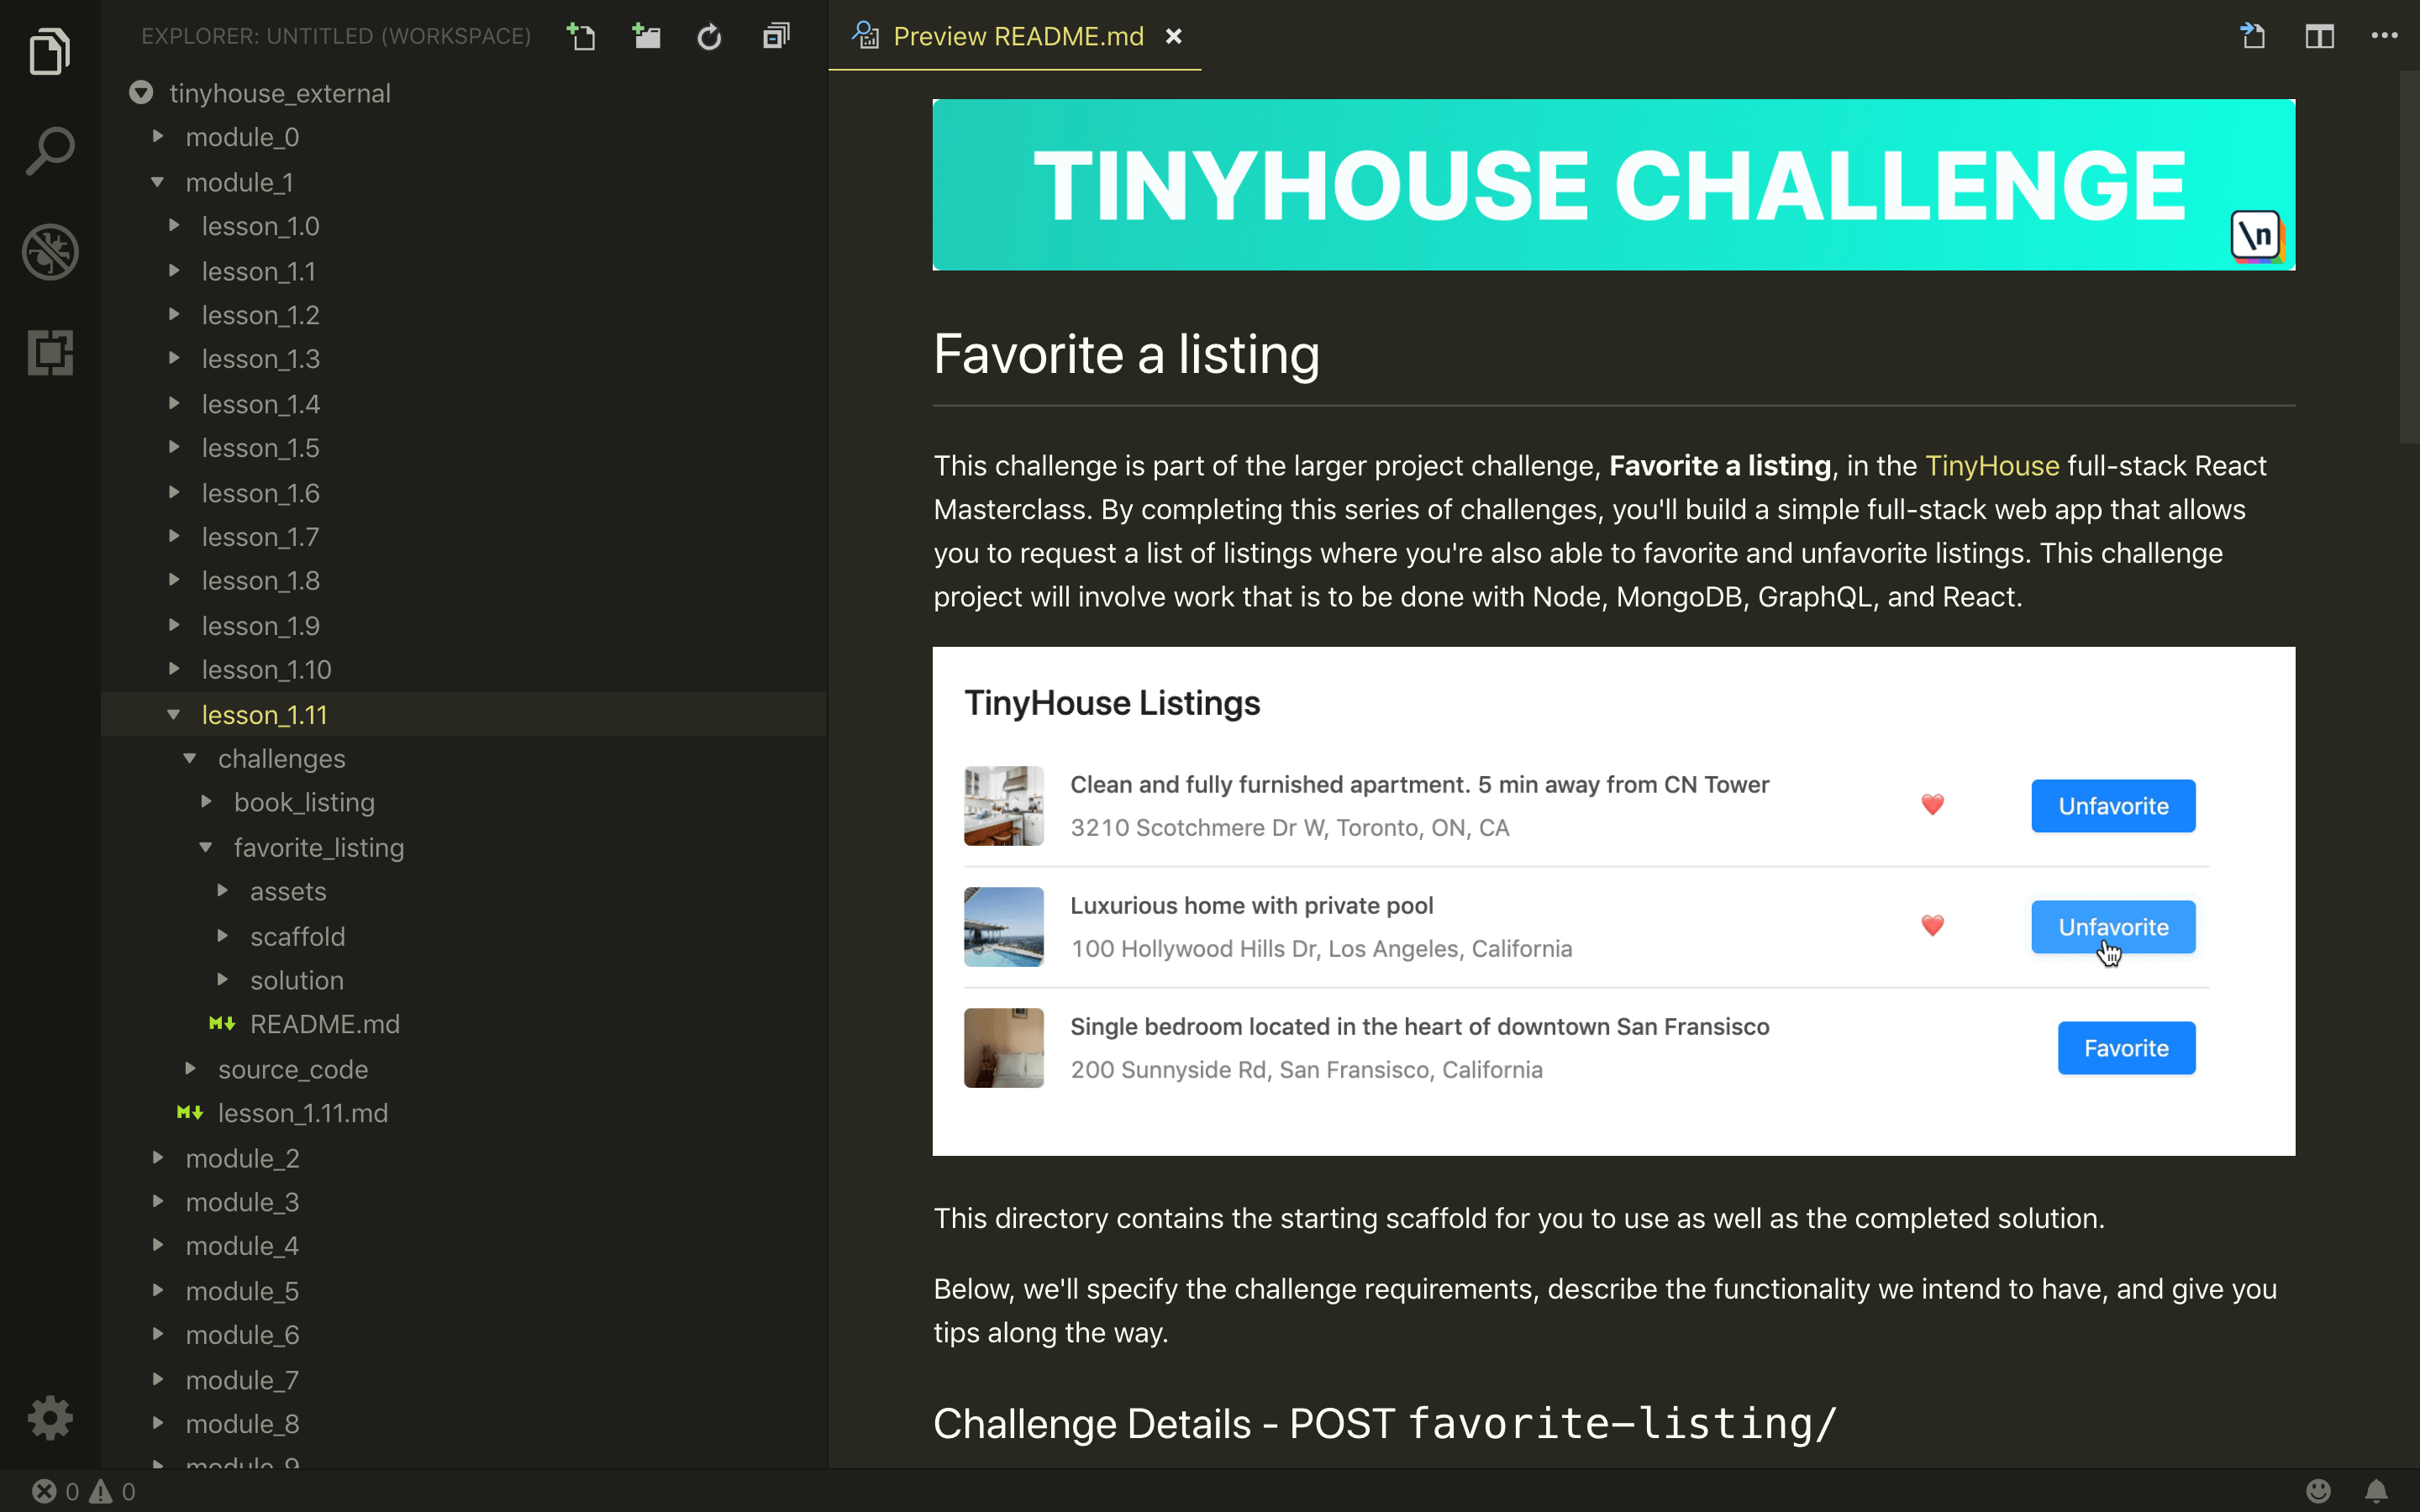
In the README.md file located within the root of the shared project code directory, a summary section will be provided highlighting the challenges and where they can be found in the project directory.
ASKING QUESTIONS
Within every lesson in the Newline platform exists a Discussion tab where you’re able to ask a question at a certain timestamp within a video.

A notification system is currently being built within the platform to handle being notified when a question might have been asked and/or answered. In the meantime, we’ll be keeping our eyes peeled for anything that might have been asked through the Discussion section of the lesson videos.
The other area where you’ll be able to ask questions is the live online community we have in our Discord organization. In the #tinyhouse channel, you’ll be able to find help and even help others! (We, the instructors will also be in the channel as well).
HOW TO GO THROUGH THE COURSE
You’re welcome to proceed through the course as you see fit but we do encourage you to:
-
 Watch the lecture videos.
 -
 Build the code samples.
 -
 Compare your results.
 -
 Answer quiz questions.
 -
 Take a look through the cheat sheets.
 -
 Tackle challenges when available.
 -
 And share your journey!
We’re interested in hearing any feedback you might have as you proceed through the course. Do let us know if there are certain things you liked, other things you might have preferred, etc. We’re committed to making this course as robust as possible so we’ll be happy to hear everything you might want to share!
ENVIRONMENT SETUP
We recognize everyone has their own development working environment and set-up. In this lesson, we’ll discuss some of the tools and items we’ll use in this course for you to either follow along with or find an appropriate replacement.
VSCODE
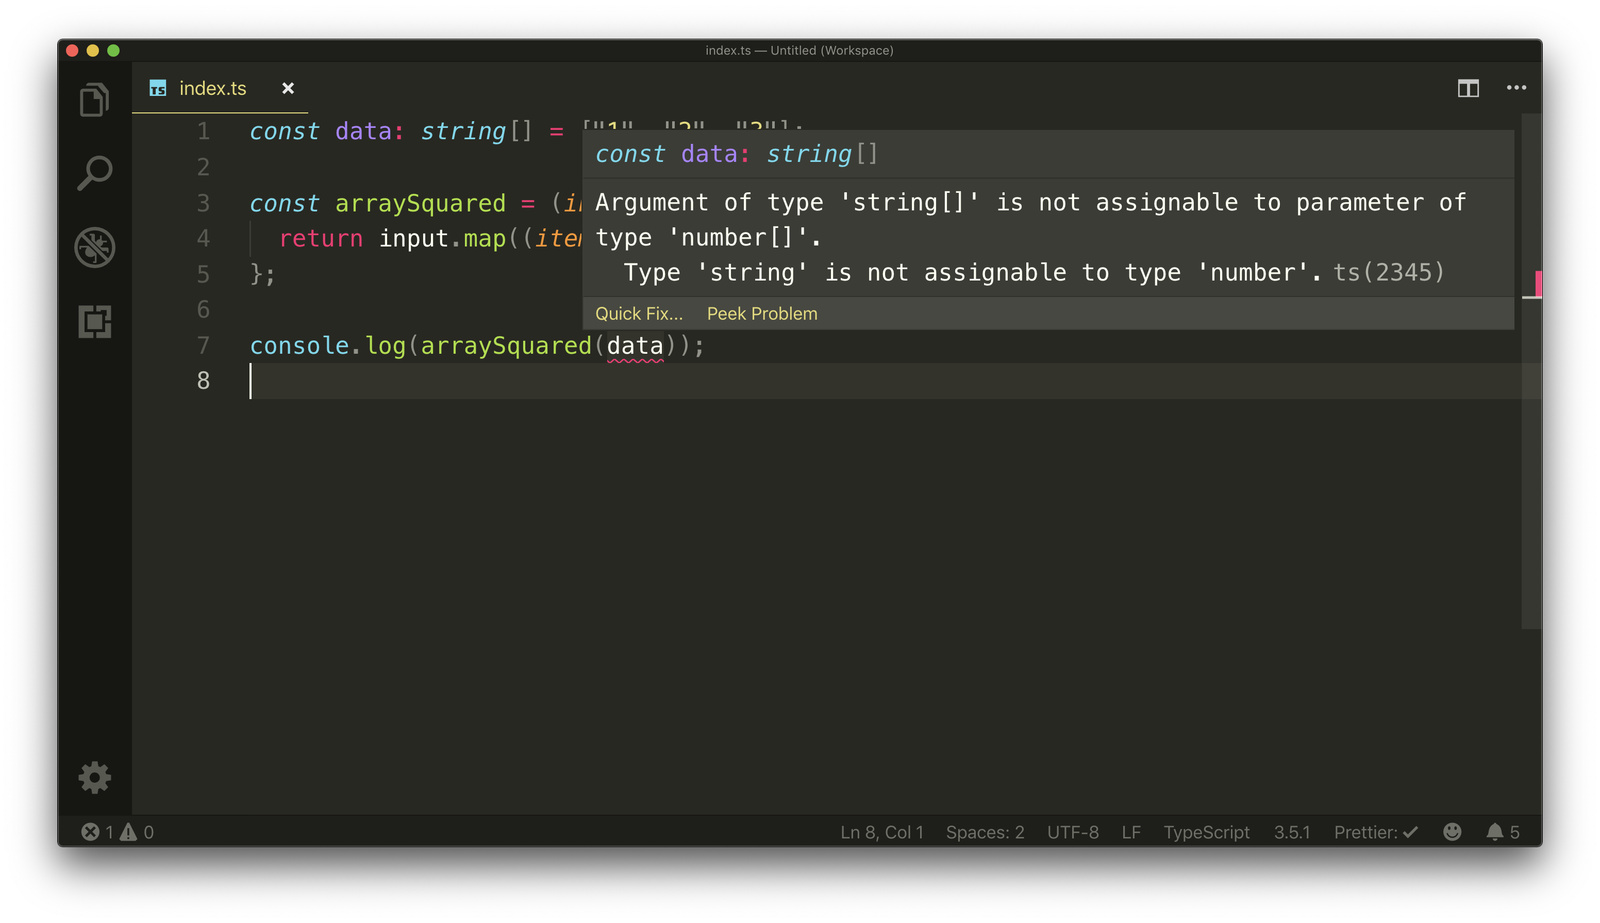
The code editor we’ll be using in this course is VSCode (otherwise known as Visual Studio Code). Though you’re welcome to use any code editor of your choice, we encourage using VSCode for some of the useful features it provides with minimal configuration changes. As an example, VSCode includes TypeScript language support out of the box to help display TypeScript compiler errors and warnings right in our editor.
As we proceed through the course, we’ll periodically be installing extensions to plug additional and useful functionality in our editor workspace. We’ll have two extensions installed from the get-go with others we’ll install at other points of the course.
- More importantly, we’ll have the Prettier extension installed. Prettier is a code formatter that helps enforce a consistent style throughout our code.
- We’ll have the Monokai Pro extension installed which provides the editor/color scheme you see in the screencast videos.
ITERM2
You can use your workspace terminal or any terminal emulator you would like to help navigate through project directories, run commands, etc. In the screencast videos, we’ll be using the iTerm2 terminal emulator available in macOS.
GOOGLE CHROME
We’ll be using Google Chrome as our browser to survey the client applications we’ll build. You’re welcome to use any browser you prefer but our preference will be either using Chrome or Firefox for their great development tools.
SECURE INTERNET CONNECTION
As you proceed through the course, you’ll need a valid and working Internet connection. Throughout the course, we’ll be working with tools available externally whether we’re installing packages, interacting with our database on the cloud, or working with remote APIs. To avoid having any issues, do ensure that you work with a secure internet connection .
PART ONE WELCOME
Welcome to Part I of the course! We’ve broken the course down to two parts and in Part I, we discuss all the things we’ll need to know before we start building the TinyHouse application. Part I can be treated as a course of its own since we discuss a lot of different topic within a React, TypeScript, and GraphQL environment.
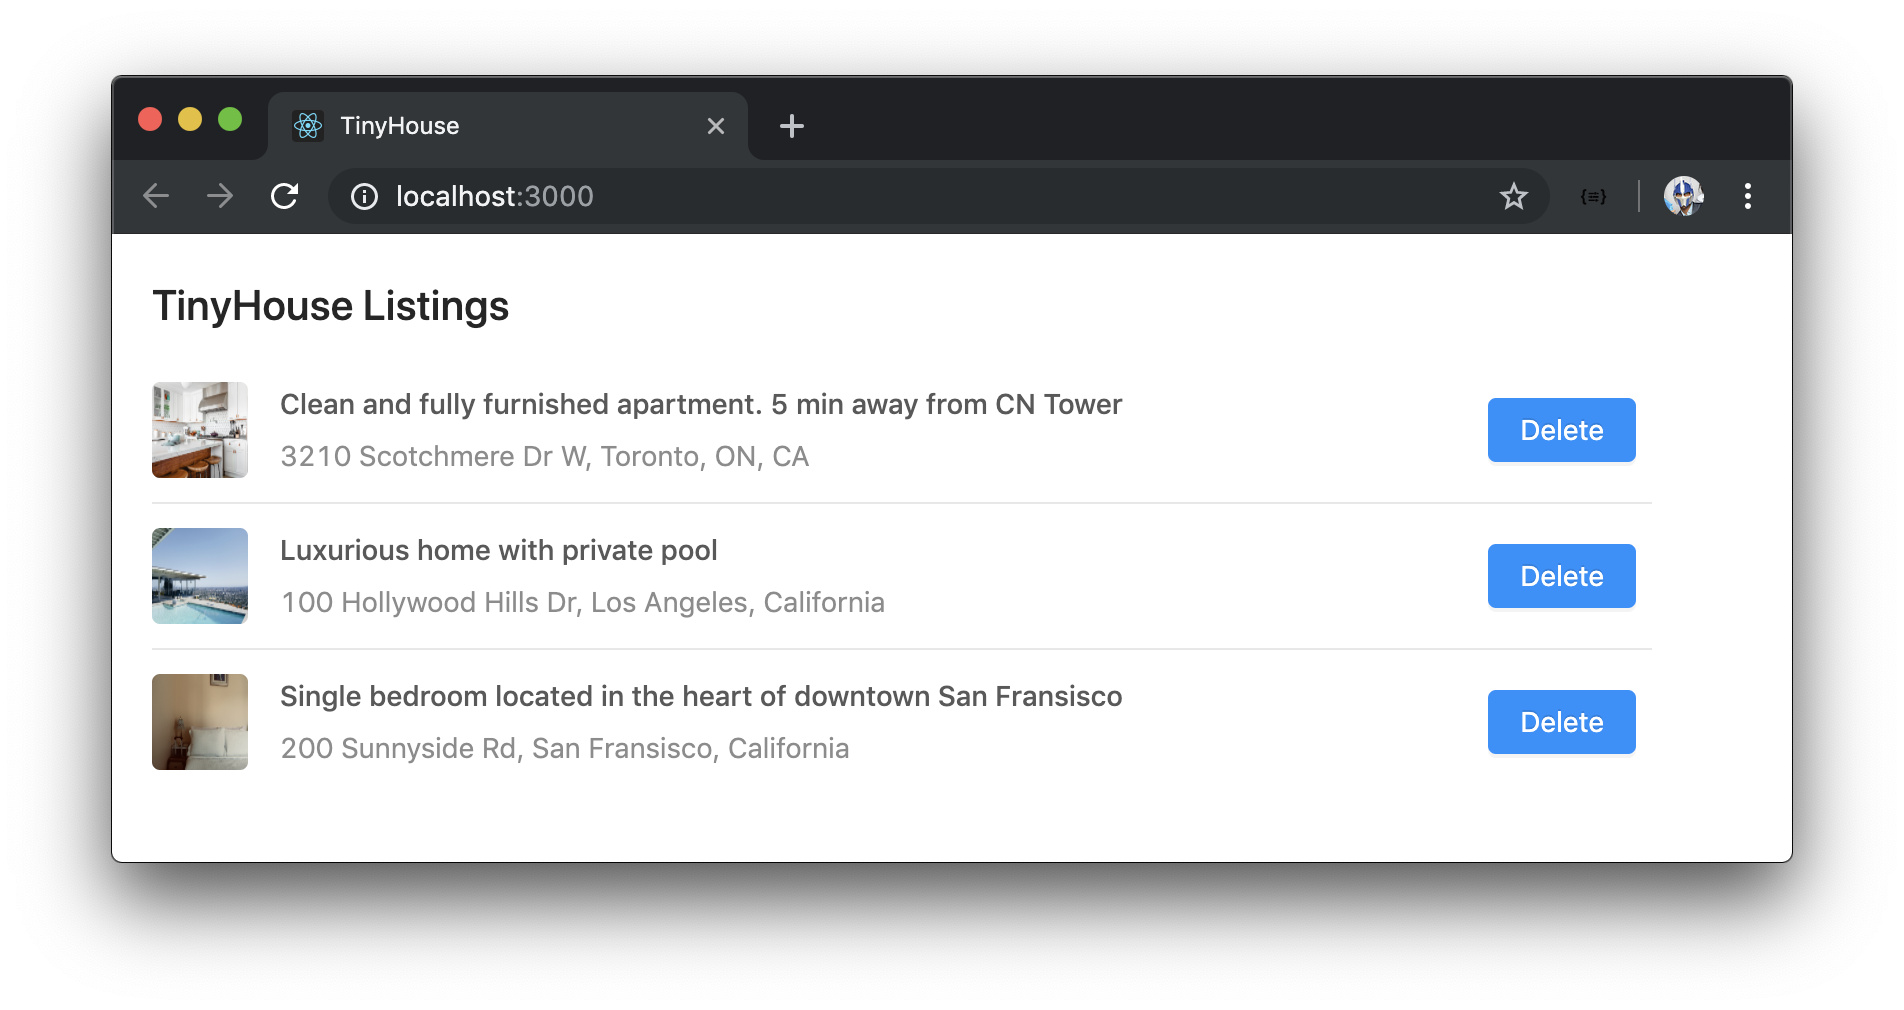
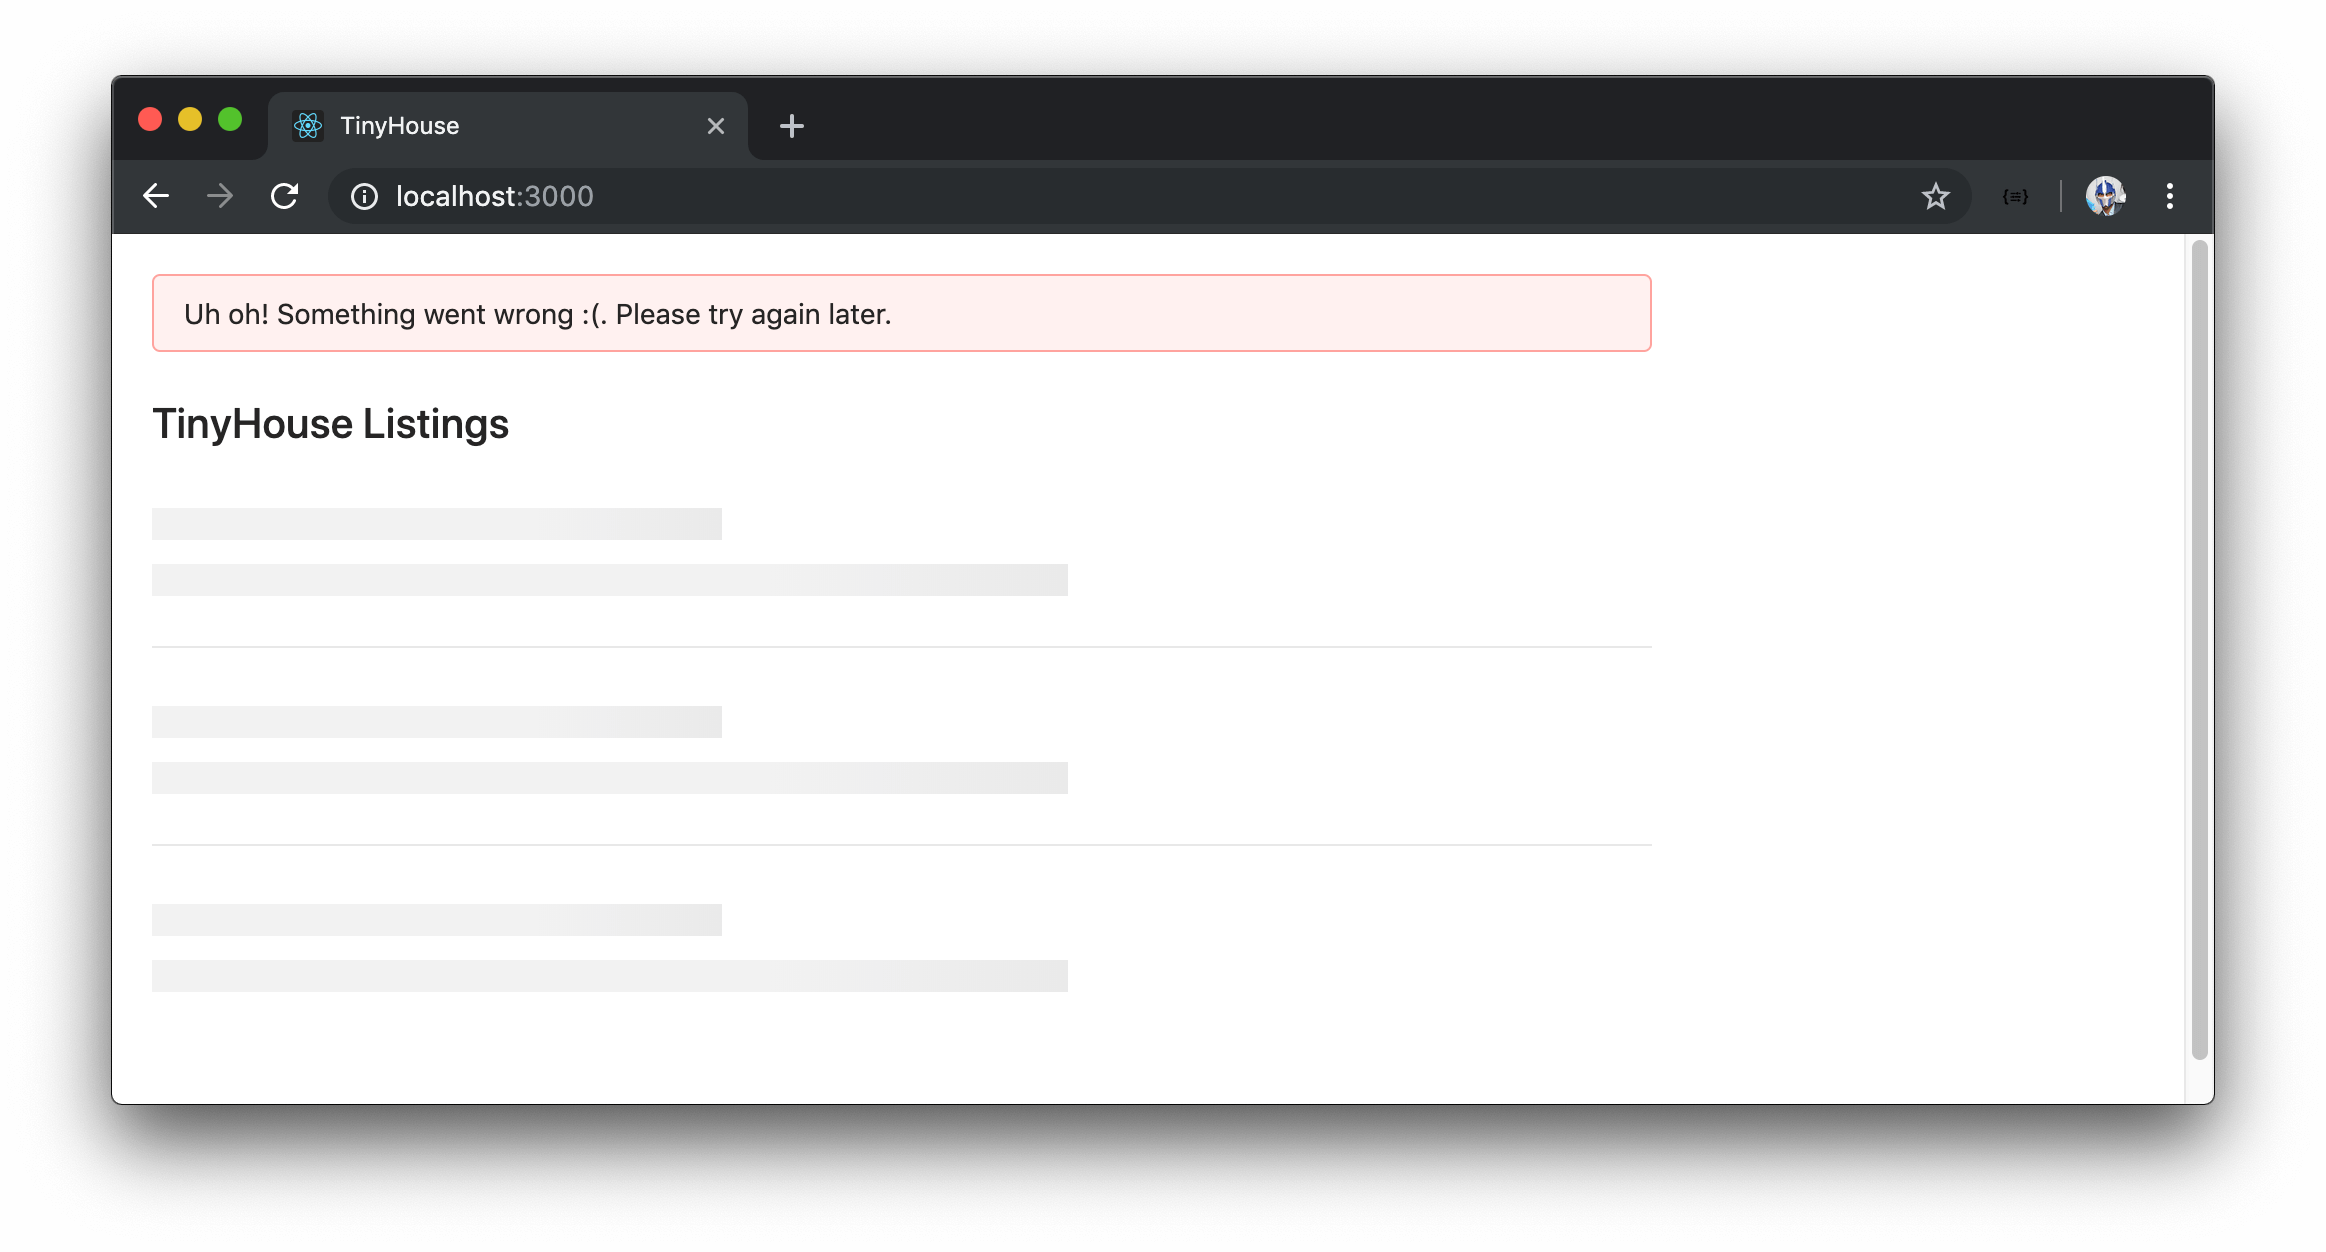
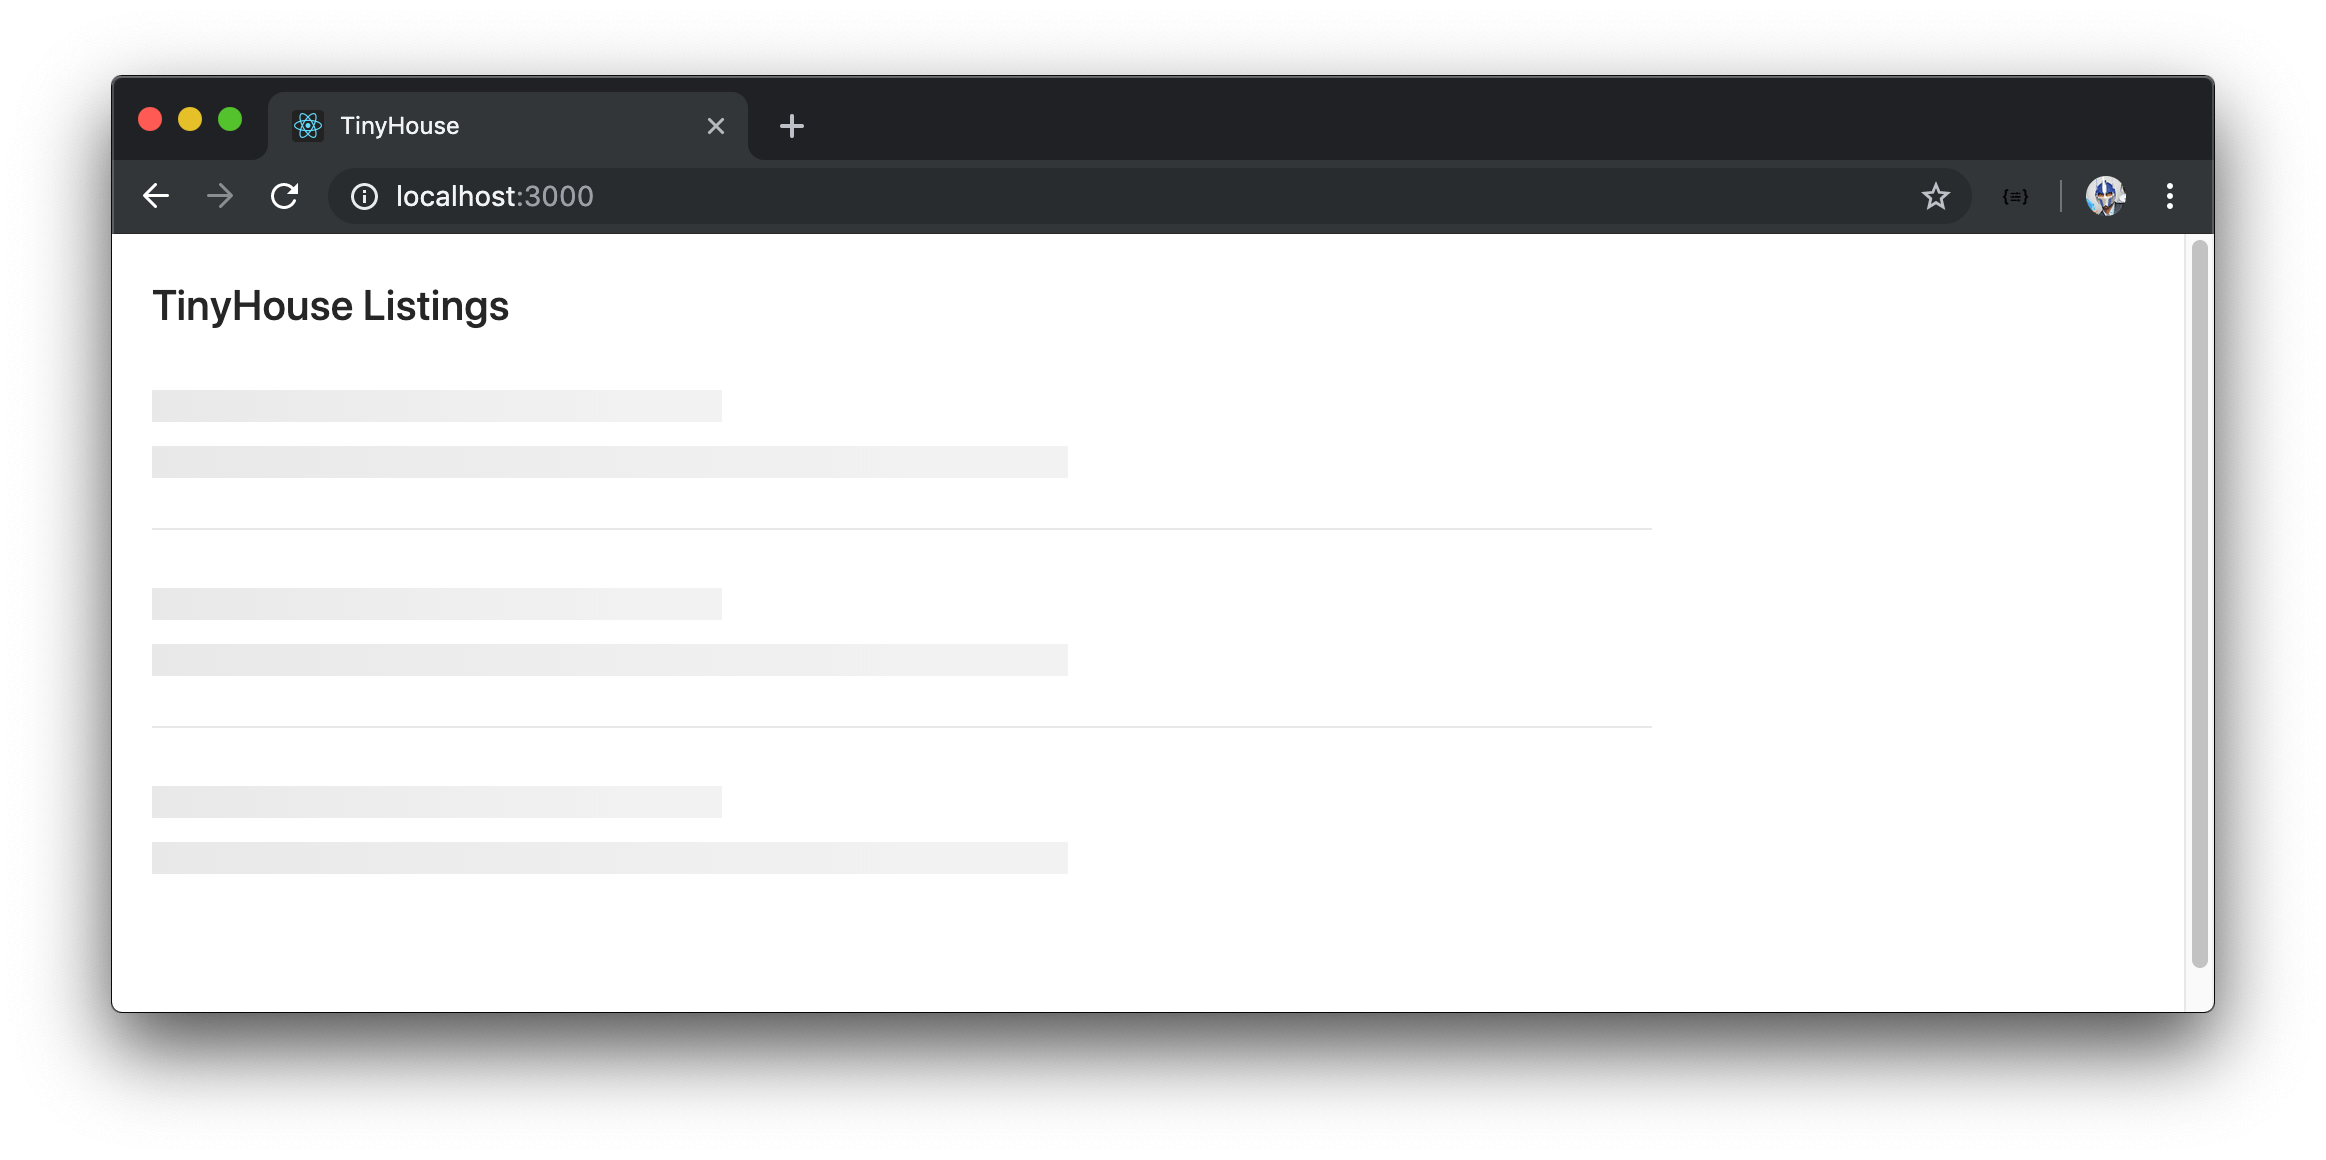
In Part I, we’ll build an app that surfaces a single web page responsible in displaying a list of listings.
When the page loads, a query is made to surface the listings to the user. If interested, the user is able to delete a listing by clicking the delete button in the list item. When a listing is deleted, a refetch is made to query the updated list of listings and the deleted listing is now removed from the list.
If the query for the list of listings fails, the user is presented with an error message that states something went wrong.
If an error occurs while a user is attempting to delete a mutation, they’ll be notified that something has gone wrong as well.
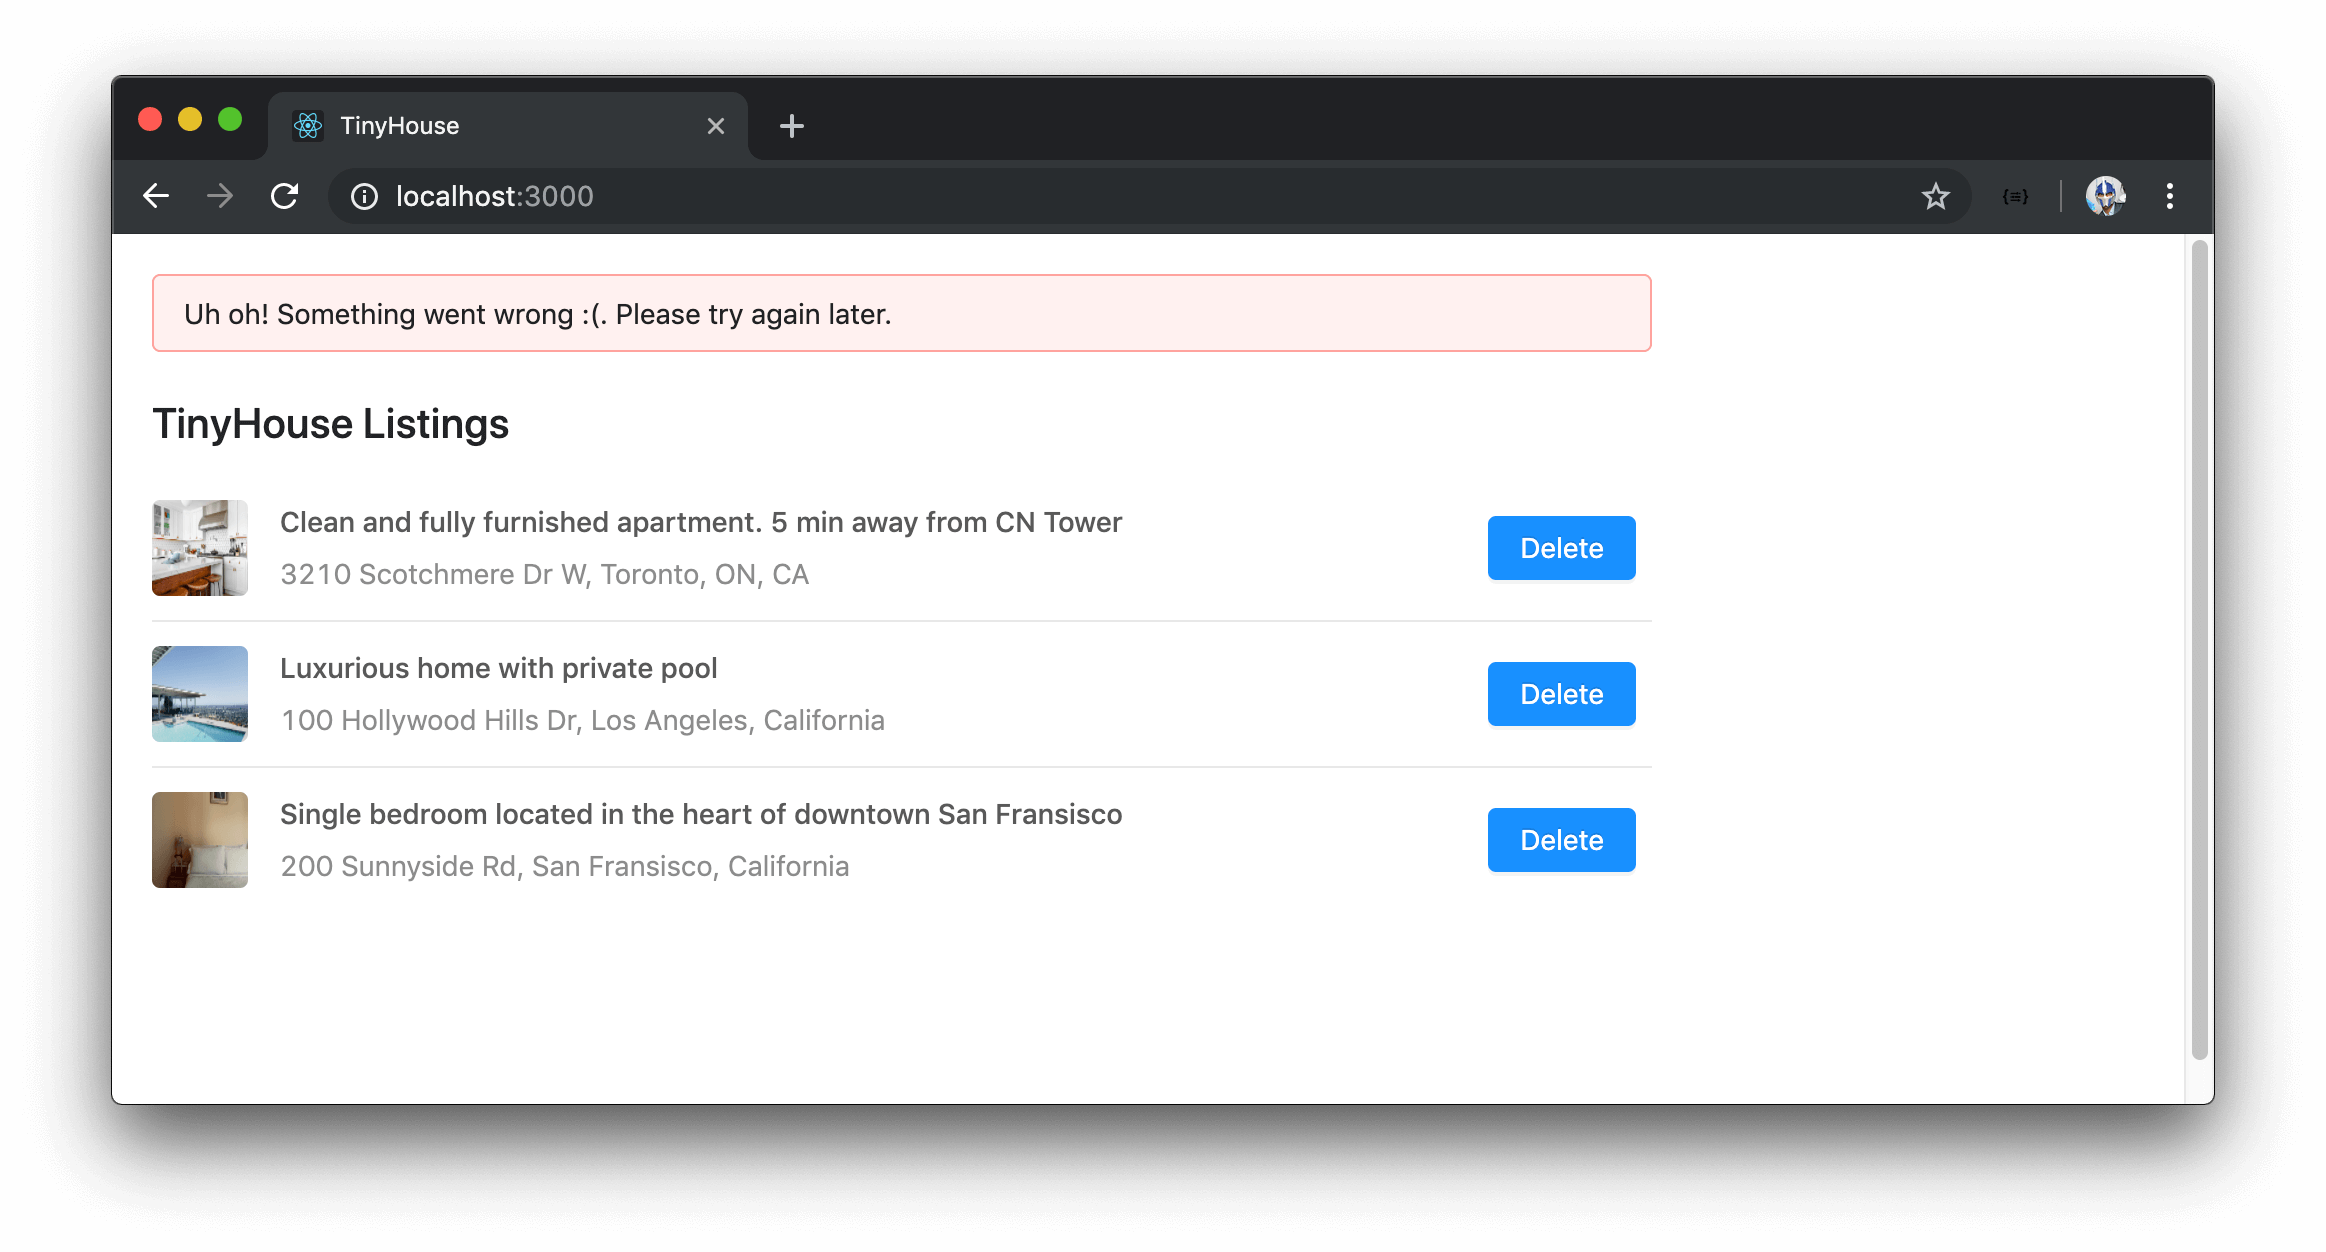
When a query or mutation is in-flight, loading statuses are displayed to convey that the information is being requested or the action is being conducted.
The app we build in Part I is fairly simple. However, we spend as much time as we can introducing and learning important patterns and concepts before we build the TinyHouse application.
In more detail, for Part I of the course we’ll:
- Create a Node server.
- Integrate Typescript into our Node server.
- Introduce GraphQL by investigating GitHub’s API.
- Deploy our GraphQL API using Apollo.
- Persist data with MongoDB.
- Bootstrap a React project.
- Integrate TypeScript into our React project.
- Have our client interact with our server using GraphQL.
- Introduce React Hooks, and even make some of our custom Hooks.
- Install React Apollo and use Apollo’s official Hooks to make GraphQL requests.
- Use the Apollo CLI to auto-generate TypeScript definitions from our GraphQL API.
- Finally, introduce and use the Ant Design UI framework to quickly build a more presentable UI.
There’s a lot of things to talk about so we’re incredibly excited to get things started!
MODULE 1 INTRODUCTION
In this module, we’ll be creating a Node server from scratch with the help of the Express framework. We’ll then introduce the benefits of TypeScript and integrate TypeScript into our Node server application.
For the details within this module:
- We’ll introduce Node and explain how Node is different to other web server technologies.
- Run a simple JavaScript file with Node.
- Create a server with the help of the popular Express package.
- Use Nodemon as a development tool to help with automatic reloading of our code.
- Introduce TypeScript and explain the benefits of using it.
- Add TypeScript to our server project and see how we’re able to compile a TypeScript project to valid JavaScript.
- Install and use ESLint as our development code linting tool.
- Finally, use mock data to create a GET and POST route within our server to mimic how RESTful APIs are to usually behave.
WHAT IS NODE?
NODE
Node is a JavaScript runtime environment that can run on different platforms (Mac, Windows, Linux, etc.). What this means is JavaScript (which was originally created to run inside a web browser) can now be run on any computer as a web server.
Node was originally released in 2009 by Ryan Dahl as a response to how slow web servers were at the time. This is because most web servers would block the I/O (Input/Output) task (e.g. reading from the file system or accessing the network) which will lower throughput. Node changed this model by making all I/O tasks non-blocking and asynchronous . Non-blocking, for example, just means a request from another interaction can be processed without waiting for the prior interaction request to finish. This allowed web servers to serve countless requests concurrently .
NON-BLOCKING I/O
Here’s an example taken from the main Node website in comparing code between the synchronous blocking state and the asynchronous non-blocking state.
This example covers the use of the Node File System ( fs module) which allows us to work with the file system in our computer.
const fs = require("fs");
const data = fs.readFileSync("/file.md");
moreWork();
The file system module is included by stating require('fs') . The readFileSync() method is used to read files on the computer with which we’ve stated we want to read the markdown file named file.md . The readFileSync() method is synchronous so the moreWork() function will only run after the entire file is read in the process. Since the readFileSync() method blocks moreWork() from running, this is an example of synchronous blocking code .
As we’ve mentioned, Node allows I/O taks to be non-blocking and asynchronous and as a result provides asynchronous forms for all file system operations. Here’s an attempt to read the file.md file and run the moreWork() function in an asynchronous setting:
const fs = require("fs");
let data;
fs.readFile("/file.md", (err, res) => {
  if (err) throw err;
  data = res;
});
moreWork();
The readFile() method is asynchronous and allows the use of a callback function. The callback function won’t run until the former function, readFile() , is complete. In this case, the readFile() method doesn’t block code since the moreWork() function will be run while the file is being read . Whenever the reading of the file is complete, the callback function will then run.
The ability to have the moreWork() function run alongside the reading of a file, in the asynchronous example above, was a primary design choice in Node to allow for higher throughput. Callback functions, promises, and the use of the async/await syntax are some of the ways in which Node allows us to conduct and use asynchronous functions.
NODE AND NPM
If you’ve built any web application within a Node environment, you’ve already come across something known as npm . npm , short for Node Package Manager, is two things:
- An online repository for the publishing of open-source Node Projects.
- A command-line utility for interacting with the
npmrepository.
The ecosystem of third-party tools that can easily be installed in a Node application makes Node a very rich ecosystem. This also ties in with how we build applications in Node by introducing just the tools and libraries we need in an app.
One awesome benefit of using Node is that Node makes capable the building of universal JavaScript applications (often also known as isomorphic JavaScript ). These are applications that have JavaScript both on the client and the server which is exactly what we’ll be doing in our course!
Node is built against modern versions of V8 (Google’s JavaScript and WebAssembly engine) which helps ensure Node stays mostly up to date with the latest ECMA JavaScript syntax. Node already supports a vast majority of ES6 features which can be seen in the node.green website.
To install Node, all we have to do is go to https://nodejs.org and download the latest LTS version of Node (which is recommended for most users).
An easy way to verify if Node is installed on a computer is to run the following command in the terminal to determine the version of Node installed.
node -v
npm is installed as part of Node with which we can also check for the version of npm .
npm -v
RUNNING JAVASCRIPT WITH NODE
We have our Visual Studio Code Editor and our terminal available to us in our workspace.
To begin, we’ll start with an empty folder labeled tinyhouse_v1/ in our editor workspace.
tinyhouse_v1/
tinyhouse_v1/ would be the directory where we build the app for the first part of our course. To get things started we’re going to create a subfolder called server within the tinyhouse_v1/ project that would host the server portion of our app. We’ll also go ahead and have an index.js file be created within this server subfolder.
tinyhouse_v1/
  server/
    index.js
THE NODE COMMAND
For our very first attempt, we’re going to see how we could use node to run some JavaScript code and the first code we’re going to write is a simple console.log message.
We’re going to attempt to log something into our terminal console and the first thing we’re going to look to log is a simple string that says 'hello world' .
server/index.js
console.log('hello world');
Next, we’re going to create two constant variables. We’re going to create a variable called one and another called two and assign them numerical values according to the variable name.
server/index.js
const one = 1;
const two = 2;
We’re using the const keyword to create our constant variables. const is one of the preferred ES6 ways to define a variable and states that the variable can’t be changed through reassignment.
Finally we’re going to fire off another console.log message and in this case, we’re going to display an interpolated string. We’ll state that we want to see 1 plus 2 is equal to the sum of the values of the variables we’ve defined.
server/index.js
console.log('hello world');

const one = 1;
const two = 2;

console.log(`1 + 2 = ${one + two}`);
We’re using back-ticks (i.e ES6 template literals) to create our interpolated string which allows us to embed expressions within our strings.
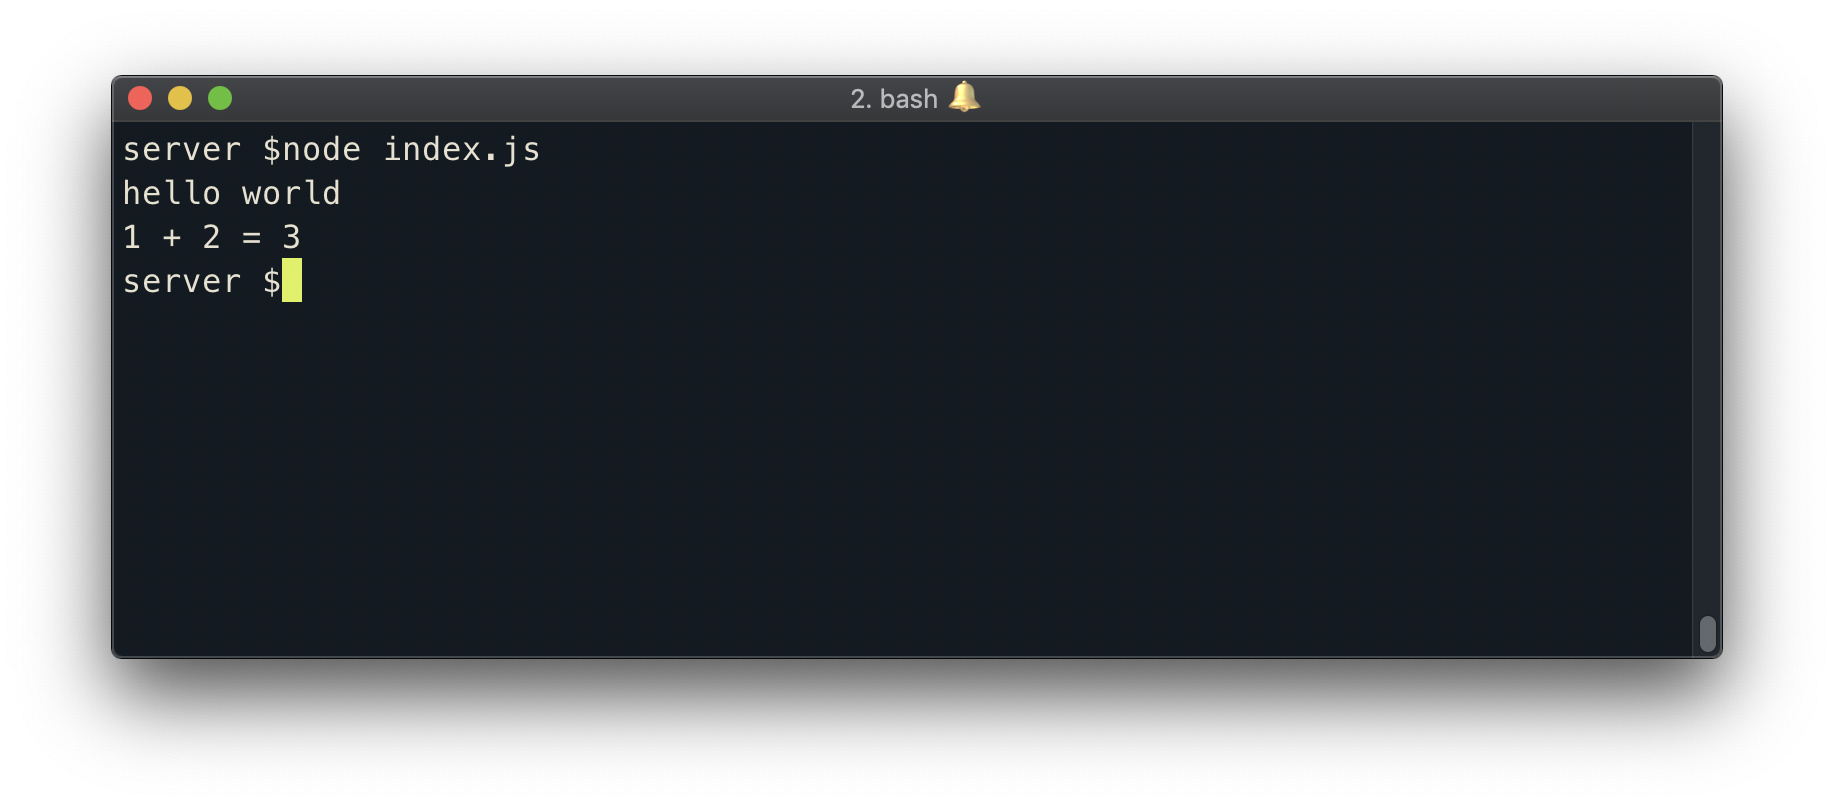
In our terminal, let’s run the javascript code we’ve written in the index.js file with the node command. The node command can take an argument for the location of the file in which we’d want the code to run. Since we’re already within the tinyhouse_v1/ directory in our terminal, we’ll want to run the index.js file within the server folder so we’ll specify the following command in our terminal.
server $: node server/index.js
By running the above command, we can see the two console.log messages we’ve prepared!
CREATING A MINIMAL NODE:EXPRESS SERVER
What we’ve done so far is use Node to run a simple JavaScript file. Now, we’ll look to create a Node server.
A server is software or even hardware that aims to provide functionality for client requests. Large scale applications we use day to day such as Airbnb, Uber, Instagram, and YouTube all have servers that serve data to the respective client apps. Client applications could be running on phones and computers to display this data to users.
Node has a built-in HTTP module that provides the capability to create a server. We’ll create a very simple Node server and if you haven’t done so before you’ll notice how surprisingly little code is needed to make this happen.
PACKAGE.JSON
The first thing we’ll do is create a package.json file. The package.json file is an important element of the Node ecosystem and is where one can provide metadata about an app, list the packages the app depends on, and create scripts to run, build, or test the app.
We’ll create this package.json file at the root of our server project directory.
tinyhouse_v1
  server/
    index.js
    package.json
A package.json file must contain a name and version field. name and version dictate the name of the application package being built and the version of that particular package respectively. We’ll name our application package tinyhouse-v1-server and label the version as 0.1.0 .
{
  "name": "tinyhouse-v1-server",
  "version": "0.1.0"
}
To help us prepare a Node server, we’ll install a third-party library known as Express. Express is an incredibly popular framework for Node designed for building servers and APIs. To install Express, we’ll run the npm install command followed by the name of the Express package ( express ).
server $: npm install express
When complete, npm will fetch Express from its repository and place the express module in a folder called node_modules in our server directory. When we now run our Node application, Node will look for modules that are required in the node_modules folder before looking into parent directories and global installs.
We’ll also notice that the package.json file has been updated to include express as a dependency.
server/package.json
{
  "name": "tinyhouse-v1-server",
  "version": "0.1.0",
  "dependencies": {
    "express": "^4.17.1"
  }
}
For anyone else downloading our directory, all they need to do is run npm install to install all the modules listed in the package.json file.
PACKAGE-LOCK.JSON
We may also notice a package-lock.json file be automatically generated in our project directory. The package-lock.json file stores a dependency tree that highlights the dependencies installed from the package.json file at a certain moment in time.
package-lock.json was first introduced in npm version 5 and serves to ensure teammates and deployment processes are all guaranteed to always install the same dependencies as well as aim to convey greater visibility to changes that are being made to an app’s dependencies.
The package-lock.json file should always be committed alongside other files to source code, but we’ll never actually directly touch this file.
If we were to use
yarn(another dependency management tool) instead ofnpm, ayarn.lockfile would be autogenerated.
EXPRESS
We’ll now use Express to instantiate a Node server. We’ll first move our index.js file within a src/ folder which would be where we’ll write all our server source code. With the auto-generated files and folders, our tinyhouse_v1/ project directory will now look like the following:
tinyhouse_v1/
  server/
    node_modules/
    src/
      index.js
    package-lock.json
    package.json
In the src/index.js file, we’ll remove everything we’ve written before and require the express module in our app and assign it to a constant called express .
server/src/index.js
const express = require('express');
We’ll create an express server instance by running the express function and assigning that instance to a const variable labeled app .
server/src/index.js
const app = express();
We’ll create a port const variable and assign a port number that we’d want the server to run. We’ll state this port number to be 9000 .
server/src/index.js
const port = 9000;
With app being the server instance, we can take advantage of express routing and use the app.get() function to associate a path with an endpoint. We’ll say when we receive an HTTP GET request to the index route - denoted by '/' , we’ll respond by sending a 'hello world' string. The endpoint function provides req and res objects as parameters. req is an object containing information about the HTTP request while res is how we send back the desired response.
server/src/index.js
app.get('/', (req, res) => res.send('hello world'));
We’ll finally use the app.listen() function from the express app instance to create the Node server at a certain port - with which we’ll use the port constant variable we’ve set up.
server/src/index.js
app.listen(port);
For convenience, we’ll place a console.log message at the end of our file to tell us that our app is successfully being run in the appropriate port. With all the above changes, the src/index.js file will now look like the following:
server/src/index.js
const express = require('express');
const app = express();
const port = 9000;
app.get('/', (req, res) => res.send('hello world'));
app.listen(port);
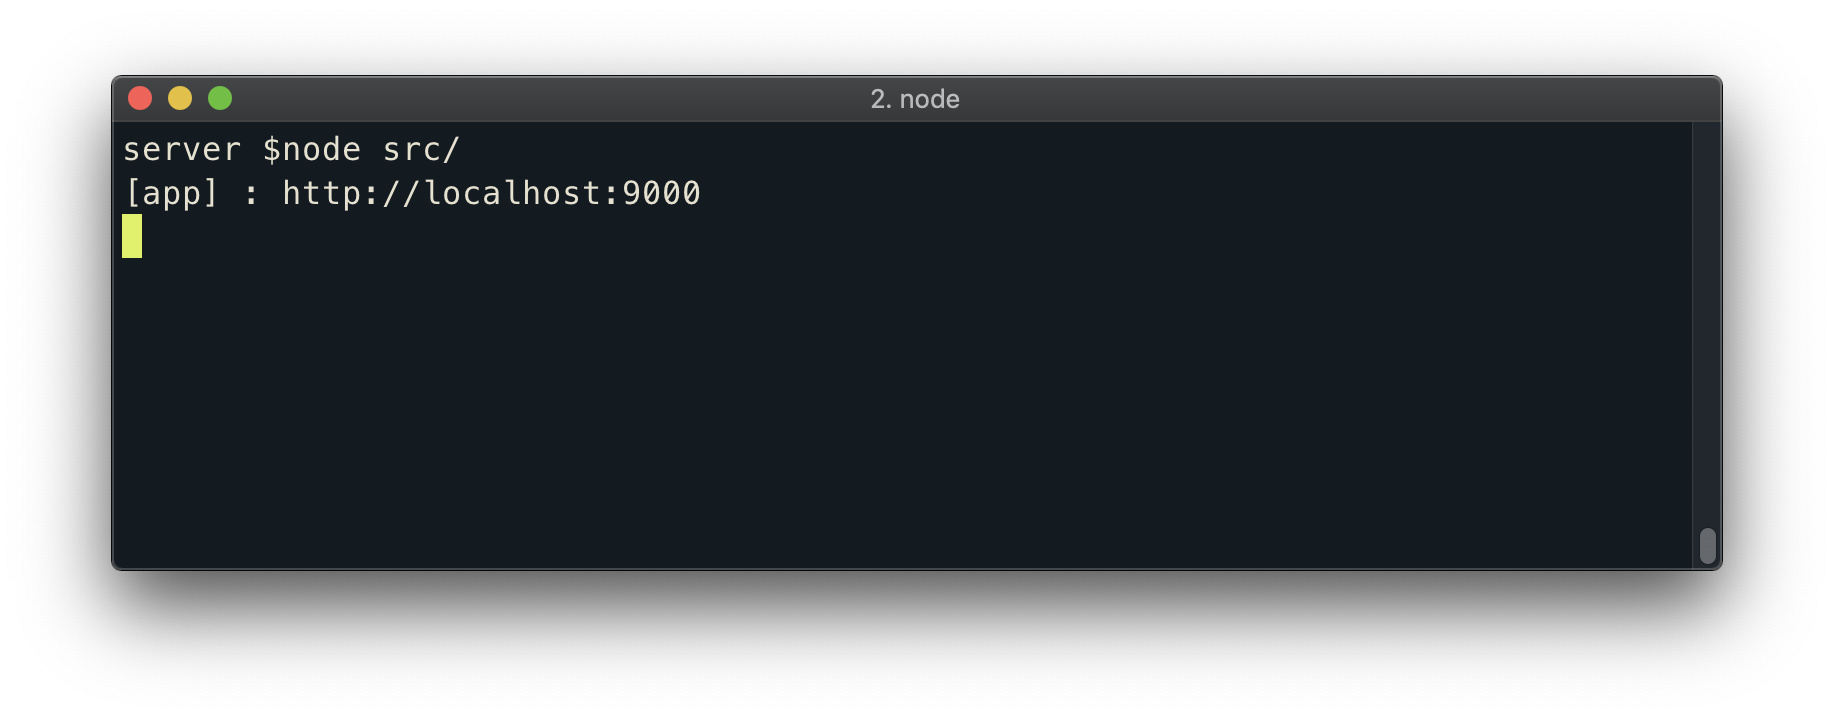
console.log(`[app] : http://localhost:${port}`);
Like we’ve seen in the previous lesson, we can run this JavaScript code by using the node command in our terminal.
server $: node src/
To know that our Node Server is running successfully, we’ll be able to see the generated console.log message in our terminal logs.
By heading to http://localhost:9000/ on our web browser, the text 'hello world' should be displayed! This is because we’ve navigated to the index route (i.e. we attempt to GET information from this route) and we’ve specified the response for this route should return a string of 'hello world' .

AUTOMATIC RELOADING USING NODEMON
When developing our server application, there are going to be a lot of changes we’re going to make to our code. We probably don’t want to stop our running server and restart it every single time we make an update. Wouldn’t it be nice if there was a third-party tool that did that for us? Well, there is, and it’s called Nodemon!
Nodemon is a tool that will monitor for any changes in our source code and automatically restart our Node server when a change is detected. To install Nodemon, we’ll run the npm install command but this time use the -D flag which is a shorthand version of --save-dev . This indicates that the package to be installed is a development dependency. Development dependencies are packages that are only needed for local development.
server $: npm install -D nodemon
After nodemon is installed, our package.json file will list nodemon in the devDependencies list:
{
  "name": "tinyhouse-v1-server",
  "version": "0.1.0",
  "dependencies": {
    "express": "^4.17.1"
  },
  "devDependencies": {
    "nodemon": "^1.19.1"
  }
}
START SCRIPT
We’ll look create a script in our application that can run the server with the nodemon utility. In Node applications, we’re able to define script commands that can be run in an app within a scripts section of the package.json file. Having scripts helps us avoid repetitively typing long commands manually in the terminal.
We’ll create a start script that is responsible in using nodemon to start our Node server:
server/package.json
  "scripts": {
    "start": "nodemon src/"
  }
To run our code with Nodemon, all we have to do now is type the npm run start command in our terminal:
server $: npm run start
Nodemon will output some messages to the console telling us the version of nodemon being used as well as other messages such as the ability to restart at any time and the location of files being watched.
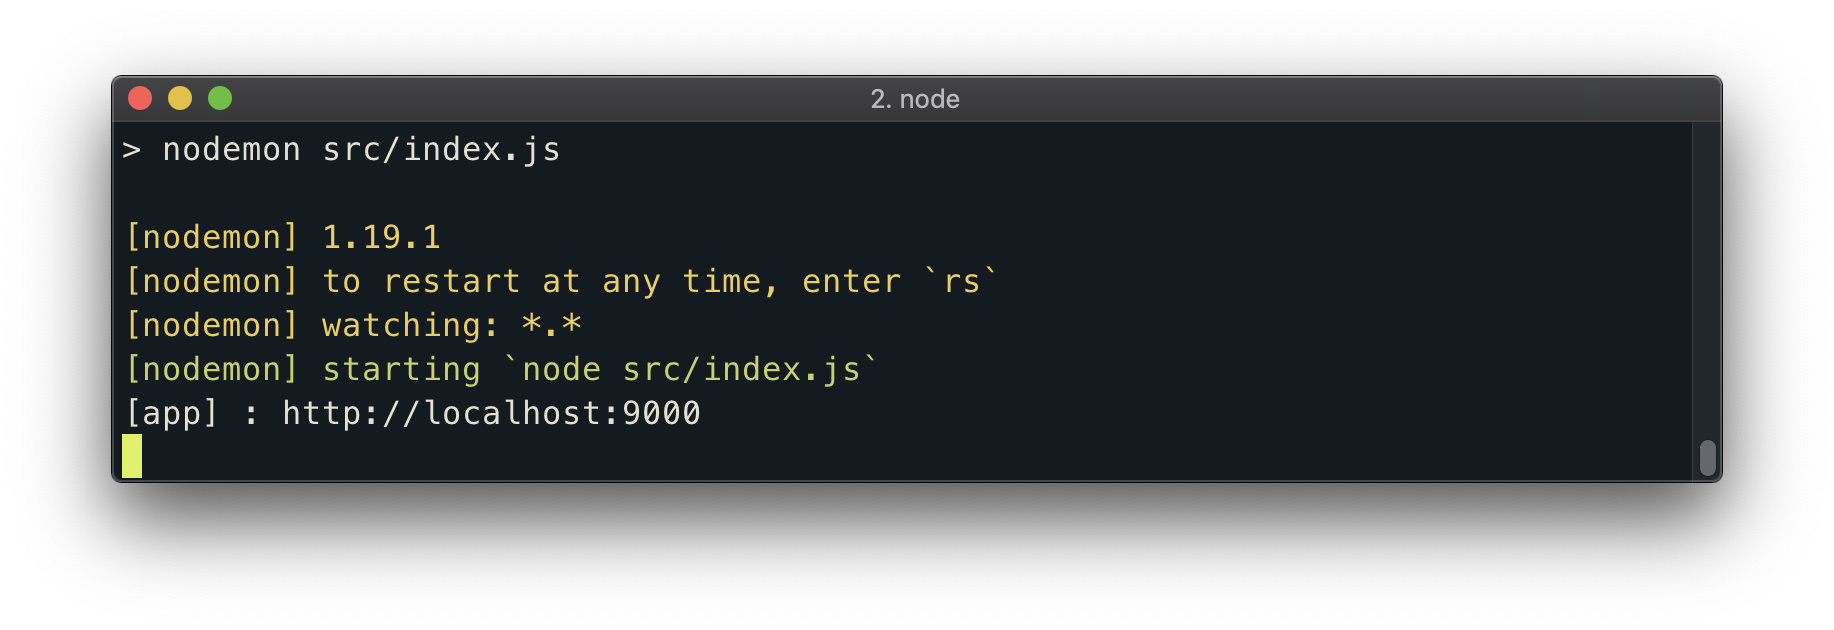
If any changes are made in our server project, these changes will be detected and nodemon will restart the server for us!
JavaScript is considered a weakly typed language which means that in JavaScript, we have the ability to assign one data type to a variable and later on assign another data type to that same variable.
Let’s see an example of this in our index.js file. We’ll look to replicate what we’ve done before by creating two variables, one and two , and attempt to show the summation of these two variables.
In the src/index.js of our server project, we’ll create constant variables labeled one and two and provide numerical values of 1 and 2 respectively.
const one = 1;
const two = 2;
In the callback function of our app.get() method for the index route, we’ll send an interpolated string that says 1 plus 2 is equal to the sum of the variables one and two .
server/src/index.js
app.get("/", (req, res) => res.send(`1 + 2 = ${one + two}`));
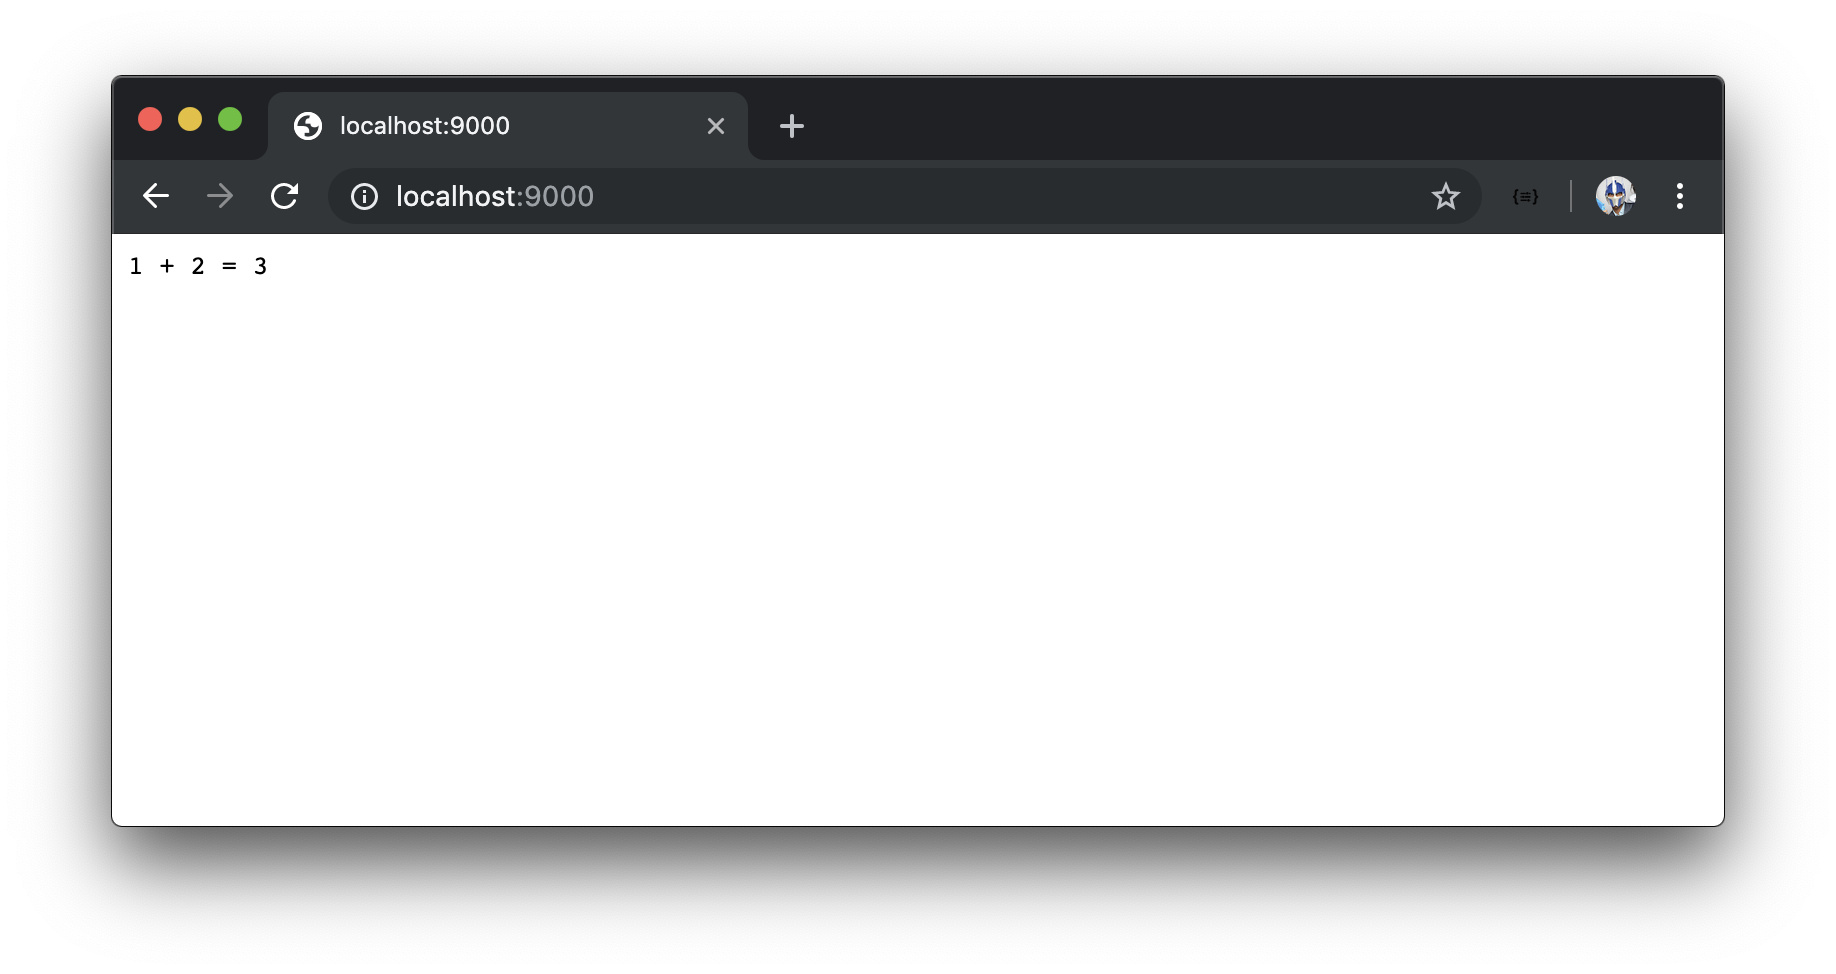
When we launch our app in http://localhost:9000/, we’ll see an output of 1 + 2 = 3.
What if shortly after we’ve instantiated our constant variables, we decide to reassign the two variable to be a string with a value of ‘two’. Since we’re reassigning the value of a variable - we’ll change how we instantiate the variable by using the let keyword.
server/src/index.js
const one = 1;
let two = 2;

two = "two";
Heading back to our browser we can see the output with the following text: 1 + 2 = 1two .

Though this isn’t what we want, it makes sense. JavaScript is unable to sum two different data types so it adds these two values by simply placing them side by side within a string.
We’ve defined the variable one to be equal to the number 1 and the variable two to be equal to the number 2 . We’ve redefined variable two to instead become a string value of 'two' . Though we did this on purpose, we can assume that this could also happen accidentally since we don’t guard for the fact that the variables one and two have to be number values .
In this case, the JavaScript code executed without any errors or warnings. In other cases, our code could error if we manipulated and used a variable without recognizing that it had an incorrect type. If we deployed code like this to a production app, this could lead to production issues.
TYPESCRIPT
This is why TypeScript was created. TypeScript is a strongly-typed superset of JavaScript that was introduced in 2012 by Microsoft. It is designed to:
- make code easier to read and understand.
- avoid painful bugs that developers commonly run into when writing JavaScript.
- ultimately save developers time and effort.
It’s important to note that TypeScript isn’t a completely different language. It’s a typed extension of JavaScript. The key difference between Static vs. Dynamic typing (i.e. JavaScript vs. TypeScript) has to do with when the types of the written program are checked. In statically-typed languages (TypeScript), types are checked at compile-time (i.e. when the code is being compiled). In dynamically-typed languages (JavaScript), types are checked at run-time (when the code is being run).
TypeScript is a development tool. Clients and servers don’t recognize TypeScript code when run. This is why the static types that can be specified in TypeScript are stripped away during a compilation process that transforms TypeScript code into valid JavaScript.
Adding types is like keeping units consistent when performing a math equation. Without TypeScript, you have to mentally keep track of units (i.e. types). Assigning values to the wrong units have big consequences (e.g. NASA crashed its 125 million dollar probe in 1999 because of incorrect unit conversions between the English Unit Measurement and the Metric System). Though not a perfect analogy, it does go to show that consistency is incredibly important.
ADDING TYPESCRIPT TO OUR SERVER
To configure our Node server into a TypeScript project, we’ll need to install and use certain TypeScript packages. We’ll install the latest versions of the typescript and ts-node libraries as development dependencies.
-
typescriptis the core Typescript library that will help us compile our TypeScript code to valid JavaScript. -
ts-nodeis a utility library that helps us run TypeScript programs in Node.
server $: npm install -D typescript ts-node
TSCONFIG.JSON
The first thing we’ll do to introduce TypeScript into our Node server project is create a TypeScript configuration file ( tsconfig.json ). The tsconfig.json file is a JSON file that should be created at the root of a TypeScript project and indicates the parent directory is a TypeScript project. tsconfig.json is where we can customize our TypeScript configuration and guide our TypeScript compiler with options required to compile the project.
server /
  // ...
  tsconfig.json
To customize and edit the options of the TypeScript compiler, we’ll specify a compilerOptions key in our tsconfig.json file.
{
  "compilerOptions": {}
}
There are a large number of options we can dictate and control in our compiler of which all can be seen in the TypeScript handbook. We’re not going to go through all the different possible options but instead dictate the ones we’ll use for our app.
target
We’ll declare the target option which specifies the target JavaScript version the compiler will output. Here we’ll declare a target output of es6 since Node supports a vast majority of ES6 features.
"target": "es6",
module
We’ll declare the module option which refers to the module manager to be used in the compiled JavaScript output. Since CommonJS is the standard in Node, we’ll state commonjs as the module option.
"module": "commonjs",
rootDir
To specify the location of files for where we want to declare TypeScript code, we’ll use the rootDir option and give a value of src/ to say we want our compiler to compile the Typescript code in the src/ folder.
"rootDir": "./src",
outDir
We can use the outDir option to specify where we’d want to output the compiled code when we attempt to compile our entire TypeScript project into JavaScript. We’ll dictate that we’ll want this output code to be in a folder called build/ .
"outDir": "./build",
esModuleInterop
To help compile our CommonJS modules in compliance with ES6 modules, we’ll need to introduce the esModuleInterop option and give it a value of true .
"esModuleInterop": true,
strict
Finally, we’ll apply the strict option which enables a series of strict type checking options such as noImplicitAny , noImplicitThis , strictNullChecks , and so on.
"strict": true
The tsconfig.json file of our server project in its entirety will look like the following:
server/tsconfig.json
{
  "compilerOptions": {
    "target": "es6",
    "module": "commonjs",
    "rootDir": "./src",
    "outDir": "./build",
    "esModuleInterop": true,
    "strict": true
  }
}
@TYPES
For us to use third-party libraries (e.g. `express) and have the full power of TypeScript, these libraries should also have dynamic types. Unfortunately, a lot of third party libraries we might want to use can be written in native JavaScript (e.g. express or with an extension of JavaScript (e.g. CoffeeScript).
This is where TypeScript allows for the creation and use of declaration files that describe the shape of existing JavaScript code. In the TypeScript community exists a DefinitelyTyped repository that holds TypeScript declaration files for a large number of packages and is entirely community-driven.
If you ever find yourself using a package that doesn’t have a declaration file publicly available, you can contribute to DefinitelyTyped!
Since Express and Node aren’t TypeScript libraries, we’ll need to install type definitions from TypeScript declaration files for the express and node packages. We’ll install these type definitions as development dependencies.
@types/ refers to the TypeScript declaration file packages that come from the DefinitelyTyped Github Repository.
server $: npm install -D @types/node @types/express
With the type definition packages of node and express installed, we can start to modify our code. First, let’s rename our src/index.js file to src/index.ts file. .ts is the file extension used to denote TypeScript files that will be compiled to JavaScript.
server/
  // ...
  src/
    index.ts
  // ...
In our index.ts file, we can begin to utilize ES6 import to import the express package. Node doesn’t currently support the capability to use the import statement to import modules. This is a great advantage of TypeScript - the capability to use and access ES6 (and newer) features that might not be natively supported in Node (or older browsers).
server/src/index.ts
import express from "express";
We’ll now notice an error in our code. Our IDE Intellisense warns us that the TypeScript compiler will recognize that assigning the string ‘two’ to the variable two is incorrect because the variable two was originally defined to be a number .
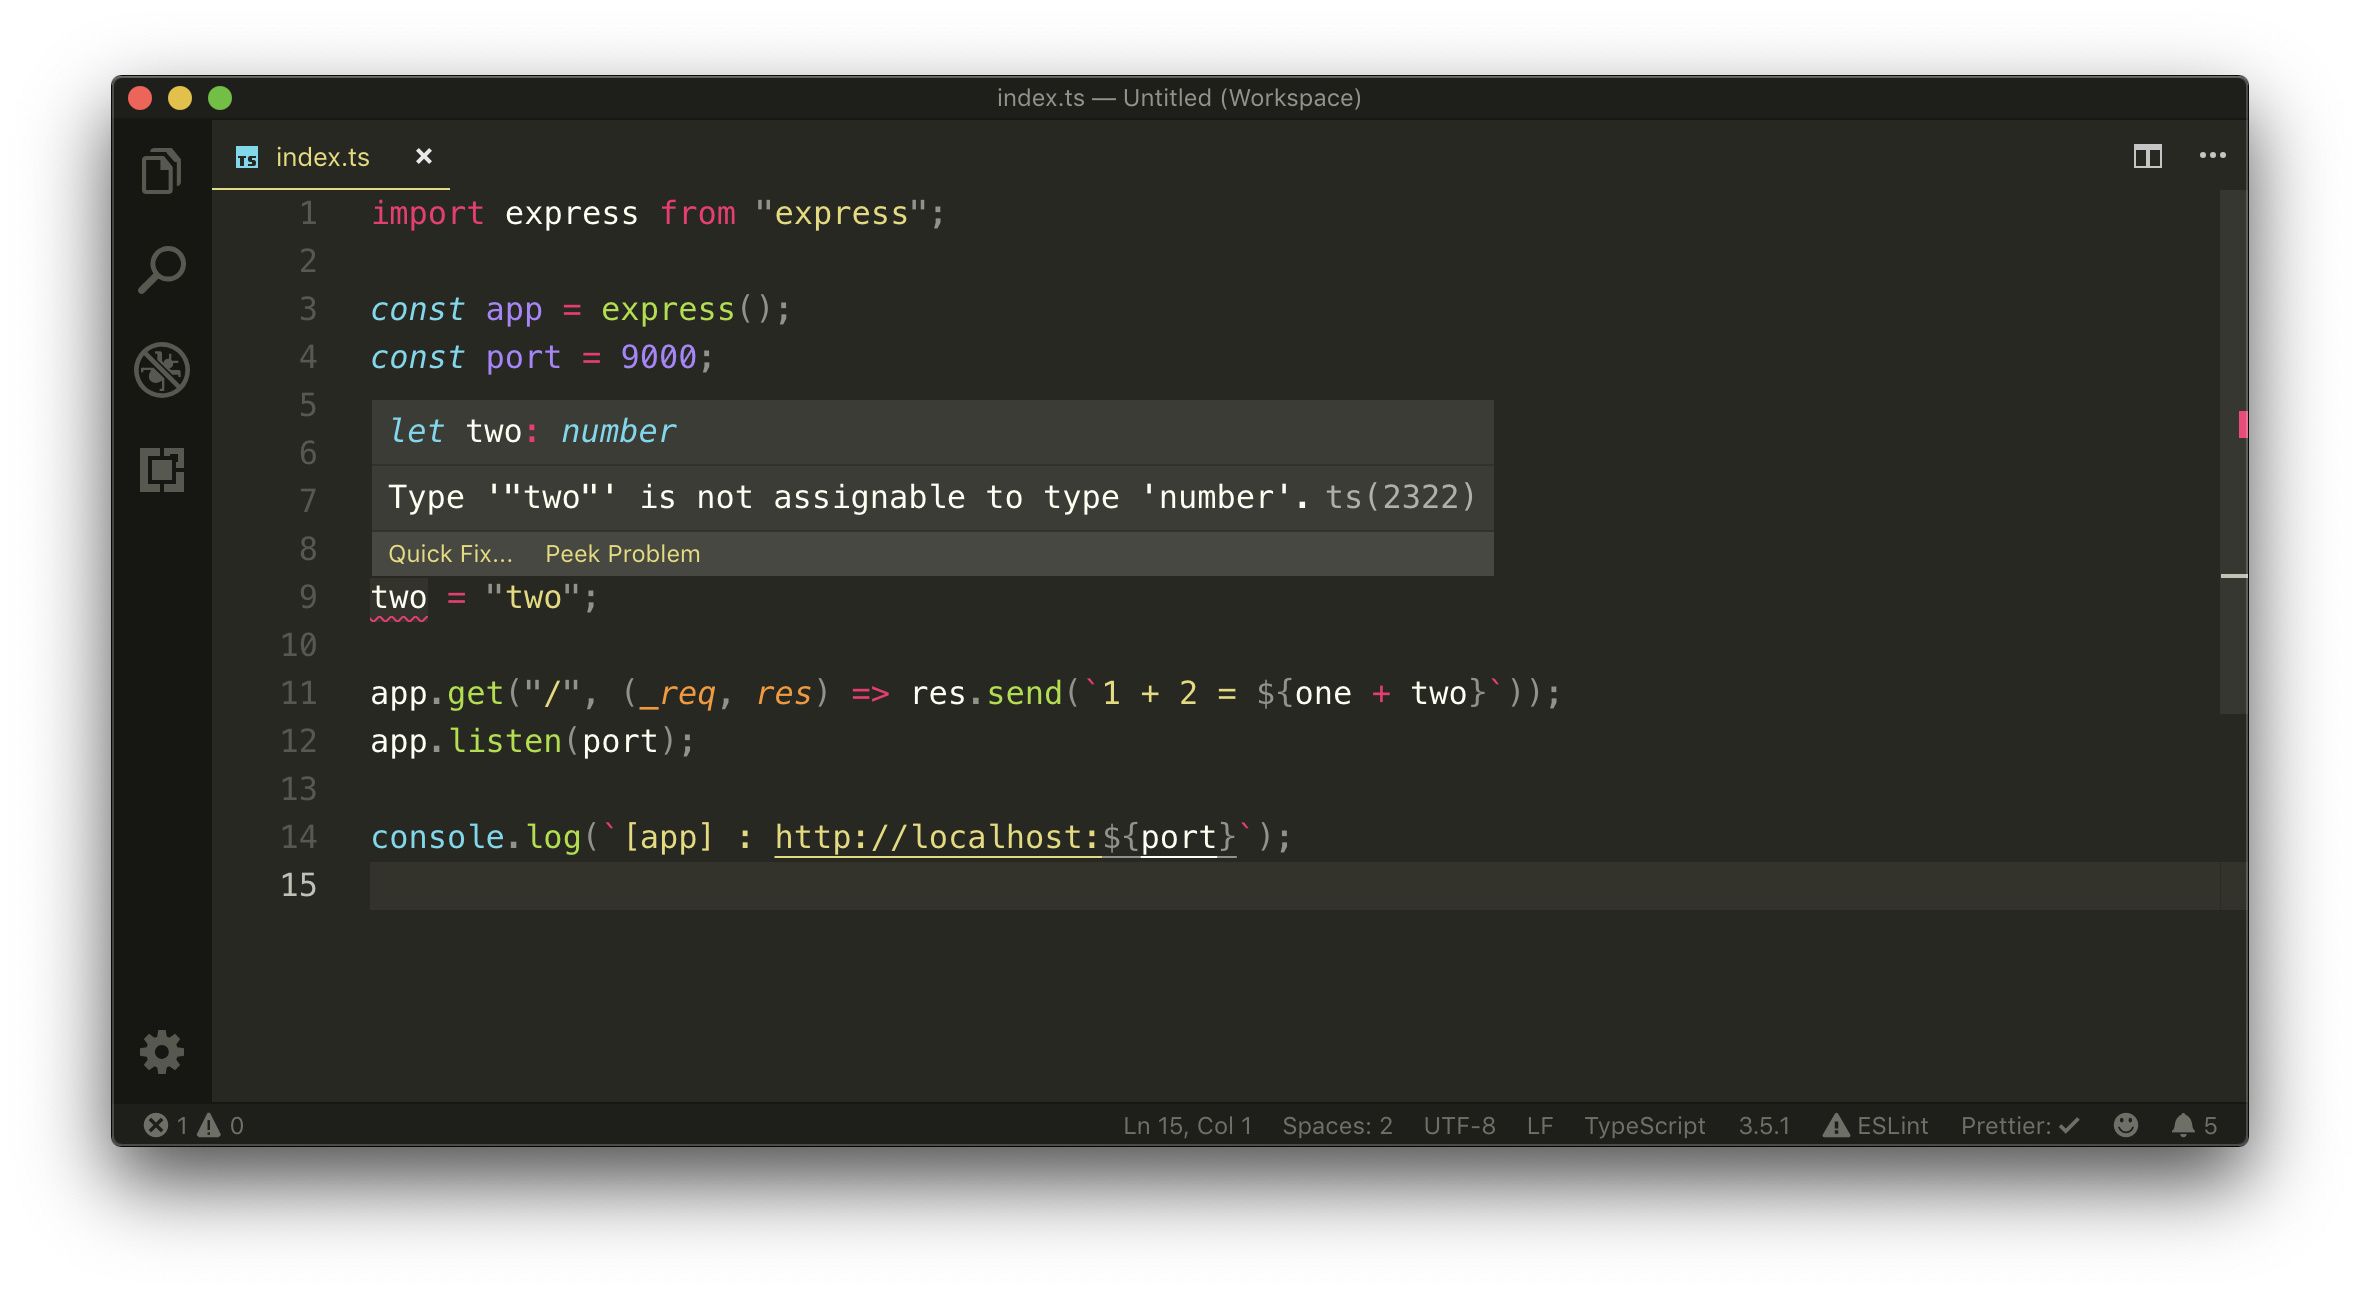
Just from the simple changes we’ve made, we can already begin to take advantage of Typescript. With that said, let’s remove the reassignment of variable two and keep both constant variables as numbers.
const one = 1;
const two = 2;

app.get("/", (_req, res) => res.send(`1 + 2 = ${one + two}`));
STATIC TYPING
The headline feature of TypeScript is static typing . Instead of having our variables be inferred as numbers, we can statically annotate the type of our variables as number with the syntax : number .
server/src/index.ts
const one: number = 1;
const two: number = 2;
TypeScript allows us to use and annotate many different basic types.
const three: boolean = false;

const three: string = "one";

const three: null = null;

const three: undefined = undefined;

const three: any = {};
There are other basic types as well such as the array type, the enum type, the void type, etc. We’ll investigate many of these different types as we proceed through the course.
When we explicitly define the type of variable, we have to provide a value that matches that type. The any type in TypeScript is unique since it allows us to define a variable with any type. Variables with the any type don’t give us the capability TypeScript provides and should be used sparingly.
STARTING OUR TYPESCRIPT NODE SERVER
In the package.json file of our project, we can see that nodemon was being used to start our Node server from the index.js file in our src/ folder.
  "scripts": {
    "start": "nodemon src/"
  }
The nodemon src/ command will by default look for JavaScript files in our src/ folder. Since our index file is now a TypeScript file ( index.ts ), we’ll be more explicit here and state that we want to run the code in the src/index.ts file.
server/package.json
  "scripts": {
    "start": "nodemon src/index.ts"
  }
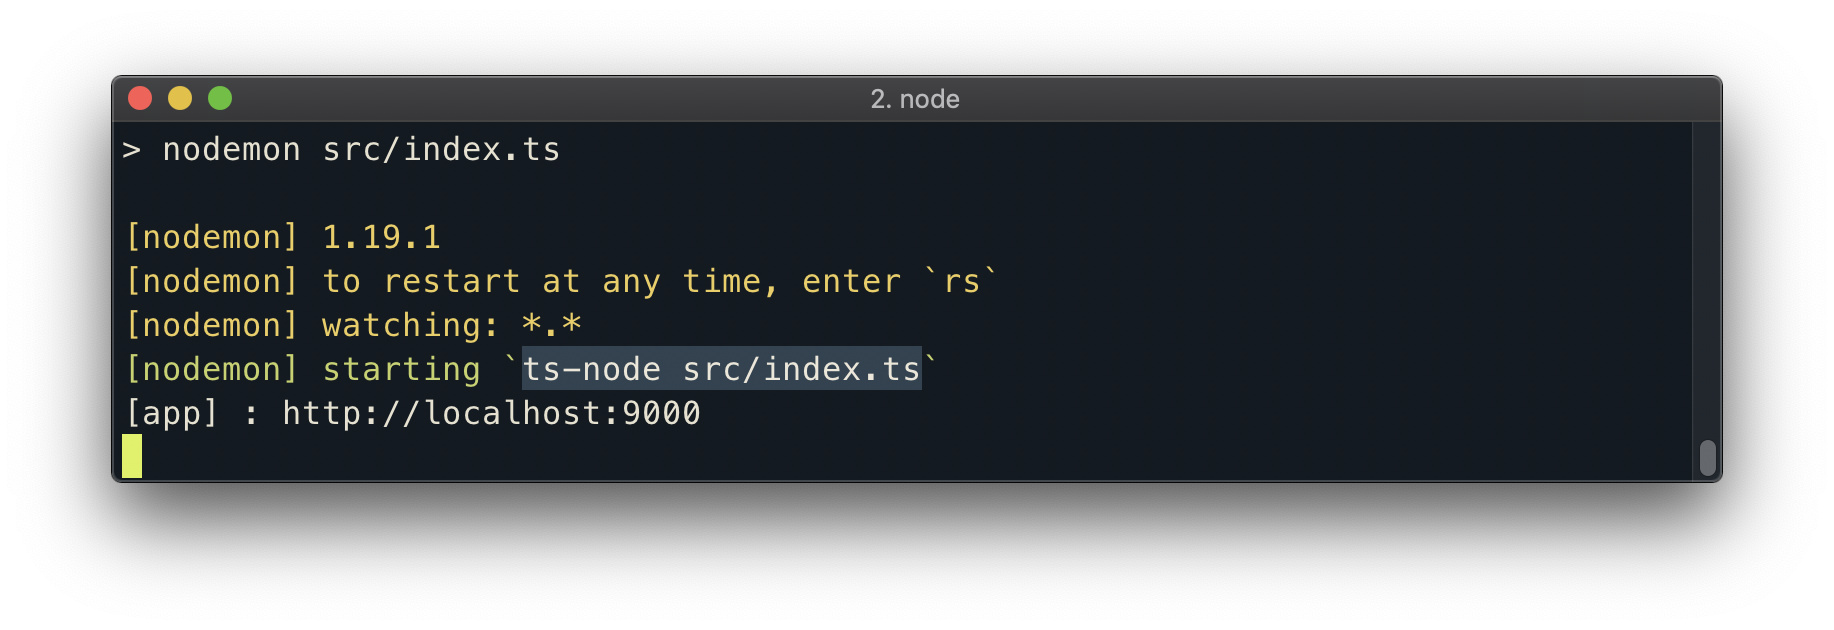
When we run the start script in our command line, our project will run despite us doing any other changes! In our console logs, we can see the message ts-node src/index.ts which tells us the ts-node package is now being used to run the TypeScript app directly from our terminal.
This is in thanks to nodemon invoking ts-node whenever a .ts file has been changed. Any time there’s a change in our TypeScript code, nodemon will re-run our server and execute ts-node . ts-node under the hood does a bunch of checks to verify all our TypeScript code is good by attempting to compile our TypeScript code to valid JavaScript. If there’s ever a TypeScript error, nodemon will crash.
COMPILING OUR TYPESCRIPT PROJECT
Though our application is now suited for TypeScript development; to have our code be ready for production, it first must be built (i.e. compiled) as a JavaScript project. This is perfectly ok because TypeScript was only created to help developers during the development phase. Once the app is in production, known bugs should have all been fixed!
To achieve the compiling of our entire TypeScript project, we’re going to create a new script in the package.json file which we’ll call the build/ script.
"scripts": {
  "start": "nodemon src/index.ts",
  "build": ""
}
TSC
build/ will be responsible in building (i.e. compiling) the TypeScript code in our project to valid JavaScript. We can achieve this compilation with the help of the tsc command the typescript package provides.
tsc takes an option labeled -p which is shorthand for --project that allows us to compile the TypeScript code in a project that contains a tsconfig.json file. The -p option requires an argument of the project directory. We’ll use the tsc command in the build script of our application to compile our TypeScript project.
server/package.json
  "scripts": {
    "start": "nodemon src/index.ts",
    "build": "tsc -p ./"
  }
tsc -p ./ references the server project directory where the package.json lives as the TypeScript project that is to be compiled. With the change made to our package.json file, we can run the build script in our terminal.
server $: npm run build
When complete, a build/ folder is introduced in the root of the server project.
server/
  build/
  // ...
This build/ folder contains JavaScript code in an index.js file that has essentially been compiled from the TypeScript index.ts file. We could run the JavaScript from the compiled index.js file directly within the build/ folder.
server $: node build/index.js
When launching the browser at http://localhost:9000 , we’ll be presented with the expected message that is to be sent for the index ( / ) route.
With deployment, we’ll need to build our application to obtain valid JavaScript code and then place the compiled build/ folder into any deployment process that we would want. We’ll hardly ever find the need to dive into the build/ folder to see the generated compiled JavaScript code.
LINTING WITH ESLINT
Though VSCode includes TypeScript language support which helps recognize errors in our TypeScript code, we’ll probably need more robust code checking. As an example of something we might want to forbid is preventing a variable from ever having the any type. TypeScript won’t stop us since any is a valid basic type but as a preference, we probably don’t want to have code built in our app that has the any type since it removes the benefits of type checking.
This is where linting comes. Linting (i.e. code checking) is a process that analyzes code for potential errors. When it comes to linting JavaScript and/or TypeScript code, ESLint is the most popular library to do so. It’s configurable, easy to introduce, and comes with a set of default rules.
To introduce linting into our app and take advantage of our code editor, we’ll first install the VSCode ESLint extension. The VSCode ESLint extension allows us to integrate ESLint into VSCode to help provide warnings, issues, and errors in our editor.
Once the VSCode ESLint extension is installed, we’ll go ahead and install a few other development dependencies that we’ll need to enable ESLint configuration into our app. We’ll install:
-
eslint: the core ESLint library -
@typescript-eslint/parser: parser that will allow ESLint to lint TypeScript code -
@typescript-eslint/eslint-plugin: plugin when used in conjunction with@typescript-eslint/parsercontains many TypeScript specific ESLint rules.
server $: npm install -D eslint @typescript-eslint/parser @typescript-eslint/eslint-plugin
.ESLINTRC.JSON
We’ll introduce an .eslintrc.json configuration file in the root project directory. The .eslintrc.json file is the configuration file that’ll dictate the ESLint set up of our application. We’ll look to introduce a couple of options to our ESLint configuration file.
parser
"parser": "@typescript-eslint/parser",
ESLint depends on a parser to read and translate JavaScript code for it to understand. The default ESLint parser (ESpree) doesn’t recognize TypeScript code. The @typescript-eslint/parser is probably the most widely used and supported parser for TypeScript code, and the one installed in our app.
parserOptions
"parserOptions": {
  "ecmaVersion": 2018,
  "sourceType": "module"
},
The parserOptions configuration allows us to specify the language options we want ESLint to support. By default, ESLint supports ES5. We’ll set the ecmaVersion to 2018 to allow us the use of modern ES features in our app. sourceType: module to declare that we’re using ES6 modules in our app.
extends
"extends": ["plugin:@typescript-eslint/recommended"],
The extends option allows us to extend the rules from a certain plugin with which we’ve picked @typescript-eslint/recommended.
env
"env": { "node": true },
env dictates which environment our ESLint script is expected to run. Every environment has its own set of particular global variables so we’ve stated that we’re in the node environment.
rules
rules is where we can declare individual ESLint rules we want in our app. Here’s where we can override the rules from the @typescript-eslint/recommended package we’ve extended.
The @typescript-eslint/recommended package comes with a rule for indenting. Prettier will handle all indenting/formatting for us, and it’s often recommended to turn off indent formatting rules as a result. We’ll turn off the standard indent rule and the @typescript-eslint/indent rule.
"rules": {
  "indent": "off",
  "@typescript-eslint/indent": "off"
}
ESLINT AND TYPESCRIPT
Currently, the ESLint VSCode Extension doesn’t have TypeScript support enabled by default, and editor warnings are only shown for JS Files. To have ESLint work for TypeScript files, we’ll need to add the following to the /settings.json file of our VSCode editor.
"eslint.validate": [
  "javascript",
  "javascriptreact",
  { "language": "typescript", "autoFix": true },
  { "language": "typescriptreact", "autoFix": true }
]
You can find the
/settings.jsonfile of your VSCode editor by first pressingSHIFT + CMD + P(on Mac) to launch the Command Palette where you can then search forPreferences: Open Settings (JSON).Alternatively, you can launch the User Settings section of VSCode by pressing
CMD + ,on Mac, orCTRL + ,on Windows, or selectingCode > Preferences > Settingsin the toolbar. In the User Setting sections, you can then typeOpen Settings (JSON)in the search field and click theEdit in settings.jsonoption to open the/settings.jsonfile.
When we survey the src/index.ts file, we’ll now notice the editor displays some lint warnings!

Note: You may only see warnings in your VSCode editor when importing only the
server/project into the editor (not the parenttinyhouse_v1/directory).
The first warning we see states that when the number type is inferred for the variables one and two , it’s unecessary for it to be explicitly declared.
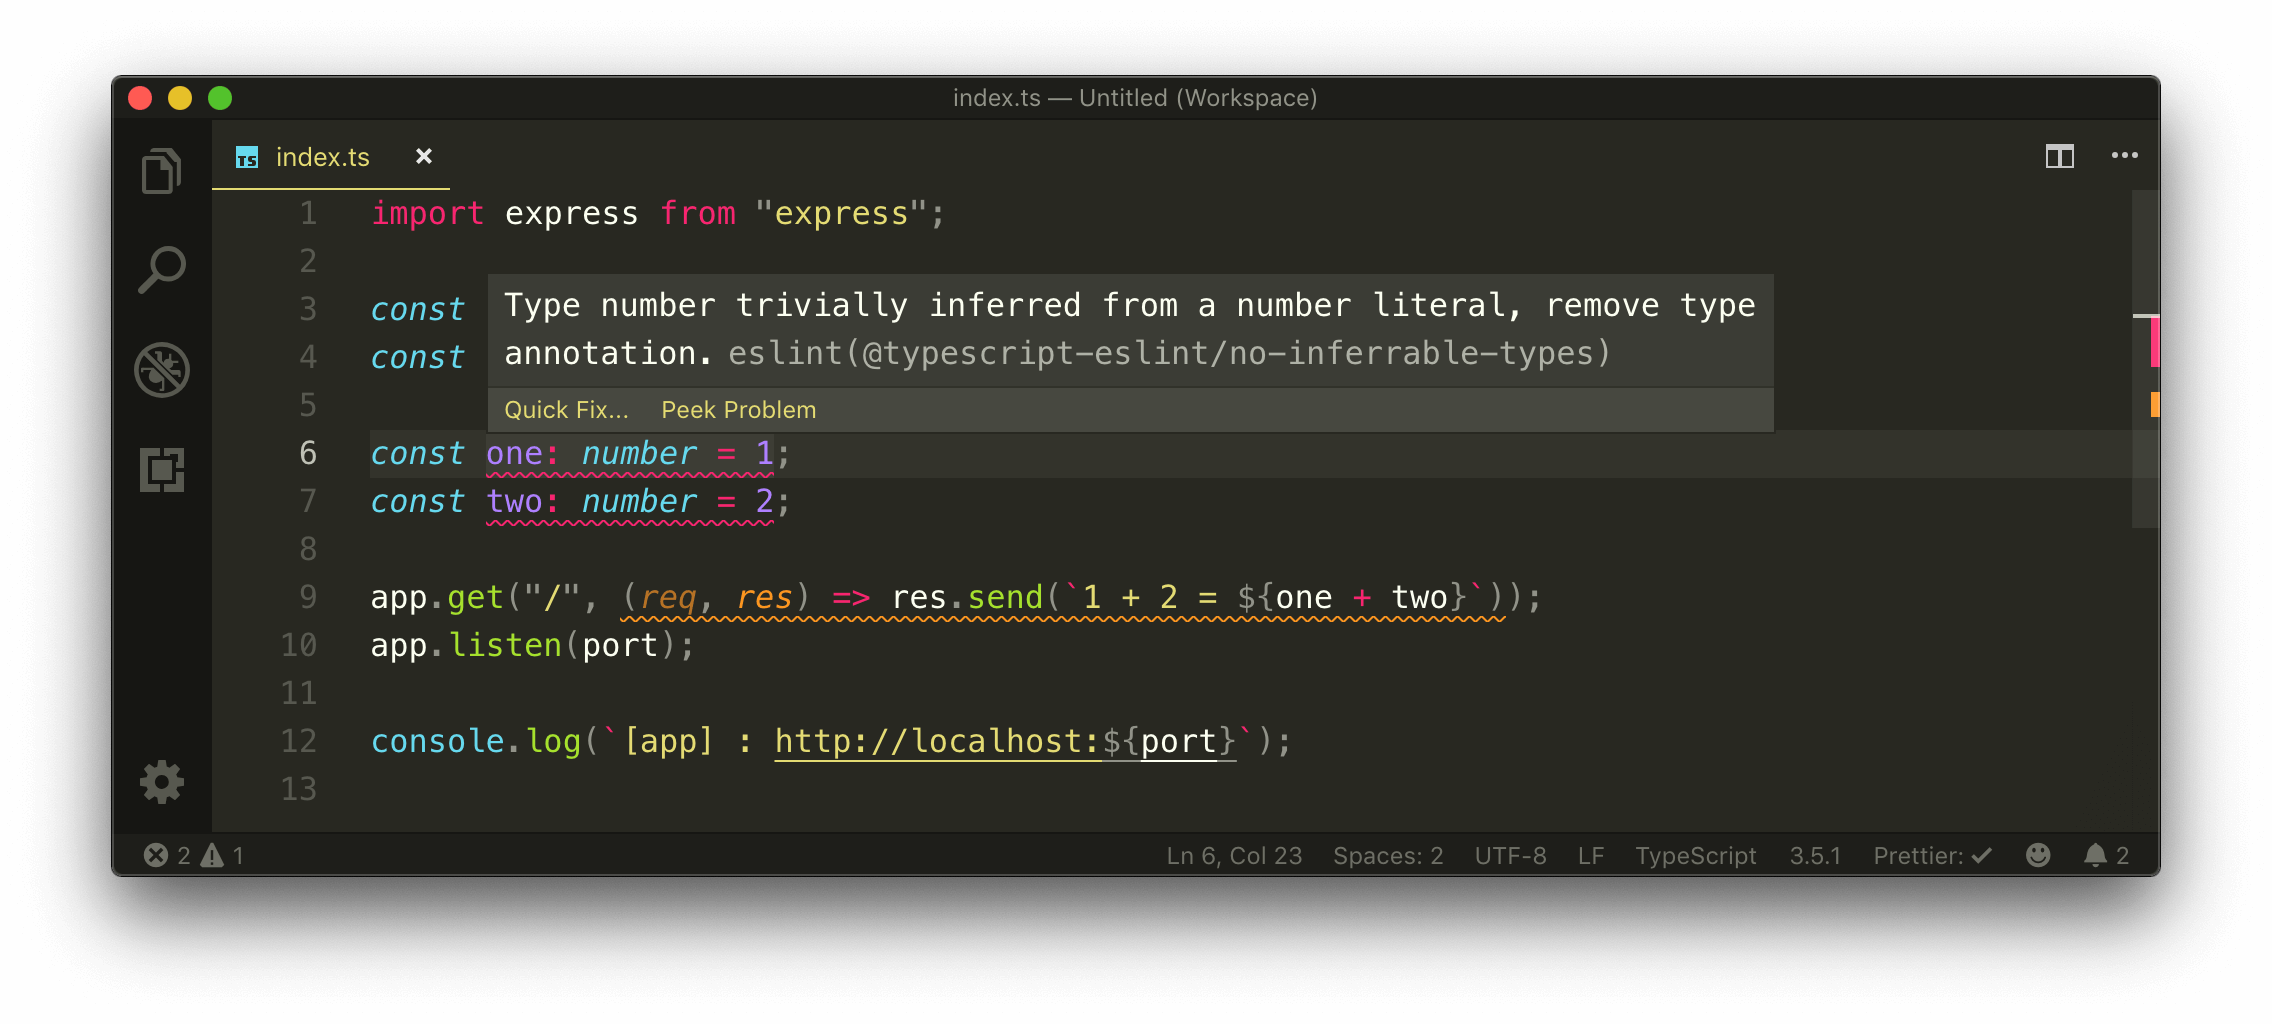
This rule is one of the ESLint rules dictated from our recommended typescript-eslint package that states simple types such as number , string and boolean can be easily inferred and doesn’t have to be explicity defined. We like this rule, so we’ll comply by removing the explicit annotation of the number type.
server/src/index.ts
const one = 1;
const two = 2;
We see another lint warning that tells us the callback function in the app.get() method is missing a return type.
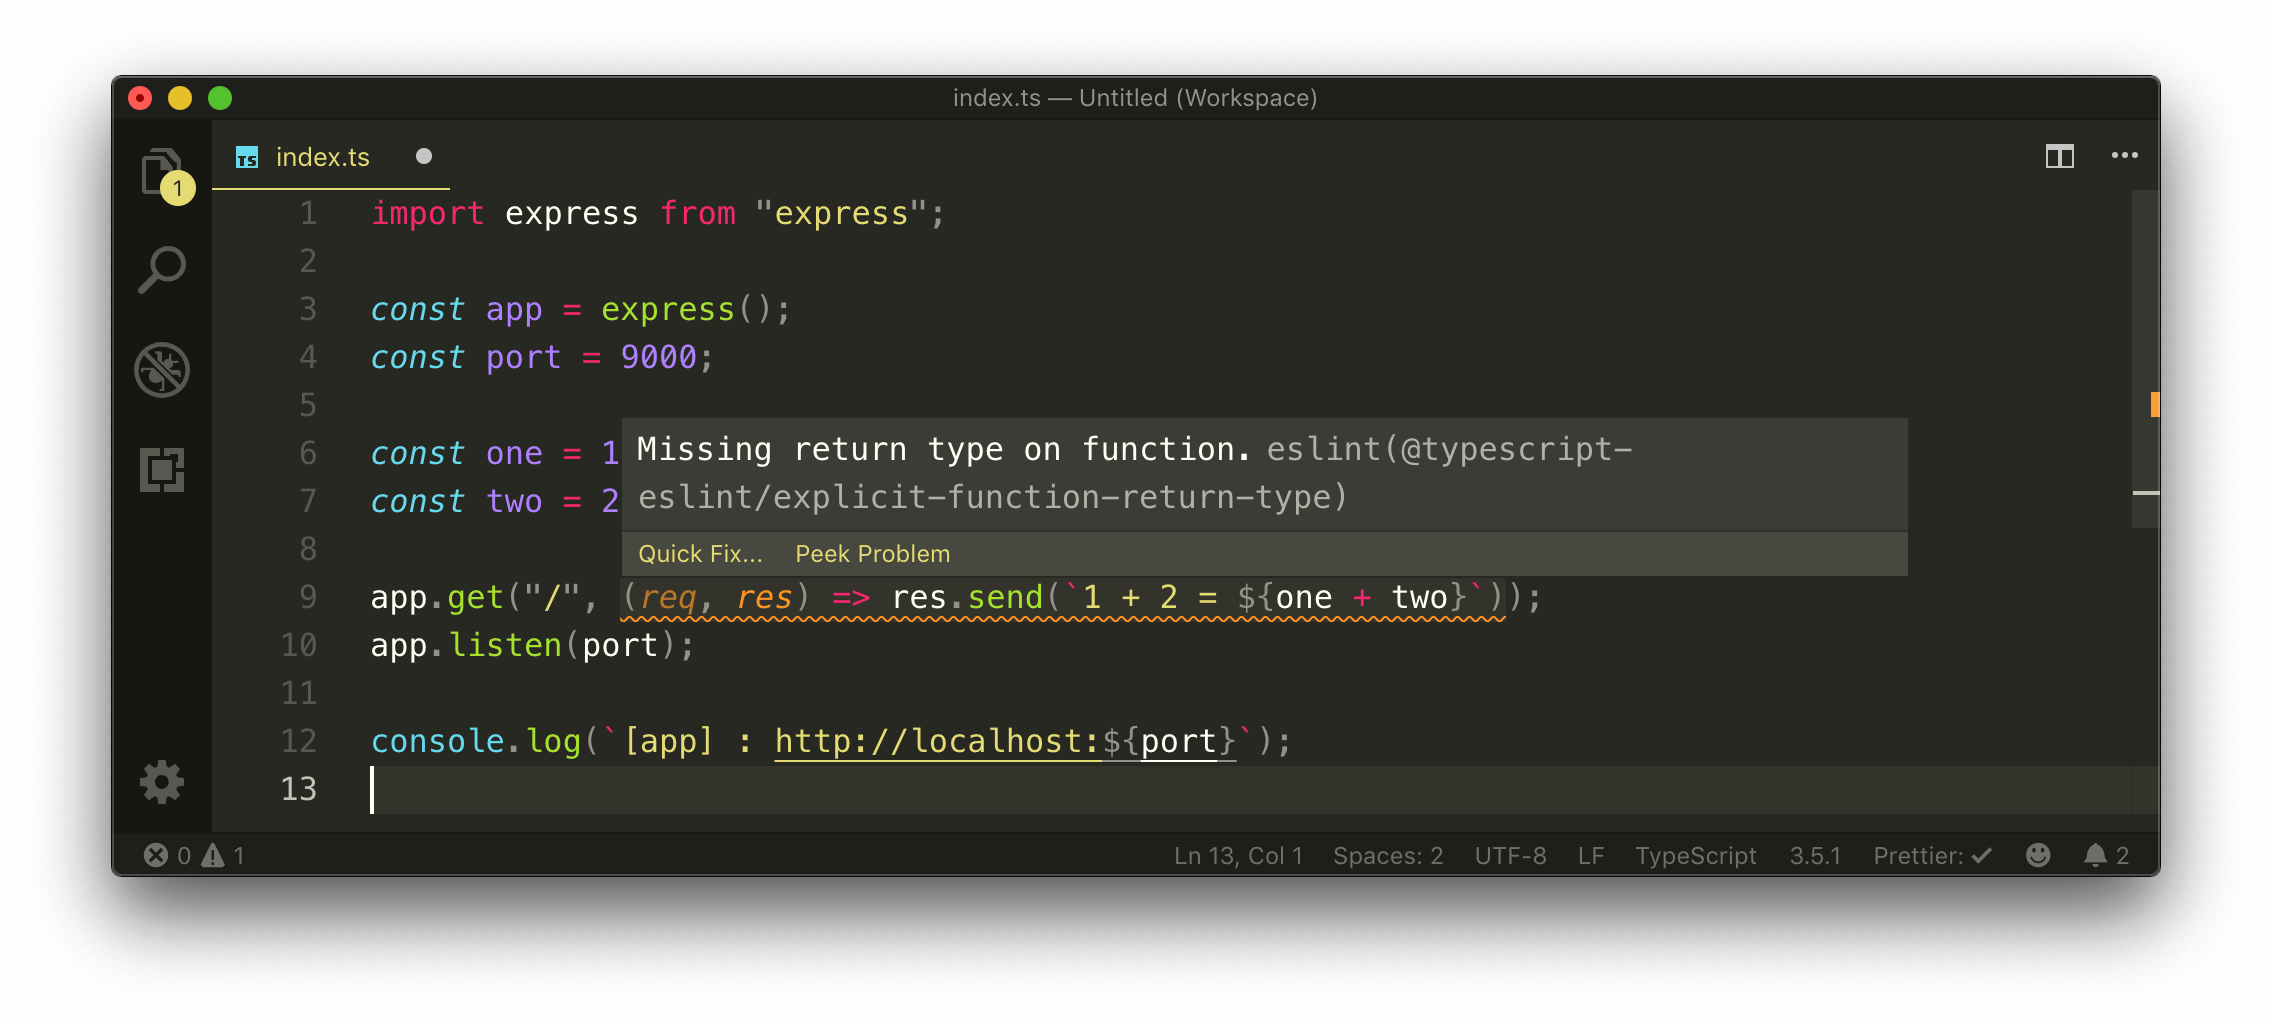
Just like how we can explicitly define types for variables, TypeScript allows us to specify the return types for functions. We like to have our function type be inferred whenever possible so we’ll modify this ESLint rule. In the .eslintrc.json file, we’ll turn off the explicit-function-return-type rule.
server/.eslintrc.json
  "rules": {
    "indent": "off",
    "@typescript-eslint/indent": "off",
    "@typescript-eslint/explicit-function-return-type": "off"
  }
There’s one more thing to consider. When we take a look at the req parameter in our callback function, we can see an editor message that states 'req' is declared but its value is never read .
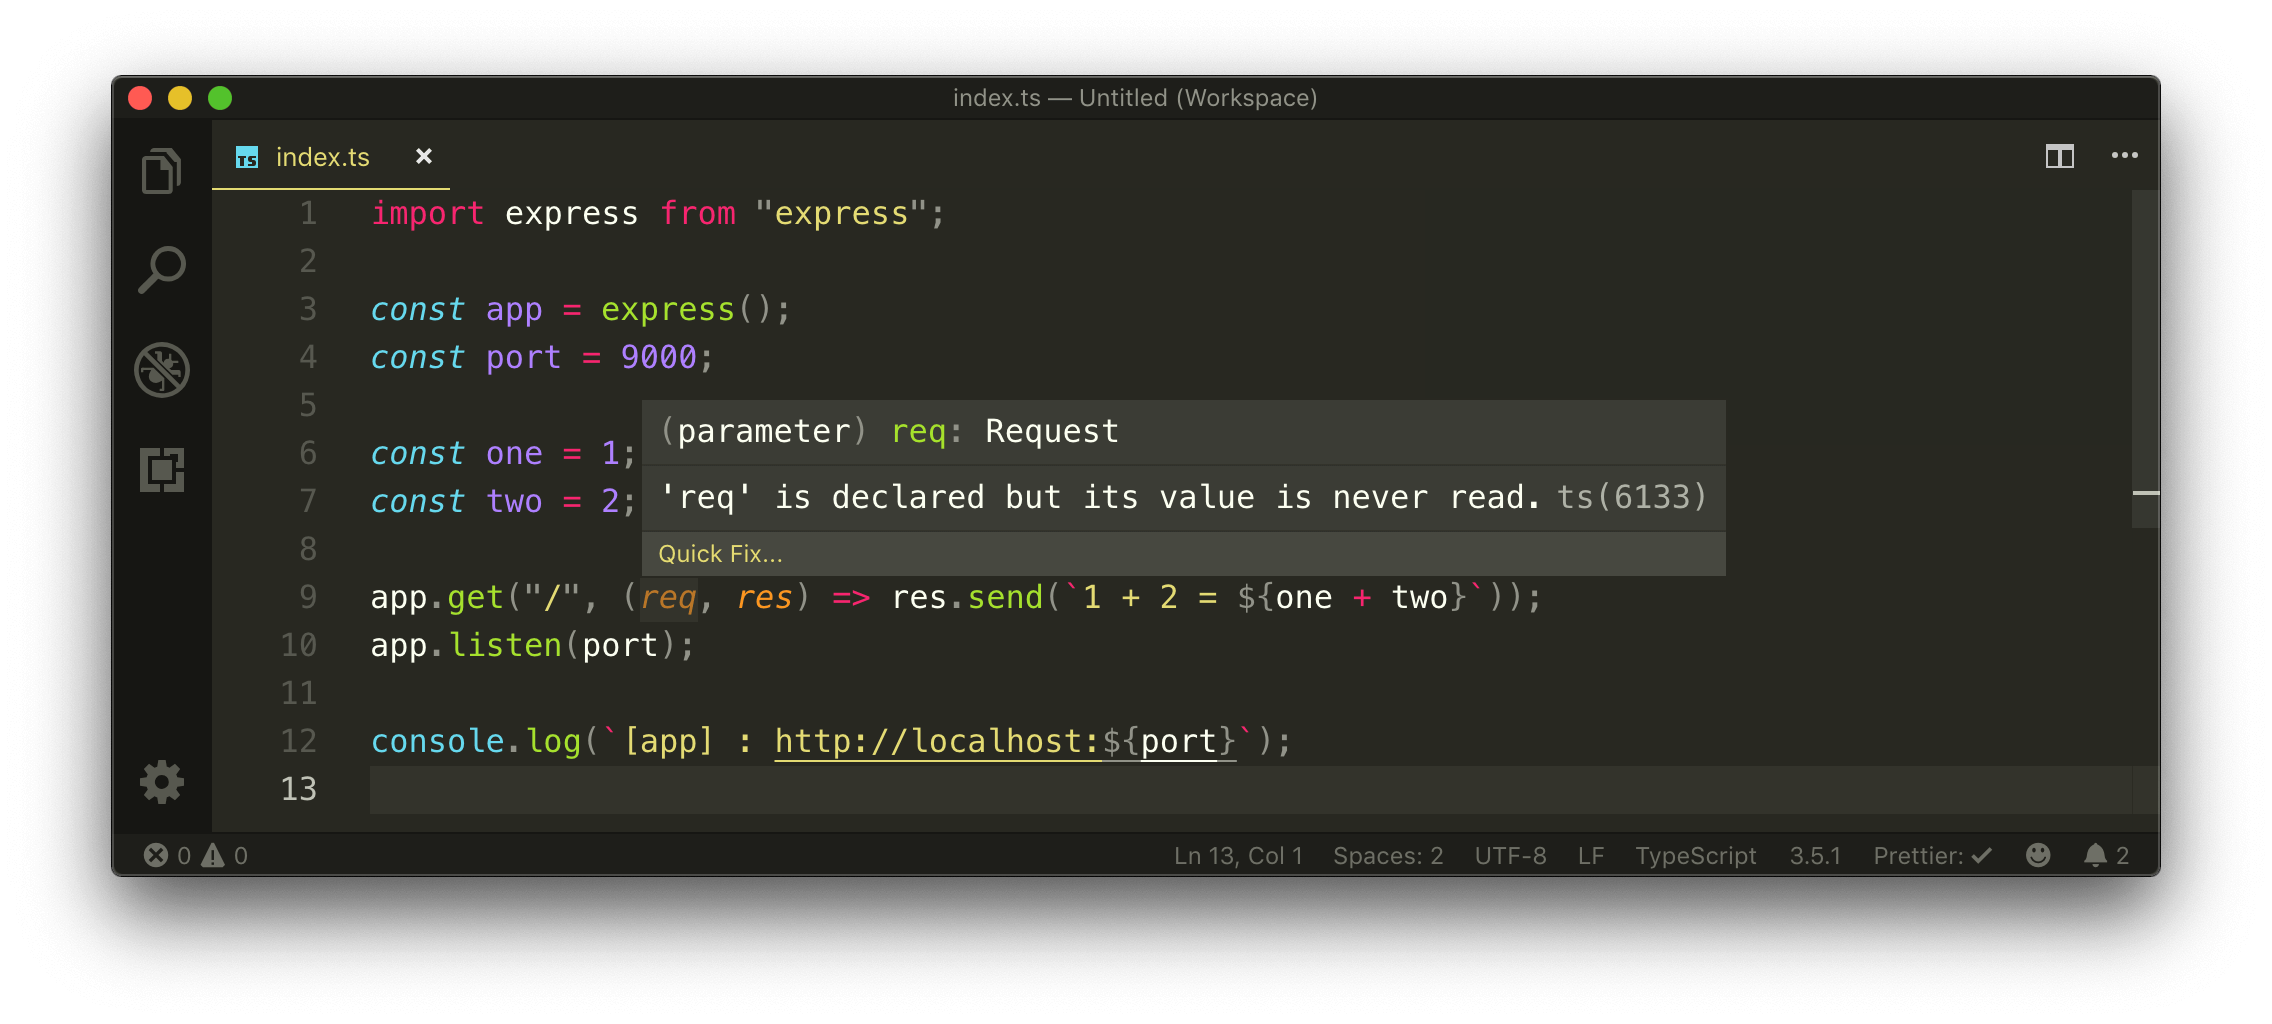
This isn’t an ESLint error but a TypeScript warning. This is a useful warning but in our case we’ve declared the req parameter to access the second positional parameter - res . To notify TypeScript we’re aware of this unused parameter, we can prefix the req parameter with an underscore.
server/src/index.ts
app.get("/", (_req, res) => res.send(`1 + 2 = ${one + two}`));
Our src/index.ts file will now look like the following:
server/src/index.ts
import express from "express";

const app = express();
const port = 9000;

const one = 1;
const two = 2;

app.get("/", (_req, res) => res.send(`1 + 2 = ${one + two}`));
app.listen(port);

console.log(`[app] : http://localhost:${port}`);
VSCODE & INTELLISENSE
The capability to hover over variables, parameters, and functions and have our editor provide information is due to VSCode’s TypeScript IntelliSense feature. TypeScript and VSCode’s IntelliSense is a powerful capability especially when coupled with an ESLint + VSCode Integration. Not only are we able to recognize issues/warnings in our editor, we’re able to hover and also recognize the typing information and documentation inferred for all the different variables, parameters, and functions used within an application!

INTRODUCING MOCK LISTINGS
Let’s add a little functionality to our current minimal server. To get us started, we’re going to introduce a mock array of data that we’ll be able to use and manipulate before we talk about and address more appropriate data persistence.
We’ll introduce this mock array in a listings.ts file within our src/ folder.
server/
  // ...
  src/
    index.ts
    listings.ts
  // ...
The mock data we hope to introduce is a collection of rental listings where each listing will have a listing title , image , address , price , rating , number of beds , number of baths , and permissible number of guests . Our mock array is to have three distinct listing objects. This is purely fake data, with fake addresses, and copyright-free to use images.
We’ll create and export a const labeled listings that is to be this mock array, in the src/listings.ts file.
export const listings = [
  {
    id: "001",
    title: "Clean and fully furnished apartment. 5 min away from CN Tower",
    image:
      "https://res.cloudinary.com/tiny-house/image/upload/v1560641352/mock/Toronto/toronto-listing-1_exv0tf.jpg",
    address: "3210 Scotchmere Dr W, Toronto, ON, CA",
    price: 10000,
    numOfGuests: 2,
    numOfBeds: 1,
    numOfBaths: 2,
    rating: 5
  },
  {
    id: "002",
    title: "Luxurious home with private pool",
    image:
      "https://res.cloudinary.com/tiny-house/image/upload/v1560645376/mock/Los%20Angeles/los-angeles-listing-1_aikhx7.jpg",
    address: "100 Hollywood Hills Dr, Los Angeles, California",
    price: 15000,
    numOfGuests: 2,
    numOfBeds: 1,
    numOfBaths: 1,
    rating: 4
  },
  {
    id: "003",
    title: "Single bedroom located in the heart of downtown San Fransisco",
    image:
      "https://res.cloudinary.com/tiny-house/image/upload/v1560646219/mock/San%20Fransisco/san-fransisco-listing-1_qzntl4.jpg",
    address: "200 Sunnyside Rd, San Fransisco, California",
    price: 25000,
    numOfGuests: 3,
    numOfBeds: 2,
    numOfBaths: 2,
    rating: 3
  }
];
When we hover over the listings constant variable, we can see that TypeScript infers the type since we’ve initialized it with data. The type inferred is an array of objects that contain these following properties with their respective types.
// inferred listings type

const listings: {
  id: string;
  title: string;
  image: string;
  address: string;
  price: number;
  numOfGuests: number;
  numOfBeds: number;
  numOfBaths: number;
  rating: number;
}[];
The square bracket at the end of the type definition is one of the commonly used ways to define an Array Type.
What if we changed the title field of one object from a string to a number . When we inspect to see what the type of listings becomes, we can see that our editor tells us that TypeScript infers that an object item in the array could be of one of two objects .
// inferred listings type

const listings: ({
    // ...
    title: number;
    // ...
} | {
    // ...
    title: string;
    // ...
})[]
This pipe symbol | is used to create something known as a Union Type in TypeScript - which is essentially stating that the type could be either one or the other.
Could we ensure that the objects we declare in the listings array have to conform to a single shape? We could, by creating an explicit type that helps describe the shape of listings .
INTERFACES
There are two common ways we can describe the shape of a single listing object. A type alias or an interface.
// Type Alias
type Listing = {};

// Interface
interface Listing {}
A type alias or an interface can be used with minor differences between them. We’ll resort to using an interface since the TypeScript team has historically used interfaces to describe the shape of objects.
We’ll have a Listing interface be created at the top of the listings.ts file which will describe the shape of a single listings object. We’ll expect each listing object to have:
- An
id,title,imageandaddressof typestring. -
price,numOfGuests,numOfBeds,numOfBaths, andratingof typenumber.
server/src/listings.ts
interface Listing {
  id: string;
  title: string;
  image: string;
  address: string;
  price: number;
  numOfGuests: number;
  numOfBeds: number;
  numOfBaths: number;
  rating: number;
}
With our Listing interface defined, we’ll assign the appropriate type to the listings array we’ve created.
export const listings: Listing[] = [
  // ...
];
We’ve set the listings constant variable to be an Array Type of Listing which states that each element in the array should conform to the Listing interface. If we now attempt to specify a value for a field that doesn’t conform to the Listing interface shape, TypeScript will warn us of this incorrectness.
Though we won’t ever do this, the one other way we can define an array type is to use the array generic type.
Array<Listing>Our ESLint set-up doesn’t accept the use of the array generic type so we’ll stick with the initial approach of defining an array type throughout the course. We’ll be taking a deeper dive into what TypeScript generics are in some of the upcoming lessons.
CREATING GET AND POST EXPRESS ROUTES
With our mock listings array defined, we’ll attempt to have our Express server give us the capability to GET and POST changes to this mock data array.
Like we’ve seen for the index route ( / ) in the src/index.ts file, Express gives us the capability to creates routes which refer to how different endpoints respond to client requests. We’re going to create two new separate routes:
- A
/listingsroute with which we can retrieve the listings collection. - A
/delete-listingroute with which we can delete a specified listing.
GET LISTINGS
To GET the listings information in an Express route, we can do just like what we’ve done when we sent the 'hello world' message for the index route. We’ll first import the listings array in our src/index.ts file.
server/src/index.ts
import { listings } from "./listings";
Then use the app.get() method to create a new /listings route that is to simply return the listings array.
server/src/index.ts
app.get("/listings", (_req, res) => {
  res.send(listings);
});
With the server being run, if we head to the browser and navigate to the /listings route, we’ll be presented with our mock listings data array.
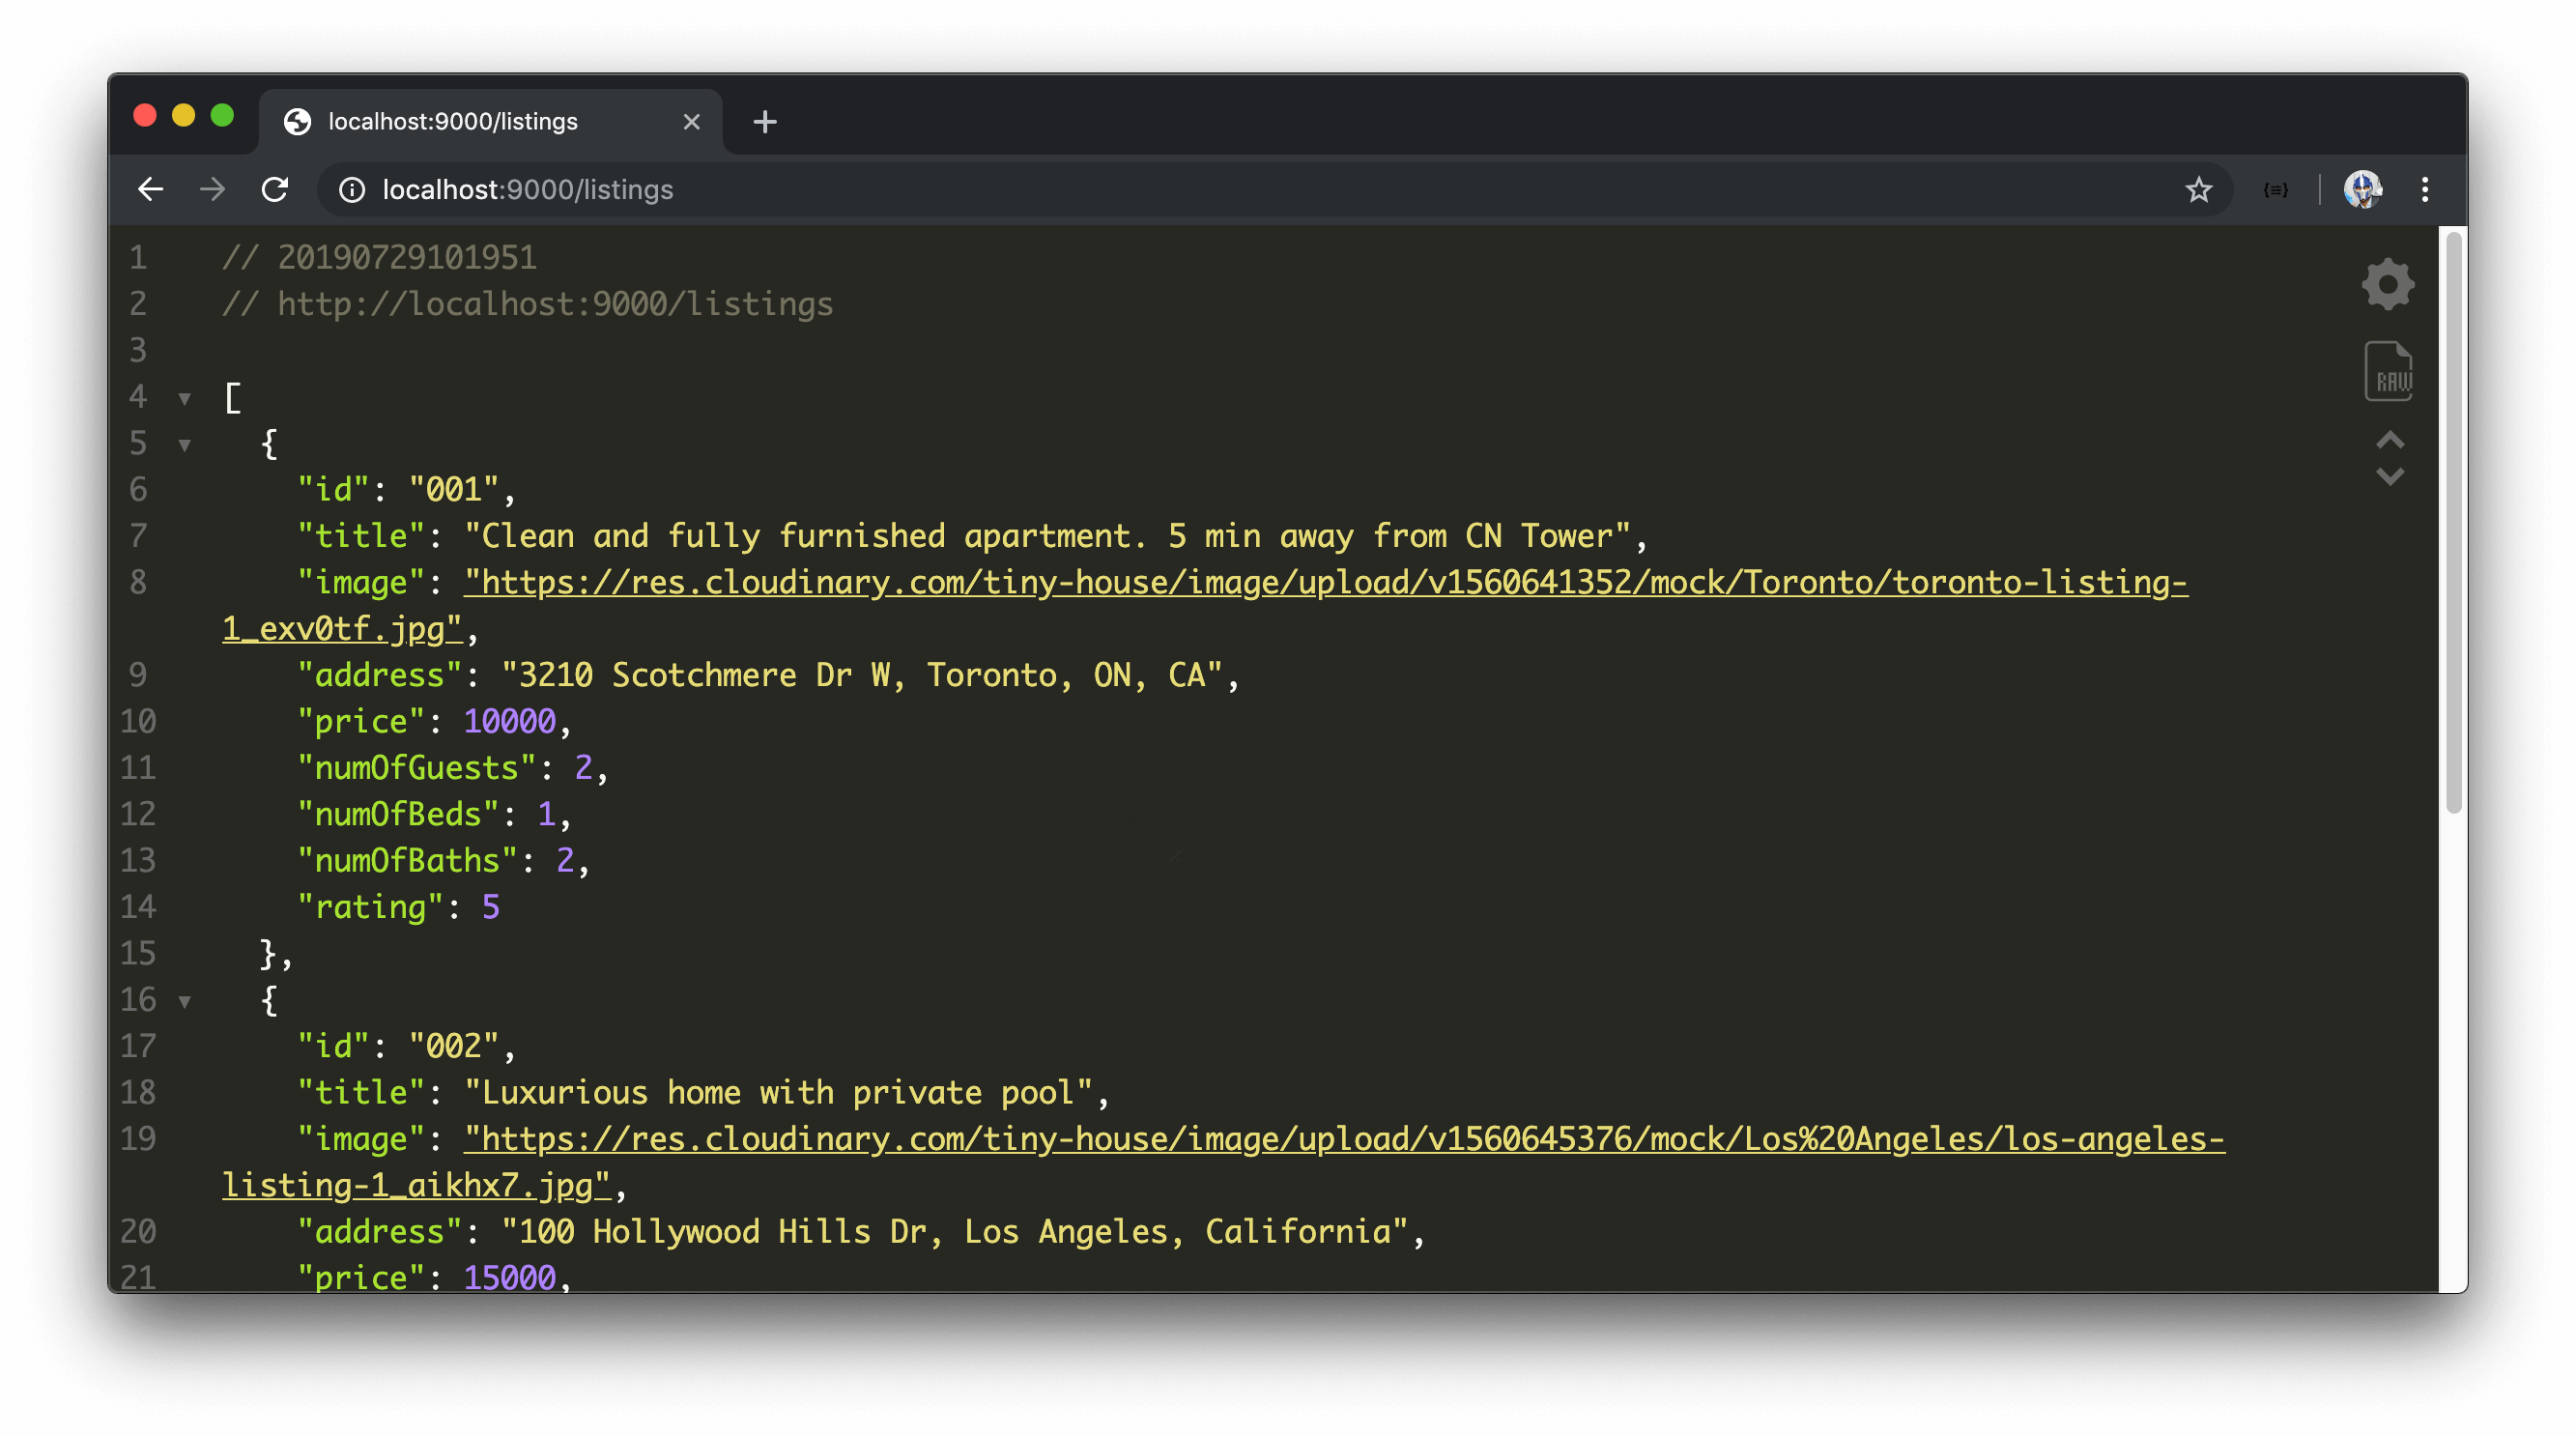
We’re using the JSON Viewer Chrome Extension to humanize this data and make it more readable.
DELETE A LISTING
We’ll now create functionality to help delete a listing from our mock data.
In a standard REST API, the GET method is often used to request data. Though many other methods exist, we’ll use the POST method to specify a route that can have data be sent to the server to conduct an action. In this case, we’ll look to have the id of a listing be passed in which will be used to delete that particular listing. For our server to access the data in our POST request, we’ll install a middleware to help parse the request body. We’ll use the popular bodyParser library which can be installed alongside its type declaration file.
We’ll first install body-parser as a dependency.
server $: npm install body-parser
Then install its type declaration file as a development dependency.
server $: npm install -D @types/body-parser
We’ll then import the bodyParser module in our index.ts file.
server/src/index.ts
import bodyParser from "body-parser";
To use middleware in our Express server, we’ll use the .use() function in our app server instance where we can mount specific middleware functionality. In our middleware function, we’ll pass in bodyParser.json() to help parse incoming requests as JSON and expose the resulting object on req.body .
server/src/index.ts
app.use(bodyParser.json());
Express now provides a built-in middleware to parse incoming requests with JSON payloads that is based on
bodyParser. Instead of using thebodyParserpackage, we can achieve the same results with:
app.use(express.json())
We’ll now set up the POST request to a /delete-listing route. We’ll declare the callback function and specify the req and res parameters we’ll need.
app.post('/delete-listing', (req, res) => {}
Though the req type is inferred to be of type Request from the Express package, the req.body property is defined as any , so we’ll annotate the id field that we expect to retrieve from the req.body to be of type string .
app.post('/delete-listing', (req, res) => {
  const id: string = req.body.id;
}
To delete a listing, we’ll use a simple for loop to iterate through the listings array and use the array splice method to remove a listing where its id matches the id value from the req body. If a listing is found, we remove the item from the array and we’ll send the deleted listing item as the response.
app.post('/delete-listing', (req, res) => {
  const id: string = req.body.id;

  for (let i = 0; i < listings.length; i++) {
    if (listings[i].id === id) {
      return res.send(listings.splice(i, 1));
    }
  }
}
If we’re unable to find a listing to delete, we’ll simply return text stating 'failed to delete listing' .
server/src/index.ts
app.post("/delete-listing", (req, res) => {
  const id: string = req.body.id;

  for (let i = 0; i < listings.length; i++) {
    if (listings[i].id === id) {
      return res.send(listings.splice(i, 1)[0]);
    }
  }

  return res.send("failed to deleted listing");
});
There are a few ways we can try and make this POST command happen from building a client to interact with the server to using tools like Postman. For now, we’ll use curl to test this POST request in our command line.
curlis installed by default on many systems and is an easy way for us to interact with APIs.OSX users should already have curl installed. Windows users can download and install curl here: https://curl.haxx.se/download.html
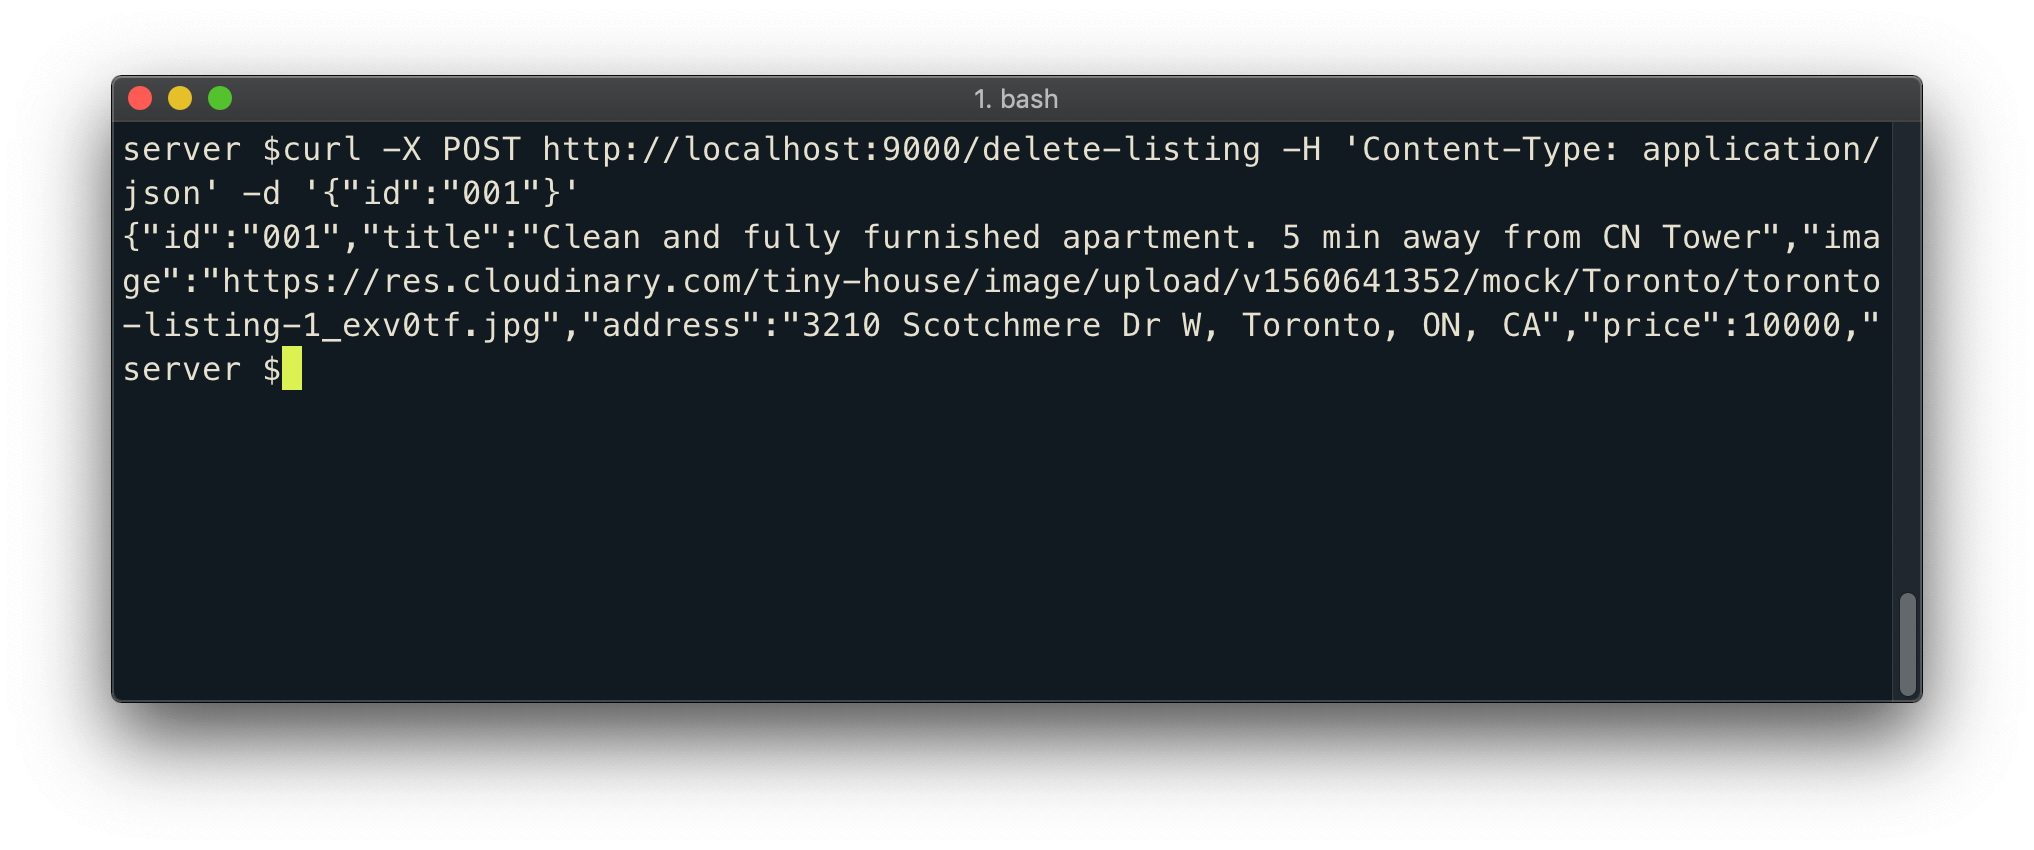
We can delete a listing with curl by running the following command in our terminal.
curl -X POST http://localhost:9000/delete-listing \
    -H 'Content-Type: application/json' \
    -d '{"id":"001"}'
Pasting the entire block above may cause some formatting issues in your terminal. To appropriately run the command, paste each line one by one or type it out.
In the above
curlcommand, we’ve picked the first item in the listings array to be deleted by passing areq.bodyof{"id":"001"}.
When successful, the deleted listing item will be sent as the response of the request.
When we head to the browser and retrieve the listings collection from the /listings route, we can see that the listing object we’ve just deleted isn’t part of the collection any longer. However, this change isn’t being persisted. When we restart our server, we see the entire list once again.
Since we no longer need the hello world message that is sent with the index route ( / ), we’ll remove the originally introduced app.get() method for the index route and the const variables one and two .
MODULE 1 SUMMARY
This lesson is a summary of what we’ve done in Module 1.0.
In Module 1.0, we’ve built a very simple Node/Express/Typescript project.
PACKAGE.JSON
In the package.json file of our app, we can see the dependencies and devDependencies our app depends on. body-parser and the express packages are our app’s main dependencies. In our development dependencies, we’ve introduced the TypeScript ESLint packages, the eslint package, nodemon , and typescript . We’ve introduced two scripts in our app; the start script which allows us to start the server and the build script which allows us to compile our TypeScript code to valid JavaScript.
server/package.json
{
  "name": "tinyhouse-v1-server",
  "version": "0.1.0",
  "dependencies": {
    "body-parser": "^1.19.0",
    "express": "^4.17.1"
  },
  "devDependencies": {
    "@types/body-parser": "^1.17.0",
    "@types/express": "^4.17.0",
    "@types/node": "^12.0.10",
    "@typescript-eslint/eslint-plugin": "^1.11.0",
    "@typescript-eslint/parser": "^1.11.0",
    "eslint": "^6.0.1",
    "nodemon": "^1.19.1",
    "ts-node": "^8.3.0",
    "typescript": "^3.5.2"
  },
  "scripts": {
    "start": "nodemon src/index.ts",
    "build": "tsc -p ./"
  }
}
.ESLINTRC.JSON
The .eslintrc.json file sets up the configuration for our ESLint setup. We’re using the @typescript-eslint/parser package to help parse TypeScript code. We’re extending the @typescript-eslint/recommended package which contains a series of recommended rules. We’ve also added and customized a few rules of our own.
server/.eslintrc.json
{
  "parser": "@typescript-eslint/parser",
  "parserOptions": {
    "ecmaVersion": 2018,
    "sourceType": "module"
  },
  "extends": ["plugin:@typescript-eslint/recommended"],
  "env": { "node": true },
  "rules": {
    "indent": "off",
    "@typescript-eslint/indent": "off",
    "@typescript-eslint/explicit-function-return-type": "off"
  }
}
TSCONFIG.JSON
The tsconfig.json file is responsible for setting up the configuration of our TypeScript project. We’ve stated the src/ folder to be the root directory of our TypeScript code. The output directory of compiled JavaScript code will be a build/ folder that is to be created in the root of the server project directory. We’ve introduced a strict: true field in our configuration to enable a series of strict type-checking options.
server/tsconfig.json
{
  "compilerOptions": {
    "target": "es6",
    "module": "commonjs",
    "rootDir": "./src",
    "outDir": "./build",
    "esModuleInterop": true,
    "strict": true
  }
}
SRC/LISTINGS.TS
The src/listings.ts file is where we export and create a mock data array of listings. We’ve stated the array should conform to the Listing[] type where each item in the array is to have the Listing interface type.
server/src/listings.ts
interface Listing {
  id: string;
  title: string;
  image: string;
  address: string;
  price: number;
  numOfGuests: number;
  numOfBeds: number;
  numOfBaths: number;
  rating: number;
}

export const listings: Listing[] = [
  {
    id: '001',
    title: 'Clean and fully furnished apartment. 5 min away from CN Tower',
    image:
      'https://res.cloudinary.com/tiny-house/image/upload/v1560641352/mock/Toronto/toronto-listing-1_exv0tf.jpg',
    address: '3210 Scotchmere Dr W, Toronto, ON, CA',
    price: 10000,
    numOfGuests: 2,
    numOfBeds: 1,
    numOfBaths: 2,
    rating: 5,
  },
  {
    id: '002',
    title: 'Luxurious home with private pool',
    image:
      'https://res.cloudinary.com/tiny-house/image/upload/v1560645376/mock/Los%20Angeles/los-angeles-listing-1_aikhx7.jpg',
    address: '100 Hollywood Hills Dr, Los Angeles, California',
    price: 15000,
    numOfGuests: 2,
    numOfBeds: 1,
    numOfBaths: 1,
    rating: 4,
  },
  {
    id: '003',
    title: 'Single bedroom located in the heart of downtown San Fransisco',
    image:
      'https://res.cloudinary.com/tiny-house/image/upload/v1560646219/mock/San%20Fransisco/san-fransisco-listing-1_qzntl4.jpg',
    address: '200 Sunnyside Rd, San Fransisco, California',
    price: 25000,
    numOfGuests: 3,
    numOfBeds: 2,
    numOfBaths: 2,
    rating: 3,
  },
];
SRC/INDEX.TS
The src/index.ts file is the main starting point of our app and is where we create and start our Node server. We import the express and body-parser packages as well as the mock listings array.
In the src/index.ts file, we run the express() function to create a server app instance. We apply middleware and pass in bodyParser.json() to have our request data be handled as JSON.
We declare two routes in our app, /listings and /delete-listing .
- The
/listingsroute acts as a GET request for clients where clients can retrieve the listings data array. - The
/delete-listingroute acts as a POST resource where clients can post information (i.e. theidof a listing) to delete a listing.
server/src/index.ts
import express from "express";
import bodyParser from "body-parser";
import { listings } from "./listings";

const app = express();
const port = 9000;

app.use(bodyParser.json());

app.get("/listings", (_req, res) => {
  res.send(listings);
});

app.post("/delete-listing", (req, res) => {
  const id: string = req.body.id;

  for (let i = 0; i < listings.length; i++) {
    if (listings[i].id === id) {
      return res.send(listings.splice(i, 1)[0]);
    }
  }

  return res.send("failed to deleted listing");
});

app.listen(port);

console.log(`[app] : http://localhost:${port}`);
MOVING FORWARD
In the next coming lessons, we’re going to introduce GraphQL. We’re going to change what we’ve built in Module 1 to maintain a similar level of functionality (i.e. query listings and delete a listing) but instead use a GraphQL API!