MODULE 2 INTRODUCTION
We’ve created a RESTful API to interact with our mock data. A common question is why would one need GraphQL?
GraphQL is a query language for APIs and was originally created to help client-side applications dictate the data they need before they request it. We thought the best way to introduce GraphQL would be to compare a real REST and GraphQL API that achieves the same outcome.
In this module, we’ll:
- Explain what GraphQL is.
- Compare Github’s REST and Github’s GraphQL APIs.
- Finally, dive deeper into some core concepts of GraphQL.
WHAT IS GRAPHQL?
What we’ve built so far with our Node app conforms to what a REST (which stands for REpresentation State Transfer) API is. In traditional REST APIs, the client can interact with the server by accessing various endpoints to GET , POST , PUT , or DELETE data while leveraging the HTTP protocol.
To get all the listings in our app, we had to make a request to the /listings endpoint. If we wanted our server to serve data for just one listing, we could implement a /listing/:id endpoint (where :id is the dynamic id value of a certain listing). If we had mock user data, we could implement a /users endpoint to return all users or a /user/:id endpoint to serve user data for a certain user.
Now, let’s consider an example scenario. What if a client app needs to display some user information plus all the listings for that user. This client doesn’t have to be ours, someone else could have developed a web or mobile app that interacts with our API. How could this scenario play out with REST?
With an example REST API, the client could make a request to a /user/:id endpoint to fetch the initial user data.
1. `/user/:id` - to fetch certain user data
Then the client could make a second request to something like a /user/:id/listings endpoint to return all the listings for that user.
1. `/user/:id` - to fetch certain user data
2. `/user/:id/listings` - to fetch listings for certain user
So far, this isn’t too bad since we’re only making two requests. With that said, how would GraphQL fare here?
GRAPHQL
GraphQL is a query language for making requests to APIs. With GraphQL, the client tells the server exactly what it needs and the server responds with the data that has been requested.
Here’s an example query of attempting to retrieve some user information of a certain id .
query User($id: ID!) {
  user(id: $id) {
    id
    name
    listings {
      id
      title
    }
  }
}
When querying the user with the example above, we can specify what fields we want to be returned from our API. Above, we’ve stated we’re interested in receiving the id , name , and listings information of the user. For the listings that are to be returned, we’re only interested in receiving the id and title of each listing.
GraphQL is a typed language. Before we tell our GraphQL API how we want each field in our API to be resolved, we’ll need to tell GraphQL the type of each of the fields.
type User {
  id: ID!
  name: String!
  listings: [Listing!]!
}
GraphQL allows for some significant benefits. GraphQL APIs are:
- Intuitive : The client can specify exactly what data it needs thus making the code intuitive and easy to understand.
- Performant : Since no useless data needs to be transferred, reduced latency will make an app feel faster which is especially important for slower internet connections.
- Typed : GraphQL uses a type system of its own to validate requests. This integrates beautifully with TypeScript to create a robust statically typed application.
GraphQL APIs are also:
- self-documenting .
- encourage the use of GraphQL IDEs .
- and consist of a single endpoint .
GraphQL isn’t tied to any specific technology. This is because GraphQL is a specification , not a direct implementation. The community has created server implementations and client libraries to create and consume a GraphQL API for a variety of different technologies.
Server libraries
- Apollo Server | Node Frameworks - Github
- GraphQL Java | Java - Github
- GraphQL Ruby | Ruby - Github
- and a lot more…
Client libraries
- Apollo Client | React, Vue, etc. - Github
- GraphQL Python | Python - Github
- GraphQL.Client | .NET - Github
- and a lot more…
In the next lesson, we’ll go through an example-driven approach to compare a real REST & GraphQL API. We’ll be using the Github API that has been made publicly available.
COMPARING GITHUB’S REST AND GRAPHQL APIS
We’ll dive into a good example that showcases GraphQL before we discuss and address some of GraphQL’s core concepts.
We’re going to use the Github Public API as this lesson’s example. GitHub has two versions of its API currently active:
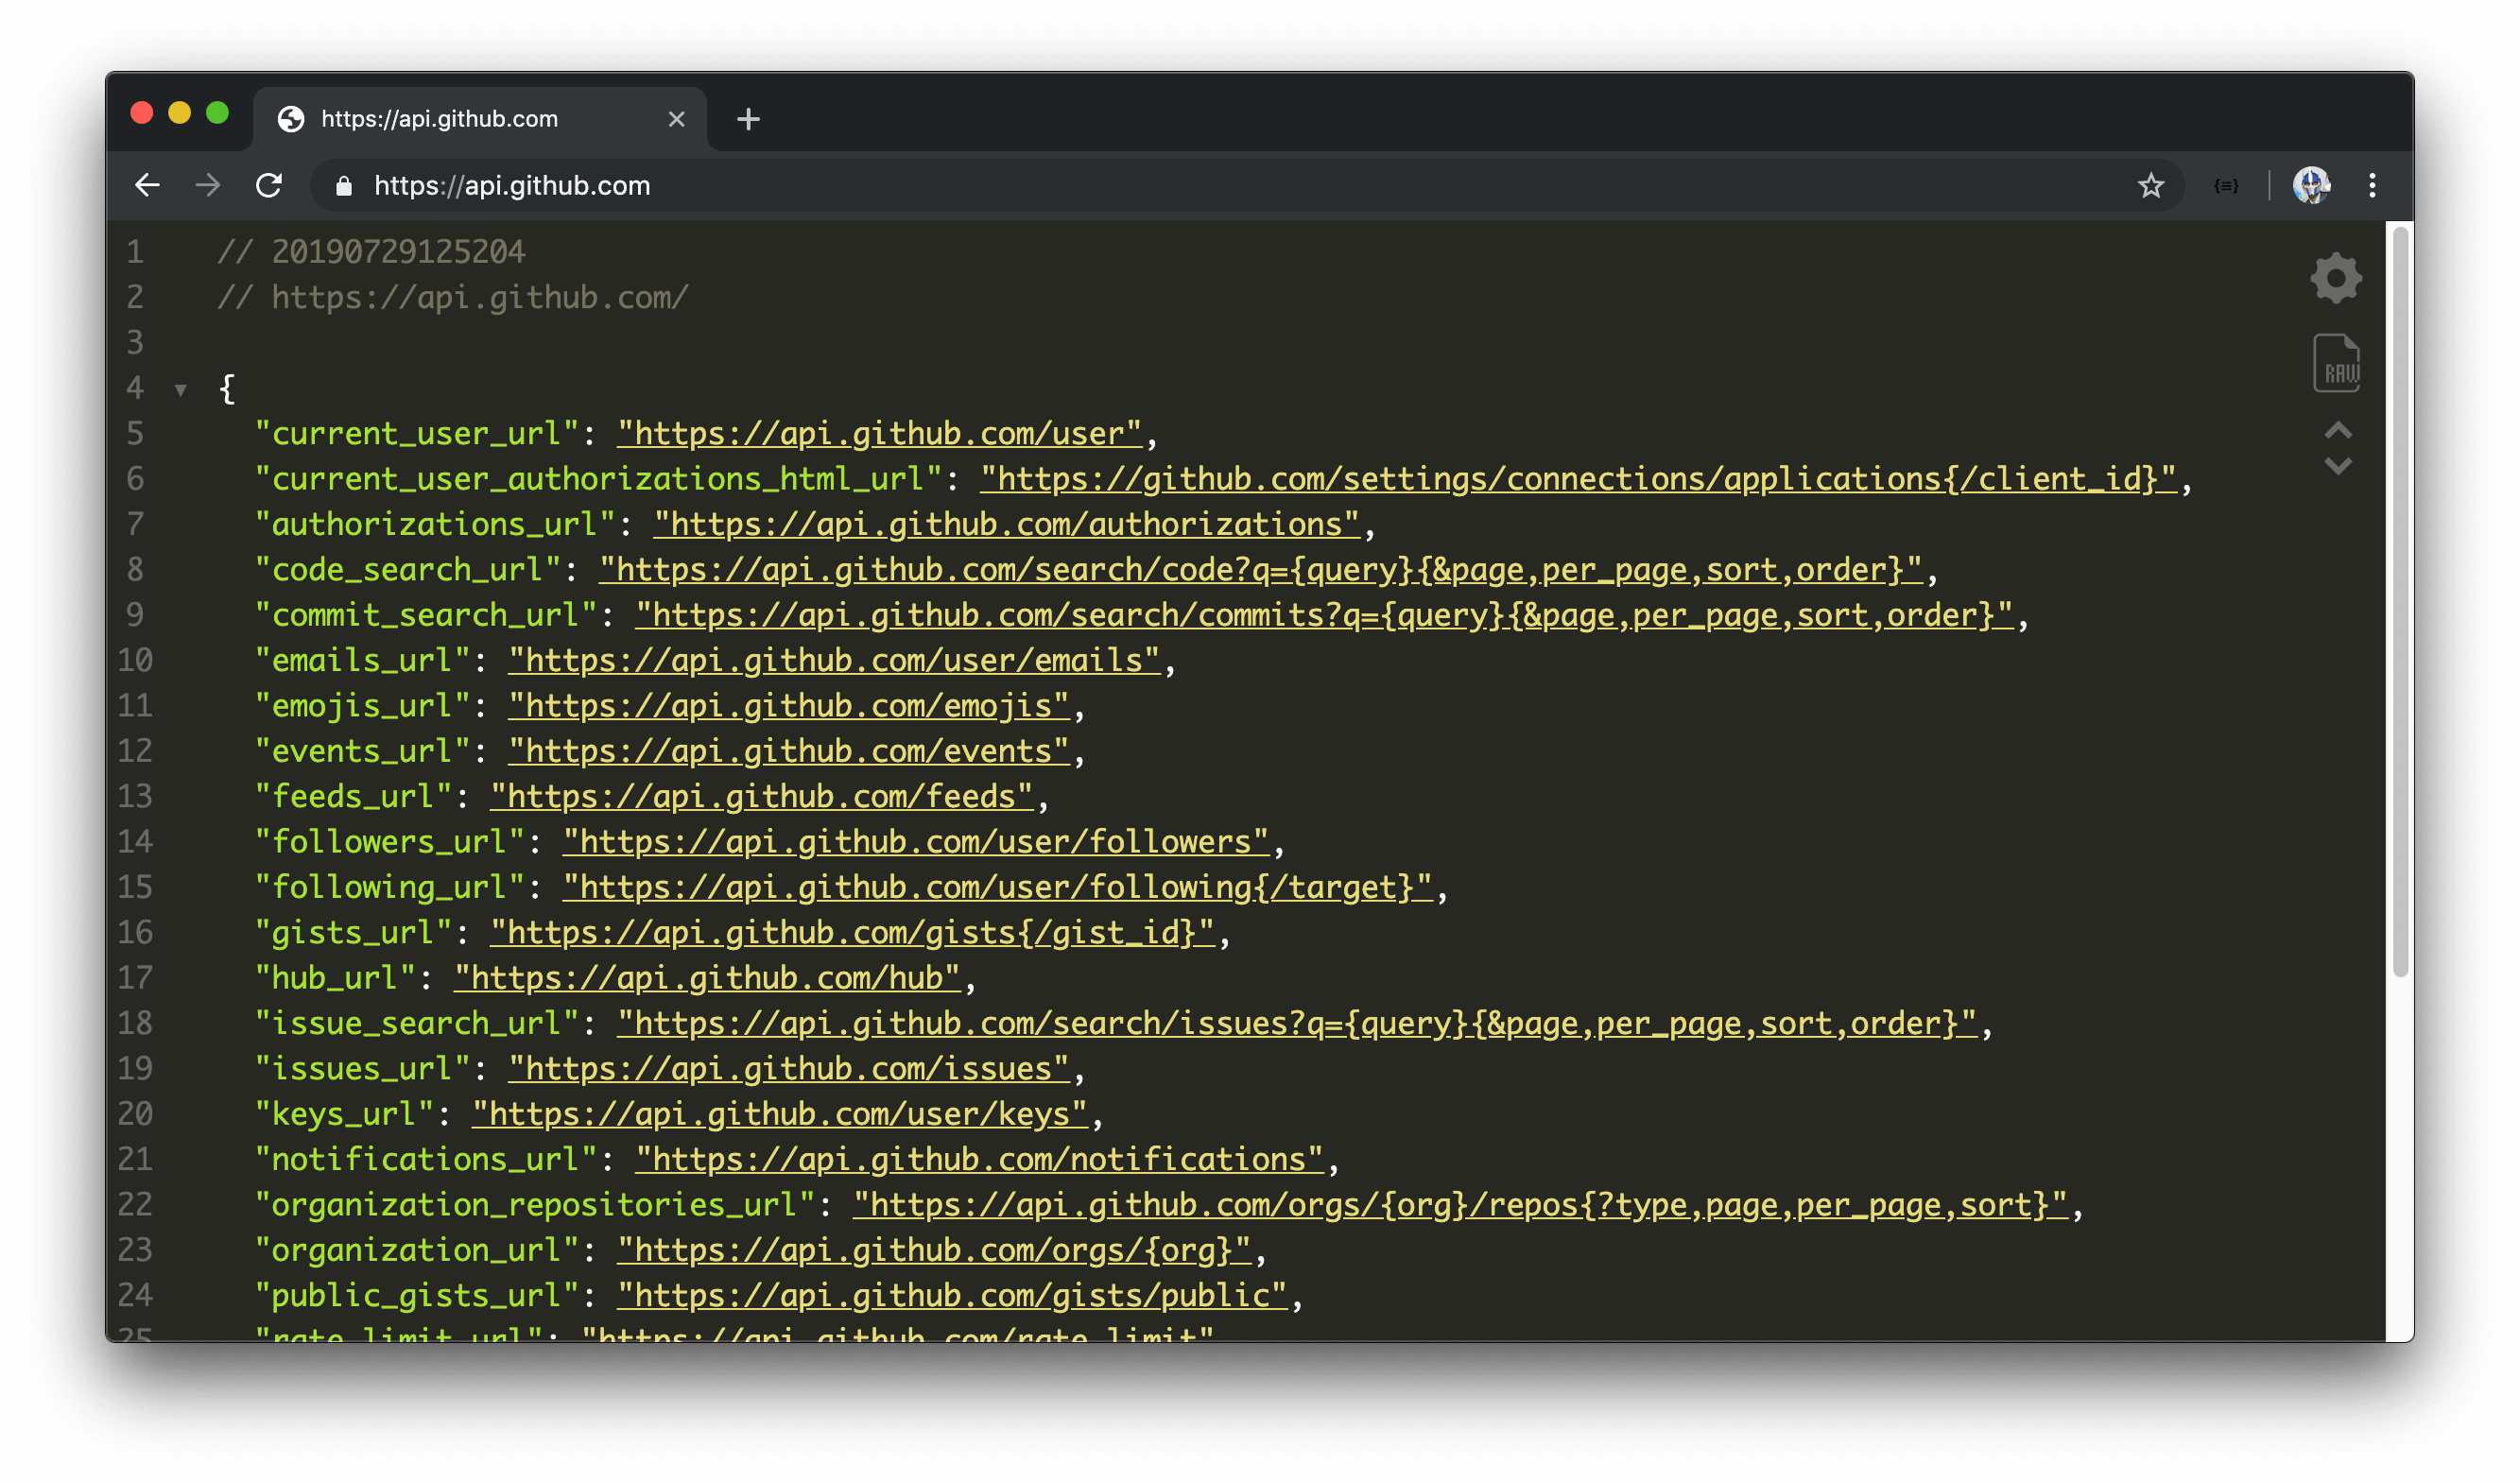
To access Github’s REST API, we can make requests to the following public URL - https://api.github.com. This main parent route gives us an overview of all the different routes we can then interact with in the v3 REST API.
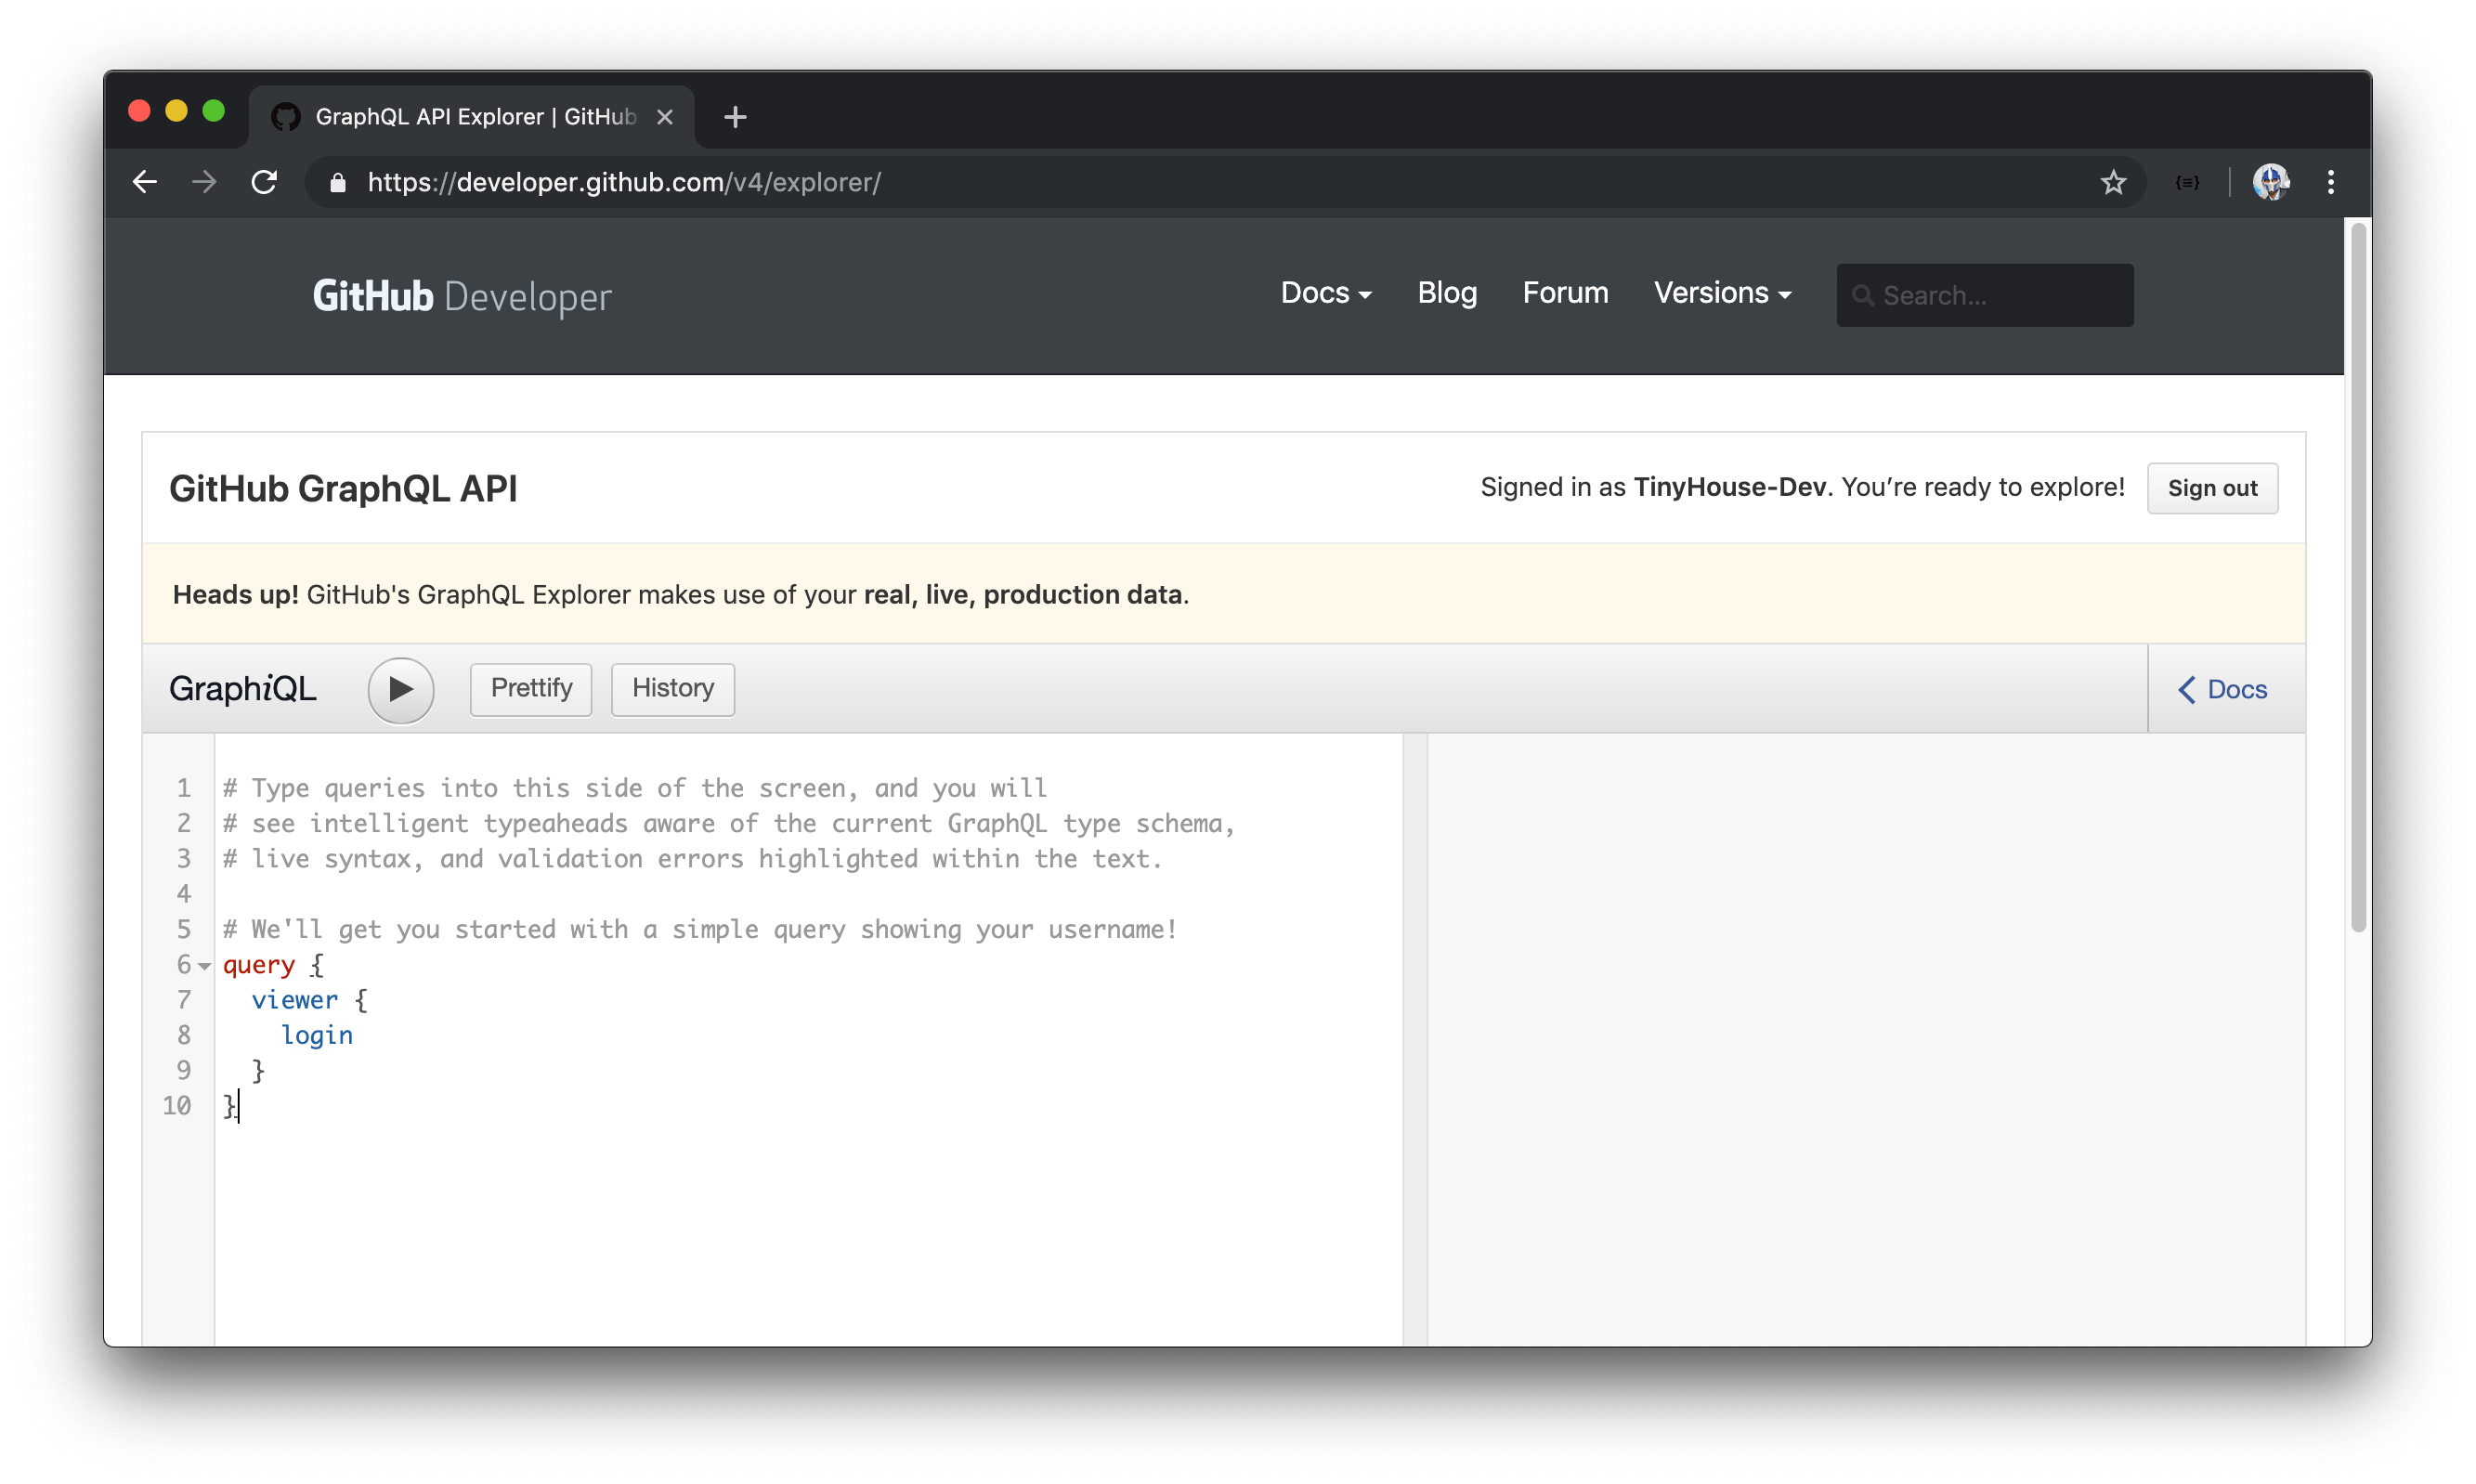
To explore GitHub’s GraphQL API, we can go to https://developer.github.com/v4/explorer. For this GraphQL interface to work, we’ll need be logged in with a GitHub account.
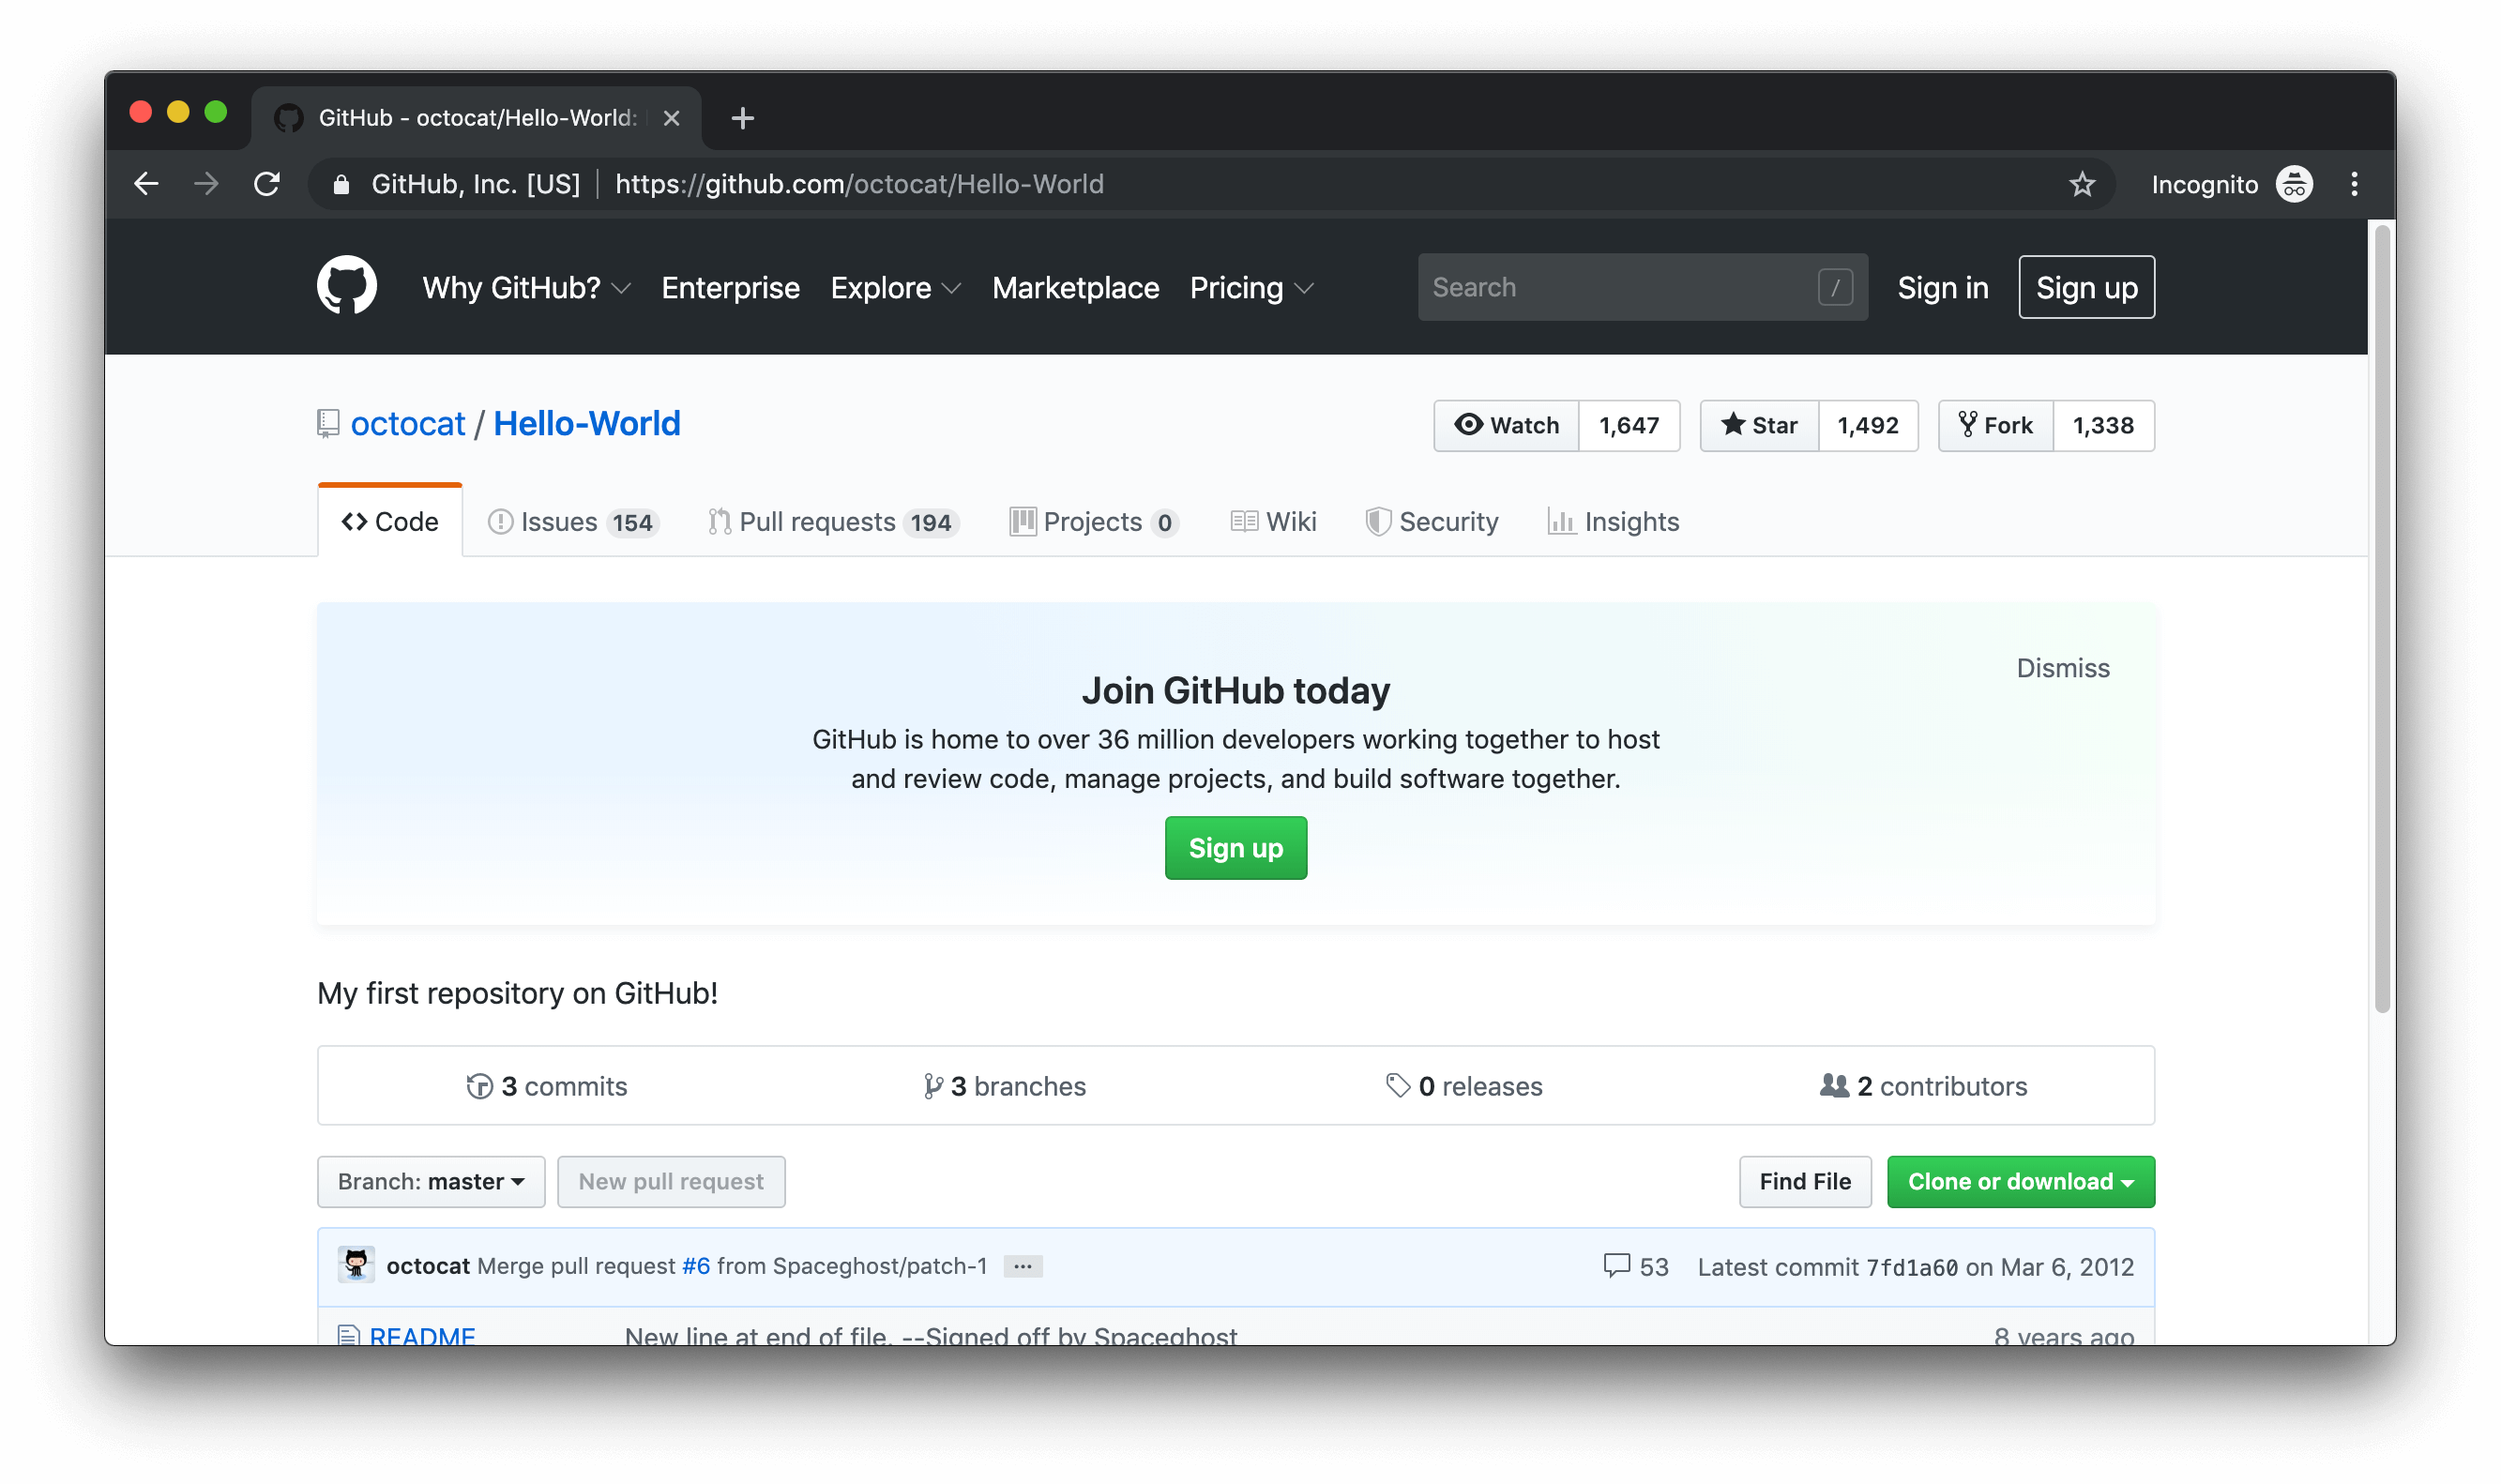
For our first exercise, the first thing we’d look to do is to get the description of a particular repository with both the v3 and v4 APIs. The repository we’ll be using is Github’s own Hello World repository, created by the Octocat profile. The description we’ll like to fetch for the Hello-World repository is My first repository on GitHub! , which can be seen in the UI when we navigate to the repository route in our browser.
REPOSITORY DESCRIPTION
V4 REST API
When we head to https://github.com/octocat/Hello-World in our browser, we’re presented with the information of the Hello-World repository in our UI. Github allows us to see the data being returned for this route by hitting the https://api.github.com/repos/octocat/Hello-World route. We’re making a GET request here as well and the data returned looks as follows:

https://api.github.com/repos/octocat/Hello-World
Though we’ve managed to retrieve the description field we’re looking for in the repository, the server sent us a lot more “useless” (i.e. useless for our current interest) such as the name of the repository, details of the owner of the repository, and other URLs that can allow us to make other requests to get more information. Regardless, we have to retrieve all this information despite the fact we only want the value of a single field.
V3 GRAPHQL API
Let’s contrast this with GraphQL. We’ll head over to the GraphQL Explorer GitHub provides for their new API at https://developer.github.com/v4/explorer. The first thing that can be noted here is that we’re able to interact with an interactive environment to help make GraphQL requests. We’ll talk about this a little more in the next lesson, but the capability of using IDEs is a cool feature that many different GraphQL services provide.
GITHUB’S GRAPHQL EXPLORER DEALS WITH LIVE PRODUCTION DATA
You’ll most likely to be able to delete issues, projects, and perhaps even your account. We’ll suggest being careful when you use this explorer!
Though we won’t be doing too much of a deep dive just yet, we essentially want to make a GET request of sorts to retrieve the description of the Hello-World repository. In GraphQL, we’re able to make queries to retrieve data that we would want.
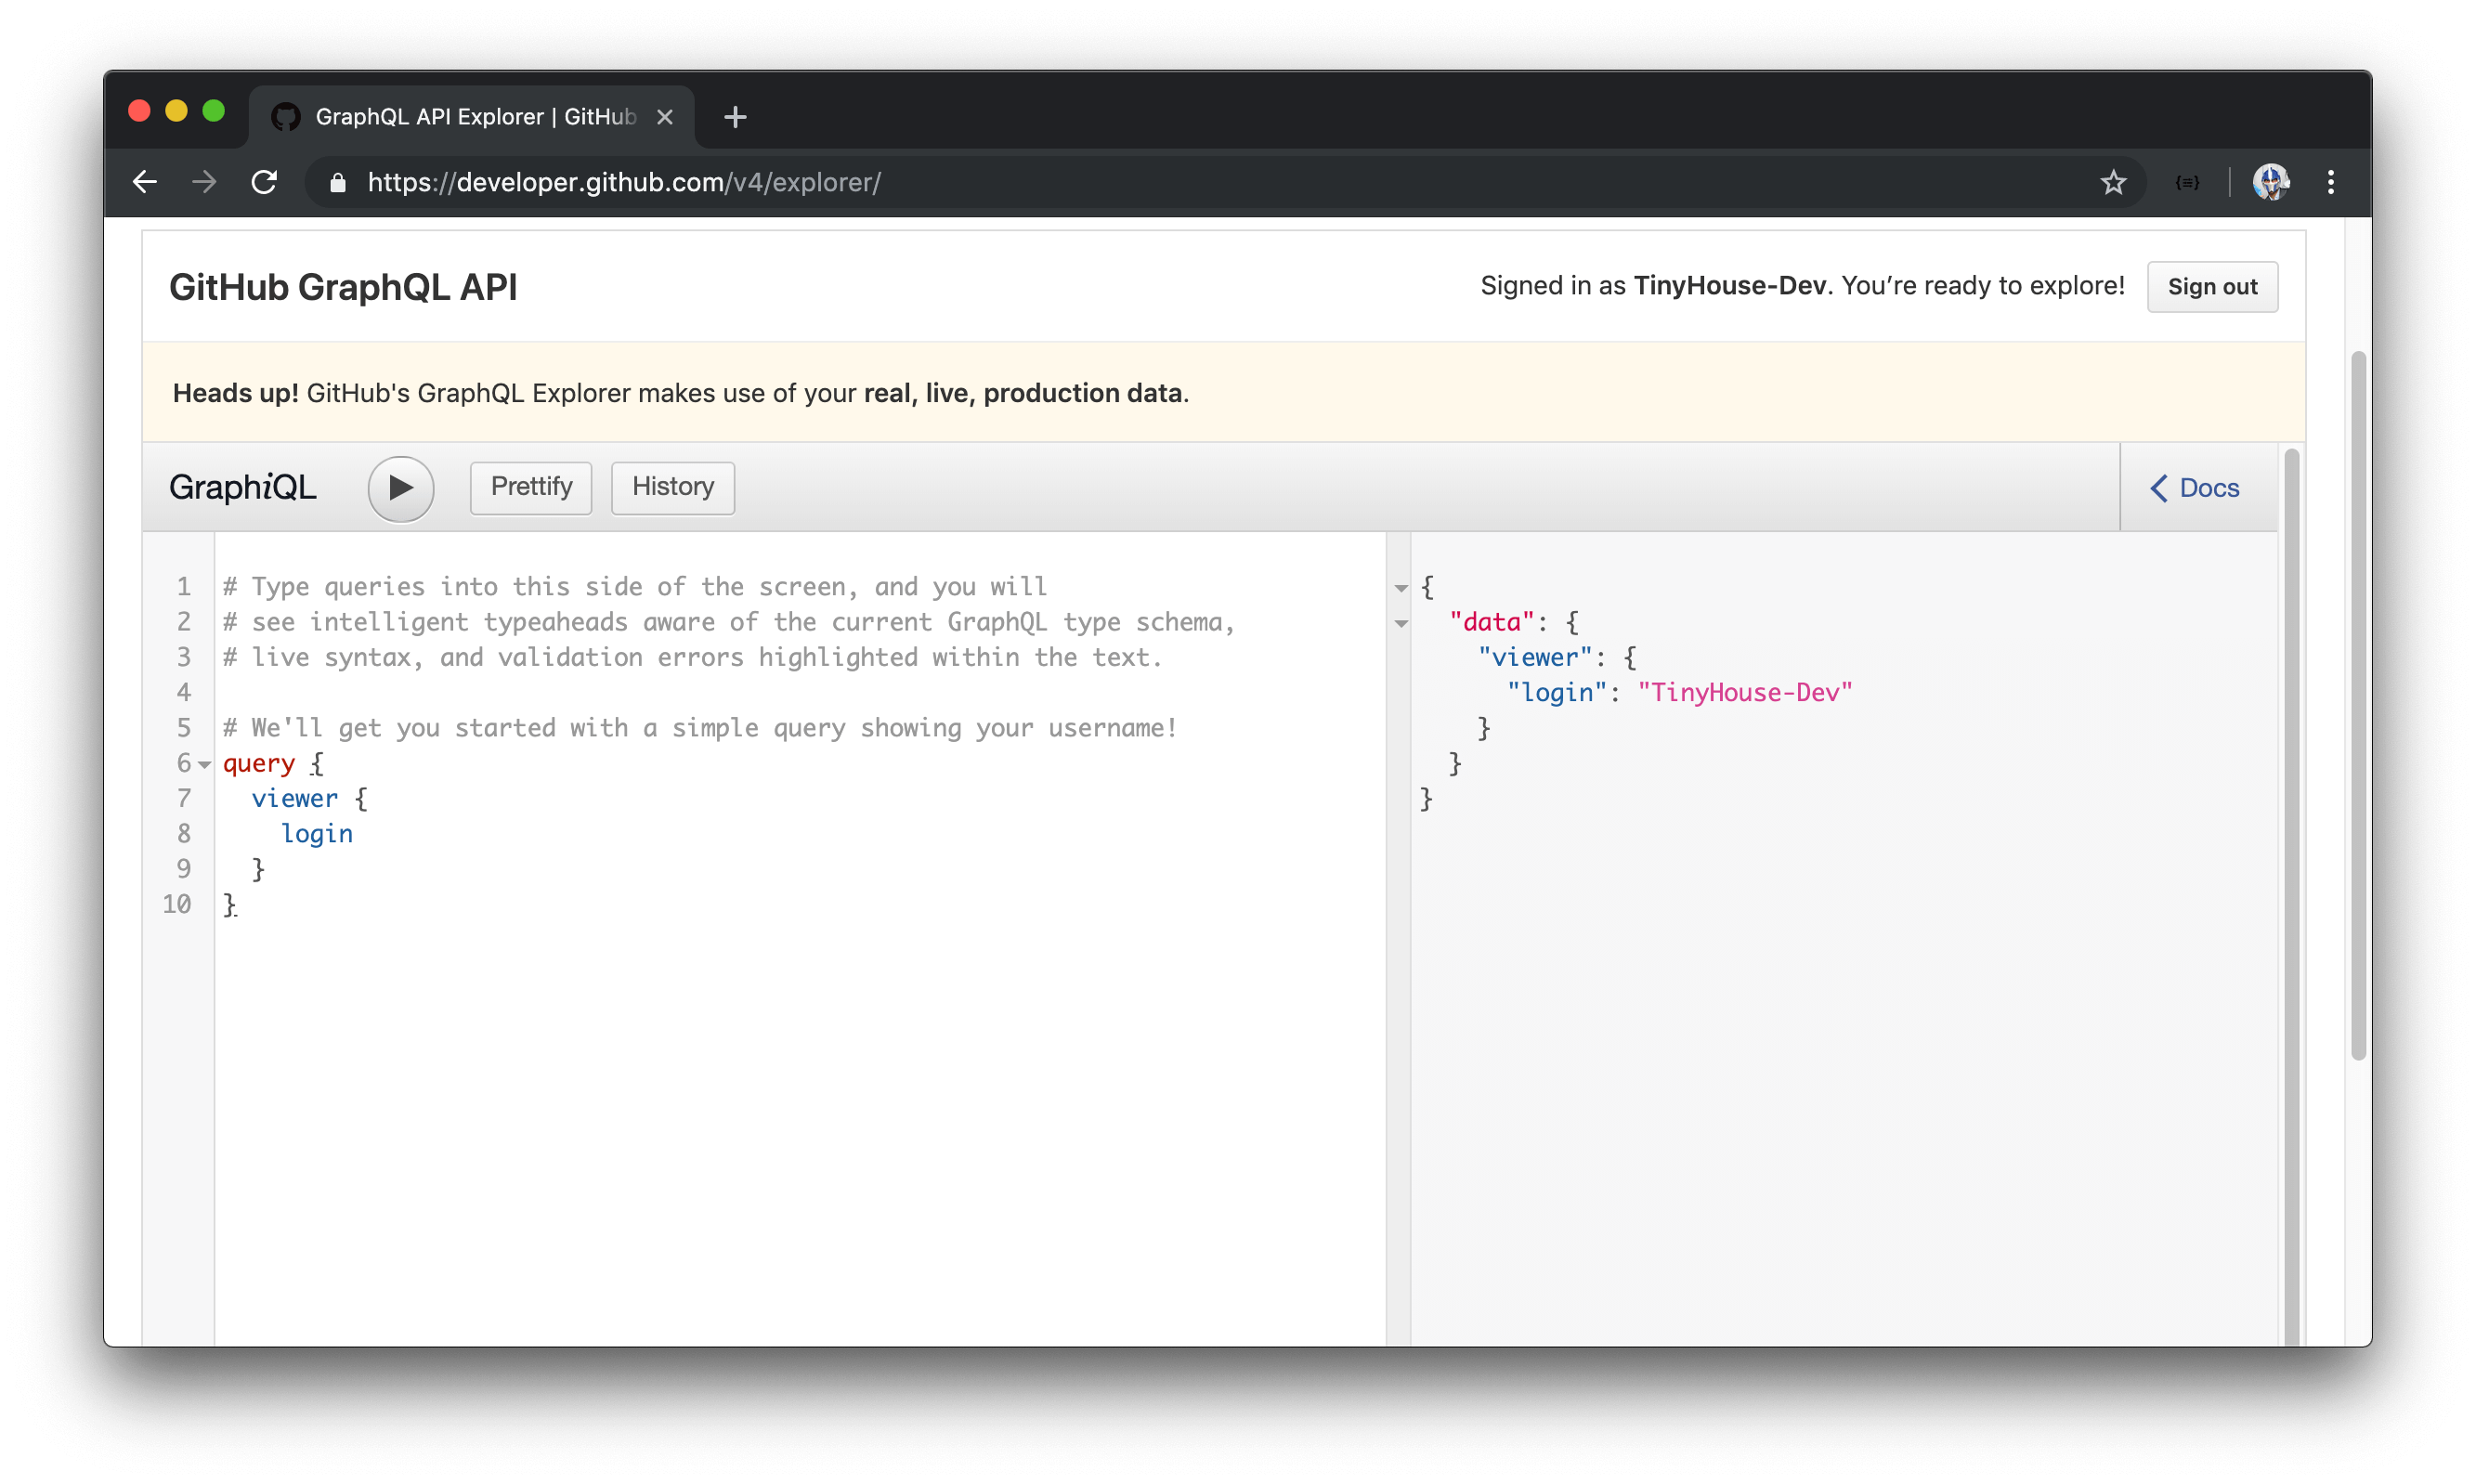
If this is the first time launching the GraphQL explorer, there should already be a query set up in allowing us to retrieve the username of our account. username lives in the login field under viewer . If we run our query (by clicking the play button), we can see the login field returns the username of our account - TinyHouse-Dev .
Let’s modify this query and attempt to query the description field from the Hello-World repository.
The description field we’re interested in lives within a parent repository field that takes an argument of the repository that is to be queried. As a result, we’ll specify repository as the parent field we want to query and we’ll pass in the arguments that conform to the Hello-World repository - owner: "octocat" and name: "Hello-World!" . And we’ll only declare a description field within to be the field we want data to be returned for.
query {
  repository(owner: "octocat", name: "Hello-World") {
    description
  }
}
When we run the query, we get the expected description we’re looking for .

Notice how clean this response is as compared to the response being returned from our REST API? We get only what we ask for .
MORE REPOSITORY INFORMATION
For the next exercise, let’s do something a little more complicated. Imagine if we were developing a client app that needs to display the following information from the same Hello-World repository:
- The repository description.
- The title of a certain particular issue in the repository. We’ll use issue #348 of the Hello-World repository.
- The first 5 comments of said issue. For each comment, we’ll also like to display the comment author’s username and the comment body text
V3 REST API
To accomplish this with the REST API, we’ll need to make three different requests.
- A request to https://api.github.com/repos/octocat/Hello-World to get the repository description.
- A request to https://api.github.com/repos/octocat/Hello-World/issues/348 to retrieve the title of issue #348 of the Hello-World repo.
- Finally, another request to https://api.github.com/repos/octocat/Hello-World/issues/348/comments to get the 5 (and many more!) comments of issue #348.
We’ll need to make three separate requests to get all the information we might be looking for.
V4 GRAPHQL API
With a well built GraphQL API, this can be made easier from a client perspective. This is, because with GraphQL, we can specify exactly what we need from the client. Let’s see how this can work for the above use case and Github’s GraphQL API.
- The
repositoryquery field contains anissuefield that allows us to query information about a certain issue in the repository. - To get information for a certain issue, we’re required to specify a
numberargument where we can provide the issue number. - The
issuefield contains a childcommentsfield where comments of an issue can be queried. -
commentsinissueis a paginated field so we’re able to query the first five by specifying afirstargument with a value of5. - Pagination in
commentsfollows a relay-based pattern (something we’ll talk more about in part 2 of this course) but essentially the data we’re looking for lives withinedgesand thennodes. For every comment we want to query, we’re interested in receiving thebodyTextof the comment and the username of the commenter which lives under theauthor.logInfield.
With all that said, the query we’d like to make looks like the following.
query {
  repository(owner: "octocat", name: "Hello-World") {
    description
    issue(number: 348) {
      title
      comments(first: 5) {
        edges {
          node {
            bodyText
            author {
              login
            }
          }
        }
      }
    }
  }
}
When we run the query, we get exactly what we requested.
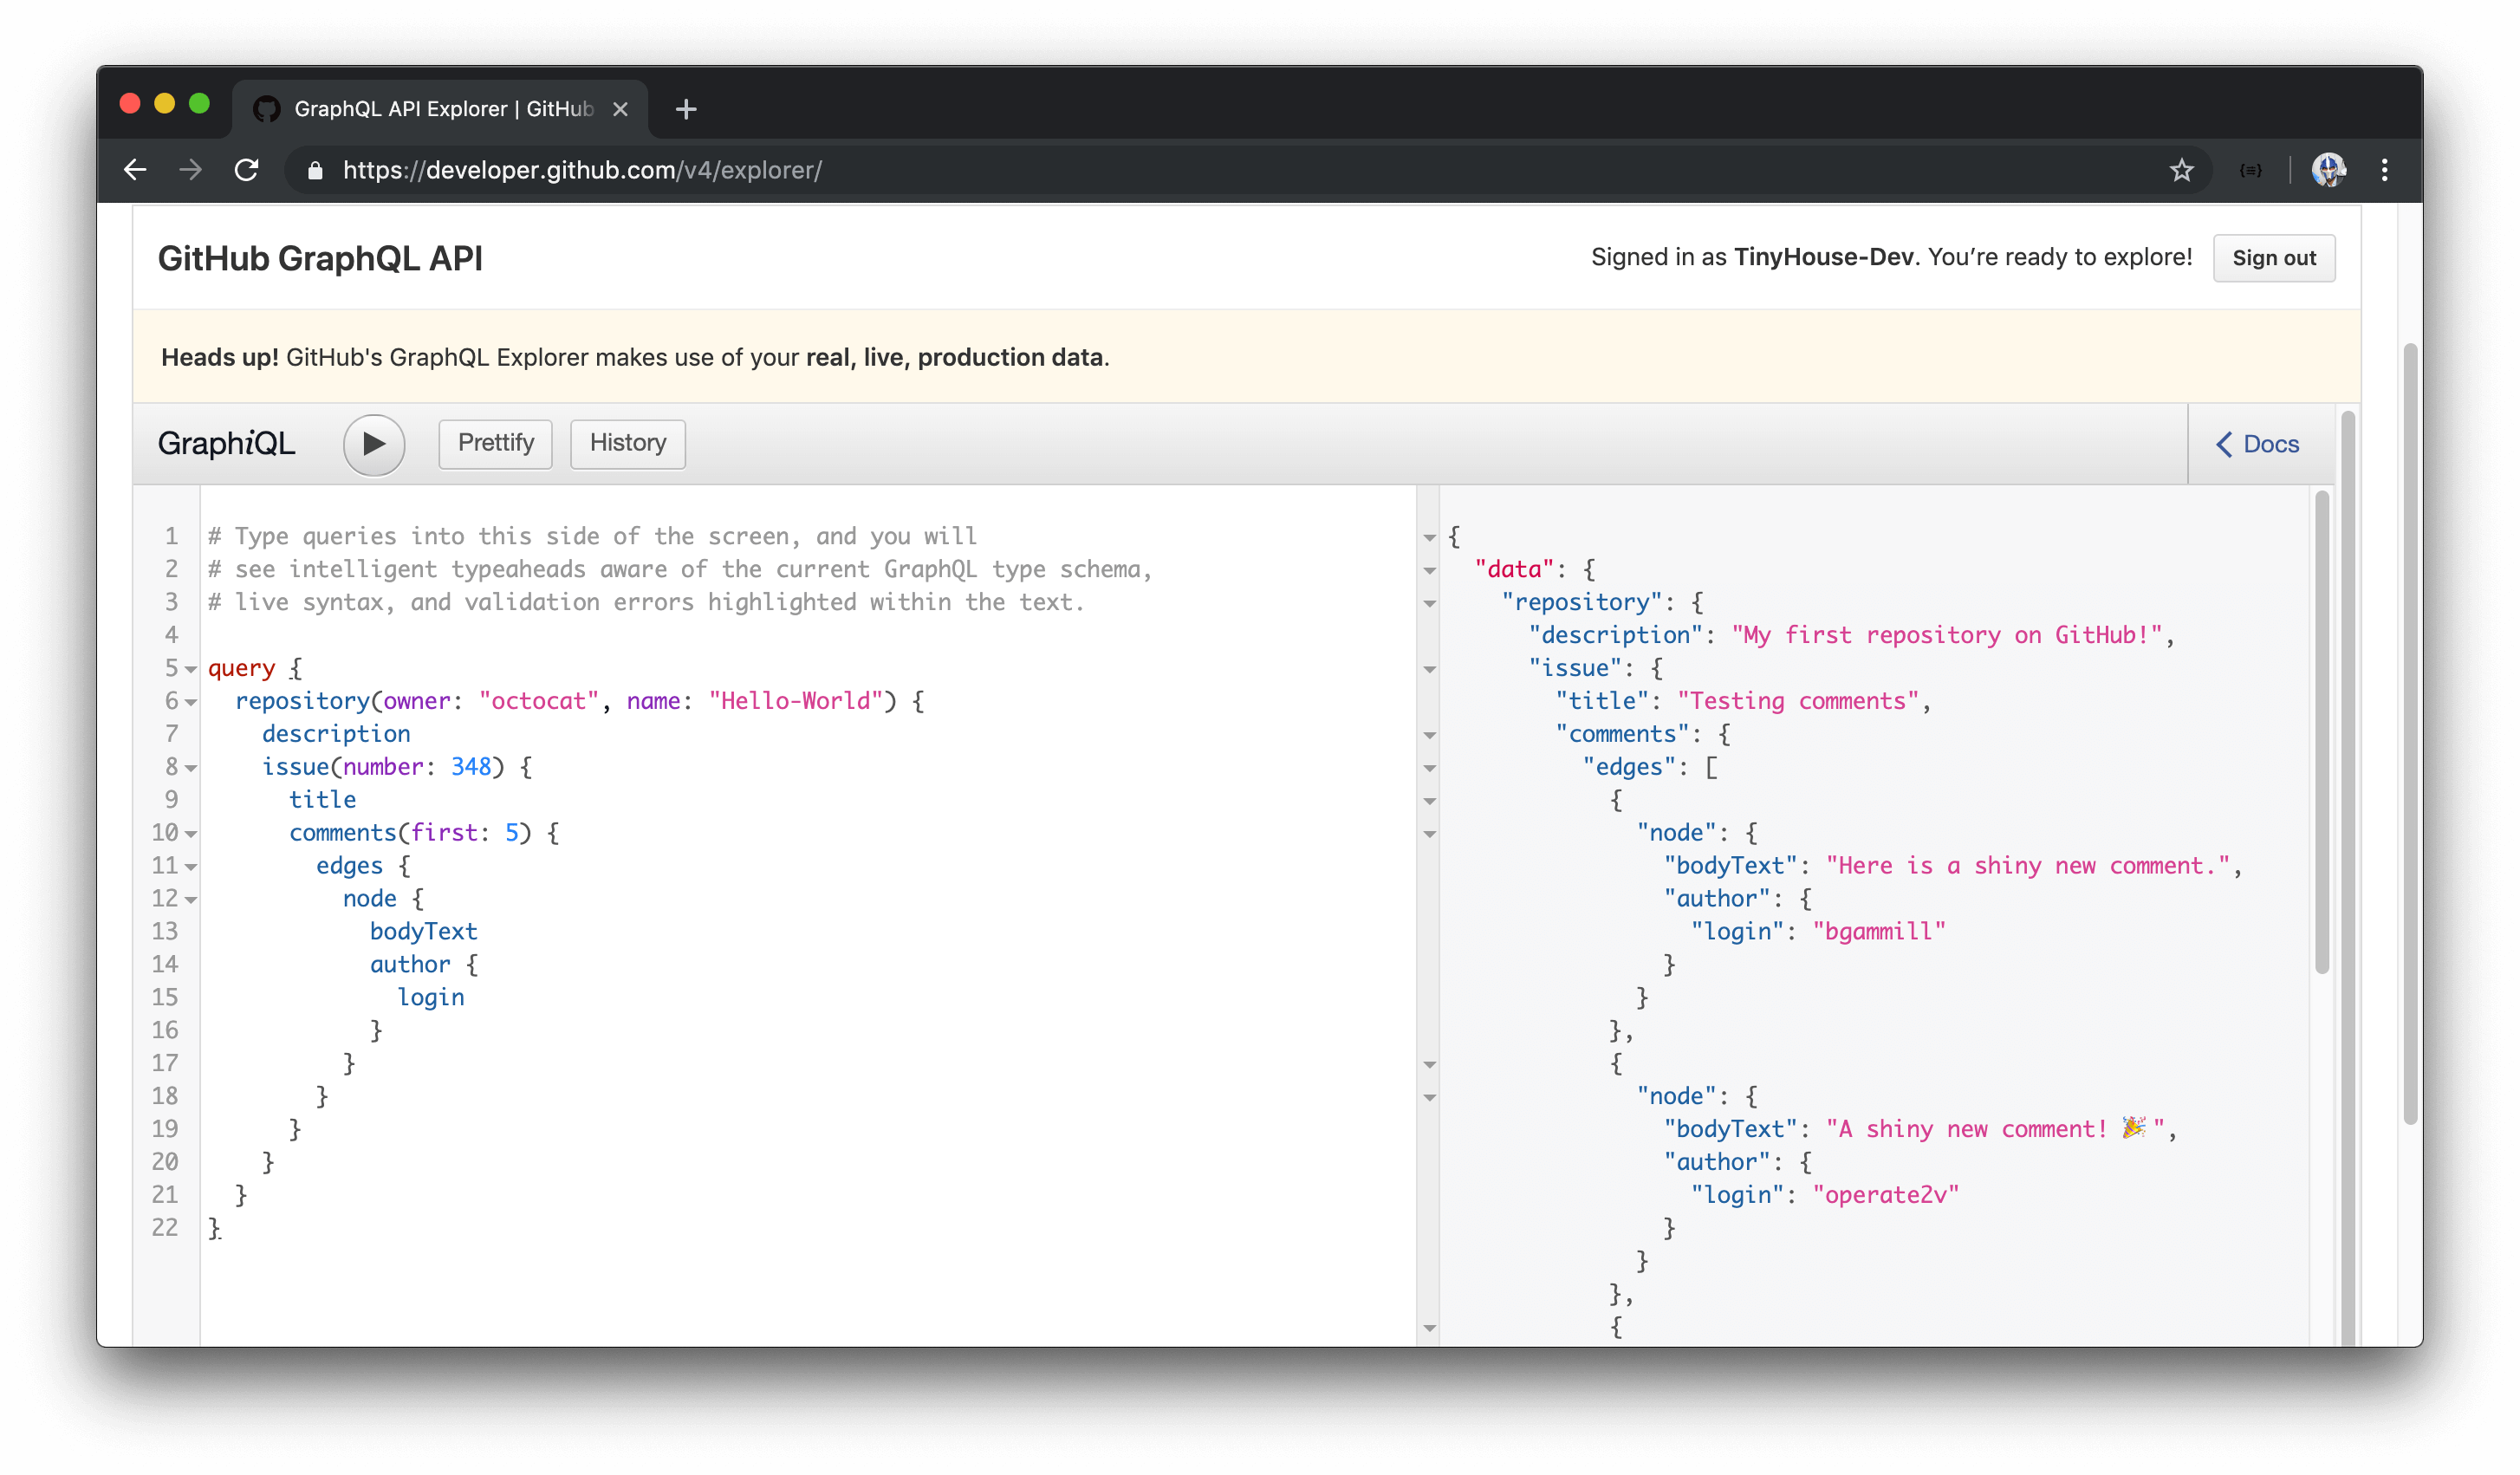
Amazing! This is a great example of a significant advantage of using GraphQL. GraphQL APIs allow clients to ask for exactly what they need and nothing more .
There’s a lot of information we’ve glazed over such as how we’re making our queries, what are fields and the type definitions of each field, where mutations fall in the picture, and a lot more. Throughout the course, we’ll be introducing all these concepts starting with the next lesson where we take a little deeper of a dive into GraphQL’s core concepts.
GRAPHQL CONCEPTS
Now that we’ve seen the advantages of using GraphQL in a real-world example, let’s dive into some core concepts. After interacting with Github’s GraphQL API in the previous lesson, we know that the GraphQL query language allows us to select properties on certain object types.
For example, assume we could query the title and price fields on a listing object type that we can create.
{
  listing {
    title
    price
  }
}
This will return data that looks something like the following:
{
  "data": {
    "listing": {
      "title": "Chic condo...",
      "price": 50
    }
  }
}
How do we know that the listing object has a title or a price property? Does the listing object have more properties we can select? This is where the GraphQL Schema comes in.
Every GraphQL API has a schema which completely describes all the possible data we can request. The schema is the blueprint of a GraphQL API. When a request comes in, it is validated against this schema and processed accordingly.
How do fields in the schema get processed? That’s due to the second piece of a GraphQL API - the resolvers . GraphQL resolvers are functions that turn a GraphQL operation or request into data.
We’ll first talk about the GraphQL schema before we dive into discussing GraphQL resolvers.
OBJECT TYPES
As quoted from the GraphQL documentation, the most basic component of a GraphQL schema are the object types which represent the kind of object we can query and what properties that object has. For the example above, we could have had an object type like the following:
type Listing {
  id: ID!
  title: String!
  address: String!
  price: Int!
}
The above states that:
- We’re creating an object type called
Listing. - The
Listingobject has a property calledidwhich is a GraphQLID. - The
Listingobject has a property calledtitlewhich is a GraphQLString. - The
Listingobject has a property calledaddresswhich is a GraphQLString. - The
Listingobject has a property calledpricewhich is a GraphQLInt.
The definitions at the end of these fields refer to the type that is to be returned from the field. (e.g. title is expected to return a string ).
The syntax we’re looking at here is known as the Graphql Schema Language with which we’re going to talk about some more as we start to introduce GraphQL into our Node application.
A GraphQL schema allows us to develop relationships between different object types. For example, we can say the Listing object type can have a tenant field in which tenant is to be an object type of its own (e.g the User object type).
type Listing {
  "..."
  tenant: User!
}
The User object type can have a similar but inverse relationship of its own where it can contain a listing field of the Listing object type.
type User {
  "..."
  listing: Listing!
}
These are one-to-one relationships where a listing can return a particular user and a user can return a certain listing. We could also have one-to-many relationships where we can say, for example, the User object type has a listings field that returns a list of listings.
type User {
  "..."
  listings: [Listing!]!
}
In the GraphQL Schema Language, we can define a GraphQL list by using the square brackets syntax. In this case, we’re stating the
listingsfield is to return a list ofListingobjects -[Listing!]!.The
!syntax is to tell our schema that the fields are marked as non-null (i.e. the field is required to be of a certain type and nevernull).We discuss more about lists and the non-null marker at the end of this lesson and in a lot more detail in the upcoming lessons.
That are two special object types within a GraphQL schema called Query and Mutation . Every GraphQL schema must have a Query type and may or may not have a Mutation type.
Query and Mutation represent the entry points of every GraphQL query . The purpose of the Query type is to define all the possible entry points for fetching data (i.e. queries). The purpose of the Mutation type is to define all the possible entry points for manipulating data (i.e. mutations).
Here’s an example of having the Query type that will allow us to query a field known as listings . We can also have the Mutation type to have a field labeled deleteListing which takes an id as an argument.
type Query {
  listings: [Listing!]!
}

type Mutation {
  deleteListing(id: ID!): Listing!
}
The listings query and deleteListing mutation are seen to both return variations of the Listing object type.
SCALAR TYPES
The properties of a GraphQL object must resolve to concrete data at some point. This is where scalar types come in. Scalar types represent basic data types that do not have any more nested properties.
field: Boolean!
field: Int!
field: Float!
field: String!
field: ID!
GraphQL comes with a set of default scalar types out of the box:
-
Boolean:trueorfalse. -
Int: A signed 32‐bit integer. -
Float: A signed double-precision floating-point number (i.e. a decimal number). -
String: A UTF‐8 character sequence. -
ID: Used to represent a unique identifier (i.e. not intended to be human-readable) but gets serialized asString.
ENUMERATION TYPES
Enumeration types are a special kind of scalar type that is restricted to a defined set of allowed values. If we wanted to introduce a listingType property to our Listing object type example and state the listingType value is to be one of a certain number of values, we can use an Enumeration ( enum ) type to describe this:
enum ListingType {
  HOUSE
  APARTMENT
}
In TypeScript, a GraphQL
enumoften gets mapped to a TypeScript stringenumby default. We’ll see examples of this as we move to Part II of the course.
LISTS
Though objects, scalars, and enums are the only types we can define in GraphQL, we can apply additional modifiers to affect their behavior. We can define fields to be lists by using the square bracket syntax in the GraphQL Schema Language.
Here’s an example of introducing a bookings field that is to return a list of the Booking object type.
type Listing {
  "..."
  bookings: [Booking]
}
Notice how the [Booking] syntax is different from [Booking!]! ? The ! is how we can mark fields to be non-null (i.e. the field is to resolve to the type specified and never to be null ).
type Listing {
  "users is to always be a list of the User type"
  users: [User!]!
  "bookings may be null AND the items in the bookings list may be null"
  bookings: [Booking]
}
ARGUMENTS & INPUT TYPES
Just like functions in any other programming language, we can pass arguments to GraphQL fields since fields are conceptually functions that return values.
What if we needed to pass in multiple values to a createListing GraphQL field to be able to resolve the intended result (i.e. have a listing be created)? Just like like we can pass in multiple arguments in a JavaScript function, we can pass in multiple arguments to a GraphQL field.
type Mutation {
  createListing(
    id: ID!
    title: String!
    address: String!
    price: Int!
  ): Listing!
}
Good convention will often find us creating input object types in situations like this. In the GraphQL schema language, input types look the same as regular object types but with the keyword input instead of type :
Here’s an example of stating that a createListing mutation accepts a non-null input argument of CreateListingInput .
input CreateListingInput {
  id: ID!
  title: String!
  address: String!
  price: Int!
}

type Mutation {
  createListing(input: CreateListingInput!): Listing!
}
FIELD RESOLVERS
At this point, we’ve come to understand that a GraphQL schema lays out the blueprint of how a GraphQL API is to be shaped. But how do these fields return values or make the changes we expect them to?
We’ve mentioned this earlier but this is where GraphQL resolvers come in.
GraphQL resolvers are functions or methods that resolve the value of GraphQL field .
Every field in a GraphQL API is referenced with a resolver function responsible in returning the value of that field.
Here’s an example of resolver functions for a root level listings query and deleteListing mutation fields. The listings field is to return a list of listings while the deleteListing field is to delete a listing and return the deleted listing.
Query: {
  listings: (obj, args, ctx) => {
    return listings;
  },
},
Mutation: {
  deleteListing: (obj, args, ctx) => {
      for (let i = 0; i < listings.length; i++) {
        if (listings[i].id === id) {
          return listings.splice(i, 1)[0];
        }
      }
  },
},
What are the obj, args, ctx parameters defined above?
A GraphQL resolver receives four positional arguments .
-
obj- the object returned from the resolver on the parent field. For rootQueryandMutationobject types, this argument is often not used and undefined. -
args- the arguments provided to the field. -
context- a value provided to every resolver and which usually holds important context information (e.g. state of currently logged in user). -
info- used usually only in advanced cases but contains information about the execution state of the query - such as thefieldName,schema,rootValue, etc.
We’ll stop here for now. This lesson touches on some core concepts of GraphQL to give us a head start as we proceed. There are numerous other topics (both advanced and non-advanced) like Pagination, Caching, Union Types, Interfaces, etc. that we haven’t discussed. However, this will be enough to get us started and well on our way for the next couple of lessons. Keep in mind that we’re going to reintroduce each of the topics discussed in this lesson as we begin to use them in the course !
MODULE 3 INTRODUCTION
We have an understanding of how GraphQL is a typed query language that allows client-side applications to request the data they want. With that said, how would one go about creating a GraphQL API?
GraphQL is a specification, not a direct implementation . This means GraphQL can be implemented in multiple programming languages. In our case, we’ll be using Apollo to create our API.
In particular, we’ll be using the Apollo Server package, which is the server package within the Apollo ecosystem. Apollo Server allows us to create a production-ready, self-documenting, GraphQL API in Node applications. It’s really easy to get started with and incrementally adoptable.
In this module, we’ll:
- Install Apollo Server and the GraphQL JavaScript library.
- Create a GraphQL Schema.
- Build GraphQL resolver functions to interact with our mock data.
- Finally, recreate our schema with the much simpler GraphQL Schema Language.
INSTALLING APOLLO SERVER AND GRAPHQL
In the lesson video, we show how we install the additional typings for the
graphqllibrary from the DefinitelyTyped repository. As of now, however, we’ll no longer need to install the community provided typings since thegraphqllibrary now provides its own type definitions!
We’ve mentioned that the GraphQL specification isn’t tied to any specific technology. We’ve also talked about one of the popular suite of tools in the GraphQL ecosystem, Apollo.
Apollo Server is one of the libraries within the Apollo framework and its responsibility is to help build a GraphQL API within Node applications. Apollo Server enables us to connect a GraphQL schema to a server and can be used to spin up a stand-alone server, be an add-on to an existing Node server, or even work within “serverless” environments. We’ll go with the approach of adding Apollo Server to our existing Node/Express server.
APOLLO-SERVER-EXPRESS
To add Apollo Server to an existing Node/Express server project, we’ll install the apollo-server-express library.
npm install apollo-server-express
apollo-server-express is a TypeScript project so we won’t have to install an additional type declaration file for it.
GRAPHQL
To use Apollo Server, we’ll need to install another dependency into our app. We’ll need to install the graphql JavaScript library. This is because the graphql library is a peer dependency of the Apollo Server package. In addition, the graphql library will also be used in our first attempt to build our schema.
We’ll install the graphql library as an application dependency.
npm install graphql
These are the only additional libraries we’ll need to begin developing our GraphQL Schema!
CREATING A GRAPHQL SCHEMA WITH THE GRAPHQL JS LIBRARY
GAMEPLAN
Let’s quickly summarize how we want to introduce Apollo Server before we begin doing so.
To introduce Apollo server to our application, the first thing we’ll need to do is create an instance of Apollo server. This is done by importing the ApolloServer class and constructing a new instance with the ApolloServer constructor.
import { ApolloServer } from "apollo-server-express";

const server = new ApolloServer();
With an Apollo Server instance created, the apollo-server-express library allows us to specify middleware that works alongside the existing server middleware. It’s in this middleware where we can pass in the express app instance as well as specify the endpoint for where our GraphQL API should live.
import { ApolloServer } from "apollo-server-express";

const app = express();
const server = new ApolloServer();

server.applyMiddleware({ app, path: "/api" });
The ApolloServer() constructor can take in a series of options needed to instantiate the Apollo Server instance. The conventional options that can often be passed in are the:
-
typeDefs: String that represents the entire GraphQL schema. -
resolvers: Map of functions that implement the schema.
Though we’re going to aim to get to this point, we’ll begin by going through a more “bare-bones” approach to creating a GraphQL server. In the first attempt to creating our schema, we’ll import and create GraphQLObjectType’s with the help of the graphql JavaScript library.
SIMPLE GRAPHQL SCHEMA
To begin, we’ll have the ApolloServer constructor class imported in our /src/index.ts file. We’ll run the constructor function and assign the result to a server const variable. We won’t pass in any arguments to the constructor just yet. We’ll apply middleware to the Apollo Server instance and pass in the express app instance, and state our GraphQL API will be on a path of /api .
Finally, we’ll also remove all the RESTful Express Routes we’ve created since we’ll now be moving towards GraphQL. We’ll remove the import of listings as well as remove the import and use of bodyParser .
At this moment, our src/index.ts file will look like the following:
import express from "express";
import { ApolloServer } from "apollo-server-express";

const app = express();
const port = 9000;
const server = new ApolloServer();

server.applyMiddleware({ app, path: "/api" });
app.listen(port);

console.log(`[app] : http://localhost:${port}`);
Let’s now look to create a schema with the graphql JavaScript library. We’ll build our schema within a new file called graphql.ts that is to be created in our src/ folder.
server/
  // ...
  src/
    graphql.ts
    index.ts
    listings.ts
  // ...
To create our schema, we’ll be using class objects that the graphql JavaScript library provides. We’re going to begin by importing two classes from the graphql library GraphQLSchema and GraphQLObjectType.
import { GraphQLSchema, GraphQLObjectType } from "graphql";
-
GraphQLSchemais to be used to create a GraphQL Schema by passing in the root level query and mutation GraphQL object types. -
GraphQLObjectTypeis the most basic component of a GraphQL schema which can be used to represent practically all our GraphQL object types from the root query and mutation types to specific custom types.
To get us started, we’ll construct a blank query and mutation object types with the help of the GraphQLObjectType class. Though the GraphQLObjectType constructor can take a series of options, we’ll only specify the name option for each object type and name them accordingly as 'Query' and 'Mutation' .
import { GraphQLSchema, GraphQLObjectType } from "graphql";

const query = new GraphQLObjectType({
  name: "Query"
});

const mutation = new GraphQLObjectType({
  name: "Mutation"
});
We’ll then pass the constructed query and mutation objects as options to a GraphQLSchema constructor. We’ll also export this created schema.
import { GraphQLSchema, GraphQLObjectType } from "graphql";

const query = new GraphQLObjectType({
  name: "Query"
});

const mutation = new GraphQLObjectType({
  name: "Mutation"
});

export const schema = new GraphQLSchema({
  query,
  mutation
});
At this point, TypeScript will display some errors in our GraphQLObjectType constructors telling us that the fields of the object type is required. This is valid since the GraphQL query language is all about selecting fields on objects.
We’ll go ahead and declare the fields option for each object type. The fields option expects us to specify a map of the different fields that live within the object type. In both cases, we’ll declare a simple hello field to get us started.
import { GraphQLSchema, GraphQLObjectType } from "graphql";

const query = new GraphQLObjectType({
  name: "Query",
  fields: {
    hello: {}
  }
});

const mutation = new GraphQLObjectType({
  name: "Mutation",
  fields: {
    hello: {}
  }
});

export const schema = new GraphQLSchema({
  query,
  mutation
});
A field property also takes options of its own. Here we can specify the type option to dictate the type of the field, and a resolve function to dictate how the field is expected to resolve .
type could be a Scalar type, Object type, Enum type, etc. In this case, we’ll want to specify that the return type of our hello field is a string so we’ll import the GraphQLString scalar type and specify that as the type of our hello fields.
import { GraphQLSchema, GraphQLString, GraphQLObjectType } from "graphql";

const query = new GraphQLObjectType({
  name: "Query",
  fields: {
    hello: {
      type: GraphQLString
    }
  }
});

const mutation = new GraphQLObjectType({
  name: "Mutation",
  fields: {
    hello: {
      type: GraphQLString
    }
  }
});

export const schema = new GraphQLSchema({
  query,
  mutation
});
Every field in a schema should have a resolver function that resolves the value of that GraphQL field. Here, we’re able to use the resolve function option to do so. For both hello fields, we’ll resolve to return simple string messages - 'Hello from the Query!' for the query and 'Hello from the Mutation!' for the mutation.
server/src/graphql.ts
import { GraphQLSchema, GraphQLObjectType, GraphQLString } from "graphql";

const query = new GraphQLObjectType({
  name: "Query",
  fields: {
    hello: {
      type: GraphQLString,
      resolve: () => "Hello from the Query!"
    }
  }
});

const mutation = new GraphQLObjectType({
  name: "Mutation",
  fields: {
    hello: {
      type: GraphQLString,
      resolve: () => "Hello from the Mutation!"
    }
  }
});

export const schema = new GraphQLSchema({ query, mutation });
With our barebones schema created, we can now have it imported and passed into the ApolloServer constructor in the /src/index.ts file.
server/src/index.ts
const server = new ApolloServer({ schema });
When we now run the server and head to the location of our GraphQL Endpoint - https://localhost:9000/api, we’ll be presented with an IDE to interact with our API!
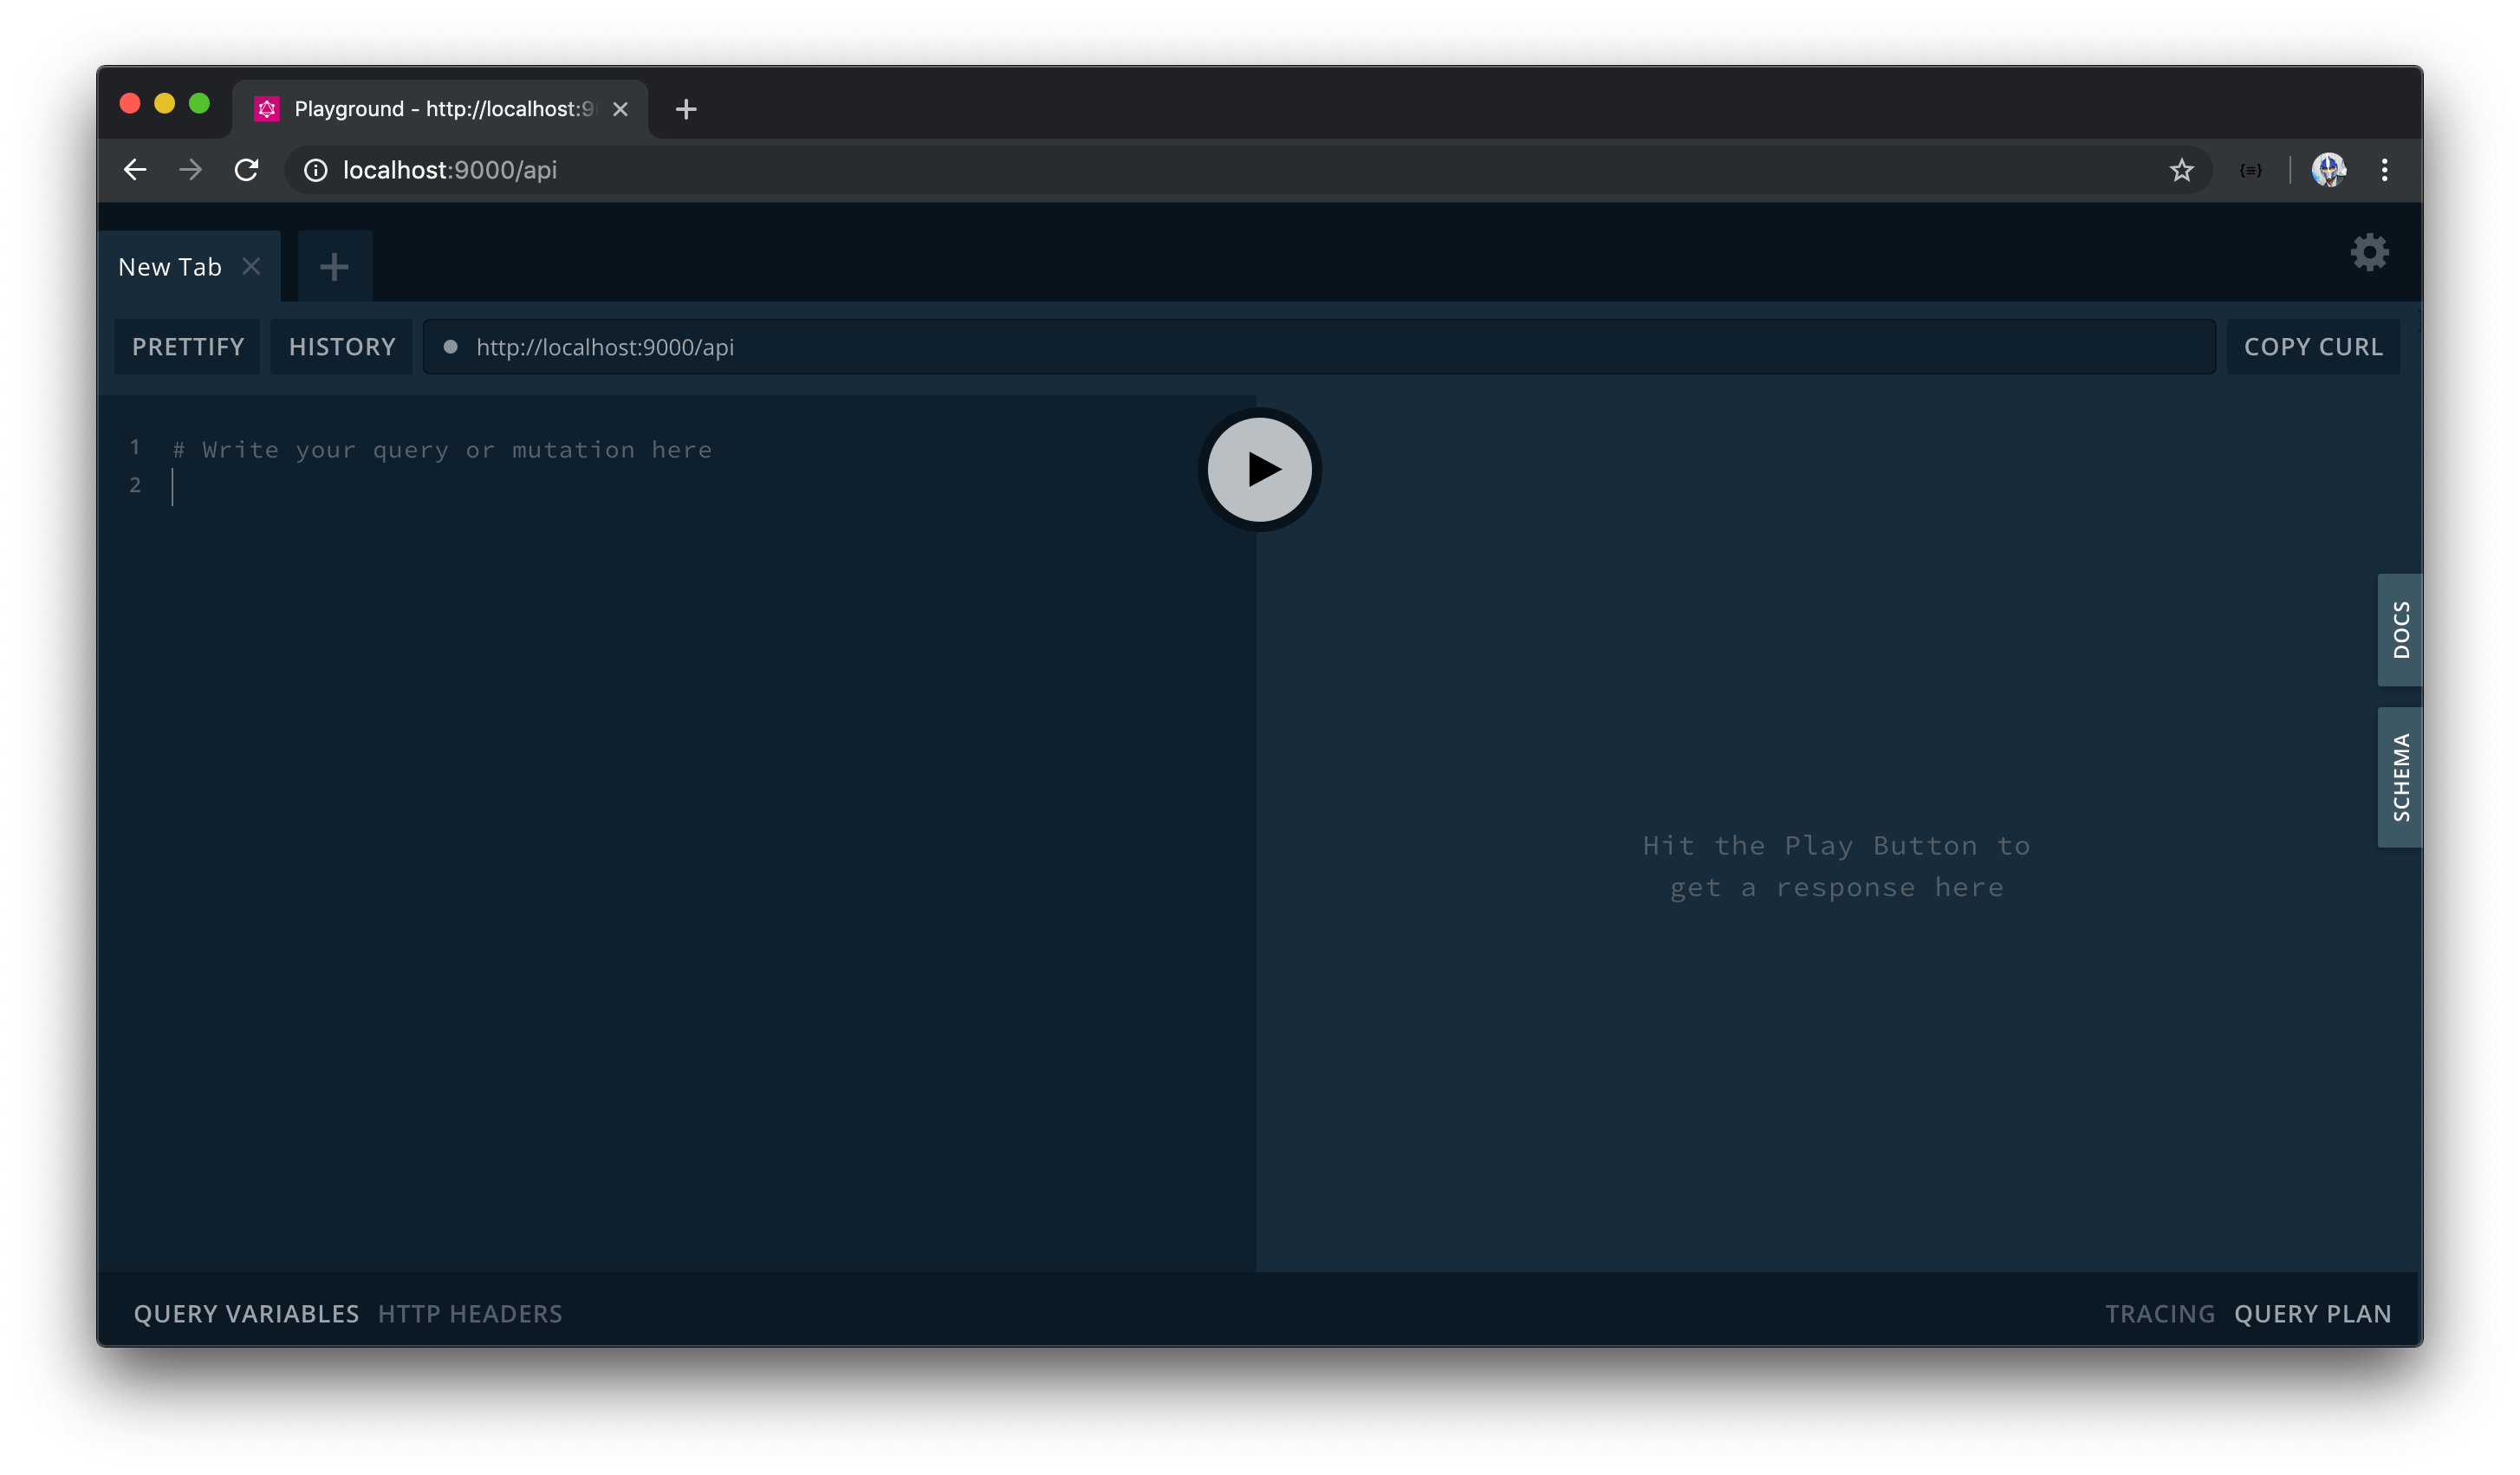
GRAPHQL PLAYGROUND
GraphQL Playground is an in-browser IDE (Integrated Development Environment) for exploring GraphQL APIs. GraphQL Playground is built by the Prisma team and is based on another IDE called GraphiQL (which is what we used for interacting with Github’s public GraphQL API).
GraphQL Playground is intended to be a more sophisticated IDE by giving us capabilities such as looking through query history, automatic schema reloading, the configuration of HTTP headers, and so on. The vast majority of the time, however, we’ll often find ourselves interacting with our API by surveying the documentation of our GraphQL schema and running queries/mutations to verify our API works as intended without having to use curl or tools like Postman.
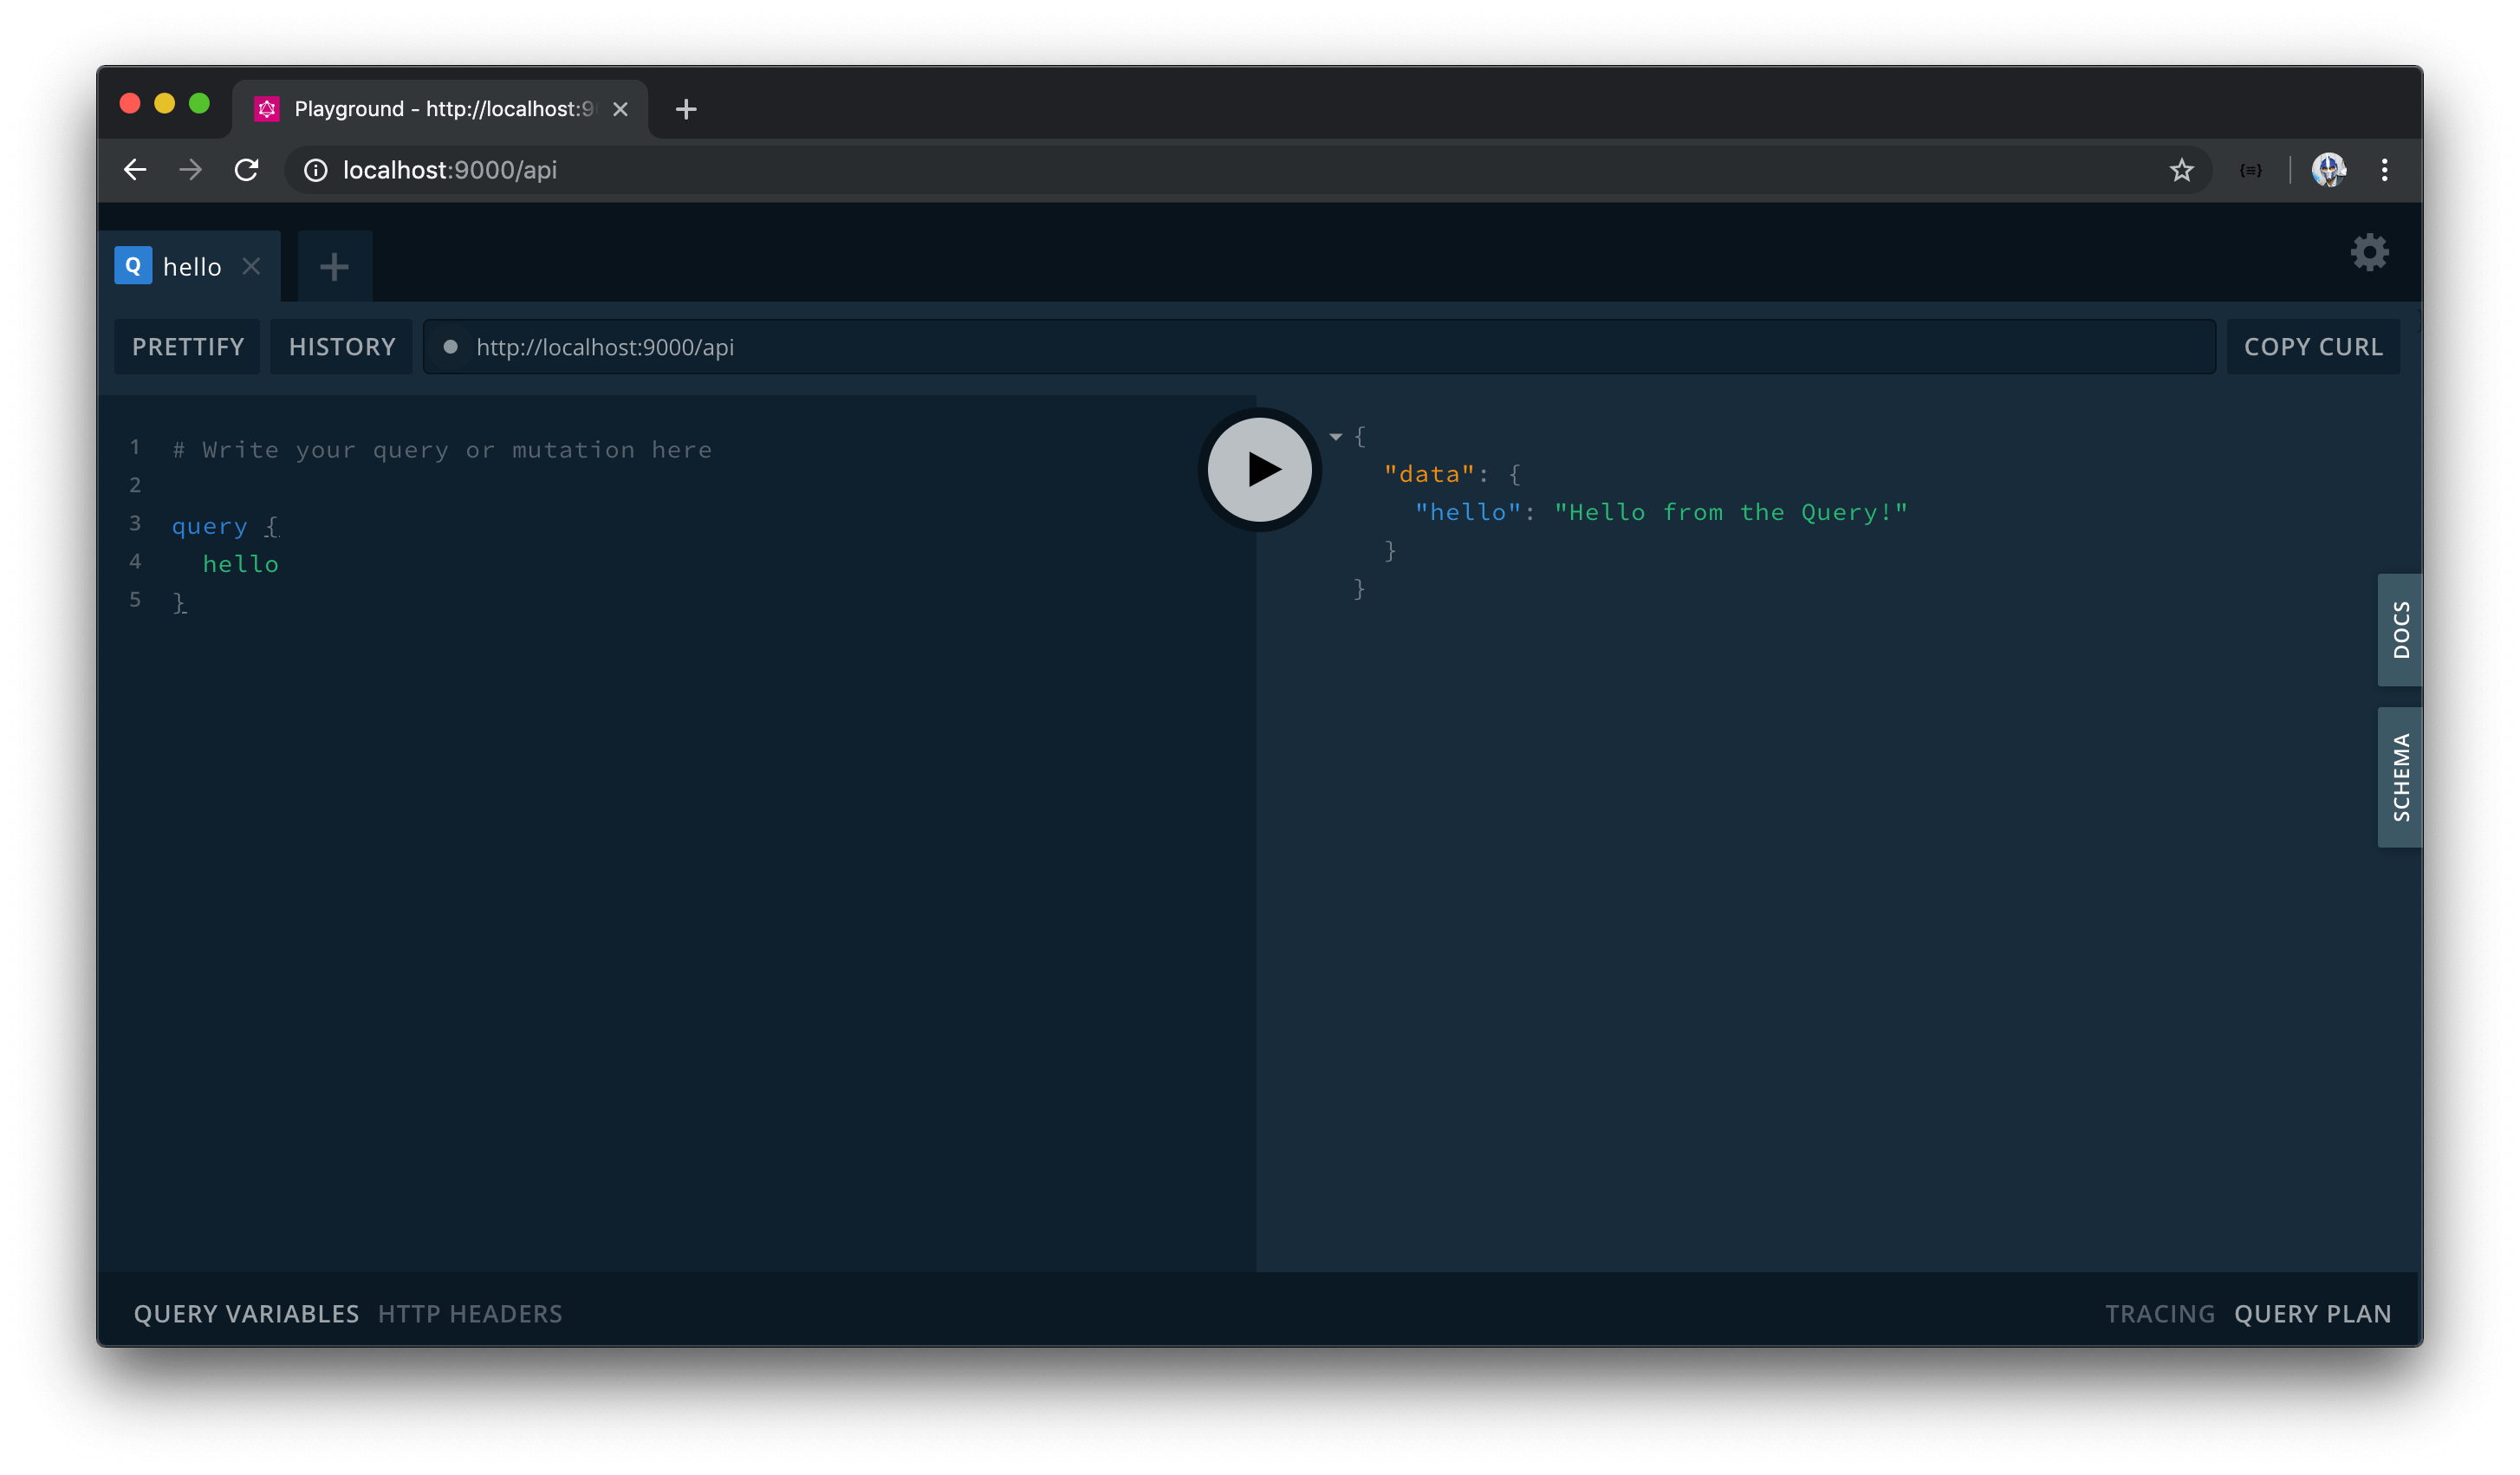
On the left-hand pane, let’s look to write our first query. We’ll use the query keyword and declare the hello field as the field we’ll want to query. When successful, we’ll get the data we expect!
This will behave similarly for the mutation as well. We’ll use the mutation keyword and state the hello field as the mutation we’ll want to run.

Amazing. Our Express app is now prepared with Apollo Server. In the next lesson, we’ll look to replicate the functionality we had in our Express REST API (querying listings and deleting a listing) with our GraphQL setting.
QUERYING AND MUTATING LISTINGS DATA WITH GRAPHQL
We’ve created a simple GraphQL Schema with which our root level query and mutation object types each have a single hello field that returns a string message when queried. We’ll now look to mimic the listings retrieval and manipulation we had in our REST API with GraphQL.
LISTING OBJECT TYPE
The first thing we’ll do is create a custom Listing object type. The Listing object type is to reference the listing type that is to be returned from our soon to be query and mutation. We’ll use the GraphQLObjectType class to construct this type in the src/graphql.ts file.
The Listing type is to contain a series of fields that represent a listing.
const Listing = new GraphQLObjectType({
  name: "Listing",
  fields: {
    id: {},
    title: {},
    image: {},
    address: {},
    price: {},
    numOfGuests: {},
    numOfBeds: {},
    numOfBaths: {},
    rating: {}
  }
});
We’ll need to define the types of each of the fields within Listing .
GRAPHQLID
GraphQL provides a unique scalar type for ID’s, GraphQLID . The GraphQLID scalar type is to represent a unique identifier however it behaves and gets serialized as a String . Its main purpose is to convey that a field is to be a unique identifying field. We’ll import the GraphQLID type and use it as the type of the id field.
import {
  // ...
  GraphQLID
} from "graphql";

const Listing = new GraphQLObjectType({
  name: "Listing",
  fields: {
    id: { type: GraphQLID }
    // ...
  }
});
GRAPHQLSTRING
The title , image , and address fields of Listing are expected to be strings so we’ll define their types with the already imported GraphQLString scalar type.
import {
  // ...
  GraphQLString
} from "graphql";

const Listing = new GraphQLObjectType({
  name: "Listing",
  fields: {
    // ...
    title: { type: GraphQLString },
    image: { type: GraphQLString },
    address: { type: GraphQLString }
    // ...
  }
});
GRAPHQLINT
The price , numOfGuests , numOfBeds , numOfBaths , and rating fields of Listing are expected to be integers so we’ll define their types with the GraphQLInt type.
import {
  // ...
  GraphQLInt
} from "graphql";

const Listing = new GraphQLObjectType({
  name: "Listing",
  fields: {
    // ...
    numOfGuests: { type: GraphQLInt },
    numOfBeds: { type: GraphQLInt },
    numOfBaths: { type: GraphQLInt },
    rating: { type: GraphQLInt }
  }
});
For floating-point numbers (i.e. numbers with decimals), GraphQL provides the
GraphQLFloatscalar type.
Our Listing object will now look like the following:
const Listing = new GraphQLObjectType({
  name: "Listing",
  fields: {
    id: { type: GraphQLID },
    title: { type: GraphQLString },
    image: { type: GraphQLString },
    address: { type: GraphQLString },
    price: { type: GraphQLInt },
    numOfGuests: { type: GraphQLInt },
    numOfBeds: { type: GraphQLInt },
    numOfBaths: { type: GraphQLInt },
    rating: { type: GraphQLFloat }
  }
});
It might be apparent that the types we specify here mimic the
ListingsTypeScript interface created in thesrc/listings.tsfile.As a reminder, TypeScript is the extension we’re using to type check and reinforce our development code.
GraphQL is a typed query language for APIs so we have to define the types of the fields in our schema. There are open-source tools (e.g. GraphQL Code Generator) that help in generating TypeScript types from GraphQL schemas, but they add a layer of complexity so we won’t be using them for our server code. We’ll investigate how we can generate TypeScript types from a GraphQL schema when we work on the client portion of our app.
GRAPHQLNONNULL
We’ll take the type definitions for the fields in the Listing object type another step. We want all our fields in the Listing type to never be null and to always be defined . We can achieve this by using the GraphQLNonNull wrapper.
GraphQLNonNull is a type marker that enforces values are never null and will ensure an error is thrown if this ever occurs. Let’s import the GraphQLNonNull wrapper in our src/graphql.ts file.
import {
  // ...
  GraphQLNonNull
} from "graphql";
We’ll wrap every field type in Listing with the GraphQLNonNull wrapper which will make our Listing object type appear as follows:
server/src/graphql.ts
const Listing = new GraphQLObjectType({
  name: "Listing",
  fields: {
    id: { type: GraphQLNonNull(GraphQLID) },
    title: { type: GraphQLNonNull(GraphQLString) },
    image: { type: GraphQLNonNull(GraphQLString) },
    address: { type: GraphQLNonNull(GraphQLString) },
    price: { type: GraphQLNonNull(GraphQLInt) },
    numOfGuests: { type: GraphQLNonNull(GraphQLInt) },
    numOfBeds: { type: GraphQLNonNull(GraphQLInt) },
    numOfBaths: { type: GraphQLNonNull(GraphQLInt) },
    rating: { type: GraphQLNonNull(GraphQLFloat) }
  }
});
ROOT QUERY AND GRAPHQLLIST
We’ll now modify our root Query object to have a field that will allow us to return an array of listing objects from the mock listings array we have in our app. We’ll rename the hello field in our query object to a listings field responsible in returning a list of listings.
const query = new GraphQLObjectType({
  name: "Query",
  fields: {
    listings: {}
  }
});
The listings query field is expected to be a list of Listing items. Since we expect this field to be a list, we’ll need to use the GraphQLList definition.
GraphQLList is a type wrapper that indicates a list is to be created for a particular type. Let’s import the GraphQLList type.
import {
  // ...
  GraphQLList
} from "graphql";
GraphQLList expects an argument of the item type expected in the list. We’ll specify the type of the listings field to be a list of the Listing object type.
const query = new GraphQLObjectType({
  name: "Query",
  fields: {
    listings: {
      type: GraphQLList(Listing)
    }
  }
});
We also want the type of element being iterated in the list to never be null so we’ll wrap it with the GraphQLNonNull wrapper.
const query = new GraphQLObjectType({
  name: "Query",
  fields: {
    listings: {
      type: GraphQLList(GraphQLNonNull(Listing))
    }
  }
});
We also don’t want the listings type itself ever being null, so we’ll wrap the whole type with the GraphQLNonNull wrapper as well.
const query = new GraphQLObjectType({
  name: "Query",
  fields: {
    listings: {
      type: GraphQLNonNull(GraphQLList(GraphQLNonNull(Listing)))
    }
  }
});
A little verbose but it does what we intended to do. For the listings field to return a defined list that has a defined set of listing items, we use the GraphQLNonNull wrapper twice.
We’ll now import the listings mock array from the src/listings.ts file.
server/src/graphql.ts
import { listings } from "./listings";
With the listings data array available, we can have it simply be returned in our listings field resolve function.
server/src/graphql.ts
const query = new GraphQLObjectType({
  name: "Query",
  fields: {
    listings: {
      type: GraphQLNonNull(GraphQLList(GraphQLNonNull(Listing))),
      resolve: () => {
        return listings;
      }
    }
  }
});
The listings field when queried will now return the list of listings from our mock array.
ROOT MUTATION
We’ll replace the hello field in our mutation object to a deleteListing field. deleteListing when resolved will delete a listing from our mock array and return the deleted listing object.
const mutation = new GraphQLObjectType({
  name: "Mutation",
  fields: {
    deleteListing: {}
  }
});
Since we expect the deleted listing to be returned, we’ll state that the type of the deleteListing field is the Listing object type. Since we won’t want to have this field ever return null , we’ll wrap the type of the field with GraphQLNonNull .
const mutation = new GraphQLObjectType({
  name: "Mutation",
  fields: {
    deleteListing: {
      type: GraphQLNonNull(Listing)
    }
  }
});
Our deleteListing mutation will need to accept an argument of the id of the listing that is to be deleted. Here is where we’ll introduce a new args field in deleteListing to dictate the fields that are to be passed to deleteListing as arguments.
const mutation = new GraphQLObjectType({
  name: "Mutation",
  fields: {
    deleteListing: {
      type: GraphQLNonNull(Listing),
      args: {}
    }
  }
});
We’ll declare an id arg and specify a type of GraphQLID . We’ll also state the id argument can’t be null so we’ll wrap it with the GraphQLNonNull type.
const mutation = new GraphQLObjectType({
  name: "Mutation",
  fields: {
    deleteListing: {
      type: GraphQLNonNull(Listing),
      args: {
        id: { type: GraphQLNonNull(GraphQLID) }
      }
    }
  }
});
GraphQL resolvers have access of up to four positional arguments. With the deleteListing field resolver, we’re currently only interested in accessing the args this field will receive. args of a resolver function is the second positional argument of the function, so we’ll define the first two arguments of the resolver function. We’ll label the first obj argument as root to convey it is the root obj passed to our root mutation object type and we’ll prefix it with underscore since it is to be unused. We’ll destruct the id value from the arguments payload.
const mutation = new GraphQLObjectType({
  name: "Mutation",
  fields: {
    deleteListing: {
      type: GraphQLNonNull(Listing),
      args: {
        id: { type: GraphQLNonNull(GraphQLID) }
      },
      resolve: (_root, { id }) => {}
    }
  }
});
Our resolver function will have the same functionality as what we had in the /delete-listing route of our Express RESTful API. We’ll look to remove the appropriate listing from our listings collection and return the removed listing.
Compared with what we did in the POST Express route is we won’t use a res.send() function and we’ll either simply return the removed listing or throw an Error . In addition, instead of returning an array from the .splice() array that contains the deleted listing item, we’ll ensure that we return the listed object from the array.
server/src/graphql.ts
const mutation = new GraphQLObjectType({
  name: "Mutation",
  fields: {
    deleteListing: {
      type: GraphQLNonNull(Listing),
      args: {
        id: { type: GraphQLNonNull(GraphQLID) }
      },
      resolve: (_root, { id }) => {
        for (let i = 0; i < listings.length; i++) {
          if (listings[i].id === id) {
            return listings.splice(i, 1)[0];
          }
        }

        throw new Error("failed to deleted listing");
      }
    }
  }
});
At this moment, the
rootobj andidargument don’t have appropriate types. We’ll add appropriate typing to these parameters in the next lesson as we change how we’re creating the GraphQL schema.
GRAPHQL PLAYGROUND
QUERYING LISTINGS
Our schema is appropriately set up with the functionality we’re interested in having. We’ll start the server in our terminal, and launch GraphQL Playground by visiting http://localhost:9000/api in our browser.
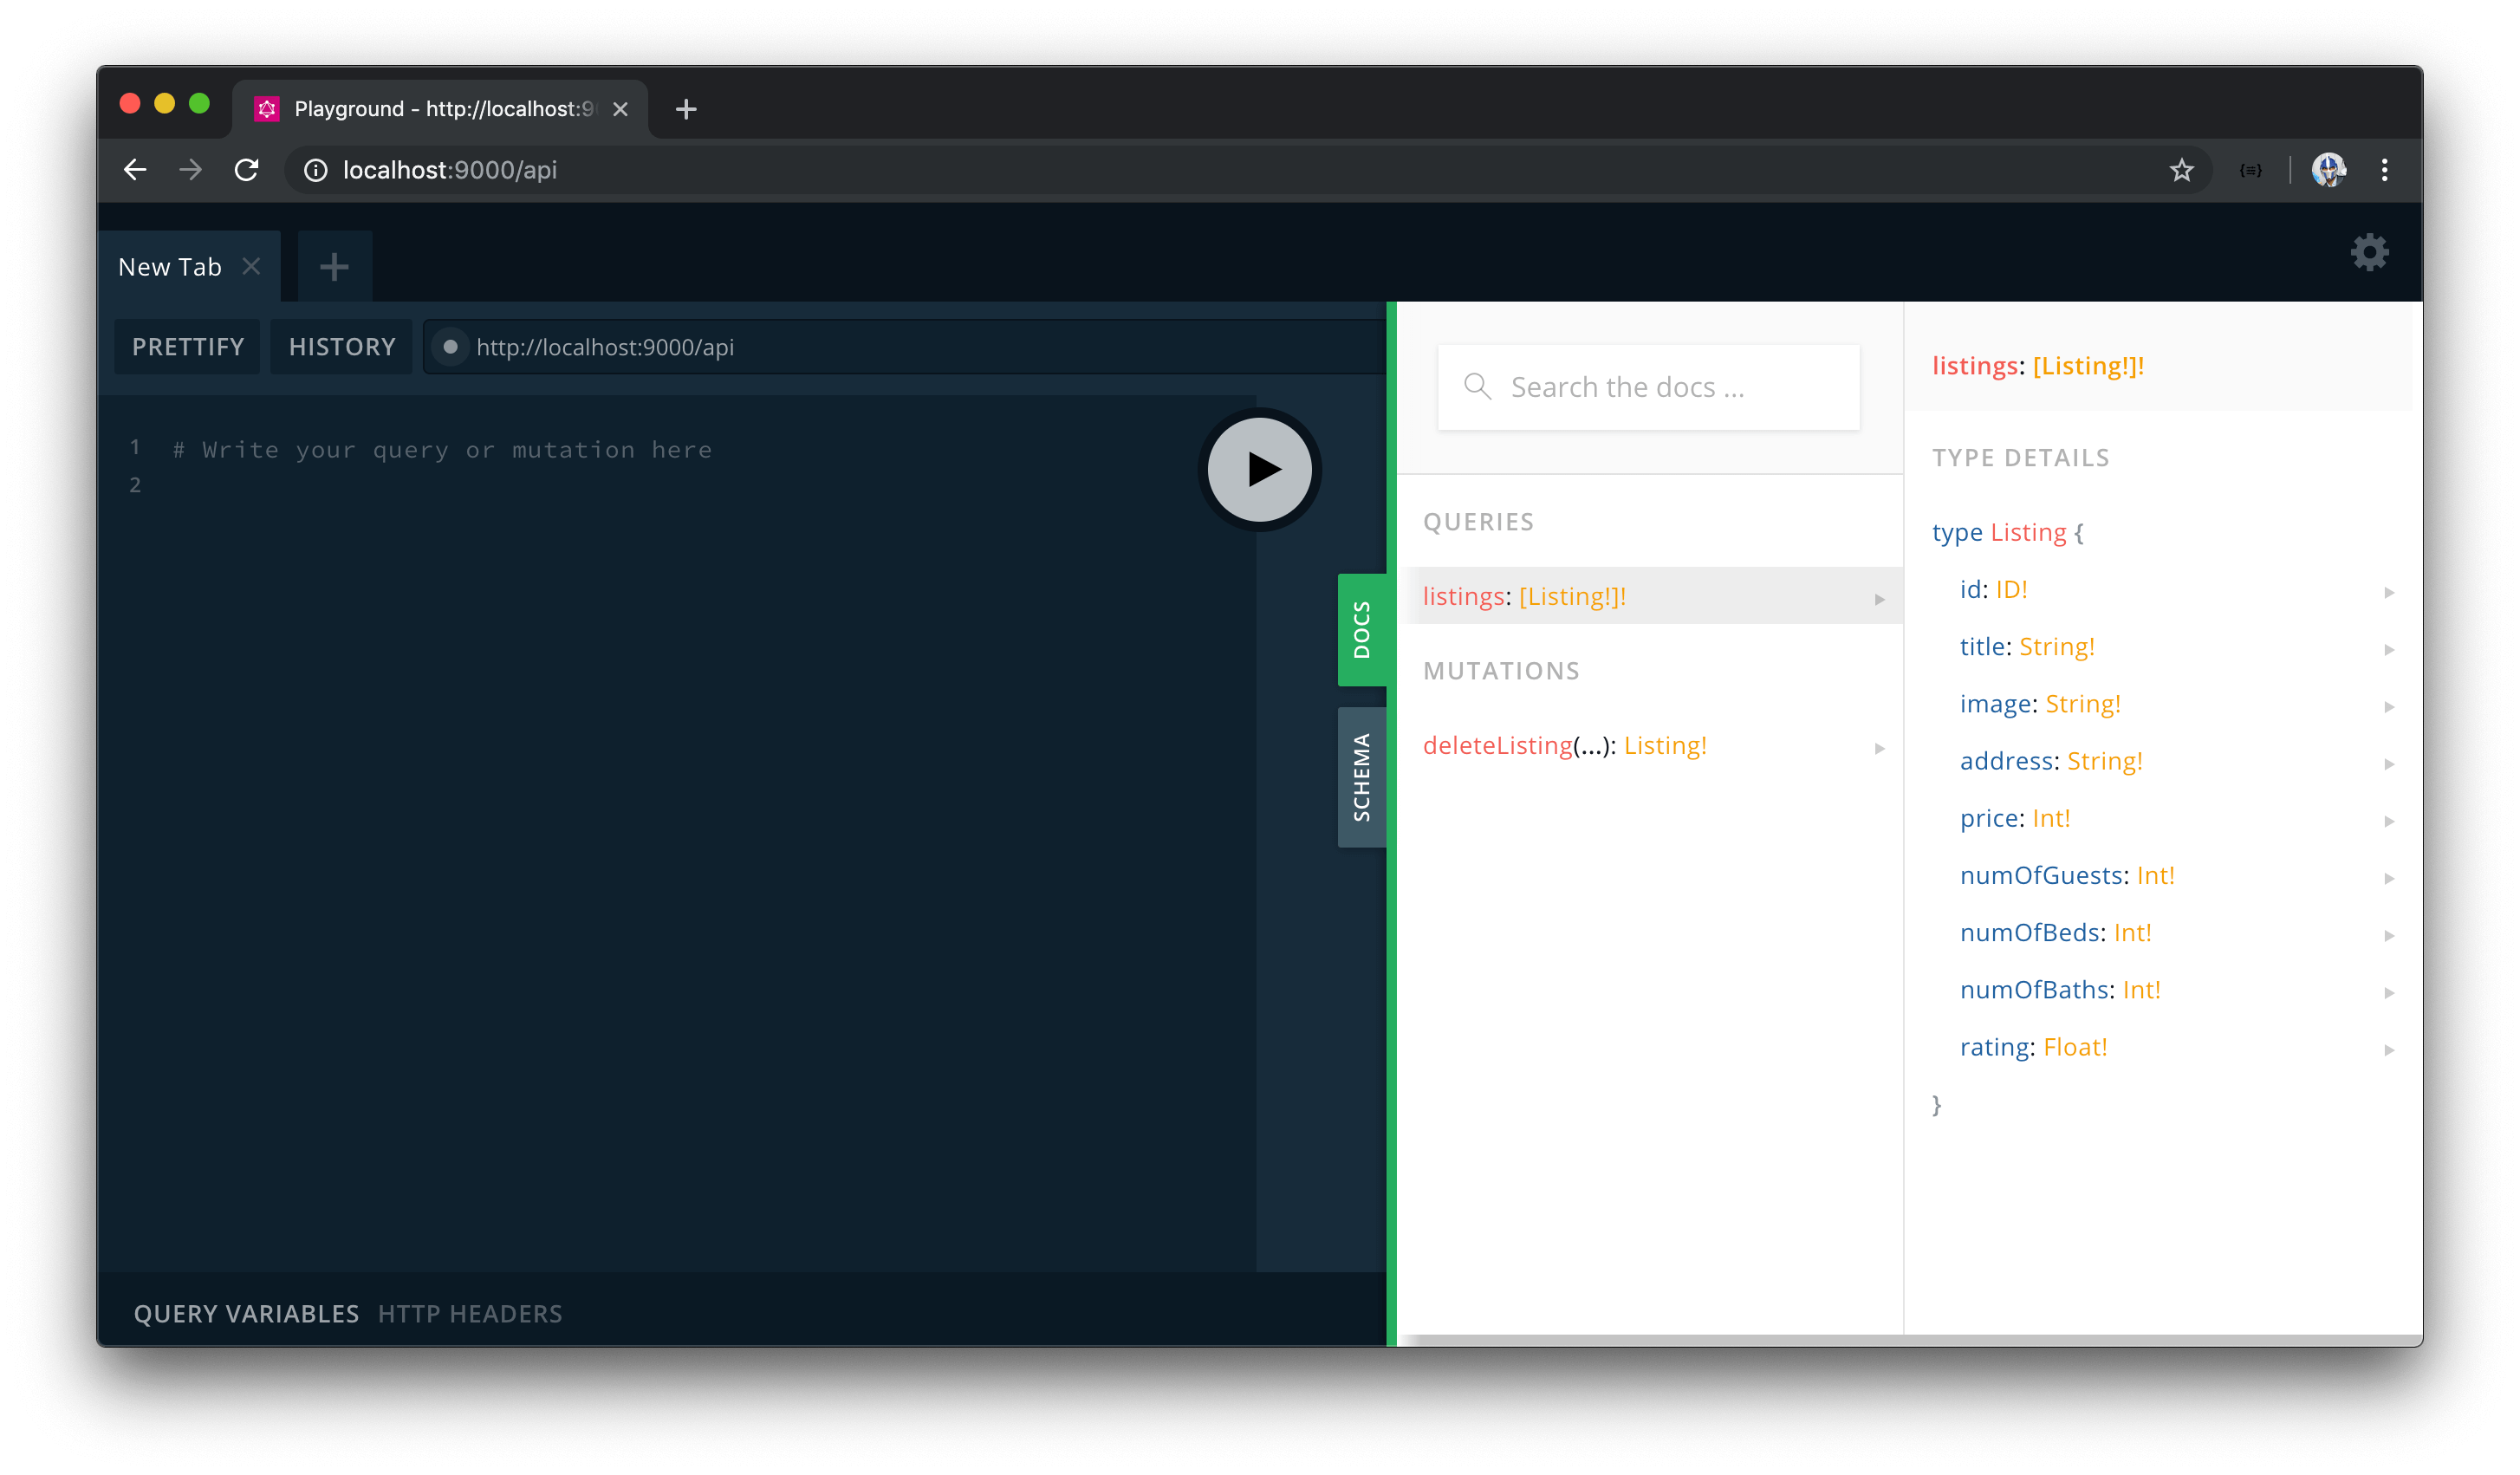
When we take a look through the GraphQL Playground documentation, we can see the newly added fields in our Query and Mutation object types. When we look at the Listing type that is to be returned, we can see all the fields and the expected types of each field for Listing .
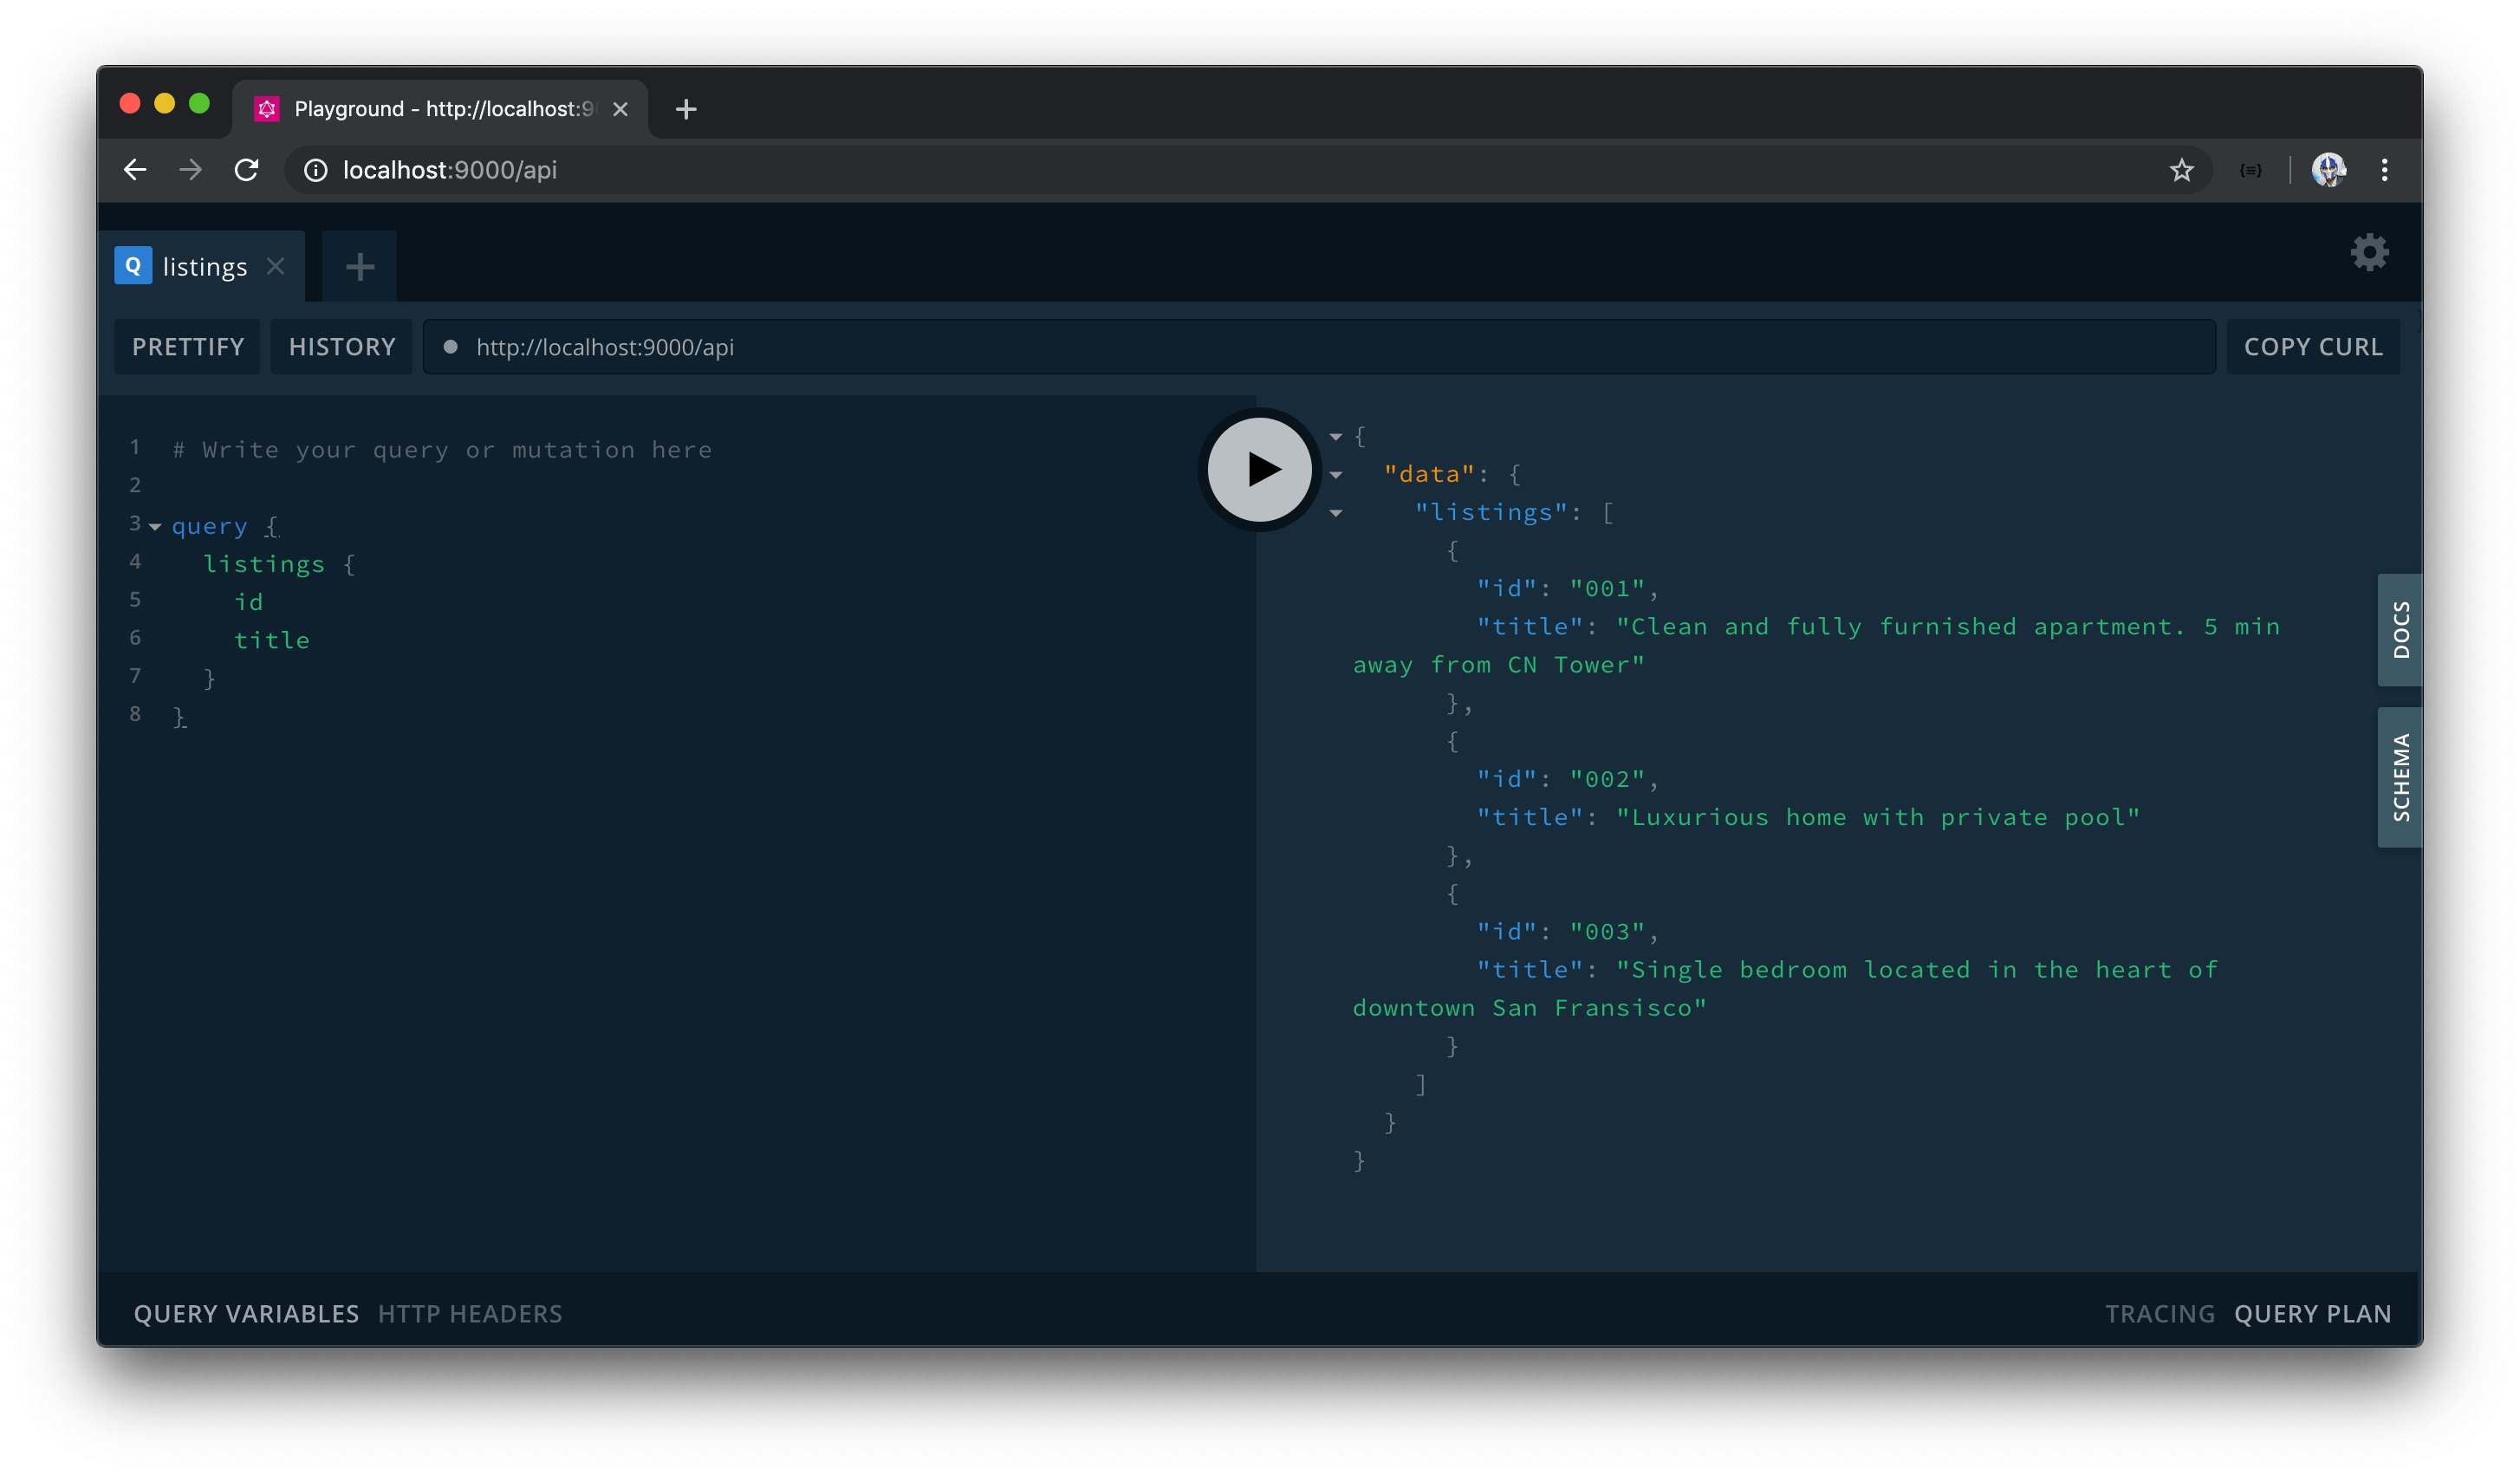
Let’s query the listings field. At first, we’ll simply query the id and title fields within listings .
query {
  listings {
    id
    title
  }
}
By running our query, we’ll see just the id and title fields of every listing object in the mock listings array!
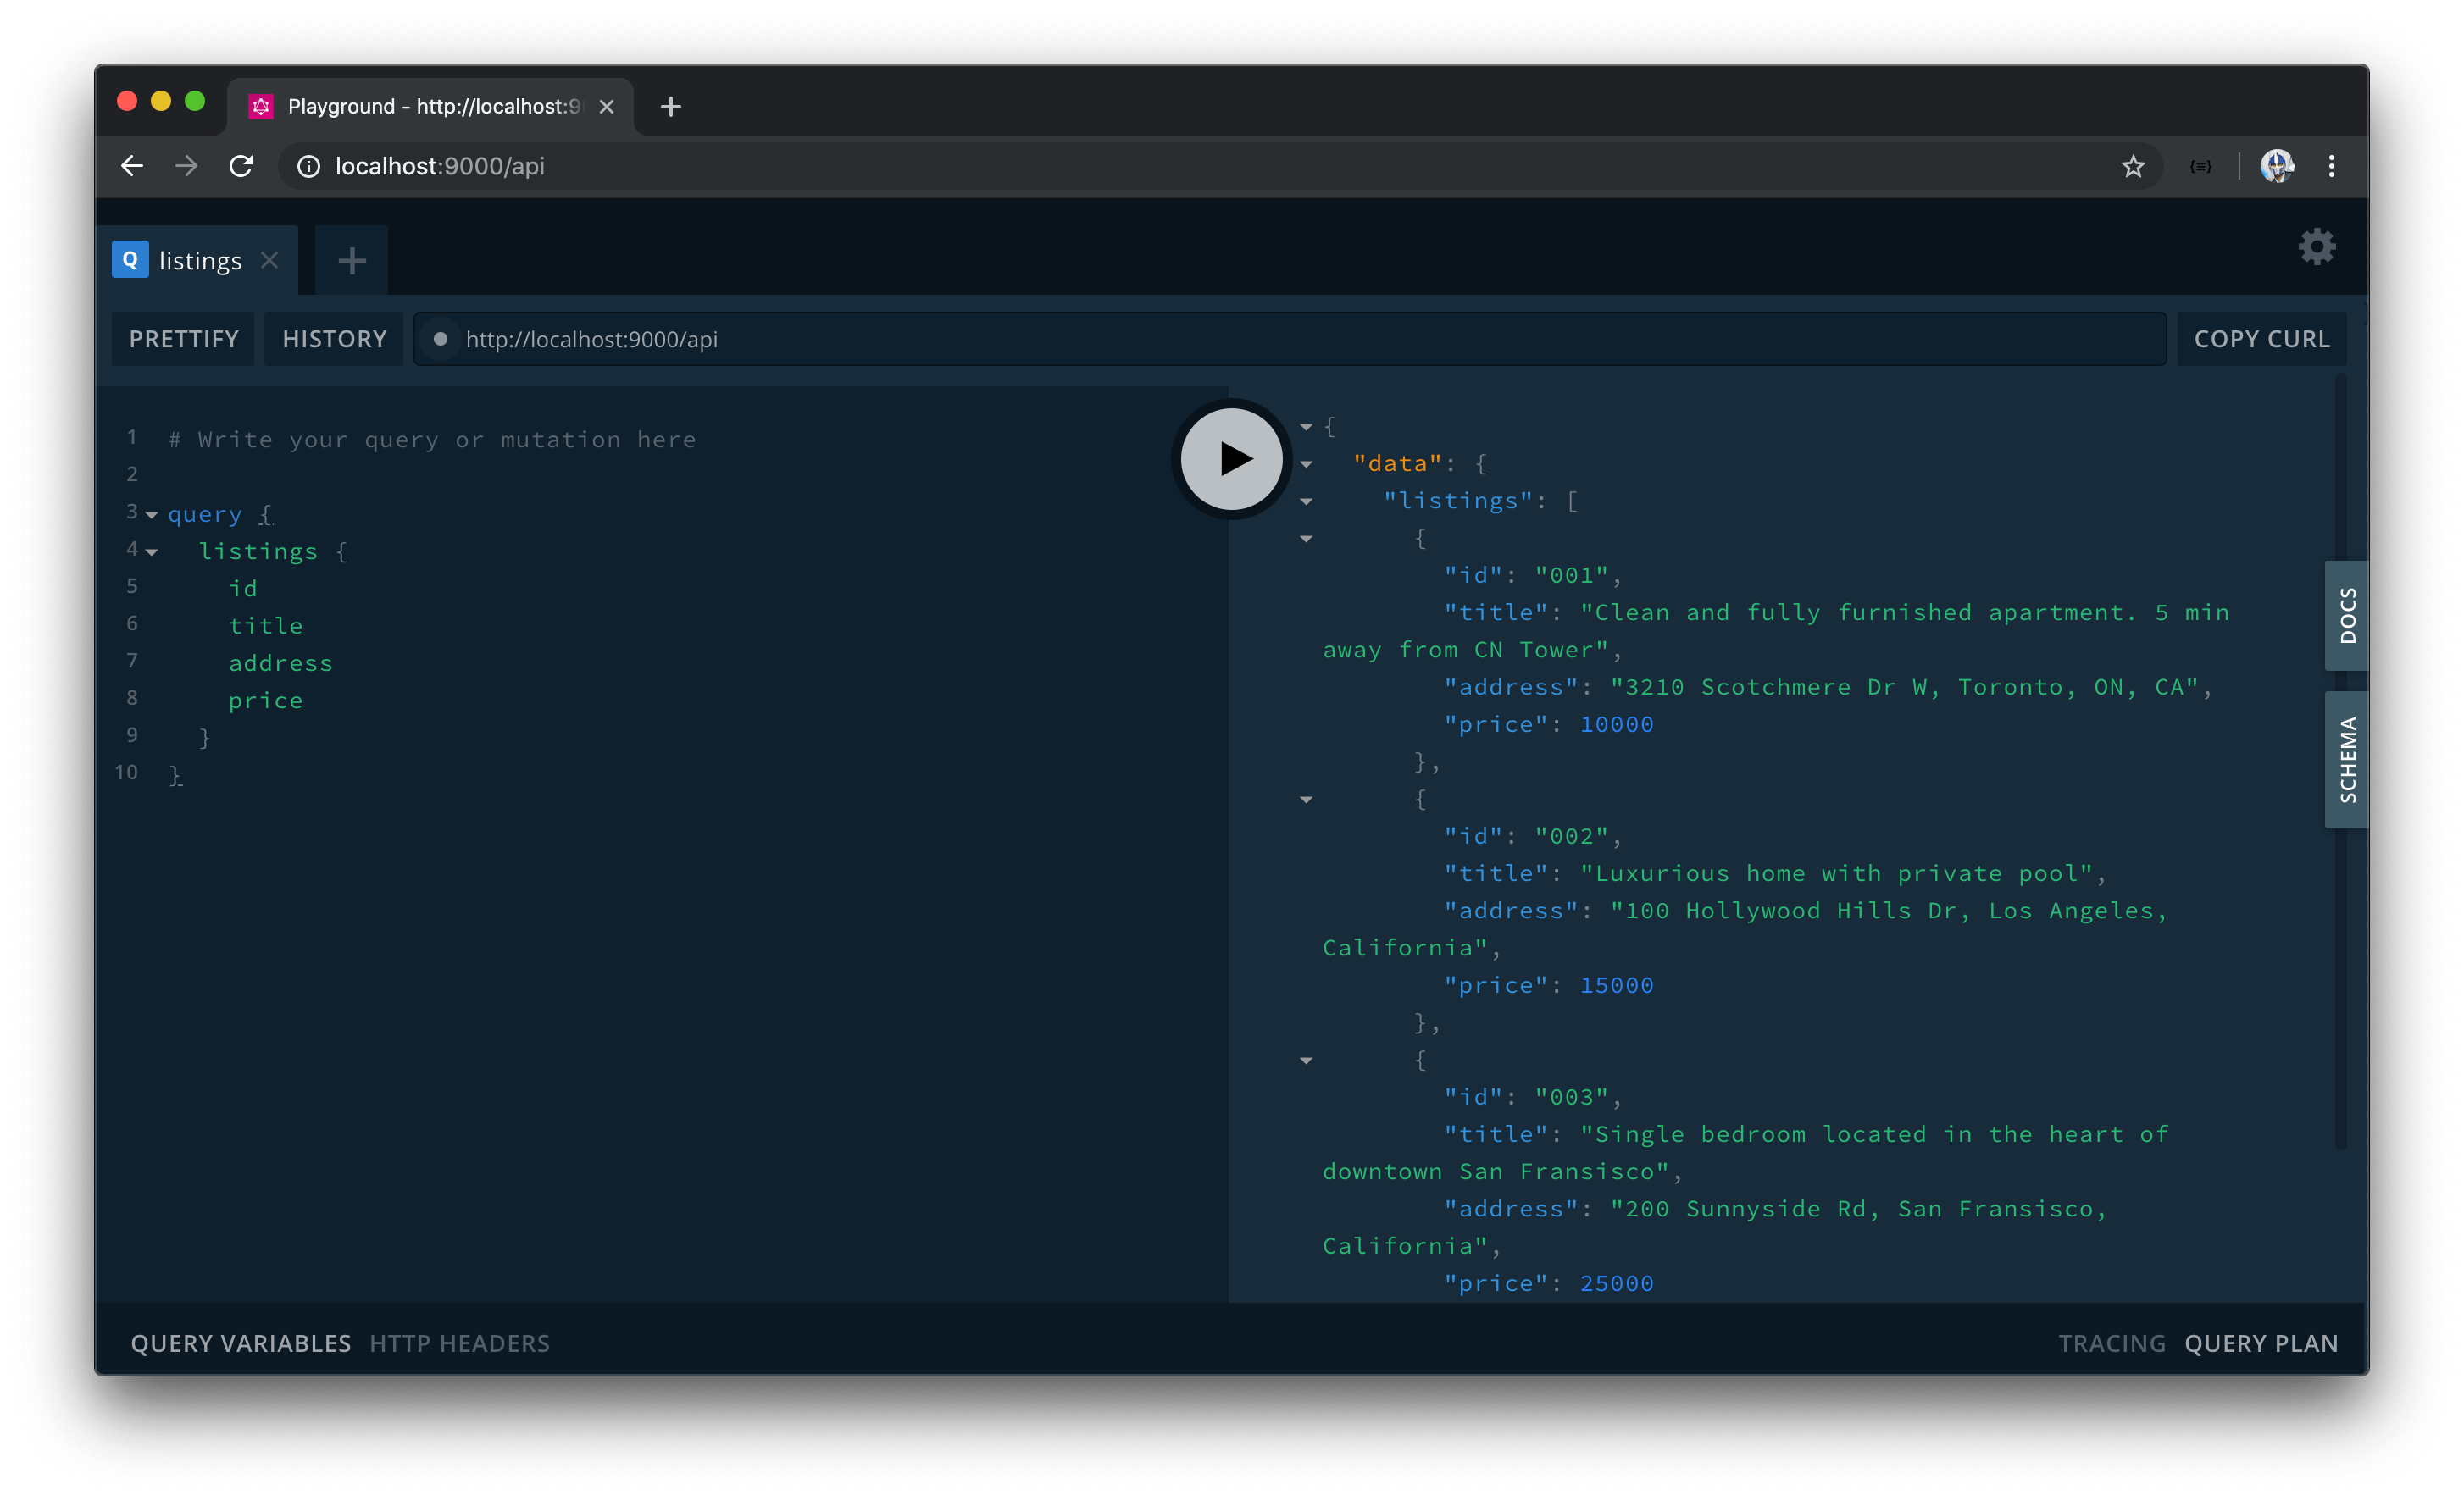
How about if we change our query and introduce more fields, like the address and price of each listing?
query {
  listings {
    id
    title
    address
    price
  }
}
Running our query again, we now get address and price information as well!
From the simple GraphQL schema we’ve set up, we’re able to query whatever fields we’d want from the mock listings array .
DELETING A LISTING
We’ll now try to delete a listing with the deleteListing mutation we’ve established. In our GraphQL Playground, we’ll change the keyword to mutation and specify the deleteListing field as the mutation that is to be run.
mutation {
  deleteListing {

  }
}
We’ll pass in an id argument and provide a value of one of the ids of our mock listings array. Like we’ve done before, we’ll use an id of "001" to represent the first listing in the mock listings array that we want deleted.
mutation {
  deleteListing(id: "001") {

  }
}
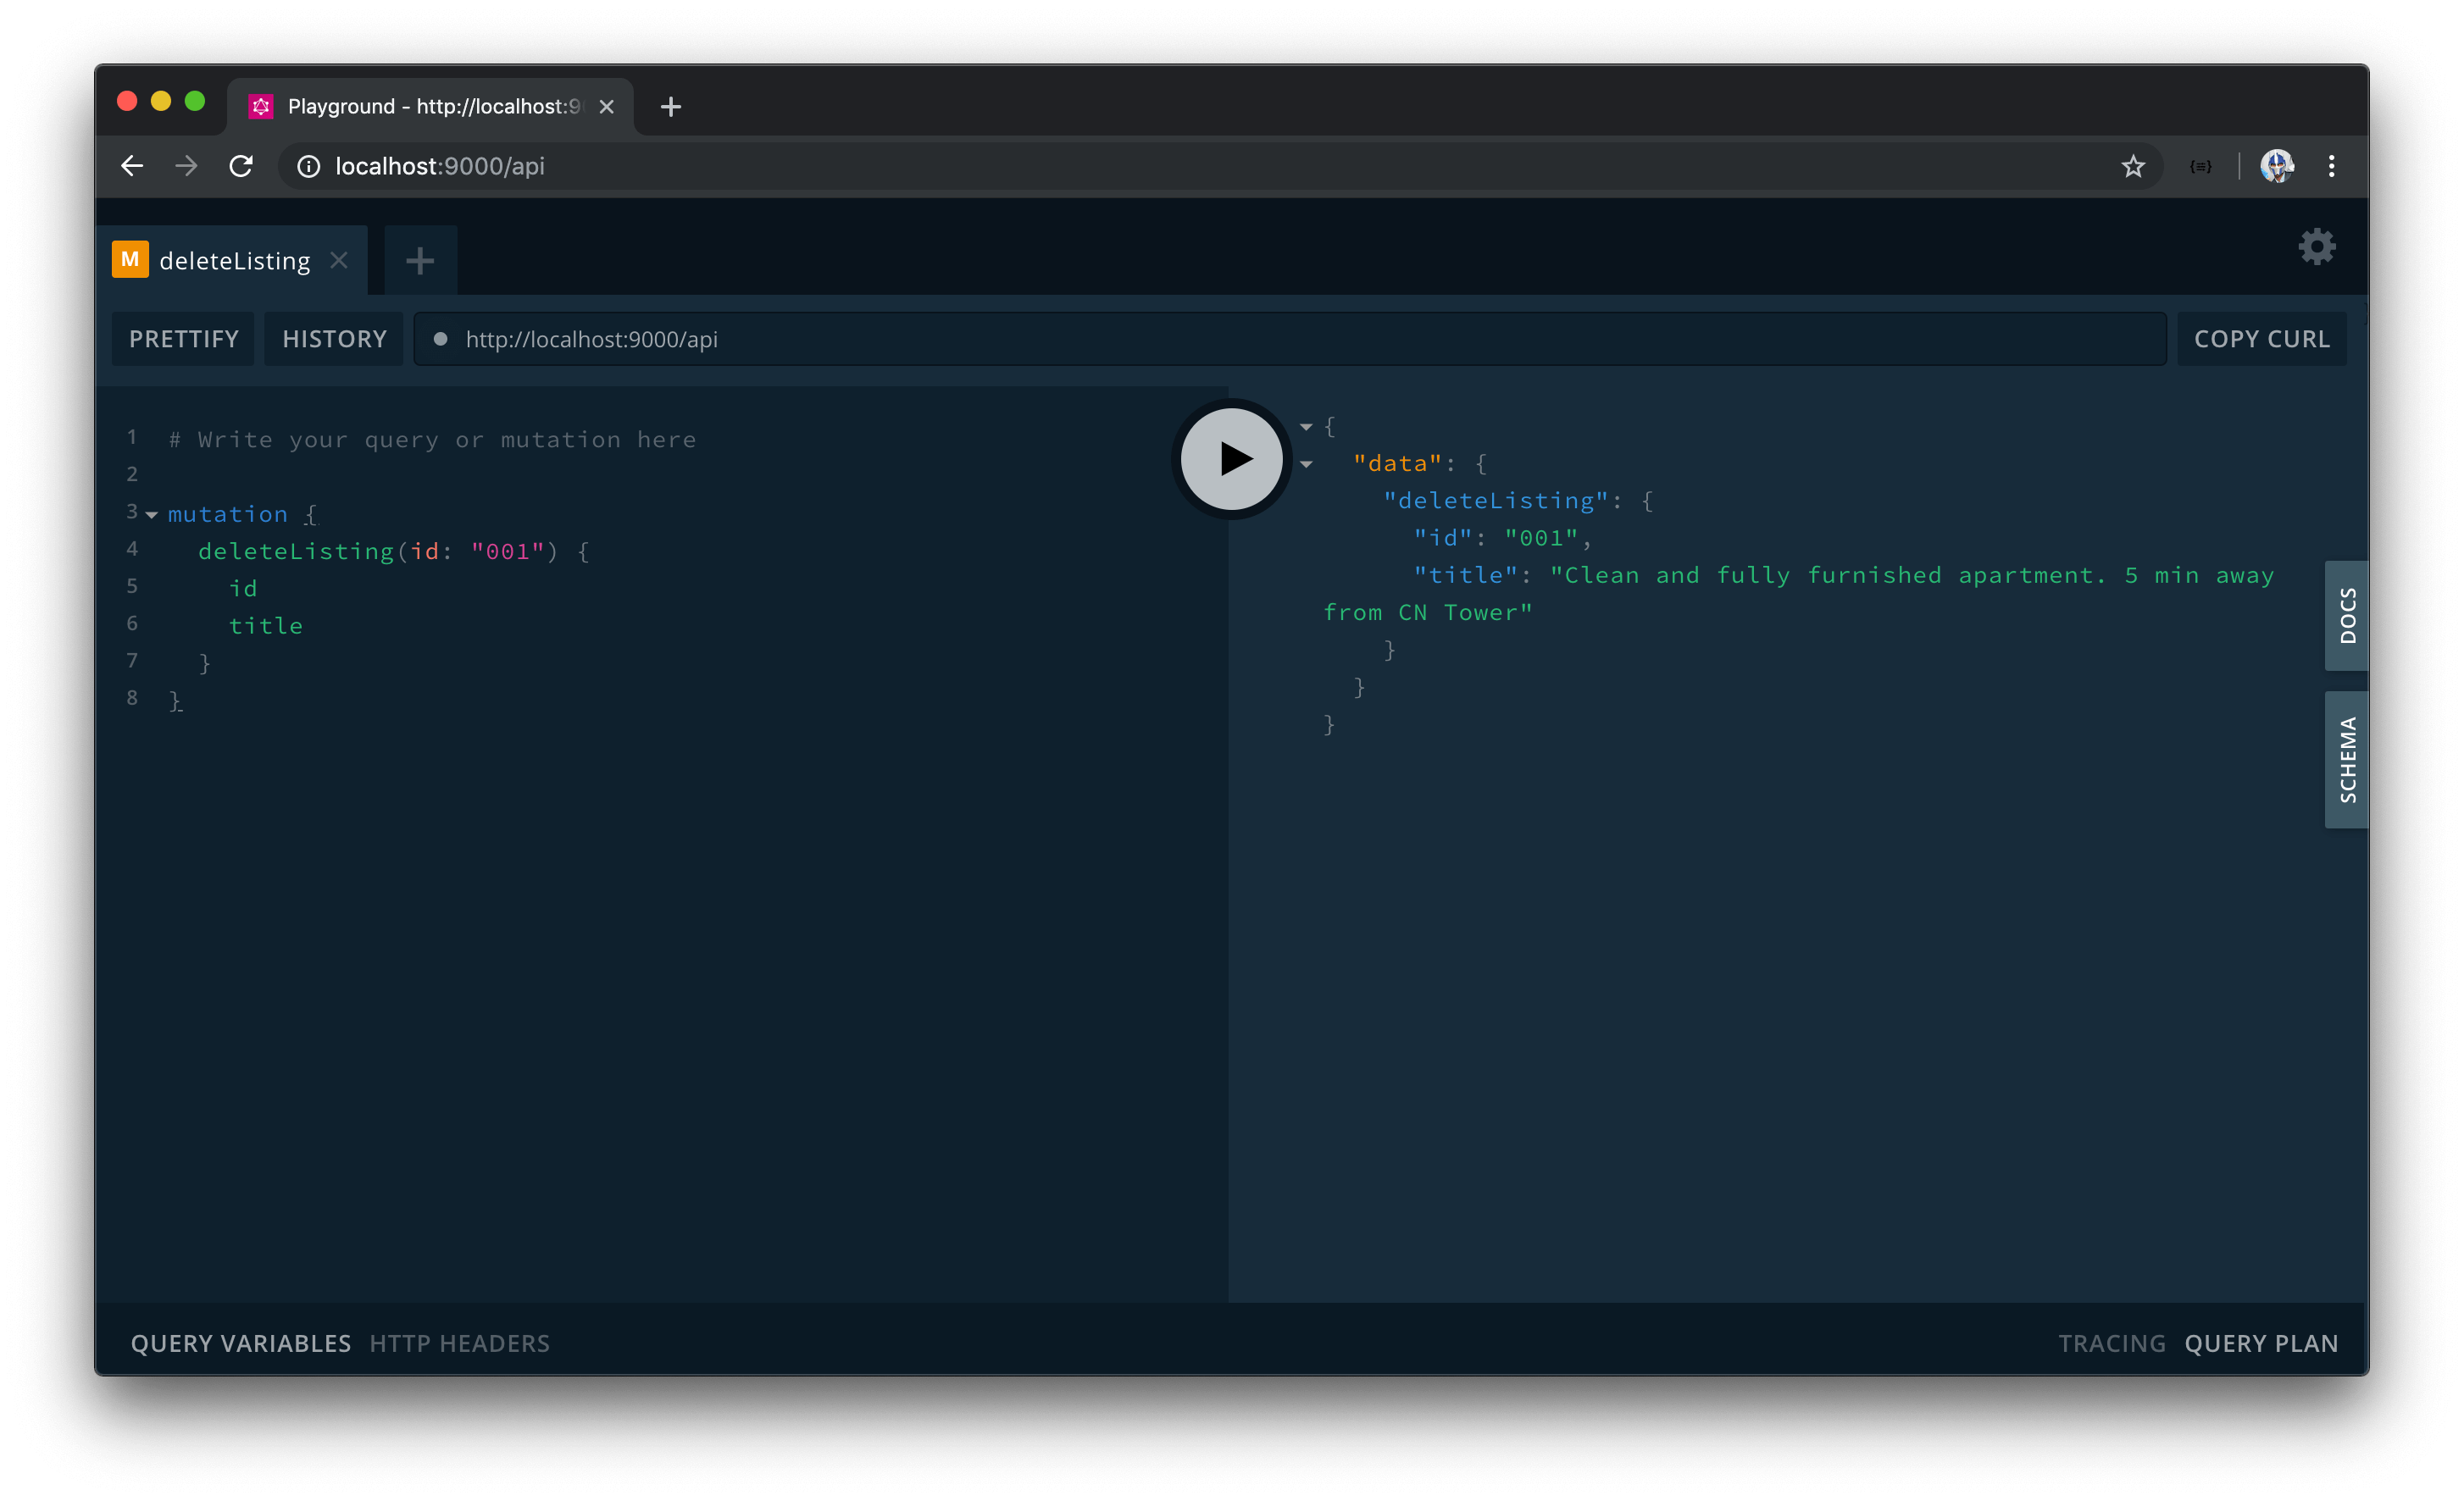
We’re able to return what fields we want from the deleted listing when the mutation is run successfully. Let’s state we’re interested in retrieving just the id and title fields of the deleted listing.
mutation {
  deleteListing(id: "001") {
    id
    title
  }
}
When we run the mutation in our playground, we’ll retrieve the id and title fields of the deleted listing when the mutation is complete.
If we attempt to query the listings again, we’ll see that the first listing object is now gone.
By invoking our listings query and deleteListing mutation, we can observe another advantage of using our GraphQL API. With our prior Express RESTful API we had to make our GET request and POST request in two separate endpoints - /listings and /delete-listing . With GraphQL, we’re able to make our queries and mutations with a single endpoint ( /api in our example).
GRAPHQL SCHEMA LANGUAGE
Great! In this lesson, we learned how to create a GraphQL schema by creating custom object types with the constructors provided by the graphql JavaScript library. You may have noticed how defining the schema this way started to become quite verbose very quickly . As our schema inevitably grows bigger when we move on to our larger-scale app, our schema will become harder to understand and debug if we continued creating the schema the way we’ve done so far.
With that said, there is a different way to define a GraphQL Schema. We can use the GraphQL Schema Language, which is a human-readable syntax to creating a GraphQL schema. In the next lesson, we’ll re-create the schema we’ve created thus far with the GraphQL Schema Language.
USING THE GRAPHQL SCHEMA LANGUAGE
The GraphQL schema language (sometimes known as the Schema Definition Language) uses a simple syntax to define and create a GraphQL schema and is language agnostic. Most graphql server libraries provide us with the capability of creating a schema with the GraphQL schema language. The GraphQL JavaScript library also allows us to create a schema with the GraphQL schema language, but we’ll achieve this with the apollo-server-express package.
Apollo Server conventionally allows us to define a GraphQL schema by setting up two different values.
-
typeDefs- string that represents the GraphQL schema. -
resolvers- map of functions that implement the schema.
We’ll create these in separate files located within a src/graphql folder. We’ll also create an index.ts file in the src/grapqhl folder to gather the typeDefs and resolvers map and export them explicitly from the graphql/ folder.
server/
  src/
    graphql/
      index.ts
      resolvers.ts
      typeDefs.ts
    // ...
TYPEDEFS
LISTING
We’ll begin by creating our schema definition with the GraphQL schema language in the src/graphql/typeDefs.ts file. To do so, we’ll import and use the gql template literal tag from apollo-server-express .
server/src/graphql/typeDefs.ts
import { gql } from "apollo-server-express";
The gql tag will allow us to write GraphQL in our code by having strings be parsed as a GraphQL Abstract Syntax Tree. Let’s see this in action before we discuss how the gql tag works. We’ll export and create a const variable named typeDefs that has the gql tag wrapped around a template literal string.
import { gql } from "apollo-server-express";

export const typeDefs = gql``;
We’ll first define the Listing object type as we’ve done in the previous lesson but in this instance use the syntax of the GraphQL schema language. We can define a new object type by using the type keyword.
import { gql } from "apollo-server-express";

export const typeDefs = gql`
    type Listing {}
`;
We can declare the fields of our Listing object type and use the built-in scalar types to reference the types of each field - ID for the id type, String for the string types, and Int for the integer types.
import { gql } from "apollo-server-express";

export const typeDefs = gql`
  type Listing {
    id: ID
    title: String
    image: String
    address: String
    price: Int
    numOfGuests: Int
    numOfBeds: Int
    numOfBaths: Int
    rating: Float
  }
`;
Recall how we’ve wanted each of the fields within the Listing type to never be null ? In the last lesson, we achieved this by wrapping the types with the GraphQLNonNull wrapper. With the GraphQL schema language, we can simply place an ! after a type definition to declare that the type should always be defined.
import { gql } from "apollo-server-express";

export const typeDefs = gql`
  type Listing {
    id: ID!
    title: String!
    image: String!
    address: String!
    price: Int!
    numOfGuests: Int!
    numOfBeds: Int!
    numOfBaths: Int!
    rating: Int!
  }
`;
QUERY
With our Listing type defined, we can go ahead and declare the shape of the root Query and Mutation types.
We intend on having a single listings field be in our Query object that’s responsible in returning a list of Listing objects. With the GraphQL schema language, we can simply wrap the type with [] brackets to denote a GraphQL List.
import { gql } from "apollo-server-express";

export const typeDefs = gql`
  type Listing {
    id: ID!
    title: String!
    image: String!
    address: String!
    price: Int!
    numOfGuests: Int!
    numOfBeds: Int!
    numOfBaths: Int!
    rating: Int!
  }

  type Query {
    listings: [Listing]
  }
`;
For our listings query field, we want to ensure the value returned is not null and contains a list of not null values. We’ll place the ! marks accordingly to denote this.
import { gql } from "apollo-server-express";

export const typeDefs = gql`
  type Listing {
    id: ID!
    title: String!
    image: String!
    address: String!
    price: Int!
    numOfGuests: Int!
    numOfBeds: Int!
    numOfBaths: Int!
    rating: Int!
  }

  type Query {
    listings: [Listing!]!
  }
`;
MUTATION
Finally, we’ll declare the shape of the Mutation object type that contains a deleteListing field that is to return a required Listing type.
import { gql } from "apollo-server-express";

export const typeDefs = gql`
  type Listing {
    id: ID!
    title: String!
    image: String!
    address: String!
    price: Int!
    numOfGuests: Int!
    numOfBeds: Int!
    numOfBaths: Int!
    rating: Int!
  }

  type Query {
    listings: [Listing!]!
  }

  type Mutation {
    deleteListing: Listing!
  }
`;
The deleteListing field is unique since it’s the only field that accepts an argument. We’ll specify the id argument it expects and declare that is of type ID! . Our typeDefs string in its complete state will look like the following:
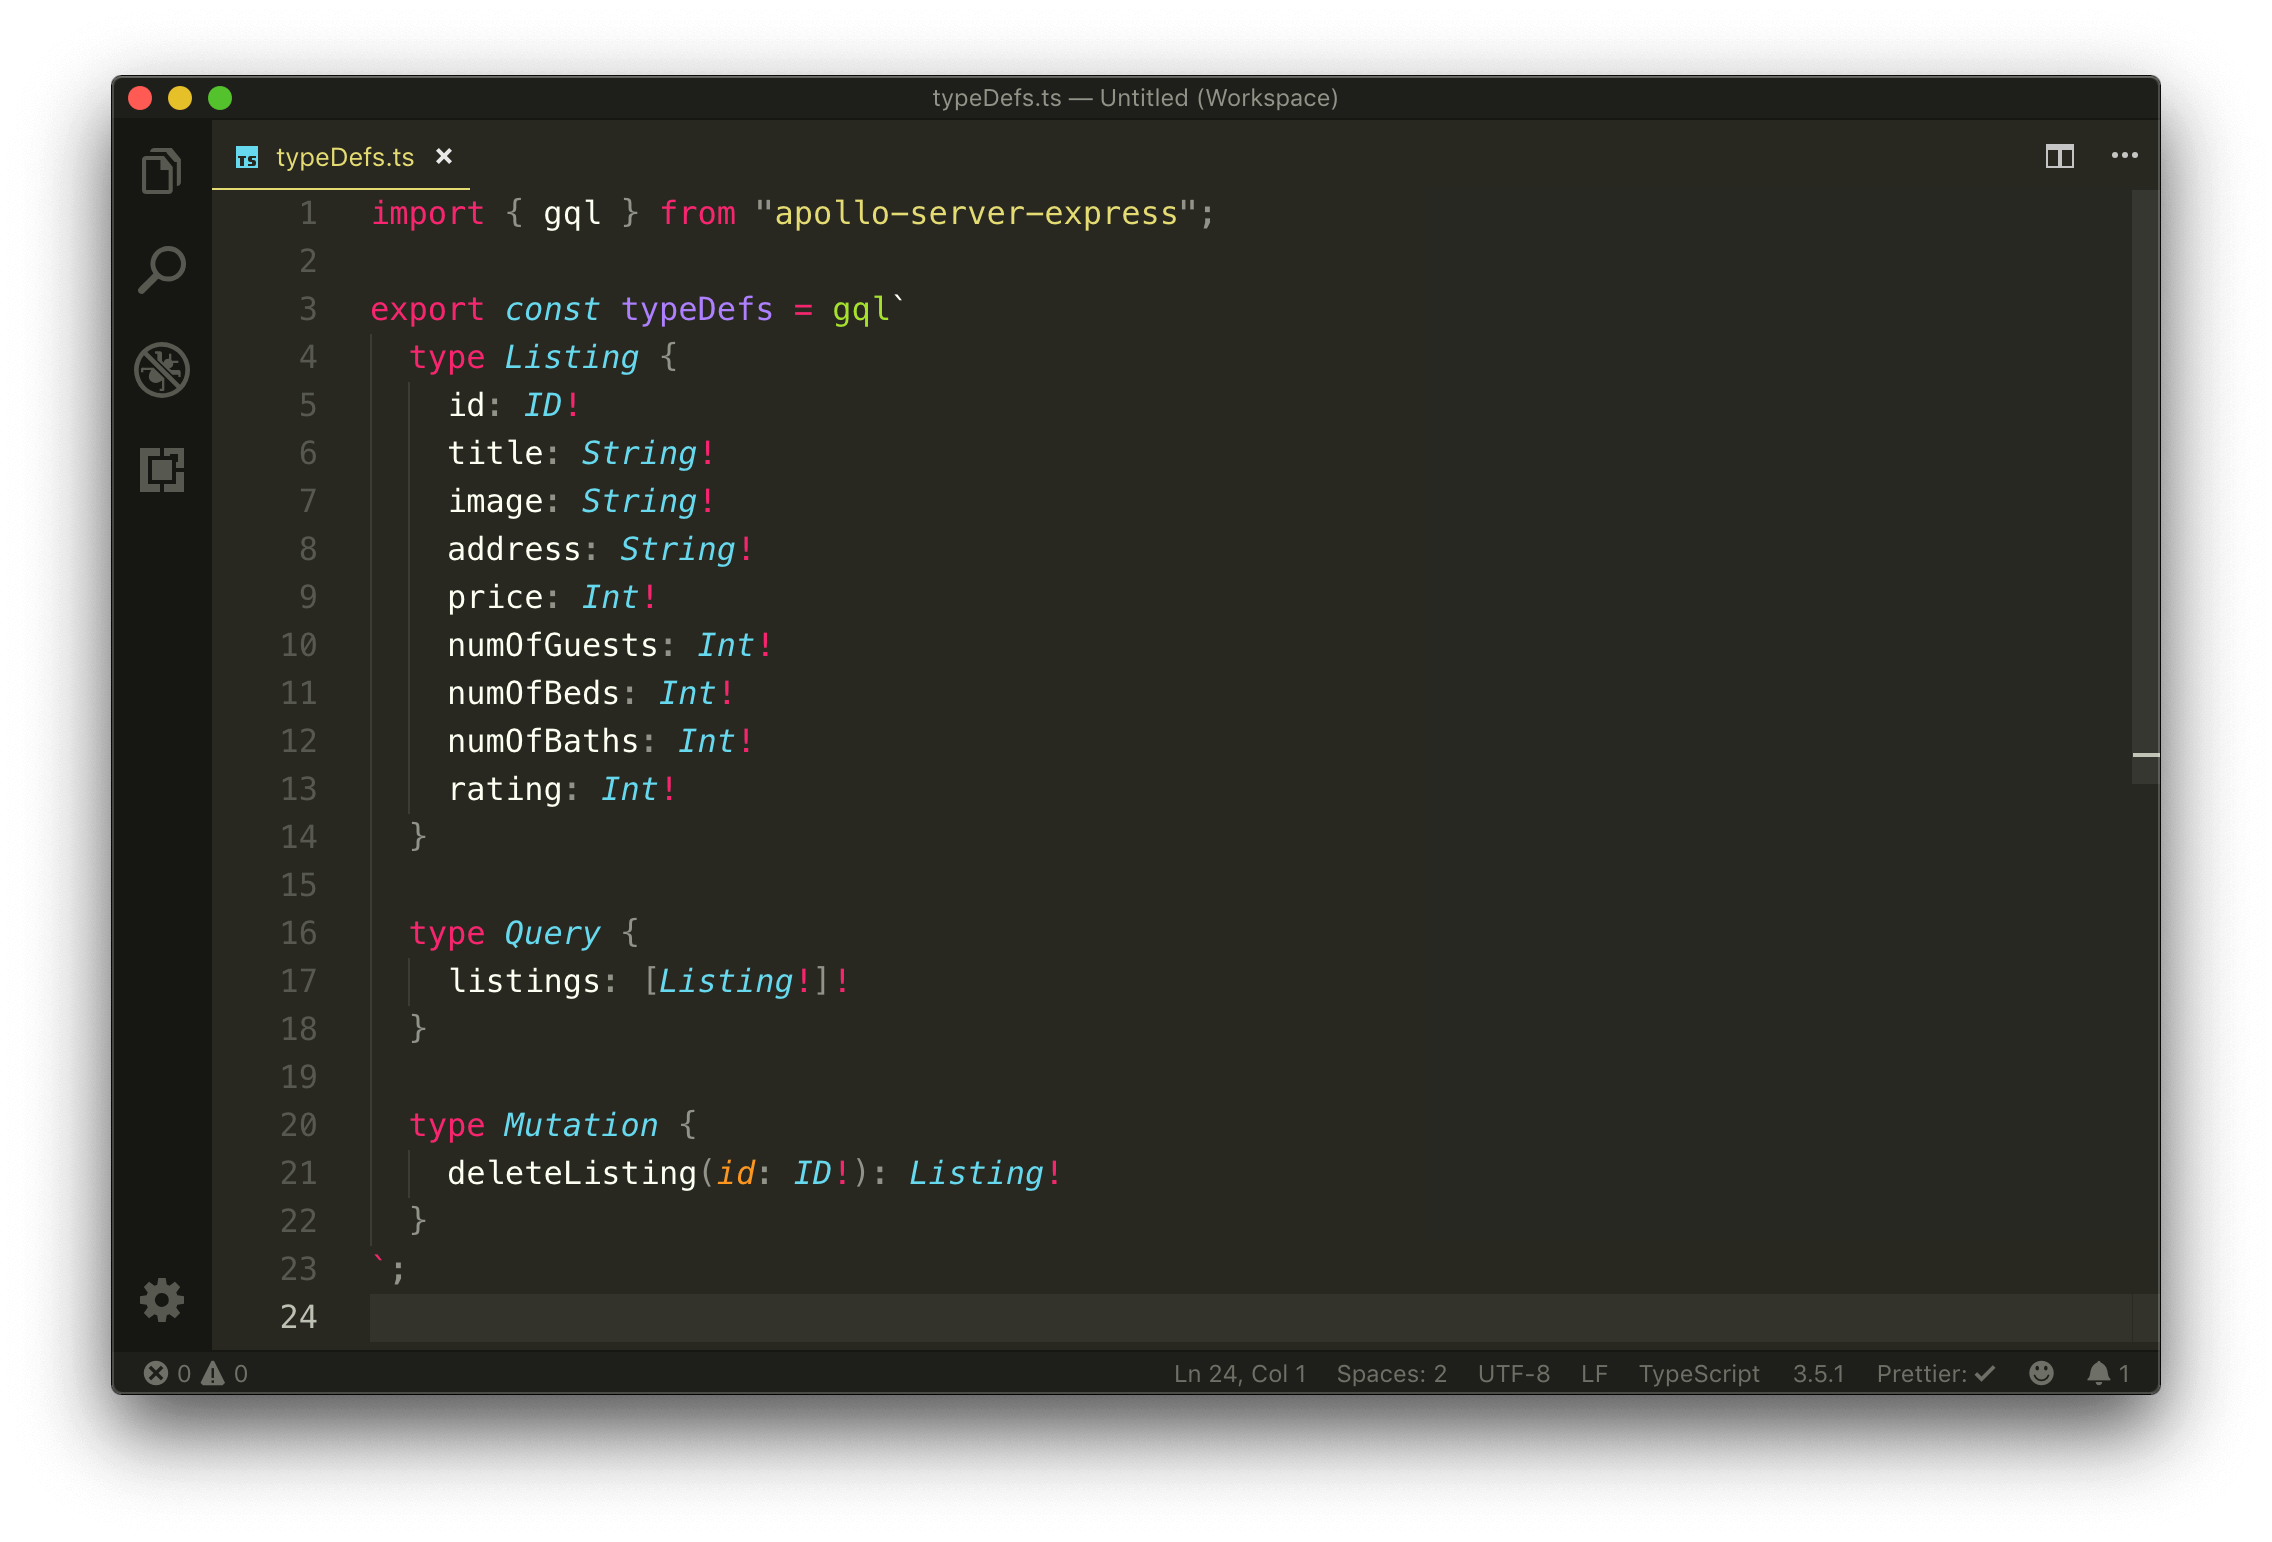
server/src/graphql/typeDefs.ts
import { gql } from "apollo-server-express";

export const typeDefs = gql`
  type Listing {
    id: ID!
    title: String!
    image: String!
    address: String!
    price: Int!
    numOfGuests: Int!
    numOfBeds: Int!
    numOfBaths: Int!
    rating: Int!
  }

  type Query {
    listings: [Listing!]!
  }

  type Mutation {
    deleteListing(id: ID!): Listing!
  }
`;
GQL
The gql tag helps parse the string we’ve created into a GraphQL Abstract Syntax tree and Apollo Server requires us to use it to wrap our schema.
For clarification - gql is a function that takes a string as an argument. The string argument has to be constructed with template literals. You might be wondering why this function appears a little strange since its use involves the placement of a template string beside the gql reference. This is an ES6 feature known as “tagged template literals” which isn’t commonly used but allows for the capability to parse strings with a preprocessor. The main takeaway here is that gql is a tag (i.e. function) where the argument is derived from the template literal applied alongside it. It takes the string and returns a GraphQL Tree.
By using the gql tag, it helps us manipulate the GraphQL document by making it easier to add/remove fields and perform more complicated functionality like merging queries. This is most apparent when we install and use an accompanying editor extension like the VSCode’s Apollo GraphQL Extension. When installed, we’ll get appropriate syntax highlighting for all our GraphQL documents created with the gql tag!
RESOLVERS
We’ll now move towards creating the resolvers of our GraphQL Schema with which we’ll do in the src/graphql/resolvers.ts file. Here’s where we’ll provide the functionality to all of our schema entry points for fetching & manipulating data. In other words, here is where define our GraphQL resolvers .
In the src/graphql/resolvers.ts file, we’ll import the mock listings data array since we’ll need it in our resolver functions and we’ll export a const object labeled resolvers .
import { listings } from "../listings";

export const resolvers = {};
The resolvers object is simply going to be a map that relates the schema fields to the functions that resolve that field.
QUERY
First, we’ll define the Query root object and the listings field resolver. The listings field resolver will simply return the listings array from our mock data.
import { listings } from "../listings";

export const resolvers = {
  Query: {
    listings: () => {
      return listings;
    }
  }
};
MUTATION
We’ll then declare the Mutation object with the deleteListing field resolver.
import { listings } from "../listings";

export const resolvers = {
  Query: {
    listings: () => {
      return listings;
    }
  },
  Mutation: {
    deleteListing: () => {}
  }
};
The deleteListing resolver will expect an id argument that we’re going to need to access. The arguments passed to a resolver function is positioned as the second argument of a resolver function. As a result, we’ll declare the root arg first and we’ll destruct the id field from the passed in arguments.
The delete functionality would appear just like we had in our original GraphQL schema where we return the spliced listing object within the list or throw an Error .
import { listings } from "../listings";

export const resolvers = {
  // ...
  Mutation: {
    deleteListing: (_root, { id }) => {
      for (let i = 0; i < listings.length; i++) {
        if (listings[i].id === id) {
          return listings.splice(i, 1)[0];
        }
      }

      throw new Error("failed to deleted listing");
    }
  }
};
RESOLVERS AND TYPES
The root and id properties in our deleteListing resolver function don’t have appropriate types associated with them.
The first root object argument will contain the results returned from a resolver on a parent field. We know Query and Mutation are our root object types so for this object to have a value, it needs to be declared and passed from the server configuration. We haven’t configured anything to be defined here so root will be undefined and as a result, we can use the undefined type.
id in the GraphQL Schema is of type ID . The ID type gets serialized as a string when the function is run so we’ll type define the destructured arguments object in deleteListing and give id the string type.
import { listings } from "../listings";

export const resolvers = {
  // ...
  Mutation: {
    deleteListing: (_root: undefined, { id }: { id: string }) => {
      for (let i = 0; i < listings.length; i++) {
        if (listings[i].id === id) {
          return listings.splice(i, 1)[0];
        }
      }

      throw new Error("failed to deleted listing");
    }
  }
};
IRESOLVERS INTERFACE
Apollo Server provides some interface types to help better define the types of a resolvers map. We’ll import the IResolvers interface from the apollo-server-express package and type define our resolvers map with it.
Our src/graphql/resolvers.ts file in the complete state for this lesson will look like the following.
server/src/graphql/resolvers.ts
import { IResolvers } from "apollo-server-express";
import { listings } from "../listings";

export const resolvers: IResolvers = {
  Query: {
    listings: () => {
      return listings;
    }
  },
  Mutation: {
    deleteListing: (_root: undefined, { id }: { id: string }) => {
      for (let i = 0; i < listings.length; i++) {
        if (listings[i].id === id) {
          return listings.splice(i, 1)[0];
        }
      }

      throw new Error("failed to deleted listing");
    }
  }
};
The IResolvers interface helps enforce our resolvers map object to only contain either resolver fields or resolver functions themselves. For example, if we tried to introduce a field that has a value of a string , we’ll get a warning.
import { IResolvers } from "apollo-server-express";
import { listings } from "../listings";

export const resolvers: IResolvers = {
  field: "this is a string" // Type 'string' is not assignable...
  // ...
};
Also, the IResolvers interface is a generic and allows us to define the types of the obj and context arguments in our resolver functions by passing in type variables - IResolvers<TSource, TContext> .
import { IResolvers } from "apollo-server-express";
import { listings } from "../listings";

export const resolvers: IResolvers<undefined, Context> = {
  Query: {
    field: (root, args: {}, ctx) => {
      // root will have the undefined type
      // ctx will have the Context type
      // ...
    }
  }
  // ...
};
We prefer to explicitly define the types of parameters in each of our resolver functions so we won’t define these types definitions as type variables to IResolvers .
If you don’t understand how TypeScript generics work (e.g. what
IResolvers<TSource, TContext>means), no need to worry! We’ll be introducing and explaining TypeScript generics and type variables in an upcoming lesson.
RUNNING OUR GRAPHQL REQUESTS
In the src/graphql/index.ts file, we’ll re-export the typeDefs string and resolvers map.
server/src/graphql/index.ts
export * from './resolvers';
export * from './typeDefs';
In the src/index.ts file, we’ll import the type definitions and resolvers from the graphql/ folder. We’ll modify our Apollo Server instantiation to take a new method of defining the schema by accepting the typeDefs and resolvers options. We’ll also remove the standalone graphql file we had before where we instantiated our schema with the help of the GraphQL JavaScript library.
With all the changes made, our src/index.ts file will look like the following:
server/src/index.ts
import express from 'express';
import { ApolloServer } from 'apollo-server-express';
import { typeDefs, resolvers } from './graphql';

const app = express();
const port = 9000;
const server = new ApolloServer({ typeDefs, resolvers });

server.applyMiddleware({ app, path: '/api' });
app.listen(port);

console.log(`[app] : http://localhost:${port}`);
When our server is running, our listings query will continue to work as expected.
And our deleteListing mutation will delete a listing when run and return information for the deleted listing.
MODULE 3 SUMMARY
In Module 3, we’ve set up a GraphQL API with Apollo Server (in particular with the apollo-express-server package).
SRC/INDEX.TS
In the main src/index.ts file, we set up a new Apollo Server instance with the ApolloServer constructor. In the ApolloServer constructor, we pass in a typeDefs string and a resolvers map that we’ve created in the src/graphql/ folder of our app.
We applied middleware on the Apollo Server instance and passed in the Express app instance as well as specified the path of our API endpoint to be /api .
server/src/index.ts
import express from 'express';
import { ApolloServer } from 'apollo-server-express';
import { typeDefs, resolvers } from './graphql';

const app = express();
const port = 9000;
const server = new ApolloServer({ typeDefs, resolvers });

server.applyMiddleware({ app, path: '/api' });
app.listen(port);

console.log(`[app] : http://localhost:${port}`);
GRAPHQL SCHEMA
typeDefs (i.e. type definitions) is a string that represents the GraphQL schema. In the src/graphql/typeDefs.ts file, we use the gql tag that apollo-server-express provides to help parse a template literal into a GraphQL Abstract Tree.
We created a Listing GraphQL object type that represents the shape of a single listing. We also created the root Query and Mutation object types. In the root Query type, we established a listings field where we return a list of listings. The deleteListing field in our Mutation object accepts an id argument and when complete returns the deleted listing.
server/src/graphql/typeDefs.ts
import { gql } from "apollo-server-express";

export const typeDefs = gql`
  type Listing {
    id: ID!
    title: String!
    image: String!
    address: String!
    price: Int!
    numOfGuests: Int!
    numOfBeds: Int!
    numOfBaths: Int!
    rating: Int!
  }

  type Query {
    listings: [Listing!]!
  }

  type Mutation {
    deleteListing(id: ID!): Listing!
  }
`;
GRAPHQL RESOLVERS
The implementation of our GraphQL schema is set up in the src/graphql/resolvers.ts file which contains the resolvers of our GraphQL API in a resolvers map.
We’ve specified the listings resolver in our Query object to return the listings mock data array. The resolver for the deleteListing field within our Mutation object accepts an id argument and loops through the listings mock array to remove the listing where listing.id matches the id argument passed in.
server/src/graphql/resolvers.ts
import { IResolvers } from "apollo-server-express";
import { listings } from "../listings";

export const resolvers: IResolvers = {
  Query: {
    listings: () => {
      return listings;
    }
  },
  Mutation: {
    deleteListing: (_root: undefined, { id }: { id: string }) => {
      for (let i = 0; i < listings.length; i++) {
        if (listings[i].id === id) {
          return listings.splice(i, 1)[0];
        }
      }

      throw new Error("failed to deleted listing");
    }
  }
};
MOVING FORWARD
Whenever our server app restarts, all the listings we delete come back. This is because we’ve hard-coded data into our app in the src/listings.ts file. Whenever our server restarts, the code in src/listings.ts is reloaded into our computer memory. For a real application, this makes our server pretty useless.
If we want our actions to be permanent, we must somehow persist our modified data outside of our app. Databases are designed to do just this with which we’ll be discussing in the next module of the course. Great job so far!
MODULE 4 INTRODUCTION
We created a GraphQL API with the help of the Apollo Server package. However, we haven’t been able to persist any of the changes we made to our data.
In this module, we’ll use a database to contain any data we want to be persisted. We’re going to set up this database with MongoDB and use a database as a service known as MongoDB Atlas.
In this module, we’ll:
- Introduce MongoDB.
- Set up a new database cluster with MongoDB Atlas.
- Connect our server with our database using the official Node Mongo driver.
- Introduce TypeScript generics to enforce types to our database.
- Create a simple script to help seed our database with initial data.
- Have our resolver functions process data from our database.
- Finally, modularize our resolvers.
SQL VS NOSQL
When it comes to deciding on a database, one of the bigger questions that often needs to be addressed is either using a relational database or a non-relational database . Relational databases are often recognized as SQL databases while non-relational databases are often recognized as NoSQL Databases.
SQL databases use a Structured Query Language for manipulating and reading data which are stored in tables. Data is stored in tables as rows and columns with predefined relationships between them (hence the term - a relational database). SQL databases require us to use defined schemas to determine the data structure. The advantage of this is we can always be confident in the structure of our data. However, this also means that a significant change in schema, later on, would be difficult to manage and somewhat disruptive since earlier forms of data may not match the newer schema.
A NoSQL database, on the other hand, has dynamic schema (or no schema at all) for unstructured data which can be stored in many ways (e.g such as document-oriented). The advantage of this is we can easily change our data structure as our app evolves. However, this does not mean code will just magically work . Because of this flexibility, additional checks are needed in our code to ensure our app logic can handle data with different structures.
SQL is a good choice for any app that will benefit from a well-defined data structure (e.g. accounting). NoSQL is a good choice for any app that may have rapid changing data structures. If we can’t define a schema for a database or if a schema is expected to change, NoSQL may be a good choice.
What we’ve talked about is a very high-level difference between relational and non-relational databases. A lot of other topics can also be compared such as scalability, compatibility with certain languages, speed, performance, etc. We’re not stating one approach is better than the other because it really comes down to a lot of different factors. With that said, we’ve decided to use a NoSQL database for our course known as MongoDB due to how incredibly easy MongoDB is to use and implement to begin persisting data within an application.
MONGODB
MongoDB is a NoSQL database system that stores data in JSON-like documents. We can integrate MongoDB to an app by installing it locally on our computer or using a database-as-a-service (DBaaS) platform (e.g. mLab, ObjectRocket, Atlas, etc). There are a few advantages to using a DBaaS platform:
- Maintenance and management of the database infrastructure becomes the responsibility of the service provider.
- Out of the box security set-up.
- Scalability and higher availability. As our app grows, we can re-configure our cloud database with more processing power.
In the next lesson, we’ll use the official Mongo Cloud Database named MongoDB Atlas to create our first Mongo cluster and database!
INTRODUCTION TO MONGODB
SQL VS NOSQL
When it comes to deciding on a database, one of the bigger questions that often needs to be addressed is either using a relational database or a non-relational database . Relational databases are often recognized as SQL databases while non-relational databases are often recognized as NoSQL Databases.
SQL databases use a Structured Query Language for manipulating and reading data which are stored in tables. Data is stored in tables as rows and columns with predefined relationships between them (hence the term - a relational database). SQL databases require us to use defined schemas to determine the data structure. The advantage of this is we can always be confident in the structure of our data. However, this also means that a significant change in schema, later on, would be difficult to manage and somewhat disruptive since earlier forms of data may not match the newer schema.
A NoSQL database, on the other hand, has dynamic schema (or no schema at all) for unstructured data which can be stored in many ways (e.g such as document-oriented). The advantage of this is we can easily change our data structure as our app evolves. However, this does not mean code will just magically work . Because of this flexibility, additional checks are needed in our code to ensure our app logic can handle data with different structures.
SQL is a good choice for any app that will benefit from a well-defined data structure (e.g. accounting). NoSQL is a good choice for any app that may have rapid changing data structures. If we can’t define a schema for a database or if a schema is expected to change, NoSQL may be a good choice.
What we’ve talked about is a very high-level difference between relational and non-relational databases. A lot of other topics can also be compared such as scalability, compatibility with certain languages, speed, performance, etc. We’re not stating one approach is better than the other because it really comes down to a lot of different factors. With that said, we’ve decided to use a NoSQL database for our course known as MongoDB due to how incredibly easy MongoDB is to use and implement to begin persisting data within an application.
MONGODB
MongoDB is a NoSQL database system that stores data in JSON-like documents. We can integrate MongoDB to an app by installing it locally on our computer or using a database-as-a-service (DBaaS) platform (e.g. mLab, ObjectRocket, Atlas, etc). There are a few advantages to using a DBaaS platform:
- Maintenance and management of the database infrastructure becomes the responsibility of the service provider.
- Out of the box security set-up.
- Scalability and higher availability. As our app grows, we can re-configure our cloud database with more processing power.
In the next lesson, we’ll use the official Mongo Cloud Database named MongoDB Atlas to create our first Mongo cluster and database!
SETTING UP A NEW MONGODB CLUSTER WITH ATLAS
Just like how we intend to deploy our server to the cloud, we’re going to implement our database on the cloud as well. This is important because the moment our server is in the cloud during production, it’ll need to access a database on the cloud as well. We can’t just have a database on our static local computer.
We’re going to set up a MongoDB cluster with MongoDB Atlas which is a fully managed cloud database service built and maintained by the same team behind MongoDB.
A MongoDB cluster is essentially a group of two or more servers that work together to provide users with higher availability, scalability, and reliability.
MongoDB Atlas makes managing and hosting data on the cloud easy with clusters.
CREATE AN ACCOUNT
To use MongoDB Atlas, we’ll need to have an account created. If you don’t happen to have an account, you’ll be to create one in the Atlas register page - https://cloud.mongodb.com/user#/atlas/register/.
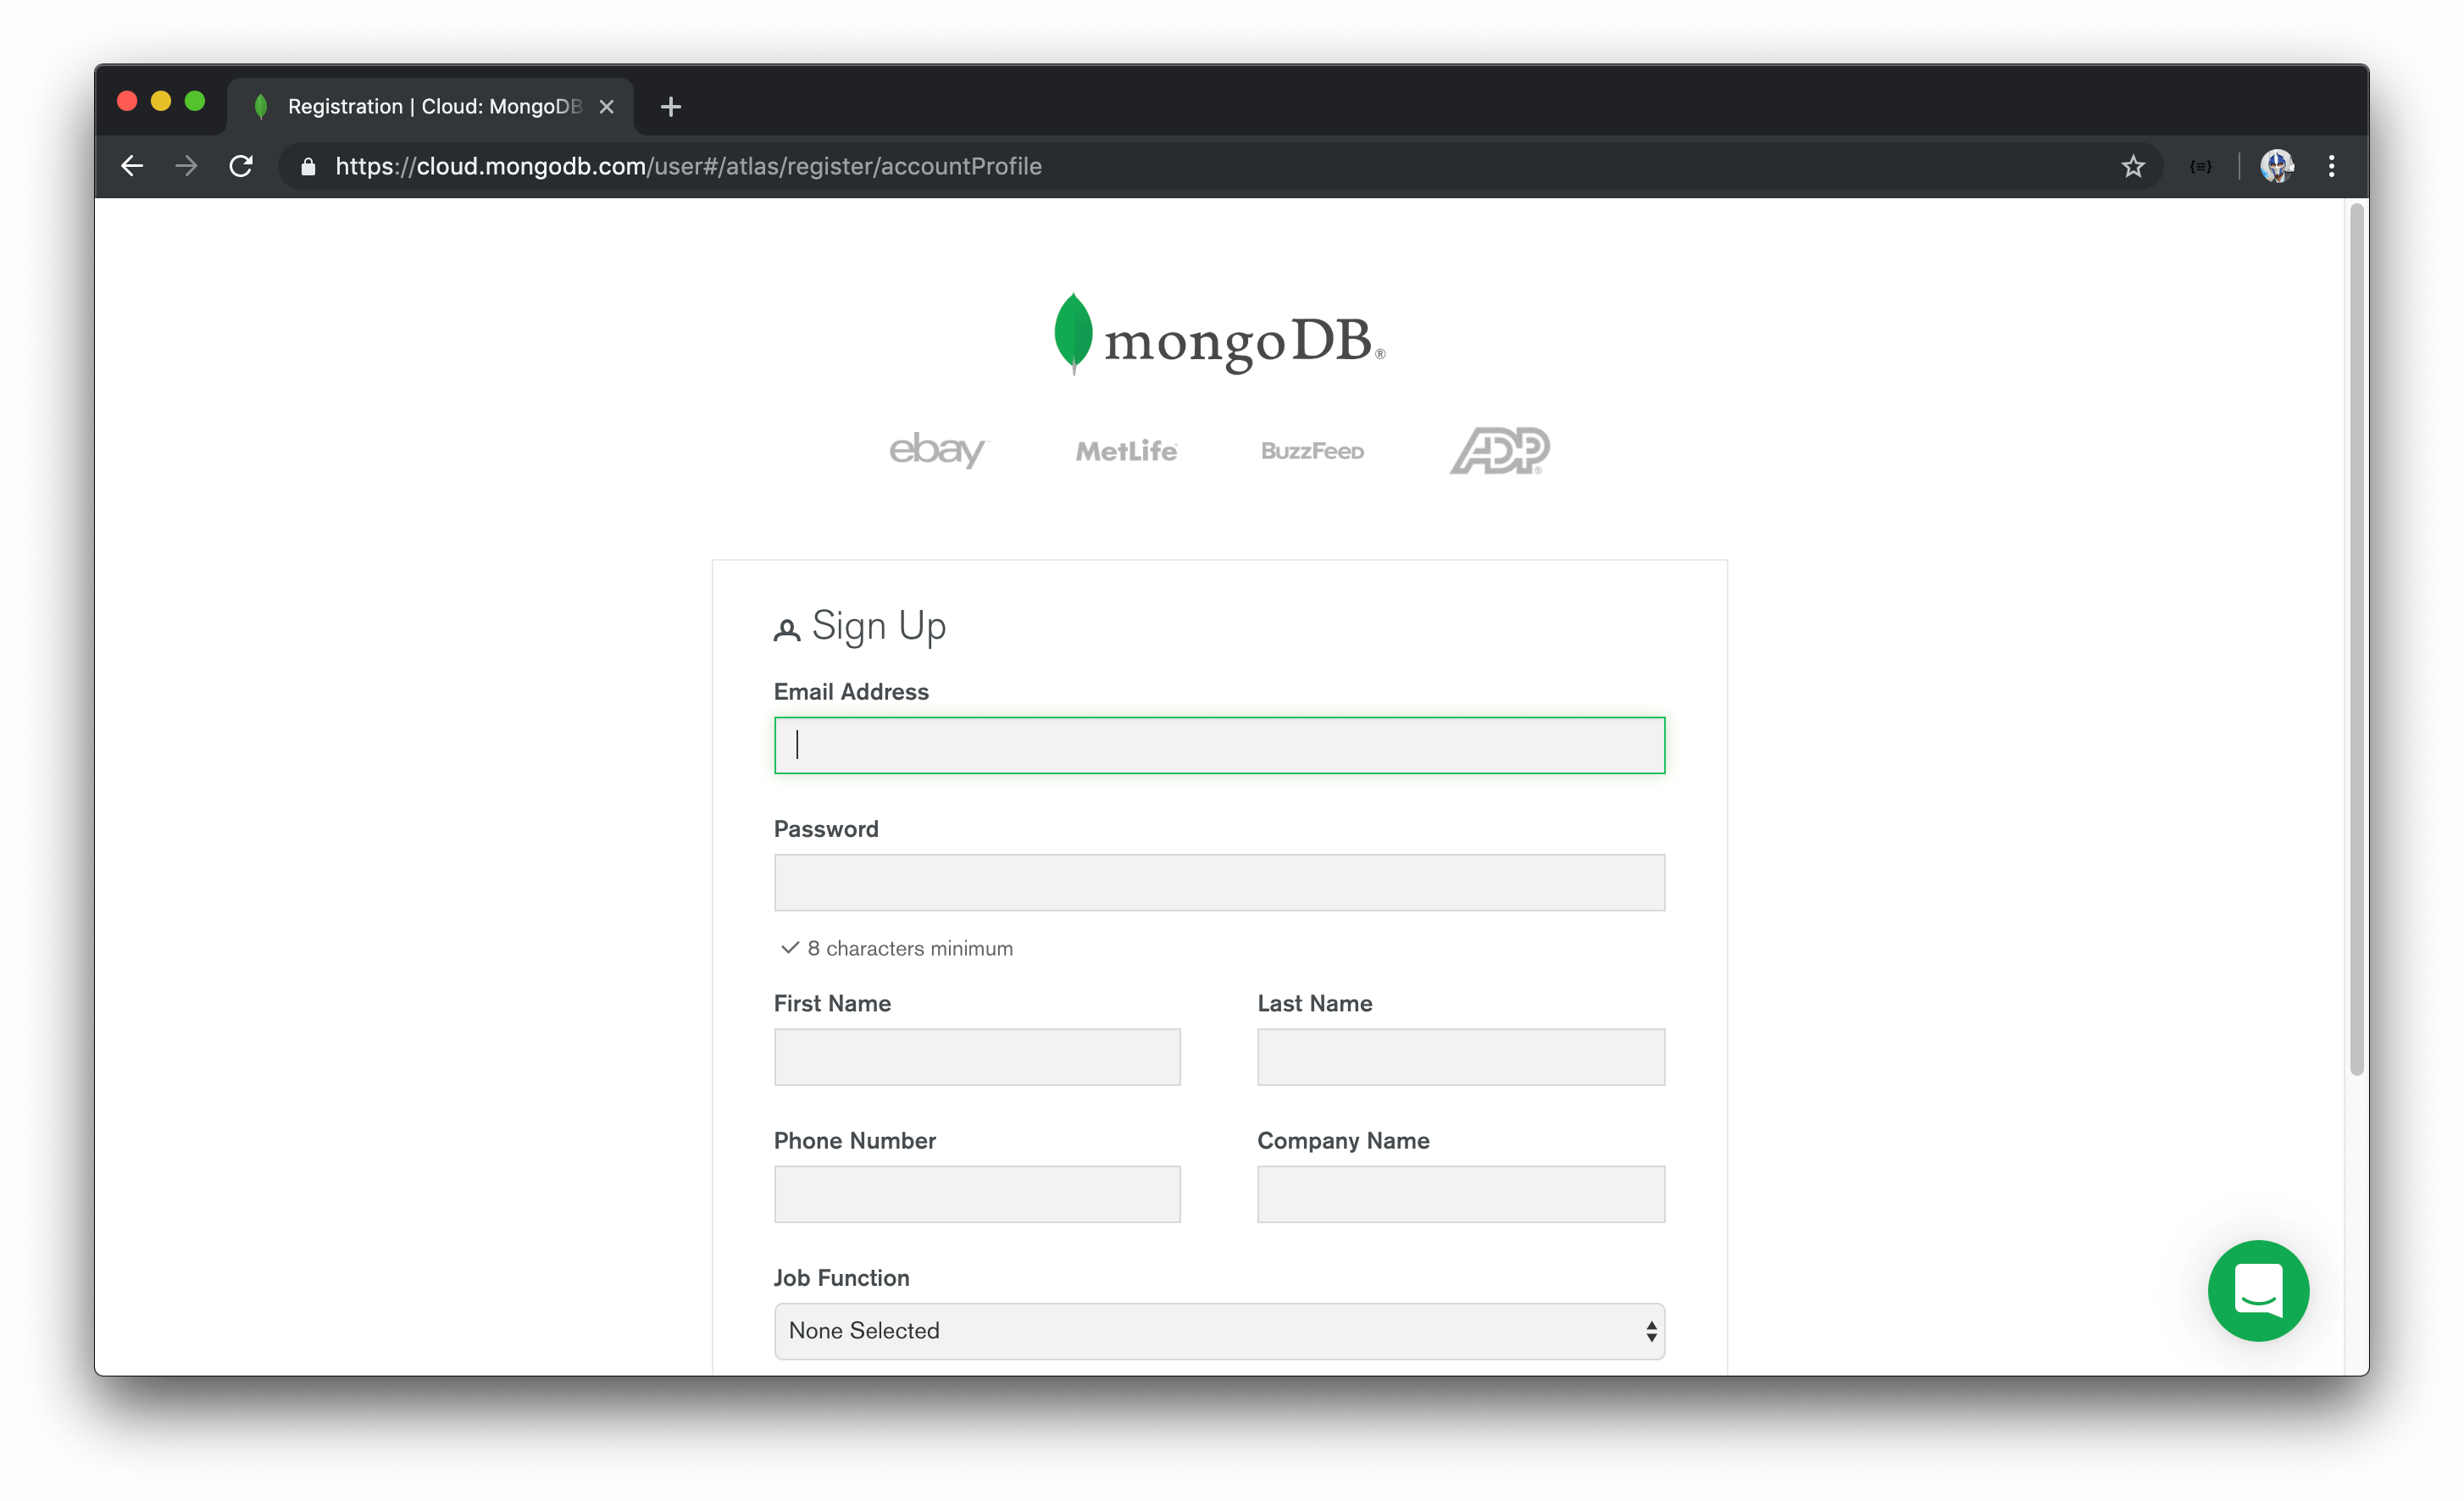
https://cloud.mongodb.com/user#/atlas/register/
CREATE A CLUSTER
Once an account has been created, we’ll be redirected and prompted to create our very first cluster.
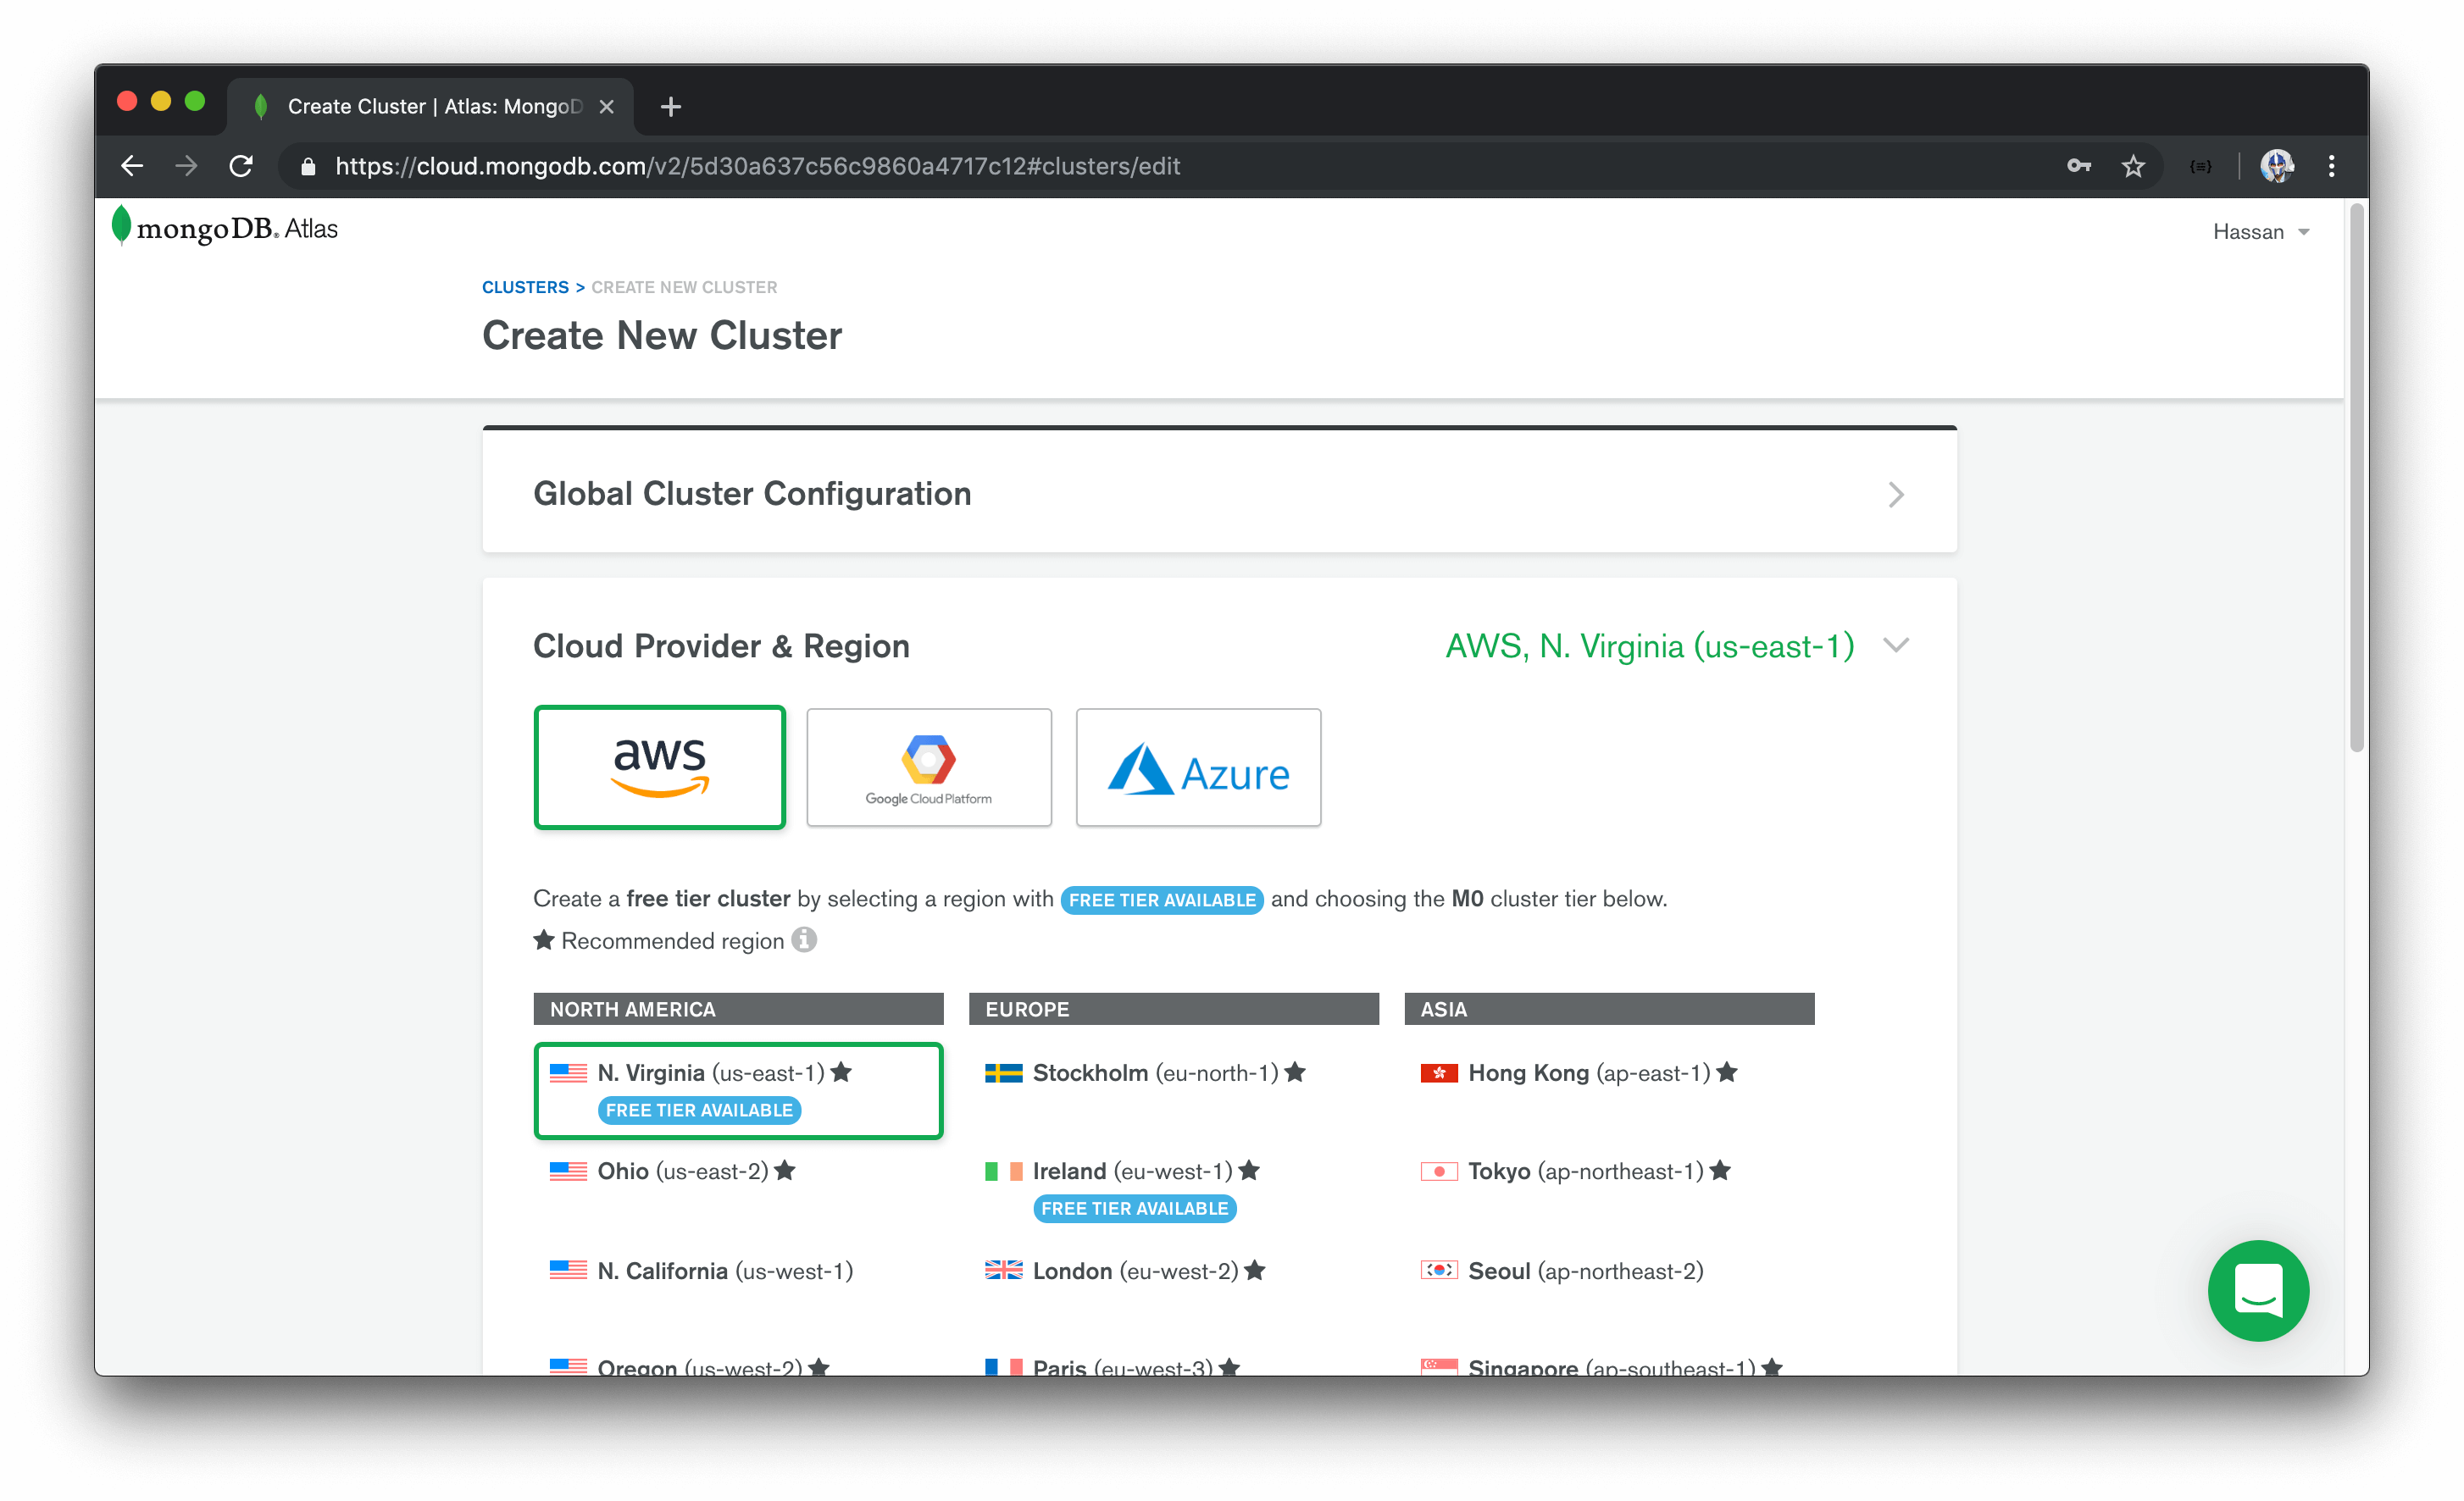
MongoDB Atlas recommends a lot of their popular options but they do give us the capability of customizing how our cluster is to be set up. We won’t make any configuration changes and keep the default options that have already been selected.
MongoDB Atlas allows for the creation and deployment of one
Free Tiercluster per Atlas project.Free Tierclusters never expire and provide all the features and functionality we need for this course.We recommend selecting a cloud provider and region that provides the capability to create a free tier cluster.
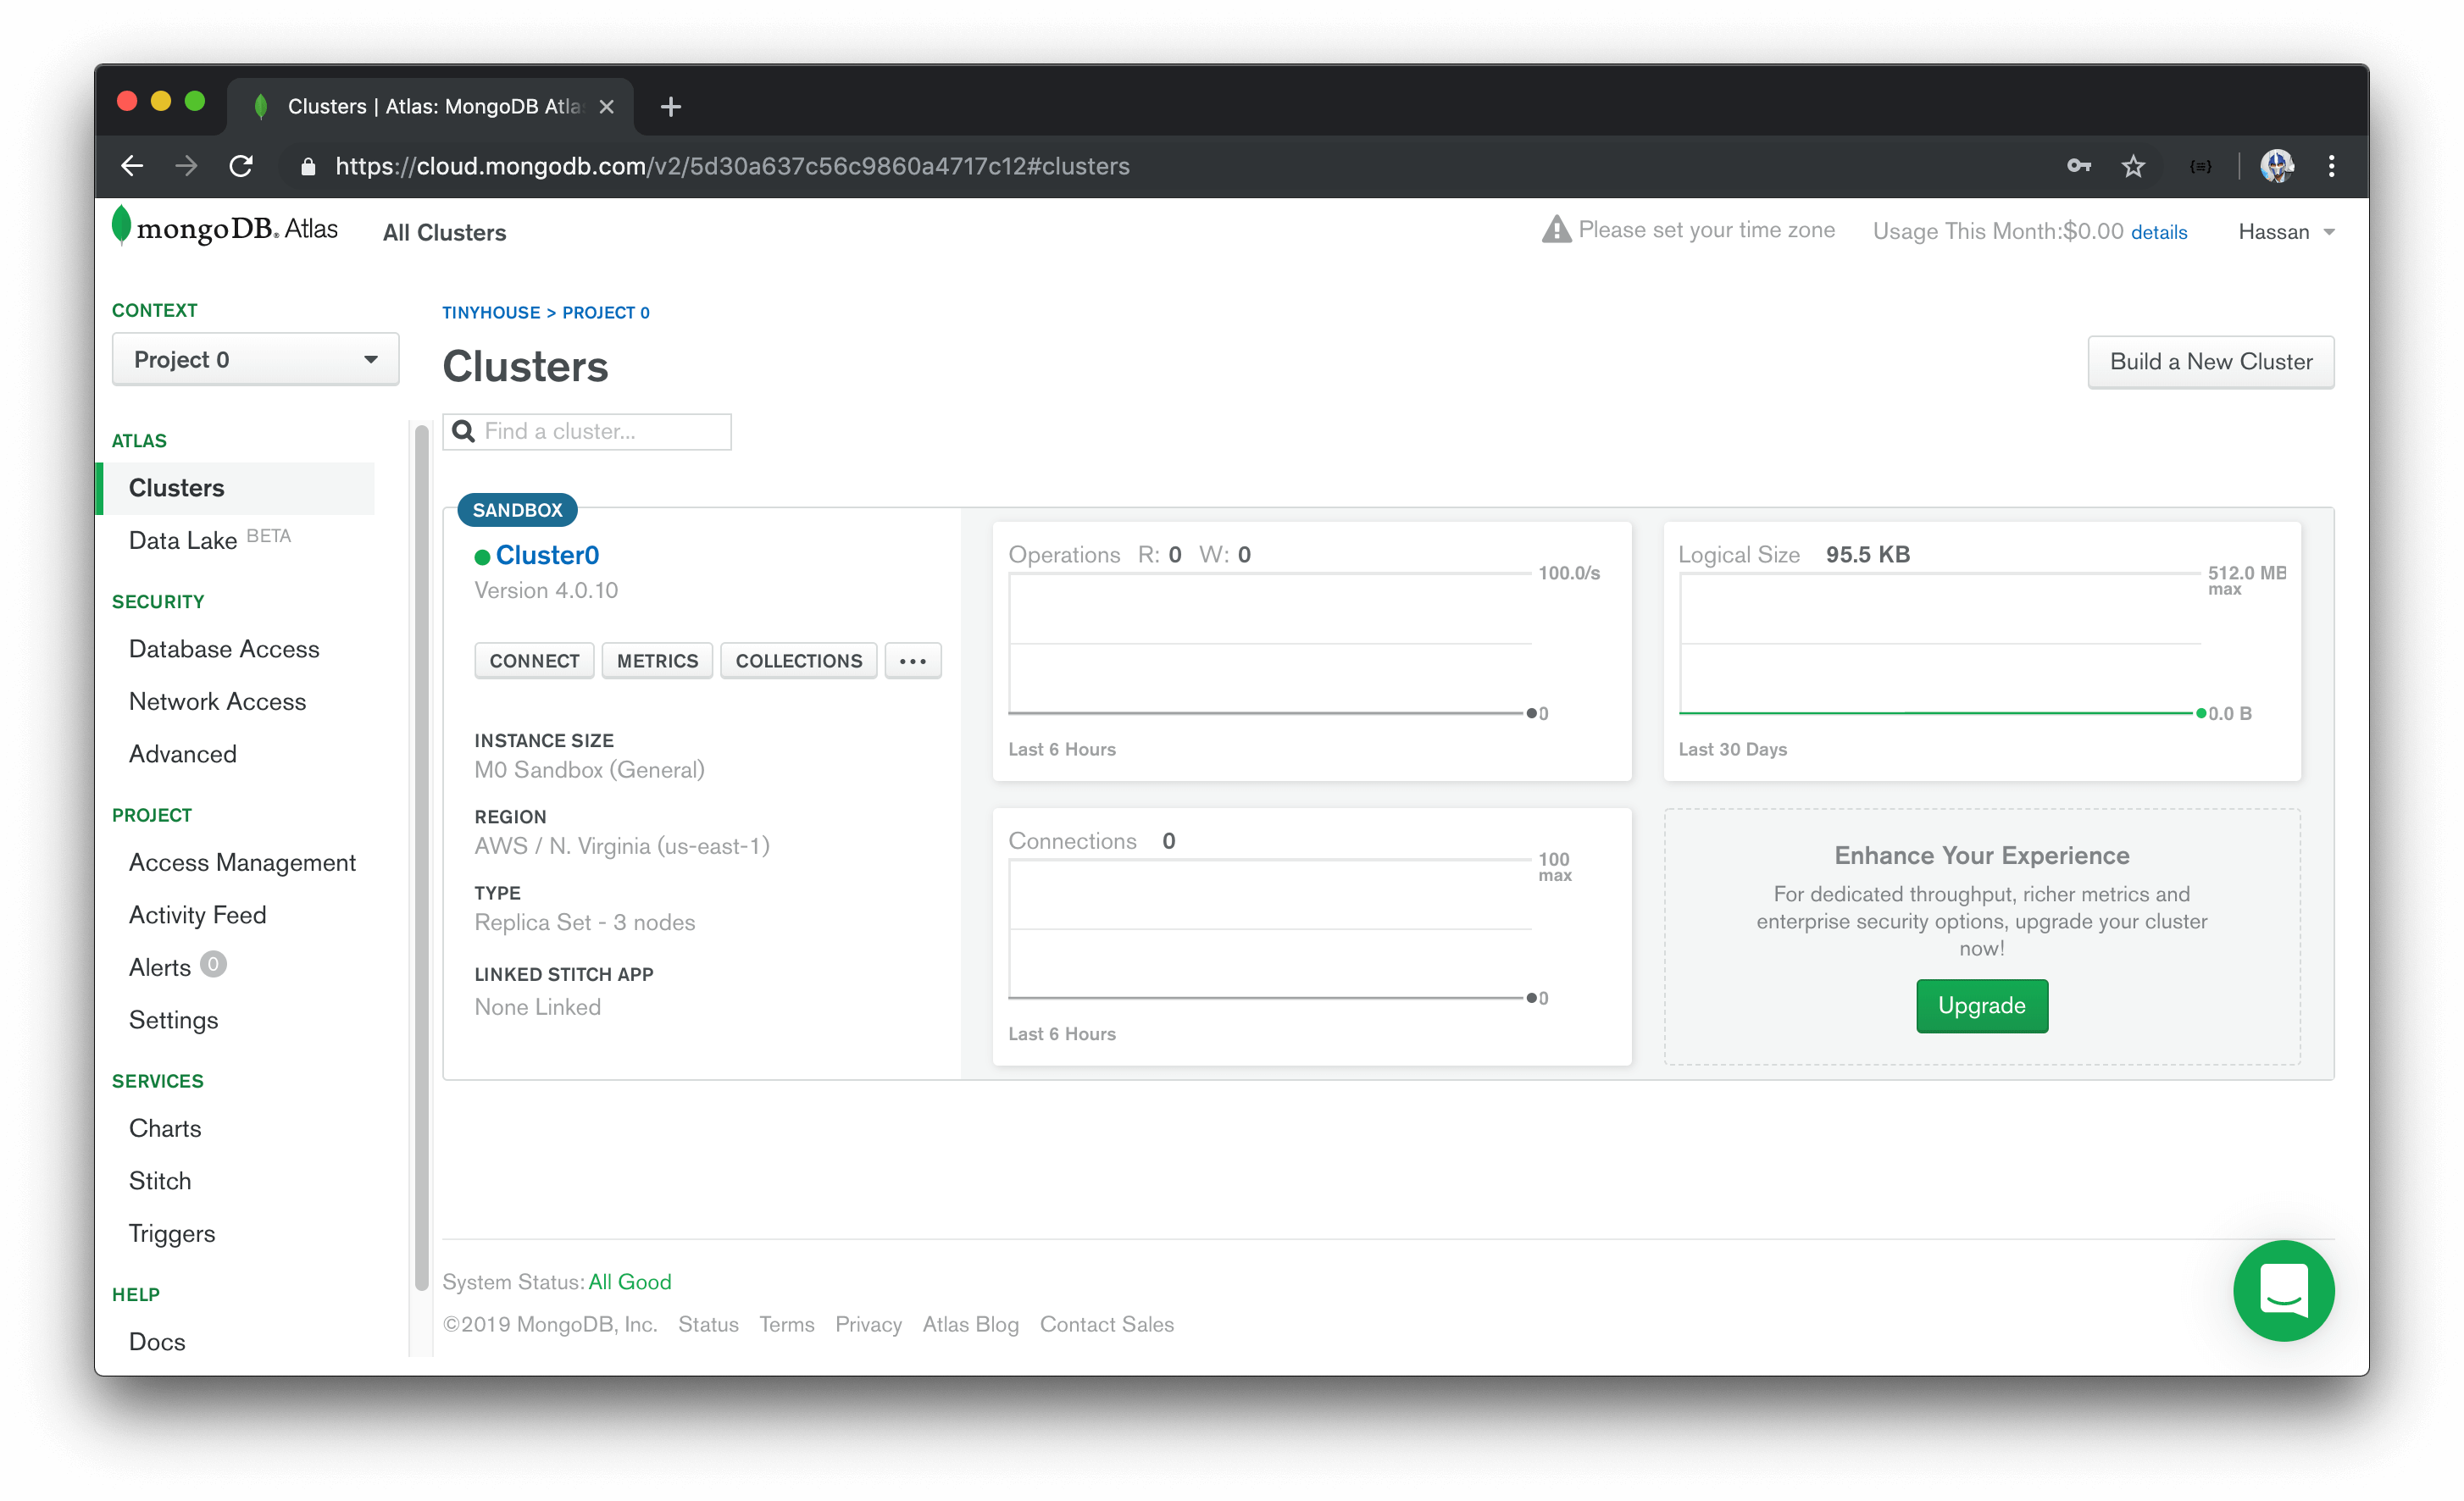
It’ll take about 7 - 10 minutes to provision a new Free tier cluster. Once ready, we’ll be presented with details about our cluster in our MongoDB Atlas dashboard.
CREATE A MONGODB USER
We’ll need to create a user to interact with databases in our MongoDB Atlas cluster. To do so, we can navigate to the Database Access section within the SECURITY tab. Here is where we’ll add a new MongoDB user and provide both read and write access to the database cluster.

A MongoDB user is different than an Atlas user. Atlas users can access the entire Atlas dashboard while MongoDB users access databases within clusters.
WHITELIST AN IP ADDRESS
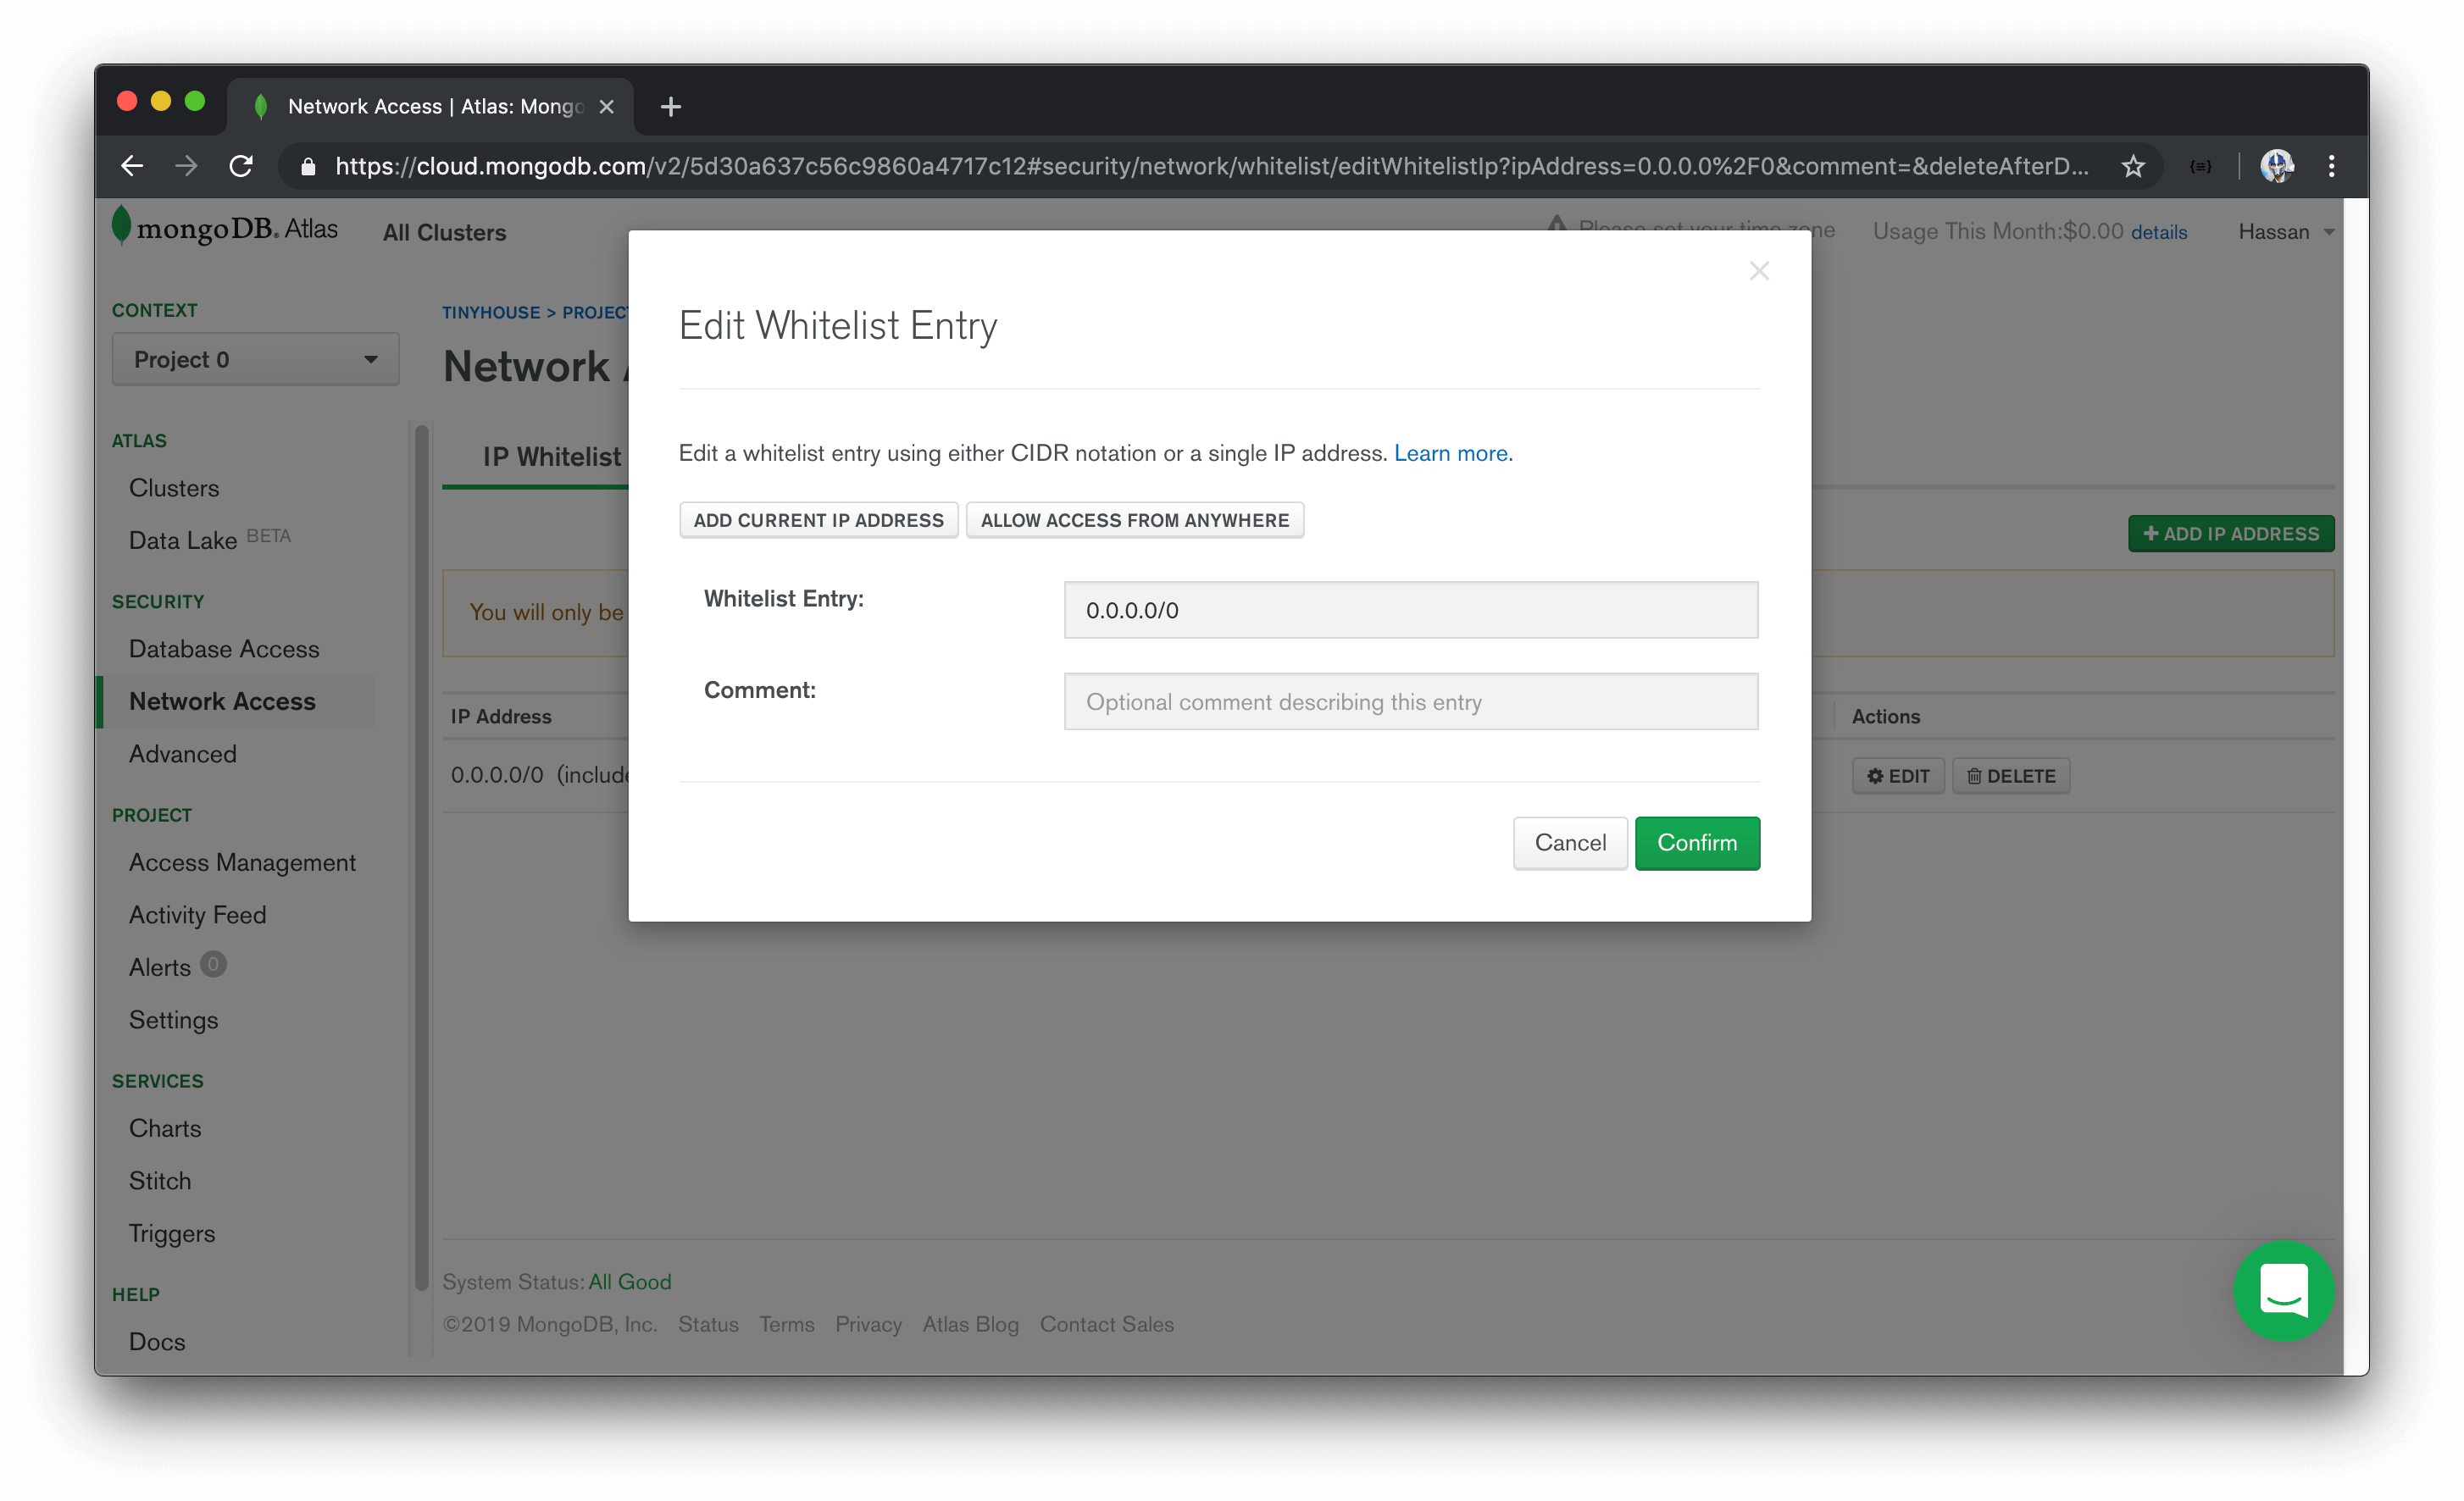
MongoDB Atlas only allows client connections to the cluster from IP addresses that have been whitelisted. To whitelist an IP address, we can navigate to the Network Access section within the SECURITY tab.
To not concern ourselves with what our client IP addresses would be in development and/or in the deployed state, we’ll select Allow Access From Anywhere to allow any IP address to access the cluster.
For databases in production settings that may contain sensitive data, there may be some valid reasons to restrict connections to only a small subset of valid IP addresses. Since this won’t be a concern in the course, we’ll allow access from anywhere.
ADD SAMPLE DATA
The last thing we’ll do as part of our cluster set-up is introduce sample data to a collection in our cluster. In the Cluster main dashboard section, we’ll select Collections to navigate to the Collections tab of our cluster. We’ll look to add our own data and specify a database name of main and a collection name of test_listings .
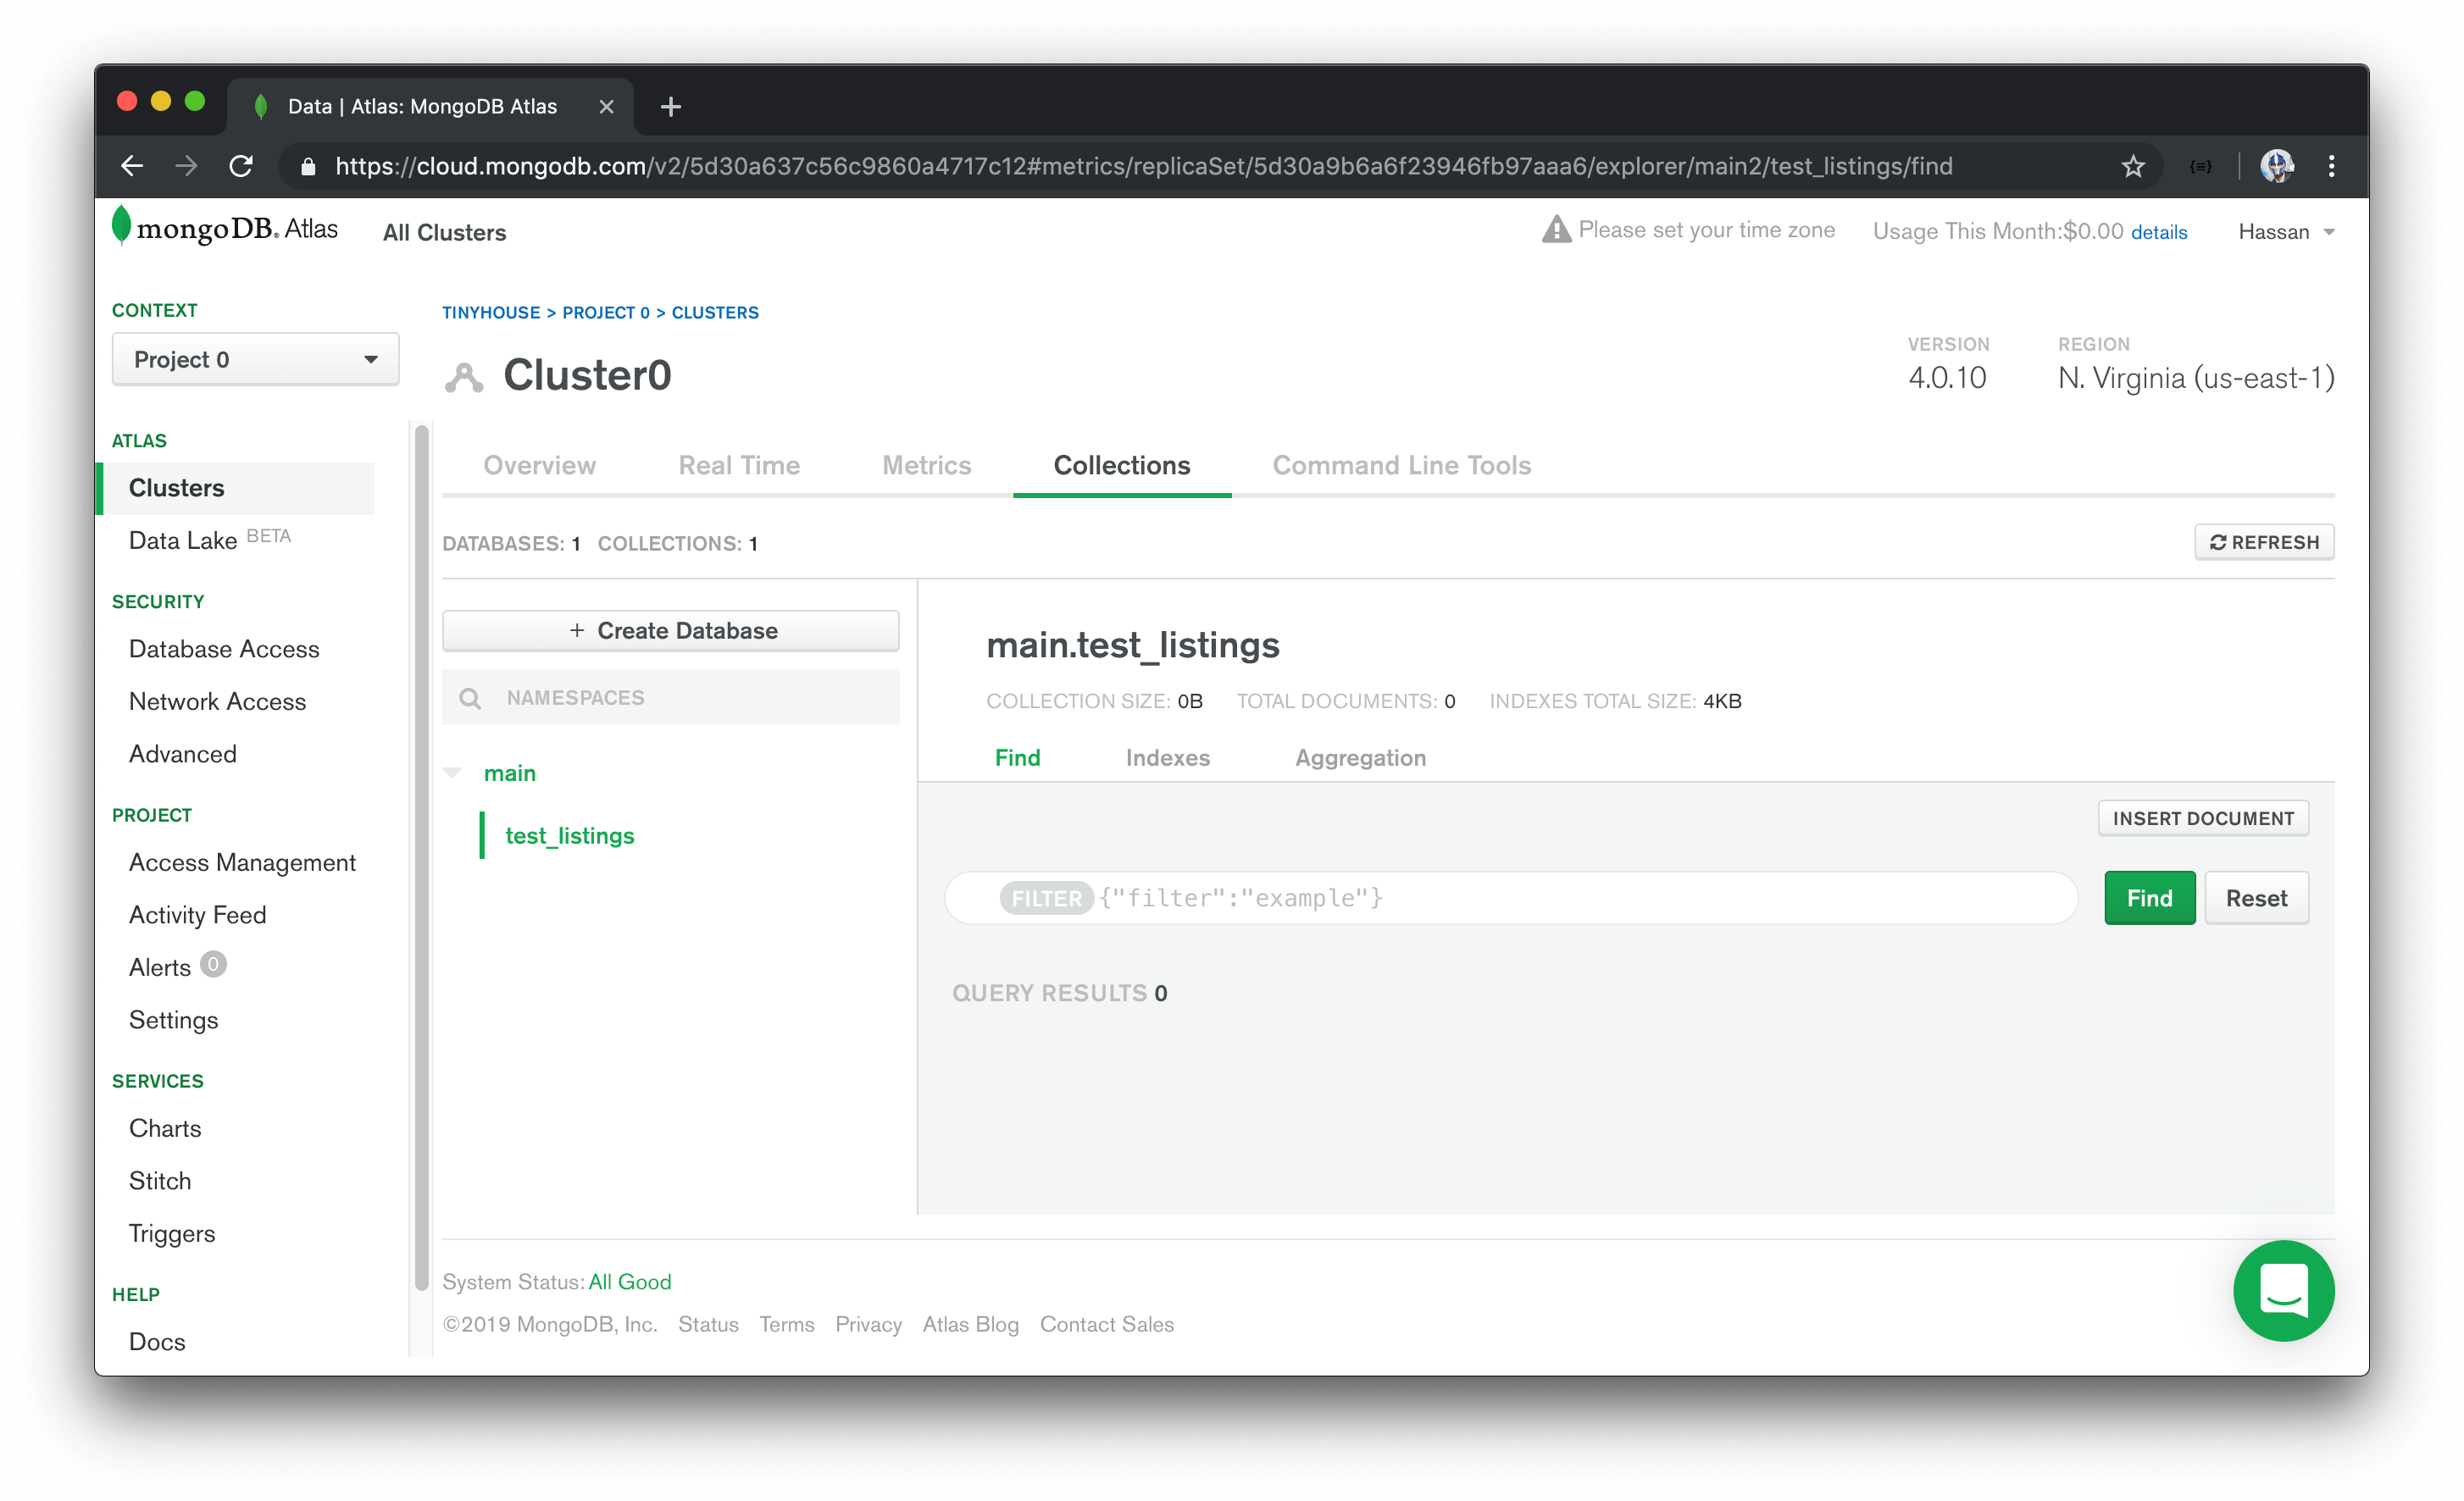
At this moment, we don’t have any data in our test_listings collection so we’ll look to add some data in the Atlas UI. We’ll select Insert Document and we’ll have three fields be added to a new document.
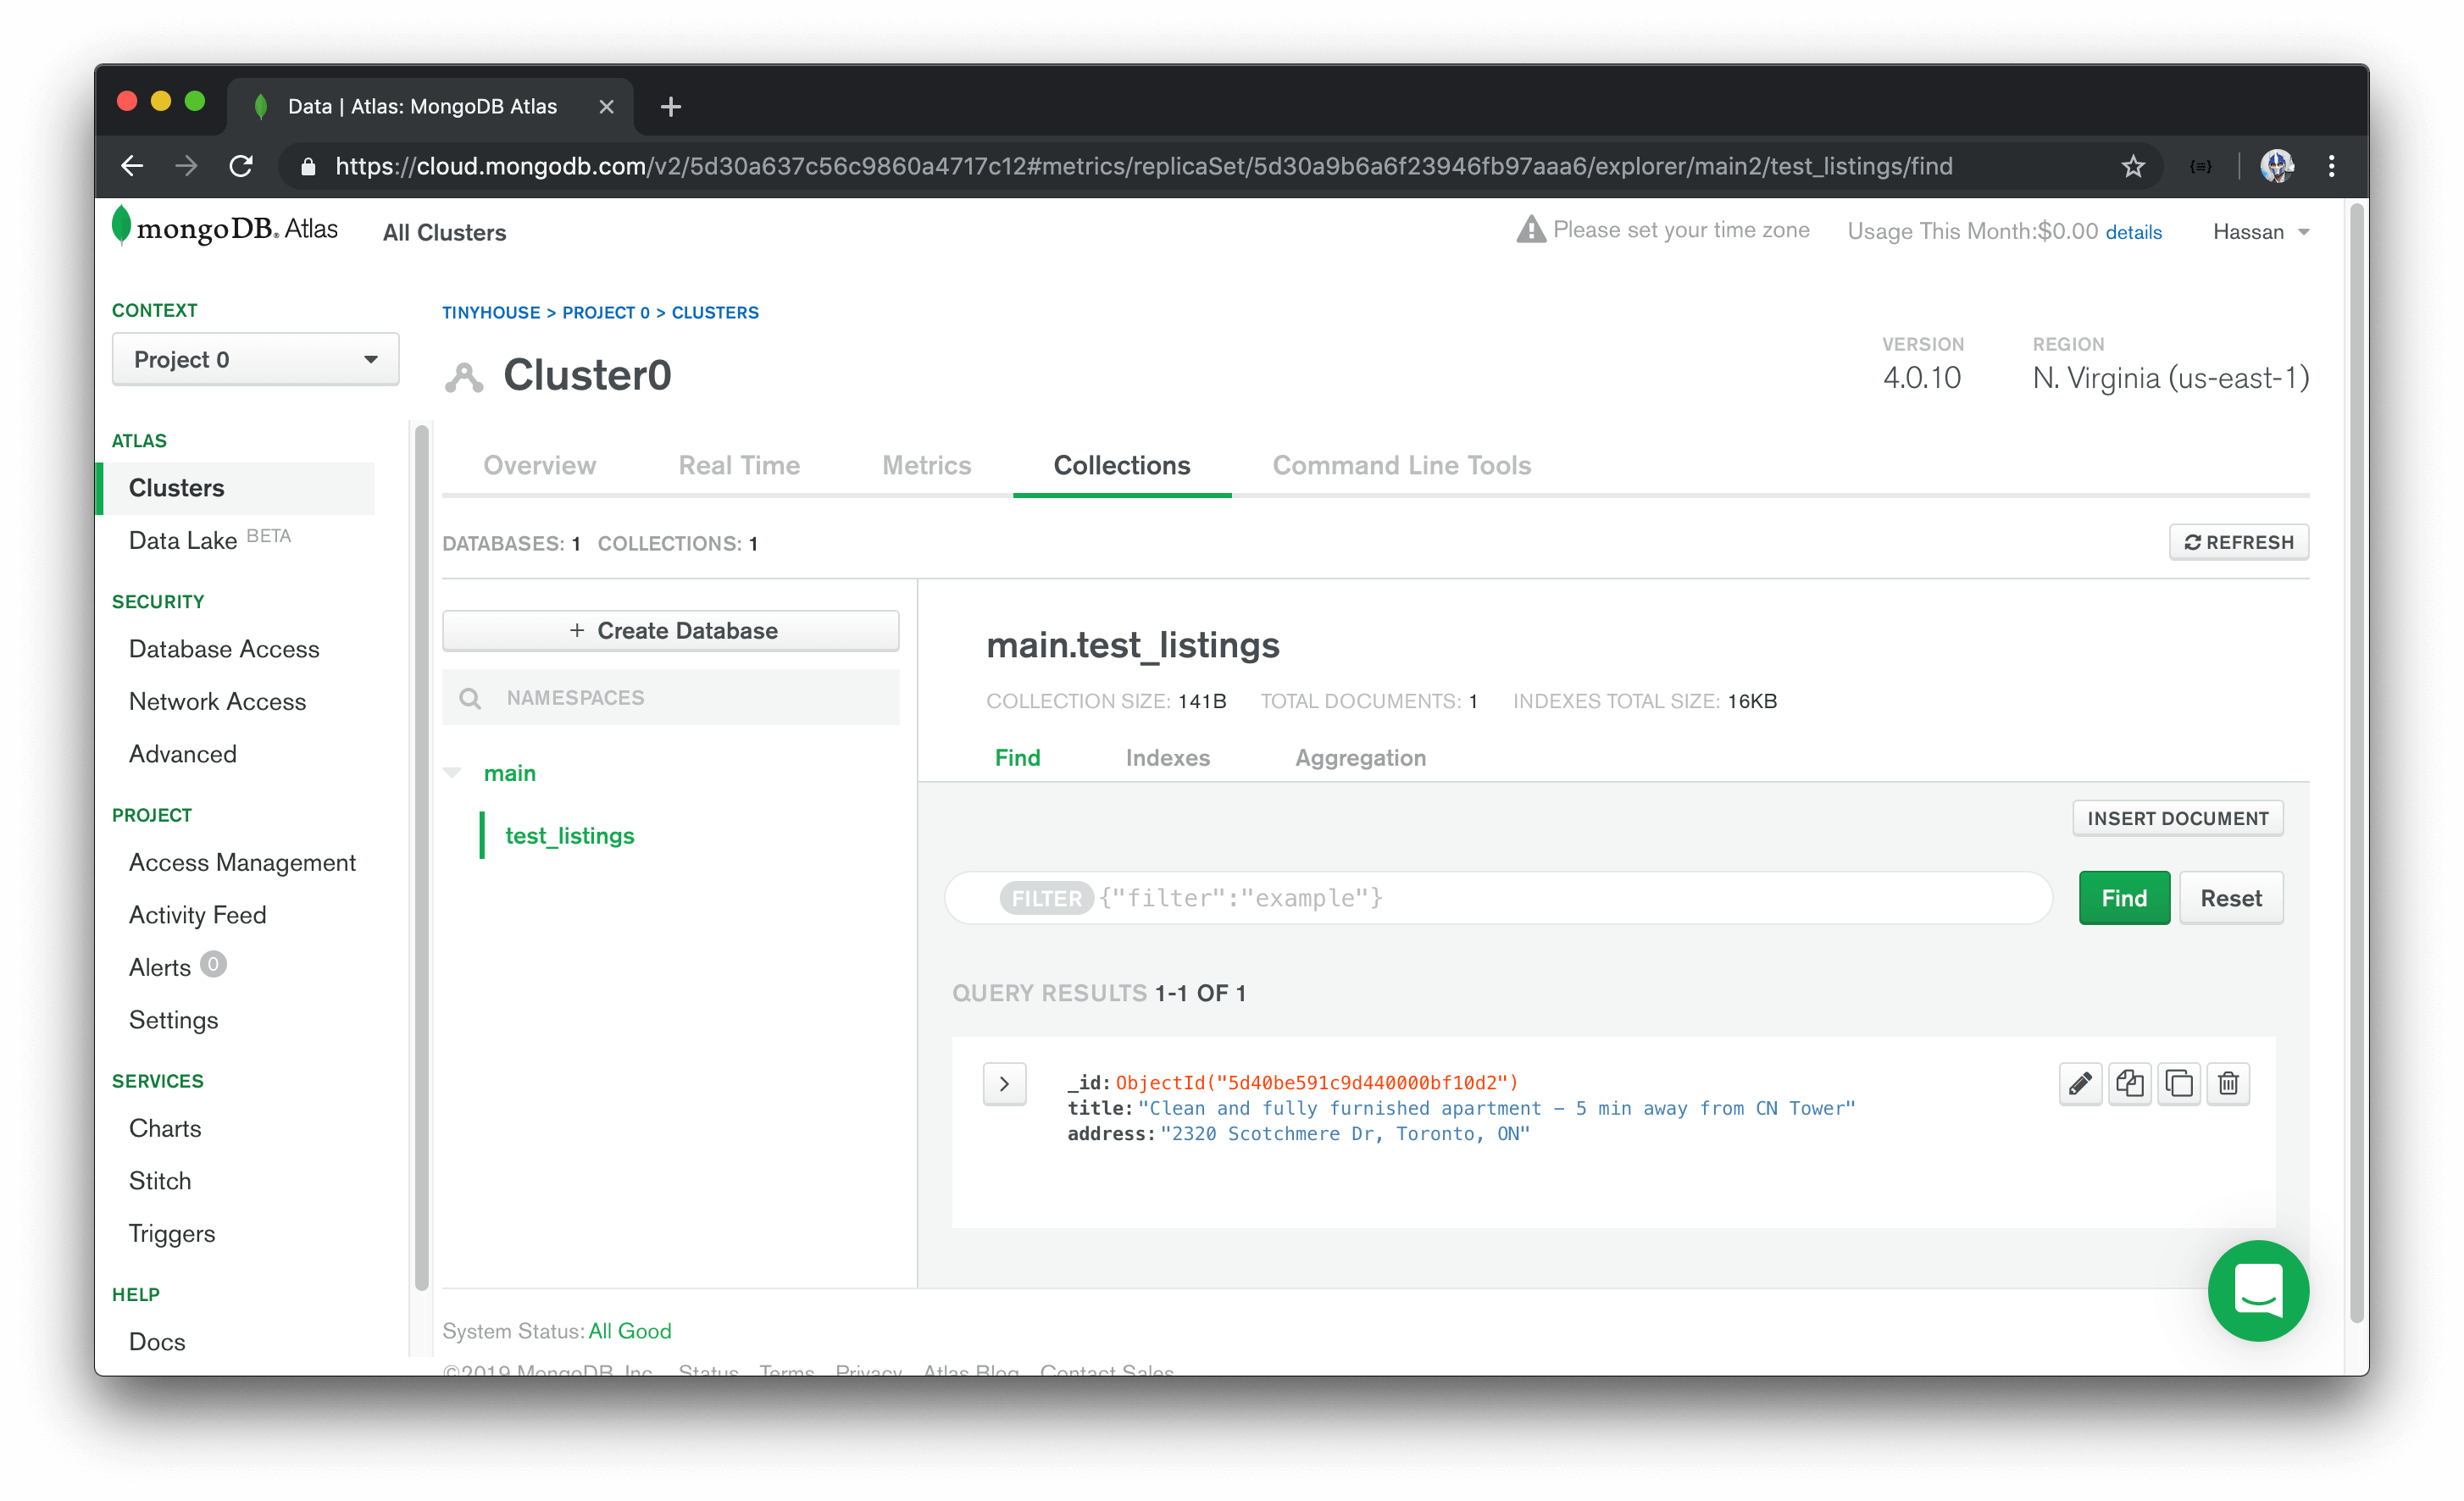
_id: ObjectId("....."); // ObjectId
title: "Clean and fully furnished apartment - 5 min away from CN Tower"; // string
address: "2320 Scotchmere Dr, Toronto, ON"; // string
As we’re inserting new fields here, we’re able to specify the types of each field. MongoDB fields could be null , Int64 (64 bit integer), Int32 (32 bit integer), code , boolean , etc. This relates to how MongoDB stores data records as BSON documents (i.e. Binary representation of JSON documents). MongoDB’s BSON document structure allows for the capability to store documents in binary form.
We’ll have the _id field be of the ObjectId data type, while title and description will be of the string data type.
The
ObjectIddata type is a 12-byte identifier that is often used for the primary_idfield of MongoDB documents. MongoDB assigns an_idfield as a primary index to every document.
Once the document is inserted, we’ll be able to see the newly added document in our Atlas collection UI.
With a MongoDB cluster created that contains sample data, the only thing left for us to do is connect our server application with our MongoDB Atlas cluster. We’ll pick this up in the next lesson!