CREATE REACT APP - THE RUNDOWN
create-react-app creates a series of files and folders as it instantiates and creates a Webpack bundled React application. For those who may be unfamiliar with the scaffold created from create-react-app , we’ll spend this lesson going through the generated client/ application.
create-react-app has created an application scaffold that looks like the following:
client/
  node_modules/
  public/
  src/
  .gitignore
  package-lock.json
  package.json
  README.md
  tsconfig.json
NODE_MODULES/
The node_modules/ directory in our application refers to all the different JavaScript libraries that have been installed in our application.
PUBLIC/
public/index.html
The public/ folder holds the favicon asset as well as the root markup page of the application - the index.html file. When we take a look at the public/index.html file, we can see a simple HTML file that contains a <head> element and a <body> element. The <head> tag specifies standard viewport settings and references the favicon asset in the public/ folder.
<!DOCTYPE html>
<html lang="en">
  <head>
    <meta charset="utf-8" />
    <link rel="shortcut icon" href="%PUBLIC_URL%/favicon.ico" />
    <meta name="viewport" content="width=device-width, initial-scale=1" />
    <meta name="theme-color" content="#000000" />
    <!--
      manifest.json provides metadata used when your web app is installed on a
      user's mobile device or desktop. See https://developers.google.com/web/fundamentals/web-app-manifest/
    -->
    <link rel="manifest" href="%PUBLIC_URL%/manifest.json" />
    <!--
      Notice the use of %PUBLIC_URL% in the tags above.
      It will be replaced with the URL of the `public` folder during the build.
      Only files inside the `public` folder can be referenced from the HTML.

      Unlike "/favicon.ico" or "favicon.ico", "%PUBLIC_URL%/favicon.ico" will
      work correctly both with client-side routing and a non-root public URL.
      Learn how to configure a non-root public URL by running `npm run build`.
    -->
    <title>React App</title>
  </head>
  <body>
    <!-- ... -->
  </body>
</html>
In the <head> tag of our public/index.html file, we can see some documentation and use of a manifest.json file. A manifest JSON file helps provide metadata for when an app is installed on a user’s mobile device, which makes a web application more progressive and is set up in the public/manifest.json file of our app. This ties into some of the boilerplate code create-react-app gives us to help create a Progressive Web Application.
Some comments exist in the <head> tag that tells us how the PUBLIC_URL tag behaves. In the create-react-app setting, PUBLIC_URL is replaced with the URL of the public folder during build which helps reference assets within the public/ folder. We won’t be making any changes to the public/index.html file except for renaming the title of our application to the name of our app - TinyHouse .
<!DOCTYPE html>
<html lang="en">
  <head>
    <!-- ... -->
    <title>TinyHouse</title>
  </head>
  <body>
    <!-- ... -->
  </body>
</html>
In the <body> element of the public/index.html file, we’re presented with a <noscript> tag followed by the <div id="root"></div> element.
<!DOCTYPE html>
<html lang="en">
  <head>
    <!-- ... -->
  </head>
  <body>
    <noscript>You need to enable JavaScript to run this app.</noscript>
    <div id="root"></div>
    <!--
      This HTML file is a template.
      If you open it directly in the browser, you will see an empty page.

      You can add webfonts, meta tags, or analytics to this file.
      The build step will place the bundled scripts into the <body> tag.

      To begin the development, run `npm start` or `yarn start`.
      To create a production bundle, use `npm run build` or `yarn build`.
    -->
  </body>
</html>
The content within <noscript> is displayed to the user when the user has disabled scripts in the browser or is using a browser that has an unsupported script. The <div> element with the id of root is where our entire React application will be mounted onto. This is the element that’s referenced in our React render() function with which we’ll see shortly. Finally, we have some comments in the <body> element that tells us upon building the application, the bundled scripts of our app will be placed into this <body> tag.
SRC/
We’ll hardly find the need to be making any significant change in the surrounding files that involve the set up of our application. The vast majority of the time, we’ll be working within the src/ directory that contains the TypeScript, React, and CSS files that we’ll be working directly with.
src/index.tsx
The src/index.tsx file is the root React/TypeScript file in our application. If you’ve never used TypeScript and React before, the .tsx file extension may seem new to you. JSX (or otherwise known as JavaScript XML) is an extension that allows us to write JavaScript that looks like HTML.
We can see the use of JSX in the ReactDOM.render() function where the first argument being passed is the <App /> component.
ReactDOM.render(<App />, document.getElementById("root"));
The declaration of <App /> in the render() function is JSX - XML-like syntax in our JavaScript file. In standard React, we’re able to use JSX within files that have the normal .js file extension though certain people prefer to use the .jsx file extension to denote the React JavaScript files that contain JSX.
If we intend on using JSX within our TypeScript files, we must name our files with the .tsx file extension. The other requirement to using JSX in TypeScript is to have the jsx option enabled in our TypeScript configuration, which we’ll see has already been done in our client project’s tsconfig.json file.
The ReactDOM.render() function helps render the parent <App /> component on the root element in our public/index.html file. The render function is from the ReactDOM library and takes up to three arguments with which the first two is often defined. The first argument is essentially the root level element we’d like our React application to render (which is currently the <App /> component). The second argument is where to render (i.e. mount) it with which in this case is the reference to the DOM node with the id of root .
The third argument of the render() function takes a callback function that when provided runs the callback after the component is mounted or updated. We won’t need to run this callback function so we won’t introduce it. The only change we’ll make is more of a preference - instead of importing the ReactDOM global, we can directly import the render() function that’s also being exported from the react-dom library.
Our src/index.tsx file will then look like the following:
import React from "react";
import { render } from "react-dom";
import "./index.css";
import App from "./App";
import * as serviceWorker from "./serviceWorker";

render(<App />, document.getElementById("root"));

// If you want your app to work offline and load faster, you can change
// unregister() to register() below. Note this comes with some pitfalls.
// Learn more about service workers: https://bit.ly/CRA-PWA
serviceWorker.unregister();
At the end of the src/index.ts file, there’s exists an additional reference to help in the introduction of a service worker. Service workers are scripts that run in the browser to help applications be more progressive by introducing features like asset caching and push notifications. We’re not going to spend much time in this course explaining how service workers and Progressive Web Apps behave, so we’ll leave this in its current state for now which is essentially the unregistered state of the service worker defined in the src/service-worker.ts file.
src/react-app-env.d.ts
In the src/ folder exists a react-app-env.d.ts declaration file. Declaration files are usually denoted with the .d.ts file extension and are files that describe the typings of a JavaScript file that exists elsewhere.
client/src/react-app-env.d.ts
/// <reference types="react-scripts" />
A triple-slash directive ( /// ) is used in the react-app-env.d.ts file and is a unique TypeScript capability that pertains to single-line comments that contain a single XML tag. Triple-slash directives instruct the TypeScript compiler to include additional files in the compilation process. The directive in the react-app-env.d.ts file instructs the compiler to include and reference the type declarations of the react-scripts library which is the library used to build, test, and run our React application.
With that said, there has been discussion among the community as to why this particular declaration file is placed within the src/ folder, and not in a types/ folder of sorts. An open issue currently exists where the React team is currently looking to place a comment in the react-app-env.d.ts file to better explain the purpose of this declaration file.
Rest of src/
The rest of the src/ folder contains a few of the other files responsible in setting up the UI we see when we start our client application.
-
App.css: CSS file used in the<App>component. -
App.test.tsx: The test file of the<App>component that demonstrates the use of the Jest testing framework installed in our application. -
App.tsx: The parent<App>component that contains the boilerplate code shown in our UI. -
index.css: CSS file used in thesrc/index.tsxfile. -
logo.svg: The React logo in SVG format used in the<App>component.
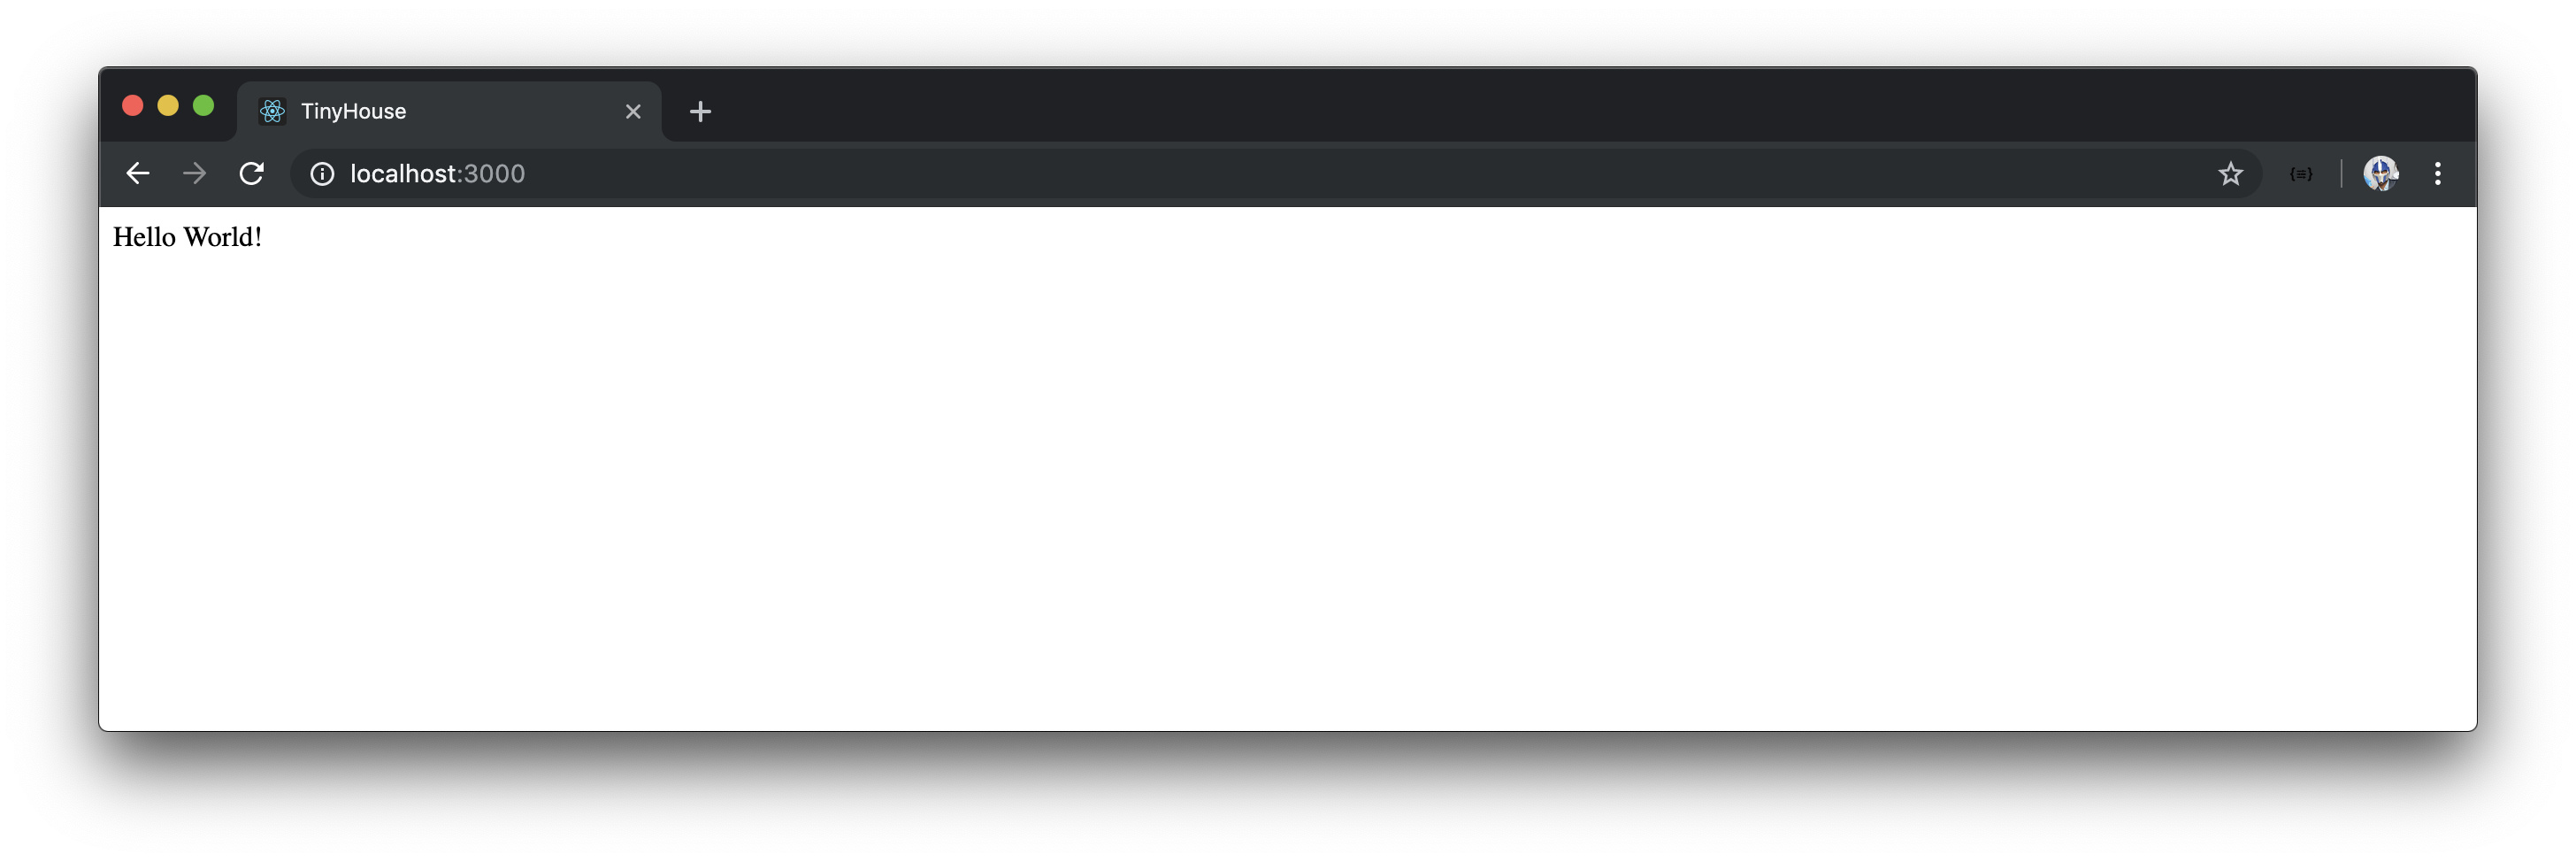
We’ll remove the index.css , App.tsx , App.test.tsx , App.css , and the logo.svg file from the src/ folder. In the src/index.tsx file, we’ll remove the imports of the removed files and in the render() function, simply render a single <div> element that says 'Hello World!' for now.
client/src/index.tsx
import React from "react";
import { render } from "react-dom";
import * as serviceWorker from "./serviceWorker";

render(<div>Hello World!</div>, document.getElementById("root"));

// If you want your app to work offline and load faster, you can change
// unregister() to register() below. Note this comes with some pitfalls.
// Learn more about service workers: https://bit.ly/CRA-PWA
serviceWorker.unregister();
.GITIGNORE
The .gitignore file dictates the files we don’t want to check in with git . This includes node_modules/ , the bundled build/ folder when created, and any .env files.
PACKAGE-LOCK.JSON
The package-lock.json file is an automatically generated JSON file that stores a dependency tree that highlights the dependencies installed from the package.json file at that moment in time. It should be committed to source code but we’ll never make changes to it directly.
PACKAGE.JSON
The package.json file lists all the locally installed npm packages as well as the npm script commands that can be made.
client/package.json
{
  "name": "client",
  "version": "0.1.0",
  "private": true,
  "dependencies": {
    "@types/jest": "24.0.16",
    "@types/node": "12.6.9",
    "@types/react": "16.8.24",
    "@types/react-dom": "16.8.5",
    "react": "^16.8.6",
    "react-dom": "^16.8.6",
    "react-scripts": "3.0.1",
    "typescript": "3.5.3"
  },
  "scripts": {
    "start": "react-scripts start",
    "build": "react-scripts build",
    "test": "react-scripts test",
    "eject": "react-scripts eject"
  },
  "eslintConfig": {
    "extends": "react-app"
  },
  "browserslist": {
    "production": [
      ">0.2%",
      "not dead",
      "not op_mini all"
    ],
    "development": [
      "last 1 chrome version",
      "last 1 firefox version",
      "last 1 safari version"
    ]
  }
}
create-react-app provides four script commands - start , build , test , and eject .
client/package.json
  "scripts": {
    "start": "react-scripts start",
    "build": "react-scripts build",
    "test": "react-scripts test",
    "eject": "react-scripts eject"
  },
-
start: runs our local Webpack server for development. -
build: bundles our application in a build folder ready for deployment. -
test: Runs the test files in our workspace with the help of the Jest testing framework. -
eject: enables us to abandon the configuration thatcreate-react-appprovides which subsequently allows us to tweak the application Webpack configuration to our liking.
Ejecting is often done when one either feels that their project ‘outgrows’ the configuration
create-react-appsets up or needs some special type of configuration. It’s always important to remember that once acreate-react-appapplication is ejected - one can never go back to the application’s original state.In this course, we won’t find the need to eject our application workspace.
All our application script commands use the react-scripts dependency available in our app to run the intended command. react-scripts is essentially the core service that’s installed into every create-react-app project. react-scripts specifies all the app’s development dependencies like Webpack, Babel, and ESLint. It also contains “scripts” that glue these dependencies together to help us start , build , test , and eject our application.
In the dependencies section of the package.json file, we can see all the locally installed dependencies in our application.
client/package.json
  "dependencies": {
    "@types/jest": "24.0.16",
    "@types/node": "12.6.9",
    "@types/react": "16.8.24",
    "@types/react-dom": "16.8.5",
    "react": "^16.8.6",
    "react-dom": "^16.8.6",
    "react-scripts": "3.0.1",
    "typescript": "3.5.3"
  },
The eslintConfig property of package.json is one way to specify the ESLint configuration within an application (as opposed to having an .eslintrc file in the root of the project directory).
client/package.json
  "eslintConfig": {
    "extends": "react-app"
  },
The create-react-app scaffold sets the ESLint configuration to extend a specific package known as react-app which was created for create-react-app projects.
And finally, browserslist works with a few other tools (such as the application’s postcss configuration as well as autoprefixer ) to dictate which browsers our application will support.
client/package.json
  "browserslist": {
    "production": [
      ">0.2%",
      "not dead",
      "not op_mini all"
    ],
    "development": [
      "last 1 chrome version",
      "last 1 firefox version",
      "last 1 safari version"
    ]
  }
README.MD
The README.md file explains the create-react-app project as well as provides details behind each of the available script commands.
TSCONFIG.JSON
create-react-app creates a tsconfig.json file for our project by default. Like we’ve seen when working with the server/ project, the tsconfig.json file guides the TypeScript compiler with options required to compile the TypeScript project. Though we won’t alter any of the configuration create-react-app has set up for us, we’ll quickly summarize the options that have been declared:
target :
target specifies the target JavaScript version the compiler will output. The target output is es5 which would be compatible for both modern and older browsers.
"target": "es5",
lib :
lib indicates the list of library files to be included in the compilation. lib is important because it helps us decouple the compile target and the library support we would want. For example, the Promise keyword doesn’t exist in ES5 and if we intend to use it, TypeScript would display a warning since our compile target is es5 . By specifying a lib option of esnext , we can still have our compiler compile down to ES5 while using the Promise keyword with no issues.
The create-react-app scaffold sets the lib option to ["dom", "dom.iterable", "esnext"] . dom allows us to directly manipulate the DOM while dom.iterable gives us the ability to iterate over a list of DOM nodes.
"lib": [
  "dom",
  "dom.iterable",
  "esnext"
],
allowJs :
allowJs allows JavaScript files to be compiled.
"allowJs": true,
skipLibCheck :
skipLibCheck skips type checking of all declaration files.
"skipLibCheck": true,
esModuleInterop | allowSyntheticDefaultImports :
esModuleInterop and allowSyntheticDefaultImports combined gives us the ability to allow default imports of modules that have no default export.
"esModuleInterop": true,
"allowSyntheticDefaultImports": true,
strict :
strict enables a series of strict type checking options such as noImplicitAny , noImplicitThis , strictNullChecks , etc.
"strict": true,
forceConsistentCasingInFileNames :
forceConsistentCasingInFileNames disallows inconsistently cased references to the same file names.
"forceConsistentCasingInFileNames": true,
module :
module refers to the module manager to be used in the compiled JavaScript output. systemjs and commonjs among other options can be specified but esnext is defined in our set-up.
"module": "esnext",
moduleResolution :
moduleResolution refers to the strategy used to resolve module declaration files (i.e. the type definition files for external JavaScript code). With the node approach, they’re simply loaded from the node_modules/ folder.
"moduleResolution": "node",
resolveJsonModule :
resolveJsonModule includes the modules with the .json extension in the compilation process.
"resolveJsonModule": true,
isolatedModules :
isolatedModules allows for the transpiling of each file as a separate module.
"isolatedModules": true,
noEmit :
noEmit specifies we don’t want the emitting of any output during the compilation process.
"noEmit": true,
jsx :
jsx allows us to state the support of JSX within TypeScript files. The preserve or react option states that JSX should be supported within TypeScript JSX files.
"jsx": "preserve"
include :
include specifies the files or folders that we would want to be included during the TypeScript compilation process. In our tsconfig.json file, src/ is being specified which states that any TypeScript code within the src/ folder will be compiled to normal JavaScript. Everything outside of the src/ folder won’t be included within the TypeScript compilation process.
If you haven’t fully understood all the options specified in the
tsconfig.jsonfile, this isn’t a problem. The main takeaways are thetsconfig.jsonfile dictates the details behind how we want to compile our TypeScript code andcreate-react-appprovides a detailed configuration out of the box. If you’re interested in seeing all the different possible compiler options that we could use, be sure to check out the TypeScript compiler options documentation.
As of now, the only significant change we’ve made to our create-react-app scaffold is in the src/ folder where we’ve removed the initial boilerplate code and had the render() function in the src/index.tsx file simply render a 'Hello World!' message.
To verify our changes, we’ll start our client application:
client $: npm run start
And when we head to http://localhost:3000 , we’ll be presented with the 'Hello World!' message.
MODULE 6 INTRODUCTION
We have a new React project now created. In this module, we’ll have our client make API requests to our server using GraphQL.
In detail we’ll:
- First, construct a functional React component.
- Use TypeScript to check the props of the component.
- See how we can go about defining the type of the functional component created.
- Create a
fetch()function to help query our GraphQL API. - See how TypeScript generics can help abstract the type of retrieved data from the API.
- Finally, use the
fetch()function we’ve created to run thedeleteListingmutation.
THE LISTINGS COMPONENT
Our eventual objective is to render and display a list of listing items in the UI that’s retrieved and obtained from the GraphQL API we’ve set up in the server. Before we concern ourselves with the custom styling and UI of the page, we’ll first attempt to have data be available and displayed on the client.
First and foremost, we’ll begin working on a new component that we’ll create called <Listings> with which we’re going to keep in a sections/ folder in our src/ directory. Let’s create the sections/ folder and an index.ts file in src/sections/ . We’ll also create a Listings/ folder within src/sections/ that has a Listings.tsx file and an index.ts file.
client/
  src/
    sections/
      Listings/
        index.ts
        Listings.tsx
      index.ts
  // ...
Since we’re creating a single <Listings> component, these additional folders may appear unnecessary. When we start building the application in more detail (especially in Part 2 of this course), we’ll want to structure and separate all the components in our app in a neat and structured format.
We’ll aim to separate and declare “parent level” components within their own section in the sections/ folder. Within a module (i.e. folder) in sections/ , we’ll explicitly namespace and contain each module within itself since each section module will contain all the accompanying files for that section such as the styles, child components, and additional assets relative to that module alone. The index.ts files are established within the root of each module to create explicit public interfaces for the ease of importing and exporting between modules. This will appear clearer when we start to introduce more code.
In the src/sections/Listings/Listings.tsx file, we’ll import React from the react library.
client/src/sections/Listings/Listings.tsx
import React from "react";
We’ll then export a functional component with the name of Listings . We’ll state the <Listings> component is to simply return a <h2> tag that says 'TinyHouse Listings' . Though we’re not directly using the React import declared, we have to import React if we ever want to define JSX in a component.
import React from "react";

export const Listings = () => {
  return <h2>TinyHouse Listings</h2>;
};
In the corresponding index.ts file within src/sections/Listings/ , we’ll re-export the <Listings> component.
client/src/sections/Listings/index.ts
export * from "./Listings";
In the src/sections/index.ts file, we’ll also re-export the <Listings> component from the sections/ folder.
client/src/sections/index.ts
export * from "./Listings";
The <Listings> component is now being exported from src/sections . In the src/index.tsx file, we’ll import the <Listings> component from the src/sections folder and render it in our application render() function.
client/src/index.tsx
import React from "react";
import { render } from "react-dom";
import { Listings } from "./sections";
import * as serviceWorker from "./serviceWorker";

render(<Listings />, document.getElementById("root"));

// If you want your app to work offline and load faster, you can change
// unregister() to register() below. Note this comes with some pitfalls.
// Learn more about service workers: https://bit.ly/CRA-PWA
serviceWorker.unregister();
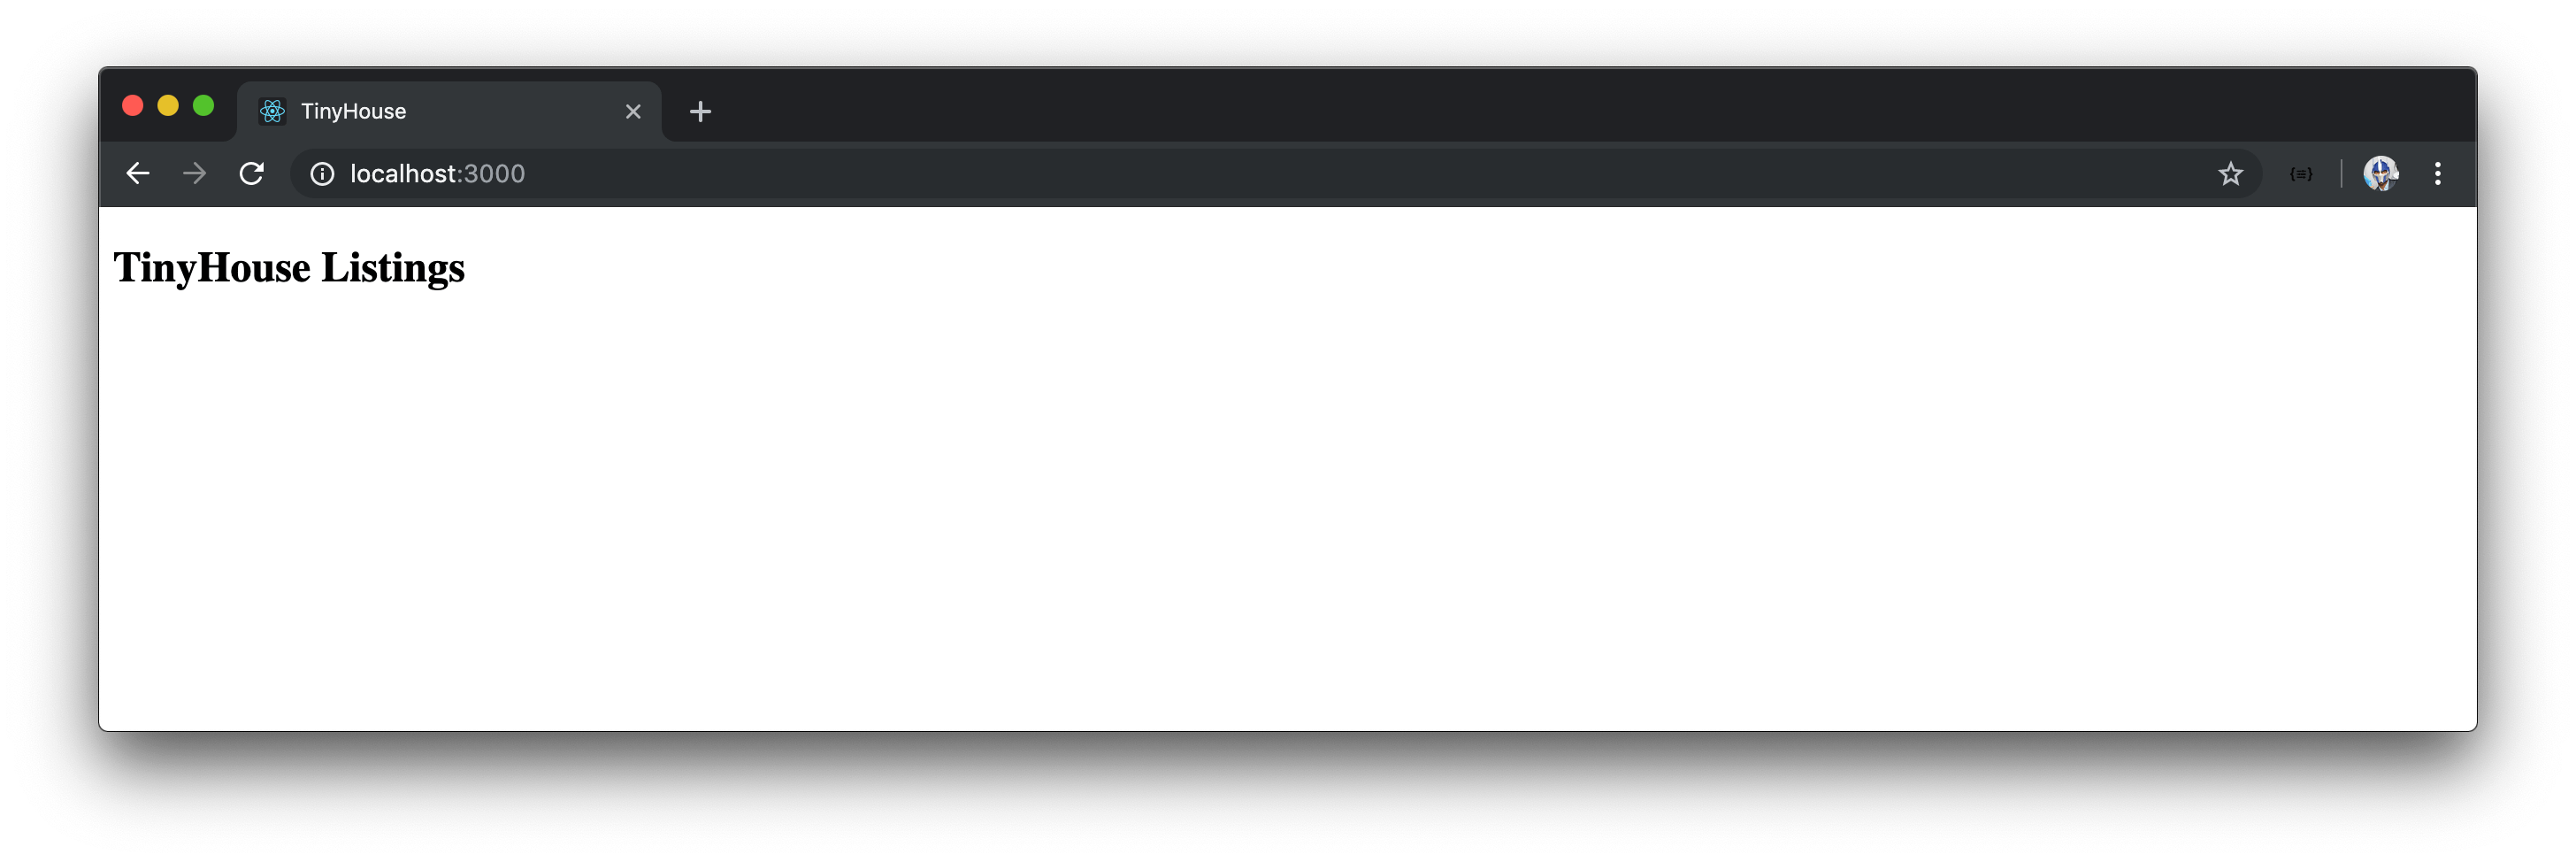
When we start our application, we’ll see the 'TinyHouse Listings' header message instead of a 'Hello World!' message.
PROPS & TYPESCRIPT
There are two main types of components in React - Class components and Functional components. Functional (or Function) components are functions that can accept props and return JSX. In our <Listings> component we can see that the Listings component doesn’t receive props yet, but returns JSX - which makes it a valid functional component.
import React from "react";

export const Listings = () => {
  return <h2>TinyHouse Listings</h2>;
};
With that said, let’s attempt to have the <Listings> component now receive some props. We’ll look to have the 'TinyHouse Listings' text be given to the <Listings> component from the parent. The parent, in this context, is the root src/index.tsx file. In the src/index.tsx file where <Listings> is being rendered, we’ll pass in a new prop labeled title that has a string value of 'TinyHouse Listings' .
client/src/index.tsx
render(
  <Listings title="TinyHouse Listings" />,
  document.getElementById("root")
);
TypeScript will throw an error since we haven’t stated that the <Listings> component is to accept a title prop of type string .
In the <Listings> component, we’ll specify that props are being passed down and the title field from props is to be used in the <h2> tag.
import React from "react";

export const Listings = props => {
  return <h2>{props.title}</h2>;
};
We’ll now get an error in the <Listings> component that says that the props argument has an implicit any type. We could explicitly type define this argument like we type define any function argument:
import React from "react";

export const Listings = (props: any) => {
  return <h2>{props.title}</h2>;
};
We’ve set props to the generic any type which tells the compiler the type of props is now explicitly defined. Our app will now work. However, any isn’t useful so let’s type define props as an object that expects a title field of type string :
import React from "react";

export const Listings = (props: { title: string }) => {
  return <h2>{props.title}</h2>;
};
Our application now works and the type of the title prop is more appropriately defined. When a component has a large number of props, specifying the type of props right where the argument is being defined can make things hard to read. So we can describe the shape of our props data as an interface above the component. We’ll call this interface Props .
With the Props interface defined, we’re now able to specify the type of our props with this newly created interface:
import React from "react";

interface Props {
  title: string;
}

export const Listings = (props: Props) => {
  return <h2>{props.title}</h2>;
};
We can go ahead and also destruct the title prop directly from the props argument.
client/src/sections/Listings/Listings.tsx
import React from "react";

interface Props {
  title: string;
}

export const Listings = ({ title }: Props) => {
  return <h2>{title}</h2>;
};
When we hover over the declaration of the <Listings> component, we can see that TypeScript infers the <Listings> component to be a function that accepts props and returns a JSX Element . In essence, the simplest TypeScript definition of a Functional Component.

Since the <Listings> component renders the same text despite it coming from props, our UI should appear the same.
FUNCTIONAL COMPONENTS & TYPESCRIPT
Though TypeScript infers that the <Listings> component is a function that renders JSX (i.e. a functional component), we can take an additional step to specify an explicit type of the function component itself.
React offers specific unique types we can use if we want to enforce additional type definitions for functional components.
Previously, functional components were recognized to be stateless presentational components since functional components could never keep track of its own state. As a result, we would be able to define a functional component with the SFC type or the StatelessComponent type which still exists today and can be exported from the type definitions of react .
import React, { StatelessComponent, SFC } from "react";
Though they exist, React has deprecated the StatelessComponent and SFC types. This is because functional components can now keep track of its own state with the emergence of React Hooks.
The FunctionComponent type (or the shorthand version FC ) is encouraged if we intend to take advantage of additional typings of our functional components.
To visualize the difference the FunctionComponent type brings, we’ll replicate the <Listings> component with another component we’ll label <Listings2> . We’ll define the type of the <Listings2> component as the FunctionComponent interface type.
import React, { FunctionComponent } from "react";
interface Props {
title: string;
}
export const Listings = ({ title }: Props) => {
return <h2>{title}</h2>;
};
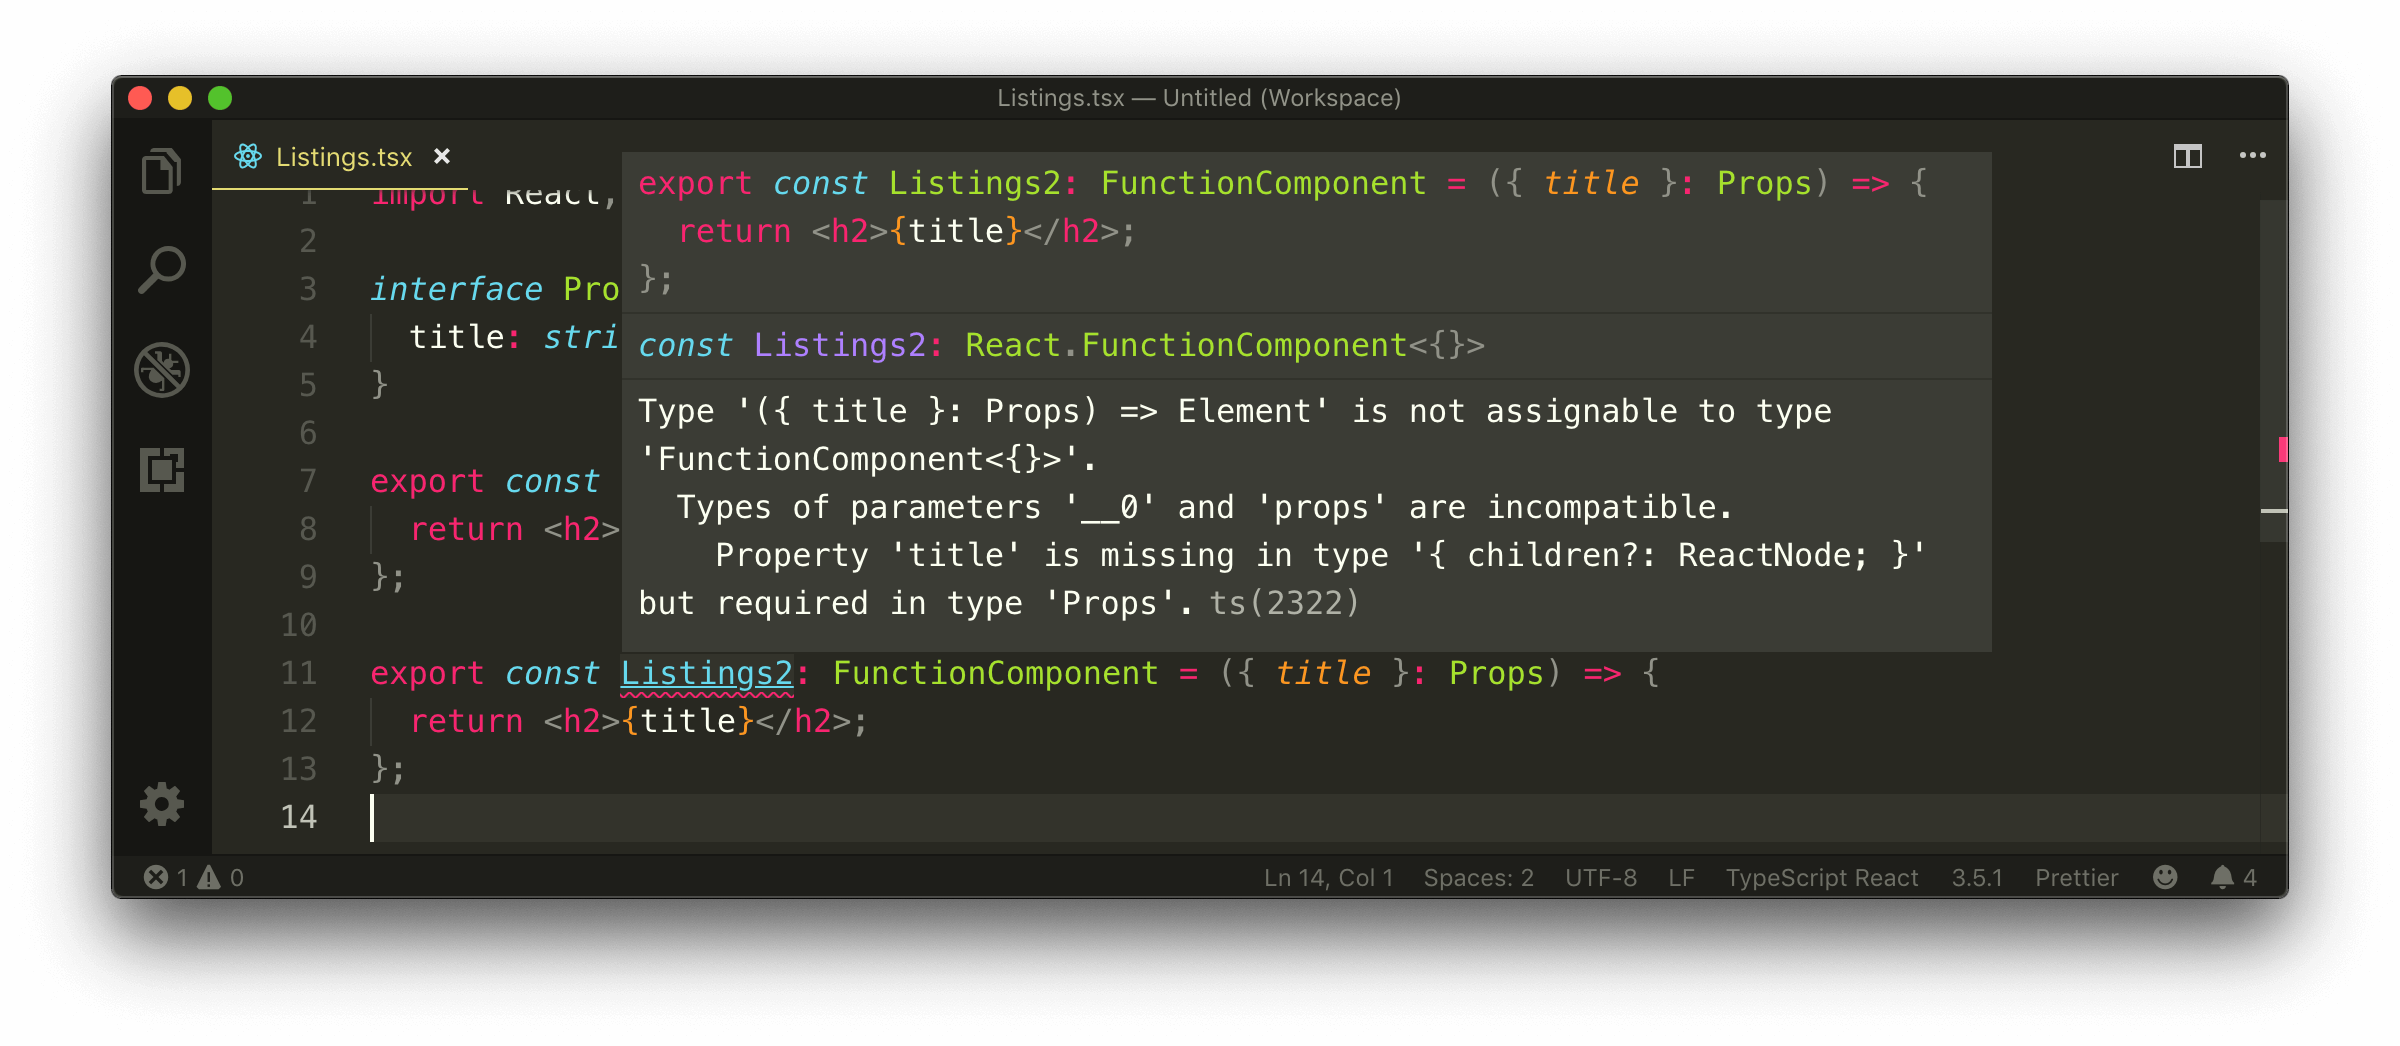
export const Listings2: FunctionComponent = ({ title }: Props) => {
return <h2>{title}</h2>;
};
We’ll see a TypeScript error emerge from the <Listings2> component where it states that the title property is missing as part of the Props type of the component.
If we take a look at the FunctionComponent interface type, we’ll get a clearer understanding of why this error occurs. The FunctionComponent type is an interface that accepts a couple of properties. The first and only required property is a function that accepts props and returns a ReactElement (or null ).
// from the react type definitions file

interface FunctionComponent<P = {}> {
  (props: PropsWithChildren<P>, context?: any): ReactElement | null;
  propTypes?: WeakValidationMap<P>;
  contextTypes?: ValidationMap<any>;
  defaultProps?: Partial<P>;
  displayName?: string;
}
In VSCode, the CMD + Click shortcut allows you to navigate and inspect the type definitions of interfaces and type aliases being used.
The FunctionComponent is a generic that accepts a type variable denoted with the letter P that has a default value of an empty object type. Though the FunctionComponent interface doesn’t require the P type variable to be defined, it passes the P type variable to the PropsWithChildren type used for the props argument of the first function property.
When we take a look at the PropsWithChildren type in our React type definitions file, we can see that PropsWithChildren is a type alias that accepts a type variable ( P ) and combines the P type variable with a new object type that has a children property. The capability of combining multiple types into one is a TypeScript capability known as intersection types.
// from the react type definitions file

type PropsWithChildren<P> = P & { children?: ReactNode };
The first required property of the FunctionComponent interface type is the function declaration of the function component (i.e. the function that accepts props and returns JSX). The props argument of that function is type defined as the PropsWithChildren type. When a type variable isn’t passed, the props object argument is recognized to only have the children property. As a result, when we attempt to access another property from our props (e.g title ), TypeScript displays an error.
To solve the error, we’ll need to pass in our Props interface type as the type variable of our FunctionComponent . By doing so, the props returned from our FunctionComponent will recognize the title property of type string. When using the FunctionComponent interface type, we also no longer need to specify the type of props from the argument itself.
import React, { FunctionComponent } from "react";

interface Props {
  title: string;
}

export const Listings = ({ title }: Props) => {
  return <h2>{title}</h2>;
};

export const Listings2: FunctionComponent<Props> = ({ title }) => {
  return <h2>{title}</h2>;
};
At this moment the <Listings> and <Listings2> component behave identically to one another. So what does the FunctionComponent type give us?
CHILDREN
The props argument of a component with the FunctionComponent type will contain a children property of type ReactNode .
import React, { FunctionComponent } from "react";

// ...

export const Listings2: FunctionComponent<Props> = ({ title, children }) => {
  return <h2>{title}</h2>;
};
The
childrenprop references the children JSX elements rendered within a component.E.g.
<ComponentA><ComponentB /></ComponentA>-<ComponentB>is the child (i.e. children) of<ComponentA>
If we wanted to replicate having a typed children prop in our original <Listings> component, we’ll need to import the ReactNode type and define a children property with ReactNode in our Props interface.
The FunctionComponent interface also provides a series of typed optional properties.
PROPTYPES
We can specify the propTypes of the component and propTypes will be able to infer what kind of props is expected to be passed in the component.
import React, { FunctionComponent } from "react";
import PropTypes from 'prop-types';

// ...

export const Listings2: FunctionComponent<Props> = ({ title }) => {
  return <h2>{title}</h2>;
};

Listings2.propTypes = {
  title: propTypes.string // title is recognized as a prop
  description: propTypes.description // description is NOT recognized as a prop
}
propTypes is a React feature that allows us to type-check props without using a JavaScript extension like TypeScript. Since we are using TypeScript to type-check our props, propTypes isn’t really helpful.
Like propTypes , the FunctionComponent interface helps type-check the contextTypes property which is used to type define the types of properties within context. Similar to propTypes , contextTypes isn’t helpful if we leverage TypeScript to define the types of our application’s context properties.
DEFAULTPROPS
React provides a defaultProps option to allow us to provide default values for props. With FunctionComponent , the props stated in the defaultProps property is type-checked.
import React, { FunctionComponent } from "react";

// ...

export const Listings2: FunctionComponent<Props> = ({ title }) => {
  return <h2>{title}</h2>;
};

Listings2.defaultProps = {
  title: "TinyHouse Listings", // title is recognized as a prop
  description: "The most fabolous listings in the city" // description is NOT recognized as a prop
};
defaultProps isn’t helpful as well since ES6 gives us the capability of defining default parameters.
import React, { FunctionComponent } from "react";

// ...

export const Listings2: FunctionComponent<Props> = ({ title = "TinyHouse Listings" }) => {
  return <h2>{title}</h2>;
};
DISPLAYNAME
Finally, the FunctionComponent interface states the type of the displayName property as a string . displayName is a component property that allows us to set the display name of components for debugging messages.
import React, { FunctionComponent } from "react";

// ...

export const Listings2: FunctionComponent<Props> = ({ title }) => {
  return <h2>{title}</h2>;
};

// displayName must be a string

Listings2.displayName = "Listings"; // Pass
Listings2.displayName = 5; // Error
displayName isn’t often used since by default, the display name of components will be inferred from the name of the function.
Though the FunctionComponent interface type is useful, it’s most helpful when we want to use and specify unique information within our components such as rendering children, or maybe setting the displayName , or possibly using propTypes / defaultProps (though we wouldn’t recommend these in a TypeScript + ES6 environment).
We don’t need the type functionality the FunctionComponent interface type gives us. As a result, we won’t use the FunctionComponent interface type and we’ll stick with the simple means of having our function components be inferred as functions that accept props and return JSX.
With that said, we’ll close this lesson by removing the import of the FunctionComponent type and the Listings2 component we’ve created.
QUERYING LISTINGS
We’ll look to make our first interaction with the local GraphQL API we’ve set up on the server. There’s a large number of tools in the ecosystem that is geared to help clients make GraphQL queries. And these tools provide a lot of value with which we’ll see shortly, but they’re not a requirement to making GraphQL requests.
In the next couple of lessons, we’ll be taking our time and looking to make our GraphQL requests through some simple means which will give us a good understanding of what it takes to make a GraphQL request.
Here’s a gameplan of what we’ll do to make our first request.
GAMEPLAN
We’ll invoke a POST HTTP method
GraphQL supports both the POST and GET methods with some requirements in each.
In traditional REST applications, POST and GET are denoted to invoke what kind of request is going to be made. In GraphQL, however, we address retrieving or mutating information with queries and mutations . The one main distinction between GraphQL queries or mutations is that mutations are executed one after the other while queries are executed in parallel. Since our GraphQL server is served over HTTP, we can make either a POST or GET request to invoke a GraphQL query or mutation.
Most GraphQL clients use the POST HTTP method to both retrieve and persist data with which we’ll be doing as well.
We’ll specify the content type of our POST request as application/json
We’ll pass our GraphQL documents (i.e. queries) as a JSON object.
We’ll reference the URL of the API endpoint when we make our requests
Our GraphQL API is served over a single endpoint ( http://localhost:9000/api ), so we’ll reference this single endpoint in all our requests.
SERVER FETCH()
We’ll be using the native browser fetch() method to make our GraphQL requests.
If you’re using the Internet Explorer browser to run the React project, the window
fetch()method is unsupported. We’ll suggest using Chrome/Firefox or installing afetch()polyfill library.
We’ll create our server fetch() function in a new lib/ folder within src/ .
client/
  src/
    lib/
    // ...
  // ...
The src/sections/ folder will be responsible for containing the main section components of our app. The src/lib/ folder will be where we introduce code that is to be most likely shared between the different components in our app.
We’ll create an api/ folder within lib/ . We’ll additionally create an index.ts and server.ts file inside the api/ folder.
client/
  src/
    lib/
      api/
        index.ts
        server.ts
In the src/lib/api/server.ts file, we’ll export a server const object that will remain empty for now.
export const server = {};
We’ll re-export the server object from the src/lib/api/index.ts file.
client/src/lib/api/index.ts
export * from "./server";
In the server object, we’ll define a property on the object that’s given a label of fetch . This property is to be a function.
export const server = {
  fetch: () => {}
};
In the server.fetch() function, we’ll use the window fetch() function to help make our request. We’ll assign the results of the window fetch() method to a constant variable we’ll call res (i.e. response).
export const server = {
  fetch: () => {
    const res = fetch();
  }
};
Window fetch() is a promise . We want the results of the promise to be assigned to the res constant variable. We’ll use the async / await syntax by making the server.fetch property function an async function and placing the await expression on the window fetch() function:
export const server = {
  fetch: async () => {
    const res = await fetch();
  }
};
When our server.fetch() function gets called, we’ll expect an object to contain the GraphQL document. We’ll label the GraphQL document as query regardless if a GraphQL query or mutation is being invoked.
Let’s create an interface for this object body, that we’ll call Body , that will have a query field of type string . We’ll dictate that the server.fetch() function is to accept a body argument of type Body .
interface Body {
  query: string;
}

export const server = {
  fetch: async (body: Body) => {
    const res = await fetch();
  }
};
With our server fetch() function expecting the request body object, we can begin to build out the window fetch() method.
/API PROXY
The first argument of the window fetch() method is a required argument that is the reference to the path of the resource we want to fetch. In our instance, the path or endpoint of our API is http://localhost:9000/api when our server is running. If we were to directly use the http://localhost:9000/api in our fetch() method, our client Webpack server ( http://localhost:3000 ) will attempt to load a resource from a different origin ( http://localhost:9000 ). This will essentially be performing Cross-Origin Resource Sharing and for security reasons, browsers may reject the ability for our client to make the request to the server. To avoid this, we can have our Webpack Server proxy requests intended for our API Server.
create-react-app makes the ability to proxy requests in development fairly easy by allowing us to define a proxy field in the package.json file.
In the package.json file, we’ll introduce a proxy field with a value of the base path of our running server url - http://localhost:9000 .
client/package.json
"proxy": "http://localhost:9000"
If a request within our React Webpack server is now made to an unrecognized request prefix, for example /api , it will be redirected to the specified proxy - http://localhost:9000/api .
Proxying requests from the client to the server is only for development. When it comes to deployment, we have to ensure these URLs point to the right locations in the production state.
You may need to restart the React Webpack server to take the proxy change made in the
package.jsonfile into account.
SERVER.FETCH()
In our server.fetch() function, we can specify an argument of /api in the window fetch() method. /api will get proxied to http://localhost:9000/api .
interface Body {
  query: string;
}

export const server = {
  fetch: async (body: Body) => {
    const res = await fetch("/api");
  }
};
Since we want our window fetch() method to make a POST request, we’ll need pass in the appropriate request options.
The first option we’ll specify is the method option with a value of 'POST' .
interface Body {
  query: string;
}

export const server = {
  fetch: async (body: Body) => {
    const res = await fetch("/api", {
      method: "POST"
    });
  }
};
The second request option will be where we declare the content type of our request as application/json . This is to be done in the headers option of our request body.
interface Body {
  query: string;
}

export const server = {
  fetch: async (body: Body) => {
    const res = await fetch("/api", {
      method: "POST",
      headers: {
        "Content-Type": "application/json"
      }
    });
  }
};
Finally, we’ll pass in the data that is to be sent as the body of the request. We can’t pass in a JavaScript object so this is where we’ll use the JSON.stringify() method to convert the data body to be passed in as a JSON string.
When the fetch is successful it returns a JSON response. To have this response handled as a native JavaScript object, we can return res.json() .
client/src/lib/api/server.ts
interface Body {
  query: string;
}

export const server = {
  fetch: async (body: Body) => {
    const res = await fetch("/api", {
      method: "POST",
      headers: {
        "Content-Type": "application/json"
      },
      body: JSON.stringify(body)
    });

    return res.json();
  }
};
At this moment, our server.fetch() method is a promise that when resolved returns a data type of any . This isn’t strongly typed so we’ll revise this in an upcoming lesson. For now, we’ll verify if we’re able to interact with the Node server from the React client.
We’ll look to query the listings information from the <Listings> component directly. In the src/sections/Listings/Listings.tsx component file, we’ll import the newly created server object from the src/lib/api/ folder.
import React from "react";
import { server } from "../../lib/api";

interface Props {
  title: string;
}

export const Listings = ({ title }: Props) => {
  return <h2>{title}</h2>;
};
To get things started, we’ll state that we want the listings query to be made only when a button has been clicked. We’ll introduce this button element in our component template and attach a click event listener on the button, that when clicked will call a component function called fetchListings() .
import React from "react";
import { server } from "../../lib/api";

interface Props {
  title: string;
}

export const Listings = ({ title }: Props) => {
  const fetchListings = () => {};

  return (
    <div>
      <h2>{title}</h2>
      <button onClick={fetchListings}>Query Listings!</button>
    </div>
  );
};
In our component fetchListings() function, we’ll attempt to make the server fetch request. Our server fetch() function expects a body argument with which contains a query field of the GraphQL query (i.e request). Since the request to be made is of content-type application/json and passes a stringified JSON, we’ll create our query as a string that represents the shape of data we’d like to return from our API. We’ll want to query the only root level query available in our server - the listings query. We’ll define this query request at the top of the Listings.tsx file.
To distinguish our GraphQL query document from any other variable, we’ll declare the query in a constant variable named LISTINGS . We’ll set up our LISTINGS query document to query all the fields from the Listing GraphQL object type.
import React from "react";
import { server } from "../../lib/api";

const LISTINGS = `
  query Listings {
    listings {
      id
      title
      image
      address
      price
      numOfGuests
      numOfBeds
      numOfBaths
      rating
    }
  }
`;

interface Props {
  title: string;
}

export const Listings = ({ title }: Props) => {
  const fetchListings = () => {};

  return (
    <div>
      <h2>{title}</h2>
      <button onClick={fetchListings}>Query Listings!</button>
    </div>
  );
};
In our component fetchListings() function - we’ll call the server.fetch() function, pass in a body object and specify a query field in body to be that of the LISTINGS query we’ve set up. We’ll assign the result of our server.fetch() function to a constant variable called listings and attempt to console.log() the listings result right after the request has been made.
import React from "react";
import { server } from "../../lib/api";

const LISTINGS = `
  query Listings {
    listings {
      id
      title
      image
      address
      price
      numOfGuests
      numOfBeds
      numOfBaths
      rating
    }
  }
`;

interface Props {
  title: string;
}

export const Listings = ({ title }: Props) => {
  const fetchListings = () => {
    const listings = server.fetch({ query: LISTINGS });
    console.log(listings);
  };

  return (
    <div>
      <h2>{title}</h2>
      <button onClick={fetchListings}>Query Listings!</button>
    </div>
  );
};
The .json() method in our server.fetch() function takes the response and returns a promise. We’ll make our component fetchListings() function asynchronous since we’ll have to await for the results from the async server.fetch() function. The data of the returned promise will live in a data field within the response object so we’ll destructure data from the response object.
GraphQL conveniently places the data we expect from a request in a
datafield of the response.
Our Listings.tsx component file will now look like the following:
client/src/sections/Listings/Listings.tsx
import React from "react";
import { server } from "../../lib/api";

const LISTINGS = `
  query Listings {
    listings {
      id
      title
      image
      address
      price
      numOfGuests
      numOfBeds
      numOfBaths
      rating
    }
  }
`;

interface Props {
  title: string;
}

export const Listings = ({ title }: Props) => {
  const fetchListings = async () => {
    const { data } = await server.fetch({ query: LISTINGS });
    console.log(data); // check the console to see the listings data from our GraphQL Request!
  };

  return (
    <div>
      <h2>{title}</h2>
      <button onClick={fetchListings}>Query Listings!</button>
    </div>
  );
};
To verify if our client can make requests to the GraphQL server, we’ll first run our Node server.
server $: npm run start
With the server running, we’ll also run our React Webpack server.
client $: npm run start
When we click the Query Listings button, we’ll see the listings data from our server in our browser console!

ABSTRACTING THE TYPE OF DATA FROM SERVER FETCH
Although our server.fetch() function works, we still have an issue where data retrieved from the server.fetch() function doesn’t have a type associated with it.

To solve this, we’ll take advantage of Typescript generics. We’ve seen how generics worked both in the Node server application as well the FunctionComponent type we initially surveyed, but we haven’t had the chance to create our own generic abstraction.
We want the server.fetch() function to return the data from the request but we also want this data to be typed. We also want the fetch() function to work for any data object with its own unique type. The server.fetch() function has no idea what the type of data it returns could be. However, in the component where the fetch function is being called, we have an idea of the data we’re expecting because we’re defining the query we want to make .
For the listings query field, we expect an array of listings where id , title , image , address are to be strings and the price , numOfGuests , numOfBeds , numOfBaths , and rating fields are to be numbers.
client/src/sections/Listings/Listings.tsx
const LISTINGS = `
  query Listings {
    listings {
      id
      title
      image
      address
      price
      numOfGuests
      numOfBeds
      numOfBaths
      rating
    }
  }
`;
If we have an idea of the shape of the data from the request, we essentially want to pass this shape of data into the server.fetch() function and we can achieve this with generics. First and foremost, in the server.fetch() function in the src/lib/api/server.ts file, we’ll use angle brackets and declare that the function can accept a type variable denoted by TData .
export const server = {
  fetch: async <TData>(body: Body) => {
    const res = await fetch("/api", {
      method: "POST",
      headers: {
        "Content-Type": "application/json"
      },
      body: JSON.stringify(body)
    });

    return res.json();
  }
};
We’ll specify a default type parameter of any to say if the type of data isn’t provided, we’ll ensure the type is to be returned as any .
export const server = {
  fetch: async <TData = any>(body: Body) => {
    const res = await fetch("/api", {
      method: "POST",
      headers: {
        "Content-Type": "application/json"
      },
      body: JSON.stringify(body)
    });

    return res.json();
  }
};
By having access to the TData type variable in our server.fetch() function, we can set the return type of the function to the type we expect. The res.json() function simply returns a value of Promise<any> and doesn’t give us the option of passing in a type variable.
When our function is successful, we’re confident of how the data is going to be returned. This is where we can type assert the returned value to what we expect. In our instance, we’ll type assert the returned statement as Promise<{ data: TData }> .
export const server = {
  fetch: async <TData = any>(body: Body) => {
    const res = await fetch("/api", {
      method: "POST",
      headers: {
        "Content-Type": "application/json"
      },
      body: JSON.stringify(body)
    });

    return res.json() as Promise<{ data: TData }>;
  }
};
Type assertions are a TypeScript capability where one can override the types that TypeScript either infers or analyzes. There are two ways of type asserting - either using the as syntax or using the angle brackets syntax.
return <Promise<{ data: TData }>>res.json(); // angle brackets to type assert res.json()

return res.json() as Promise<{ data: TData }>; // (as) to type assert res.json()
Our ESLint configuration prefers the as syntax and so do we, so we’ll use the as syntax to type assert the returned promise.
Type assertions should be used sparingly because it’s easy to type assert information without specifying the properties that are needed in the type. Most of the time we’ll assign types normally but only in cases we know better than the compiler - do we assert.
The data being returned from our server.fetch() can be now be typed as the type value passed into the function! Let’s see how this would work for our <Listings> component.
For the <Listings> component, we’ll create an interface type that is to resemble the shape of listings data that can be retrieved from our GraphQL listings query. We’ll create this type in a types.ts file located within the src/sections/Listings/ folder.
client/
  src/
    lib/
      api/
      sections/
        Listings/
          index.ts
          Listings.ts
          types.ts
  // ...
In the Listings/types.ts file, we’ll first create an interface called Listing that describes the shape of a single listing object.
client/src/sections/Listings/types.ts
interface Listing {
  id: string;
  title: string;
  image: string;
  address: string;
  price: number;
  numOfGuests: number;
  numOfBeds: number;
  numOfBaths: number;
  rating: number;
}
We’ll then export an interface labeled ListingsData that represents the shape of the data field returned from our API. When we query listings, we’ll observe the data field is to contain a listings field which is an array of listing items so we’ll specify the interface as so.
client/src/sections/Listings/types.ts
interface Listing {
  id: string;
  title: string;
  image: string;
  address: string;
  price: number;
  numOfGuests: number;
  numOfBeds: number;
  numOfBaths: number;
  rating: number;
}

export type ListingsData = {
  listings: Listing[];
};
In the Listings.tsx component file, we’ll import the ListingsData interface type and pass it down as the type variable for the server.fetch() function.
client/src/sections/Listings/Listings.tsx
import React from "react";
import { server } from "../../lib/api";
import { ListingsData } from "./types";

const LISTINGS = `
  query Listings {
    listings {
      id
      title
      image
      address
      price
      numOfGuests
      numOfBeds
      numOfBaths
      rating
    }
  }
`;

interface Props {
  title: string;
}

export const Listings = ({ title }: Props) => {
  const fetchListings = async () => {
    const { data } = await server.fetch<ListingsData>({ query: LISTINGS });
    console.log(data); // check the console to see the listings data from our GraphQL Request!
  };

  return (
    <div>
      <h2>{title}</h2>
      <button onClick={fetchListings}>Query Listings!</button>
    </div>
  );
};
The data now being returned from the server fetch() function is appropriately typed.

If we attempt to access the listings field within data , we’ll be able to access the listings information we expect. If we wanted to access some other property that didn’t exist, TypeScript will throw an error.
const fetchListings = async () => {
  const { data } = await server.fetch<ListingsData>({
    query: LISTINGS
  });
  console.log(data.listings); // listings exists in data
  console.log(data.bookings); // bookings does not exist in data
};
Our app will still behave the same as before since we haven’t made any functional changes. We’ll be able to query the listings from our database and see the queried result in our browser console.
DELETING A LISTING
With our custom server.fetch() function, we’ve been able to query the listings field in our GraphQL API. Now, we’ll look to see how we can make the GraphQL mutation available in our API - deleteListing .
In our server.fetch() function, we’ve specified that the request body has to have at the very least the query string that represents the GraphQL query (i.e. request) we want to make.
interface Body {
  query: string;
}

export const server = {
  fetch: async <TData = any>(body: Body) => {
    // ...
  }
};
We can reuse this server.fetch() function to help conduct our mutation. The mutation we’ll want to make ( deleteListing ) expects a variable argument to be passed which is the id of the listing that is to be deleted. As a result, we should expect the body of the request to contain the variables that can be passed into our GraphQL request.
The JSON body we pass into our request expects a query field of type string . The other field we’ll pass in is the variables field which is to be an object for holding the variables that are to be passed into the GraphQL request.
Just like how the data of a request is to be typed, it can be helpful if we’re able to type define the expected variables of a request since every request may expect different variables. Because of this, we’ll make the Body interface a generic that accepts a TVariables type with which will be the type of the variables field.
interface Body<TVariables> {
  query: string;
  variables: TVariables;
}
Variables of a request can be optional since we don’t have to pass in variables for every GraphQL request. We’ll denote the variables field as being optional by placing a question mark at the end of the variables field in the Body interface.
client/src/lib/api/server.ts
interface Body<TVariables> {
  query: string;
  variables?: TVariables;
}
In the server.fetch() function, we’ll need to pass the value of the TVariables type to the Body interface type assigned to the body argument. Just like how we’ve introduced a TData type variable into our server.fetch() function, we can introduce a TVariables type variable as well and give it a default value of any . We’ll then pass the TVariables type value along to the Body interface used as the type of the body argument.
client/src/lib/api/server.ts
interface Body<TVariables> {
  query: string;
  variables?: TVariables;
}

export const server = {
  fetch: async <TData = any, TVariables = any>(body: Body<TVariables>) => {
    const res = await fetch("/api", {
      method: "POST",
      headers: {
        "Content-Type": "application/json"
      },
      body: JSON.stringify(body)
    });

    return res.json() as Promise<{ data: TData }>;
  }
};
Our server.fetch() function is now prepared to allow components to make GraphQL mutations. In the <Listings> component, we’ll create a button that’ll trigger a method when clicked. We’ll call this method deleteListing() and the button text will be 'Delete a listing!' . Since our deleteListing() function will make an asynchronous request, we’ll label the function as an async function.
import React from "react";
import { server } from "../../lib/api";
import { ListingsData } from "./types";

const LISTINGS = `
  query Listings {
    listings {
      id
      title
      image
      address
      price
      numOfGuests
      numOfBeds
      numOfBaths
      rating
    }
  }
`;

interface Props {
  title: string;
}

export const Listings = ({ title }: Props) => {
  const fetchListings = async () => {
    const { data } = await server.fetch<ListingsData>({
      query: LISTINGS
    });
    console.log(data); // check the console to see the listings data from our GraphQL Request!
  };

  const deleteListing = async () => {};

  return (
    <div>
      <h2>{title}</h2>
      <button onClick={fetchListings}>Query Listings!</button>
      <button onClick={deleteListing}>Delete a listing!</button>
    </div>
  );
};
The deleteListing() function is where we’ll want to call the server.fetch() function, pass in the expected GraphQL request and the variables of the request. Let’s first define the shape of both the data we expect to retrieve as well as the shape of variables we want to pass in.
In the Listings/types.ts file, we’ll declare the expected types of the data and variables field of our deleteListing mutation as DeleteListingData and DeleteListingVariables respectively.
The data we expect returned from the deleteListing mutation is the deleted listing itself. So we’ll specify a deleteListing field within the DeleteListingData interface that will have a type of the Listing interface we’ve defined earlier.
interface Listing {
  id: string;
  title: string;
  image: string;
  address: string;
  price: number;
  numOfGuests: number;
  numOfBeds: number;
  numOfBaths: number;
  rating: number;
}

export type ListingsData = {
  listings: Listing[];
};

export interface DeleteListingData {
  deleteListing: Listing;
}
The only variable of the deleteListing mutation is to be an id of type string.
client/src/sections/Listings/types.ts
interface Listing {
  id: string;
  title: string;
  image: string;
  address: string;
  price: number;
  numOfGuests: number;
  numOfBeds: number;
  numOfBaths: number;
  rating: number;
}

export type ListingsData = {
  listings: Listing[];
};

export interface DeleteListingData {
  deleteListing: Listing;
}

export interface DeleteListingVariables {
  id: string;
}
In the Listings.tsx file, we’ll import the newly created types for our GraphQL deleteListing request.
client/src/sections/Listings/Listings.tsx
import {
  DeleteListingData,
  DeleteListingVariables,
  ListingsData
} from "./types";
We’ll need to construct the query document of our deleteListing mutation. We’ll set this document in a const variable called DELETE_LISTING . We’ll use the mutation keyword and declare the name of the mutation as DeleteListing and we’ll call the deleteListing mutation. For what is to be returned, we’ll state we’re only interested in returning the id of the deleted listing.
const DELETE_LISTING = `
  mutation DeleteListing {
    deleteListing {
      id
    }
  }
`;
We now need to find a way to pass in the id variable needed in our deleteListing mutation. In the mutation declaration of our document, we can say we expect a variable named id and we can say the GraphQL type of this id variable is GraphQLID and it is to be required. Since we can use the GraphQL schema language here - this will appear as ID! .
In GraphQL, we can use the $ syntax to define variables in a GraphQL request, and we can pass the variables as a separate map into the request field. This will appear as follows:
client/src/sections/Listings/Listings.tsx
const DELETE_LISTING = `
  mutation DeleteListing($id: ID!) {
    deleteListing(id: $id) {
      id
    }
  }
`;
With our mutation query document available, we can now establish the server.fetch() function in the component deleteListing() function. We’ll trigger the server.fetch() function, pass in the DeleteLisingData and DeleteListingVariables type variables, and specify in the body of the request the mutation query we’ve set up and id variable to be passed in. To get an id of a listing in our database, we’ll retrieve and use an id from a listing object when we query all the listings.
We’ll destructure the data returned from our server.fetch() call and console.log() it at the end of our deleteListing(() component function.
This will make our Listings.tsx component file now look like the following:
client/src/sections/Listings/Listings.tsx
import React from "react";
import { server } from "../../lib/api";
import {
  DeleteListingData,
  DeleteListingVariables,
  ListingsData
} from "./types";

const LISTINGS = `
  query Listings {
    listings {
      id
      title
      image
      address
      price
      numOfGuests
      numOfBeds
      numOfBaths
      rating
    }
  }
`;

const DELETE_LISTING = `
  mutation DeleteListing($id: ID!) {
    deleteListing(id: $id) {
      id
    }
  }
`;

interface Props {
  title: string;
}

export const Listings = ({ title }: Props) => {
  const fetchListings = async () => {
    const { data } = await server.fetch<ListingsData>({ query: LISTINGS });
    console.log(data); // check the console to see the listings data from our GraphQL Request!
  };

  const deleteListing = async () => {
    const { data } = await server.fetch<
      DeleteListingData,
      DeleteListingVariables
    >({
      query: DELETE_LISTING,
      variables: {
        id: "5d4507a9cf295034813b35c2" // hardcoded id variable,
      }
    });
    console.log(data); // check the console to see the result of the mutation!
  };

  return (
    <div>
      <h2>{title}</h2>
      <button onClick={fetchListings}>Query Listings!</button>
      <button onClick={deleteListing}>Delete a listing!</button>
    </div>
  );
};
We’ll start both the Node server and React Webpack server from our terminal.
server $: npm run start
client $: npm run start
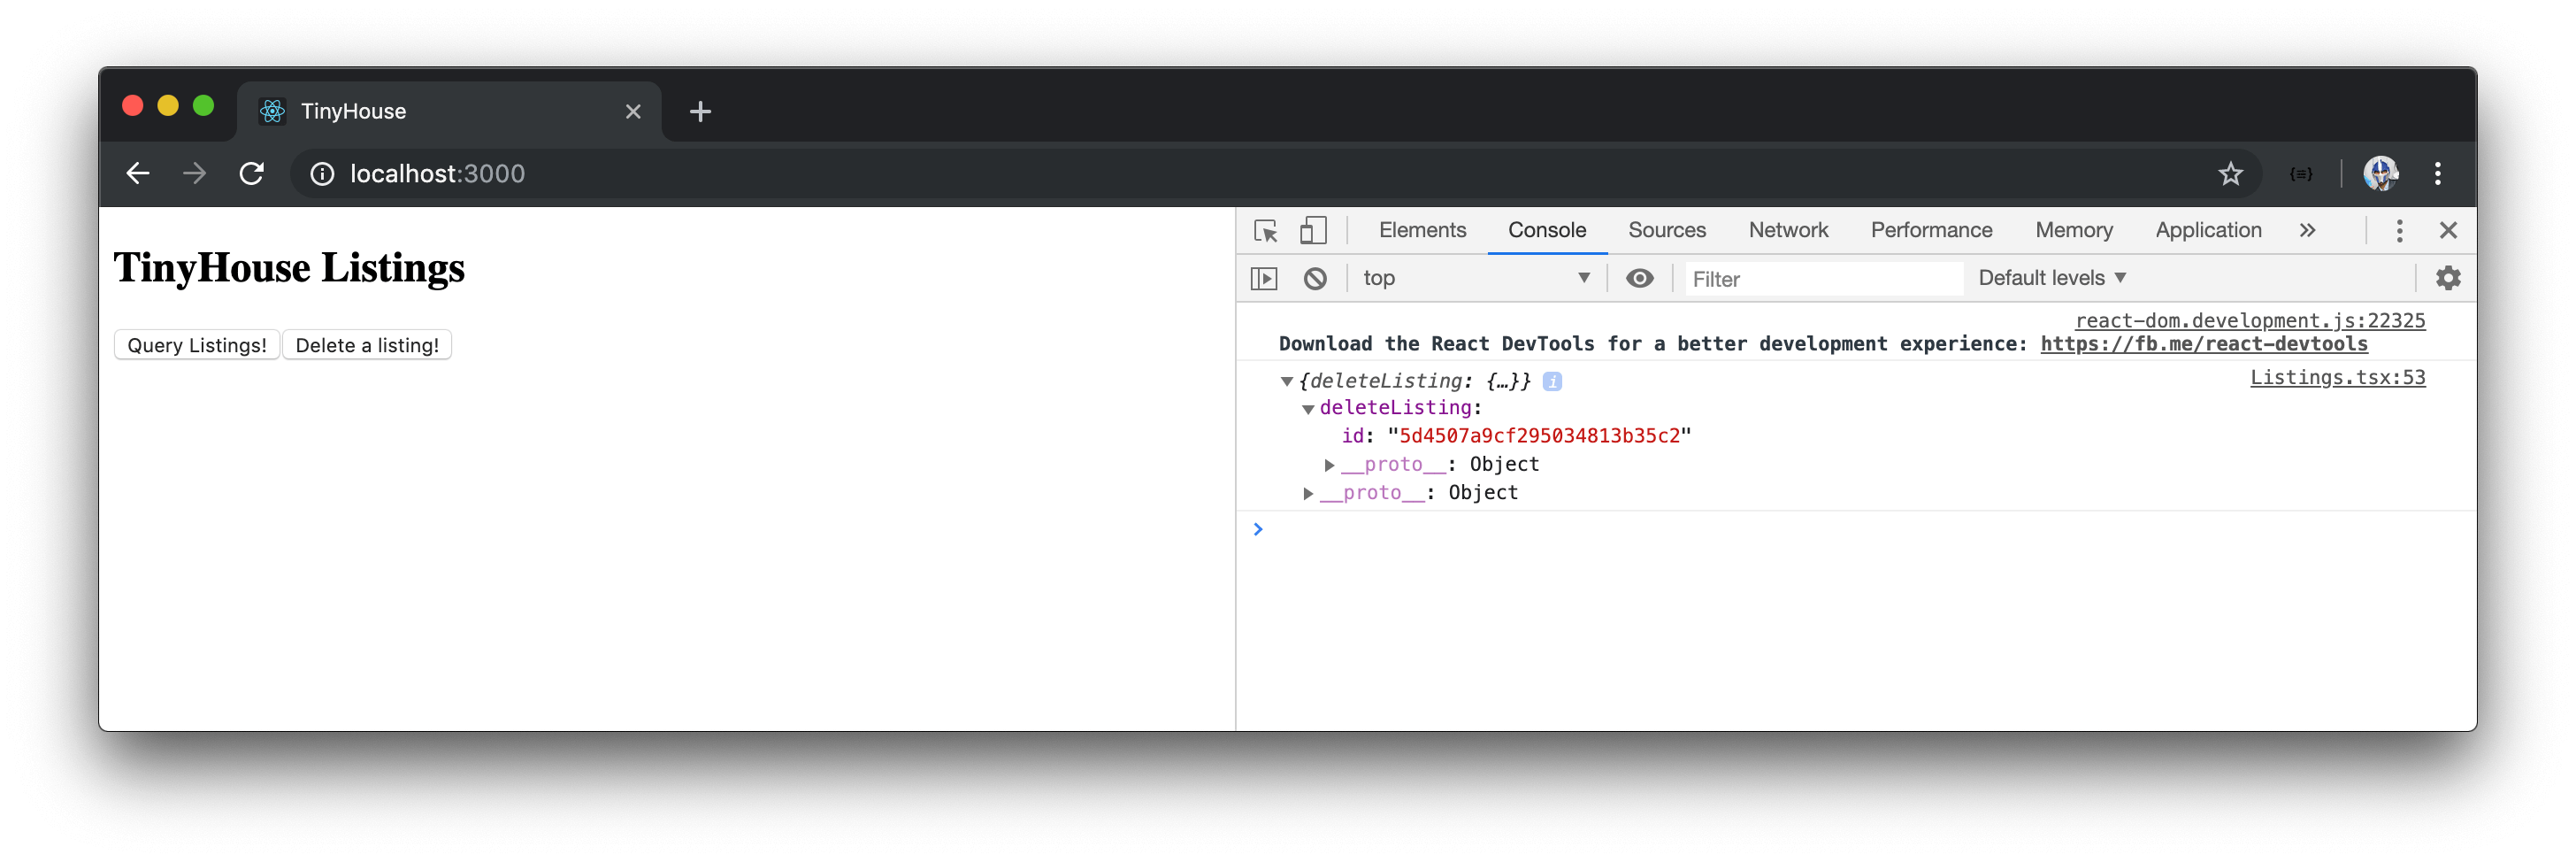
When we click the 'Delete a listing!' button in our UI, we’ll see the id information of the deleted listing in our console!
If we were to query all the listings again, we’ll see the listing we’ve deleted has been removed.
At any moment in time, you can run the
seedscript on the Node server project to introduce more listings into the listings collection in the database.
TVARIABLES
When we’ve set a value of the TData type variable in our server.fetch() function, we’ve been able to assign the type of data being returned from the request. Specifying a value of TVariables on the other hand helps type check the variables data being used in the request.
In our component deleteListing() function, if we were to introduce another variable that we haven’t stated is part of the DeleteListingVariables interface - TypeScript will emit an error.
const deleteListing = async () => {
  const { data } = await server.fetch<DeleteListingData, DeleteListingVariables>({
    query: DELETE_LISTING,
    variables: {
      id: "5d4507a9cf295034813b35c2",
      rating: 3 // rating does not exist in DeleteListingVariables
    }
  });
  console.log(data);
};
Since not every request needs variables, the variables field in our body request is optional.
MODULE 6 SUMMARY
We’ve created our first functional component, the <Listings> component, and we’ve investigated how TypeScript allows us to type-check the props a component is expected to receive.
interface Props {
  title: string;
}

export const Listings = ({ title }: Props) => {
  // ...
};
SERVER.FETCH()
With the help of the browser window fetch() method, we were able to create a server.fetch() function that’s able to make a POST request to conduct our GraphQL queries and mutations.
We’ve stated the content of our POST request as application/json . The JSON body passed in our requests requires the query of the GraphQL request while variables is optional.
client/src/lib/api/server.ts
interface Body<TVariables> {
  query: string;
  variables?: TVariables;
}

export const server = {
  fetch: async <TData = any, TVariables = any>(
    body: Body<TVariables>
  ) => {
    const res = await fetch("/api", {
      method: "POST",
      headers: {
        "Content-Type": "application/json"
      },
      body: JSON.stringify(body)
    });

    return res.json() as Promise<{ data: TData }>;
  }
};
<LISTINGS>
In our <Listings> component, we’ve introduced two buttons. One button is responsible for querying the listings from our collection and the other in deleting a certain listing from our collection.
We’ve set up our GraphQL query documents as simple strings that are passed to each server fetch request we make in our component functions. For the delete listing request, we’ve hardcoded an id to delete a listing of that particular id.
client/src/sections/Listings/Listings.tsx
import React from "react";
import { server } from "../../lib/api";
import {
  DeleteListingData,
  DeleteListingVariables,
  ListingsData
} from "./types";

const LISTINGS = `
  query Listings {
    listings {
      id
      title
      image
      address
      price
      numOfGuests
      numOfBeds
      numOfBaths
      rating
    }
  }
`;

const DELETE_LISTING = `
  mutation DeleteListing($id: ID!) {
    deleteListing(id: $id) {
      id
    }
  }
`;

interface Props {
  title: string;
}

export const Listings = ({ title }: Props) => {
  const fetchListings = async () => {
    const { data } = await server.fetch<ListingsData>({
      query: LISTINGS
    });
    console.log(data); // check the console to see the listings data from our GraphQL Request!
  };

  const deleteListing = async () => {
    const { data } = await server.fetch<
      DeleteListingData,
      DeleteListingVariables
    >({
      query: DELETE_LISTING,
      variables: {
        id: "5d4507a9cf295034813b35c2" // hardcoded id variable,
      }
    });
    console.log(data); // check the console to see the result of the mutation!
  };

  return (
    <div>
      <h2>{title}</h2>
      <button onClick={fetchListings}>
        Query Listings!
      </button>
      <button onClick={deleteListing}>
        Delete a listing!
      </button>
    </div>
  );
};
In each of our server.fetch() requests within the <Listings> component, we’ve established generics to help define the type of data that is to be returned from our request as well as type check the variables that are to be passed into a request.
MOVING FORWARD
Though we’ve been able to create a custom server.fetch() function to help us query listings or delete a certain listing, we’ve only been able to see the results of our requests in our browser console. In the next module, we’ll investigate how we can keep track of state in our <Listings> component as well as modify how we make our query and mutation. We’ll be interested in making our listings query the moment the component mounts and for the deleteListing mutation, we’ll pass in an id from a listing that is to be selected from the UI.
We’ll be achieving all this by introducing and using React Hooks!