GOOGLE SIGN-IN GRAPHQL FIELDS
Let’s brainstorm the GraphQL fields we’ll need to integrate Google OAuth into our app.
The first thing we’ll do is clear out our schema from Part I of the course. We’ll go to the type definitions file in our server project ( src/graphql/typeDefs.ts ) file and remove the definitions for the fields we had before.
import { gql } from "apollo-server-express";

export const typeDefs = gql`
  type Query {}
  type Mutation {}
`;
We can also delete the Listing folder from our src/graphql/resolvers/ folder since we’ll no longer need the listingResolvers map we created in Part I. This will also require us to remove the import and use of the listingResolvers map in the src/graphql/resolvers/index.ts file.
import merge from "lodash.merge";

export const resolvers = merge();
In our GraphQL type definitions file, we’ll create three new GraphQL fields to help with authenticating users with Google OAuth.
The first step in our OAuth flow requires us to redirect our user to Google so they can authorize our app and sign in. We’ll need to generate the URL that will navigate the user to the Google consent form. We’ll construct this URL in our server application and have our client app be able to retrieve this URL from the server through a query field. This query field will be the authUrl field.
Once Google Sign-In provides a value for the authorization code and redirects the user to the /login page of our app, we’ll want to have our React app pass the code onto our Node server. Our Node server will then make a request to Google servers with the code to retrieve the access token of the signed-in user. The logIn mutation will be the mutation our React client application will fire while passing in the code to make the request to Google to retrieve the token for a user.
Finally, we’ll have a logOut mutation to have the user be able to log-out from our app.
authUrl , logIn , and logOut are the three GraphQL root-level fields we’ll need to handle Google OAuth. Let’s prepare our GraphQL API type definitions and resolvers with these new fields.
AUTHURL
In the src/graphql/typeDefs.ts file, we’ll introduce an authUrl field in our root Query object. This field when resolved will return a string.
import { gql } from "apollo-server-express";

export const typeDefs = gql`
  type Query {
    authUrl: String!
  }

  type Mutation {}
`;
LOGIN
Our logIn mutation will accept a code argument and when resolved will return an instance of the user (with which we’re going to call the Viewer ) that has been logged-in. We’ll handle this in the next lesson and for now simply state that the logIn mutation when resolved will return a string.
import { gql } from "apollo-server-express";

export const typeDefs = gql`
  type Query {
    authUrl: String!
  }

  type Mutation {
    logIn: String!
  }
`;
LOGOUT
The logOut mutation when resolved will also return an instance of the logged in user. For now, we’ll state that it is to return a string as well. With these changes, our src/graphql/typeDefs.ts file will look like the following:
server/src/graphql/typeDefs.ts
import { gql } from "apollo-server-express";

export const typeDefs = gql`
  type Query {
    authUrl: String!
  }

  type Mutation {
    logIn: String!
    logOut: String!
  }
`;
RESOLVER FUNCTIONS
Next, we’ll set up the boilerplate of our resolver functions for the fields we’ve just created in our schema. We’ll have these resolver functions be part of a resolvers map that we’ll call viewerResolvers .
Vieweris the term we’ll use in our app to refer to the user that’s viewing (i.e. using) our app and as a result will be the term used to refer to the user that’s attempting to log-in to our application.
We’ll create a Viewer/ folder that is to have an index.ts file in the src/graphql/resolvers/ folder.
server/
  src/
    graphql/
      resolvers/
        Viewer/
          index.ts
      // ...
    // ...
In the src/graphql/resolvers/index.ts file, we’ll import the IResolvers map from apollo-server-express and set it as the type of the viewerResolvers map we’ll create.
import { IResolvers } from "apollo-server-express";

export const viewerResolver: IResolvers = {};
To have our resolver functions be set up for the next lesson, we’ll have each of our resolver functions return strings that refer to which field is being queried without building any of the implementation just yet.
server/src/graphql/resolvers/Viewer/index.ts
import { IResolvers } from "apollo-server-express";

export const viewerResolvers: IResolvers = {
  Query: {
    authUrl: () => {
      return "Query.authUrl";
    }
  },
  Mutation: {
    logIn: () => {
      return "Mutation.logIn";
    },
    logOut: () => {
      return "Mutation.logOut";
    }
  }
};
Finally, to have our viewerResolvers map recognized in our Apollo Server instance - we’ll need to import the viewerResolvers map in the src/graphql/resolvers/index.ts file and place it in the lodash merge() function.
server/src/graphql/resolvers/index.ts
import merge from "lodash.merge";
import { viewerResolvers } from "./Viewer";

export const resolvers = merge(viewerResolvers);
With our server running, if we open the GraphQL Playground at http://localhost:9000/api, we’ll see that each of the GraphQL fields we’ve set up can be queried.
The authUrl query.

The logIn and logOut mutations.

In the next lesson, we’ll update the resolvers we’ve created to execute the functionality we would want.
USING GOOGLE SIGN-IN & PEOPLE API
Documentation on the Google APIs Node.js Client library can be found - here.
To access Google’s APIs, we’re going to use Google’s officially supported Node.js library - the Google APIs Node.js Client. The Google APIs Node.js Client provides authorization and authentication with OAuth 2.0 and provides the capability for our Node application to interact with the full list of supported Google APIs.
In the terminal of our Node server, we’ll install the Google APIs Node.js Client as an application dependency:
npm install googleapis
The googleapis package is a TypeScript library so we won’t need to install any additional type definitions.
Next, we’ll create an api/ folder in our source code’s lib/ folder. This is where we’ll keep all our server interaction with 3rd party APIs. We’ll create a Google.ts file within the lib/api/ folder to store the methods we’ll create that connect with Google’s APIs.
We’ll also create an index.ts file in the lib/api/ folder to export the functionalities from the different files we’ll eventually set up in our api/ folder.
server/
  src/
    // ...
    lib/
      api/
        Google.ts
        index.ts
    // ...
  // ...
In the lib/api/index.ts file, we’ll re-export everything we’ll create from the Google.ts file.
export * from "./Google";
GOOGLE APIS
The first thing we’ll do in the lib/api/Google.ts file is import the google object class from the googleapis package we’ve just installed.
server/src/lib/api/Google.ts
import { google } from "googleapis";
Next, we’ll construct an object we’ll label Google that is to expose exactly what we’ll need in our app.
import { google } from "googleapis";

export const Google = {};
The first property we’ll create in our Google object is an authUrl field where the value is to the authentication URL Google is to provide where users can sign-in with their Google account. This is needed in Step 1 of our Google OAuth flow.
The second field we’ll have in our exported Google object is a logIn() function. This logIn() function is where we would make a request to Google using a code argument to get a user’s access token. This is needed in one of the later steps of our Google OAuth flow.
import { google } from "googleapis";

export const Google = {
  authUrl: "Google's authentication URL for our app",
  logIn: async (code: string) => {
    // make a request to Google using a "code" argument to get a user's access token
  }
};
AUTHURL
The documentation in the Google APIs Node.js Client shows us the steps needed to create an authentication URL. We’ll need to configure a new auth object with OAuth client_id and client_secret values as well as a redirect URL. In the last lesson, we’ve conveniently saved client_id , client_secret , and redirect URL values as environment variables in our .env file.
We’ll run the google.auth.Oauth2() constructor function and pass in the client id, client secret, and the redirect URL we have as environment variables.
const auth = new google.auth.OAuth2(
  process.env.G_CLIENT_ID,
  process.env.G_CLIENT_SECRET,
  `${process.env.PUBLIC_URL}/login`
);
G_CLIENT_ID and G_CLIENT_SECRET are the configuration variables for the OAuth Client ID we’ve created in the Google Developers Console. PUBLIC_URL is the base path of our React app which in development is set to http:/localhost:3000 . We’re appending /login since we want the user to be redirected to the login path.
In the Google APIs Node.js Client documentation, it then shows us that we can run a generateAuthUrl() function from the constructed auth object to create the authentication URL that can navigate the user to Google’s consent screen.
Before our TinyHouse app can access Google APIs on behalf of our users, we must obtain an access token that grants access to those APIs. A single access token can grant varying degrees of access to multiple APIs. A parameter called scope controls this. To see the full list of scopes one can add to an app, we can go to the following documentation link - https://developers.google.com/identity/protocols/googlescopes. For our app, all we’ll need is the user’s email and basic profile info .
In our the authUrl field of the exported Google object, we’ll run the generateAuthUrl() from the auth object. In the scope option, we’ll state that we’re interested in the user’s email and basic user info profile. We’ll also state that the value of an access_type field is online .
import { google } from "googleapis";

const auth = new google.auth.OAuth2(
  process.env.G_CLIENT_ID,
  process.env.G_CLIENT_SECRET,
  `${process.env.PUBLIC_URL}/login`
);

export const Google = {
  authUrl: auth.generateAuthUrl({
    access_type: "online",
    scope: [
      "https://www.googleapis.com/auth/userinfo.email",
      "https://www.googleapis.com/auth/userinfo.profile"
    ]
  }),
  logIn: async (code: string) => {
    // make a request to Google using a "code" to get our user's access token
  }
};
ESLint will give us a warning with regards to the access_type option field since an ESLint rule exists that expects identifiers to always be in camelCase.

This ESLint rule is something we would want to keep. In this case, however, the access_type field is in snake_case format as determined by the Google Node.js client and we won’t be able to change it. Here’s where we can apply a small change to disable the @typescript-eslint/camelcase rule in the line where access_type is declared. This will look something like this:
export const Google = {
  authUrl: auth.generateAuthUrl({
    // eslint-disable-next-line @typescript-eslint/camelcase
    access_type: "online"
    // ...
  })
  // ...
};
The ESLint warning will no longer be shown and the authUrl field for our Google object will now return the authentication url.
LOGIN()
Let’s now build the function to obtain a user’s access token and other information. This will be the logIn() function that will run after the code from the authUrl is passed along from the client.
The auth object we’ve constructed has a getToken() function that accepts a code and creates an HTTP request to Google’s servers to obtain the user’s access_token . In the beginning of our logIn() function, we’ll run the getToken() function and destruct the tokens value it returns.
export const Google = {
  // ...,
  logIn: async (code: string) => {
    const { tokens } = await auth.getToken(code);
  }
};
The tokens value we’ve destructed contains both the access_token as well as a value called a refresh_token . For our app, we are just using the tokens to obtain the user’s information right away so we won’t need to save them in our database. If we were to develop an app that uses these tokens for other APIs (e.g. using Gmail or Google Calendar API), we would most likely need them saved in our database for later use.
We’ll then run the setCredentials() function from the auth object and pass in tokens to configure the auth object.
export const Google = {
  // ...,
  logIn: async (code: string) => {
    const { tokens } = await auth.getToken(code);

    auth.setCredentials(tokens);
  }
};
At this moment, we can now use the configured auth object to make a request to Google’s People API to get the user information we’ll need. To do so, we’ll run the people() constructor from the imported google object.
export const Google = {
  // ...,
  logIn: async (code: string) => {
    const { tokens } = await auth.getToken(code);

    auth.setCredentials(tokens);

    await google.people();
  }
};
The people() function accepts an options object where it will expect us to state the version number. We’ll set the version as v1 to mimic the Google Node.js client documentation. We’ll then also pass the auth object along as another option property.
export const Google = {
  // ...,
  logIn: async (code: string) => {
    const { tokens } = await auth.getToken(code);

    auth.setCredentials(tokens);

    await google.people({ version: "v1", auth });
  }
};
From the people() constructor, we’ll access and run the get() function from a people property that is to be returned from the people() constructor. In the get() function, we’ll specify the resourceName and personFields we would like. For resourceName we’ll say people/me and for personFields we’ll say emailAddresses , names and photos . We’ll destruct the data from the complete function and simply return it from our logIn function. We’ll return an object that contains a user property which is the data retrieved from Google.
With all these changes, the complete logIn() function in our Google object will look like the following:
server/src/lib/api/Google.ts
export const Google = {  logIn: async (code: string) => {
    const { tokens } = await auth.getToken(code);

    auth.setCredentials(tokens);

    const { data } = await google.people({ version: "v1", auth }).people.get({
      resourceName: "people/me",
      personFields: "emailAddresses,names,photos"
    });

    return { user: data };
  }};
And the entire lib/api/Google.ts file will appear as:
server/src/lib/api/Google.ts
import { google } from "googleapis";

const auth = new google.auth.OAuth2(
  process.env.G_CLIENT_ID,
  process.env.G_CLIENT_SECRET,
  `${process.env.PUBLIC_URL}/login`
);

export const Google = {
  authUrl: auth.generateAuthUrl({
    // eslint-disable-next-line @typescript-eslint/camelcase
    access_type: "online",
    scope: [
      "https://www.googleapis.com/auth/userinfo.email",
      "https://www.googleapis.com/auth/userinfo.profile"
    ]
  }),
  logIn: async (code: string) => {
    const { tokens } = await auth.getToken(code);

    auth.setCredentials(tokens);

    const { data } = await google.people({ version: "v1", auth }).people.get({
      resourceName: "people/me",
      personFields: "emailAddresses,names,photos"
    });

    return { user: data };
  }
};
There’s one last thing we’ll need to consider. Since we’re interested in interacting with the People API , we should head over to the Google developers console for our project, search for the People API in the API library, and explicitly enable it as an API we’d like to use for our project.

We’ve set up the functions to now be able to connect with Google APIs to either generate an authentication URL for a consent form or use Google’s People API to get information for a certain user. At this moment, however, our React client app can’t interact with this functionality. Which is why in the next lesson, we’ll update the authUrl , logIn , and logOut resolvers in our GraphQL API to use the functionalities we’ve set up in this lesson.
BUILDING THE AUTHENTICATION RESOLVERS
We’ve set up functions needed to interact with Google’s Node.js Client to either generate an authentication URL or get user information for a user logging in. We’ll now begin to establish our GraphQL schema and the resolvers for the fields our client application can interact with to handle this functionality.
We’ll first modify our GraphQL schema and introduce some new type definitions.
We’ll want the React client to pass a code argument to the logIn mutation to help conduct the login process in our server. Good convention often finds people specifying the arguments of a mutation within an input object. In the src/graphql/typeDefs.ts file, we’ll create a new input object type to represent the input that can be passed into the logIn mutation. We’ll label this input object type LogInInput and it is to contain a non-null code property of type GraphQL String .
server/src/graphql/typeDefs.ts
  input LogInInput {
    code: String!
  }
We’ll also state that the logIn mutation field is to accept an input argument of type LogInInput . Furthermore, we’ll have the logIn mutation expect input as an optional argument. This is because, in the next couple of lessons, we’ll investigate how users will also be able to log-in with the presence of a request cookie.
When the logIn and logOut mutations resolve successfully, we’ll expect them both to return a GraphQL object type we’ll create shortly labeled Viewer .
import { gql } from "apollo-server-express";

export const typeDefs = gql`
  input LogInInput {
    code: String!
  }

  type Query {
    authUrl: String!
  }

  type Mutation {
    logIn(input: LogInInput): Viewer!
    logOut: Viewer!
  }
`;
VIEWER GRAPHQL OBJECT TYPE
Viewer is an object that is to represent the actual person looking/using our app (i.e. the person viewing our app). We’ll create an object type to represent what a viewer object is to contain. It will have the following fields and corresponding field types:
-
id: ID- a unique identifier since every user in our database is to have a unique id. -
token: String- a unique token value to help in countering Cross-Site Request Forgery, with which we’ll learn more about in Module 5 . -
avatar: String- the viewer’s avatar image URL. -
hasWallet: Boolean- abooleanvalue to indicate if the viewer has connected to the payment processor in our app (Stripe). -
didRequest: Boolean!- abooleanvalue to indicate if a request has been made from the client to obtain viewer information.
All the fields of the Viewer object type except for the didRequest field are optional. This is because the person viewing the app could be logged out , or doesn’t have an account on our platform. In this case, we won’t have any specific viewer information ( id , avatar , etc.) but we’ll still want our client to know that we did attempt to obtain viewer information. This is the reason as to why the didRequest field is a non-optional Boolean .
We’ll get a better understanding of the purpose of these fields once we start to write more of our implementation. At this moment, the src/graphql/typeDefs.ts file of our server project will look like the following:
server/src/graphql/typeDefs.ts
import { gql } from "apollo-server-express";

export const typeDefs = gql`
  type Viewer {
    id: ID
    token: String
    avatar: String
    hasWallet: Boolean
    didRequest: Boolean!
  }

  input LogInInput {
    code: String!
  }

  type Query {
    authUrl: String!
  }

  type Mutation {
    logIn(input: LogInInput): Viewer!
    logOut: Viewer!
  }
`;
VIEWER TYPESCRIPT INTERFACE
We’ll now create the corresponding TypeScript definition for a Viewer object in our TypeScript code. We’ll do this in the lib/types.ts file since the Viewer TypeScript type we’ll create will be accessed in multiple parts of our server application.
The Viewer interface type we’ll create in the lib/types.ts file will look very similar to the Viewer object type in our GraphQL schema with some minor differences such as:
- In our
ViewerTypeScript interface, we’ll label the identifying field as_idinstead ofidbecause we are to reference the same_idfield from our MongoDB database in our TypeScript code. We’ll only have the identifying field of theViewerreturn asidin a soon to be created resolver function in theViewerGraphQL object. - In our
ViewerTypeScript interface, we’ll have awalletIdfield instead ofhasWalletbecausewalletIdwill be an actualidwe’ll get from our payment processor (Stripe) and we’ll store in our database. We won’t need to pass this sensitive information to the client which is why we resolve it to the client as ahasWalletbooleanfield which is to betrueif the viewer has awalletIdorundefinedif viewer doesn’t.
With that said, the Viewer TypeScript interface we’ll create in the lib/types.ts file will look as follows:
server/src/lib/types.ts
export interface Viewer {
  _id?: string;
  token?: string;
  avatar?: string;
  walletId?: string;
  didRequest: boolean;
}
VIEWER, ID, AND HASWALLET RESOLVERS
The _id and walletId conversion to id and hasWallet in our GraphQL schema will be done by creating resolver functions for the Viewer GraphQL object. If we recall, trivial resolvers often don’t need to be declared when we simply attempt to return a value from an object argument using the same key specified in the object type (e.g. id -> viewer.id ). In this case, however, we’ll need to declare the resolver functions for the id and hasWallet fields for our GraphQL Viewer object type since we want to resolve these different fields.
We’ll add the id and hasWallet resolver functions to a Viewer object we’ll create in the viewerResolvers map within src/graphql/resolvers/Viewer/index.ts .
import { IResolvers } from "apollo-server-express";

export const viewerResolver: IResolvers = {
  Query: {
    // ...
  },
  Mutation: {
    // ...
  },
  Viewer: {
    id: () => {},
    hasWallet: () => {}
  }
};
Our id resolver function will take a viewer input argument and return the value of viewer._id . The viewer input argument will have the shape of the Viewer interface we’ve set up in the lib/types.ts so we’ll import the Viewer interface and set it as the type of the viewer argument.
import { IResolvers } from "apollo-server-express";
import { Viewer } from "../../../lib/types";

export const viewerResolver: IResolvers = {
  Query: {
    // ...
  },
  Mutation: {
    // ...
  },
  Viewer: {
    id: (viewer: Viewer): string | undefined => {
      return viewer._id;
    },
    hasWallet: () => {}
  }
};
Where is this
viewerinput argument coming from? The first positional argument of resolver functions will always be the root object returned from the parent fields . In this example, the parentlogInandlogOutmutations will return the viewer object when resolved, and the resolver functions we define in theViewerreceives this viewer object and maps the data as we expect in our GraphQL schema.
The Viewer hasWallet resolver function will receive the viewer input argument and return true if the viewer walletId exists. Otherwise, we’ll have it return undefined .
import { IResolvers } from "apollo-server-express";
import { Viewer } from "../../../lib/types";

export const viewerResolver: IResolvers = {
  Query: {
    // ...
  },
  Mutation: {
    // ...
  },
  Viewer: {
    id: (viewer: Viewer): string | undefined => {
      return viewer._id;
    },
    hasWallet: (viewer: Viewer): boolean | undefined => {
      return viewer.walletId ? true : undefined;
    }
  }
};
We could also have the
hasWallet()resolver function just returnbooleanvalues oftrueorfalse.
QUERY.AUTHURL
With the Viewer object defined in our TypeScript code and GraphQL schema, we’ll now modify the authUrl() query resolver function to return the authUrl from the Google object we’ve created in our lib/api/ folder.
In the src/graphql/resolvers/Viewer/index.ts file, we’ll import the Google object. In the authUrl() resolver function of the Query object, we’ll use a try...catch pattern to have the field simply return the authUrl field of our Google API object or throw an error.
import { IResolvers } from "apollo-server-express";
import { Google } from "../../../lib/api";

export const viewerResolver: IResolvers = {
  Query: {
    authUrl: (): string => {
      try {
        return Google.authUrl;
      } catch (error) {
        throw new Error(`Failed to query Google Auth Url: ${error}`);
      }
    }
  },
  Mutation: {
    // ...
  },
  Viewer: {
    // ...
  }
};
MUTATION.LOGIN
We’ll now modify the resolver function for the root level logIn mutation. The logIn mutation is to expect an input that contains a code property. We’ll define a TypeScript interface type to describe the shape of the arguments the logIn mutation is to expect. We’ll define this interface in a types.ts we’ll keep in the src/graphql/resolvers/Viewer/ folder.
server/
  src/
    graphql/
      resolvers/
        Viewer/
          index.ts
          types.ts
      // ...
    // ...
We’ll name the interface to describe the shape of arguments the logIn mutation is to accept LogInArgs and it will have an input property that is to be an object that has a code of type string . Since this input property is optional, we’ll say the input object might also be null .
server/src/graphql/resolvers/Viewer/types.ts
export interface LogInArgs {
  input: { code: string } | null;
}
We’ll head back to the viewerResolvers map and look to build the implementation for the logIn() resolver function.
The logIn mutation will be fired in one of two cases:
- Where the viewer signs-in with the Google authentication url and consent screen.
- Where the viewer signs-in with their cookie session.
In this lesson, we’ll only focus on the former case of a viewer being able to sign-in by going through the Google authentication/consent screen. In the logIn() resolver function, we’ll look to access the input argument and db object available as context. We’ll import the LogInArgs and Database interfaces to describe the shape of the input and db parameters respectively.
When the logIn() mutation resolver function is to resolve successfully, it’ll return a Promise that when resolved will be the Viewer object.
import { IResolvers } from "apollo-server-express";
import { Google } from "../../../lib/api";
import { Viewer, Database } from "../../../lib/types";
import { LogInArgs } from "./types";

export const viewerResolver: IResolvers = {
  Query: {
    // ...
  },
  Mutation: {
    logIn: async (
      _root: undefined,
      { input }: LogInArgs,
      { db }: { db: Database }
    ): Promise<Viewer> => {}
    // ...
  },
  Viewer: {
    // ...
  }
};
The first thing we’ll do in the logIn() resolver function is check for the presence of the code property within the input argument and set it a const of the same name. If it doesn’t exist, we’ll simply set the value of the const to null .
export const viewerResolver: IResolvers = {
  Query: {
    // ...
  },
  Mutation: {
    logIn: async (
      _root: undefined,
      { input }: LogInArgs,
      { db }: { db: Database }
    ): Promise<Viewer> => {
      const code = input ? input.code : null;
    }
    // ...
  },
  Viewer: {
    // ...
  }
};
Next, we’ll create a random string to use as a session token. We’ll want this token string to be randomly generated every time a user is logged in and will be returned/sent to the client application. The client will eventually use this token on every request it intends to make with which we’ll use to authorize that the request is coming from a valid viewer to prevent Cross-Site Request Forgery attacks. We’re going to investigate this some more in the upcoming lessons but for now, we’ll simply look to store this randomly generated token value in our database.
To do this, we’ll use the crypto module available in the Node ecosystem. The crypto module provides cryptographic functionality to help handle encrypted data. We’ll import the crypto module and create a random hex string of 16 bytes and assign its value to a constant labeled token .
import crypto from "crypto";
// ...

export const viewerResolver: IResolvers = {
  Query: {
    // ...
  },
  Mutation: {
    logIn: async (
      _root: undefined,
      { input }: LogInArgs,
      { db }: { db: Database }
    ): Promise<Viewer> => {
      const code = input ? input.code : null;
      const token = crypto.randomBytes(16).toString("hex");
    }
    // ...
  },
  Viewer: {
    // ...
  }
};
If the value for the code property in our logIn() resolver function exists (with which it will when the user has signed in via the Google authentication flow), we’ll call a function that we’ll shortly create called logInViaGoogle() and we’ll pass the code , token and db values to this function. We’ll assign the results of this function to a constant we’ll call viewer .
// ...
import { Viewer, Database, User } from "../../../lib/types";
// ...

export const viewerResolver: IResolvers = {
  Query: {
    // ...
  },
  Mutation: {
    logIn: async (
      _root: undefined,
      { input }: LogInArgs,
      { db }: { db: Database }
    ): Promise<Viewer> => {
      const code = input ? input.code : null;
      const token = crypto.randomBytes(16).toString("hex");

      const viewer: User | undefined = code
        ? await logInViaGoogle(code, token, db)
        : undefined;
    }
    // ...
  },
  Viewer: {
    // ...
  }
};
Though we’re labeling the constant we’ve just created as viewer , we’ll expect the logInViaGoogle() function to get the user information from Google’s servers, store that information in the database, and return the user document of the recently logged-in user . As a result, we’ve specified the type of the viewer constant as User or undefined . The logInViaGoogle() function will return undefined if it is unable to get the appropriate user information or store that information in the database.
Before we implement the logInViaGoogle() function, we’ll proceed and work through what the rest of the logIn() resolver function will do. We’ll check if the viewer constant we’ve created doesn’t have a value which would mean we weren’t able to sign the user in and get the appropriate information for the viewer. If that’s the case, we’ll have our logIn() resolver function simply return an object with the didRequest field set to true so the client will recognize a request has been made and no viewer information was available.
// ...
import { Viewer, Database, User } from "../../../lib/types";
// ...

export const viewerResolver: IResolvers = {
  Query: {
    // ...
  },
  Mutation: {
    logIn: async (
      _root: undefined,
      { input }: LogInArgs,
      { db }: { db: Database }
    ): Promise<Viewer> => {
      const code = input ? input.code : null;
      const token = crypto.randomBytes(16).toString("hex");

      const viewer: User | undefined = code
        ? await logInViaGoogle(code, token, db)
        : undefined;

      if (!viewer) {
        return { didRequest: true };
      }
    }
    // ...
  },
  Viewer: {
    // ...
  }
};
If the viewer returned from logInViaGoogle() does exist, we’ll return the viewer data we’ll get and we’ll also state the value of the didRequest field to true .
We’ll keep all of the work we’ve done in the logIn() resolver function within a try block and if any error was to occur, we’ll throw an error with a custom message. With all the changes we’ve made, the logIn() resolver function will look as follows:
server/src/graphql/resolvers/Viewer/index.ts
    logIn: async (
      _root: undefined,
      { input }: LogInArgs,
      { db }: { db: Database }
    ): Promise<Viewer> => {
      try {
        const code = input ? input.code : null;
        const token = crypto.randomBytes(16).toString("hex");

        const viewer: User | undefined = code
          ? await logInViaGoogle(code, token, db)
          : undefined;

        if (!viewer) {
          return { didRequest: true };
        }

        return {
          _id: viewer._id,
          token: viewer.token,
          avatar: viewer.avatar,
          walletId: viewer.walletId,
          didRequest: true
        };
      } catch (error) {
        throw new Error(`Failed to log in: ${error}`);
      }
    },
LOGINVIAGOOGLE()
To complete our logIn() resolver functionality, we’ll need to build out the logInViaGoogle() function.
We’ll create this function at the top of the file above our viewerResolvers map. The logInViaGoogle() function will receive code and token arguments of type string and a db object of interface type Database . When this asynchronous function is to be resolved successfully, we expect it to return a Promise that when resolved will return a User document from our "users" collection for the user that’s just signed in. If unsuccessful it’ll return a Promise of undefined .
const logInViaGoogle = async (
  code: string,
  token: string,
  db: Database
): Promise<User | undefined> => {};
The first thing we’ll do in the logInViaGoogle() function is call the Google.logIn() function we created within our lib/api/ folder and we’ll pass the code along. We’ll destruct the user data from this function when it resolves successfully. If this user instance doesn’t exist, we’ll throw an error that says "Google login error" .
const logInViaGoogle = async (
  code: string,
  token: string,
  db: Database
): Promise<User | undefined> => {
  const { user } = await Google.logIn(code);

  if (!user) {
    throw new Error("Google login error");
  }
};
If the user is available, we can begin to access the fields from the user object we’ll need, such as the user email, display name, and avatar. Unfortunately, Google returns the information we’re looking for within an object that has multiple levels of nested fields and information that’s a little complicated to dig through. We’re going to write a decent amount of code to verify the information we’re looking for exists and we’re able to get what we’re looking for.
We’ll first attempt to get the list of user names, photos, and emails.
const logInViaGoogle = async (
  code: string,
  token: string,
  db: Database
): Promise<User | undefined> => {
  const { user } = await Google.logIn(code);

  if (!user) {
    throw new Error("Google login error");
  }

  // Names/Photos/Email Lists
  const userNamesList = user.names && user.names.length ? user.names : null;
  const userPhotosList = user.photos && user.photos.length ? user.photos : null;
  const userEmailsList =
    user.emailAddresses && user.emailAddresses.length ? user.emailAddresses : null;
};
From the list of usernames, we’ll get the display name from the first user name.
const logInViaGoogle = async (
  code: string,
  token: string,
  db: Database
): Promise<User | undefined> => {
  const { user } = await Google.logIn(code);

  if (!user) {
    throw new Error("Google login error");
  }

  // Names/Photos/Email Lists
  const userNamesList = user.names && user.names.length ? user.names : null;
  const userPhotosList = user.photos && user.photos.length ? user.photos : null;
  const userEmailsList =
    user.emailAddresses && user.emailAddresses.length ? user.emailAddresses : null;

  // User Display Name
  const userName = userNamesList ? userNamesList[0].displayName : null;
};
From the list of usernames, we’ll also get the user id of the first username as follows:
const logInViaGoogle = async (
  code: string,
  token: string,
  db: Database
): Promise<User | undefined> => {
  const { user } = await Google.logIn(code);

  if (!user) {
    throw new Error("Google login error");
  }

  // Names/Photos/Email Lists
  const userNamesList = user.names && user.names.length ? user.names : null;
  const userPhotosList = user.photos && user.photos.length ? user.photos : null;
  const userEmailsList =
    user.emailAddresses && user.emailAddresses.length ? user.emailAddresses : null;

  // User Display Name
  const userName = userNamesList ? userNamesList[0].displayName : null;

  // User Id
  const userId =
    userNamesList && userNamesList[0].metadata && userNamesList[0].metadata.source
      ? userNamesList[0].metadata.source.id
      : null;
};
We’ll get the user avatar from the url field from the first item in the photos list.
const logInViaGoogle = async (
  code: string,
  token: string,
  db: Database
): Promise<User | undefined> => {
  const { user } = await Google.logIn(code);

  if (!user) {
    throw new Error("Google login error");
  }

  // Names/Photos/Email Lists
  const userNamesList = user.names && user.names.length ? user.names : null;
  const userPhotosList = user.photos && user.photos.length ? user.photos : null;
  const userEmailsList =
    user.emailAddresses && user.emailAddresses.length ? user.emailAddresses : null;

  // User Display Name
  const userName = userNamesList ? userNamesList[0].displayName : null;

  // User Id
  const userId =
    userNamesList && userNamesList[0].metadata && userNamesList[0].metadata.source
      ? userNamesList[0].metadata.source.id
      : null;

  // User Avatar
  const userAvatar =
    userPhotosList && userPhotosList[0].url ? userPhotosList[0].url : null;
};
Finally, we’ll get the user email from the first email in the emails list.
const logInViaGoogle = async (
  code: string,
  token: string,
  db: Database
): Promise<User | undefined> => {
  const { user } = await Google.logIn(code);

  if (!user) {
    throw new Error("Google login error");
  }

  // Names/Photos/Email Lists
  const userNamesList = user.names && user.names.length ? user.names : null;
  const userPhotosList = user.photos && user.photos.length ? user.photos : null;
  const userEmailsList =
    user.emailAddresses && user.emailAddresses.length ? user.emailAddresses : null;

  // User Display Name
  const userName = userNamesList ? userNamesList[0].displayName : null;

  // User Id
  const userId =
    userNamesList && userNamesList[0].metadata && userNamesList[0].metadata.source
      ? userNamesList[0].metadata.source.id
      : null;

  // User Avatar
  const userAvatar =
    userPhotosList && userPhotosList[0].url ? userPhotosList[0].url : null;

  // User Email
  const userEmail =
    userEmailsList && userEmailsList[0].value ? userEmailsList[0].value : null;
};
If either the userId , userName , userAvatar , or userEmail constants we’ve set-up are unavailable - we’ll throw an error that says "Google login error" .
const logInViaGoogle = async (
  code: string,
  token: string,
  db: Database
): Promise<User | undefined> => {
  const { user } = await Google.logIn(code);

  if (!user) {
    throw new Error("Google login error");
  }

  // Names/Photos/Email Lists
  const userNamesList = user.names && user.names.length ? user.names : null;
  const userPhotosList = user.photos && user.photos.length ? user.photos : null;
  const userEmailsList =
    user.emailAddresses && user.emailAddresses.length ? user.emailAddresses : null;

  // User Display Name
  const userName = userNamesList ? userNamesList[0].displayName : null;

  // User Id
  const userId =
    userNamesList && userNamesList[0].metadata && userNamesList[0].metadata.source
      ? userNamesList[0].metadata.source.id
      : null;

  // User Avatar
  const userAvatar =
    userPhotosList && userPhotosList[0].url ? userPhotosList[0].url : null;

  // User Email
  const userEmail =
    userEmailsList && userEmailsList[0].value ? userEmailsList[0].value : null;

  if (!userId || !userName || !userAvatar || !userEmail) {
    throw new Error("Google login error");
  }
};
There’s a lot of code we’ve just written in the logInViaGoogle() function but the main takeaway is we’re just trying to get the id , name , avatar , and email of the user signing in with Google OAuth.
Once we have this information about the user that has signed in. We’ll first attempt to check if this user already exists in our database. If it does, we’ll update the user information in the database to the latest information we get from Google. Luckily there is a Mongo function called findOneAndUpdate() that can easily accomplish this task. We’ll set up the function and assign the result to a constant we’ll call updateRes .
const logInViaGoogle = async (
  code: string,
  token: string,
  db: Database
): Promise<User | undefined> => {
  //
  // getting user information
  //

  const updateRes = await db.users.findOneAndUpdate();
};
In the first argument of findOneAndUpdate() , we’ll pass { _id: userId } . This is the filter object wherein the findOneAndUpdate() method, Mongo will select the first document that matches this parameter. In this instance, we want to find the user document where the document _id field matches the userId we’ve obtained from Google.
const logInViaGoogle = async (
  code: string,
  token: string,
  db: Database
): Promise<User | undefined> => {
  //
  // getting user information
  //

  const updateRes = await db.users.findOneAndUpdate({ _id: userId });
};
In the second argument, we’ll use the $set operator to specify how we want to update the selected document. If we’ve found a document with the matching _id , we’ll simply update the name , avatar , and contact fields of our document with the latest Google data. We’ll also update the token field with the most recent randomly generated session token that’s passed in as an argument to our logInViaGoogle() function.
And lastly, in the third argument, we’ll specify { returnOriginal: false } which just means we want to return the updated document (not the original document) and assign the result to the updateRes constant we’ve set-up.
const logInViaGoogle = async (
  code: string,
  token: string,
  db: Database
): Promise<User | undefined> => {
  //
  // getting user information
  //

  const updateRes = await db.users.findOneAndUpdate(
    { _id: userId },
    {
      $set: {
        name: userName,
        avatar: userAvatar,
        contact: userEmail,
        token
      }
    },
    { returnOriginal: false }
  );
};
If we weren’t able to find an already existing user, we’ll want to insert and add a new user into our database. We can access the returned value from the value field of the updateRes object and if it doesn’t exist, we’ll look to insert a new document.
const logInViaGoogle = async (
  code: string,
  token: string,
  db: Database
): Promise<User | undefined> => {
  //
  // getting user information
  //

  const updateRes = await db.users.findOneAndUpdate(
    { _id: userId },
    {
      $set: {
        name: userName,
        avatar: userAvatar,
        contact: userEmail,
        token
      }
    },
    { returnOriginal: false }
  );

  let viewer = updateRes.value;

  if (!viewer) {
    // insert a new user
  }
};
We’ll use the insertOne() function that Mongo provides to insert a new document to the "users" collection. insertOne() takes a document object and inserts it directly into the collection.
We’ll want to insert a document that matches the setup for how a user document is to be shaped. We’ll specify the _id , token , name , avatar , and contact fields. We’ll set income to 0 since a new user will have no income. The bookings and listings of the new user will be empty arrays as well.
const logInViaGoogle = async (
  code: string,
  token: string,
  db: Database
): Promise<User | undefined> => {
  //
  // getting user information
  //

  const updateRes = await db.users.findOneAndUpdate(
    { _id: userId },
    {
      $set: {
        name: userName,
        avatar: userAvatar,
        contact: userEmail,
        token
      }
    },
    { returnOriginal: false }
  );

  let viewer = updateRes.value;

  if (!viewer) {
    const insertResult = await db.users.insertOne({
      _id: userId,
      token,
      name: userName,
      avatar: userAvatar,
      contact: userEmail,
      income: 0,
      bookings: [],
      listings: []
    });
  }
};
The document that has been inserted with the insertOne() method can be accessed with the .ops array from the returned value. We’ll get the first item from the array (since we’re only inserting a single document) and set it as the value of the viewer variable. At the end of our logInViaGoogle() function, we’ll simply return the viewer object that arose from either updating an existing document or inserting a new document.
In its entirety, the logInViaGoogle() function will appear as follows:
server/src/graphql/resolvers/Viewer/index.ts
const logInViaGoogle = async (
  code: string,
  token: string,
  db: Database
): Promise<User | undefined> => {
  const { user } = await Google.logIn(code);

  if (!user) {
    throw new Error("Google login error");
  }

  // Name/Photo/Email Lists
  const userNamesList = user.names && user.names.length ? user.names : null;
  const userPhotosList = user.photos && user.photos.length ? user.photos : null;
  const userEmailsList =
    user.emailAddresses && user.emailAddresses.length
      ? user.emailAddresses
      : null;

  // User Display Name
  const userName = userNamesList ? userNamesList[0].displayName : null;

  // User Id
  const userId =
    userNamesList &&
    userNamesList[0].metadata &&
    userNamesList[0].metadata.source
      ? userNamesList[0].metadata.source.id
      : null;

  // User Avatar
  const userAvatar =
    userPhotosList && userPhotosList[0].url ? userPhotosList[0].url : null;

  // User Email
  const userEmail =
    userEmailsList && userEmailsList[0].value ? userEmailsList[0].value : null;

  if (!userId || !userName || !userAvatar || !userEmail) {
    throw new Error("Google login error");
  }

  const updateRes = await db.users.findOneAndUpdate(
    { _id: userId },
    {
      $set: {
        name: userName,
        avatar: userAvatar,
        contact: userEmail,
        token
      }
    },
    { returnOriginal: false }
  );

  let viewer = updateRes.value;

  if (!viewer) {
    const insertResult = await db.users.insertOne({
      _id: userId,
      token,
      name: userName,
      avatar: userAvatar,
      contact: userEmail,
      income: 0,
      bookings: [],
      listings: []
    });

    viewer = insertResult.ops[0];
  }

  return viewer;
};
Our logIn mutation will now do as intended and:
- Authenticate with Google OAuth.
- Either update or insert the viewer in the database.
- And return the viewer and viewer details for the client to receive.
MUTATION.LOGOUT
The last thing we’ll do is update the resolver function for the root level logOut mutation. Since we’re not dealing with cookies just yet, this will be simple and we’ll have the logOut() resolver return an empty viewer object with only the didRequest field set to true . We’ll keep the contents of the logOut() function within a try...catch statement to keep things consistent.
export const viewerResolver: IResolvers = {
  Query: {
    // ...
  },
  Mutation: {
    // ...,
    logOut: (): Viewer => {
      try {
        return { didRequest: true };
      } catch (error) {
        throw new Error(`Failed to log out: ${error}`);
      }
    }
  },
  Viewer: {
    // ...
  }
};
Okay! That was a lot of code. The resolvers for authenticating with Google OAuth are the most complicated resolver functions we have in our app. At this moment and with our server running, by querying the authUrl field, we’ll be able to see the authenticated URL that Google returns to us for our TinyHouse project. If we were to place the URL in a browser window when not logged into Google, we’ll be presented with the Consent Form that says we can sign-in to the TinyHouse application!
In the next lesson, we’ll begin to work on the client-side to consume what we’ve done on the server.
BUILDING THE UI FOR LOGIN
google_logo.jpgimage asset used in this lesson can be found - here.
We’ll now switch over to work in our React application and have it communicate with the server to allow a user to sign-in via Google OAuth.
The first thing we’ll do is create the GraphQL documents for the new GraphQL queries and mutations we established on the server. In Part II of this course, we’ll be grouping all the GraphQL documents of our app within a graphql/ folder we’ll create in a src/lib/ folder. In src/lib/graphql/ , we’ll create two separate folders ( queries/ and mutations/ ) to contain the documents for the queries and mutations of our GraphQL API respectively.
client/
  // ...
  src/
    lib/
      graphql/
        queries/
        mutations/
    // ...
  // ...
We’ve created three new GraphQL root-level fields so we’ll create folders for each of these fields. We’ll create the AuthUrl/ folder within the queries/ folder and is to have an index.ts file which is to contain the authUrl query document. We’ll create a LogIn/ folder and a LogOut/ folder, within mutations/ , to contain the LogIn/ and LogOut/ mutation documents respectively. We’ll have both the LogIn/ and LogOut/ folder contain index.ts files.
client/
  // ...
  src/
    lib/
      graphql/
        queries/
          AuthUrl/
            index.ts
        mutations/
          LogIn/
            index.ts
          LogOut/
            index.ts
    // ...
  // ...
AUTHURL , LOGIN , LOGOUT
In the AuthUrl/index.ts file within lib/graphql/queries/ , we’ll import the gql tag from the apollo-boost package and export a GraphQL constant for making a query to the authUrl field. We’ll name this query AuthUrl .
client/src/lib/graphql/queries/AuthUrl/index.ts
import { gql } from "apollo-boost";

export const AUTH_URL = gql`
  query AuthUrl {
    authUrl
  }
`;
In the LogIn/index.ts file within lib/graphql/mutations/ , we’ll import the gql tag and export a constant to make our logIn mutation. We’ll name the mutation LogIn and state that it must accept an input argument with which the mutation field will accept as well. We’ll have all the fields of the Viewer be queried from the result of the mutation - id , token , avatar , hasWallet , and didRequest .
client/src/lib/graphql/mutations/LogIn/index.ts
import { gql } from "apollo-boost";

export const LOG_IN = gql`
  mutation LogIn($input: LogInInput) {
    logIn(input: $input) {
      id
      token
      avatar
      hasWallet
      didRequest
    }
  }
`;
In the LogOut/index.ts file within lib/graphql/mutations/ , we’ll import the gql tag and export a constant to contain the LogOut mutation. We’ll also have all the fields from the Viewer object queried from our mutation result.
client/src/lib/graphql/mutations/LogOut/index.ts
import { gql } from "apollo-boost";

export const LOG_OUT = gql`
  mutation LogOut {
    logOut {
      id
      token
      avatar
      hasWallet
      didRequest
    }
  }
`;
With the GraphQL query and mutation documents defined in our client, we can autogenerate the corresponding TypeScript definitions with our codegen scripts. We’ll first need to modify the codegen:generate script. In Part I of the course we had our gql documents within .tsx files in our src/ folder. In Part II, we are to keep all GraphQl documents in their own .ts files within the lib/graphql folder.
We’ve also mentioned in Part I how the apollo codegen utility autogenerates a global types file that contains enum and input object type values of the GraphQL API and is kept in root of the client project by default. In Part II of this course, we’ll have the global types file be kept within the src/lib/graphql/ folder. So we’ll apply the --globalTypesFile option and state the file will be in src/lib/grapqhl/globalTypes.ts .
With these changes, the codegen:generate script in our client’s package.json file will look like the following:
"codegen:generate": " npx apollo client:codegen
  --localSchemaFile=schema.json
  --includes=src/**/*.ts
  --globalTypesFile=./src/lib/graphql/globalTypes.ts
  --target=typescript
"
The
codegen:generatescript is broken down in multiline format above for easier readability. In the clientpackage.jsonfile, thecodegen:generatescript is prepared in a single line.
In our terminal, we’ll run the codegen:schema command to re-generate the schema.json file in our client project.
npm run codegen:schema
We’ll then run the codegen:generate command to generate the TypeScript definitions from our GraphQL queries and mutations.
npm run codegen:generate
When complete, we’ll notice the auto-generated TypeScript definitions within the folders where we’ve kept our GraphQL documents!
<LOGIN />
We’ll want our users to log-in via a /login path of our client application. And we’ll want a corresponding <Login /> component to be shown in this path.
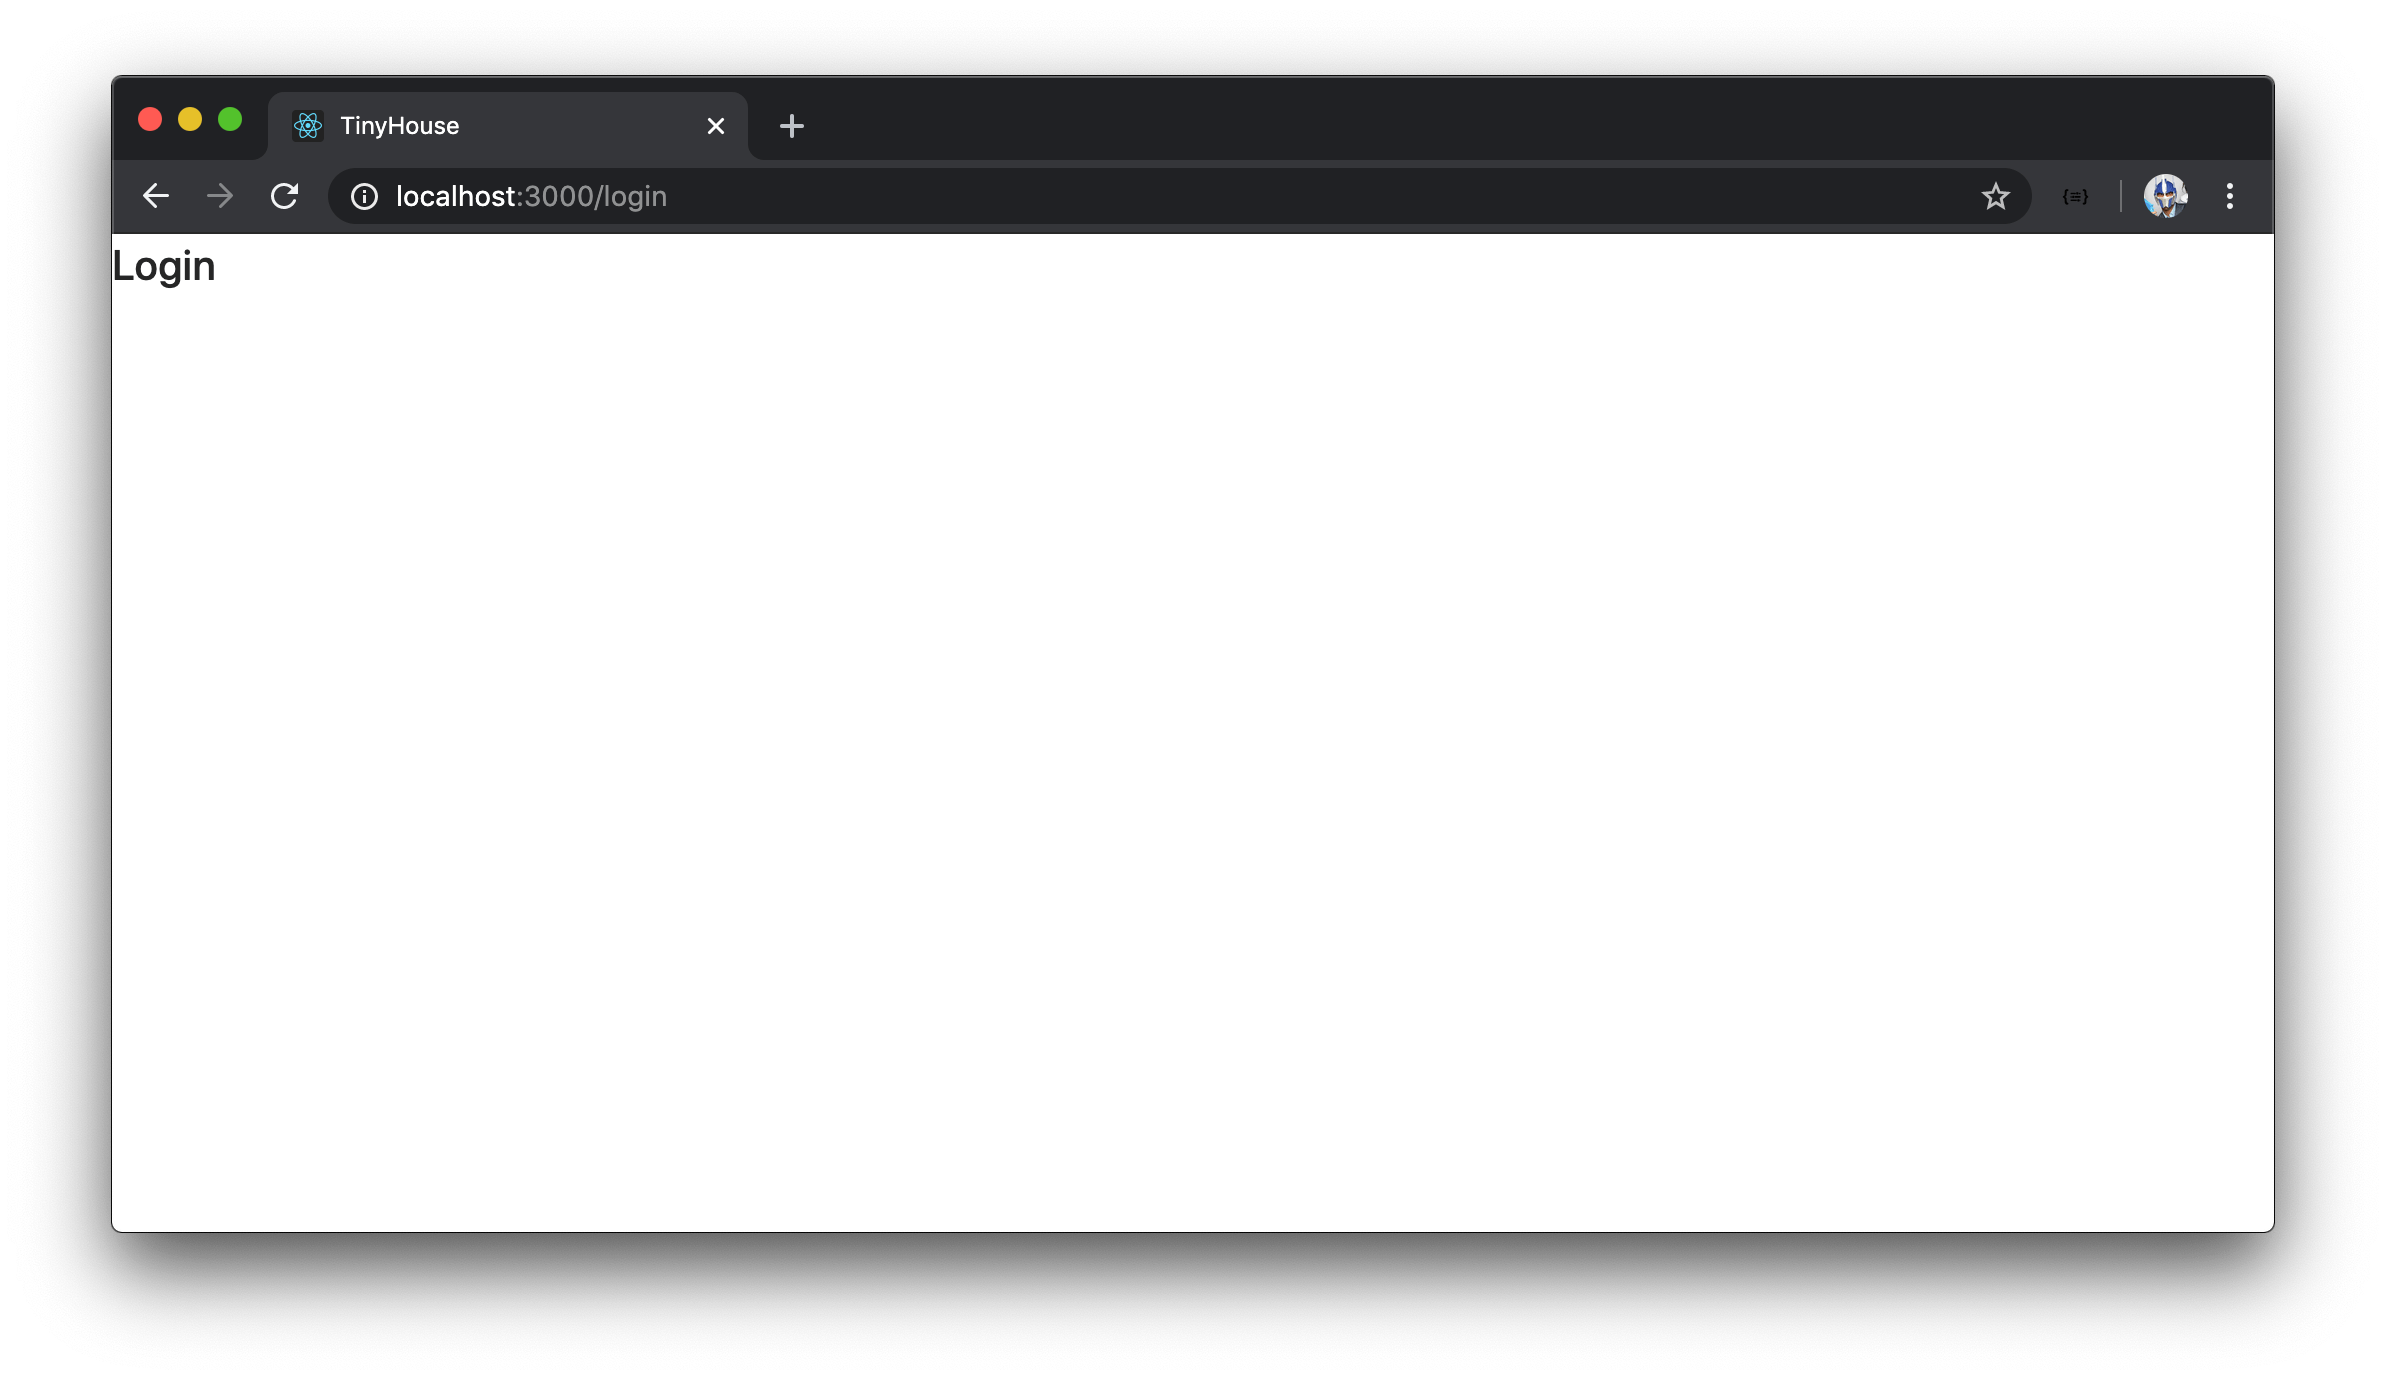
We’ll first create this <Login /> component in our src/sections/ folder, and for now, simply have this <Login /> component display a header element that says Login .
import React from "react";

export const Login = () => {
  return (
    <div>
      <h2>Login</h2>
    </div>
  );
};
In the src/sections/index.ts file, we’ll be sure to re-export the <Login /> component function.
client/src/sections/index.ts
export * from "./Login";
We’ll then import the <Login /> component in our src/index.tsx file and create a new <Route /> that will have the <Login /> component be shown in the /login path.
import { Home, Host, Listing, Listings, Login, NotFound, User } from "./sections";

const App = () => {
  return (
    <Router>
      <Switch>
        {/* ... */}
        <Route exact path="/login" component={Login} />
        {/* ... */}
      </Switch>
    </Router>
  );
};
If we were to go to http://localhost:3000/login with our React client application running, we’ll see our <Login /> component rendered.
Before we start to query for the Google authentication URL and conduct the logIn mutation, we’ll make our <Login /> component more presentable. We’ll want our application’s login page to look something like the following.
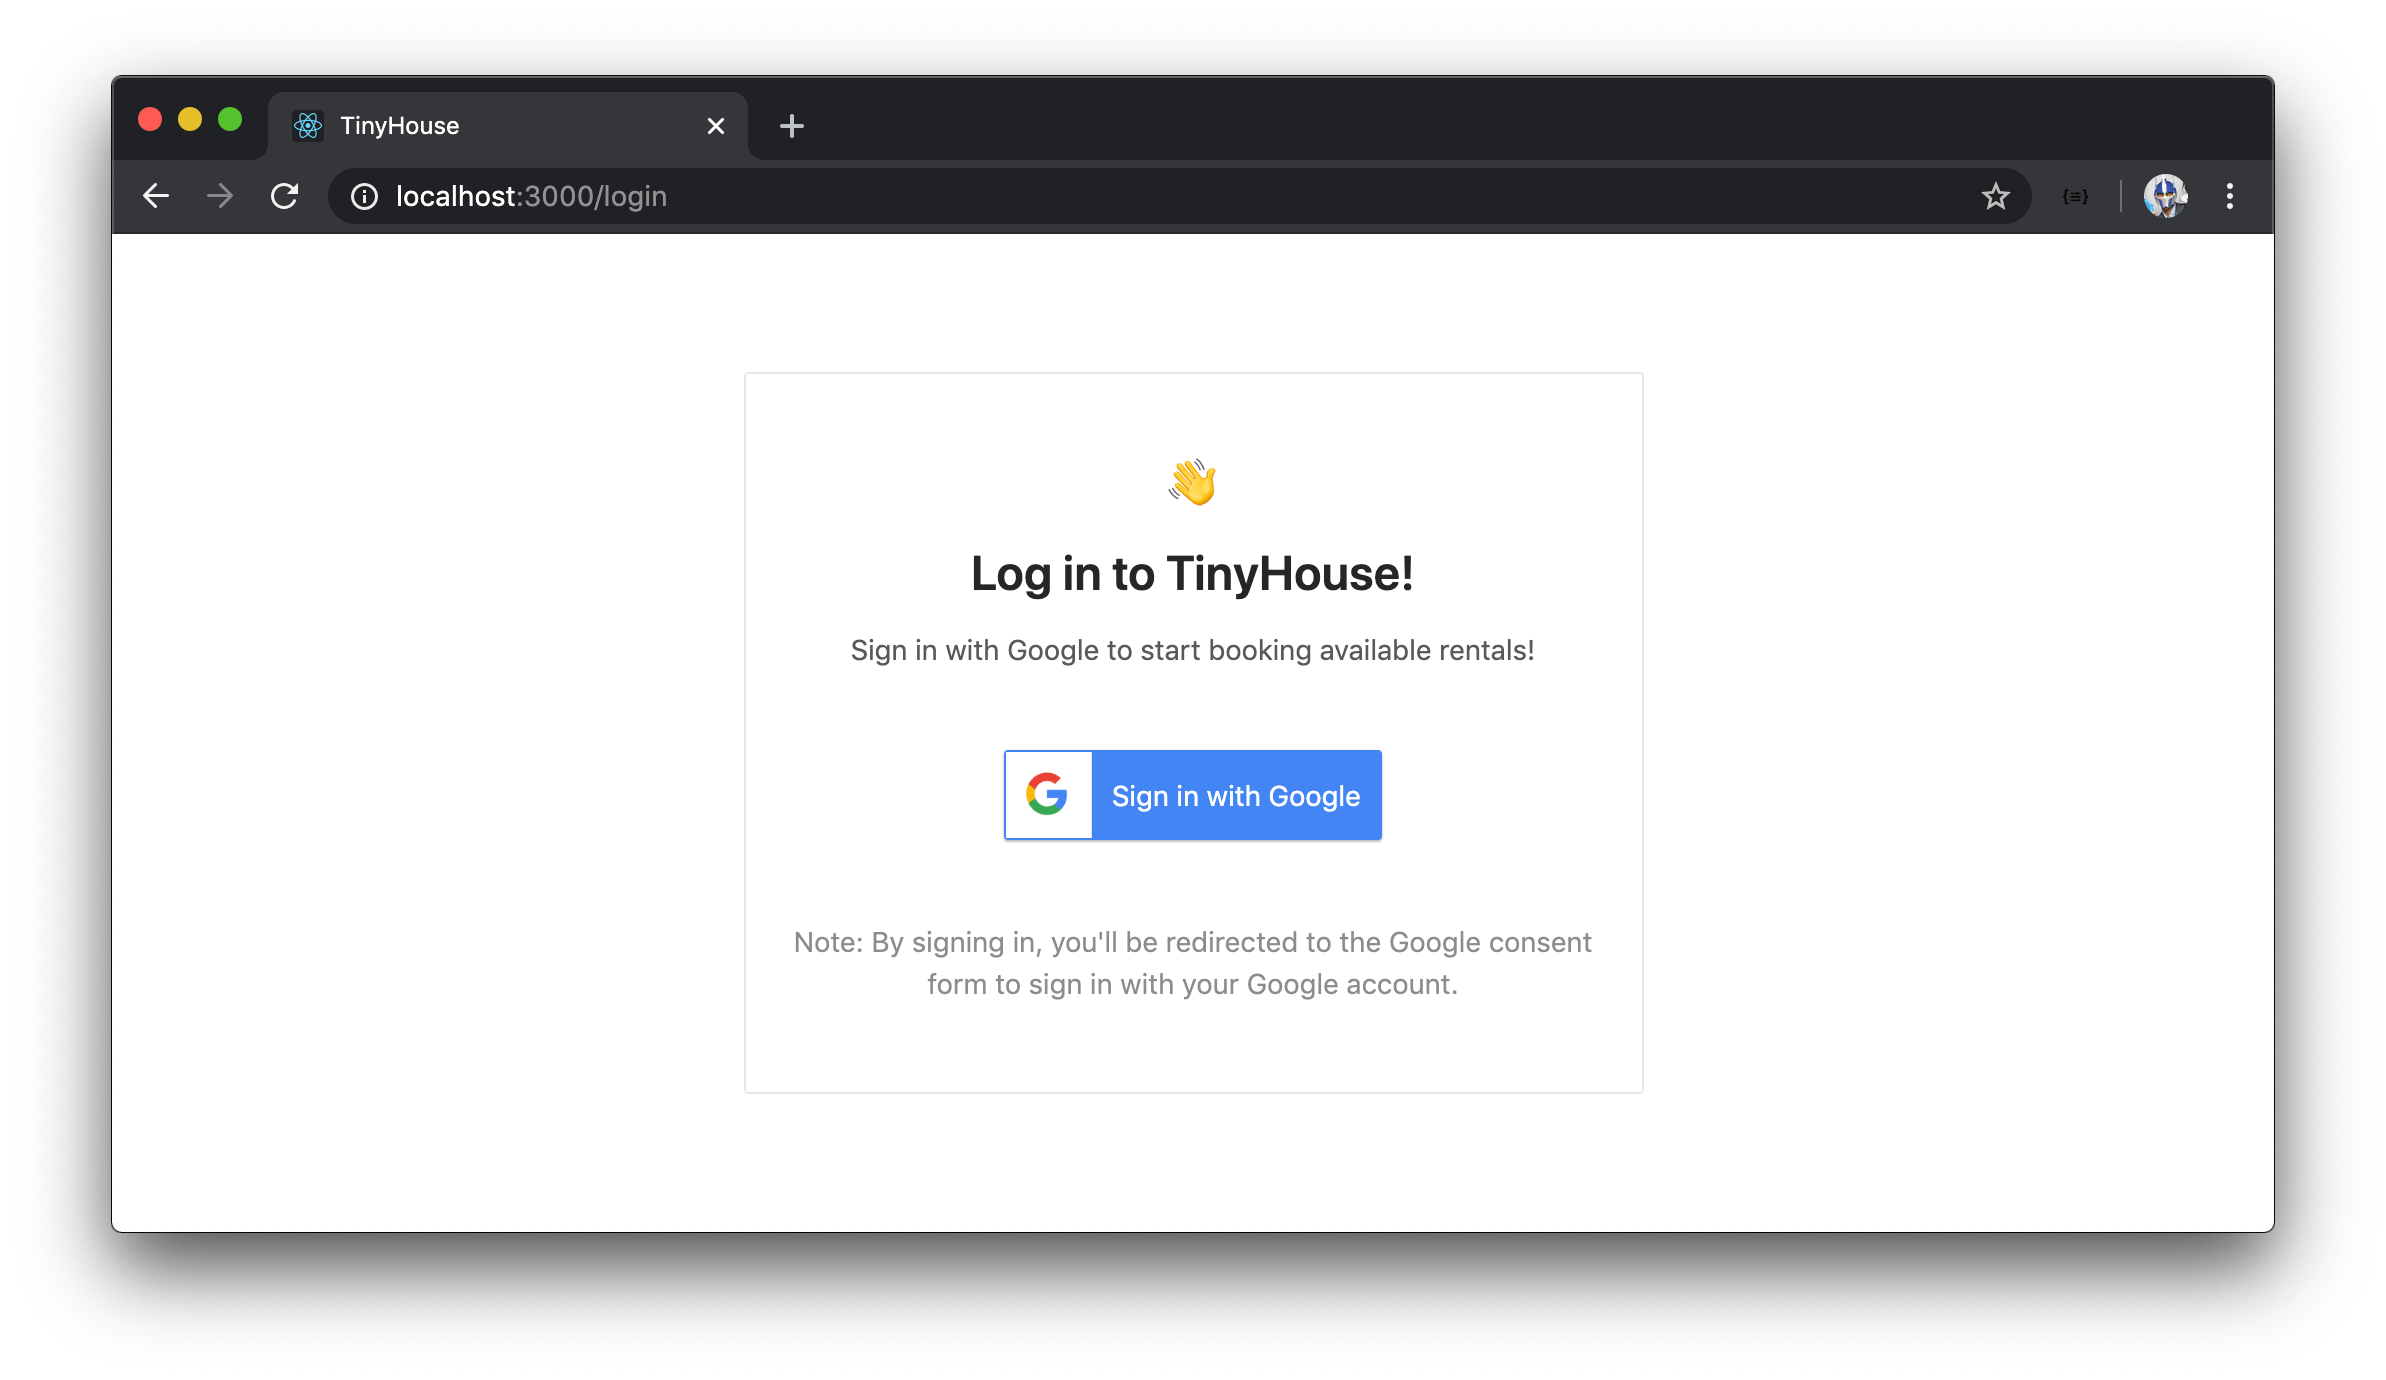
It’ll have a simple card with some details telling the user to sign if they’re interested in booking rentals. We’ll also add some secondary text that tells the user if they sign in - they’ll be taken to Google’s consent form.
The three main components we’re going to use from Ant Design for this page are the <Layout /> , <Card /> , and <Typography /> components.
- The
<Layout />component helps handle the overall layout of a page. - The
<Card />component is a simple rectangular container (i.e. a card). - The
<Typography />component gives us some simple styles for headings, body texts, and lists.
When we build the markup, we’re also going to use some CSS classes that we’ve already created to add some additional custom styling.
Let’s begin creating the UI of our <Login /> component.
Note: We use an image asset labeled
google-logo.jpgin thesrc/sections/Login/assets/folder for the sign-in button. Find a source for this image asset - here.
In the src/sections/Login/index.tsx file, we’ll first import the <Card /> , <Layout /> and <Typography /> components from Ant Design. We’ll also import the google-logo.jpg asset from the adjacent assets/ folder.
client/src/sections/Login/index.tsx
import { Card, Layout, Typography } from "antd";

// Image Assets
import googleLogo from "./assets/google_logo.jpg";
We’ll destruct the child <Content /> component from <Layout /> and the child <Text /> and <Title /> components from the parent <Typography /> .
client/src/sections/Login/index.tsx
const { Content } = Layout;
const { Text, Title } = Typography;
In our <Login /> component’s return statement, we’ll return the <Content /> component. The <Content /> component will have a <Card /> component as a child. The <Card /> component will have a <div /> element that is to be the intro section. The intro section will display a <Title /> where the wave emoji is shown and another <Title /> that says "Log In to TinyHouse" . There’ll also be a text statement that is to say "Sign in with Google to start booking available rentals!" .
import React from "react";
import { Card, Layout, Typography } from "antd";

// Image Assets
import googleLogo from "./assets/google_logo.jpg";

const { Content } = Layout;
const { Text, Title } = Typography;

export const Login = () => {
  return (
    <Content className="log-in">
      <Card className="log-in-card">
        <div className="log-in-card__intro">
          <Title level={3} className="log-in-card__intro-title">
            <span role="img" aria-label="wave">
              👋
            </span>
          </Title>
          <Title level={3} className="log-in-card__intro-title">
            Log in to TinyHouse!
          </Title>
          <Text>Sign in with Google to start booking available rentals!</Text>
        </div>
      </Card>
    </Content>
  );
};
Outside of the intro section and in the <Card /> component, we’ll have a button that will have the google image and a <span /> that says "Sign in with Google" . Finally, we’ll have secondary text that will state "By signing in, you'll be redirected to the Google consent form to sign in with your Google account" .
At this point, our <Login /> component in the src/sections/Login/index.tsx file will look like the following:
client/src/sections/Login/index.tsx
import React from "react";
import { Card, Layout, Typography } from "antd";

// Image Assets
import googleLogo from "./assets/google_logo.jpg";

const { Content } = Layout;
const { Text, Title } = Typography;

export const Login = () => {
  return (
    <Content className="log-in">
      <Card className="log-in-card">
        <div className="log-in-card__intro">
          <Title level={3} className="log-in-card__intro-title">
            <span role="img" aria-label="wave">
              👋
            </span>
          </Title>
          <Title level={3} className="log-in-card__intro-title">
            Log in to TinyHouse!
          </Title>
          <Text>Sign in with Google to start booking available rentals!</Text>
        </div>
        <button className="log-in-card__google-button">
          <img
            src={googleLogo}
            alt="Google Logo"
            className="log-in-card__google-button-logo"
          />
          <span className="log-in-card__google-button-text">Sign in with Google</span>
        </button>
        <Text type="secondary">
          Note: By signing in, you'll be redirected to the Google consent form to sign in
          with your Google account.
        </Text>
      </Card>
    </Content>
  );
};
To help have the contents in the <Login /> component centered in the middle of the page, we’ll make a small change in the root src/index.tsx file. We’ll import the <Layout /> component from Ant Design and wrap our <Switch /> statement with the <Layout /> component that has an id of app .
// ...
import { Layout } from "antd";
// ...

const App = () => {
  return (
    <Router>
      <Layout id="app">
        <Switch>{/* ... */}</Switch>
      </Layout>
    </Router>
  );
};
When we take a look at the /login route of our React application, we’ll now see the login page look like the way we want it to.
Great! In the next lesson, we’ll see how we can manually make our authentication URL query when the user clicks the Sign in with Google button.
To reiterate, markup (i.e. HTML/JSX) and CSS/styling is not a primary lesson of this course . As a result, we’ve provided all the custom CSS we’ll need from the beginning and simply reference/use them when we prepare the markup for our components.
EXECUTING LOGIN
With the UI of our <Login /> component mostly prepared, we’ll now handle how we can make the authUrl query to direct the user to the Google consent form. We’ll then look to handle the response when the consent form redirects a signed-in user back to our client application.
VIEWER STATE OBJECT
Just like how we have the concept of a Viewer in our server, we’ll create the same Viewer concept in our client (i.e. the person viewing the app). This Viewer object on the client will determine whether the user has been logged in, and the id and avatar of this user is available, as well whether the user has connected to their Stripe account.
We’ll create the Viewer interface type in a types.ts file within the src/lib/ folder which is to be the file we’ll keep type definitions that is to be accessed in multiple parts of the client app.
client/
  // ...
  src/
    lib/
      // ...
      types.ts
    // ...
  // ...
The Viewer interface we’ll create will have the same properties as we’ve seen before - id , token , avatar , hasWallet , and didRequest .
client/src/lib/types.ts
export interface Viewer {
  id: string | null;
  token: string | null;
  avatar: string | null;
  hasWallet: boolean | null;
  didRequest: boolean;
}
For most of the Viewer fields, null means the fields requested is not available. In our logIn mutation, we’re requesting all the fields within the Viewer object type and if they’re not available, they will come back as null values.
In the main starting point of our app, the src/index.tsx file, we’ll import the Viewer interface and we’ll use the useState Hook to create a viewer state object that the child components of <App /> will be able to access and use. We’ll initialize this viewer state object with null values for all the fields except for the didRequest field which will be given a false boolean value.
In the useState Hook, we’ll also destruct a setViewer() function which will be used to update the state viewer object.
import React, { useState } from "react";
// ...
import { Viewer } from "./lib/types";

const initialViewer: Viewer = {
  id: null,
  token: null,
  avatar: null,
  hasWallet: null,
  didRequest: false
};

const App = () => {
  const [viewer, setViewer] = useState<Viewer>(initialViewer);
  ...
};
We’ll want to have the setViewer() function be available in the <Login /> component so the client viewer object can be updated after the logIn mutation runs. To have the setViewer() function be available in the Login component we can take advantage of React Router’s render props pattern and pass in the setViewer() function.
<Route exact path="/login" render={props => <Login {...props} setViewer={setViewer} />} />
React Router has now introduced Hooks! Be sure to check out the React Router Hooks video in Module 15 of the course to highlight how the above can be done with Hooks.
<LOGIN />
The <Login /> component now expects a setViewer prop with which we should check for. In the <Login /> component file, we’ll create a Props interface and state that setViewer is a prop it will receive. The setViewer prop is to be a function that receives a viewer object with which it uses to update the viewer state property and won’t return anything (i.e. void ). We have the interface for what represents a viewer in our client so we’ll import this Viewer interface and assign it as the type of the viewer argument within the setViewer function prop type. We’ll then destruct the setViewer prop from the props argument of the <Login /> component function.
import React from "react";
import { Card, Layout, Typography } from "antd";
import { Viewer } from "../../lib/types";

interface Props {
  setViewer: (viewer: Viewer) => void;
}

export const Login = ({ setViewer }: Props) => {
  // ...
};
MANUAL QUERY OF AUTHURL
We’ll continue to work on the <Login /> component. The first thing we’ll look to tackle is how we can make the query for the authentication URL from Google Sign-in/OAuth and direct our user to this URL when they attempt to sign-in.
We’ve created the authUrl field in our GraphQL API that will provide this authentication URL. We know that the useQuery Hook from React Apollo runs a query upon component mount. That isn’t what we want to do here. In this context, we’ll rather have the authUrl query fired on the click event of the Sign in with Google Button.
To manually fire a query upon an event other than component rendering, React Apollo gives us two options to do so:
- Use the
useLazyQueryHook - Run the
query()function from theclientobject obtained from theuseApolloClientHook.
The
useQueryanduseLazyQueryHooks leverage and use theclientobject that can be accessed directly from theuseApolloClientHook.
We’ll import and use the useApolloClient Hook. At the top of the <Login /> component, we’ll run useApolloClient() to get the client object.
// ...
import { useApolloClient } from "@apollo/react-hooks";
// ...

export const Login = ({ setViewer }: Props) => {
  const client = useApolloClient();
  // ...
};
With this client object, we have access to a query() function that will allow us to run the authUrl query manually. With that said, we’ll create a handleAuthorize() component function that will fire when the user clicks the Sign in with Google button in our <Login> component template. We’ll attach this function as a click listener to the button.
export const Login = ({ setViewer }: Props) => {
  const client = useApolloClient();

  const handleAuthorize = async () => {};

  return (
    <Content className="log-in">
      {/* ... */}
      <button className="log-in-card__google-button" onClick={handleAuthorize}>
        {/* ... */}
      </button>
      {/* ... */}
    </Content>
  );
};
In the handleAuthorize() function, we’ll want to use the client object from our useApolloClient Hook to request the authUrl query. First, we’ll need to import the authUrl query document from the src/lib/graphql/ folder.
client/src/sections/Login/index.tsx
import { AUTH_URL } from "../../lib/graphql/queries";
We’ll also import the corresponding type definitions for the authUrl query data.
client/src/sections/Login/index.tsx
import { AuthUrl as AuthUrlData } from "../../lib/graphql/queries/AuthUrl/__generated__/AuthUrl";
In the handleAuthorize() function, we’ll have a try...catch statement. The try statement will use the client object to make our query. The query() function from client will appear similar to how the useQuery Hook behaves. It accepts a type variable for the data (and variables) of the query and an options argument where we can pass in the query document. It returns a result of options where in this case, we’re only interested in returning the data from the query.
const handleAuthorize = async () => {
  try {
    const { data } = await client.query<AuthUrlData>({
      query: AUTH_URL
    });
  } catch {}
};
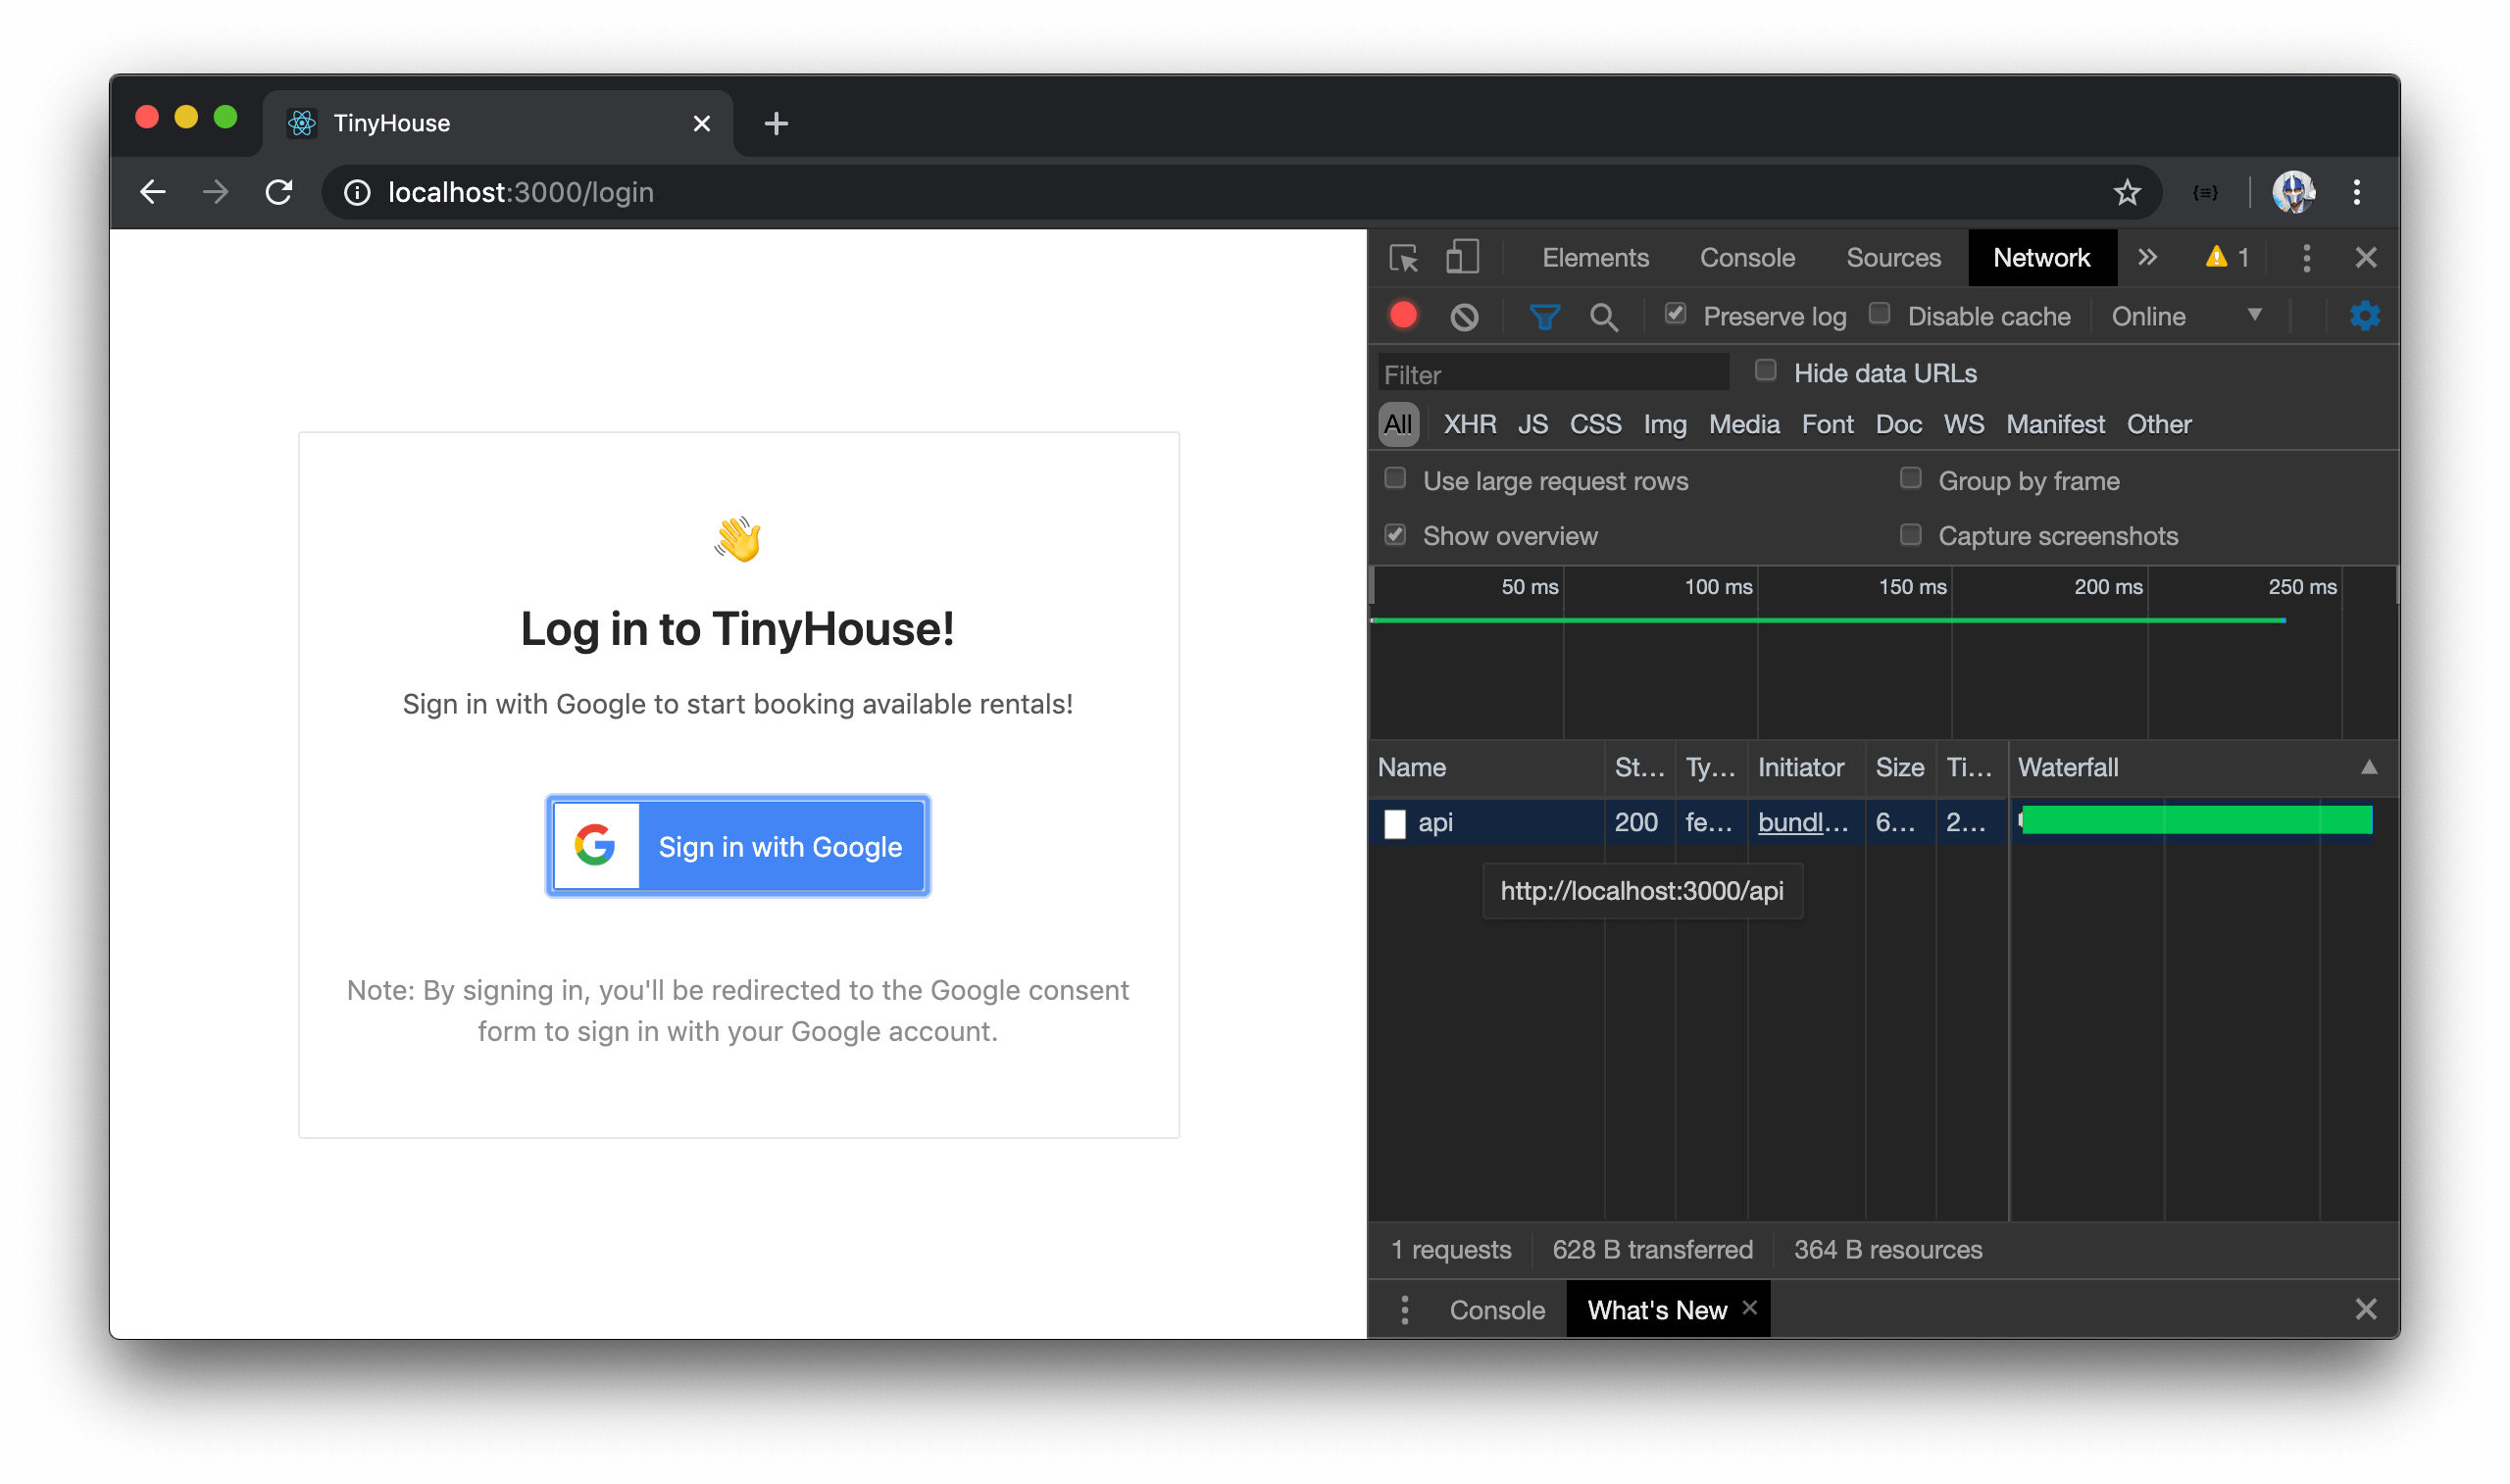
With our client application running, if we were to head over the login page and click the Sign in with Google button, we’ll notice the API call being made in our browsers developer console.
We’ll need to have our app be redirected to the url that’s returned from the authUrl query. To simply redirect our app to the new URL, we’ll use the window.location.href property and set it to the data.authUrl value.
const handleAuthorize = async () => {
  try {
    const { data } = await client.query<AuthUrlData>({
      query: AUTH_URL
    });
    window.location.href = data.authUrl;
  } catch {}
};
Now, when we click the Sign In With Google Button, we’ll be taken to the Google Consent page!

The consent page we see here refers to the project we’ve set up in our Google cloud developer console with which we’ve given the name of TinyHouse. If we were to provide a valid email and password for a Google account and sign-in, we’ll be redirected back to the /login route of our app.
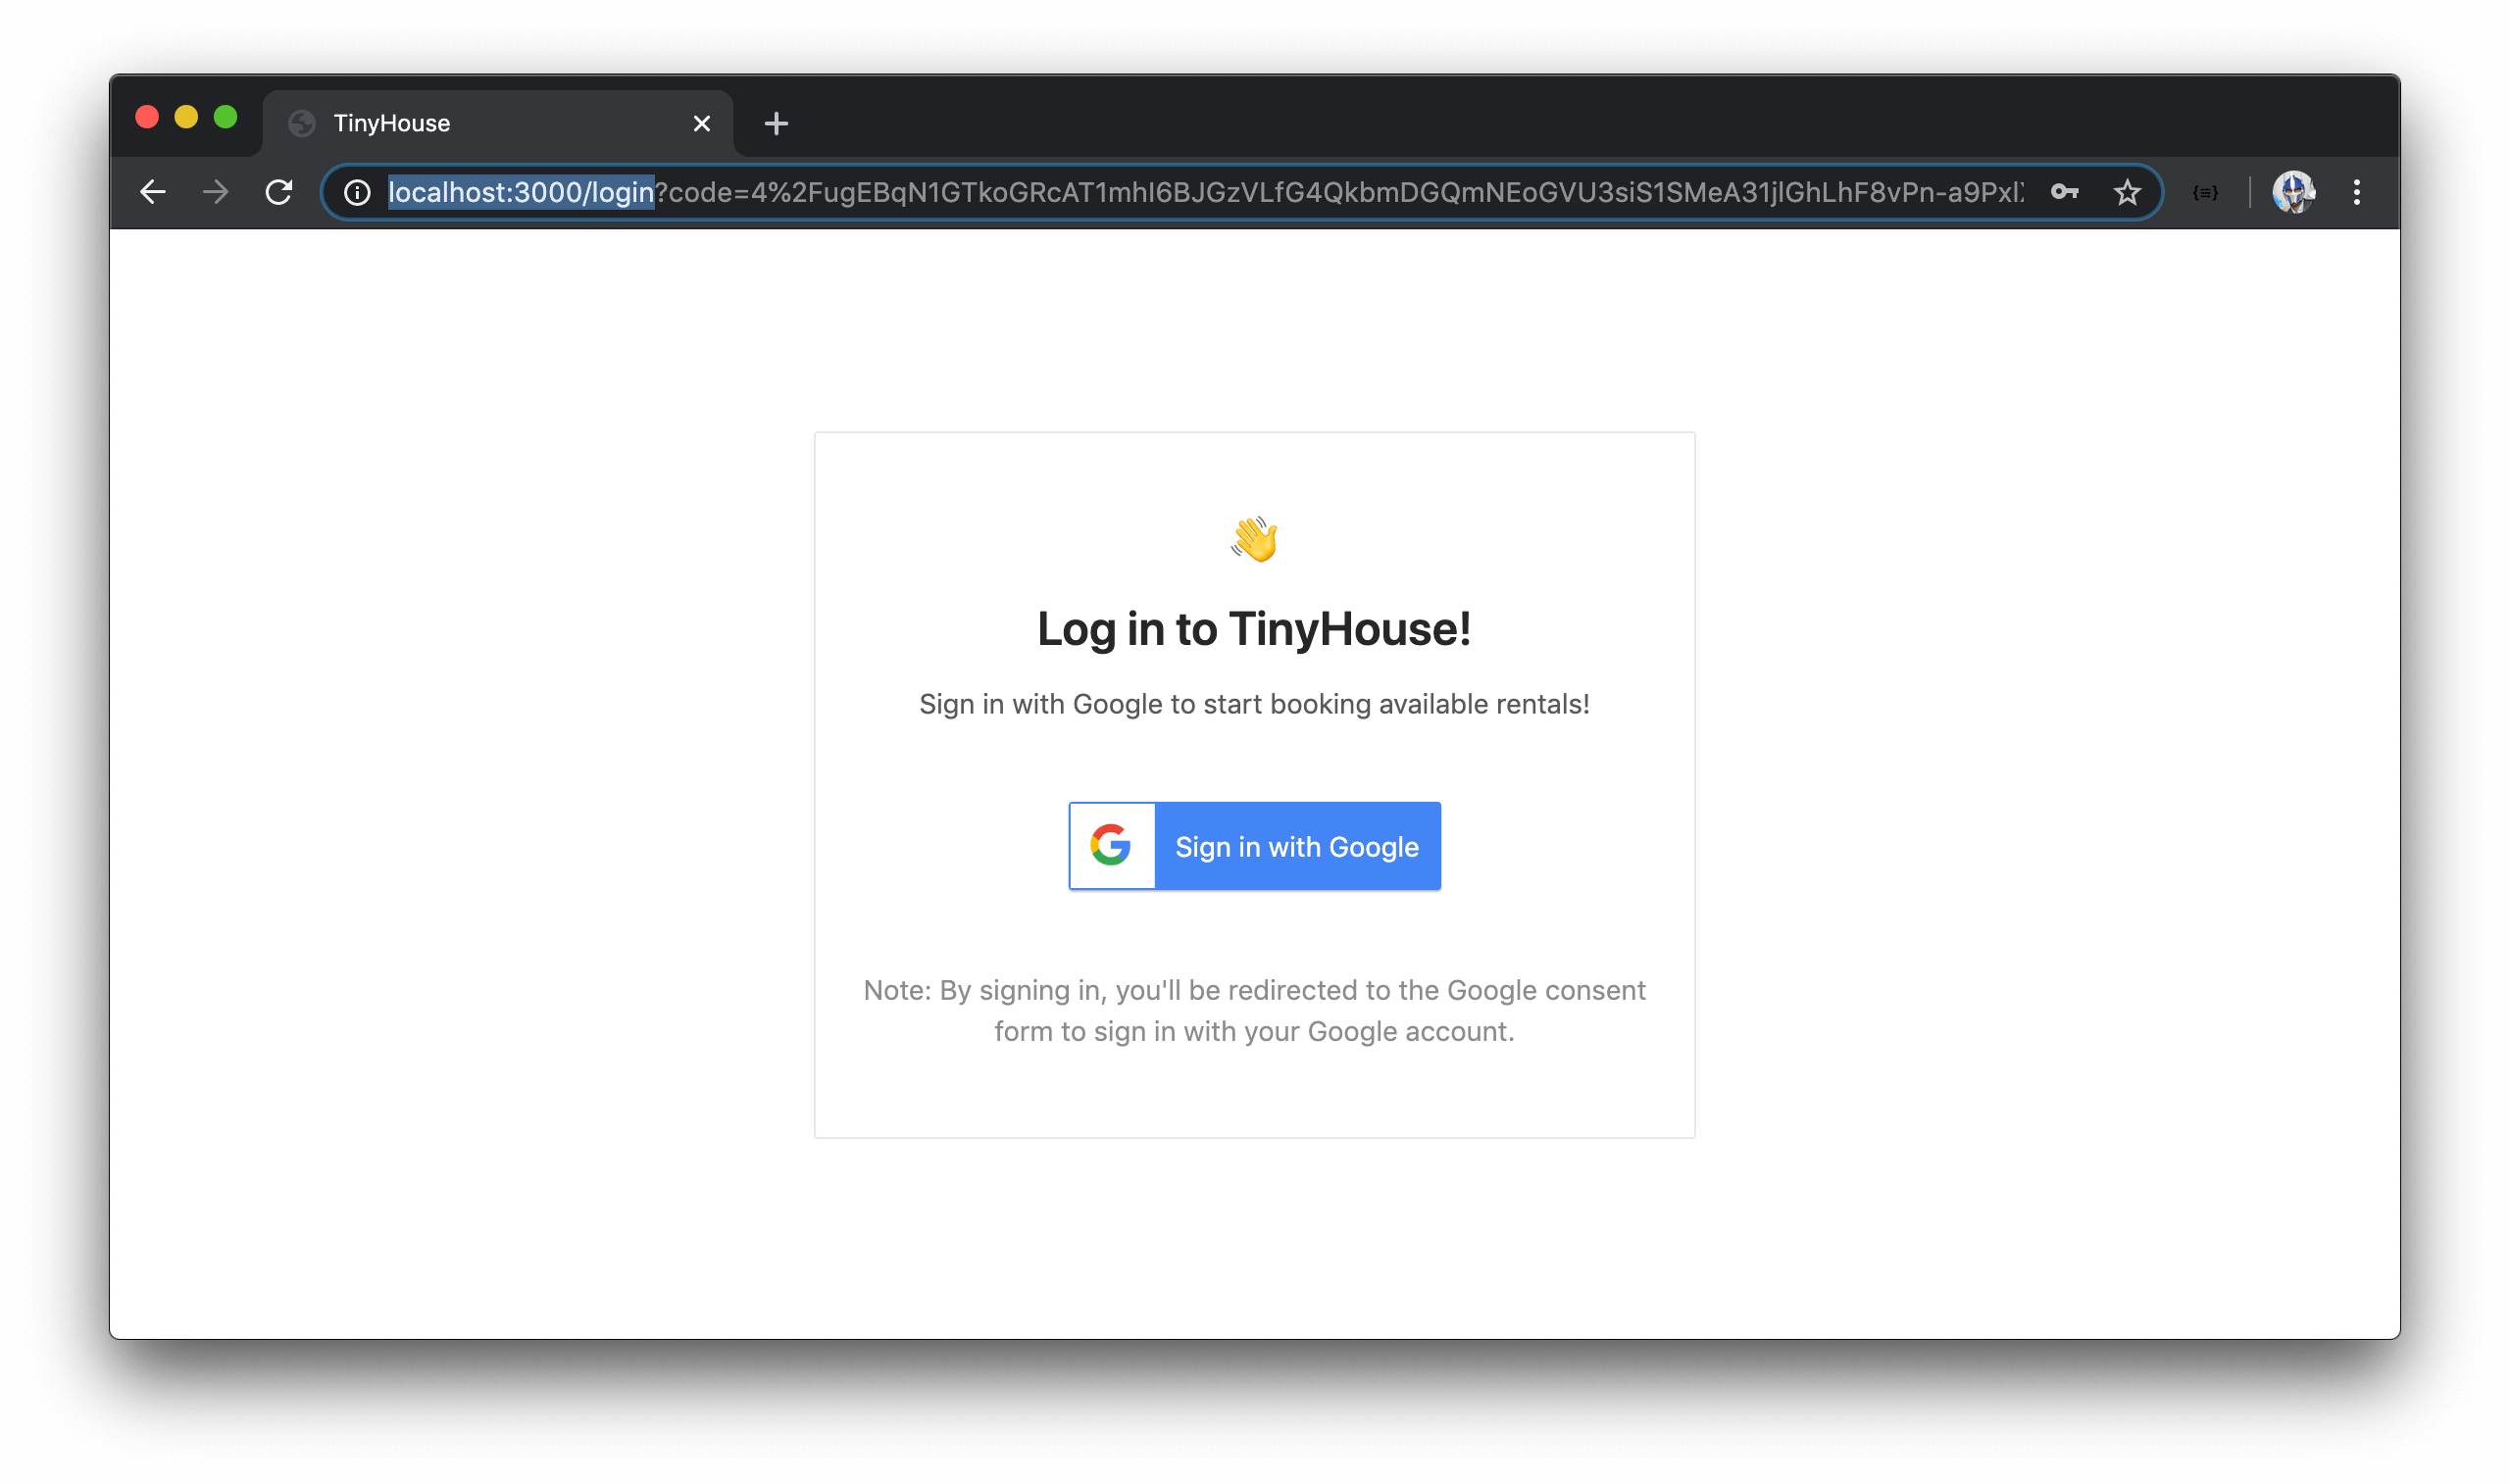
Why are we being redirected to /login ? This is because we’ve stated in the Google Developer Console for our TinyHouse project, the redirect URI of the OAuth client credentials we’ve generated (and are using) is going to be http://localhost:3000/login , which is the login page for our development environment.
When we’re redirected to the /login page, Google returns a code as part of the URL query parameter . The redirected URL will look something like this.
http://localhost:3000/login?code={...}&scope={...}&authuser=0&session_state={...}&prompt=consent#
At this point, we’ve finished Step 1 of our Google OAuth flow. Our React client must now pass this authorization code to our Node server where our server will use the code to communicate with Google’s People API and determine if this is an existing user logging to our app or a new user.
LOGIN
We’ve set up the logIn mutation in our GraphQL API that when triggered will accept the code returned from Google and essentially “log in” our user. To run this mutation, we’ll use the useMutation Hook React Apollo provides.
In our <Login /> component, we’ll first import the LOG_IN mutation document.
client/src/sections/Login/index.tsx
import { LOG_IN } from "../../lib/graphql/mutations";
We’ll import the autogenerated type definitions for the data to be returned from the logIn mutation and the variables it accepts.
client/src/sections/Login/index.tsx
import {
  LogIn as LogInData,
  LogInVariables
} from "../../lib/graphql/mutations/LogIn/__generated__/LogIn";
Lastly, we’ll also import the useMutation Hook from React Apollo.
client/src/sections/Login/index.tsx
import { useApolloClient, useMutation } from "@apollo/react-hooks";
At the top of our <Login /> component, we’ll use the useMutation Hook to destruct the logIn mutation request as well the results we’re interested in. We’ll be interested in the data , loading , and error properties with which we’ll rename to logInData , logInLoading , and logInError .
export const Login = ({ setViewer }: Props) => {
  const client = useApolloClient();
  const [
    logIn,
    { data: logInData, loading: logInLoading, error: logInError }
  ] = useMutation<LogInData, LogInVariables>(LOG_IN);
  ...
};
We’ll want to run the logIn mutation request in a certain condition. We want to run the request the moment our <LogIn /> component is being rendered and the code is available as a query parameter . To run an effect in a certain condition like this, we can use React’s useEffect Hook.
We’ll import the useEffect Hook and declare it near the top of our component function.
import React, { useEffect } from "react";

export const Login = ({ setViewer }: Props) => {
  const client = useApolloClient();
  const [
    logIn,
    { data: logInData, loading: logInLoading, error: logInError }
  ] = useMutation<LogInData, LogInVariables>(LOG_IN);

  useEffect(() => {}, []);
};
We’ll place an empty dependencies list since we don’t want the effect we’ll create to ever run after the component has been mounted. We’ll access the code from the URL query parameter with the URL() constructor and the capability to use the searchParams.get() function. This will allow us to access the value of a certain parameter in our URL. In this case, we’re interested in accessing the value of the code parameter.
useEffect(() => {
  const code = new URL(window.location.href).searchParams.get("code");
}, []);
Note: The
searchParamsproperty and theURLinterface may not be applicable for the Internet Explorer browser. We advise you to use any of the newer browsers such as Chrome, Firefox, Edge, and Safari.
In our effect callback, we’ll place an if condition to state that only if the code is available, will we make the logIn request and pass the code as a variable.
useEffect(() => {
  const code = new URL(window.location.href).searchParams.get("code");
  if (code) {
    logIn({
      variables: {
        input: { code }
      }
    });
  }
}, []);
The useEffect Hook will display a warning since it’ll tell us that if we want to use the logIn function, we’ll need to declare it as a dependency to the Hook.
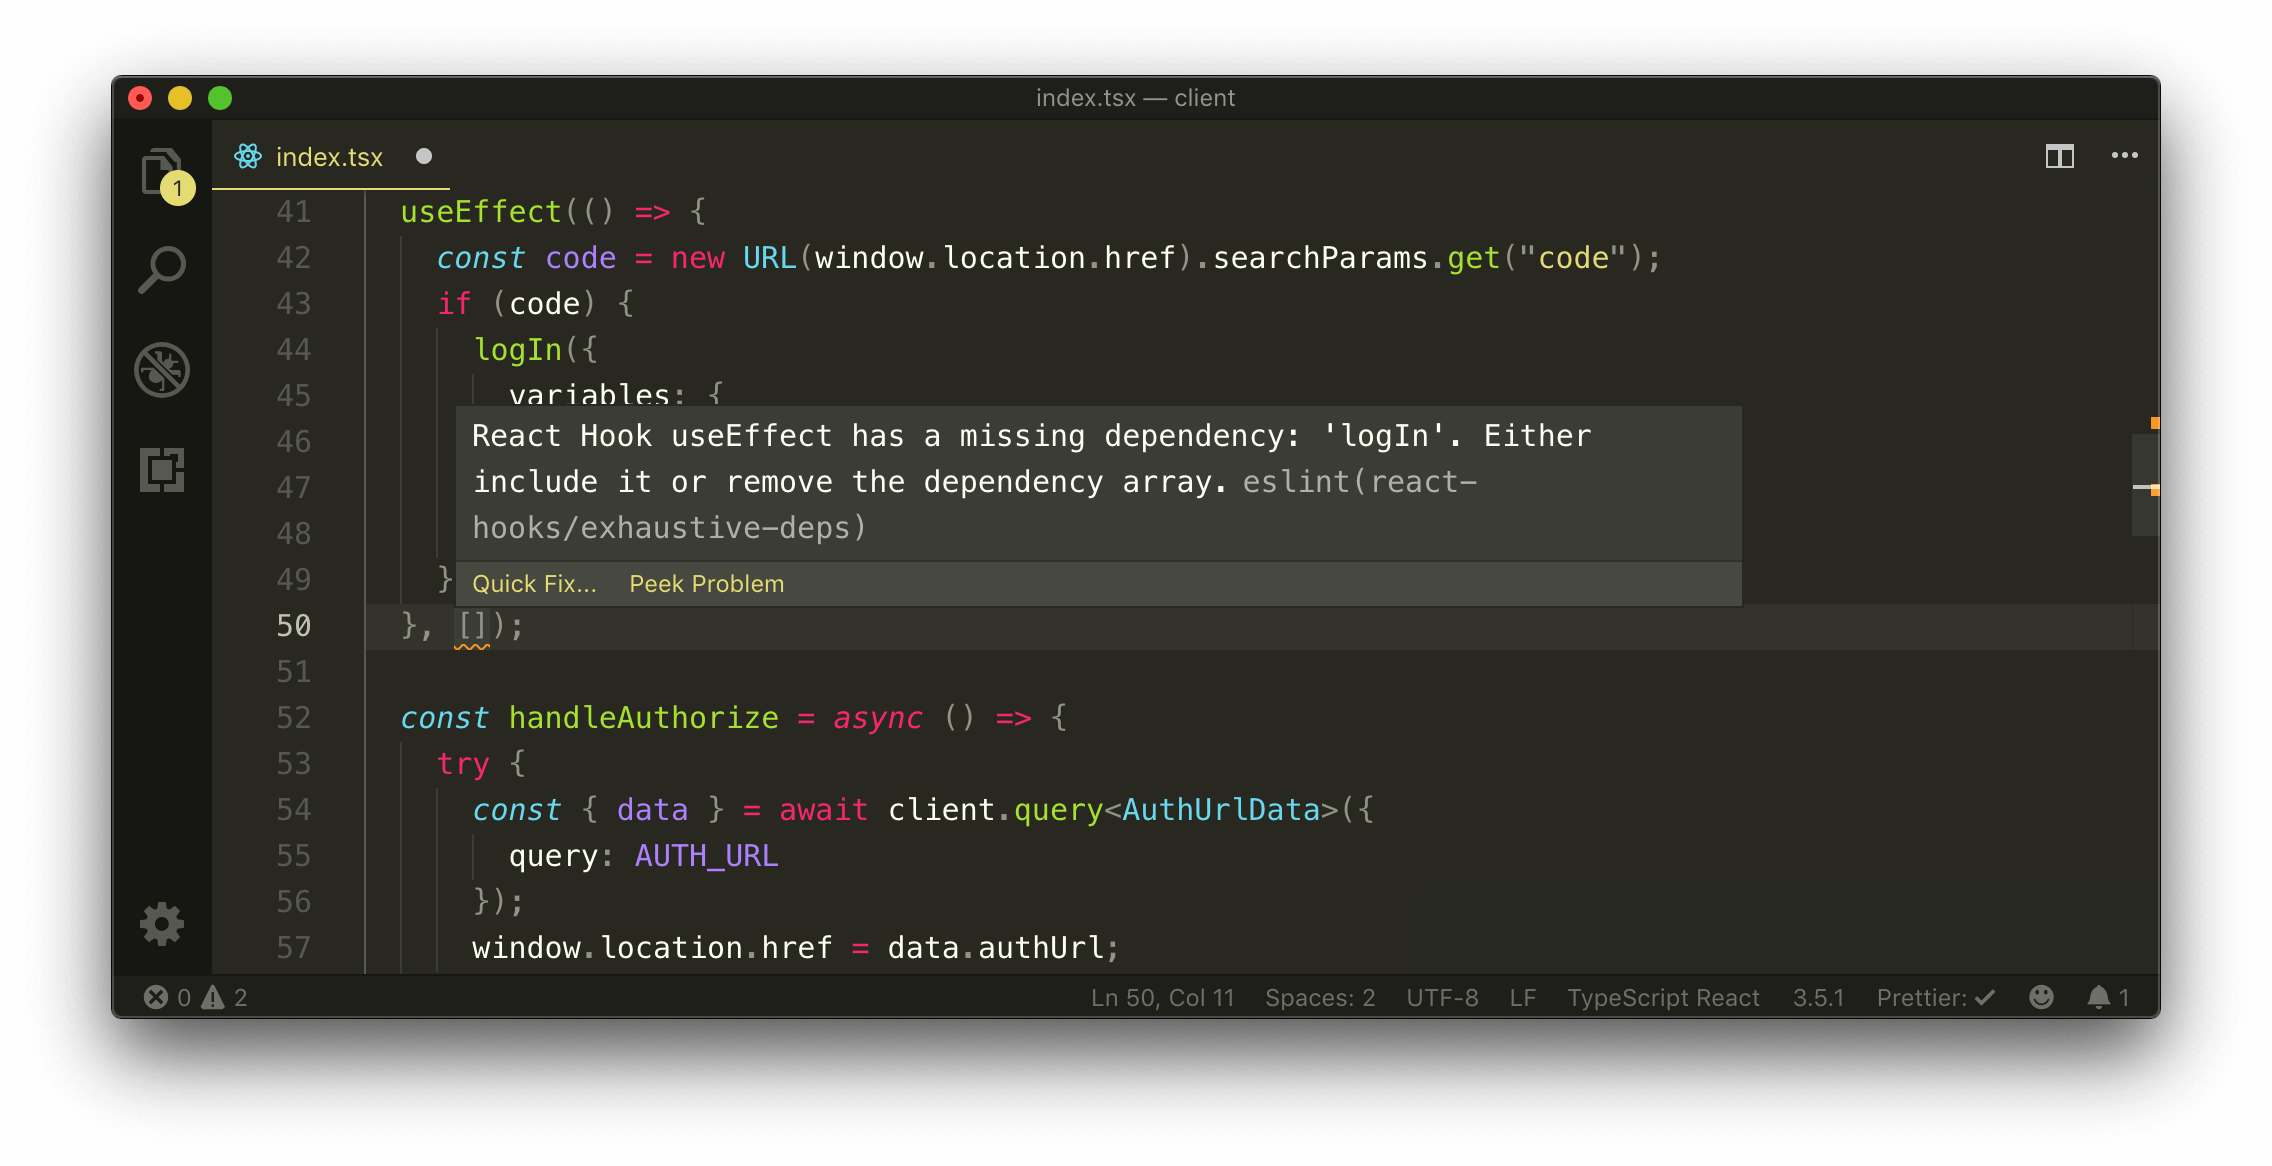
Since the logIn request is being instantiated within the component, we won’t add it as a dependency to our useEffect Hook. If the component was to ever re-render, a new version of logIn will be set up which may cause our useEffect Hook to run again, which is something we’ll definitely not want.
USEREF
Here, we’ll use an additional Hook we haven’t seen yet called the useRef Hook. The useRef Hook accepts an argument with which it returns a mutable object which will persist for the lifetime of the component .
We’ll import the useRef Hook, pass the logIn function into the useRef Hook function, and assign the result to a const we’ll call logInRef . In our effect callback, we can access the mutable logIn property we’ve passed in with the .current property of the object returned from the useRef Hook. This will look something like this:
import React, { useEffect, useRef } from "react";
// ...

export const Login = ({ setViewer }: Props) => {
  const client = useApolloClient();
  const [
    logIn,
    { data: logInData, loading: logInLoading, error: logInError }
  ] = useMutation<LogInData, LogInVariables>(LOG_IN);
  const logInRef = useRef(logIn);

  useEffect(() => {
    const code = new URL(window.location.href).searchParams.get("code");
    if (code) {
      logInRef.current({
        variables: {
          input: { code }
        }
      });
    }
  }, []);

  // ...
};
The logInRef.current property will reference the original function regardless of how many renders happen again. Our useEffect Hook recognizes this and doesn’t require us to specify the logInRef property in the dependencies list.
The way we’ve used the
useRefHook in this example should be done sparingly . If you’re dealing with actual data properties an effect may depend on, you may want to include it in the dependencies list to avoid bugs/issues. In this case however, we’re referencing a function that’s going to remain the same regardless of how many times our component renders!
SUCCESS, LOADING, & ERROR STATES
When our logIn mutation fires, we’ll like to do something right after our mutation has finished successfully. What we intend to do is use the setViewer() function to update the viewer state object in the parent component with the new viewer data being received from the mutation. There are a few ways where we can run some functionality after the success of a mutation or query. One simple way of doing so is using the onCompleted() callback function available to us as an option of our useMutation hook from React Apollo.
onCompleted() is a callback property that is executed once a mutation is successfully completed. The only argument it has is the data from the successful mutation. We’ll define the onCompleted() callback as part of our useMutation options and in the callback, we’ll check if the data argument and data.logIn values exist. If data and data.logIn exists, we’ll call the setViewer function and set the viewer with the data received.
const [
  logIn,
  { data: logInData, loading: logInLoading, error: logInError }
] = useMutation<LogInData, LogInVariables>(LOG_IN, {
  onCompleted: data => {
    if (data && data.logIn) {
      setViewer(data.logIn);
    }
  }
});
Let’s now update our <LogIn /> component to better notify the user when the log-in process is happening and when it completes successfully or where it might error.
When the user is being logged in, we probably want to show some loading indicator. We’ll import and use the Ant Design Spin component, and return the <Spin /> component with a message when the loading property from our logIn mutation is true .
// ...
import { Card, Layout, Spin, Typography } from "antd";
// ...

export const Login = ({ setViewer }: Props) => {
  // ...
  const [
    logIn,
    { data: logInData, loading: logInLoading, error: logInError }
  ] = useMutation<LogInData, LogInVariables>(LOG_IN, {
    onCompleted: data => {
      if (data && data.logIn) {
        setViewer(data.logIn);
      }
    }
  });

  // ...

  if (logInLoading) {
    return (
      <Content className="log-in">
        <Spin size="large" tip="Logging you in..." />
      </Content>
    );
  }

  return (
    // ...,
  );
};
<ERRORBANNER /> , DISPLAYSUCCESSNOTIFICATION() , DISPLAYERRORMESSAGE()
When a query is successful (or when it errors), or when a mutation is successful (or when it errors) - we’ll always want to notify the user about this in our UI.
- For mutations that run upon component mount and is successful, we’ll use Ant Design’s
<Notification />component to display a success notification in the page. - For when most mutations (or a manually triggered query) fail, we’ll use Ant Design’s
<Message />component to display an error message in the page. - When queries on page load (or the
LogInmutation when the<Login />component mount) fails, we’ll want to display an error<Alert />banner.
These pieces of UI functionality are going to be used in multiple parts of our React app so we’ll create them in a shared location that can be easily used everywhere.
In the src/lib/ folder, we’ll create a components/ folder that has an ErrorBanner/ component folder with an index.ts file. We’ll have the components/ folder in src/lib/ contain an index.ts file.
client/
  // ...
  src/
    lib/
      components/
        ErrorBanner/
          index.ts
        index.ts
      // ...
    // ...
  // ...
We’ll also create a utils/ folder within src/lib/ that is to have an index.ts file as well.
client/
  // ...
  src/
    lib/
      components/
        ErrorBanner/
          index.ts
        index.ts
      utils/
        index.ts
    // ...
  // ...
The <ErrorBanner /> component is the shared alert banner component we’ll want to show when a query on page load (or mutations during component mount) ever fails. In the src/lib/components/ErrorBanner/index.ts file, we’ll import and use Ant Design’s <Alert /> component and state that the <ErrorBanner /> component may receive a message or description prop. We’ll use the capability to define default prop values for when the message or description props are never passed in. Finally, we’ll have the <ErrorBanner /> component render the <Alert /> component with the prop options we’ll want ( banner , closable , type="error" , etc.).
The <ErrorBanner /> component file will look like the following:
client/src/lib/components/ErrorBanner/index.tsx
import React from "react";
import { Alert } from "antd";

interface Props {
  message?: string;
  description?: string;
}

export const ErrorBanner = ({
  message = "Uh oh! Something went wrong :(",
  description = "Look like something went wrong. Please check your connection and/or try again later."
}: Props) => {
  return (
    <Alert
      banner
      closable
      message={message}
      description={description}
      type="error"
      className="error-banner"
    />
  );
};
In the src/lib/components/index.ts file, we’ll re-export the <ErrorBanner /> component from the adjacent ErrorBanner/ folder.
client/src/lib/components/index.ts
export * from "./ErrorBanner";
The utils/index.ts file in the src/lib/ folder will be where we create the functions Ant Design gives to render the <Notification /> and <Message /> components. In the utils/index.ts file, we’ll import the message and notification functions from Ant Design.
We’ll have a displaySuccessNotification() function that accepts a message argument and an optional description argument to then return a success notification to be placed on the top left of the page.
import { message, notification } from "antd";

export const displaySuccessNotification = (message: string, description?: string) => {
  return notification["success"]({
    message,
    description,
    placement: "topLeft",
    style: {
      marginTop: 50
    }
  });
};
We’ll have a displayErrorMessage() function that accepts an error argument and simply returns the results of message.error() .
client/src/lib/utils/index.ts
import { message, notification } from "antd";

export const displaySuccessNotification = (
  message: string,
  description?: string
) => {
  return notification["success"]({
    message,
    description,
    placement: "topLeft",
    style: {
      marginTop: 50
    }
  });
};

export const displayErrorMessage = (error: string) => {
  return message.error(error);
};
<LOGIN />
In our <Login /> component, we’ll import the <ErrorBanner /> component from the src/lib/components/ folder.
client/src/sections/Login/index.tsx
import { ErrorBanner } from "../../lib/components";
We’ll also import the displaySuccessNotification() and displayErrorMessage() functions from the src/lib/utils folder.
client/src/sections/Login/index.tsx
import { displaySuccessNotification, displayErrorMessage } from "../../lib/utils";
At the end of our onCompleted() callback function of our useMutation Hook, we’ll use the displaySuccessNotification() function to display a success message of "You've successfully logged in!" .
client/src/sections/Login/index.tsx
  const [
    logIn,
    { data: logInData, loading: logInLoading, error: logInError }
  ] = useMutation<LogInData, LogInVariables>(LOG_IN, {
    onCompleted: data => {
      if (data && data.logIn) {
        setViewer(data.logIn);
        displaySuccessNotification("You've successfully logged in!");
      }
    }
  });
In the catch statement for our <Login /> component’s handleAuthorize() function, we’ll place the displayErrorMessage() function with an error message of "Sorry! We weren't able to log you in. Please try again later!" .
client/src/sections/Login/index.tsx
  const handleAuthorize = async () => {
    try {
      const { data } = await client.query<AuthUrlData>({
        query: AUTH_URL
      });
      window.location.href = data.authUrl;
    } catch {
      displayErrorMessage(
        "Sorry! We weren't able to log you in. Please try again later!"
      );
    }
  };
In the <Login /> component, if the logInError property from our logIn mutation result is ever true , we’ll conditionally create a constant called logInErrorBannerElement that is to be the <ErrorBanner /> component. We’ll place the logInErrorBannerElement above our <Card className="log-in-card"/> and render the rest of our component template.
export const Login = ({ setViewer }: Props) => {
  // ...
  const [
    logIn,
    { data: logInData, loading: logInLoading, error: logInError }
  ] = useMutation<LogInData, LogInVariables>(LOG_IN, {
    onCompleted: data => {
      if (data && data.logIn) {
        setViewer(data.logIn);
      }
    }
  });

  // ...

  const logInErrorBannerElement = logInError ? (
    <ErrorBanner description="We weren't able to log you in. Please try again soon." />
  ) : null;

  return (
    <Content className="log-in">
      {logInErrorBannerElement}
      <Card className="log-in-card">{/* ... */}</Card>
    </Content>
  );
};
The last thing we’ll do in our <Login /> component is check that when the user successfully logs in, we wouldn’t want to keep them in the /login page any longer. Instead, we’ll want to redirect them to the /user page where we’ll later populate with user information of the logged in user.
To achieve a redirect to another route in our app, we can use the <Redirect /> component that React Router gives us. In our <Login /> component file, we’ll import Redirect from react-router-dom .
<Redirect /> is a component that does a redirect when rendered. In our <Login /> component, we’ll check if the logInData from our mutation exists, and if so, render the <Redirect /> component with a to prop with a target location of /user/viewerId where viewerId is the id of the viewer.
export const Login = ({ setViewer }: Props) => {
  // ...
  const [
    logIn,
    { data: logInData, loading: logInLoading, error: logInError }
  ] = useMutation<LogInData, LogInVariables>(LOG_IN, {
    onCompleted: data => {
      if (data && data.logIn) {
        setViewer(data.logIn);
      }
    }
  });

  // ...

  if (logInData && logInData.logIn) {
    const { id: viewerId } = logInData.logIn;
    return <Redirect to={`/user/${viewerId}`} />;
  }

  return <Content className="log-in">{/* ... */}</Content>;
};
With all the changes we’ve made, the <Login /> component and the src/sections/Login/index.tsx file will look like the following.
client/src/sections/Login/index.tsx
import React, { useEffect, useRef } from "react";
import { Redirect } from "react-router-dom";
import { useApolloClient, useMutation } from "@apollo/react-hooks";
import { Card, Layout, Spin, Typography } from "antd";
import { ErrorBanner } from "../../lib/components";
import { LOG_IN } from "../../lib/graphql/mutations";
import { AUTH_URL } from "../../lib/graphql/queries";
import {
  LogIn as LogInData,
  LogInVariables
} from "../../lib/graphql/mutations/LogIn/__generated__/LogIn";
import { AuthUrl as AuthUrlData } from "../../lib/graphql/queries/AuthUrl/__generated__/AuthUrl";
import { displaySuccessNotification, displayErrorMessage } from "../../lib/utils";
import { Viewer } from "../../lib/types";

// Image Assets
import googleLogo from "./assets/google_logo.jpg";

interface Props {
  setViewer: (viewer: Viewer) => void;
}

const { Content } = Layout;
const { Text, Title } = Typography;

export const Login = ({ setViewer }: Props) => {
  const client = useApolloClient();
  const [
    logIn,
    { data: logInData, loading: logInLoading, error: logInError }
  ] = useMutation<LogInData, LogInVariables>(LOG_IN, {
    onCompleted: data => {
      if (data && data.logIn) {
        setViewer(data.logIn);
        displaySuccessNotification("You've successfully logged in!");
      }
    }
  });
  const logInRef = useRef(logIn);

  useEffect(() => {
    const code = new URL(window.location.href).searchParams.get("code");
    if (code) {
      logInRef.current({
        variables: {
          input: { code }
        }
      });
    }
  }, []);

  const handleAuthorize = async () => {
    try {
      const { data } = await client.query<AuthUrlData>({
        query: AUTH_URL
      });
      window.location.href = data.authUrl;
    } catch {
      displayErrorMessage(
        "Sorry! We weren't able to log you in. Please try again later!"
      );
    }
  };

  if (logInLoading) {
    return (
      <Content className="log-in">
        <Spin size="large" tip="Logging you in..." />
      </Content>
    );
  }

  if (logInData && logInData.logIn) {
    const { id: viewerId } = logInData.logIn;
    return <Redirect to={`/user/${viewerId}`} />;
  }

  const logInErrorBannerElement = logInError ? (
    <ErrorBanner description="Sorry! We weren't able to log you in. Please try again later!" />
  ) : null;

  return (
    <Content className="log-in">
      {logInErrorBannerElement}
      <Card className="log-in-card">
        <div className="log-in-card__intro">
          <Title level={3} className="log-in-card__intro-title">
            <span role="img" aria-label="wave">
              👋
            </span>
          </Title>
          <Title level={3} className="log-in-card__intro-title">
            Log in to TinyHouse!
          </Title>
          <Text>Sign in with Google to start booking available rentals!</Text>
        </div>
        <button className="log-in-card__google-button" onClick={handleAuthorize}>
          <img
            src={googleLogo}
            alt="Google Logo"
            className="log-in-card__google-button-logo"
          />
          <span className="log-in-card__google-button-text">Sign in with Google</span>
        </button>
        <Text type="secondary">
          Note: By signing in, you'll be redirected to the Google consent form to sign in
          with your Google account.
        </Text>
      </Card>
    </Content>
  );
};
That’s it for now! At this moment, when we attempt to sign-in with Google, we’re taken to Google’s authentication/consent form.
After providing the correct sign-in information and signing in, we’re redirected to the <Login /> component where the loading indicator is shown and the code query parameter is in the URL.
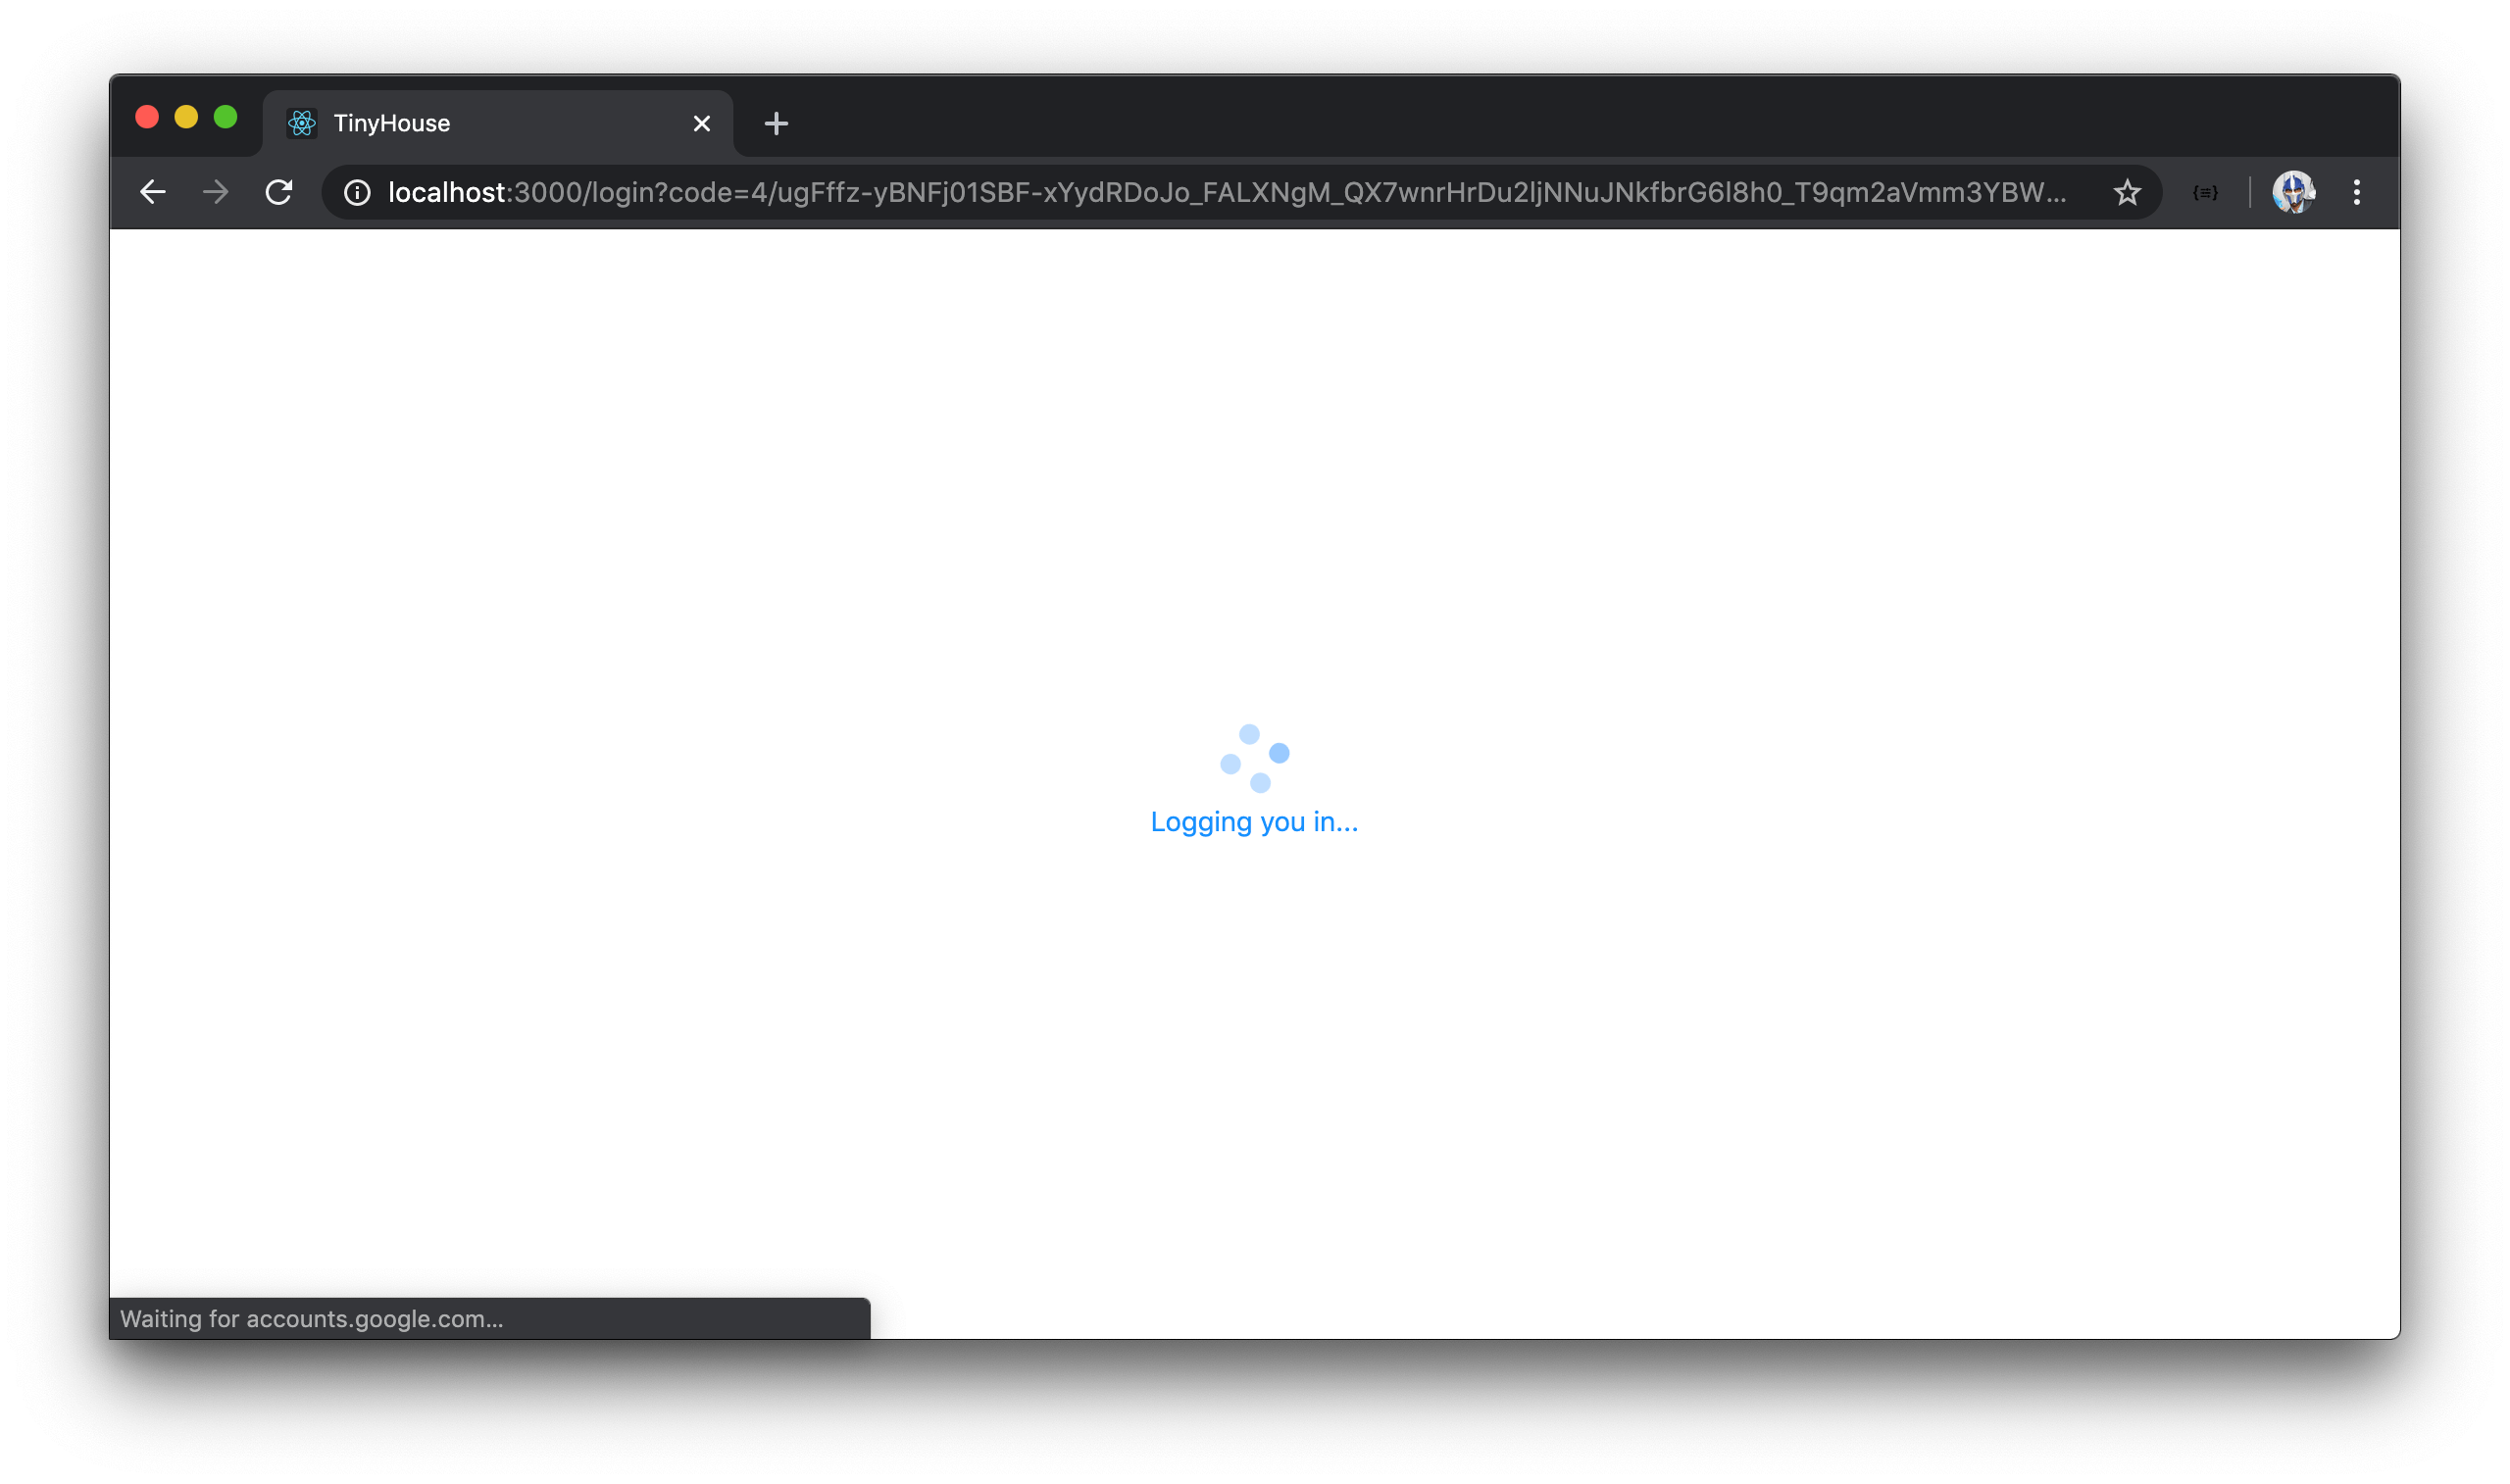
When we see the spinning loading indicator in the UI, this is where the logIn mutation is in flight. When complete successfully, we’re redirected to the /user page of the logged-in user and we see a success notification!
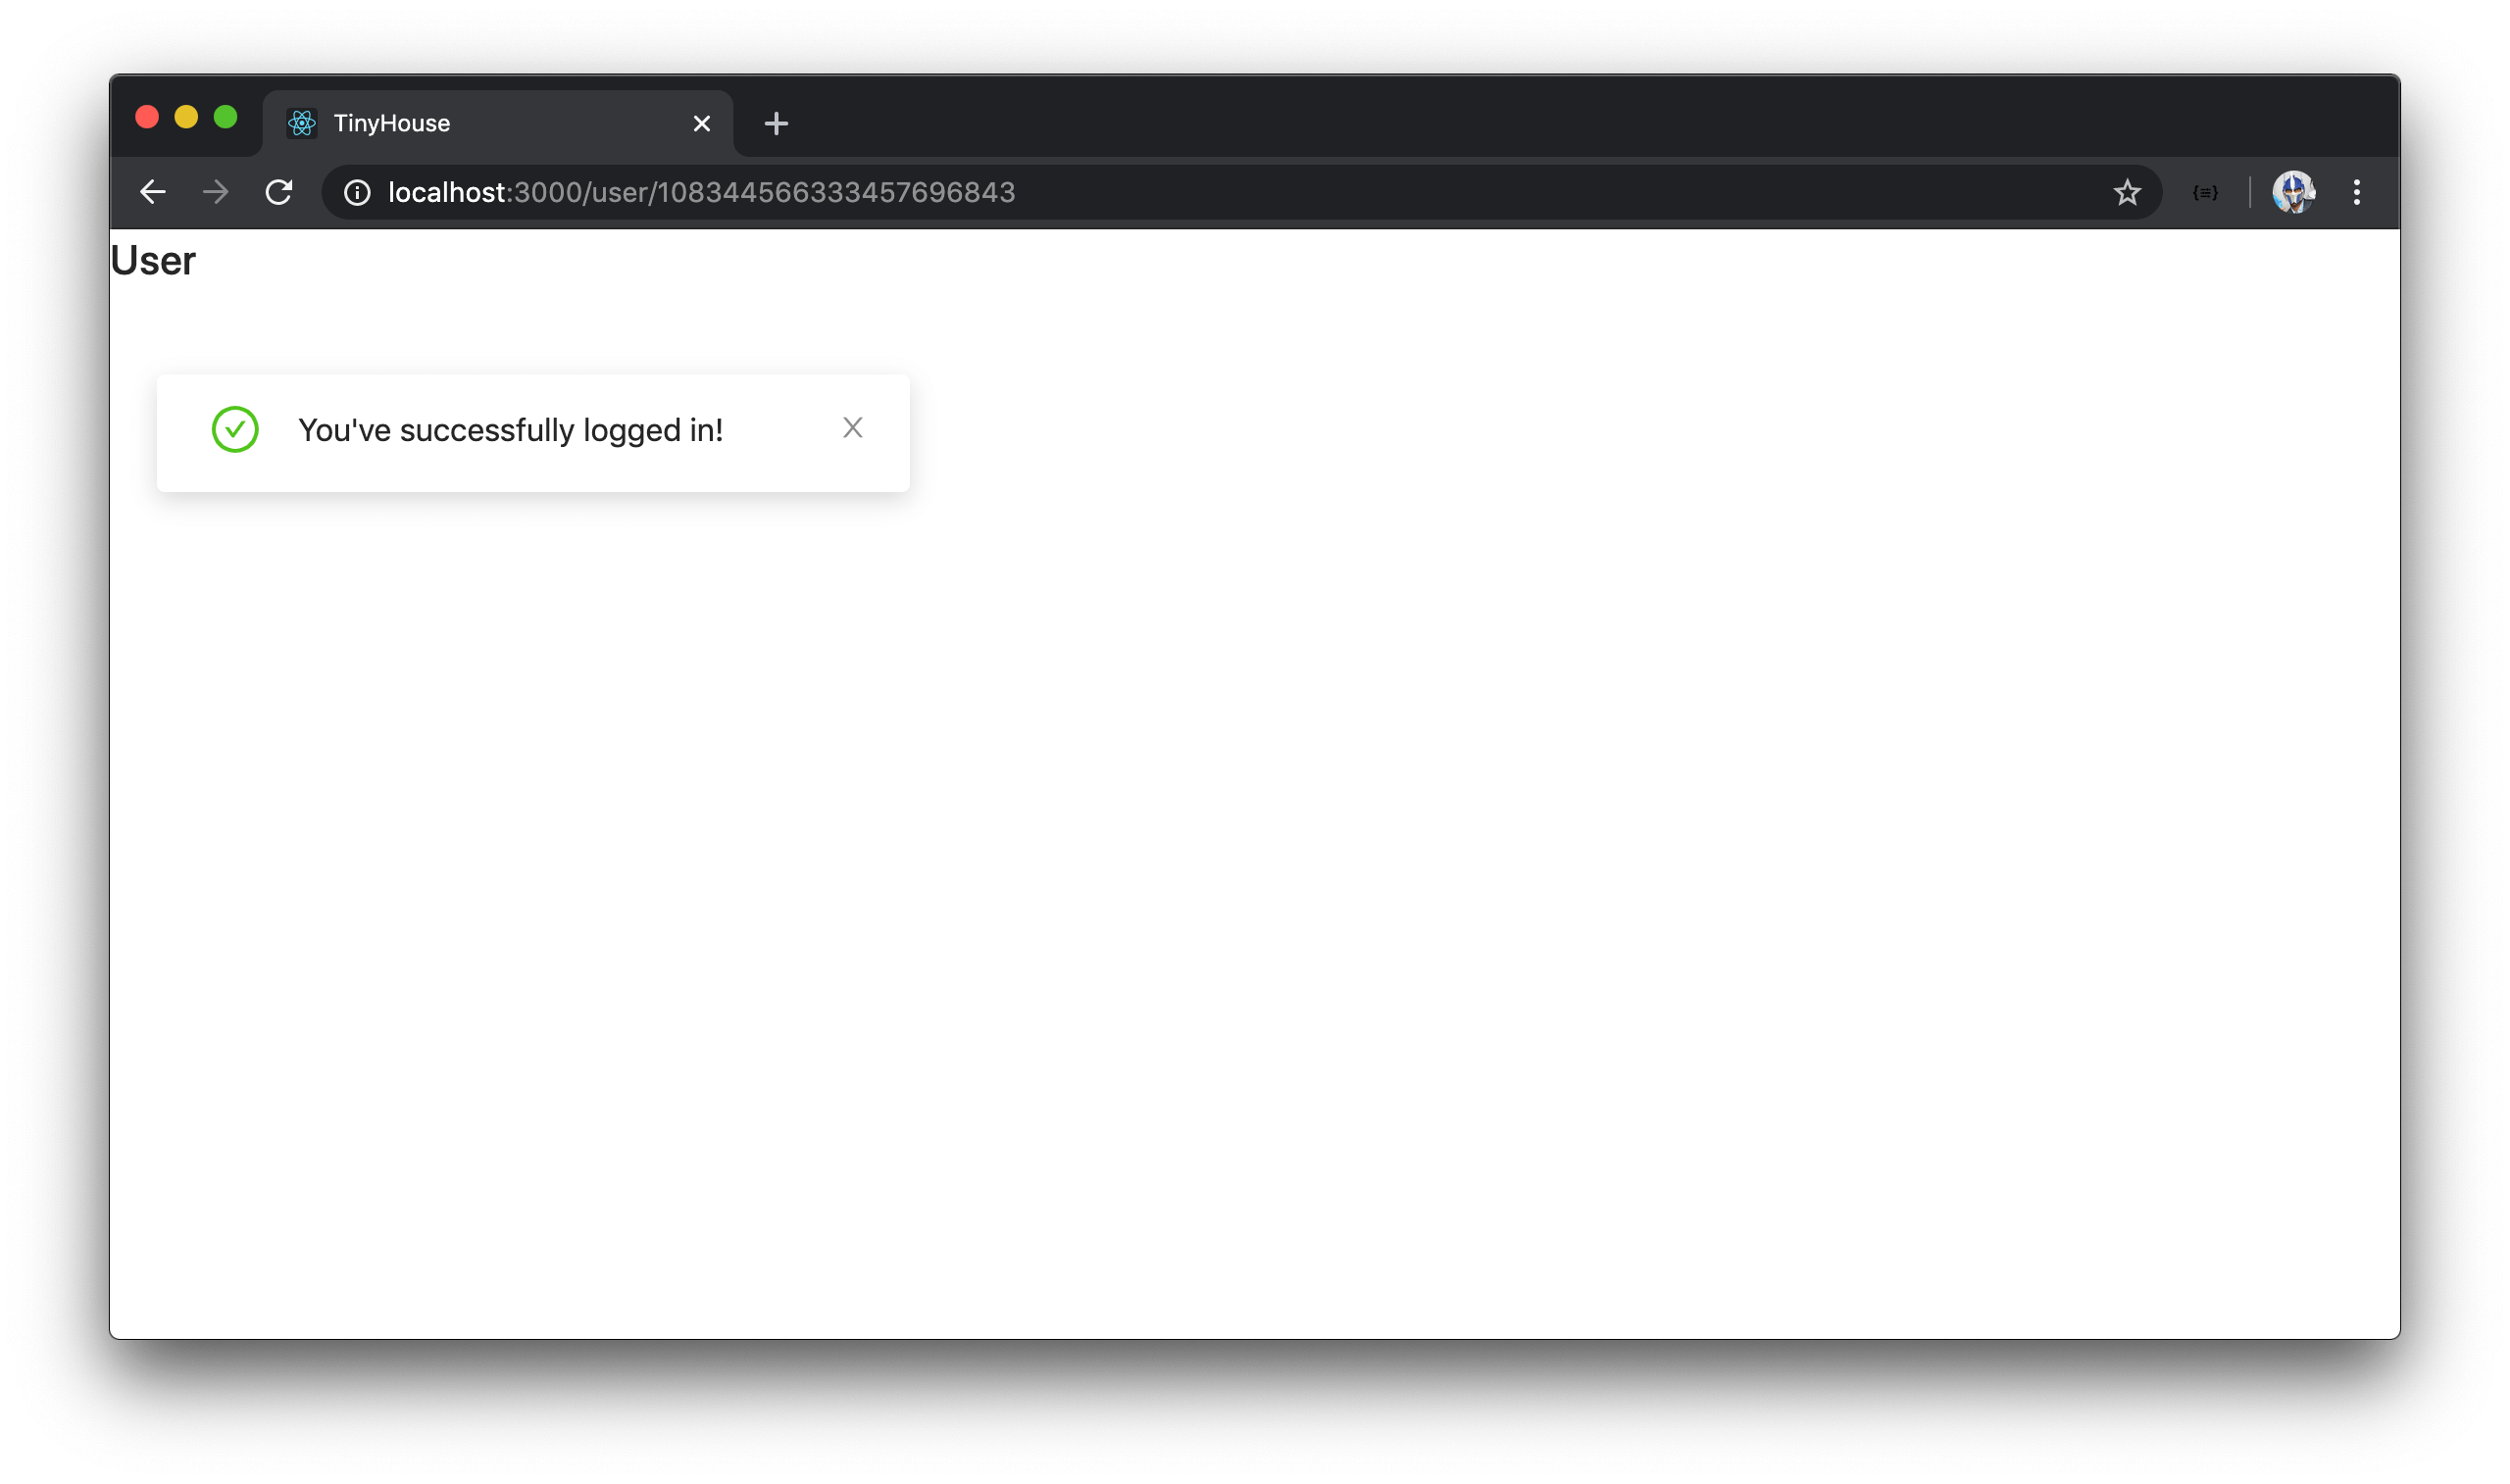
Amazing! At this moment, our client now recognizes the viewer that’s logged in and keeps that information within a viewer state value in the main parent <App /> component.
If, for some reason or another, the query for the authUrl field fails when a user clicks the Sign in with Google button - an error message will be displayed near the top of the page notifying the user.
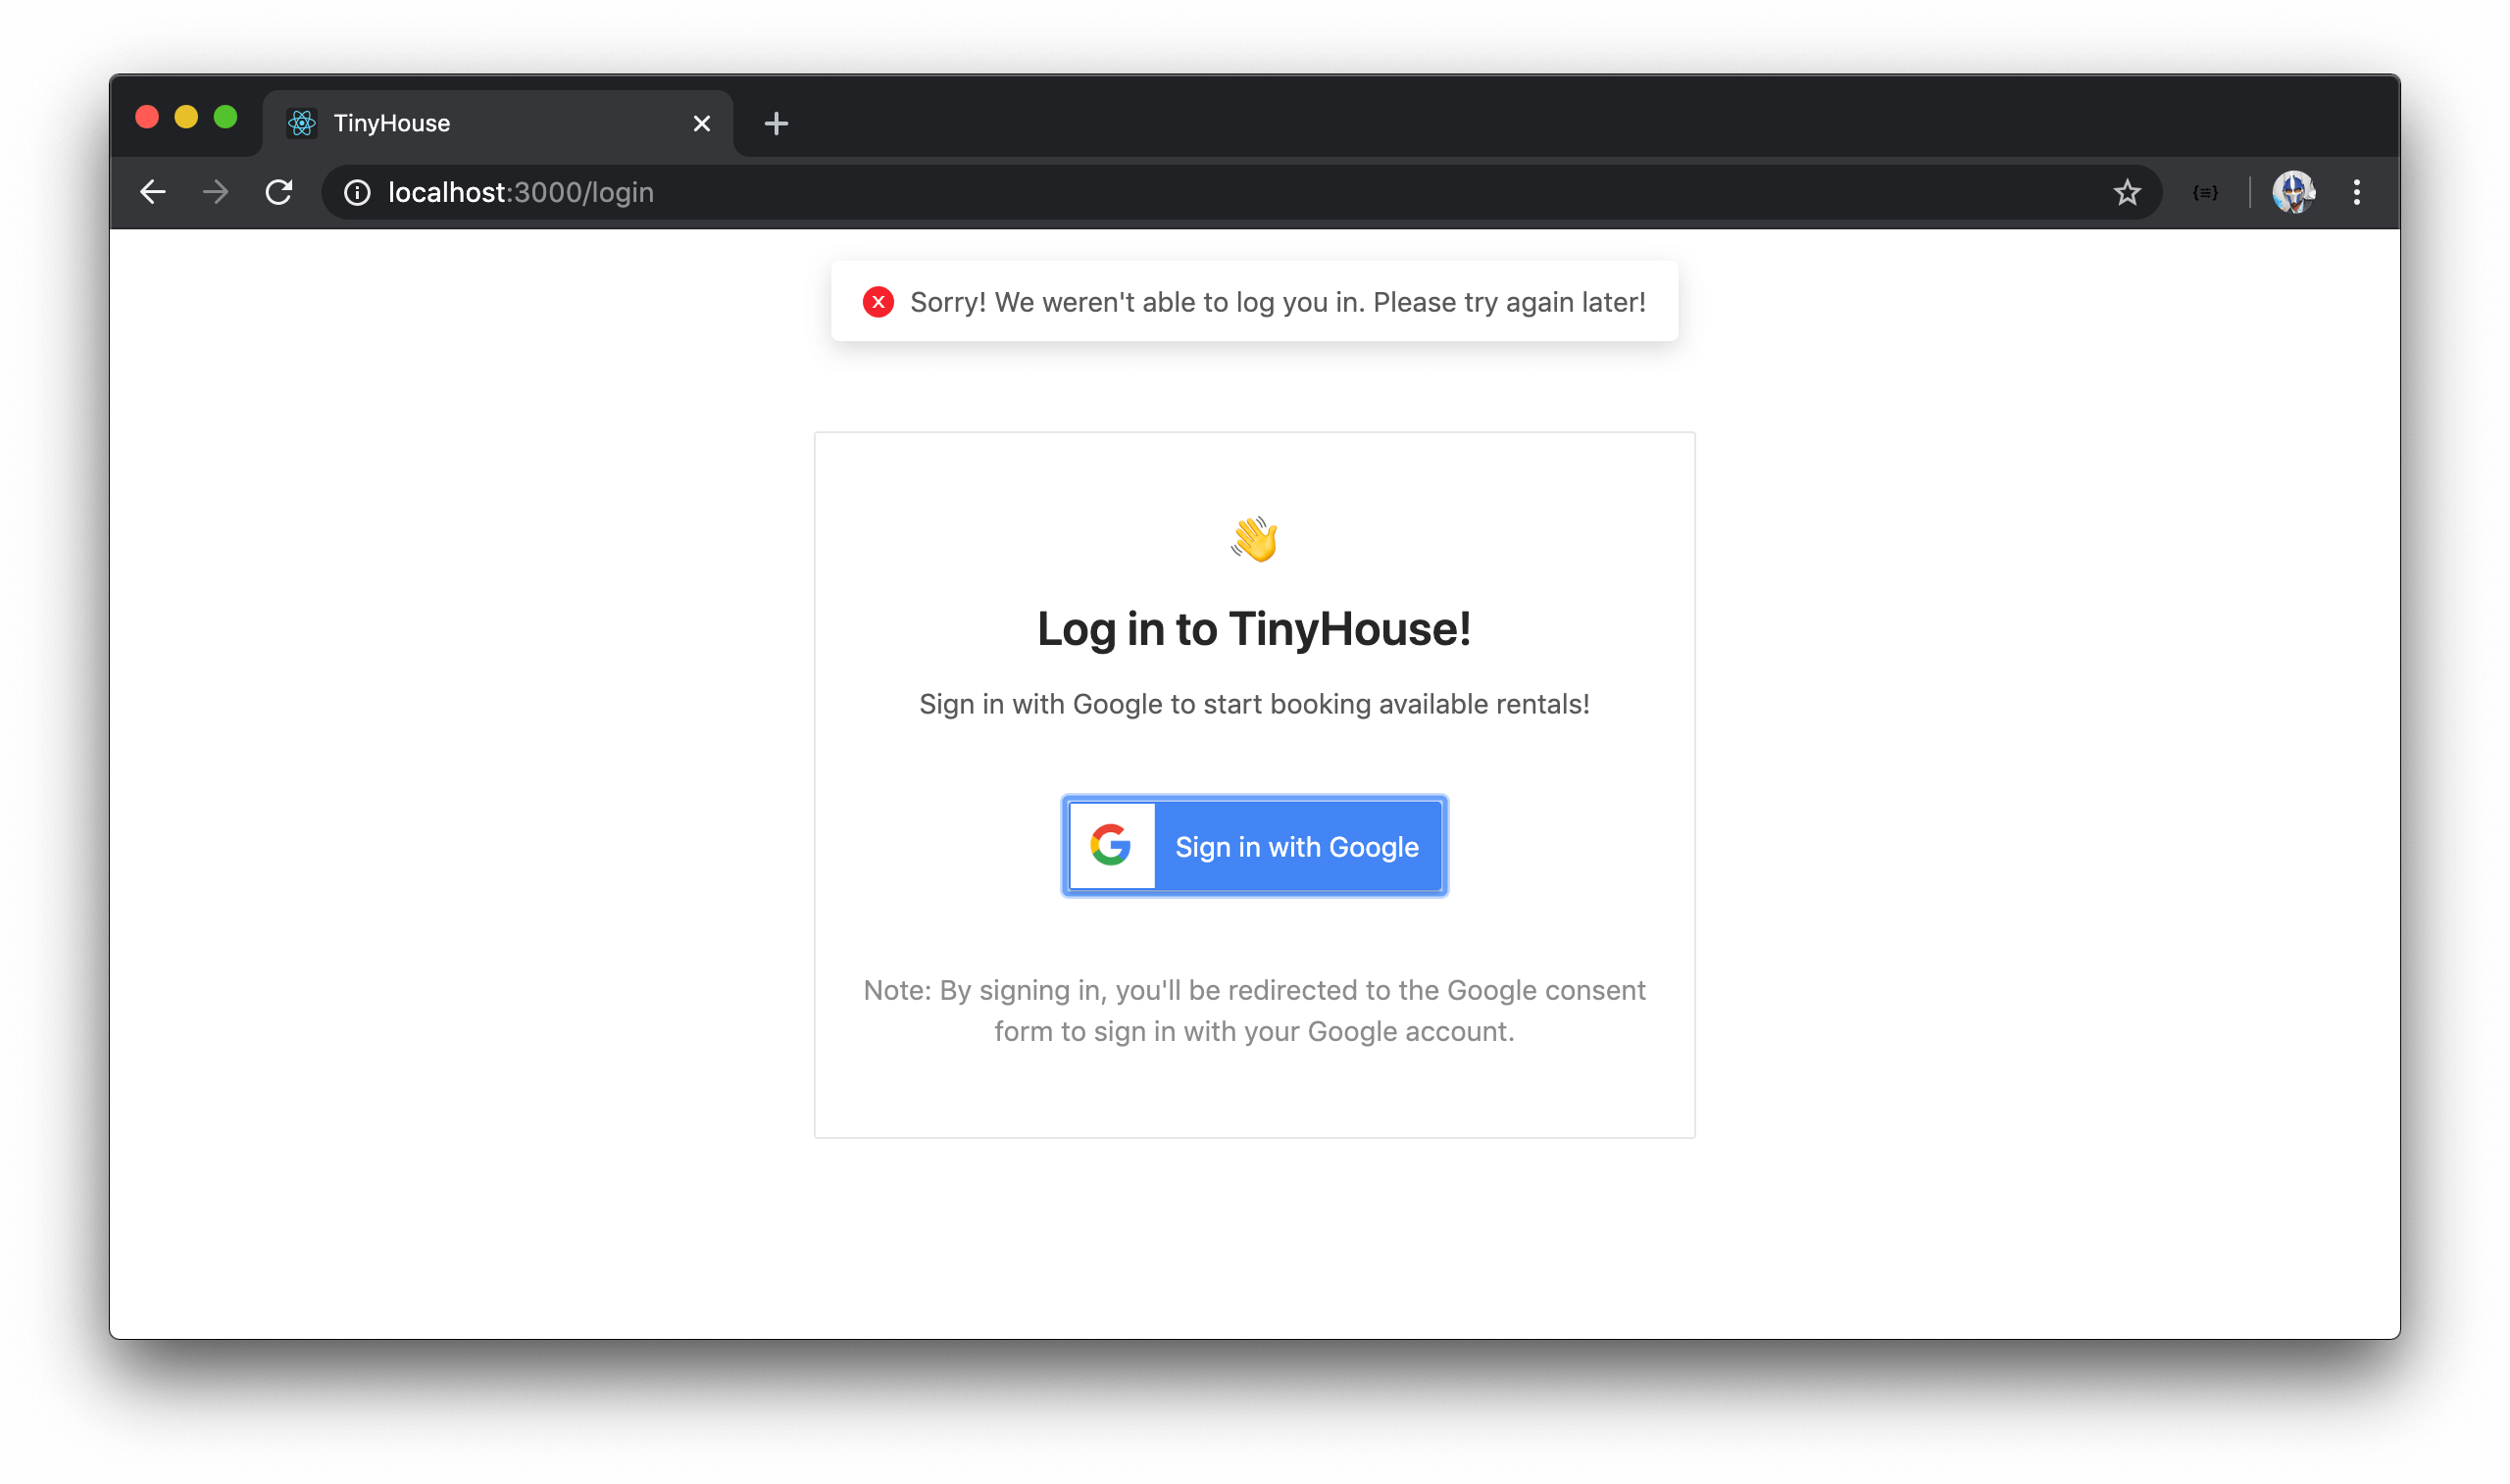
If the logIn mutation that’s run when the user is redirected to the /login page fails, an error banner will be shown in the top of the rendered template.
