BUILDING THE APP HEADER & LOGOUT
The
tinyhouse-logo.pngimage asset used in this lesson can be found - here.
We’ve been able to go through Google’s Sign-In flow and obtain the details of a signed-in viewer in our client app. In this lesson, we’ll look to find a way to notify the viewer whenever they’re in the logged-in state. We’ll achieve this by creating an app header element that indicates when a viewer is logged in and will also allow the viewer to navigate between different routes in the app.
<APPHEADER />
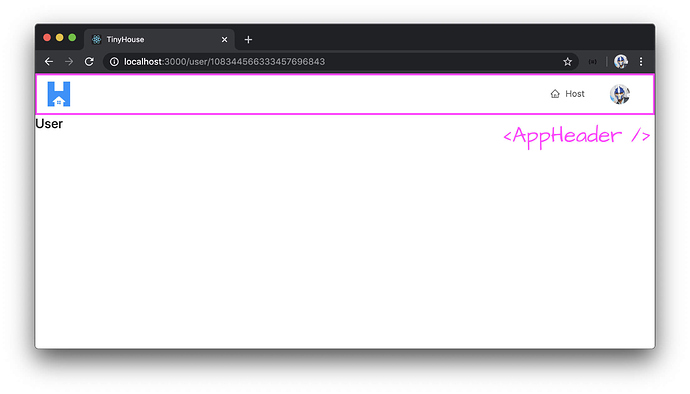
We’ll create an <AppHeader /> component that’ll be shown in all different pages and will allow the user to navigate around the app, log in, and log out.
We’ll have this <AppHeader /> component be established within a new src/sections/ folder.
client/
  // ...
  src/
    // ...
    sections/
      AppHeader
        index.tsx
      // ...
    // ...
  // ...
Note: We use an image asset labeled
tinyhouse-logo.pngin thesrc/sections/AppHeader/assets/folder for the app header. Find a source for this image asset - here.
The <AppHeader /> component will use the <Header /> component from Ant Design’s <Layout /> component. We’ll first look to have the <AppHeader /> component display the application logo. In the src/sections/AppHeader/index.tsx file, we’ll import the React library, the <Layout /> component from Ant Design, and the tinyhouse-logo asset. We’ll also import the <Link /> component from react-router-dom that we’ll use to allow the user to click the logo in the app header and navigate back to the index route (i.e. / ).
import React from "react";
import { Link } from "react-router-dom";
import { Layout } from "antd";

import logo from "./assets/tinyhouse-logo.png";
We’ll destruct the <Header /> component from <Layout /> . We’ll construct the <AppHeader /> component and have it return a header with the tinyhouse-logo image kept in a <Link /> component that acts as a link to the index route ( / ).
import React from "react";
import { Link } from "react-router-dom";
import { Layout } from "antd";

import logo from "./assets/tinyhouse-logo.png";

const { Header } = Layout;

export const AppHeader = () => {
  return (
    <Header className="app-header">
      <div className="app-header__logo-search-section">
        <div className="app-header__logo">
          <Link to="/">
            <img src={logo} alt="App logo" />
          </Link>
        </div>
      </div>
    </Header>
  );
};
In the src/sections/index.ts file, we’ll have the <AppHeader /> component function be re-exported.
client/src/sections/index.ts
export * from "./AppHeader";
In the parent src/index.tsx file, we’ll import the <AppHeader /> component and look to place it at the top of our <App /> component return statement. To have the <AppHeader /> component shown in every route, we’ll place it outside of the router <Switch /> statement. To ensure the <AppHeader /> component stays affixed to the top of the page even if we were to scroll down, we’ll import and use the <Affix /> component from Ant design and wrap our AppHeader component with it. By specifying the offsetTop option to 0 for the <Affix /> component, we’re stating that we want the child elements within it to stay at the very top of the page.
// ...
import { Affix } from "antd";
// ...

const App = () => {
  // ...
  return (
    <Router>
      <Affix offsetTop={0} className="app__affix-header">
        <AppHeader />
      </Affix>
      <Switch>{/* ... */}</Switch>
    </Router>
  );
};
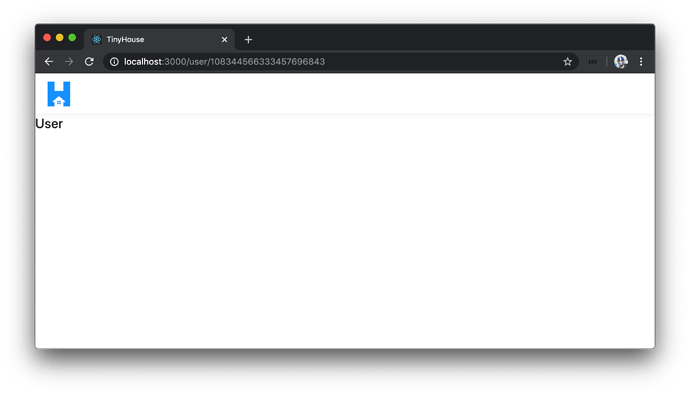
When we launch our client application, we’ll now be presented with the <AppHeader /> component that shows our application logo regardless of what route we’re in.
<MENUITEMS />
We’ll leverage the <Menu /> component from Ant Design to help show a menu of links that the user can use in the <AppHeader /> . When the viewer is not signed-in, we’ll want to show a link to the /host page and a “Sign In” button to take them to the /login page.
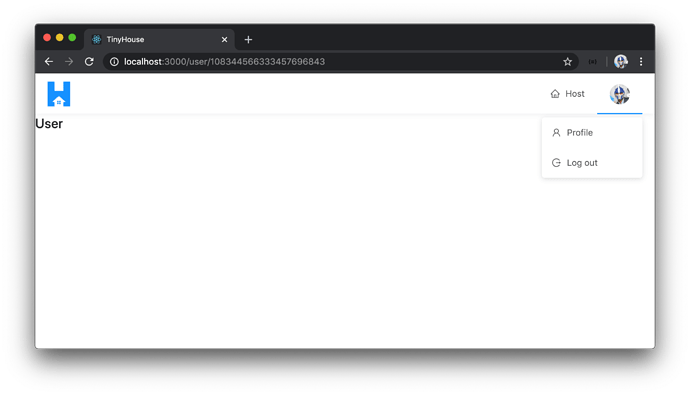
However, when the user is signed in - instead of the “Sign In” button, we’re interested in showing the avatar of the viewer that itself is a drop-down button that will allow the viewer to navigate to their profile (i.e. user page) or log out of the application.
The menu items section of the app header will have some decent functionality of its own so we’ll abstract that section away to a new component we’ll call <MenuItems /> that will be set up in the components/ folder of AppHeader/ .
We’ll also have an index.ts file be kept in the src/sections/AppHeader/components/ folder.
client/
  // ...
  src/
    // ...
    AppHeader/
      components/
        MenuItems/
          index.tsx
        index.ts
    // ...
  // ...
In the MenuItems/index.tsx file, we’ll first aim to have the menu items show the "Host" link and the "Sign In" button. We’ll import and use the <Button /> , <Icon /> , and <Menu /> components from Ant Design to help us here. We’ll destruct the child <Item /> and <SubMenu /> components from Ant Design that we’ll use. We’ll use the <Link /> component from React Router to have the “Host” menu item be navigable to the /host route and the “Sign In” button be navigable to the /login route.
import React from "react";
import { Link } from "react-router-dom";
import { Button, Icon, Menu } from "antd";

const { Item, SubMenu } = Menu;

export const MenuItems = () => {
  return (
    <Menu mode="horizontal" selectable={false} className="menu">
      <Item key="/host">
        <Link to="/host">
          <Icon type="home" />
          Host
        </Link>
      </Item>
      <Item key="/login">
        <Link to="/login">
          <Button type="primary">Sign In</Button>
        </Link>
      </Item>
    </Menu>
  );
};
In the src/sections/AppHeader/components/index.ts file, we’ll re-export the <MenuItems /> component function.
client/src/sections/AppHeader/components/index.ts
export * from "./MenuItems";
We’ll import the <MenuItems /> component in the <AppHeader /> component and render it as a child component.
import React from "react";
import { Link } from "react-router-dom";
import { Layout } from "antd";

import logo from "./assets/tinyhouse-logo.png";

const { Header } = Layout;

export const AppHeader = () => {
  return (
    <Header className="app-header">
      <div className="app-header__logo-search-section">
        <div className="app-header__logo">
          <Link to="/">
            <img src={logo} alt="App logo" />
          </Link>
        </div>
      </div>
      <div className="app-header__menu-section">
        <MenuItems viewer={viewer} setViewer={setViewer} />
      </div>
    </Header>
  );
};
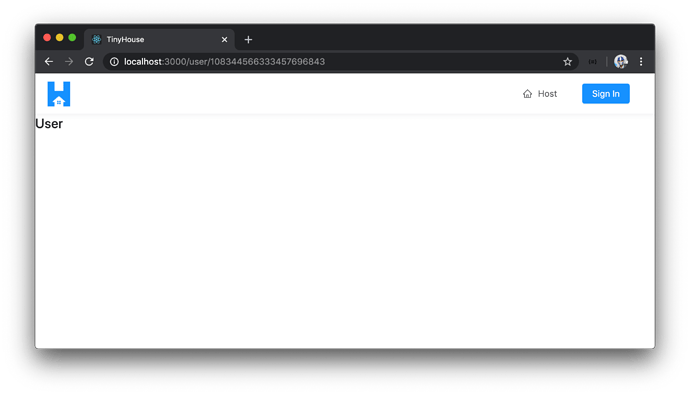
If we launch our client application in the browser, we’ll be presented with the "Host" link and "Sign In" button.
If we were to click the "Host" link or "Sign In" button, we’ll be taken to the /host page and /login page respectively.
We’ll now want to conditionally show the viewer avatar in the <MenuItems /> element if the user is logged in . To do so, we’ll need access to the viewer state value in our parent <App /> component. In the <App /> component, we’ll pass the viewer state value as a prop down to the rendered <AppHeader /> component.
const App = () => {
  const [viewer, setViewer] = useState<Viewer>(initialViewer);

  return (
    <Router>
      <Affix offsetTop={0} className="app__affix-header">
        <AppHeader viewer={viewer} />
      </Affix>
      <Switch>{/* ... */}</Switch>
    </Router>
  );
};
In the <AppHeader /> component we’ll declare the viewer prop and pass it along down to the <MenuItems /> component. We’ll import the Viewer interface from the lib/types.ts file and set it as the type of the viewer prop.
// ...
import { Viewer } from "../../lib/types";
// ...

interface Props {
  viewer: Viewer;
}

export const AppHeader = ({ viewer }: Props) => {
  return (
    <Header className="app-header">
      <div className="app-header__logo-search-section">
        <div className="app-header__logo">
          <Link to="/">
            <img src={logo} alt="App logo" />
          </Link>
        </div>
      </div>
      <div className="app-header__menu-section">
        <MenuItems viewer={viewer} />
      </div>
    </Header>
  );
};
With the viewer prop available in <MenuItems /> , we can conditionally render the viewer avatar and drop-down menu when the viewer is signed in. The drop-down menu will be created with the help of the <SubMenu /> child component Ant Design provides.
Within the <MenuItems /> component, we’ll create a const element called subMenuLogin which will be a <SubMenu /> component. This subMenuLogin element will have a “Profile” menu item to be used as a link to the user page and a "Log out" menu item which will be used as a trigger to help log out the user.
import React from "react";
import { Button, Icon, Menu } from "antd";

const { Item, SubMenu } = Menu;

export const MenuItems = () => {
  const subMenuLogin = (
    <SubMenu>
      <Item key={"/user/"}>
        <Icon type="user" />
        Profile
      </Item>
      <Item key="logout">
        <Icon type="logout" />
        Log out
      </Item>
    </SubMenu>
  );

  return (
    // ...
  );
};
We’ll conditionally have the subMenuLogin element display the submenu item if the viewer is logged in. To do so, we can check for a valid property of the viewer object. For example, if the id of the viewer exists, it most likely means the server was able to return a viewer instance. If the viewer doesn’t exist, we’ll have the subMenuLogin element display the "Sign In" button. We’ll render the subMenuLogIn const element in the return statement of the <MenuItems /> component.
import React from "react";
import { Link } from "react-router-dom";
import { Button, Icon, Menu } from "antd";
import { Viewer } from "../../../../lib/types";

interface Props {
  viewer: Viewer;
}

const { Item, SubMenu } = Menu;

export const MenuItems = ({ viewer }: Props) => {
  const subMenuLogin = viewer.id ? (
    <SubMenu>
      <Item key="/user">
        <Icon type="user" />
        Profile
      </Item>
      <Item key="/logout">
        <Icon type="logout" />
        Log out
      </Item>
    </SubMenu>
  ) : (
    <Item>
      <Link to="/login">
        <Button type="primary">Sign In</Button>
      </Link>
    </Item>
  );

  return (
    <Menu mode="horizontal" selectable={false} className="menu">
      <Item key="/host">
        <Link to="/host">
          <Icon type="home" />
          Host
        </Link>
      </Item>
      {subMenuLogin}
    </Menu>
  );
};
The <SubMenu /> component takes a title prop with which we’ll be able to use to show the avatar of the logged-in user. We’ll import an <Avatar /> component from Ant Design and place it in the title prop and use the avatar property within the viewer object as the source.
To ensure the viewer avatar is to be shown only when the viewer.avatar property exists, we’ll state that both the viewer.id and viewer.avatar fields should exist (i.e. not be null ) to render the <SubMenu /> element.
import React from "react";
import { Link } from "react-router-dom";
import { Avatar, Button, Icon, Menu } from "antd";
import { Viewer } from "../../../../lib/types";

interface Props {
  viewer: Viewer;
}

const { Item, SubMenu } = Menu;

export const MenuItems = ({ viewer }: Props) => {
  const subMenuLogin =
    viewer.id && viewer.avatar ? (
      <SubMenu title={<Avatar src={viewer.avatar} />}>
        <Item key="/user">
          <Icon type="user" />
          Profile
        </Item>
        <Item key="/logout">
          <Icon type="logout" />
          Log out
        </Item>
      </SubMenu>
    ) : (
      <Item>
        <Link to="/login">
          <Button type="primary">Sign In</Button>
        </Link>
      </Item>
    );

  return (
    <Menu mode="horizontal" selectable={false} className="menu">
      <Item key="/host">
        <Link to="/host">
          <Icon type="home" />
          Host
        </Link>
      </Item>
      {subMenuLogin}
    </Menu>
  );
};
In our UI, let’s attempt to login and go through the consent flow. When being taken back to our app, we’ll notice after a brief period - we’re now presented with our avatar image and a drop-down menu! Amazing!
LOGOUT
We’ll now wire the logOut mutation with the "Log out" button in our <AppHeader /> menu items.
If we recall, the
logOutmutation resolver function doesn’t achieve much at this moment. It simply returns an emptyviewerobject which is something we can do on the client. In the next module,logOutwill help clear out a cookie to prevent the viewer from having a persistent log-in state. We’ll have the"Log Out"item in the dropdown trigger theLogOutmutation when clicked to set us up for the next module.
In the <MenuItems /> component, we’ll import the LOG_OUT mutation document and the autogenerated interface for the data to be returned from the mutation. We’ll also import the useMutation Hook.
At the top of the <MenuItems /> component function, we’ll use the useMutation Hook and simply return the logOut mutation request function only.
// ...
import { useMutation } from "@apollo/react-hooks";
import { LOG_OUT } from "../../../../lib/graphql/mutations";
import { LogOut as LogOutData } from "../../../../lib/graphql/mutations/LogOut/__generated__/LogOut";
// ...

export const MenuItems = ({ viewer }: Props) => {
  const [logOut] = useMutation<LogOutData>(LOG_OUT);
  // ...
};
In the subMenuLogin element, we’ll wrap the contents of the “Log out” item with a div element that when clicked will trigger a component handleLogOut() function that will subsequently call the logOut mutation function.
Additionally, when the “Profile” item in the <SubMenu /> element is clicked, we’ll use the <Link /> component from React Router to help navigate the viewer to the user page with the id of the viewer .
// ...
import { useMutation } from "@apollo/react-hooks";
import { LOG_OUT } from "../../../../lib/graphql/mutations";
import { LogOut as LogOutData } from "../../../../lib/graphql/mutations/LogOut/__generated__/LogOut";
// ...

export const MenuItems = ({ viewer }: Props) => {
  const [logOut] = useMutation<LogOutData>(LOG_OUT);

  const handleLogOut = () => {
    logOut();
  };

  const subMenuLogin =
    viewer.id && viewer.avatar ? (
      <SubMenu title={<Avatar src={viewer.avatar} />}>
        <Item key={`/user/${viewer.id}`}>
          <Link to={`/user/${viewer.id}`}>
            <Icon type="user" />
            Profile
          </Link>
        </Item>
        <Item key="/logout">
          <div onClick={handleLogOut}>
            <Icon type="logout" />
            Log out
          </div>
        </Item>
      </SubMenu>
    ) : (
      <Item>
        <Link to="/login">
          <Button type="primary">Sign In</Button>
        </Link>
      </Item>
    );

  return (
    // ...
  );
};
When the logOut mutation is successful, we’ll want to notify the user it was successful and set the viewer client state object to a value that references a signed off viewer. To update the viewer state value in the parent <App /> component, we’ll need access to the setViewer() function available from the parent <App /> .
In the <App /> component, we’ll pass the setViewer() function as a prop down to <AppHeader /> .
client/src/index.tsx
<AppHeader viewer={viewer} setViewer={setViewer} />
In the <AppHeader /> component, we’ll declare the setViewer prop and pass it along to the <MenuItems /> component. This will complete what we intended to do for <AppHeader /> component which will have the <AppHeader /> component file look like the following:
client/src/sections/AppHeader/index.tsx
import React from "react";
import { Link } from "react-router-dom";
import { Layout } from "antd";
import { Viewer } from "../../lib/types";
import { MenuItems } from "./components";

import logo from "./assets/tinyhouse-logo.png";

interface Props {
  viewer: Viewer;
  setViewer: (viewer: Viewer) => void;
}

const { Header } = Layout;

export const AppHeader = ({ viewer, setViewer }: Props) => {
  return (
    <Header className="app-header">
      <div className="app-header__logo-search-section">
        <div className="app-header__logo">
          <Link to="/">
            <img src={logo} alt="App logo" />
          </Link>
        </div>
      </div>
      <div className="app-header__menu-section">
        <MenuItems viewer={viewer} setViewer={setViewer} />
      </div>
    </Header>
  );
};
In the <MenuItems /> component, we’ll declare the setViewer() function as an expected prop as well.
// ...

interface Props {
  viewer: Viewer;
  setViewer: (viewer: Viewer) => void;
}

export const MenuItems = ({ viewer, setViewer }: Props) => {
  // ...
};
When the logOut mutation is successful, it’ll return an empty viewer object (with a didRequest field set to true ) as part of data. We’ll use the useMutation onCompleted() callback and run the setViewer() function to set the viewer state value to the new received logged out viewer object.
export const MenuItems = ({ viewer, setViewer }: Props) => {
  const [logOut] = useMutation<LogOutData>(LOG_OUT, {
    onCompleted: data => {
      if (data && data.logOut) {
        setViewer(data.logOut);
      }
    }
  });
};
We’ll also look to display a success notification to tell the user they were able to sign off successfully. We’ll import the displaySuccessNotification() function we have in the src/lib/utils/index.ts file and run it after the setViewer() function is used in the onCompleted() callback.
// ...
import { displaySuccessNotification } from "../../../../lib/utils";
// ...

export const MenuItems = ({ viewer, setViewer }: Props) => {
  const [logOut] = useMutation<LogOutData>(LOG_OUT, {
    onCompleted: data => {
      if (data && data.logOut) {
        setViewer(data.logOut);
        displaySuccessNotification("You've successfully logged out!");
      }
    }
  });
};
If the logOut mutation was to ever fail, we’ll want to notify the user. When the mutation fails, we’ll want to run the displayErrorMessage() function we have in our lib/utils/index.ts file to show an error alert. Since we want to simply run a function, we can do so in the onError() callback of the useMutation Hooks which is a callback function React Apollo provides that runs when the mutation has failed .
With all the intended changes made to the <MenuItems /> component, the <MenuItems /> component file will look like the following:
client/src/sections/AppHeader/components/MenuItems/index.tsx
import React from "react";
import { Link } from "react-router-dom";
import { useMutation } from "@apollo/react-hooks";
import { Avatar, Button, Icon, Menu } from "antd";
import { LOG_OUT } from "../../../../lib/graphql/mutations";
import { LogOut as LogOutData } from "../../../../lib/graphql/mutations/LogOut/__generated__/LogOut";
import { displaySuccessNotification, displayErrorMessage } from "../../../../lib/utils";
import { Viewer } from "../../../../lib/types";

interface Props {
  viewer: Viewer;
  setViewer: (viewer: Viewer) => void;
}

const { Item, SubMenu } = Menu;

export const MenuItems = ({ viewer, setViewer }: Props) => {
  const [logOut] = useMutation<LogOutData>(LOG_OUT, {
    onCompleted: data => {
      if (data && data.logOut) {
        setViewer(data.logOut);
        displaySuccessNotification("You've successfully logged out!");
      }
    },
    onError: () => {
      displayErrorMessage(
        "Sorry! We weren't able to log you out. Please try again later!"
      );
    }
  });

  const handleLogOut = () => {
    logOut();
  };

  const subMenuLogin =
    viewer.id && viewer.avatar ? (
      <SubMenu title={<Avatar src={viewer.avatar} />}>
        <Item key="/user">
          <Link to={`/user/${viewer.id}`}>
            <Icon type="user" />
            Profile
          </Link>
        </Item>
        <Item key="/logout">
          <div onClick={handleLogOut}>
            <Icon type="logout" />
            Log out
          </div>
        </Item>
      </SubMenu>
    ) : (
      <Item>
        <Link to="/login">
          <Button type="primary">Sign In</Button>
        </Link>
      </Item>
    );

  return (
    <Menu mode="horizontal" selectable={false} className="menu">
      <Item key="/host">
        <Link to="/host">
          <Icon type="home" />
          Host
        </Link>
      </Item>
      {subMenuLogin}
    </Menu>
  );
};
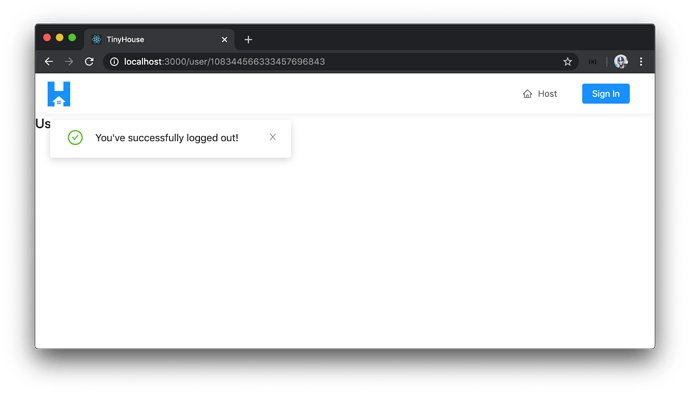
This should help us achieve what we set out to do! If we take a look at our app, sign in, then click the log out button - we’ll notice that the viewer state has been removed! Great!
There are two important notes to make here before we close the lesson.
- The
logOutgraphQL mutation at this moment doesn’t achieve anything significant. It simply returns an emptyviewerobject which we could have done on the client-side instead. - Though we’re able to effectively log-in as a user with the Google Sign-In flow, there’s still a large flaw in our application. If we were to ever refresh our app when logged in, our login state in the client is gone . This isn’t user-friendly since a user will have to sign-in to our application every time they refresh the page or close and open the browser tab/window.
This is going to be part of the investigation we’ll make in the next module of the course by seeing how a viewer can maintain a persistent login state in our application.
MODULE 4 SUMMARY
In this module, we spent our efforts in creating the functionality to have a user log-in through Google Sign-In.
SERVER PROJECT
SRC/LIB/API/GOOGLE.TS
In the src/lib/api/Google.ts file of our server project, we created a Google object instance that consolidates the functionality to interact with Google’s servers. In the src/lib/api/Google.ts file, we constructed an OAuth client with the help of the Google APIs Node.js Client . Within the Google object we export from the file, there exist two properties:
-
authUrl: Derives the authentication URL from Google’s servers where users are directed to on the client to first sign-in with their Google account information. -
logIn(): Function that uses Google’s People API to get relevant information (i.e. their emails, names, and photos) for the Google account of a user.
server/src/lib/api/Google.ts
import { google } from "googleapis";

const auth = new google.auth.OAuth2(
  process.env.G_CLIENT_ID,
  process.env.G_CLIENT_SECRET,
  `${process.env.PUBLIC_URL}/login`
);

export const Google = {
  authUrl: auth.generateAuthUrl({
    // eslint-disable-next-line @typescript-eslint/camelcase
    access_type: "online",
    scope: [
      "https://www.googleapis.com/auth/userinfo.email",
      "https://www.googleapis.com/auth/userinfo.profile"
    ]
  }),
  logIn: async (code: string) => {
    const { tokens } = await auth.getToken(code);

    auth.setCredentials(tokens);

    const { data } = await google.people({ version: "v1", auth }).people.get({
      resourceName: "people/me",
      personFields: "emailAddresses,names,photos"
    });

    return { user: data };
  }
};
SRC/GRAPHQL/TYPEDEFS.TS
We created three new root-level fields in our GraphQL API.
-
Query.authUrl: Returns a string and is expected to return the Google Sign-In/OAuth authentication URL. -
Mutation.logIn: Returns aViewerobject and is expected to log a viewer into the TinyHouse application. -
Mutation.logOut: Returns aViewerobject and is expected to log a viewer out of the TinyHouse application.
server/src/graphql/typeDefs.ts
import { gql } from "apollo-server-express";

export const typeDefs = gql`
  type Viewer {
    id: ID
    token: String
    avatar: String
    hasWallet: Boolean
    didRequest: Boolean!
  }

  input LogInInput {
    code: String!
  }

  type Query {
    authUrl: String!
  }

  type Mutation {
    logIn(input: LogInInput): Viewer!
    logOut: Viewer!
  }
`;
SRC/GRAPHQL/RESOLVERS/VIEWER/INDEX.TS
The resolver functions for the three new root-level fields in our API were established in a viewerResolvers map kept within the src/lib/graphql/resolvers/Viewer/index.ts file.
The authUrl() resolver function simply returns the value of the authUrl field in our Google instance created in the src/lib/api/Google.ts file.
The logIn() resolver function receives a code parameter from the input argument provided to the logIn mutation. A random token is generated which will be used to help prevent CSRF. We then interact with Google’s People API to derive the information of the user signing-in with Google. If the user is logging in to our TinyHouse application for the first time, we insert a new user document to the "users" collection of our database. If the user already exists, we update the information of the relevant document in the "users" collection.
The logOut() resolver function simply returns a Viewer object to the client with the didRequest field set to true to convey that the updated viewer information has been requested. At this moment, logOut() doesn’t achieve much. In the next module, we’ll have logOut involve removing persistent log-in sessions.
server/src/graphql/resolvers/Viewer/index.ts
import crypto from "crypto";
import { IResolvers } from "apollo-server-express";
import { Google } from "../../../lib/api";
import { Viewer, Database, User } from "../../../lib/types";
import { LogInArgs } from "./types";

const logInViaGoogle = async (
  code: string,
  token: string,
  db: Database
): Promise<User | undefined> => {
  const { user } = await Google.logIn(code);

  if (!user) {
    throw new Error("Google login error");
  }

  // Name/Photo/Email Lists
  const userNamesList = user.names && user.names.length ? user.names : null;
  const userPhotosList = user.photos && user.photos.length ? user.photos : null;
  const userEmailsList =
    user.emailAddresses && user.emailAddresses.length
      ? user.emailAddresses
      : null;

  // User Display Name
  const userName = userNamesList ? userNamesList[0].displayName : null;

  // User Id
  const userId =
    userNamesList &&
    userNamesList[0].metadata &&
    userNamesList[0].metadata.source
      ? userNamesList[0].metadata.source.id
      : null;

  // User Avatar
  const userAvatar =
    userPhotosList && userPhotosList[0].url ? userPhotosList[0].url : null;

  // User Email
  const userEmail =
    userEmailsList && userEmailsList[0].value ? userEmailsList[0].value : null;

  if (!userId || !userName || !userAvatar || !userEmail) {
    throw new Error("Google login error");
  }

  const updateRes = await db.users.findOneAndUpdate(
    { _id: userId },
    {
      $set: {
        name: userName,
        avatar: userAvatar,
        contact: userEmail,
        token
      }
    },
    { returnOriginal: false }
  );

  let viewer = updateRes.value;

  if (!viewer) {
    const insertResult = await db.users.insertOne({
      _id: userId,
      token,
      name: userName,
      avatar: userAvatar,
      contact: userEmail,
      income: 0,
      bookings: [],
      listings: []
    });

    viewer = insertResult.ops[0];
  }

  return viewer;
};

export const viewerResolvers: IResolvers = {
  Query: {
    authUrl: (): string => {
      try {
        return Google.authUrl;
      } catch (error) {
        throw new Error(`Failed to query Google Auth Url: ${error}`);
      }
    }
  },
  Mutation: {
    logIn: async (
      _root: undefined,
      { input }: LogInArgs,
      { db }: { db: Database }
    ): Promise<Viewer> => {
      try {
        const code = input ? input.code : null;
        const token = crypto.randomBytes(16).toString("hex");

        const viewer: User | undefined = code
          ? await logInViaGoogle(code, token, db)
          : undefined;

        if (!viewer) {
          return { didRequest: true };
        }

        return {
          _id: viewer._id,
          token: viewer.token,
          avatar: viewer.avatar,
          walletId: viewer.walletId,
          didRequest: true
        };
      } catch (error) {
        throw new Error(`Failed to log in: ${error}`);
      }
    },
    logOut: (): Viewer => {
      try {
        return { didRequest: true };
      } catch (error) {
        throw new Error(`Failed to log out: ${error}`);
      }
    }
  },
  Viewer: {
    id: (viewer: Viewer): string | undefined => {
      return viewer._id;
    },
    hasWallet: (viewer: Viewer): boolean | undefined => {
      return viewer.walletId ? true : undefined;
    }
  }
};
CLIENT PROJECT
SRC/INDEX.TSX
In the root <App /> component of our client project, we’ve created a viewer state object to represent the viewer who is to navigate and sign-in within our application.
const App = () => {
  const [viewer, setViewer] = useState<Viewer>(initialViewer);
  // ...
};
SRC/LIB/GRAPHQL/
We created the GraphQL documents for the three root-level fields that exist in our GraphQL API.
client/src/lib/graphql/queries/AuthUrl/index.ts
import { gql } from "apollo-boost";

export const AUTH_URL = gql`
  query AuthUrl {
    authUrl
  }
`;
client/src/lib/graphql/mutations/LogIn/index.ts
import { gql } from "apollo-boost";

export const LOG_IN = gql`
  mutation LogIn($input: LogInInput) {
    logIn(input: $input) {
      id
      token
      avatar
      hasWallet
      didRequest
    }
  }
`;
client/src/lib/graphql/mutations/LogOut/index.ts
import { gql } from "apollo-boost";

export const LOG_OUT = gql`
  mutation LogOut {
    logOut {
      id
      token
      avatar
      hasWallet
      didRequest
    }
  }
`;
SRC/SECTIONS/LOGIN/INDEX.TSX
We’ve constructed a <Login /> component that is to be shown to the user when in the /login route of our app. The <Login /> component is where we allow the user to sign-in with their Google account.
When the user is to click the "Sign in with Google" button, a manual query is made to retrieve the Google Sign-In authentication url and the user is then navigated to the url.
When the user signs-in with Google, they’re redirected back to the <Login /> component with a value for the authorization code available in the URL as a query parameter. An effect is run in the <Login /> component to retrieve the value of the code parameter and execute the logIn mutation. When the logIn mutation is successful the user is redirected to their /user/:id page.
client/src/sections/Login/index.tsx
import React, { useEffect, useRef } from "react";
import { Redirect } from "react-router-dom";
import { useApolloClient, useMutation } from "@apollo/react-hooks";
import { Card, Layout, Spin, Typography } from "antd";
import { ErrorBanner } from "../../lib/components";
import { LOG_IN } from "../../lib/graphql/mutations";
import { AUTH_URL } from "../../lib/graphql/queries";
import {
  LogIn as LogInData,
  LogInVariables
} from "../../lib/graphql/mutations/LogIn/__generated__/LogIn";
import { AuthUrl as AuthUrlData } from "../../lib/graphql/queries/AuthUrl/__generated__/AuthUrl";
import {
  displaySuccessNotification,
  displayErrorMessage
} from "../../lib/utils";
import { Viewer } from "../../lib/types";

// Image Assets
import googleLogo from "./assets/google_logo.jpg";

interface Props {
  setViewer: (viewer: Viewer) => void;
}

const { Content } = Layout;
const { Text, Title } = Typography;

export const Login = ({ setViewer }: Props) => {
  const client = useApolloClient();
  const [
    logIn,
    { data: logInData, loading: logInLoading, error: logInError }
  ] = useMutation<LogInData, LogInVariables>(LOG_IN, {
    onCompleted: data => {
      if (data && data.logIn) {
        setViewer(data.logIn);
        displaySuccessNotification("You've successfully logged in!");
      }
    }
  });
  const logInRef = useRef(logIn);

  useEffect(() => {
    const code = new URL(window.location.href).searchParams.get("code");
    if (code) {
      logInRef.current({
        variables: {
          input: { code }
        }
      });
    }
  }, []);

  const handleAuthorize = async () => {
    try {
      const { data } = await client.query<AuthUrlData>({
        query: AUTH_URL
      });
      window.location.href = data.authUrl;
    } catch {
      displayErrorMessage(
        "Sorry! We weren't able to log you in. Please try again later!"
      );
    }
  };

  if (logInLoading) {
    return (
      <Content className="log-in">
        <Spin size="large" tip="Logging you in..." />
      </Content>
    );
  }

  if (logInData && logInData.logIn) {
    const { id: viewerId } = logInData.logIn;
    return <Redirect to={`/user/${viewerId}`} />;
  }

  const logInErrorBannerElement = logInError ? (
    <ErrorBanner description="Sorry! We weren't able to log you in. Please try again later!" />
  ) : null;

  return (
    <Content className="log-in">
      {logInErrorBannerElement}
      <Card className="log-in-card">
        <div className="log-in-card__intro">
          <Title level={3} className="log-in-card__intro-title">
            <span role="img" aria-label="wave">
              👋
            </span>
          </Title>
          <Title level={3} className="log-in-card__intro-title">
            Log in to TinyHouse!
          </Title>
          <Text>Sign in with Google to start booking available rentals!</Text>
        </div>
        <button
          className="log-in-card__google-button"
          onClick={handleAuthorize}
        >
          <img
            src={googleLogo}
            alt="Google Logo"
            className="log-in-card__google-button-logo"
          />
          <span className="log-in-card__google-button-text">
            Sign in with Google
          </span>
        </button>
        <Text type="secondary">
          Note: By signing in, you'll be redirected to the Google consent form
          to sign in with your Google account.
        </Text>
      </Card>
    </Content>
  );
};
<MENUITEMS /> LOGOUT()
In the <MenuItems /> section of the <AppHeader /> , we provide the user the capability to log-out which triggers the logOut mutation in our GraphQL API.
client/src/sections/AppHeader/components/MenuItems/index.tsx
import React from "react";
import { Link } from "react-router-dom";
import { useMutation } from "@apollo/react-hooks";
import { Avatar, Button, Icon, Menu } from "antd";
import { LOG_OUT } from "../../../../lib/graphql/mutations";
import { LogOut as LogOutData } from "../../../../lib/graphql/mutations/LogOut/__generated__/LogOut";
import { displaySuccessNotification, displayErrorMessage } from "../../../../lib/utils";
import { Viewer } from "../../../../lib/types";

interface Props {
  viewer: Viewer;
  setViewer: (viewer: Viewer) => void;
}

const { Item, SubMenu } = Menu;

export const MenuItems = ({ viewer, setViewer }: Props) => {
  const [logOut] = useMutation<LogOutData>(LOG_OUT, {
    onCompleted: data => {
      if (data && data.logOut) {
        setViewer(data.logOut);
        displaySuccessNotification("You've successfully logged out!");
      }
    },
    onError: () => {
      displayErrorMessage(
        "Sorry! We weren't able to log you out. Please try again later!"
      );
    }
  });

  const handleLogOut = () => {
    logOut();
  };

  const subMenuLogin =
    viewer.id && viewer.avatar ? (
      <SubMenu title={<Avatar src={viewer.avatar} />}>
        <Item key="/user">
          <Link to={`/user/${viewer.id}`}>
            <Icon type="user" />
            Profile
          </Link>
        </Item>
        <Item key="/logout">
          <div onClick={handleLogOut}>
            <Icon type="logout" />
            Log out
          </div>
        </Item>
      </SubMenu>
    ) : (
      <Item>
        <Link to="/login">
          <Button type="primary">Sign In</Button>
        </Link>
      </Item>
    );

  return (
    <Menu mode="horizontal" selectable={false} className="menu">
      <Item key="/host">
        <Link to="/host">
          <Icon type="home" />
          Host
        </Link>
      </Item>
      {subMenuLogin}
    </Menu>
  );
};
MOVING FORWARD
The logOut graphQL mutation doesn’t achieve anything significant and simply returns an empty viewer object. If we were to ever refresh our app when logged in, our login state in the client is gone . In the next coming modules, we’ll see how we can resolve both of these concerns by allowing a viewer to maintain a persistent login state in our application.
MODULE 5 INTRODUCTION
In the last module, we helped facilitate the capability for a user to sign-in with a Google account with the help of OAuth 2.0, however, there was a certain problem we noticed by the end of the module. If we were to ever refresh a page in the app when logged-in, our login state was effectively removed. Though a user will just be able to log-in again by going to the Login page and clicking beginning the sign-in process with Google, this will be repetitive. Is there a way we can persist the log-in session of a user?
Yes! We can accomplish this with cookies . In this module, we’ll:
- Talk about persistent login sessions and cookies.
- Compare localStorage, sessionStorage, and cookies.
- Utilize a cookie on our client to persist login state.
- Discuss and see how we can help avoid cross-site request forgery attacks.
COOKIES & LOGIN SESSIONS
In the last module, we’ve successfully managed to create our login functionality. However, when logged in and when we refresh a page in our app (or close the browser and reopen it), we’ll notice that we’re not in the logged-in state any longer. This is because we haven’t implemented any persistent login sessions .
Persistent login sessions allow users to stay logged-in over multiple browser sessions. Closing and reopening the browser or reloading the web app will not log out the user. This is what all major web apps do. We can observe this behavior in applications like GitHub, YouTube, Twitter, Google, etc.
How do these apps achieve this? Well, it’s with something you may have heard about before known as cookies ! Let’s see an example of this.
First, we’ll open a brand new incognito window in our browser since we won’t want any cookies already in our browser’s memory to affect our exercise.
We’ll be using the Google Chrome browser in this exercise.
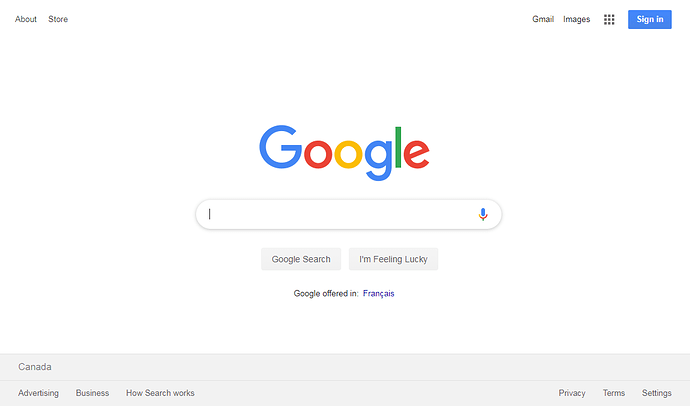
Next, we’ll go to Google’s main website - https://www.google.com and we’ll see that we’re in the logged-out state.
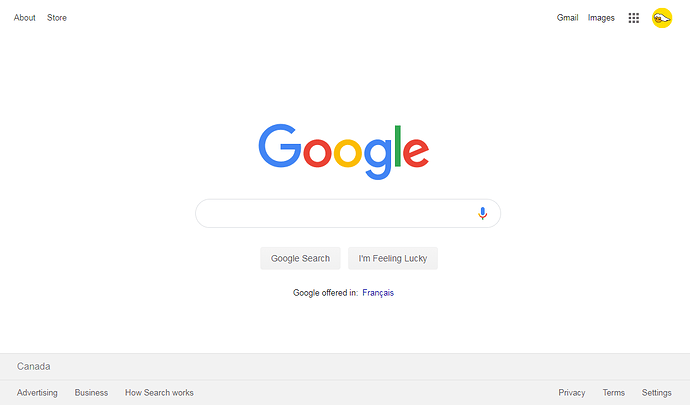
If we were to log-in with our Google account, head back to https://www.google.com, and refresh the web page in our browser, we’ll see that Google keeps us logged-in.
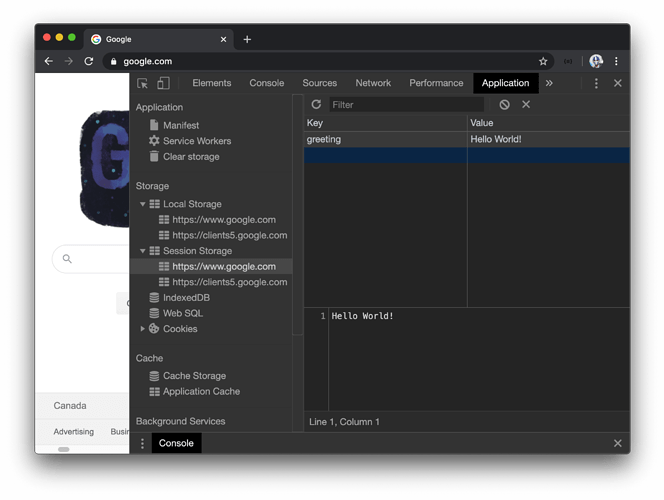
Google Chrome allows us to view, edit, and delete cookies with their dev tools. We’ll open the dev tools in our browser and navigate to where we can see information about our browser cookies. In Google Chrome, cookies are shown in the Application tab.
We’ll select the cookie called SID and delete it. We’re not 100% sure what this cookie was created to do or what it stands for (only Google’s engineers know that for sure), but we probably think it stands for Session ID .
Now, with the cookie deleted, we’ll refresh the web page. And surprise! Google does not keep us logged-in!
As we can see, this particular web app utilizes cookies to persist login sessions.
A browser cookie is data that a server can send to a user’s web browser where the browser can often send back to the server. Cookies are often used to store user sessions and personalized preferences for a user among other things.
In the next few lessons, we’ll compare cookies with modern browser APIs that allow for storing information in the client before we implement persistent login sessions in our app!
LOCALSTORAGE VS. SESSIONSTORAGE VS. COOKIES
Before we dive into implementing a persistent login session, we’ll touch on the different storage mechanisms of the web browser. We’ll discuss localStorage , sessionStorage , and cookies . All three of these mechanisms allows us to store data in key-value pairs as strings in the browser’s memory. However, there are key differences between each of them.
LOCALSTORAGE
With localStorage ,
- Stored data is persistent in browser memory .
- Stored data is only accessible through client-side JavaScript .
- Stored data is not automatically sent to the server during an HTTP request.
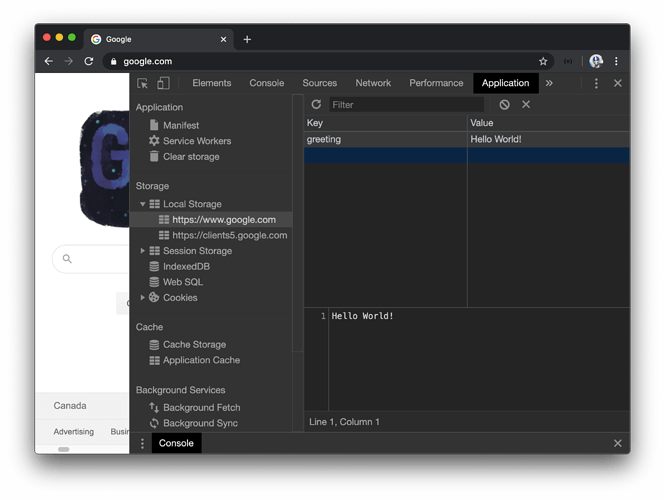
Let’s test this out! In the Console tab of our browser’s dev tools, we’ll run the following command:
localStorage.setItem("greeting", "Hello World!");
We can then navigate to the section of our dev tools that highlight what’s been stored in localStorage . In Google Chrome, this can be seen in the Application tab. We’ll now see a "greeting" : "Hello World!" key-value pair.
If we were to refresh the web page, close and reopen the tab, close and reopen the browser, or even restart our computer, the data remains. The only way to delete this data is to either clear our browser’s memory or explicitly delete the localStorage item with the following:
localStorage.removeItem("greeting");
SESSIONSTORAGE
sessionStorage behaves very similar to localStorage since:
- Stored data is only accessible through client-side JavaScript .
- Stored data is not automatically sent to the server during an HTTP request.
However, with sessionStorage , stored data is deleted once the browser tab or window is closed
We can test this out as well. We’ll run the following command in the Console of our browsers dev tools.
sessionStorage.setItem("greeting", "Hello World!");
If we navigate to where we can see sessionStorage data with which will be in the Application tab in Chrome. We’ll see the "greeting" : "Hello World!" key-value pair.
Refreshing the web-page will not delete the data. However, by closing and reopening the browser tab or closing and reopening the browser window, the data will be deleted. Just like localStorage , data can also be deleted by clearing out the browser’s memory or with the following command:
sessionStorage.removeItem("greeting");
COOKIES
With cookies ,
- stored data is persistent in browser memory .
- stored data is inaccessible with JavaScript on the client (when an
HttpOnlyflag is set) . - stored data is automatically sent to the server during an HTTP request.
Just like localStorage , cookies are persistent in memory. This means that by refreshing the web-page, closing and reopening a browser tab, closing and reopening the browser window, or even restarting our computer will not delete this data. A cookie is often deleted when the cookie is to be used up to an expiration date or by clearing our browser’s memory.
Another interesting property of a cookie is that it can be tagged with an HttpOnly flag. By setting a cookie to HttpOnly , we ensure that the cookie can only be accessed from the server and as a result can’t be tampered with by JavaScript running on the browser.
Lastly, unlike localStorage or sessionStorage , cookies are automatically sent to the server on every HTTP request .
LOCALSTORAGE & SESSIONSTORAGE SECURITY
localStorage & sessionStorage are accessible through JavaScript running in the browser.
Because of this, authentication data stored in these types of storage are vulnerable to cross-site scripting (XSS) attacks . XSS is a vulnerability where attackers can inject client-side scripts (i.e JavaScript) to run on a web app.
To prevent XSS, we could:
- ensure that all links are from a trusted source. This includes the URLs of HTML
<img/>elements and<a/>tags. - escape untrusted data (which is often automatically done when using a modern front-end framework such as React).
COOKIE SECURITY
Cookies, when used with the HttpOnly flag, are not accessible through JavaScript and thus are immune to XSS. We can also set a Secure flag to a cookie to guarantee the cookie is only sent over HTTPS. These are some of the reasons why cookies are often used to store tokens or session data.
However, cookies are vulnerable to a different type of attack - cross-site request forgery (CSRF) . CSRF, in a nutshell, is a type of attack that occurs when one is lured to a malicious website or email which causes the web browser to perform an unwanted HTTP request to another website which one is currently authenticated. This is an exploit of how the browser handles cookies.
Another flag for the cookie, the SameSite flag, was designed to counter CSRF attacks by ensuring that cookies are not sent with cross-site requests. Though the SameSite flag is new, it’s supported by most major browsers. However, as of now, not all web browsers support this technology. So in the meantime, the best strategy to counter CSRF is to also include a token (e.g. X-CSRF-TOKEN ) with every HTTP request to help ensure the intended user is making the request.
In the next few lessons, we’ll see how cookies can be used to persist login sessions and we’ll follow up with how clients can add a X-CSRF-TOKEN to requests as an additional step to preventing CRSF attacks.
ADDING THE VIEWER COOKIE ON THE SERVER
A sample of the
.envfile in our server project, after this lesson is complete, can be found - here.
COOKIE-PARSER
To integrate cookies into our Node Express server app, we’ll use the cookie-parser package provided to us by the Express team. cookie-parser helps parse HTTP requests and can be applied as an Express middleware. We’ll head to the terminal and in our server project, install the cookie-parser package.
npm install cookie-parser
We’ll also install the community-supported type definitions of cookie-parser as a development dependency.
npm install -D @types/cookie-parser
For our server app to parse incoming cookies from our client, we’ll need to make some small changes. The cookieParser() function from cookieParser takes an optional secret parameter. If this secret is set, then cookies can be signed with this secret which will ensure that cookies aren’t to be tampered with. To ensure the secret we’ll apply is a secret that can be specified as part of the application’s configuration, we’ll declare the value of this secret in our server .env file.
We’ll create a new environment variable called SECRET . This isn’t something that we have to specify with a certain value so for our development environment we’ll simply say something along the lines of "this-is-a-secret" .
SECRET=this-is-a-secret
Note: In production, it will be more appropriate to use a longer and more randomly generated string. Something that resembles more like the client secret of our Google OAuth client credentials.
We’ll now import the cookieParser package in our src/index.ts file and apply cookieParser as an application middleware. We’ll pass in the optional secret value by referencing the secret in our environment configuration.
require("dotenv").config();

// ...
import cookieParser from "cookie-parser";
// ...

const mount = async (app: Application) => {
  const db = await connectDatabase();

  app.use(cookieParser(process.env.SECRET));

  const server = new ApolloServer({
    typeDefs,
    resolvers,
    context: () => ({ db })
  });

  server.applyMiddleware({ app, path: "/api" });
  app.listen(process.env.PORT);

  console.log(`[app] : http://localhost:${process.env.PORT}`);
};

mount(express());
We’ll want the logIn() and logOut() resolver functions in our API to be able to read and set a cookie depending on whether the viewer is logging in or logging out. To read or set a cookie, we’ll need access to the req and res objects in our resolver functions. To have the req and res objects available in any resolver function that may need it, we’ll want to introduce them in the context of our resolver functions.
The context function property of our Apollo Server constructor is run with the req and res objects for every request, so we can simply access these properties and pass them along as part of the context object for all our resolvers.
const server = new ApolloServer({
  typeDefs,
  resolvers,
  context: ({ req, res }) => ({ db, req, res })
});
With these changes, the src/index.ts file will look like the following:
server/src/index.ts
require("dotenv").config();

import express, { Application } from "express";
import cookieParser from "cookie-parser";
import { ApolloServer } from "apollo-server-express";
import { connectDatabase } from "./database";
import { typeDefs, resolvers } from "./graphql";

const mount = async (app: Application) => {
  const db = await connectDatabase();

  app.use(cookieParser(process.env.SECRET));

  const server = new ApolloServer({
    typeDefs,
    resolvers,
    context: ({ req, res }) => ({ db, req, res })
  });

  server.applyMiddleware({ app, path: "/api" });
  app.listen(process.env.PORT);

  console.log(`[app] : http://localhost:${process.env.PORT}`);
};

mount(express());
UPDATING LOGIN AND LOGOUT
We’ll now head over to our viewerResolvers map in the src/graphql/resolvers/Viewer/index.ts file and look to set and clear a cookie in the logIn() and logOut() resolver functions respectively.
There are a few things we’re going to need to do.
- The
logInViaGoogle()function that runs when the user signs in with Google will be modified to create a cookie. - The
logOut()resolver function will be modified to clear the cookie when the user logs out. - Lastly, we’ll create a
logInViaCookie()utility function that can be run as part of ourlogIn()resolver which will help the user log-in via a cookie when a Google authorization code is not provided .
cookieOptions
We can set a cookie with the res.cookie() function available from the cookie-parser package. When we set a cookie, we’re able to pass an options object that will help us create a secure cookie. Since we’ll use these options in a few different cases, let’s create this options object at the top of the file as cookieOptions .
const cookieOptions = {};
Here are the options we’ll add to our cookie.
- We’ll set the
httpOnlyflag totrueto ensure the cookie is not to be accessible by client-side JavaScript. This helps counters XSS attacks. - We’ll set the
sameSiteflag totrueto ensure the cookie is not sent with cross-site requests. This is available in most modern browsers and helps prevent CSRF attacks. - The
signedproperty will help ensure the cookie is not tampered with by creating an HMAC of the value and base64 encoding it. We’ll set thesignedproperty totrueas well. - The
secureproperty ensures the cookie is only sent over HTTPS. We’ll only want this option in production since in development environment, localhost, is in HTTP. What we’ll do here is use an environment variable (that we can callNODE_ENV) that will check for if we are in development. We’ll have the cookiesecureproperty asfalseif we are in development otherwise set it astrue.
const cookieOptions = {
  httpOnly: true,
  sameSite: true,
  signed: true,
  secure: process.env.NODE_ENV === "development" ? false : true
};
In our server/.env file, we’ll create the NODE_ENV environment variable and provide a value of development .
NODE_ENV=development
logInViaGoogle()
In the logInViaGoogle() function, after a user successfully signs in, we’ll look to set a new cookie. To have the res object available, we’ll state the res object will be a parameter of the function and we’ll assign its type to the Response interface we can import from express .
// ...
import { Response } from "express";
// ...

const logInViaGoogle = async (
  code: string,
  token: string,
  db: Database,
  res: Response
): Promise<User | undefined> => {
  // ...
};
At the end of the logInViaGoogle() function and after we’ve obtained a relevant user object, we’ll use the res.cookie() function from cookie-parser to set a new cookie with the key of viewer . For the value of this cookie, we’ll use the userId of the user we’ve obtained.
// ...
import { Response } from "express";
// ...

const logInViaGoogle = async (
  code: string,
  token: string,
  db: Database,
  res: Response
): Promise<User | undefined> => {
  // ...
  // get user information
  // ...

  res.cookie("viewer", userId);

  return viewer;
};
One could take an additional security step here to encode the
userIdvalue as we set it as the value of the cookie and decode it when we attempt to retrieve the cookie. Since we’re already signing the cookie, we won’t take this additional step.
In the third positional argument of res.cookie() , we’ll declare the options of the cookie with the cookieOptions we’ve created above. We’ll introduce one other option in this case which is the maxAge option which helps set the maximum age of our cookie in Millisecond format. We wouldn’t want this cookie to expire any time soon so for our case we’ll set the expiration to 1 year.
// ...
import { Response } from "express";
// ...

const logInViaGoogle = async (
  code: string,
  token: string,
  db: Database,
  res: Response
): Promise<User | undefined> => {
  // ...
  // get user information
  // ...

  res.cookie("viewer", userId, {
    ...cookieOptions,
    maxAge: 365 * 24 * 60 * 60 * 1000
  });

  return viewer;
};
logOut()
In the logOut() resolver function, we’ll look to clear this viewer cookie when the viewer ever signs out. We’ll access the res object available as context and use the res.clearCookie() function of cookie-parser to specify that the viewer cookie is the cookie we’ll like to clear. We’ll also pass the cookieOptions we’ve specified as the second argument value of res.clearCookie() since most web browsers will only clear the cookie if the given options is identical to those given to res.cookie() (excluding an expires or maxAge property) .
server/src/graphql/resolvers/Viewer/index.ts
logOut: (
  _root: undefined,
  _args: {},
  { res }: { res: Response }
): Viewer => {
  try {
    res.clearCookie("viewer", cookieOptions);
    return { didRequest: true };
  } catch (error) {
    throw new Error(`Failed to log out: ${error}`);
  }
}
logInViaCookie()
The last thing we’ll do is create and use a logInViaCookie() function. We’ll create this logInViaCookie() function right below the logInViaGoogle() function.
The logInViaCookie() function will be fairly straightforward. It’ll try to find a user document in our database using the viewer id retrieved from the viewer cookie that can be found in the request . We’ll say that the logInViaCookie() function is to accept the user token, the db object, and the req and res properties. We’ll set the type of the req property as the Request interface we’ll import from express . This function will be a promise that when resolved successfully should return an instance of a User or undefined .
// ...
import { Request, Response } from "express";
// ...

const logInViaCookie = async (
  token: string,
  db: Database,
  req: Request,
  res: Response
): Promise<User | undefined> => {};
We’ll use Mongo’s findOneAndUpdate() method and we’ll state that we’re interested in finding the viewer where the id matches that from the viewer cookie in our req . Since our cookie is signed, we’ll need to access it from the signedCookies property of req .
// ...
import { Request, Response } from "express";
// ...

const logInViaCookie = async (
  token: string,
  db: Database,
  req: Request,
  res: Response
): Promise<User | undefined> => {
  const updateRes = await db.users.findOneAndUpdate({ _id: req.signedCookies.viewer });
};
If this viewer is found, we’ll update the token field with the most recent randomly generated token from logging in. We’ll set the returnOriginal property to false since we’re interested in retrieving the updated value.
// ...
import { Request, Response } from "express";
// ...

const logInViaCookie = async (
  token: string,
  db: Database,
  req: Request,
  res: Response
): Promise<User | undefined> => {
  const updateRes = await db.users.findOneAndUpdate(
    { _id: req.signedCookies.viewer },
    { $set: { token } },
    { returnOriginal: false }
  );
};
We’ll access the updated document by accessing the value of the result. If this viewer doesn’t exist, we’ll clear out the cookie since this tells us the cookie doesn’t have the appropriate viewer id. If the viewer is found we’ll simply return it from our function.
server/src/graphql/resolvers/Viewer/index.ts
const logInViaCookie = async (
  token: string,
  db: Database,
  req: Request,
  res: Response
): Promise<User | undefined> => {
  const updateRes = await db.users.findOneAndUpdate(
    { _id: req.signedCookies.viewer },
    { $set: { token } },
    { returnOriginal: false }
  );

  let viewer = updateRes.value;

  if (!viewer) {
    res.clearCookie("viewer", cookieOptions);
  }

  return viewer;
};
We’ll now look to use the logInViaCookie() function in our logIn() resolver. If a logIn mutation is ever fired from our client and a code isn’t being passed in, this will entail that the viewer is attempting to login from their cookie. So in this, we’ll call the logInViaCookie() function.
We’ll update our logIn() resolver to destruct the req and res properties from the resolver context. We’ll update how we’ve called the logInViaGoogle() function by passing in the res object it now expects.
With these changes, our logIn() resolver function will look as follows:
server/src/graphql/resolvers/Viewer/index.ts
    logIn: async (
      _root: undefined,
      { input }: LogInArgs,
      { db, req, res }: { db: Database; req: Request; res: Response }
    ): Promise<Viewer> => {
      try {
        const code = input ? input.code : null;
        const token = crypto.randomBytes(16).toString("hex");

        const viewer: User | undefined = code
          ? await logInViaGoogle(code, token, db, res)
          : await logInViaCookie(token, db, req, res);

        if (!viewer) {
          return { didRequest: true };
        }

        return {
          _id: viewer._id,
          token: viewer.token,
          avatar: viewer.avatar,
          walletId: viewer.walletId,
          didRequest: true
        };
      } catch (error) {
        throw new Error(`Failed to log in: ${error}`);
      }
    },
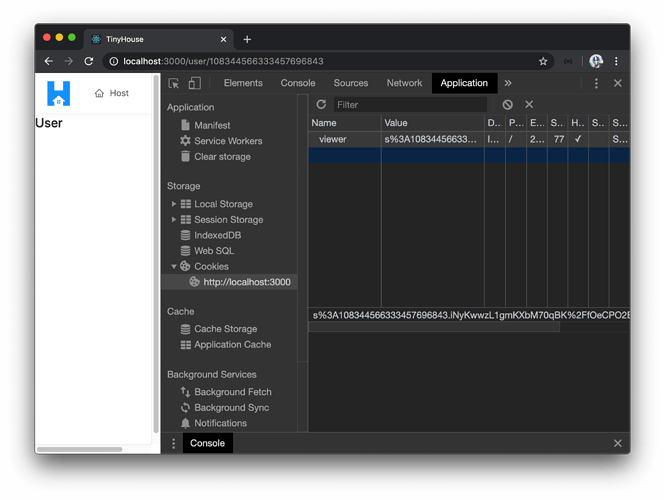
Now, with our server and client projects running, when we head to the client side of our app and log-in, we’ll see a cookie called viewer being set on our client browser by our server.
If we log out of our application, this viewer cookie will be cleared.
That should be it! The server is now prepared to set and clear a cookie that will help with persisting login sessions after a user initially signs-in with Google. In the next lesson, we’ll pick up the client-side work to see how we can fire the logIn mutation whenever the app is being launched with which a cookie will now be passed along.
ADDING THE VIEWER COOKIE ON THE CLIENT
Our server is now able to help set and clear the viewer cookie in our client when we sign-in and sign-out respectively. In this lesson, we’ll modify our client application such that it will use the viewer cookie to automatically log a viewer in when the app first renders and the cookie is available.
To help log the user in, we’ll fire the logIn mutation we already have available in our API. Since we’ll want to run this mutation when the app renders and regardless of which component or page is being rendered, we’ll have this mutation fire in the uppermost parent <App /> component.
We’re interested in running the logIn mutation the moment the application first loads or in other words the moment when the <App /> component first renders. To help conduct the mutation during this effect, we’ll import and use the useEffect Hook in the src/index.tsx file. Since we’re interested in executing the logIn mutation, we’ll import the LOG_IN mutation document and the autogenerated type variables for the LOG_IN mutation. We’ll also import the useMutation Hook from react-apollo .
import React, { useState, useEffect } from "react";
// ...
import { ApolloProvider, useMutation } from "@apollo/react-hooks";
// ...
import { LOG_IN } from "./lib/graphql/mutations";
import {
  LogIn as LogInData,
  LogInVariables
} from "./lib/graphql/mutations/LogIn/__generated__/LogIn";
// ...
In the <App /> component, we’ll use the useMutation Hook and pass in the LOG_IN mutation document and return the logIn() request function and the error result value. Similar to how we’ve conducted the logIn mutation in our <Login /> component - we’ll state when the mutation is successful, we’ll set the viewer state value in our client with the returned data from our mutation. We’ll use the onCompleted() callback function to achieve this.
const App = () => {
  const [viewer, setViewer] = useState<Viewer>(initialViewer);
  const [logIn, { error }] = useMutation<LogInData, LogInVariables>(LOG_IN, {
    onCompleted: data => {
      if (data && data.logIn) {
        setViewer(data.logIn);
      }
    }
  });

  // ...
};
We’ll use the useEffect Hook and look to run the effect only when the component first renders by placing an empty dependencies list. To satisfy the useEffect Hook and prevent multiple runs of the effect when the component is to ever re-render, we’ll import the useRef Hook and use the useRef Hook to create a ref object to represent the logIn() request function and have it remain constant through the life of the component. We’ll access and run the logIn mutation in our effect callback by accessing the current property of the ref object we’ve created.
const App = () => {
  const [viewer, setViewer] = useState<Viewer>(initialViewer);
  const [logIn, { error }] = useMutation<LogInData, LogInVariables>(LOG_IN, {
    onCompleted: data => {
      if (data && data.logIn) {
        setViewer(data.logIn);
      }
    }
  });

  const logInRef = useRef(logIn);

  useEffect(() => {
    logInRef.current();
  }, []);

  // ...
};
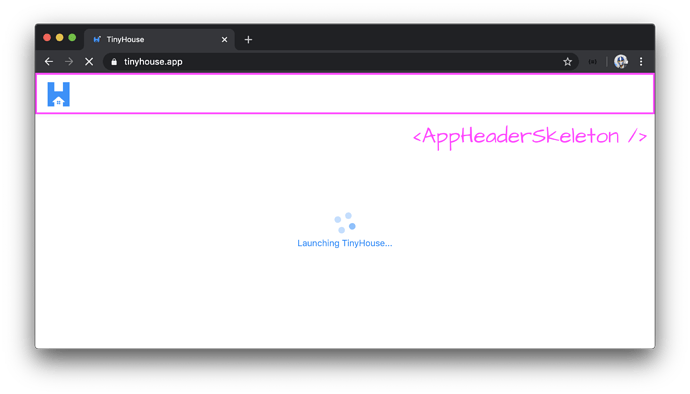
We’ll want to show some loading state to the user while the user is being logged in. The loading UI we’ll look to show will be page-level where a skeleton of the <AppHeader /> is shown and a spinning indicator is shown in the body of the UI.
The skeleton of the <AppHeader /> will improve the perceived performance of our app since the functional <AppHeader /> will show shortly after.
Let’s first create this <AppHeaderSkeleton /> component. We’ll create this component in the src/lib/components/ folder.
client/
  // ...
  src/
    lib/
      components/
        AppHeaderSkeleton/
          index.tsx
        // ...
    // ...
  // ...
We’ll re-export the <AppHeaderSkeleton /> component we plan to create from the src/lib/components/index.ts file.
client/src/lib/components/index.ts
export * from "./AppHeaderSkeleton";
The <AppHeaderSkeleton /> component will be very similar to the <AppHeader /> component except that it won’t accept any props and simply show just the application logo without any menu items. We’ll copy the code over from <AppHeader /> and also copy over our app logo asset to an assets/ folder within src/lib/components/AppHeaderSkeleton/ .
client/src/lib/components/AppHeaderSkeleton/index.tsx
import React from "react";
import { Layout } from "antd";

import logo from "./assets/tinyhouse-logo.png";

const { Header } = Layout;

export const AppHeaderSkeleton = () => {
  return (
    <Header className="app-header">
      <div className="app-header__logo-search-section">
        <div className="app-header__logo">
          <img src={logo} alt="App logo" />
        </div>
      </div>
    </Header>
  );
};
To show loading UI when the log-in request is in flight in the parent <App /> component, we could use the loading value from the mutation result but in this case, we’ll check for the didRequest property of the viewer state object and the error state of our request. We know that the didRequest field will only be set to true when the request for viewer information has been made complete so we’ll use this field to verify that the viewer hasn’t finished the log-in attempt. We’ll also check for the error status of our mutation request. If at any moment, the mutation contains errors, we’ll stop displaying the loading indicator and show a banner in our app.
In the src/index.tsx file, we’ll import the <AppHeaderSkeleton /> component from the src/lib/components/ folder and we’ll import the <Spin /> component from Ant Design.
// ...
import { Affix, Spin, Layout } from "antd";
// ...
import { AppHeaderSkeleton } from "./lib/components";
// ...
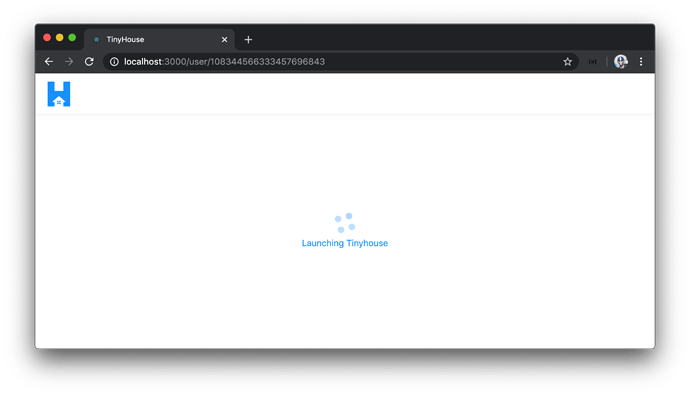
In the <App /> component, we’ll check for if the viewer.didRequest field is not true and the logIn mutation hasn’t errored. In this case, our <App /> component will show the <AppHeaderSkeleton /> and a spinning indicator that says "Launching TinyHouse..." .
const App = () => {
  const [viewer, setViewer] = useState<Viewer>(initialViewer);
  const [logIn, { error }] = useMutation<LogInData, LogInVariables>(LOG_IN, {
    onCompleted: data => {
      if (data && data.logIn) {
        setViewer(data.logIn);
      }
    }
  });

  const logInRef = useRef(logIn);

  useEffect(() => {
    logInRef.current();
  }, []);

  if (!viewer.didRequest && !error) {
    return (
      <Layout className="app-skeleton">
        <AppHeaderSkeleton />
        <div className="app-skeleton__spin-section">
          <Spin size="large" tip="Launching Tinyhouse" />
        </div>
      </Layout>
    );
  }

  // ...
};
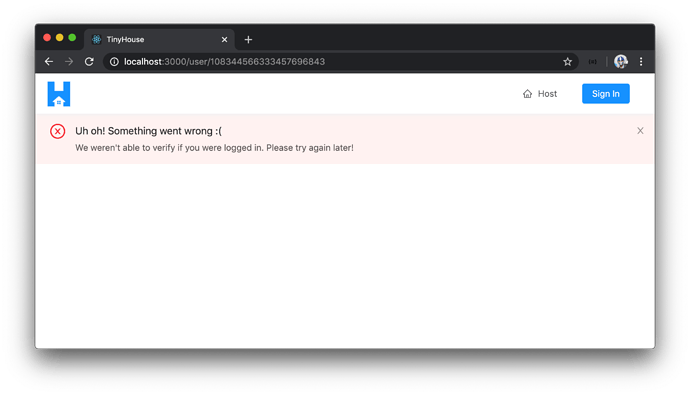
If there was ever an error during the login process, we’ll import and use the <ErrorBanner /> component we created before to show an error banner at the top of our app. We’ll state an error message along the lines of "We weren't able to verify if you were logged in. Please try again soon!" . We’ll set this error banner element to a constant we’ll call logInErrorBannerElement and have the logInErrorBannerElement shown at the top of the expected returned elements of the <App /> component.
With all the changes made to the <App /> component, the src/index.tsx file will now look like the following:
client/src/index.tsx
import React, { useState, useEffect, useRef } from "react";
import { render } from "react-dom";
import { BrowserRouter as Router, Route, Switch } from "react-router-dom";
import ApolloClient from "apollo-boost";
import { ApolloProvider, useMutation } from "@apollo/react-hooks";
import { Affix, Spin, Layout } from "antd";
import {
  AppHeader,
  Home,
  Host,
  Listing,
  Listings,
  Login,
  NotFound,
  User
} from "./sections";
import { AppHeaderSkeleton, ErrorBanner } from "./lib/components";
import { LOG_IN } from "./lib/graphql/mutations";
import {
  LogIn as LogInData,
  LogInVariables
} from "./lib/graphql/mutations/LogIn/__generated__/LogIn";
import { Viewer } from "./lib/types";
import * as serviceWorker from "./serviceWorker";
import "./styles/index.css";

const client = new ApolloClient({
  uri: "/api"
});

const initialViewer: Viewer = {
  id: null,
  token: null,
  avatar: null,
  hasWallet: null,
  didRequest: false
};

const App = () => {
  const [viewer, setViewer] = useState<Viewer>(initialViewer);
  const [logIn, { error }] = useMutation<LogInData, LogInVariables>(LOG_IN, {
    onCompleted: data => {
      if (data && data.logIn) {
        setViewer(data.logIn);
      }
    }
  });
  const logInRef = useRef(logIn);

  useEffect(() => {
    logInRef.current();
  }, []);

  if (!viewer.didRequest && !error) {
    return (
      <Layout className="app-skeleton">
        <AppHeaderSkeleton />
        <div className="app-skeleton__spin-section">
          <Spin size="large" tip="Launching Tinyhouse" />
        </div>
      </Layout>
    );
  }

  const logInErrorBannerElement = error ? (
    <ErrorBanner description="We weren't able to verify if you were logged in. Please try again later!" />
  ) : null;

  return (
    <Router>
      <Layout id="app">
        {logInErrorBannerElement}
        <Affix offsetTop={0} className="app__affix-header">
          <AppHeader viewer={viewer} setViewer={setViewer} />
        </Affix>
        <Switch>
          <Route exact path="/" component={Home} />
          <Route exact path="/host" component={Host} />
          <Route exact path="/listing/:id" component={Listing} />
          <Route exact path="/listings/:location?" component={Listings} />
          <Route
            exact
            path="/login"
            render={props => <Login {...props} setViewer={setViewer} />}
          />
          <Route exact path="/user/:id" component={User} />
          <Route component={NotFound} />
        </Switch>
      </Layout>
    </Router>
  );
};

render(
  <ApolloProvider client={client}>
    <App />
  </ApolloProvider>,
  document.getElementById("root")
);

// If you want your app to work offline and load faster, you can change
// unregister() to register() below. Note this comes with some pitfalls.
// Learn more about service workers: https://bit.ly/CRA-PWA
serviceWorker.unregister();
That should be it! When our parent <App /> component renders, it’ll fire off the logIn() mutation request. As the request is fired, the viewer cookie (when available) is sent to the server automatically. If the viewer cookie is available and the server can locate the user in the users collection of our database from the viewer cookie id, the server will return the user information to the client. Our client app will then set the viewer state object with this returned user information. In other words, the user will have successfully logged-in via a cookie .
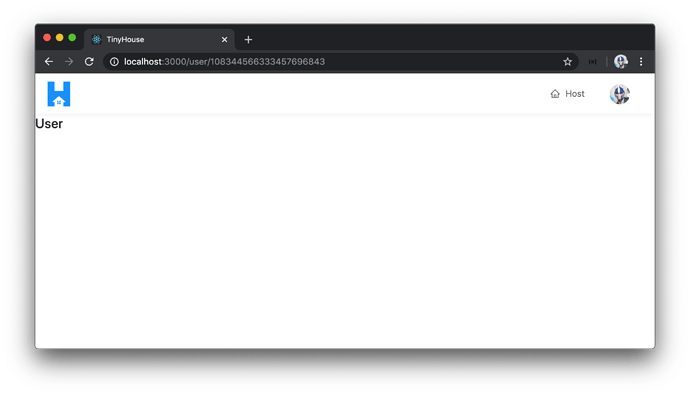
Let’s give it a try. With our server and client projects running, we’ll launch our client app and we’ll sign in again. When successfully signed in, we’ll be back in our app in the logged in state. When we close the browser or close the tab, reopen it, or refresh our app, we’ll stay in the logged-in state!
We’ll also see the brief loading indicator that says "Launching TinyHouse" (but in essence is the in-flight status of our login request via a cookie) whenever the logIn() request is made from the <App /> component but hasn’t finished.
When we now log out, the viewer cookie will be cleared from our browser and upon refreshing the app we won’t be logged in any longer.
Amazing! If the logIn request ever errored, our app will be shown with an error banner that notifies the user that something might have gone wrong.
X-CSRF TOKEN
Currently, our log-in via cookie functionality works as intended since a viewer can log-in when a cookie is available in the browser. When we set the cookie on the server, we added some options to help ensure the cookie can only be sent through HTTPS. We also used the sameSite cookie option to state that the cookie can only be sent from the site a user is currently viewing which helps prevent Cross-Site Request Forgery attacks.
In this lesson, we’ll take an additional step to prevent Cross-Site Request Forgery attacks and look to see how we can have the client pass an X-CSRF token with every request. In certain cases when needed, the server will use the token to verify the identity of the request, or in other words, verify that the request is coming from a viewer from the TinyHouse app (and not somewhere else).
This authorize() function will be used when we start to build functionality in our app that is to only be used or accessed by a viewer that’s logged in to the application. When a request is to be made for some sensitive data, for example, if the viewer is trying to see their income - we’ll want to verify that the viewer is requesting their own data.
This will make a little more sense as we set this up and start to use this in the next coming lessons.
AUTHORIZE()
In the server, we’ll introduce a function called authorize() that will accept a token given to it and return a user document from the users collection that it finds based on two things.
- The viewer id from the client cookie.
- The autogenerated token from a viewer when a viewer signs in.
If we recall, we autogenerate a token and store it in the users collection when a user signs in. We autogenerate this token at the beginning of our logIn() resolver function.
server/src/graphql/resolvers/Viewer/index.ts
const token = crypto.randomBytes(16).toString("hex");
When a user is to ever sign-in again, with Google Sign-In or with a cookie, we re-generate this token. The authorize() function we’ll create will accept the token from the client and verify that this token is the token of the viewer currently signed in to our app . Later on, we’ll authorize this viewer to make requests for sensitive data.
Since this authorize() function will be used in potentially many different GraphQL resolvers, we’ll create it in a utils/index.ts file kept within the src/lib/ folder.
client/
  src/
    // ...
    lib/
      // ...
      utils
        index.ts
    // ...
  // ...
In the src/lib/utils/index.ts file, we’ll export an authorize() function that is to accept the db object and the req object. We’ll import the Request interface from express and the Database interface from our src/lib/types.ts file and set the db and req parameters with these types.
import { Request } from "express";
import { Database } from "../types";

export const authorize = (db: Database, req: Request) => {};
We’ll want this authorize() function to access the users collection and return a user that matches the cookie and token of the logged-in viewer. We’ll import the User interface from the src/lib/types.ts file as well and state the return type of our function as a promise that when resolved will either return an instance of the User or null .
import { Request } from "express";
import { Database, User } from "../types";

export const authorize = async (db: Database, req: Request): Promise<User | null> => {};
We’re saying null instead of undefined since the findOne() function we’ll use from Mongo will either return the intended document object or a null value. With that said, in our authorize() function, we’ll use Mongos findOne() helper to help find one document from the users collection.
import { Request } from "express";
import { Database, User } from "../types";

export const authorize = async (db: Database, req: Request): Promise<User | null> => {
  const viewer = await db.users.findOne();
};
The findOne function takes a query that finds one document that satisfies the query. We’ll query for the document in which the document _id matches the value of the viewer cookie in our request - with which we can access in the signedCookies field of the passed in req object.
import { Request } from "express";
import { Database, User } from "../types";

export const authorize = async (db: Database, req: Request): Promise<User | null> => {
  const viewer = await db.users.findOne({
    _id: req.signedCookies.viewer
  });
};
We’ll also want to verify the token value of the document matches that of the request. Since token is to be in the header passed in the request, we can get this value with the req.get() function and state the value of the header key, which we’ll call X-CSRF-TOKEN . We’ll then have the authorize() function return the document that has been potentially found.
server/src/lib/utils/index.ts
import { Request } from "express";
import { Database, User } from "../types";

export const authorize = async (db: Database, req: Request): Promise<User | null> => {
  const token = req.get("X-CSRF-TOKEN");
  const viewer = await db.users.findOne({
    _id: req.signedCookies.viewer,
    token
  });

  return viewer;
};
That’s all we’ll do in the server project for now. We’ll use this authorize() function in the upcoming resolvers we’ll create to authorize the request to see if the intended viewer is making it and if so - return the viewer object. We’ll now head to our client project and look to see how we can pass the X-CSRF-TOKEN as part of our requests.
X-CSRF-TOKEN
We’re interested in having the client send the viewer token on every request so the server can receive that token as part of the request header and authorize that the request is coming from a signed-in user. In the ApolloClient constructor of our apollo-boost setting, there exists a request configuration option which is called on every request and where we can set headers as part of the context of our operation.
Let’s see how this can work. In the ApolloClient constructor in the src/index.tsx file of our client project, we’ll specify the request configuration option.
const client = new ApolloClient({
  uri: "/api",
  request: () => {}
});
The request configuration function is an asynchronous function that receives the GraphQL operation.
const client = new ApolloClient({
  uri: "/api",
  request: async operation => {}
});
We’ll use the operation object and run the setContext() function available in operation and pass the options it can accept. We’ll declare the headers option and specify the X-CSRF-TOKEN header we want to pass.
const client = new ApolloClient({
  uri: "/api",
  request: async operation => {
    operation.setContext({
      headers: {
        "X-CSRF-TOKEN":
      }
    });
  }
});
Here’s where we have a small issue. The token is part of the viewer state object and is set after the user is signed in. Our ApolloClient configuration is unaware of the viewer state object because it’s created/defined outside of the context of our React application.
What we’ll do is have the token as part of our client’s sessionStorage and retrieve the token here from sessionStorage . If the token is available from sessionStorage , we’ll pass it in as part of our header. If it isn’t, we’ll simply pass an empty string to ensure a string value is being passed.
With these changes, our ApolloClient constructor will appear as follows:
client/src/index.tsx
const client = new ApolloClient({
  uri: "/api",
  request: async operation => {
    const token = sessionStorage.getItem("token");
    operation.setContext({
      headers: {
        "X-CSRF-TOKEN": token || ""
      }
    });
  }
});
Above, we’re using the double pipe operator as the logical OR operator to say we’ll pass the token from session storage OR an empty string if it doesn’t exist.
sessionStorage is the ideal storage mechanism here since data in sessionStorage is not automatically sent to our server unlike our cookie and we want our token to be part of the request header as another alternative verification step. However, we’ll now need to ensure the token is available in sessionStorage when a user logs-in, and is cleared from sessionStorage when a user logs-out.
First, when we successfully log-in with a cookie in the <App /> component, we’ll set our token in sessionStorage . If the log-in is unsuccessful (i.e. the request is complete but no token exists), we’ll also go ahead clear the existing token from our sessionStorage to be on the safe side and ensure no token exists as part of sessionStorage in the case a user can’t log in with a cookie. We’ll update the onCompleted() callback of our useMutation Hook in the <App /> component to reflect this.
const App = () => {
  // ...
  const [logIn, { error }] = useMutation<LogInData, LogInVariables>(LOG_IN, {
    onCompleted: data => {
      if (data && data.logIn) {
        setViewer(data.logIn);

        if (data.logIn.token) {
          sessionStorage.setItem("token", data.logIn.token);
        } else {
          sessionStorage.removeItem("token");
        }
      }
    }
  });

  // ...
};
We will also need to set the token data of sessionStorage when we log-in in from our <Login /> component so we’ll update the onCompleted() callback for the useMutation Hook used in the <Login /> component.
export const Login = ({ setViewer }: Props) => {
  // ...
  const [
    logIn,
    { data: logInData, loading: logInLoading, error: logInError }
  ] = useMutation<LogInData, LogInVariables>(LOG_IN, {
    onCompleted: data => {
      if (data && data.logIn && data.logIn.token) {
        setViewer(data.logIn);
        sessionStorage.setItem("token", data.logIn.token);
        displaySuccessNotification("You've successfully logged in!");
      }
    }
  });

  // ...
};
Finally, we’ll need to remove the token data kept in sessionStorage when we log-out. To achieve this, we’ll update the onCompleted() callback of the logOut mutation conducted in the <MenuItems /> component.
export const MenuItems = ({ viewer, setViewer }: Props) => {
  const [logOut] = useMutation<LogOutData>(LOG_OUT, {
    onCompleted: data => {
      if (data && data.logOut) {
        setViewer(data.logOut);
        sessionStorage.removeItem("token");
        displaySuccessNotification("You've successfully logged out!");
      }
    },
    onError: () => {
      // ...
    }
  });
};
That’s all we’ll do for now. For every request made in our app, the X-CSRF-TOKEN will now be passed to our server as a header property. In our server, when we run the authorize() function, we’ll check to see if the viewer can be found with this token in our database. In resolver functions where we want to verify that the request is coming from a valid viewer, we’ll obtain the viewer information from the authorize() function and allow the request to query or manipulate sensitive information in our app.
MODULE 5 SUMMARY
In this module, we build on top of the previous module to help conduct persistent login sessions in our application with the help of cookies  .
.
SERVER PROJECT
SRC/INDEX.TS
In the root src/index.ts file of our server project, we import and use the cookie-parser library as middleware to help populate req 's made to the server with an object keyed by the cookie names.
In our ApolloServer constructor, we pass in the req and res objects for every request made as context to be accessible by all our GraphQL resolver functions.
server/src/index.ts
require("dotenv").config();

import express, { Application } from "express";
import cookieParser from "cookie-parser";
import { ApolloServer } from "apollo-server-express";
import { connectDatabase } from "./database";
import { typeDefs, resolvers } from "./graphql";

const mount = async (app: Application) => {
  const db = await connectDatabase();

  app.use(cookieParser(process.env.SECRET));

  const server = new ApolloServer({
    typeDefs,
    resolvers,
    context: ({ req, res }) => ({ db, req, res })
  });

  server.applyMiddleware({ app, path: "/api" });
  app.listen(process.env.PORT);

  console.log(`[app] : http://localhost:${process.env.PORT}`);
};

mount(express());
SRC/GRAPHQL/RESOLVERS/VIEWER/INDEX.TS
In the viewerResolvers map, we construct the options of the cookie we’ll want to set with the help of the cookie-parser library.
server/src/graphql/resolvers/Viewer/index.ts
const cookieOptions = {
  httpOnly: true,
  sameSite: true,
  signed: true,
  secure: process.env.NODE_ENV === "development" ? false : true
};
In the utility logInViaGoogle() function and once the user has successfully logged in, we set a new cookie labeled viewer which is provided with the id value of the user who has logged in. We introduce one other cookie option to state the maximum age of the cookie (i.e. the expiry time) is one year.
server/src/graphql/resolvers/Viewer/index.ts
const logInViaGoogle = async (  res.cookie("viewer", userId, {
    ...cookieOptions,
    maxAge: 365 * 24 * 60 * 60 * 1000
  });};
In our logIn() mutation resolver, we call another utility function labeled logInViaCookie() which is to be executed when the logIn mutation is fired and an authorization code is not present as part of the mutation input.
server/src/graphql/resolvers/Viewer/index.ts
logIn: async (        const viewer: User | undefined = code
      ? await logInViaGoogle(code, token, db, res)
      : await logInViaCookie(token, db, req, res);    },
In the utility logInViaCookie() function, we attempt to find a user document in the "users" collection where the user _id is equal to the value of the viewer cookie that was registered when the user first logs in with Google Sign-In.
server/src/graphql/resolvers/Viewer/index.ts
const logInViaCookie = async (
  token: string,
  db: Database,
  req: Request,
  res: Response
): Promise<User | undefined> => {
  const updateRes = await db.users.findOneAndUpdate(
    { _id: req.signedCookies.viewer },
    { $set: { token } },
    { returnOriginal: false }
  );

  let viewer = updateRes.value;

  if (!viewer) {
    res.clearCookie("viewer", cookieOptions);
  }

  return viewer;
};
In the logOut() resolver function, we make sure to remove (i.e. clear) the viewer cookie if it exists in the request.
server/src/graphql/resolvers/Viewer/index.ts
logOut: (
  _root: undefined,
  _args: {},
  { res }: { res: Response }
): Viewer => {
  try {
    res.clearCookie("viewer", cookieOptions);
    return { didRequest: true };
  } catch (error) {
    throw new Error(`Failed to log out: ${error}`);
  }
}
SRC/LIB/UTILS/INDEX.TS
Within the src/lib/utils/index.ts file, we’ve introduced a function labeled authorize() that aims to find information on the viewer making the request which helps prevents any CSRF attacks when sensitive information is being persisted and/or requested. The authorize() function looks to find the viewer document in the "users" collection from the viewer cookie available in the request and an X-CSRF-TOKEN value available in the request header options.
server/src/lib/utils/index.ts
import { Request } from "express";
import { Database, User } from "../types";

export const authorize = async (db: Database, req: Request): Promise<User | null> => {
  const token = req.get("X-CSRF-TOKEN");
  const viewer = await db.users.findOne({
    _id: req.signedCookies.viewer,
    token
  });

  return viewer;
};
CLIENT PROJECT
SRC/INDEX.TSX
In the root <App /> component of our client project, we’ve stated that whenever the <App /> component is to render - the logIn mutation will be triggered attempting to log the user in based on the presence of the viewer cookie. When the user successfully logs-in with a cookie, we set the value of the Viewer token returned from the server as sessionStorage .
client/src/index.tsx
  const [logIn, { error }] = useMutation<LogInData, LogInVariables>(LOG_IN, {
    onCompleted: data => {
      if (data && data.logIn) {
        setViewer(data.logIn);

        if (data.logIn.token) {
          sessionStorage.setItem("token", data.logIn.token);
        } else {
          sessionStorage.removeItem("token");
        }
      }
    }
  });
When the user logs-in with Google in the <Login /> component, we also set the token value obtained there to sessionStorage . If the user logs-out from the <MenuItems /> of <AppHeader /> , we clear the token value in sessionStorage .
The token value in sessionStorage is what we pass as the X-CSRF-TOKEN value in the header options of all our requests to the server.
client/src/index.tsx
const client = new ApolloClient({
  uri: "/api",
  request: async operation => {
    const token = sessionStorage.getItem("token");
    operation.setContext({
      headers: {
        "X-CSRF-TOKEN": token || ""
      }
    });
  }
});
MOVING FORWARD
In the next module, we begin building the server and client implementation that will help allow us to retrieve and display information for users in the /user/:id route of our application.
